

David Ovenden
-
Posts
1,073 -
Joined
-
Last visited
-
Days Won
6
Content Type
Profiles
Forums
Blogs
Gallery
Calendar
Downloads
Everything posted by David Ovenden
-
Belt and braces myself. I drill and tap GF/plastic engine mounts and use cap head hex socket screws into the tapped holes with nyloc nuts underneath as well. Then the bolts never come loose!
-
Seagull Sea Fury make-over
David Ovenden replied to David Ovenden's topic in Scale and Semi-Scale kits
The model is nearly ready to test. Does anyone who has built and flown one of these have any advice on whether the throws and CG in the manual are accurate. If not what did you end up using? -
Indeed, it's only the one page on this site and it doesn't happen on other sites either.
-
It has always been like that for me on my Samsung tablet. I reported it and was told the techies would look into it. But it never improved. As you say Peter, it's white text on an off-white background which renders it all but unreadable. I have to just guess where to tap on the screen.
-
Seagull Sea Fury make-over
David Ovenden replied to David Ovenden's topic in Scale and Semi-Scale kits
A reminder of the uninspired scheme on the standard Seagull kit. -
Seagull Sea Fury make-over
David Ovenden replied to David Ovenden's topic in Scale and Semi-Scale kits
Paul, this will have my Saito 115 4 stroke in it so it's not electric. I was just making the point that it's an older kit made before Seagull adapted their designsl to be "electric friendly" Mine will be glow powered so don't worry. You will not be alone! -
Well , not so much a make-over as a build with a modified paint scheme. I recently picked up an unstarted Seagull Sea Fury kit from a modeller who was giving up. Obviously these kits have been out of production for quite a while, and the kit is not quite up to current standards. For example, it has no electric provision (mounts / battery space etc) and no removable top hatch. Danny F and others have some time back detailed modifications for electric and demonstrated that the model can be redone in other paint schemes. So far I have fitted some HK electric retracts and oleos in place of the supplied mechanical units with wire legs. I have increased the wheel wells to take proper size wheels (3.5"). And repainted the model to disguise the pretty boring and unconvincing film finish it came with. I have decided on a Dutch naval scheme and am modelling 860which was part of the 1959 Dutch Naval aerobatic team that used Sea Furies. I feel its a much nicer scheme than the Canadian racing colours supplied as standard. Eagled eyed will see I have the cowl on upside down 098 instead of 860!
-
Gloss matt paint
David Ovenden replied to Allan Bennett's topic in Building from Traditional Kits and Plans
is it possible the tin needed more stirring/mixing.? The matting element in the paint can tend to stick to the bottom of the tin. -
Plotter for cutting vinyl letters and numbers
David Ovenden replied to David Ovenden's topic in Gadgets and Electronics
Thanks to everyone for their very helpful replies. I contemplating the Silhouette Cameo as it seems to come with useful software to give plenty of flexibility -
Anyone got experience of using a "home" (rather than semi-professional) plotter cutter for making registration letters/numbers from self adhesive vinyl? If so, what are machine you using and what software to drive it? What are pitfalls? It may not be worthwhile getting one, but the theoretical ease of cutting letters and professional finish of items appeals. Thanks
-
DB Sport and Scale Auster J1 Autocrat
David Ovenden replied to Danny Fenton's topic in Scale Matters
Danny, I regularly fly four stroke powered models as well as electric ones. I am always more nervous test flying a new electric model than one powered by a four stroke engine. You will be fine I'm sure. Look forward to seeing the photos. -
Black Horse FW190 retracts (70" version)
David Ovenden replied to David Ovenden's topic in Scale Matters
An update on the FW 190 retracts issue. I have managed to source a new, but well discounted, set of the now-discontinued E-Flite 60-120 retracts with 81degree retract angle. These were designed (I think) for the H9 ME109 kit. Good news is they fit easily into the Black Horse FW 190 model and the oleo struts that come with the kit are a perfect fit in the E Flite retracts. It gives nearly the correct angled look (81 degrees vs. 75 degrees) when extended and the wheels sit nicely on the ground when down. The info might help someone else wanting to replace the air units on the BH kit. -
Danny the wing lettering was good too. I will get some better pics when the model is asembled properly outside. I may not have got the placement of lettering completely correct, but it gives the model a much more authentic look.
-
duplicated post
-
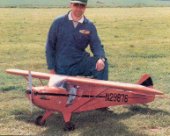
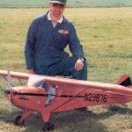
I was too preoccupied at the field to remember to take photos! Here is a quick snap taken in the workshop.
-
Successful test flight with the Chipmunk. I need to work on my 3- point landings though as this model seems quite prone to bounce on landing! Thanks to Danny for the "671 lettering" that looks great.
-
Personally I agree entirely with what has been said so far . I'll always mount my servos in-line with the pushrod axis for all the reasons previously stated. However, back in the day(1981) R.H.Warring no less was suggesting either method was OK. Photo from his book "Radio Control for Modellers".
-
Is there a Balsa shortage 2022?
David Ovenden replied to EarlyBird's topic in All Things Model Flying
Well it seems there is a current supply shortage of balsa in the grades needed for modelling. Fortunately I have a buffer stock that means personally I've not run out. I remember in the 80s visiting Balsa Cabin's premises with 3 friends in a big Volvo estate (theirs not mine) to buy a "stock" of frequently used sheet and strip wood. It was a bit if an investment at the time when money was tight. Since then I have tried to keep the supply stocked up as and when wood was easily available. (When a nice piece was seen in a shop or at shows.) Some may say it's hoarding. But as I only replace what I use when wood is easily available I don't see it that way , its just common sense so I have the wood to build when I need it. So during lockdown I could get a model built when trips out were not possible. -
By the time you're finished Paul, it will be running better than it was new from the factory. What do you call it now - a ROSsEnya 120?
-
Anyone used HK Tan Green covering
David Ovenden replied to David Ovenden's topic in All Things Model Flying
Indeed screen pics are deceptive. Denis who has some film describes it as "lime green". So I'll just paint the existing light grey film on the model with the correct colour. Can check then before/ as the paint goes on. -
That's quite some interesting adaption Paul. I guess you will be modifying the NVA to be in a more convenient position once it is fitted in a model?
-
I have found what ED suggests above to work well if tve thread in the cab is a little worn you could try wrapping some PTFE pipe tape round the manifold pipe before you screw the can on. Then follow the steps as outlined by ED above. Has worked in the past for me
-
Black Horse FW190 retracts (70" version)
David Ovenden replied to David Ovenden's topic in Scale Matters
Thanks Brian. Yes, reliability and practicality trumps "exact scale" looks for most models. Especially everyday flying from grass and less than perfect runways. -
Anyone used HK Tan Green covering
David Ovenden replied to David Ovenden's topic in All Things Model Flying
Thanks for the info Denis, I was wondering how close it would be to the green on this Sea Fury scheme. (matted down a bit) -
Anyone used HK Tan Green covering
David Ovenden replied to David Ovenden's topic in All Things Model Flying
Thanks Paul. If he has any it would be interesting to see what colour it actually is.
