

Danny Fenton
-
Posts
15,155 -
Joined
-
Last visited
-
Days Won
22
Content Type
Profiles
Forums
Blogs
Gallery
Calendar
Downloads
Posts posted by Danny Fenton
-
-
24 minutes ago, dirk tinck said:
Yes , Danny always primer and paint !
It will stand the heat of the plastic , no worries!
Thanks Dirk, I have been getting conflicting advice and it was not helping me.
I can improve the surface finish on my plug with primer and paint fairly easily. I presume it doesn't have to be an epoxy primer/paint??
Cheers
Danny

-
 2
2
-
-
19 minutes ago, dirk tinck said:
@ Danny fenton
In this case , i simply made a new part in the mould of the canope frame twice as thick.
Usually i make a plug out of pink foam , covered with 500gr glass to get a smooth finish.
Thanks Dirk, i made my plug from blue foam covered in a couple of layers of glass cloth, but i cannot get a gloss finish. Do you prime and paint? I am concerned primer and paint wont survive the heat of vacforming?
Thanks for your thoughts
Danny
-
I am currently struggling making a canopy mould, have you pics of your process to make that plug, i can see a glass version in the bakground.
Cheers
Danny
-
Looks and sounds fantastic well done Dirk, mammoth effort!
-
Looks great Kevin, well done
-
On 11/07/2023 at 14:14, Manish Chandrayan said:
Thanks Danny,
Regarding the tail wheel unit, if I decide to go your route (at a later date) I would slip on a piece of brass tube with the end notched to take the wheel yoke and lips folded over. That way, not only will the wires be butt joined but be strengthened by the surrounding brass tube and filled in silver solder.
Not sure how much strength brass will add, but it cannot hurt. Quite amazed how strong it has turned out to be.
-
Sorry chaps just seen this. I remember struggling with this too. and without going and looking would guess that Eric is correct. I used short lengths of fuel tubing to hold the clips closed. As I resprayed mine this all got coloured the same as the underside so not so noticable. By the way that butt jointed tailwheel is still holding up! Lost the tailwheel lost time out, but thats nowt to do with that joint 😉
Cheers
Danny
-
-
On 15/11/2022 at 00:13, McG 6969 said:
Hi Dirk,
I guess you must be chuffed that you can finally mount your beloved EDF into the fuse... even be it temporary...
After all those months of intense composite jobs, this must be heavily rewarding.
Happy Dremeling now...
Cheers
Chris
PS : ... my composite 'sock' for the wing joiner went absolutely fine... thanks for your assistance and advices. You're mostly welcome to stop by in Zaventem when/if you're in the neighbourhood...
Chris, you probably know this but I have found out the hard way.
I was advised that the resin will shrink a little and to leave the carbon plug in the sleeve for a while.
I left the two parts together for a couple of days, thinking that was enough, now two weeks later I slide the tube in the sleeve and its a very tight fit.
I think when I do the wing sections of the sock I will wrap 3 or four layers of the cling film.....
Anyway it is still a great process, so thank you Dirk 🙂
The Fouga is looking amazing BTW, and you are doing a brilliant job on it, the dedication is well beyond me.
Cheers
Danny
-
Hi Chris, thanks for filling in the gaps, I was tempted to use some sellotape to secure the cellophane, but static worked at holding it with no adhesive.
Another question, I was going to use Polyester resin but thought it might dissolve the cellophane, so stuck with epoxy. Any thoughts?
I liked doing all this horizontally, so will think of using a bungee chord to apply a pulling tension.
The video of the process is here
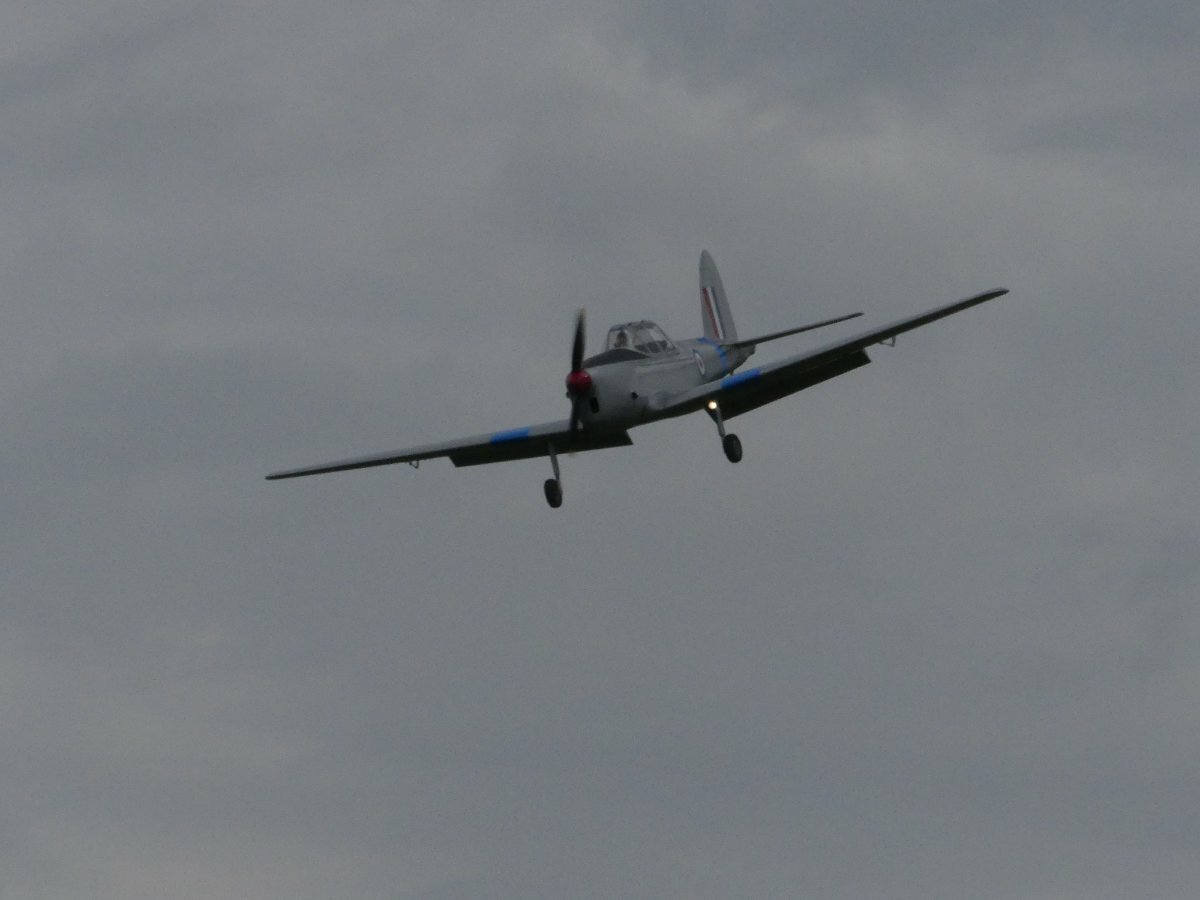
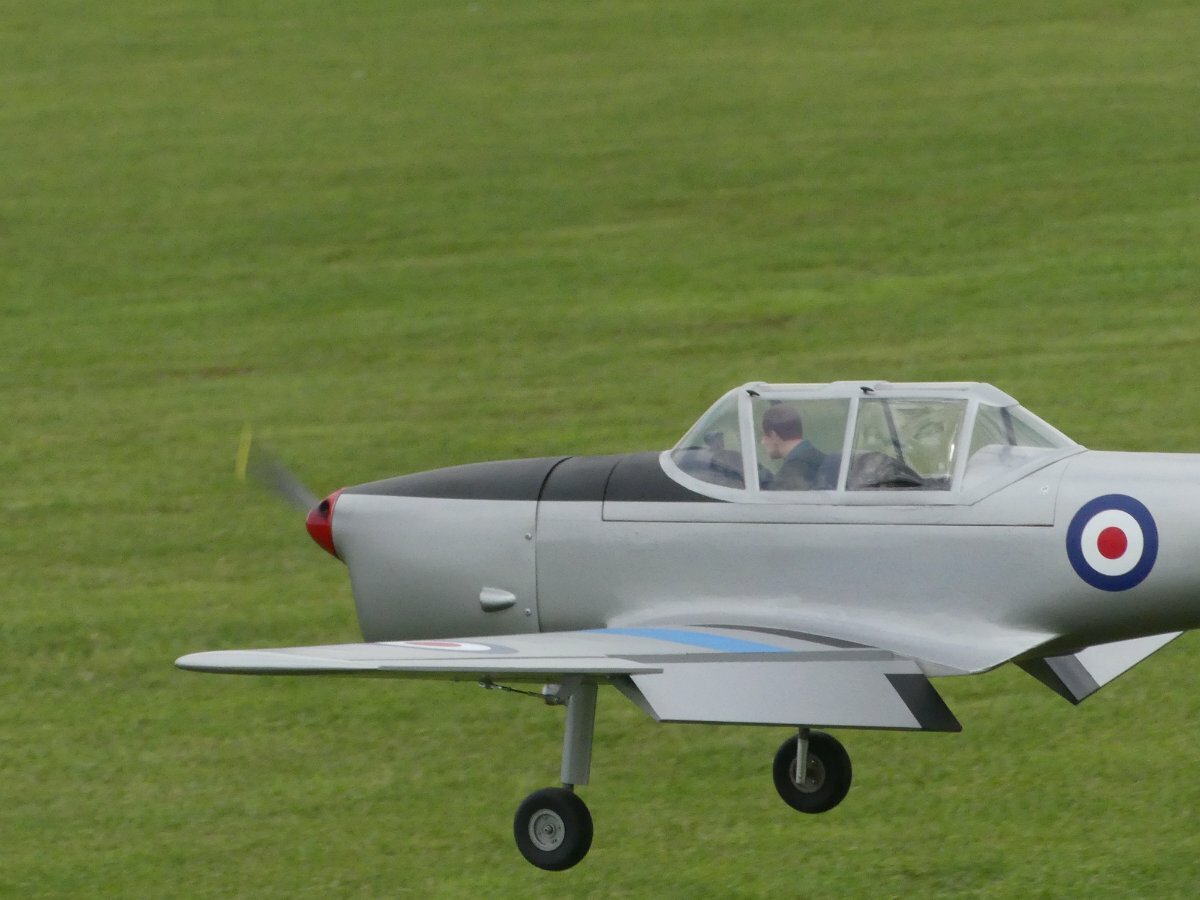
Yes I am building a quarter scale Chipmunk, this one is based on the Jerry Bates plan with lots of modifications, including increasing the dihedral. The build is on RCSB under "poor Man's Spitfire 2"
Thanks again Dirk for the inspiration
Cheers
Danny
-
I hadn't seen these pics until just now, and wish I had as it explains how you are putting tension on the glass sock.
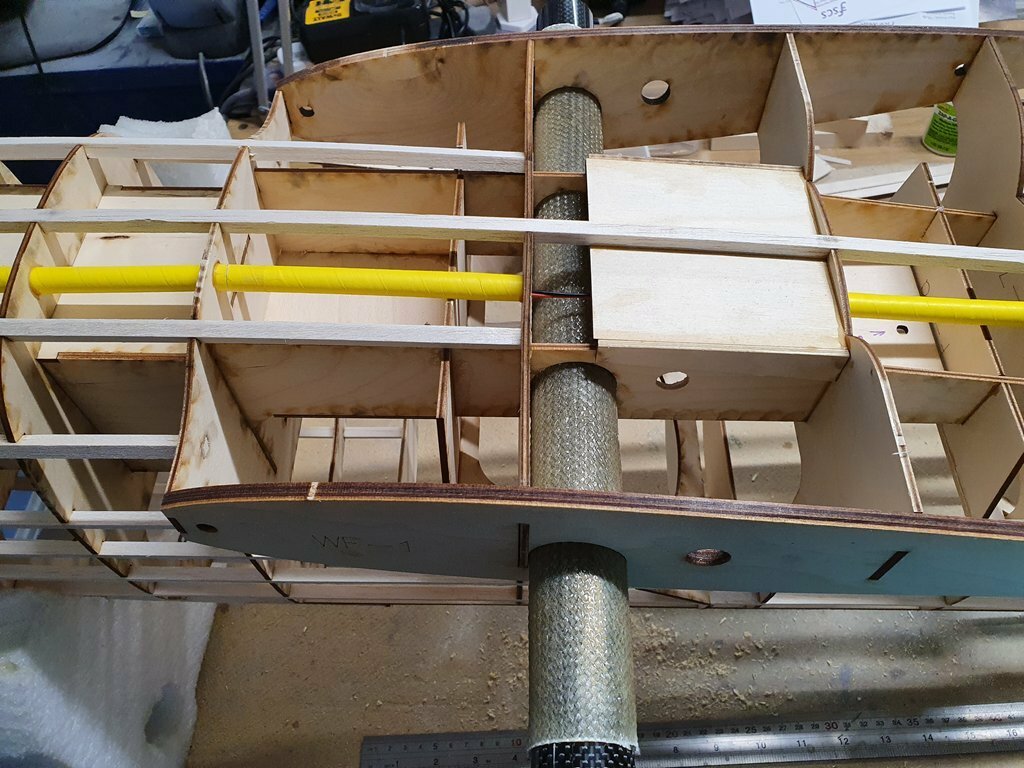
I have just made wing tube sheaths and very pleased, put a couple of areas where the tube lifted a little.

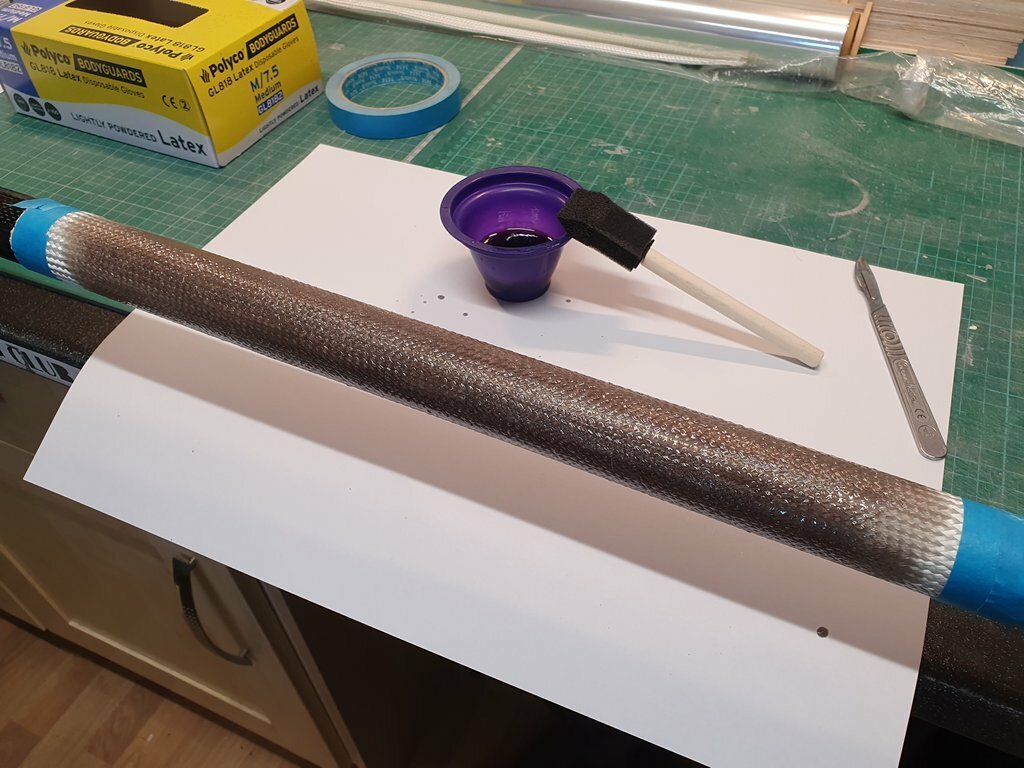
I sprayed a release film over the carbon tube, then wrapped the cellophane around it. I wrapped it without any tape as I didn't want the tape to stick to the resin.
I used a 100g glass tube and West Systems Epoxy. It slid off with zero effort!
Thanks Dirk, brilliant, and don't be surprised if I include this in my column, of course I will give you credit.
Next ones I will try pulling the end of the tube while it sets.
Do you uses sellotape to attach the cellophane?
Cheers
Danny
-
The BMFA Scale Technical Comitee are asking for help creating a logo for their forthcoming bid for the Scale World Championships.
Cheers
Danny - With STC hat firmly askew
-
Thanks Dirk thats great, yes probably three sections of 250mm
I think the florist plastic is Cellophane, i have some funnily enough for laminating depron, makes it shiny 🙂
Cheers
Danny
-
1
-
-
On 02/10/2020 at 19:48, dirk tinck said:
Hi, Alan P,
Sorry it was unclear
,
The tube i made is nothing but glass cloth,glass-fiber.The one i used was 136gr m².
It's a very easy and effective way to make the tube for wing joiners or in my case now ,rudder -fuse joiners.
If you worry that the tube might be to big (inner diameter)for the joiner they are made on , because of the plastic in between , i can assure you ,that is NOT the case. It is still a perfect fit !! If you hold the combo vertical , the tube does NOT slide off !
I just tryed it .The protective plastic is easy to pull out of the tube.
/sites/3/images/member_albums/149787/877394.jpg
If you want to try it , i recommend you look for a cloth tube close to the joiner diameter. You can stretch the tube but then the meshes get bigger
I purchase mine at the webshop of HP textiles , Schapen , Germany. Great service !!
/sites/3/images/member_albums/149787/877395.jpg
/sites/3/images/member_albums/149787/877396.jpg
Hope this helps ! If not , shoot !!
Hi Dirk, I know this is going back a little bit, but I have a 32mm OD carbon tube, and I need to make the outer glass sleeve as you have for a wing tube. I can only get 25mm or 50mm glass sleeving, so have a couple of meters of each coming, I presume I can either stretch the diameter of the 25mm a little? or stretch (length) of the 50mm to fit
Anyway about the plastic you used as a release layer, what sort of plastic, I was thinking cellophane?
Cheers
Danny
-
A little update, for those who are not familiar with silver soldering.
The tailwheel that I made has had ten landings/touch and go's and is still intact.
So even a simple butt-joint is very strong indeed.
Cheers
Danny
-
7
-
-
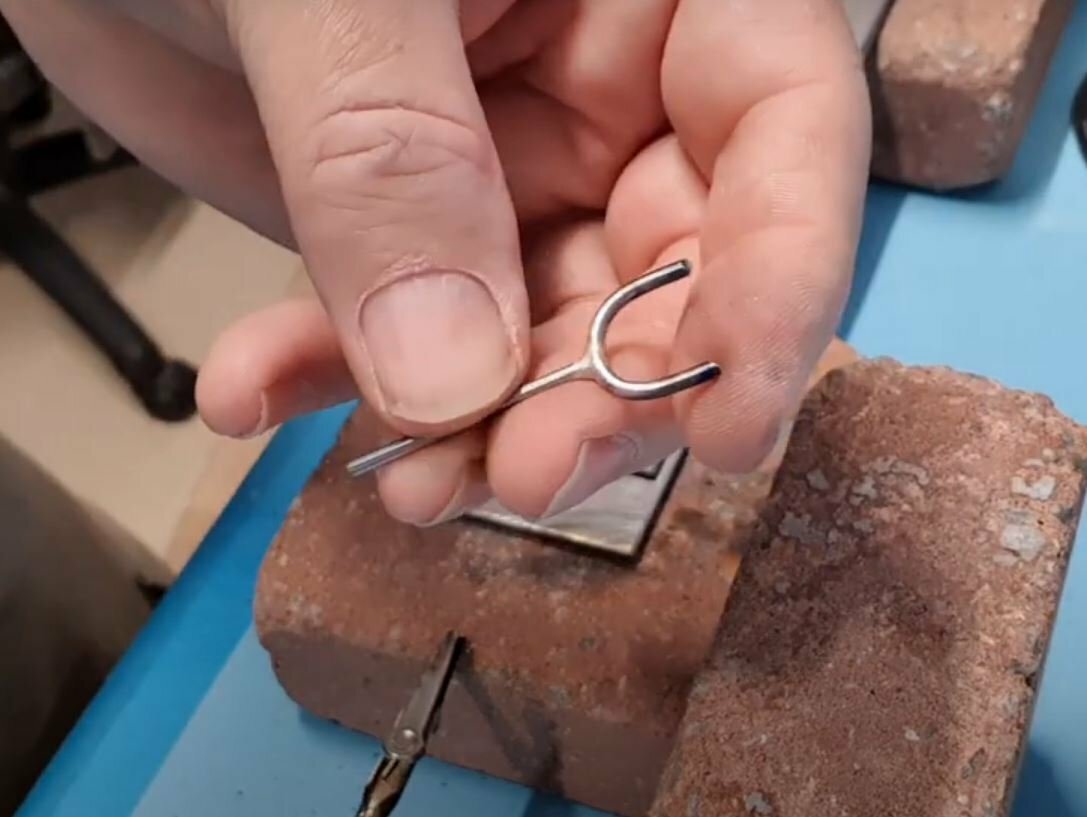
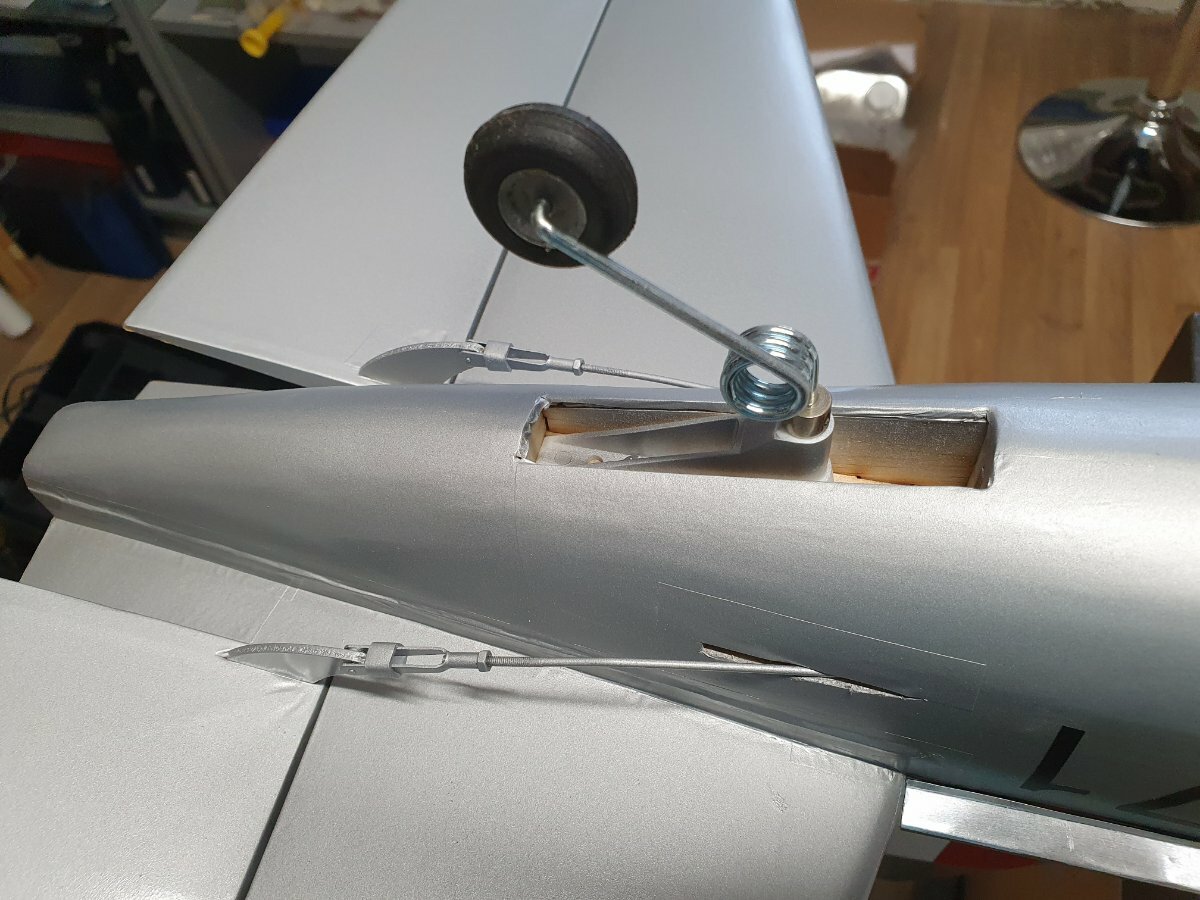
Added more detail as it was a good exercise in more silver soldering. Fashioned a somewhat better tailwheel
however thats now it finished as far as I am concerned
cheers
Danny
-
2
-
-
11 hours ago, GrumpyGnome said:
Some nice pics there Danny, cheers.
Sorry the weekend wasn't a success....
Thanks, to say the weekend wasn't a success would be unfair, everything ran smoothly, I achieved 9,000 steps each day and the social scene was really good. I even really enjoyed flying the model. Just wish I had set the model up better before the event.
Cheers
Danny
-
1
-
-
Well the event wasn't a big success for me, but the social side was excellent. The last minute tweaking to the gyro were a bit of a disaster and i didn't figure out what was going on in time.
Never mind I learned a great deal, and had a fab weekend.
Well done to Brian Seymour for winning Stand-off and Steve Jackson for winning Scale.
Pic courtesy of Brian, thx again.
More pics from the weekend are on my Flickr page
Cheers
Danny
-
5
-
-
Well I couldn't face that blooming tail-wheel any longer
Still not right but gave me a chance to try butt jointing piano wire using silver solder, will it be strong enough. I also used flattened tubing to form the ends of the fork to accept an M2 axle.
Worked well I think.
Cheers
Danny
-
2
-
-
So it seems the Chippy will be entering the Nationals this weekend F4h, Stand-off-scale. It will lose loads of marks for starting life as a humble artf, but the more I do the better.
Added a few more details...
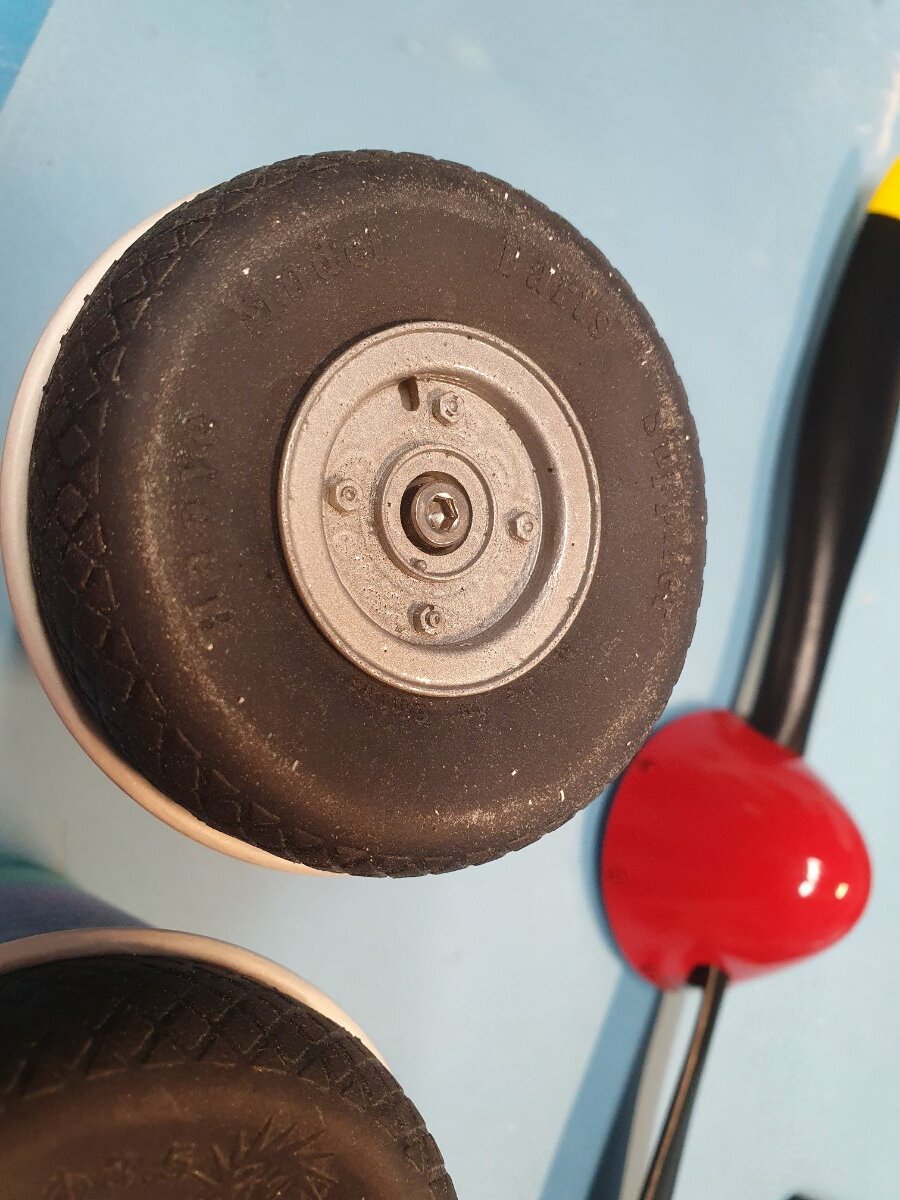
So I made some new wheels.
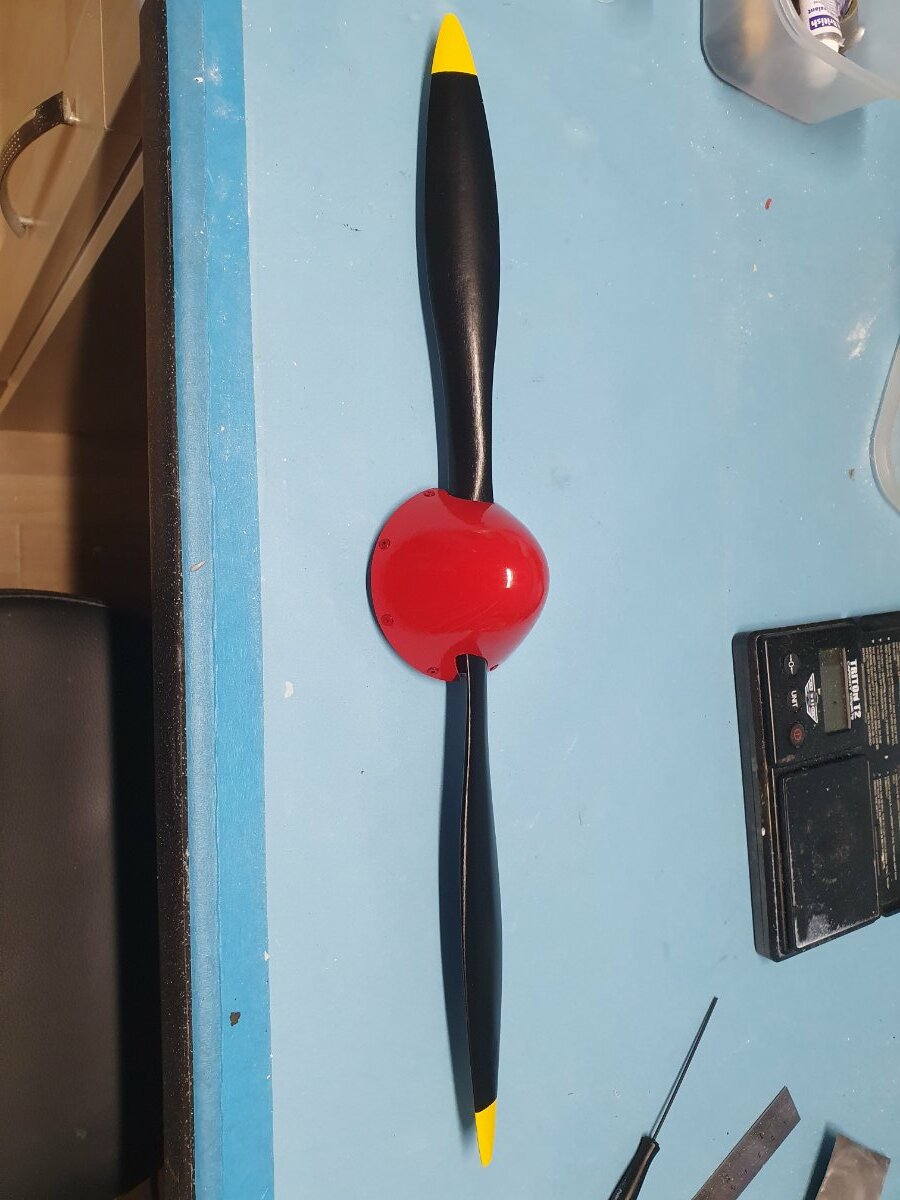
And a static prop and spinner
See you at Buckminster maybe?
Cheers
Danny
-
2
-
-
Nice to hear from you Dwain, and thanks for the kind words. It was after all your Auster that inspired me to do one myself.
Cheers
Danny
-
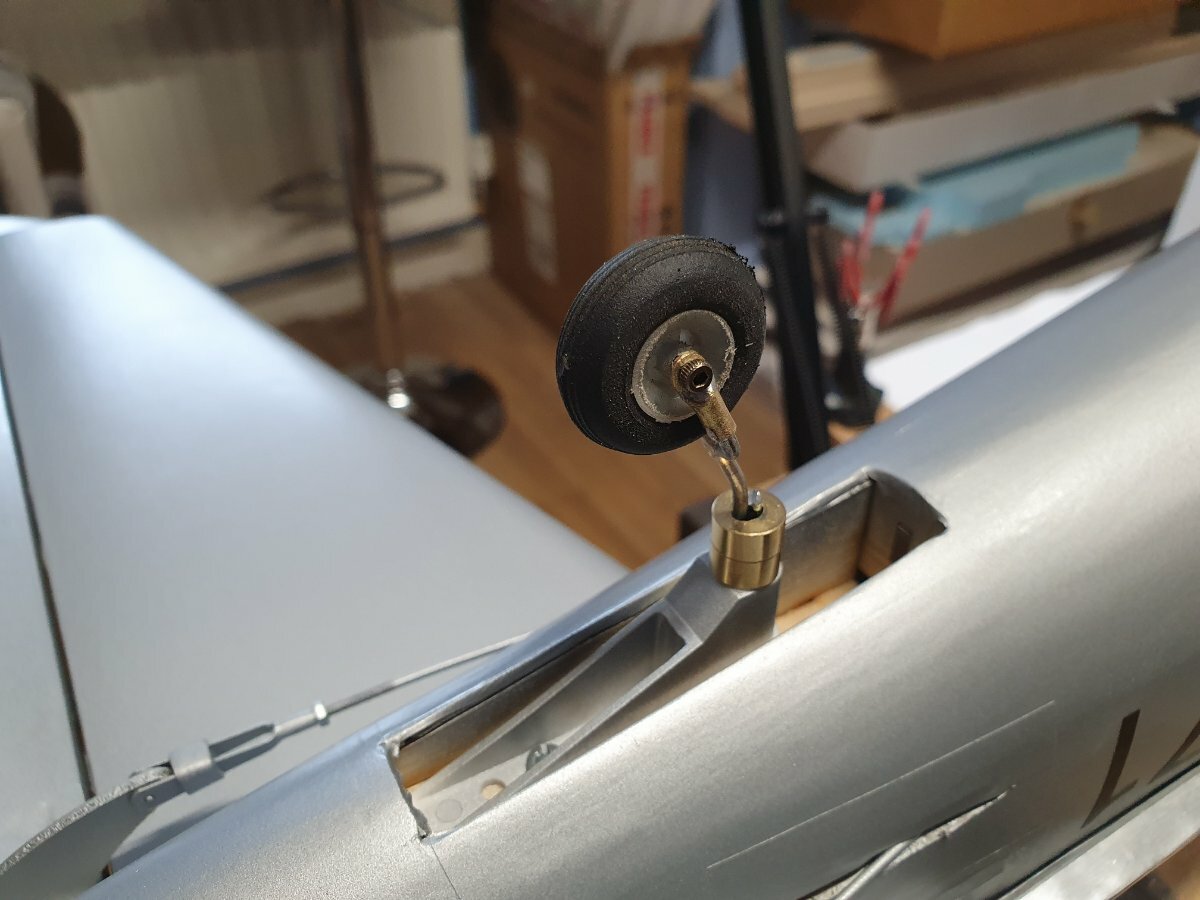
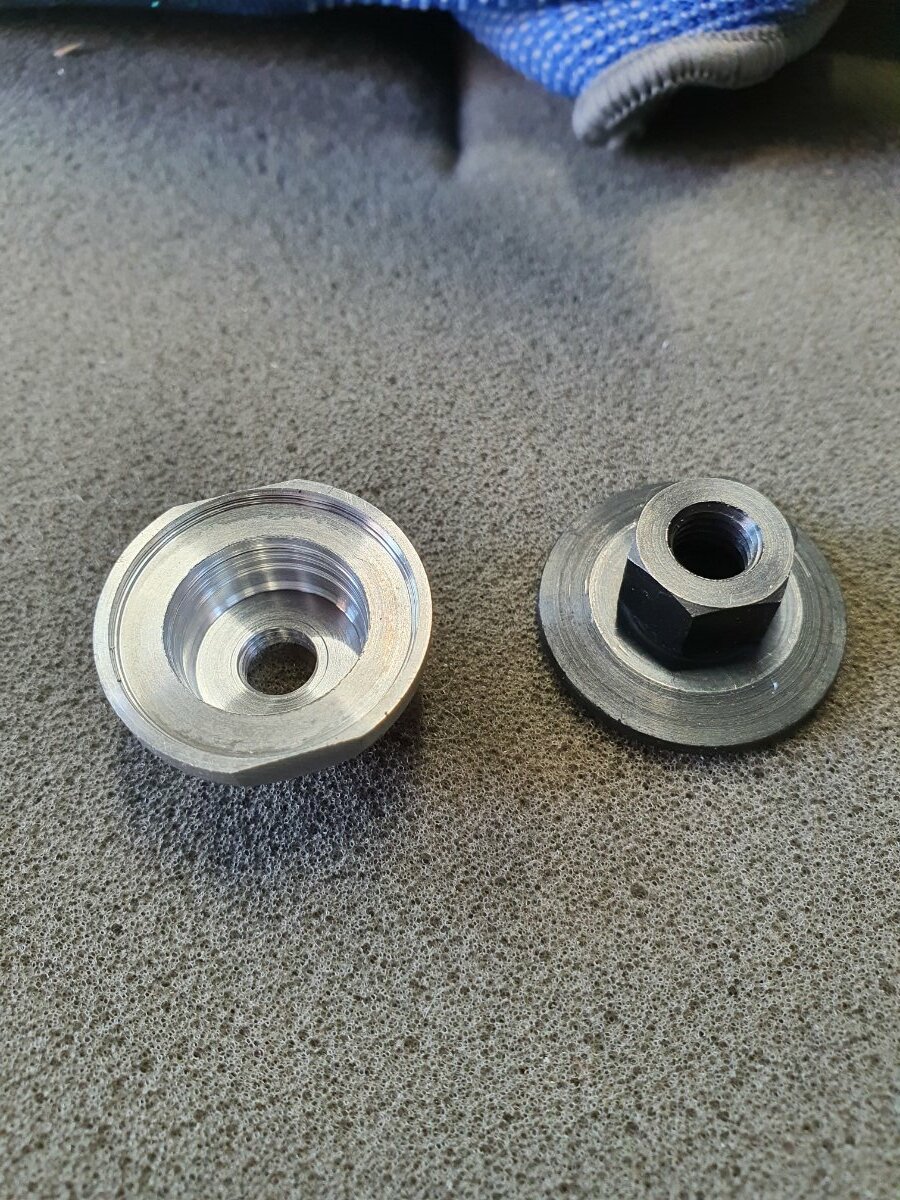
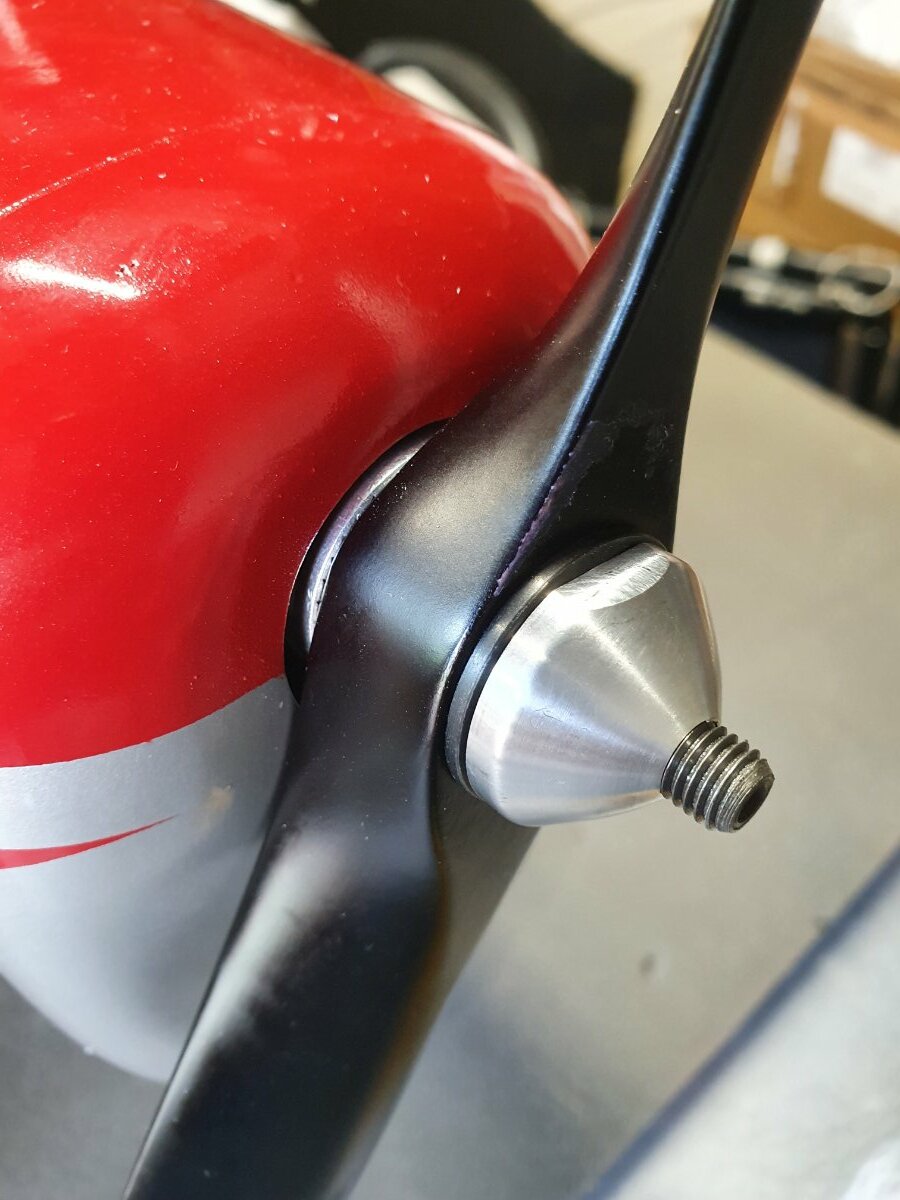
Had a play on the lathe/mill
The alloy cone goes over the original nut.
Not enough room to fit the little Saito locking nut, but this helps.
Cheers
Danny
-
3
-
-
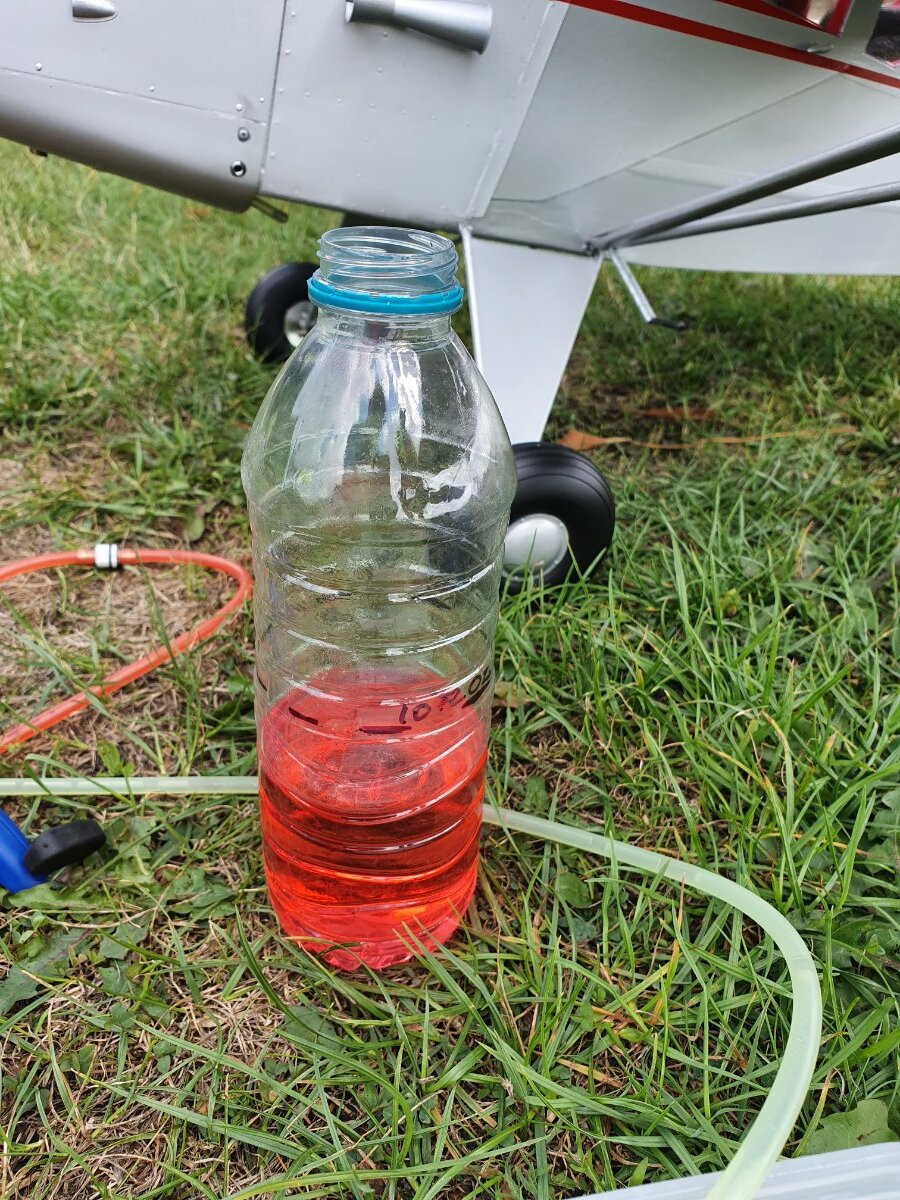
No I took the advice to only put 10oz in that 16 oz tank.
and off that 10 ozs this came out of the tank afterwards.........
I reckon I burned just 3.5 ozs
Cheers
Danny
-
1
-
-
Thanks Brian, 😊
It was quite sattisfying when it burst into life, and continued bursting into life. Once I know I can trust it I will try some chandelles and wingovers. I was amazed at how little power it needed.
Cheers
Danny
.jpg.551d1f5b85d6b8fda351db1e3fc9a3c4.jpg)


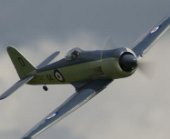
Fouga magister 1/4.5 moulded from scratch
in Electric Ducted Fan
Posted
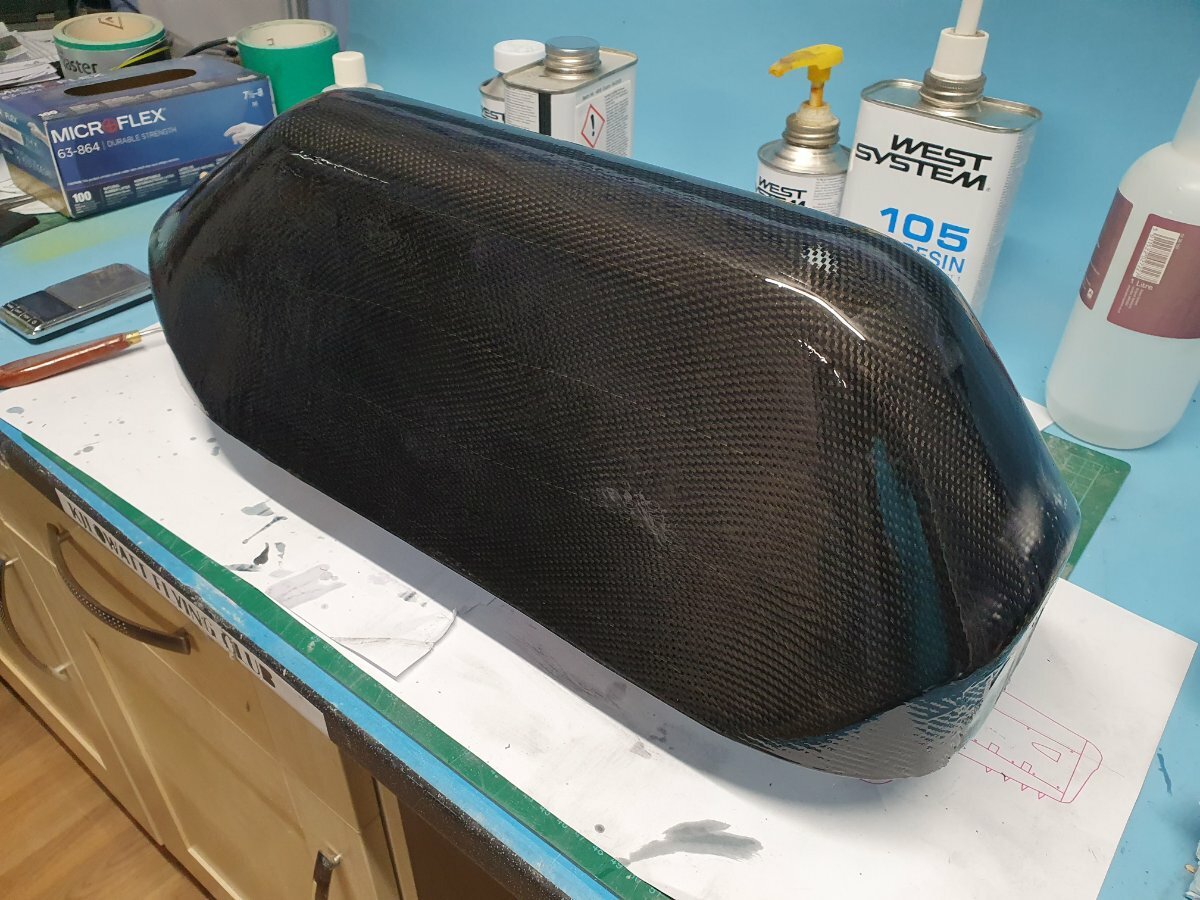
Hi guys, it is 24" x 9" and 7" tall. So yes a bit big.
SLEC have agreed to form the canopy and a 2nd form of styrene over the PETG to make the frame. But i have a plan to have a go myself first. Because of the shape it might plunge mould, but never tried at this scale? Otherwise i will make a frame and vac table. My home made A4 set up certainly wont cope!
This isnt my first Paul, but it is the largest. Hence seeking advice, alas i got lots of contradicting information, mainly statiing a plug formed the way I have wont work. And it will collapse. My head thinks it will work for a couple at least. We will see. Its a fair cost to make something this big in man hours, and materials. And I wanted to mitigate risk before just charging forward in my usual way.
Dirk clearly is much more experienced at this scale than me and I appreciate his time.
Sorry Dirk back to your fabulous build 😀