

Martin Gay
-
Posts
773 -
Joined
-
Last visited
Martin Gay's Achievements
40
Reputation
-
I believe a Mustang has already been kitted, so how about a twin Mustang?
-
Lancaster looks great! Keep watching for the next multi-engine models, from the scrap box, in this series. We expect to test fly the next one in about a month, weather permitting!
-
I've had a few recent issues with Fusion 360 freezing when using a bluetooth mouse. Works fine using wireless IR connection instead.
-
Warbird Replicas FW190 newbie build (or possibly some wellingtons)
Martin Gay replied to Lipo Man's topic in Warbird kits
I'm guessing it is about 1:8 scale. Would that be correct? -
Not really complicated. It is simply a mix of equal volumes of lightweight filler, water based varnish and talcum powder. The colour is added as an aid to sanding. Martin.
-
Copied from the original post by McG 6969 in April 2016 Bella Ballerina HD thread Freddie B's Secret Sauce... I did mention it earlier, but in fact it isn’t such a big secret, as Freddie B - an American foamie guru - himself talked about it in an earlier RCgroup’s thread. While many have been amazed by Fred’s finished airframes, this was the process he used. Basically, it’s a filler & primer coat (all-in-one) that doesn't weigh much but seems to work really well. He does this on his foam builds often when there is no covering, lamination or other coating involved. Here are some photos to help 'show and tell' in case some of you want to try this. Let’s have it in sequence. 1). Take some light weight filler (Polyfilla One Fill or a cellulose based filler, I use Red Devil OneTime) and put a nice size plug in a little mixing bowl. In my testcase, the plug of filler is about the size of a nut. /sites/3/images/member_albums/140450/670209.jpg 2). Next add some Polycrylic clear varnish (water based of course), about the same volume as the plug of filler. /sites/3/images/member_albums/140450/670210.jpg 3). Get some Talc Powder. Baby Powder or Foot Powder, but the Baby kind smells best…Talc is very fine and does a great job of getting those tiny imperfections filled, but sands away nicely. Note the 'pile' of powder - the Mods shouldn’t be worried, this is ‘real genuine’ talc powder - about equals the volume of the light filler we used too. /sites/3/images/member_albums/140450/670211.jpg 4). Add two or three drops of acrylic paint (craft paint, water based or airbrush acrylics), I used ‘Raw Sienna’ here for better picture contrast. It can be white paint of course, but it’s easier with a colour to see the work in process and the finished results shows up better. Anyway, use a colour that works for your intended top coat. Light for light topcoats, gray for everything else. You can use Yellow in the primer if you are painting Yellow top coats, because Yellow - and Reds - don't always cover well. /sites/3/images/member_albums/140450/670212.jpg 5). Now mix it well. It is very thick, but get it creamy and all one colour and texture, working out any chunks. /sites/3/images/member_albums/140450/670214.jpg 6). Add water until it is like very thin whipping cream, thin shaving cream, or even thinner like a very thick paint. Brush this on your pre-sanded foam, making sure to completely wet everything and force the mixture into any hollows, dings, scratches, etc. /sites/3/images/member_albums/140450/670213.jpg Let this dry. Then sand it all with some 180 grit or 220 grit papers, mounted to some sheets of laminated white foam. I use plaster wall hard foam sponges. The foam sanding blocks are flat, but 'give enough' to not cause grooves nor scoring. Just make sure to remove sanding dust often and use a reasonable pressure while sanding. When you have sanded most of this formula away, you will see some original foam, but also many areas of filled and flush mixture and the surface will be very smooth. Little weight gain, yet ready for top coating with paint. You can sand with even finer papers, depending on what top coat paint you will be using. This is good enough using craft paints, but if like Fred, you intend to spray with Vallejo, Model Master or Tamya paints, you could go to 320 or 400 grit paper. All four kinds of paint seem to work well with this process. I’m truly convinced by Fred’s method and believe it’s really worth trying this out on a piece of scrap foam or Depron. I intend to test my ‘Raw Sienna’ mixture and will report here later on. … sjeesh… this was quite a long one… comments welcome, of course... Hakuna matata Chris BRU - BE / CTR Raw Sienna Control Edited By McG 6969 on 26/04/2016 20:46:06
-
Erfolg, You may need to set the line parameters to 3D. As Ron says, please give us a hand drawn sketch of what you want to do.
-
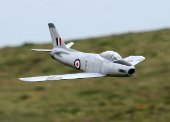
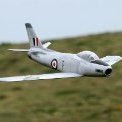
Hi Heritage_1944, It was all about aesthetics at the end of the day. As the wing section on the model is much thinner than the full size more dihedral than shown on the plan just did not look right! The PSS version flies very well on the slope and also handles a good blow with ease. Martin.
-
Richard, in my opinion the Spit/109 combo is one that has been modelled many times. How about something less mainstream such as a Japanese/American combo from the Pacific war? Martin.
-
Advice on multi motor set ups
Martin Gay replied to Mike downs 1's topic in General Electric Flight Chat
Mike, Outrunner beat me to the same reply! -
This own design A320 was built with the foam packaging from a shower screen!
-
712g! That is lightweight considering all the extra stuff that you added. 80W per motor give something close to 75W/lb. I look forward to the report, post maiden. Martin.
-
Martin, The slope version is 702 grams ready to fly, including the bouncing bomb. MG
-
Rich Griff, The Free Plan Lancaster has an Eppler 374 wing section, if that helps with those of you that wish to construct a built up wing. Martin.
-
Hi Martin, I'm very impressed with your modifications. Well done. Looking forward to seeing it flying. Martin.
