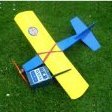
Phil Green Posted July 6, 2014 Share Posted July 6, 2014 Sometimes its good to try something new! My Godson had been given an Arduino kit for his birthday, and he was starting to ask questions I couldnt answer - although I'm a lifetime embedded systems developer I'd never touched an Arduino - so I thought I'd better learn something about them. Coincidentally Paul Luby had posted about his Futaba M6 refit and another retro conversion seemed a good place to dive right in at the deep end. When I was a kid the Krafts were very desirable sets but way beyond our budget, so its great to be able to fly one years later and with a few convenient bells & whistles on top. This has been a fun project in that the rewards come very easily, the Arduino is simplicity itself and most of the hard work has been done for you by the designers, leaving the user with just a basic scripting job. Let me admit up front that my Arduino code is very simplistic, there are many far more complex and very clever encoder projects out there in interweb land, including the Microstar, 9x, ArduinoRC, Patolin and more, but this one suffices for a retro conversion where there is no lcd screen or fancy programming interface, and its probably easier to make than any of the posh ones. I enjoyed doing it. You can even make one without soldering, using one of these. With the back off (screws long-lost...) you can see the Arduino, a 2S lipo and the Frsky DHT module. I removed the LED from the bind board and fitted a new extended one behind the Kraft meter, and I removed the bind button and extended the connections to what was the Kraft trainer button. To calibrate, you hold a button down, switch on, and still holding the button, move each of the sticks into all four corners a few times (including the mechanical trims, or not, as you prefer). When done, you let go of the button and it saves the maximum and minimum values from each pot to flash. Every time you power-up it reads the calibrated values from flash and uses these for the stick maps. You can repeat the calibration as often as you like but it only needs to be done once unless you change the stick configurations. The 'calibrate' button isnt dedicated - its my channel 5 where the momentary push-button can be used for towhook release, bomb drop etc. Channel 6 is a conventional 2-position switch for retracts, flaps etc (not that I'll ever use them) The code is a bit longer than I'd hoped as the sequencing is a bit awkward with the enforced setup() and loop() constructs and also each int has to be broken down into bytes for the flash write, and combined again on read. The ppm frame output including sync can be done in only 5 statements by having the sync as another (long) channel. Heres the spec: 6 channels, 4 propo, one toggle switched (ch6), one momentary pushbutton (ch5) (with several 'spare' analog & digital inputs) Self-calibrating sticks, saved to EEPROM during power-off - no measurements and presets needed (needs mechanical trim stick units) Servo-reversing by holding sticks over on power-up, saved to EEPROM during power-off (throttle deliberately doesnt reverse, its a safety thing!) Rates variable from 100% down to 10% via a pot, click for no rates Expo variable from none to lots via a pot , click for no expo (sincere thanks to Paul Luby for his expo maths!) Single-handed range check mode, flick the ch6 toggle three times to invoke, throttle is held off in range check mode, exit by moving stick Switchable elevon mixer for flying-wings with 75% aileron & 25% elevator Servo-slow on switched channel 6 (flaps, retracts etc) No bootloader delay, instant ppm so Corona-safe! Here's a bit of a demo: Edited By Phil Green on 14/07/2016 09:21:09 Quote Link to comment Share on other sites More sharing options...
Phil Green Posted July 6, 2014 Author Share Posted July 6, 2014 OBSOLETE - see 7ch code on the Archive page of http://www.singlechannel.co.uk // Simple, minimal six channel PPM encoder for retro refits. // Four propo, one toggle-switched with servo-slow (ch6), one momentary button (ch5) // Please dont use the bootloader, startup delay messes things up and can strip servo gears. // Connections: // Pots wired between ground and regulated 5v from Arduino. Wipers connected as follows: // A0=aileron, A1=elevator, A2=rudder, A3=throttle. A6=expo, A7=rates. D10=mixer, D11=ch5 button, D12=hip-hop group, (and also ch6 toggle switch) // Features // Stick calibration - hold button in, switch on, still holding button move sticks and trims to extreme corners. Centralise trims, release button. // Variable expo & rates on ch1, 2 & 4. Elevon mixer on ch1 & ch2, 75% aileron, 25% elevator. // Flick toggle 3x for range test. Servo reversing by holding sticks over on power up (saved to eeprom). Servo-slow on channel 6 toggle. // Scope trigger on D10. Thanks to Paul Luby for his expo maths! // Phil_G on most forums, [email protected] int sw_mix = 10; // mixer switch int sw_btn = 11; // pushbutton channel 5 int sw_tog = 12; // toggle channel 6 int ppm = 13, ppmPulse = 300, neutralPulse = 1200, raw, flips, ch, calibrated=1, startup=1, stickcalHi[]={0,0,0,0}, stickcalLo[]={1023,1023,1023,1023}; float ch0val, chtemp, channel[]={1200,1200,1200,1200,1200,1200,8000}; // last is sync float lastch6, cchannel6, slow, sweep, rate =0, expo = 0; byte reverse[]={0,0,0,0,0,0}, rangetest=0, flip=0; unsigned int framecounter=0; #include void setup() { noInterrupts(); pinMode(ppm, OUTPUT); pinMode(sw_mix, INPUT_PULLUP); // set to OUTPUT for scope trigger pinMode(sw_btn, INPUT_PULLUP); pinMode(sw_tog, INPUT_PULLUP); } void loop() { while (startup==1 && digitalRead(sw_btn) == 0) { // calibrate sticks calibrated=0; for (int stick=0; stick <4; ++stick) { raw=analogRead(stick); if (raw > stickcalHi[stick]) stickcalHi[stick] = raw; if (raw < stickcalLo[stick]) stickcalLo[stick] = raw; } } if (startup==1 && calibrated==0) { for (ch=0; ch<4; ch++) {EEPROMWriteInt(ch*4,stickcalLo[ch]); EEPROMWriteInt(ch*4+2,stickcalHi[ch]);} calibrated=1; } if (startup==1) { for (ch=0; ch<4; ch++) {stickcalLo[ch]=EEPROMReadInt(ch*4); stickcalHi[ch]=EEPROMReadInt(ch*4+2); reverse[ch]=EEPROM.read(ch+16) & 1; } reverse[3]=0; // no throttle reverse for safety slow=digitalRead(sw_tog)==0 ?500:-500; // initial channel 6 value } for (ch=0; ch<4; ch++) {channel[ch] = map(analogRead(ch),stickcalLo[ch],stickcalHi[ch],-500,500); channel[ch] = constrain(channel[ch], -600, 600);} channel[4]=digitalRead(sw_btn)==0 ?500:-500; // channel 5 if (digitalRead(sw_tog) == 0) { cchannel6 = 500; if (slow < 500) slow+=2; } if (digitalRead(sw_tog) == 1) { cchannel6 = -500; if (slow > -500) slow-=2; } channel[5]=slow; ch0val=channel[0]; // check for reversing, stick over on power-up, not throttle though. if (startup==1) { for (ch=0; ch<3; ch++) { if (channel[ch] > 450 || channel[ch] < -450) { reverse[ch] ^=B00000001; EEPROM.write(16+ch,reverse[ch]);} } } // end of once-only startup routines startup=0; // read expo pot expo = map(analogRead(A6),0,1023,100,300); expo/=100; // read rates pot rate = map(analogRead(A7),0,1023,100,10); rate/=100; for (ch=0; ch<3; ch++) { if (channel[ch] <0) {channel[ch]=abs(channel[ch])/500; channel[ch]=pow(channel[ch],expo)*-500; } else channel[ch]=(pow(channel[ch]/500,expo)*500); channel[ch]*=rate; } // do timed stuff if (cchannel6 != lastch6) {++flips; framecounter=0;} if (framecounter < 12 && flips >5) { rangetest ^= 1; // this flags the 3 flicks 'active' framecounter=12; } if (framecounter > 11) flips=0; lastch6=cchannel6; // format the frame channel[6]=0; // 6th element is sync for (ch=0; ch<6; ch++) { channel[ch]+=neutralPulse; if (reverse[ch] ==1) channel[ch] = 2400-channel[ch]; channel[6]+=channel[ch]; } channel[6] = 15500-channel[6]; chtemp=channel[3]; channel[3]=channel[2]; channel[2]=chtemp; // change channel order to Futaba AETR if (rangetest==1) { channel[2]=700; // throttle low if (framecounter==50) { framecounter=0; flip^=1; } channel[0]=flip==0 ?800:1600; if (ch0val < -50 || ch0val > 50) rangetest=0; } // check if mixer switched in if (digitalRead(sw_mix) == 0) { channel[0]*=.75; channel[1]*=.25; chtemp=channel[1]; channel[1]=channel[0]+600-channel[1]; channel[0]+=chtemp; } //send ppm frame, last channel holds sync value for (int ch=0; ch<7; ch++) { digitalWrite(ppm, HIGH); delayMicroseconds(ppmPulse); digitalWrite(ppm, LOW); delayMicroseconds(channel[ch]); } if (framecounter<255) ++framecounter; // scope trigger pin 10, ensure mixer switched off, then temp define as OUTPUT in setup // digitalWrite(10, HIGH); // delayMicr Quote Link to comment Share on other sites More sharing options...
Phil Green Posted July 6, 2014 Author Share Posted July 6, 2014 // This function will write a 2 byte integer to the eeprom at the specified address and address + 1 void EEPROMWriteInt(int p_address, int p_value) { byte lowByte = p_value%256; byte highByte = p_value/256; EEPROM.write(p_address, lowByte); EEPROM.write(p_address + 1, highByte); } //This function will read a 2 byte integer from the eeprom at the specified address and address + 1 unsigned int EEPROMReadInt(int p_address) { byte lowByte = EEPROM.read(p_address); byte highByte = EEPROM.read(p_address + 1); return lowByte + highByte*256; } I've tried to make the diagram look the same style as Pauls Futaba M6: Note that Coronas and early Frsky modules will need a schottky diode in the PPM line, banded end to the arduino, non-banded end to the RF module. Something like a BAT42 is ideal. Edited By Phil Green on 08/07/2014 02:14:09 Quote Link to comment Share on other sites More sharing options...
Phil Green Posted July 6, 2014 Author Share Posted July 6, 2014 Lots more retro conversions and refits on singlechannel.co.uk and on Youtube channel PHILG2864 Cheers Phil Edited By Phil Green on 06/07/2014 09:42:13 Quote Link to comment Share on other sites More sharing options...
Former Member Posted July 6, 2014 Share Posted July 6, 2014 [This posting has been removed] Quote Link to comment Share on other sites More sharing options...
Sparks Posted July 6, 2014 Share Posted July 6, 2014 Congatulations Phil, excellent job and thanks for sharing the code. Nice to see the 'E' part of RCME still exists. Quote Link to comment Share on other sites More sharing options...
DJC Posted July 6, 2014 Share Posted July 6, 2014 what next Phil Galloping Ghost or single channel using an Arduino looks like Arduino has taken over from pic solution djc Quote Link to comment Share on other sites More sharing options...
Phil Green Posted July 6, 2014 Author Share Posted July 6, 2014 Not taken over Dave, but its another option! The GG emulation has been the 'next project' for about 5 projects now, Shaun is itching to fly a Ghost-Rider 'properly' so I really ought to get my finger out. Its the busy season here though (family business is a boarding kennels) so not much playtime! Thanks for the positive comments chaps Cheers Phil PS if anyone is that interested, dont copy from the code in the post above, rather use the download link please. This is because the forum has removed all the formatting, and more critically I've spotted that it has missed out the odd character in a couple of places, maybe more, probably because its trying to interpret them as smileys Edited By Phil Green on 07/07/2014 13:06:16 Quote Link to comment Share on other sites More sharing options...
GONZO Posted July 7, 2014 Share Posted July 7, 2014 The last time I had anything to do with programming was back in the late 70's when BT sent me on a machine code and assembler course and I then never used it in anger. Forward to the present. I've found the terminology a slight hurdle but its starting to come together. So, please forgive any errors. I'm still waiting for the very slow boat from China(Maylaysia) to arrive with my nano's so I decided to upload some code to my own Arduino library for subsequent use in a Futaba M6 (had it from new and its hardly been used). I liked the facilities in the ArduinoRC (multi model etc) and also in Phils. Thought I could try each out (or a mix of both if I get really adventurous) as its so easy to reprogramm and then decide which to use. Phils dowloaded fine and I have it ready for trying on the nanos when they arrive. But, I'm having trouble with the ArduinoRC. I dont get a complete sketch, its either partial or split into tabed parts. I'm probably doing something stupid. Has anyone tried the ArduinoRC sketch? Help would be gratefully accepted. (mmmmmm this humble pie does taste good) Quote Link to comment Share on other sites More sharing options...
Phil Green Posted July 21, 2014 Author Share Posted July 21, 2014 This evening about 8:30pm I took the converted Kraft down to Ponty Park with my usual testbed Multiplex Easycub, there was no-one else there and conditions were ideal (apart from facing directly into the sun!). Its the first opportunity I've had to fly for quite some time, and the Kraft was overdue a flight-test, having been soak-tested for hours and hours on the bench. Over about an hour & a quarter I flew four lipo batteries flat and the radio was lovely, exactly like a Kraft was back in 1971. I do like those Kraft-Hayes stick units! A couple of times for a giggle, well up at a good height, I tried the single-handed range-test function, which automagically waggles the rudder side to side - it amused me to watch the Cub fishtailing along of its own accord. A quick dab of rudder and we're back in control again. Came home when it was getting difficult to orientate as dusk settled in... happy chappy, I can tick the 'flight-tested' box now! Cheers Phil Edited By Phil Green on 22/07/2014 00:48:40 Quote Link to comment Share on other sites More sharing options...
DJC Posted July 22, 2014 Share Posted July 22, 2014 Phil There is nothing quite like the satisfaction of flying something that you have built for the first time. I remember the joy every time I flew my old 27mhz Classic system. Those were the days when you even built the amps for the servos from a bag of bits. I could kick myself, as I only recycled it a little while ago, it would have a made a good retro build djc Quote Link to comment Share on other sites More sharing options...
Phil Green Posted July 22, 2014 Author Share Posted July 22, 2014 its only the nice feedback comments that keep me going! Cheers Phil www.singlechannel.co.uk www.youtube.com/user/PHILG2864/videos Edited By Phil Green on 01/08/2014 23:23:29 Quote Link to comment Share on other sites More sharing options...
Phil Green Posted July 31, 2014 Author Share Posted July 31, 2014 Cheers Phil Edited By Phil Green on 31/07/2014 01:26:52 Quote Link to comment Share on other sites More sharing options...
DJC Posted July 31, 2014 Share Posted July 31, 2014 phil you never fail to amaze me with your ingenuity, don't you ever sleep whats next GG using the toggle switch any chance of see the code ? I have been kicking around some thoughts on a back of a fag packet to provide a bang bang solution using an arduino, but a bit strapped for cash and time to put it in to action djc Quote Link to comment Share on other sites More sharing options...
Martyn K Posted July 31, 2014 Share Posted July 31, 2014 I really wish there was a 'like' button. Nice one Phil. Martyn Quote Link to comment Share on other sites More sharing options...
Chris Bott - Moderator Posted July 31, 2014 Share Posted July 31, 2014 That's just genius Phil. Amazing. I so want one. Here's me with a perfectly working Waltron conversion that acts just like it Waltron designed it to, and you have me considering drilling holes and adding switches, etc etc. Arghhh Quote Link to comment Share on other sites More sharing options...
Chris Bott - Moderator Posted July 31, 2014 Share Posted July 31, 2014 PS I have a club mate who is likely to throw these out soon. Should I be saving them? Quote Link to comment Share on other sites More sharing options...
Martyn K Posted July 31, 2014 Share Posted July 31, 2014 Definitely, I wish I had kept my Futaba FM M6 Martyn Quote Link to comment Share on other sites More sharing options...
Phil Green Posted August 1, 2014 Author Share Posted August 1, 2014 Just got back from Ponty Park, I took a punt on the rain holding off for an hour or so as I really wanted to test fly the single-channel escapement emulation mix on the Kraft - and what a revelation! And what a great way for newbies to learn the noble art of single-channel button bashing! ... or for anyone who just doesnt have the confidence to go the whole hog with a true rudder-only S/C set... Because the emulation is a mix, your 'safety net' propo sticks are live all the time - theres no switching or mode selection to do to enable or ditch the escapement emulation - so if you can fly propo its almost crash-proof! It was only a couple of sessions between showers but I'm absolutely chuffed to bits with it! Cheers Phil PS is it the future? nah! I love the simplicity of a proper rudder-only model and real S/C radio! Quote Link to comment Share on other sites More sharing options...
Chris Bott - Moderator Posted August 1, 2014 Share Posted August 1, 2014 I could see just what a good idea it was straight away Phil. I'm really battling with myself over either changing my Waltron, or converting another. On the other hand, I just have too many projects on. When you have 5 mins, just knock up a single channel program for Taranis would you? Quote Link to comment Share on other sites More sharing options...
Phil Green Posted August 1, 2014 Author Share Posted August 1, 2014 Quote Link to comment Share on other sites More sharing options...
Jamie sawyer Posted August 1, 2014 Share Posted August 1, 2014 Posted by Chris Bott - Moderator on 31/07/2014 11:18:29: PS I have a club mate who is likely to throw these out soon. Should I be saving them? Chris, I am sure that one on the right was my very first radio set. Looks exactly like it. It was a 4 ch 27 mhz radio set. I bought it second hand back about 1992. I built a Precedent Fly Boy, put an enya in it and loved it. Unfortuately after about 3 months of pure delight the radio suffered black wire creep and I lost my first plane, enya engine and all the radio gear as the Fly boy flew out to sea on a down wind circuit. I was gutted and only abou 12 at the time....It didn't put me off the addiction though I always wondered how old that set was back even then. It was like an antique compared to what everyone else was using. Jamie Quote Link to comment Share on other sites More sharing options...
john stones 1 - Moderator Posted August 1, 2014 Share Posted August 1, 2014 Way over my head Phil very enjoyable read though John Quote Link to comment Share on other sites More sharing options...
IDD15 Posted August 3, 2014 Share Posted August 3, 2014 Hi Is it possible these days to still source stick/gimbal units? Years ago RCM&E was full of ads for them from the likes of Micron, SLM, Teleradio etc. I fancy a go at building my own custom tx though the thought of finding a McGregor Digimac tx for a serious nostalgia trip is equally appealing! MTIA Ian Quote Link to comment Share on other sites More sharing options...
GONZO Posted August 3, 2014 Share Posted August 3, 2014 Stick/gimbal units available as Taranis spares. In the UK from T9 **LINK** or a lot cheaper from HK International **LINK** But they don't have trims. The trims are seperate electrical units and I believe you would have to alter the sketch to allow for this as the original was for mechanical trim stick units. When you add the cost up your probably better sourcing a suitable donor Tx from the bay. Phil will probably be along at some time and will advise you better. Quote Link to comment Share on other sites More sharing options...

Recommended Posts
Join the conversation
You can post now and register later. If you have an account, sign in now to post with your account.
Note: Your post will require moderator approval before it will be visible.