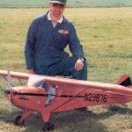
David Ovenden Posted June 16, 2022 Share Posted June 16, 2022 Well , not so much a make-over as a build with a modified paint scheme. I recently picked up an unstarted Seagull Sea Fury kit from a modeller who was giving up. Obviously these kits have been out of production for quite a while, and the kit is not quite up to current standards. For example, it has no electric provision (mounts / battery space etc) and no removable top hatch. Danny F and others have some time back detailed modifications for electric and demonstrated that the model can be redone in other paint schemes. So far I have fitted some HK electric retracts and oleos in place of the supplied mechanical units with wire legs. I have increased the wheel wells to take proper size wheels (3.5"). And repainted the model to disguise the pretty boring and unconvincing film finish it came with. I have decided on a Dutch naval scheme and am modelling 860which was part of the 1959 Dutch Naval aerobatic team that used Sea Furies. I feel its a much nicer scheme than the Canadian racing colours supplied as standard. Eagled eyed will see I have the cowl on upside down 098 instead of 860! 5 Quote Link to comment Share on other sites More sharing options...
Paul De Tourtoulon Posted June 17, 2022 Share Posted June 17, 2022 A bit late David, but I have a couple of Seagull leccy mounts, as you know all noisy oily things for me,, Quote Link to comment Share on other sites More sharing options...
David Ovenden Posted June 17, 2022 Author Share Posted June 17, 2022 (edited) Paul, this will have my Saito 115 4 stroke in it so it's not electric. I was just making the point that it's an older kit made before Seagull adapted their designsl to be "electric friendly" Mine will be glow powered so don't worry. You will not be alone! Edited June 17, 2022 by David Ovenden Quote Link to comment Share on other sites More sharing options...
David Ovenden Posted June 18, 2022 Author Share Posted June 18, 2022 A reminder of the uninspired scheme on the standard Seagull kit. Quote Link to comment Share on other sites More sharing options...
David Ovenden Posted June 24, 2022 Author Share Posted June 24, 2022 The model is nearly ready to test. Does anyone who has built and flown one of these have any advice on whether the throws and CG in the manual are accurate. If not what did you end up using? Quote Link to comment Share on other sites More sharing options...
David Ovenden Posted June 26, 2022 Author Share Posted June 26, 2022 Made up some brackets to secure the u/c doors to the oleo legs. The items supplied on the kit were only suitable for piano wire uc legs. Quote Link to comment Share on other sites More sharing options...
Paul De Tourtoulon Posted June 26, 2022 Share Posted June 26, 2022 Nice but what stops them from twisting around the leg ?. Quote Link to comment Share on other sites More sharing options...
David Ovenden Posted June 26, 2022 Author Share Posted June 26, 2022 Firstly, there are notches in the upper bracket that locate over the oleo retaining screws. Second I will drill the brackets and oleo to take small self tapping screws to fix them. Or I could just epoxy the brackets to the legs. 1 Quote Link to comment Share on other sites More sharing options...
Andrew Calcutt Posted June 26, 2022 Share Posted June 26, 2022 Nice work,had one of these years ago,needed quite a bit of nose weight but flew ok with a sc 90. Quote Link to comment Share on other sites More sharing options...

Recommended Posts
Join the conversation
You can post now and register later. If you have an account, sign in now to post with your account.
Note: Your post will require moderator approval before it will be visible.