Koen Smits
-
Posts
215 -
Joined
-
Last visited
Content Type
Profiles
Forums
Blogs
Gallery
Calendar
Downloads
Posts posted by Koen Smits
-
-
Pete, see attached picture.
Edited By Koen Smits on 15/01/2020 16:29:47
-
@ FilmBuff,
Hello, please look at this link
They have spinners, centerpieces and rubber rings for foldingprops.
the site is in german and englisch.
-
Hi all,
DIY incidence meter found on the german forum rc-network.de
language is german.
Koen.
-
Hi, to start my phoenix ASK 21, span 3 meter i use also a startdolly. the biggest problem from using a startdolly is: it somewhere on the field and you need an other person to retrieve it.
During this summer i have experimented to create a return home system, by using an Arduino, GPS and an Ultra-sonic distance sensor.
In de link one of the first testruns.
In short, the dolly has 5 wheels, 4 (black) are used during take off, at return home there are 3 wheels ( 2 black and 1 blue) used.
Edited By Koen Smits on 20/11/2018 09:47:16
Edited By Koen Smits on 20/11/2018 09:48:21
Edited By Koen Smits on 20/11/2018 10:15:11
-
Hi All, in he past i already posted a drawing from a wire bender to make your own.
In this post are also some links with short video's how to use the tool.
The tool can be used up to 4 mm ( 5/32" ) piano wire.
-
For all the Ballerina Builders who don't have a wire bender. A few years ago i posted a downloadable drawing from my wire bender **LINK**
2 or 3 post later there are some links to video's how to use the bender.
Feel free to download the drawing.
Koen
-
-
-
Hi All, I started the build from the Flychatcher as an autum project. Due problems with my camera i lost a lot of pictures made during the build but here pictures how far i'm now.
The next thing i plan to do is create Mort's brother Lionel.
Will post new pictures soon
regards
Koen Smits
Edited By Koen Smits on 24/10/2015 22:45:23
-
Posted by Max Z on 29/05/2015 19:11:08:Posted by Pete B - Moderator on 29/05/2015 17:36:22:
Have you guys completed the survey?
Yes.
Also Yes.
-
Victor, maybe he did the same with the carrier pigion on her way to you

https://www.youtube.com/watch?v=YrWx4y9_tqA
Koen Smits
Edited By Koen Smits on 29/05/2015 19:02:29
-
-
Sinds my first discription I got my copies always before they were available in the shops, up to the april 2014 issue. From there its always delivered at least a week after its available in the book shop. At the moment i'm in doubt if i will renew my discription at the end of the year.
Koen Smits
Edited By Koen Smits on 22/05/2015 12:41:27
-
Hi KC,
The vise is actual clamped on the table with 2 clamps. The smallest radius you can bend piano wire without the possibility to get cracks in the wire is equal on the diameter. The thickest wire you can bend with this tool is 4 mm. In video #4 i bend pianowire from 4 mm.
The reason i used M10 bolts is, if you look at the video you see at the other end from the in the vice clamped part also 2 treaded holes. these hole are positioned on the centerline. At the end where i bend the wire in the video the treaded hole are positioned on approx. 45 degr. this is done so you are able to bend right hand- and if you turn the in vice clamped part upside down you are able left-hand springs.
(p.s. I don't own an engineers vice.)
Koen
-
Hi All, in he past i already posted a drawing from a wire bender to make your own.
http://www.modelflying.co.uk/forums/postings.asp?th=82878
In this post are also some links with short video's how to use the tool.
The tool can be used up to 4 mm ( 5/32" ) piano wire.
Edited By Koen Smits on 06/01/2015 09:33:35
-
-
It's old watch maker measuring tool.
One devision is 1/72 inch. more you can read here
Koen
-
-
Nice smoke, this could be used as smoker

Imo is this fire caused by lack of coolingair for the ESC .If you put in a new ESC, he will burn also within a short time. As I could see in the video the fuselage is coplete closed without any ventilation possible.Also you use a lot of foam to inside the fuselage to prevent moving from some electronic parts.
Koen
-
Thanks VA for the links.
The lower XT 60 connectors are for the ESC and the upper for the battery. As you can see it's very busy inhere, I had to drill a hole in the firewall to get the motorwires trough and have some free space left.
In this male connector goes the interupt dummy ( arming and disarming) connector.
For all who are also and will build the DFin the future, keep the tail as light as possible, to get the CG at the right spot i have to put 70 gramms of lead in the nose. probably this will be more because a plane can't fly without a pilot.
Koen
Edited By Koen Smits on 12/01/2014 13:52:07
-
Hello all,
I'm now putting all the electronic stuff in my Dawn Flyer and use these XT60 connectors, they have a very tight fit. To put the battery in the compartment ( with the model tuned upside down ) and connect the the battery to the ESC you are very close with hands e.g. fingers to the propellor. After a flight you have to turn the model upside down again, disconnect the battery from the ESC. At this moment the ESC is fully armed and now your hands and fingers come again very close to the propellor. Does anyone have an idee how to avoid getting wounded by an accidently, at hi speed turning propellor.
Koen
Edited By Koen Smits on 10/01/2014 20:20:47
-
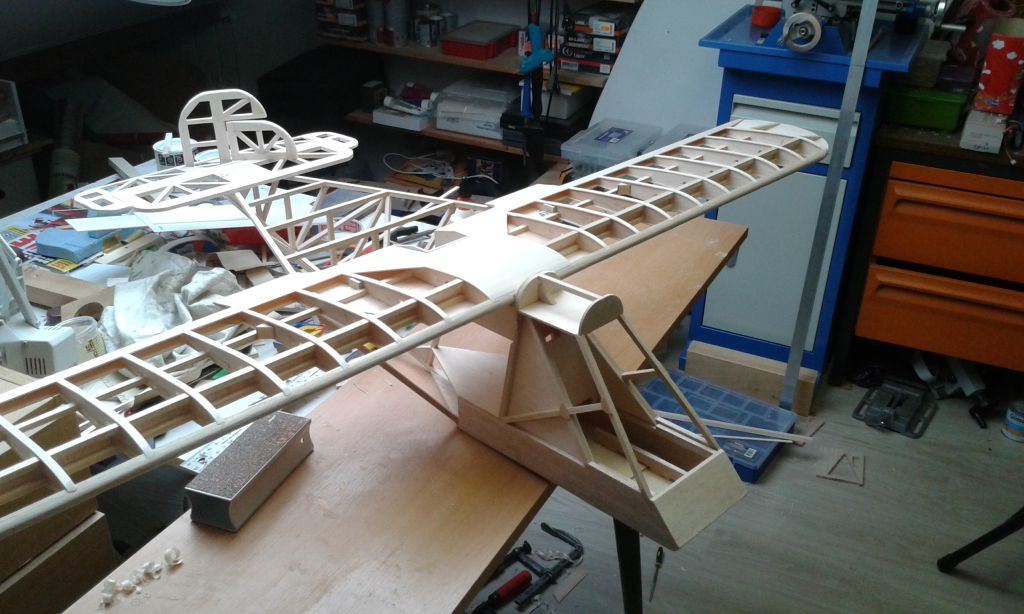
As promised, some pictures from my DF build up to now.
Some details
Guide for the elevator control rod, I used 3 of them.
Detail from the wingdowel hole in F2 and the wingbolt plate with a M5 nut.
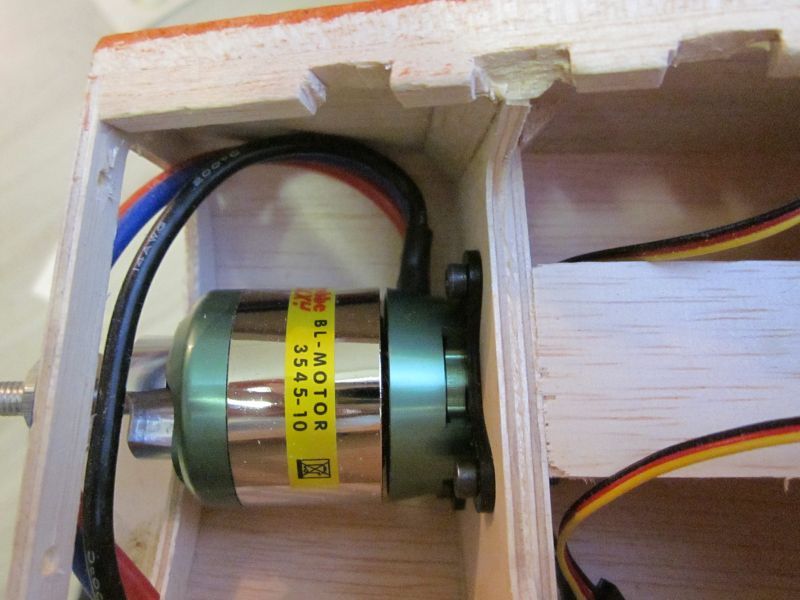
This is the motor i will use, Robbe Roxxy 3545-10 on 3S 2200-25C lipo battery.
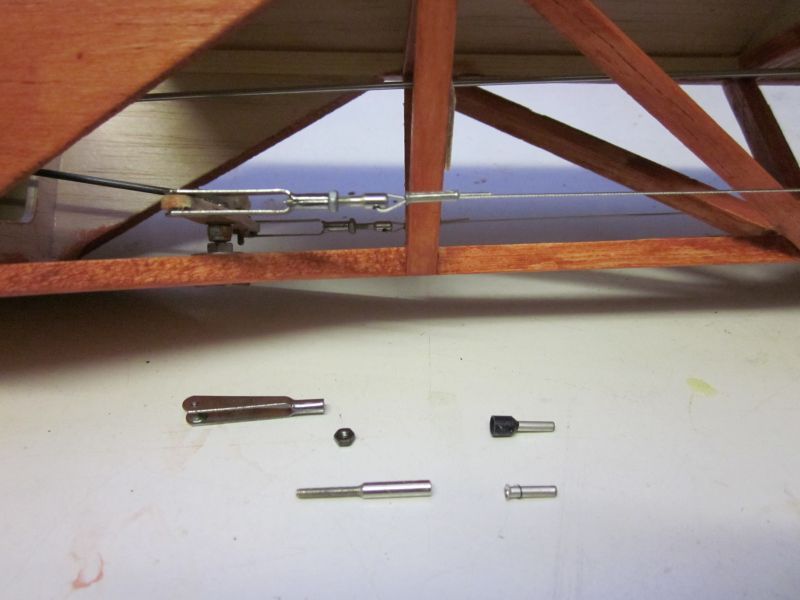
Detail from the ruddercontrol wire tensioners, made from a quick-link, modified treaded coupler, m2 nut and a ferrule. ( I suppose it's the right name for it )
Detail from the closed loop at the rudder side. ( it's different from the detail on the plan )
Just above the wing sadle you can see I sanded the fuselage-sides flat to match to the tail end.
Possible some of the details are helpfull for other DF builders.
Koen
Edited By Biggles' Elder Brother - Moderator on 04/01/2014 21:01:21
-
Hello Dawn Flyer builders,
I'm also building the Dawn Flyer and had the same problem with the differences in width from the body and the tail part. If you measure the width on the plan from former F4 including the wing sadle ( 99 mm) and the width from the body seen from above is 108 mm. In my opinion the fault is caused by the fact the top from the fuselage side is behind the wingseat 7 mm lower then at the leadingedge side from the wingsadle. This is not taken in account when the topview is drawn. I fixed it by making the first two cross members shorter so the tail part matches the width from the fuselage body.
will post some pictures from my build later.
Koen
-
Rich,
These where his first flights with an autogyro after making a few adjusting hops the day before. Now i know the panther flyes, maybe on the next occaision i will try by myself
koen


![20150529_103458[1].jpg 20150529_103458[1].jpg](/sites/3/images/member_albums/97695/604532.jpg)


Unisens E Telemetry Sensor
in Gadgets and Electronics
Posted