
Electriflier
-
Posts
1,678 -
Joined
-
Last visited
Never
Content Type
Profiles
Forums
Blogs
Gallery
Calendar
Downloads
Posts posted by Electriflier
-
-
I have the sad duty to inform you all that our good friend and true gentleman Geoff Noble passed away peacefully in the early hours of this morning following a short but debilitating illness.
Always the pioneer of large model builds along with his best mate and builder Mick, Geoff was a regular visitor to the shop when sourcing his 'rain forest' amounts of balsa. The A10, a testament to Mick's craftsmanship and to Geoffs insatiable appetite for bigger and better remains on hold for the foreseeable future and so, apart from leaving this build post open for messages of condolences, will close as a mark of respect to this lovely man.
RIP Geoff Noble
Roy
-
Ian, it was never in doubt. Something as well made as your Lanc' that looks so right..... How could it not fly? Superb achievement and as I've already stated, the best depron build I have seen. Congratulations !
-
-
-
-
Quality building Chris. It really is looking lovely.
Regards
Roy -
Cracking flight Phil!


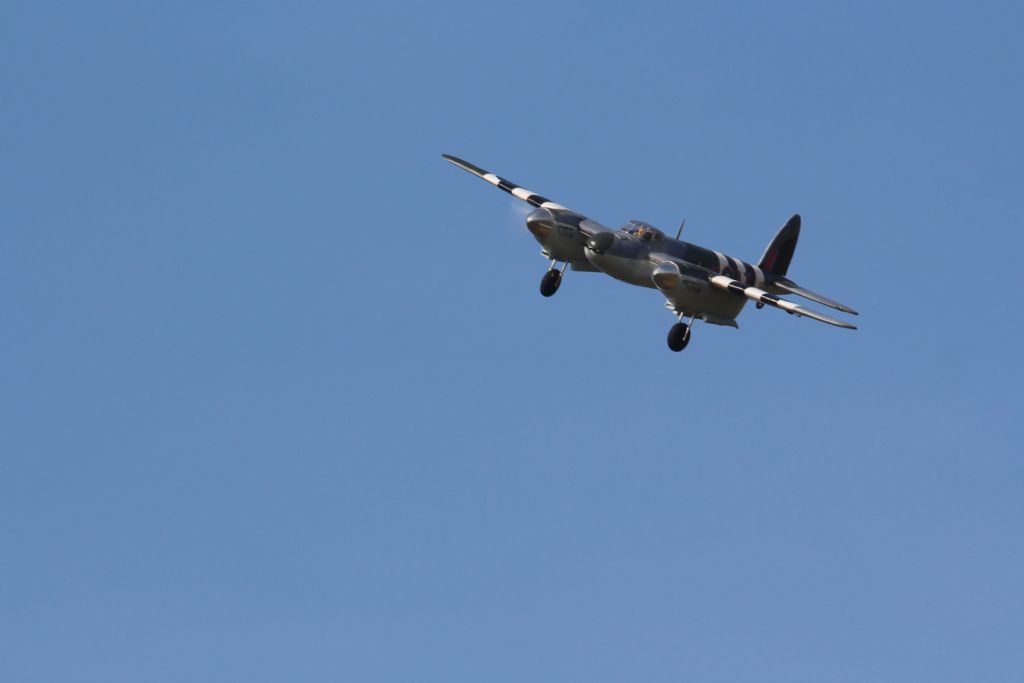


Even a bow at the end!
I hope you have many more successful flights with your new favourite warbird.
Regards
Roy
-
Hehe..... That ole devil called Depron Daz..... Back on the team!
2 motors now eh, and matching? Too good not to use so I've got to suggest a twin. One thing I'd suggest you consider though before you go much further is, if you're going down the WW2 aircraft route (conventional prop setup) and you want the end result to look polished ( and knowing you as I do, I'd suggest that's what you'd want), do some research on models that you're able to purchase the glazied cockpit canopy at least. Twins, as you're well aware tend to have a fair amount of Perspex front and sometimes rear and can be complex shapes, difficult to form from the old pop bottle. This limits your choice somewhat but after you spend all that time, effort and money on a build, the last thing you want is for the glazing to spoil the appearance.
I'm not going to suggest any one particular aircraft, that's part of the fun for you.
I second what quite a few people have already said...... welcome back!
Regards
Roy
-
Shane,
Thanks (I think)
I use 'High Energy' Extreme Lipos (Suppliers - Ripmax). I've found them to be a very good battery and available at very reasonable prices. No issues with them at all.
As for the maiden, It ain't gonna happen until the proprietors of our field give it the first after-winter cut. The grass is far too long to risk it. There's also Phil's Mosquito to maiden but the same problem stops that too.
Patience young man
Roy
-
Again, thank you Colin.
I'm not sure whether it's acceptable to post links to relevant sites but I have just started my own Build page on Facebook if Admin allows me to share....
I do understand if this is not PC.https://www.facebook.com/groups/100285473699240/
-
Cheers Andy,
Well, i'm getting to the point now where updates will become fewer as the build nears completion. Small jobs of which there are plenty need doing to get the model looking just right.
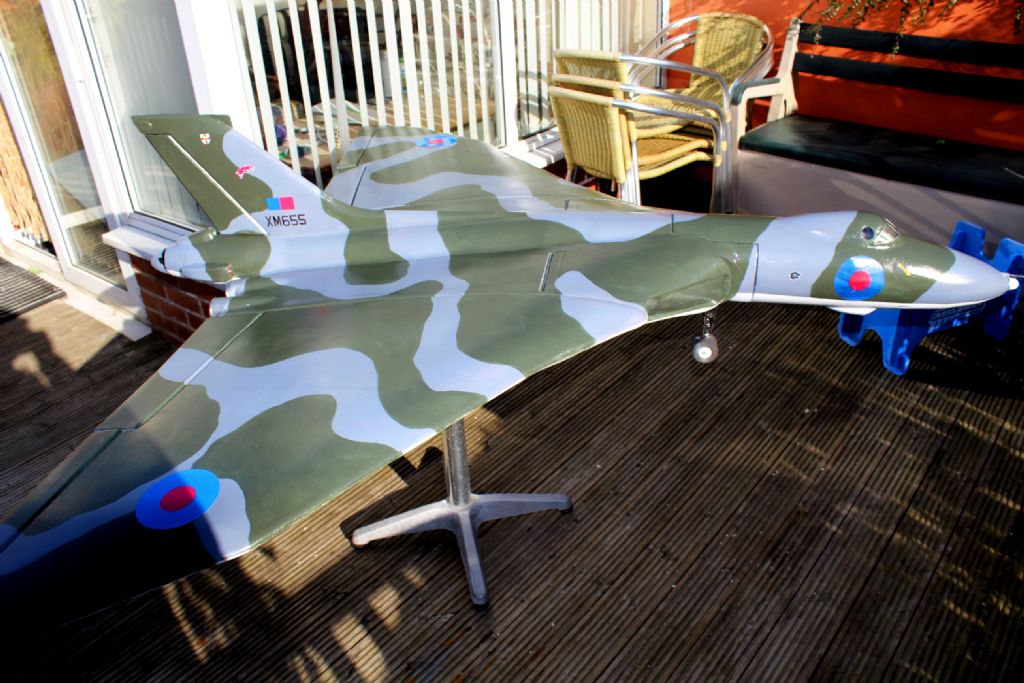
I made some decals from glossy paper and tried fixing them with some spray adhesive. Not very successfully I might add and so, I'll be removing them and having them vinyl cut in the next few days. I've painted the underside white and added the olive green camouflage pattern to the top of the model Yes, I used Valspar emulsion. as I intend to finish the model with a few coats of Acrylic spray gloss varnish.
As I think I might have mentioned earlier, the model is following the design of XM665 and so I've had to do a fair amount of digging around to reproduce the relevant squadron markings that can be found on the actual aircraft.
The running dogs are insignia of 50 Sqdn and the shield of the City of Lincoln are both used on the vertical stab whilst the insignia of 6 other Squadrons is used on the edge of the front retract door. Oh, almost forgot to mention, I also added the bulbous nose (carved from blue foam) that 's just beneath the refueling probe.Once the paint had dried overnight, I sanded the whole model which sort of 'dulled-off'' the colours. Not a problem because the spray gloss would breathe new life into the paintwork. See for yourselves....


There's still plenty of little jobs to do but generally speaking, the major part of the building is done.
For now,
RegardsRoy
-
Its been a week since I last updated the log so I thought I'd better catch up.
Wife asked me last week what I wanted for my Birthday present which is during Feb. This is what I asked for.....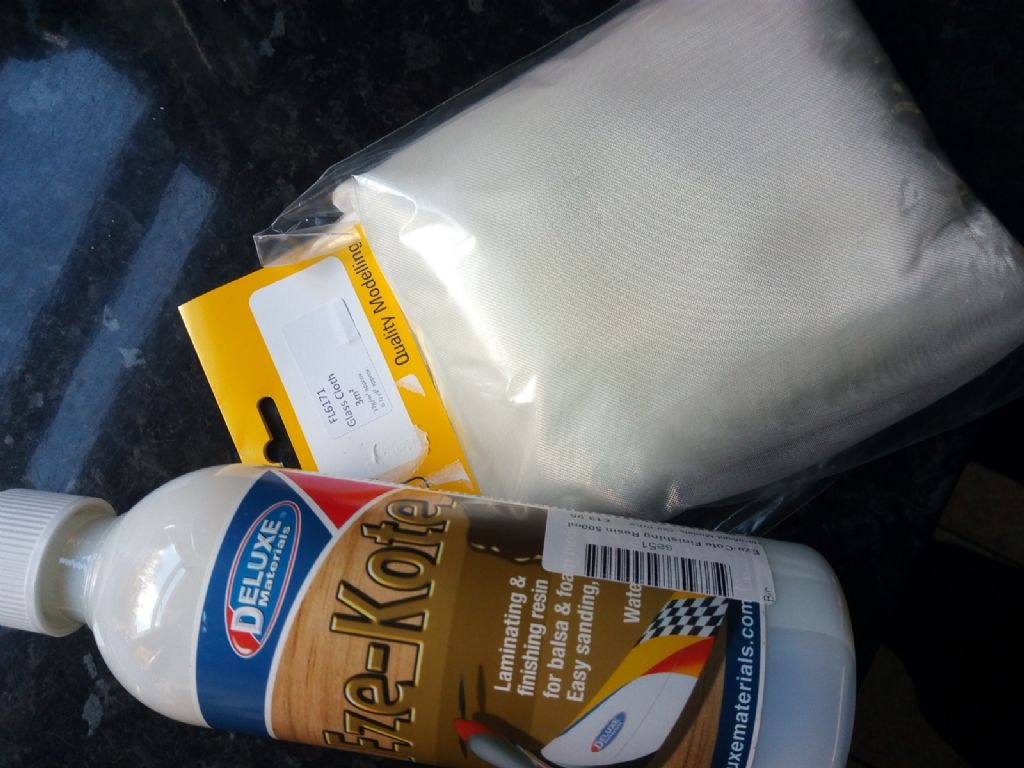
.6 oz glass cloth and a bottle of EzeKote for my birthday. - well chuffed!
I'd been pondering whether or not I'd cover the model and as I'm in no rush to get this one finished thought - 'why not?'
For the small amount of additional weight, decided to invest the time in going for a good finish ( with additional strength)
Before I could start though, I still had one or two jobs to finish on the fuselage. The rear ECM pod needed completing (around the ESC and the parachute bulge etc) so I cracked-on getting these done. In an attempt to get as much cooling as possible around both the motor and the ESC, I have decided to base the aircraft on XM655 which is still painted in the split colour scheme (camo' on top - white underside) and also allows me to cover the ESC with a dummy heat exchanger on the rear of the model. OK, the heat exchanger is slightly over-sized but I'd rather have a cool ESC than risk overheating.The ESC can be seen on the side of the model prior to adding the heat exchanger cover. I've cut a hole in the top-side of the tail to facilitate additional cooling to the motor which will be disguised as the parachute bulge.

I have also built-in another air scoop on the underside towards the rear,just ahead of the motror which I'll point out later (once I have taken a photo). Reasonably happy that I could commence glassing, I prepared the fuselage by painting on a thinned coat of Eze-Kote. I started on the fuselage top as you can see here:-
The top was covered in 3 pieces of .6 oz glass cloth and put aside overnight to dry. Next, I made a start on the wings.
To cut a long story short, the whole of the topside of the model took me around 3 hours to glass. Maybe a long time but I really did take time to brush out any creases in the silk. The additional effort paid off in the long run as it took very little sanding the next day to achieve a smooth finish that I was happy to apply the first coat of grey.
Pointless getting grey paint on the underside of the model as this one is going to be white so I masked0ff the edges where white meets grey.
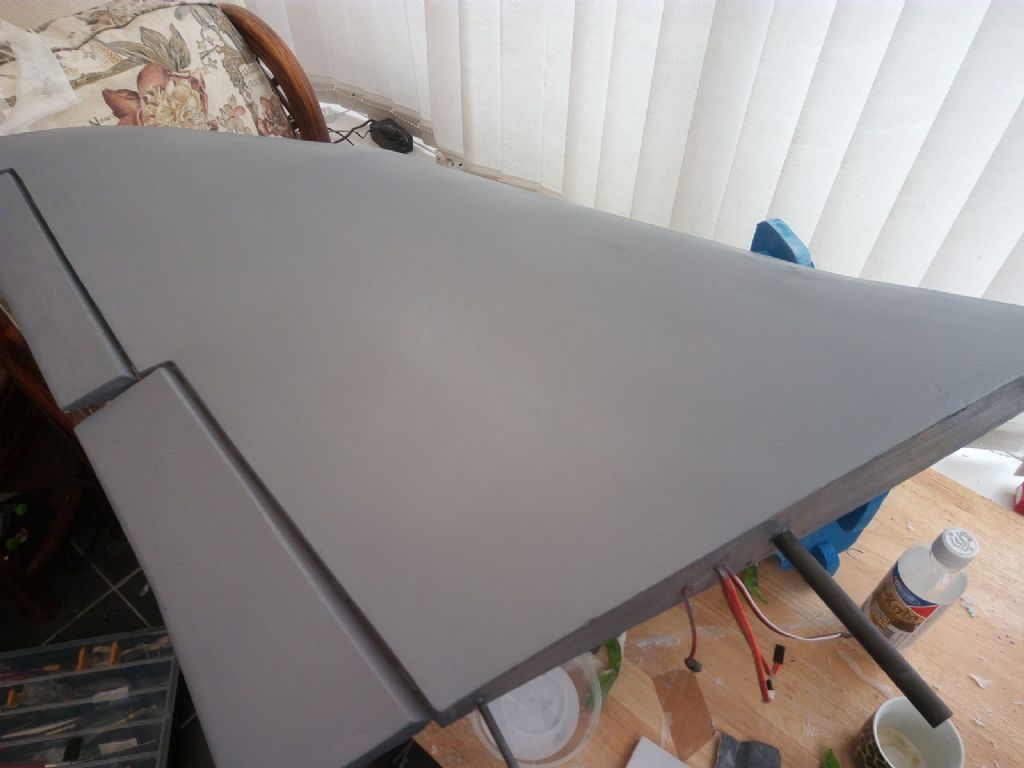
First coat of grey emulsion and it's time to wait until it's dry enough to polish it with 1200 grit emery cloth.
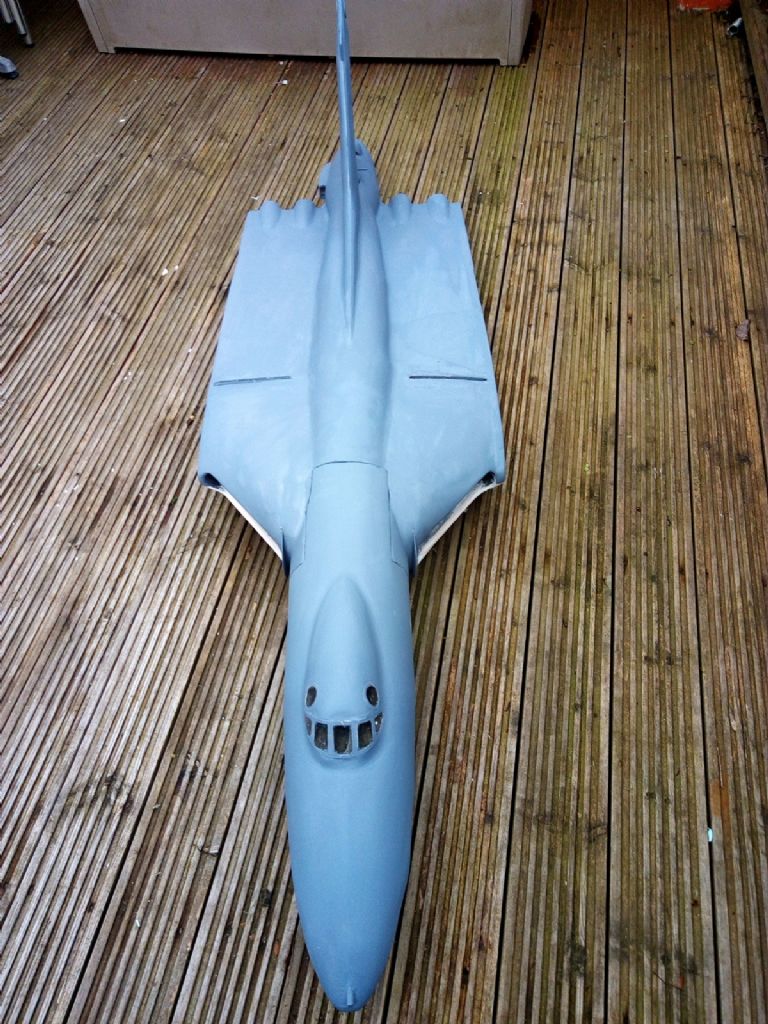
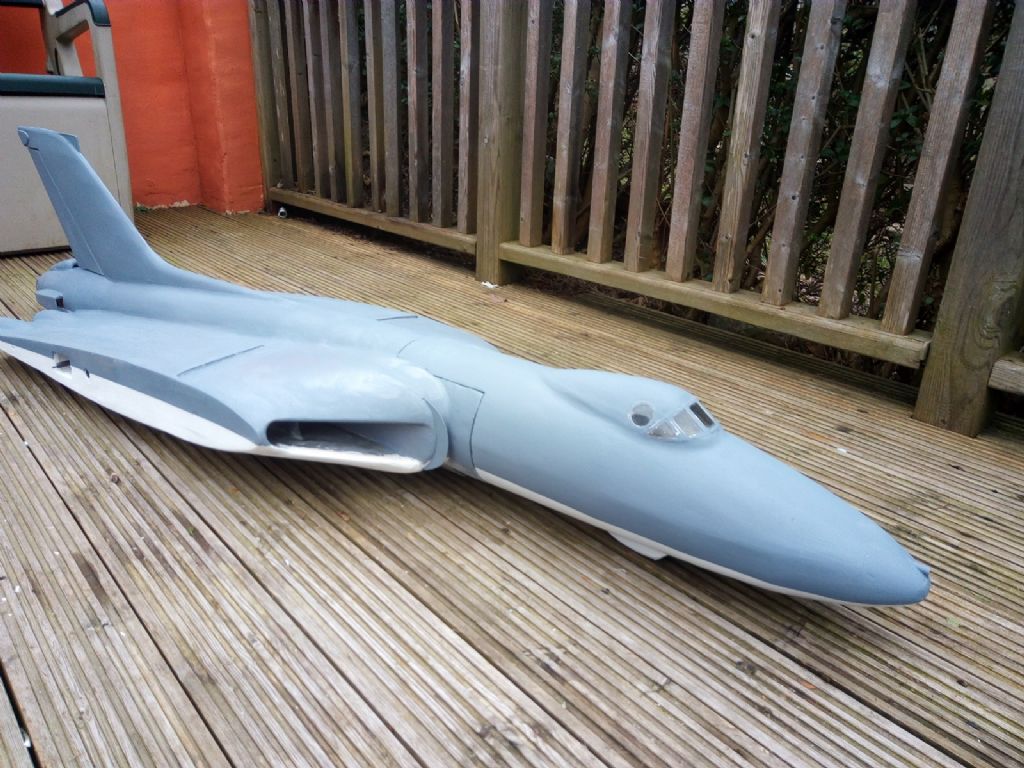
The grey paint makes quite a difference to the appearance of the model and frankly, makes a lovely change from looking at white depron for the past 12 weeks or so.Starting to look more like a Vulcan now

Regards
Roy -
Like I said, filling, sanding etc etc.
Looking better though as the imperfections are smoothed out.


Had to take this opportunity to start sanding as the weather has been really good today. It allowed me to work outside which was a MUST as the dust would have made a right old mess indoors.Wasn't able to spend all day on the build today as jobs around the house were calling.
Once I had caught up on the chores, spent an hour messing around heat-forming some fairings that I'll be using on the rear of the model to keep the motor cool. I had previously carved and sanded these balsa shapes for another build and never used them. Shame to let them go to waste so I glued one to each side of a piece of block balsa thus:

Then I cut the top off a small bottle of tonic water and pushed the balsa block inside and tehn applied heat from a heat gun. Almost instant results as the plastic bottle shrinks around the balsa plugs. Hardest part of the job was cutting them free from the bottle once it had cooled down.

A little bit more trimming, a coat of paint and they'll do fine.
Cheers
Roy -
Lol, always learning....... you're not kidding!
Thank you Phil.
As some of you will know, today, I definately proved to myself that i am officially 'losing it'
I took the model to the shop where it would be far easier for me to assemble it as there is more room and also Charles there to lend a hand. It was when I came to plug everything together, realised that I have skinned the fuselage BEFORE i have fully completed installing the extension cables. So, absolutely gutted and even more, disappointed in myself, I had to fish, force, persuade, gouge, poke sorry, route two more 1m extension cables to supply the main retracts. I cannot believe I let this happen as I have made myself check off each job before progressing onto the next!!!! As I said - Losing It.
Anyhow, frustrations aside, i was able to snag the build progress to date. Problems that I have found that need addressing were 3.5mm gold connectors that were pre-installed on the motor required changing to 4mm. Thank you Charles for sorting that one out for me. The left wing front carbon wing locator needs breaking out and re-aligning as the fit against the fuselage could be much better.
Loads of sanding, filling, sanding etc over the coming week. Hopefully, address the aforementioned issues then I'll decide whether or not to glass certain parts of the model, notably, the removable nose section.'Anyhow, that's next week. In the meantime, a couple more pictures from today.
Cheers -
Thank you chaps!
The evening before last, I rolled some 3mm white Depron onto a brush staff to sit overnight in readiness for the exhaust tubes for the model.

The edge of the 3mm Depron was taped to the brush handle before carefully rolling the rest of the sheet tightly around. Once I had managed to roll the whole sheet, I taped the free edge down and sat it on a radiator overnight.
The next morning, tape removed, it hardly budged. In fact, it was quite a task to unroll the Depron off the brush handle to get to the tape that was holding it on.The roll relaxed into this permanent state once it had been unrolled and un-taped from the brush handle.
The underside of the fuselage is where most of the jet tubes show and again, I thought it best to first, cut a paper template before attempting to cut from Depron sheet. I forget to mention that I had glued slithers of 6mm depron around the edges of where the 3mm tubes would meet the fuselage to give me something to glue to rather than simply glueing to the surface of the fuz.

The 6mm slithers of depron and the paper template on the underside of the fuselage.Before I cut the required shape from the 3mm Depron sheet, I cut some 60mm roundels of 6mm Depron to act as formers within the jet tubes. The diameter along the length of the Jet pipes remains constant at 60mm, so all I had to do was reduce the depth of the roundels to give the effect of the jet tubes flowing into the fuselage.
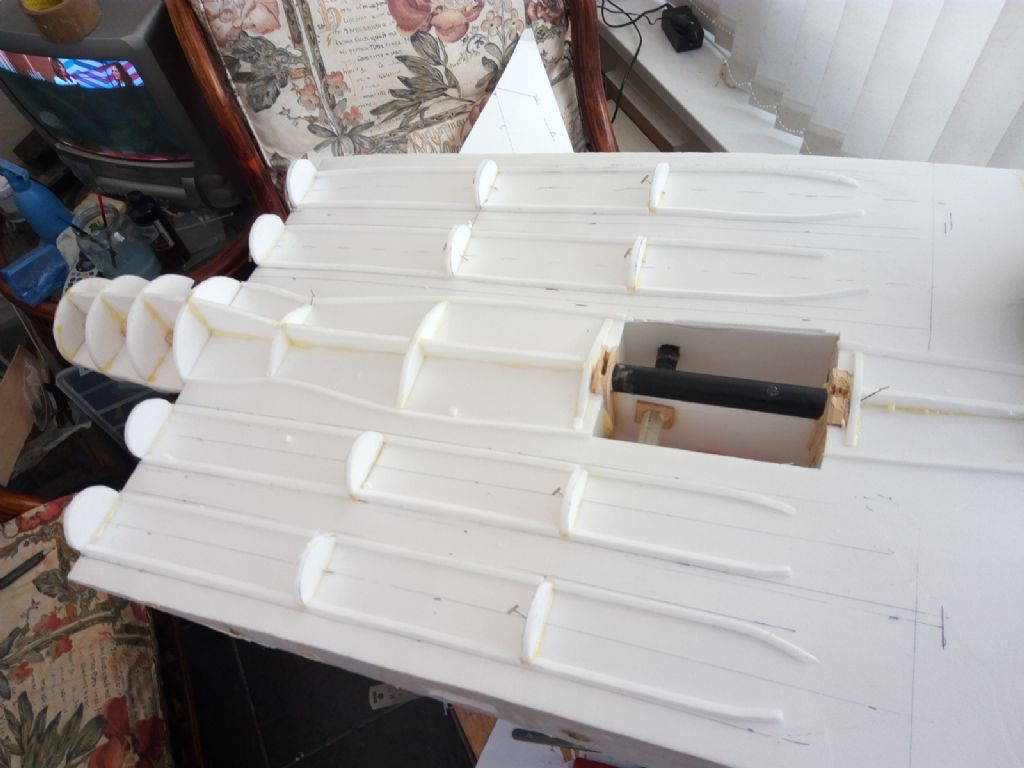
The 60mm dia Depron roundels (formers for the jet tubes) decreasing in height the further forward they come.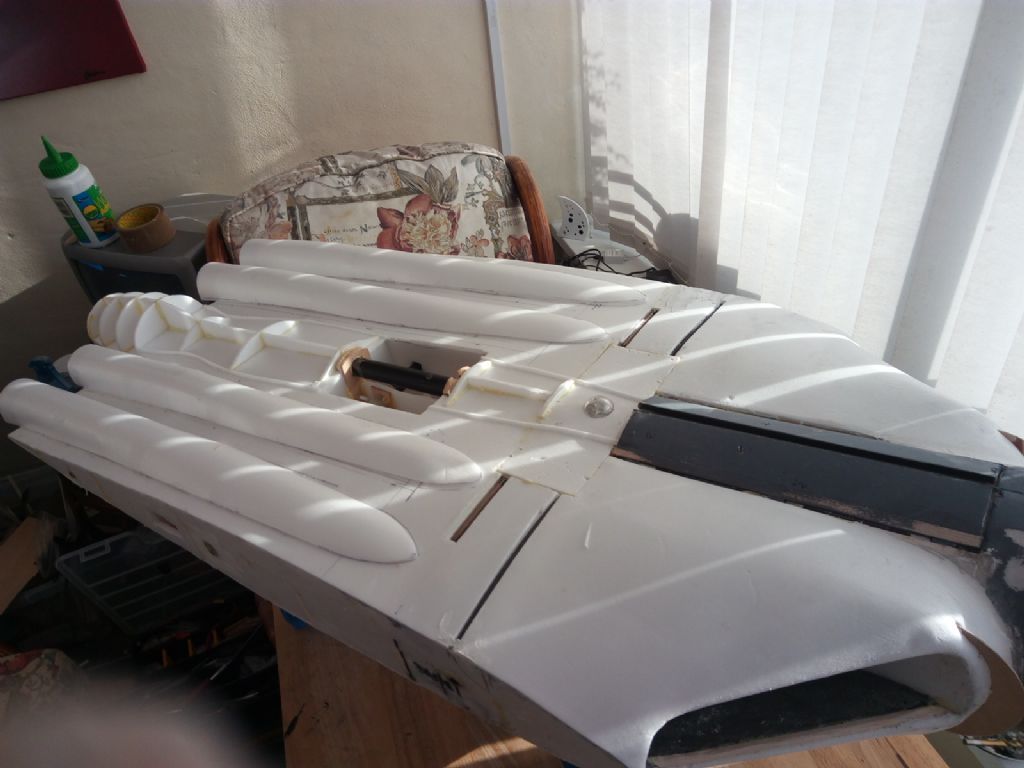
With the 3mm Depron skins applied, starting to look the part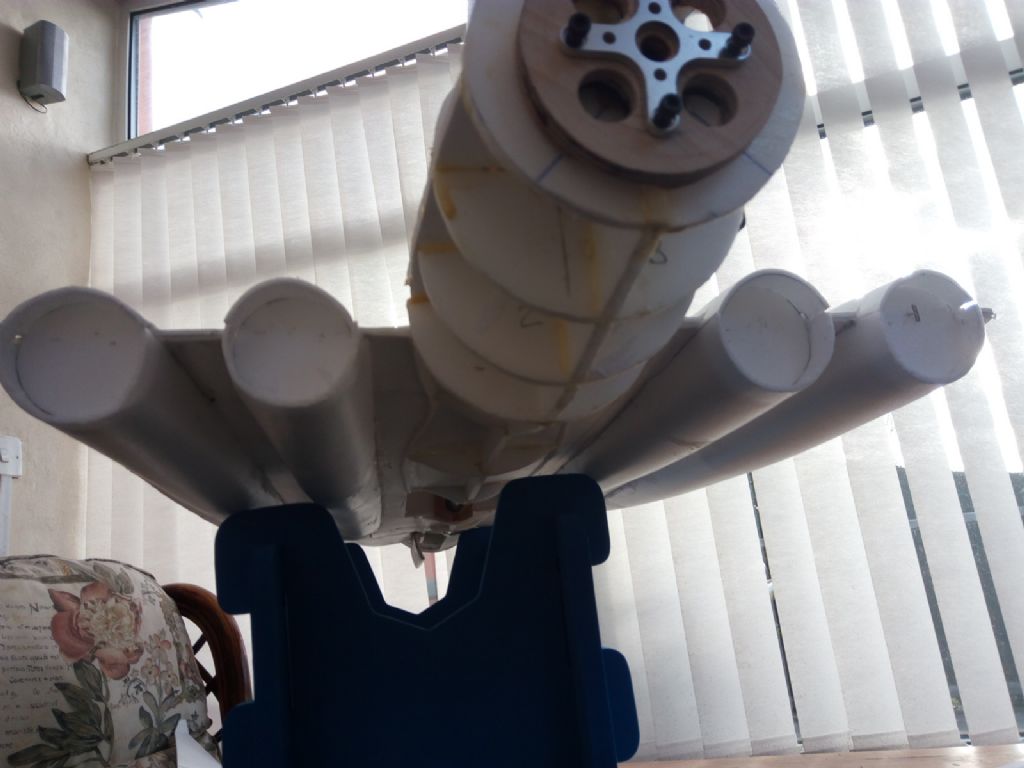
A bit of tidying up to do at the back end but looking good so far.Starting to skin the central fuselage rear section with 3mm.

It was starting to become obvious to me that I had to think soon about the motor installation as I'm getting very cloe to enclosing the motor mountSo, motor bolted on, i'm now able to refer to my drawings and confirm the size of the motor cowl that will be added to the end of the fuselage. I need to get this blue foam cowling sanded down to something close to the required shape before I skin any more of the fus'


and, that's as far as I manged to get today. Progress nonetheless,
Regards
Roy
Edit:...... just realised also that I haven't mentioned that I skinned the vertical stab and rudder yesterday.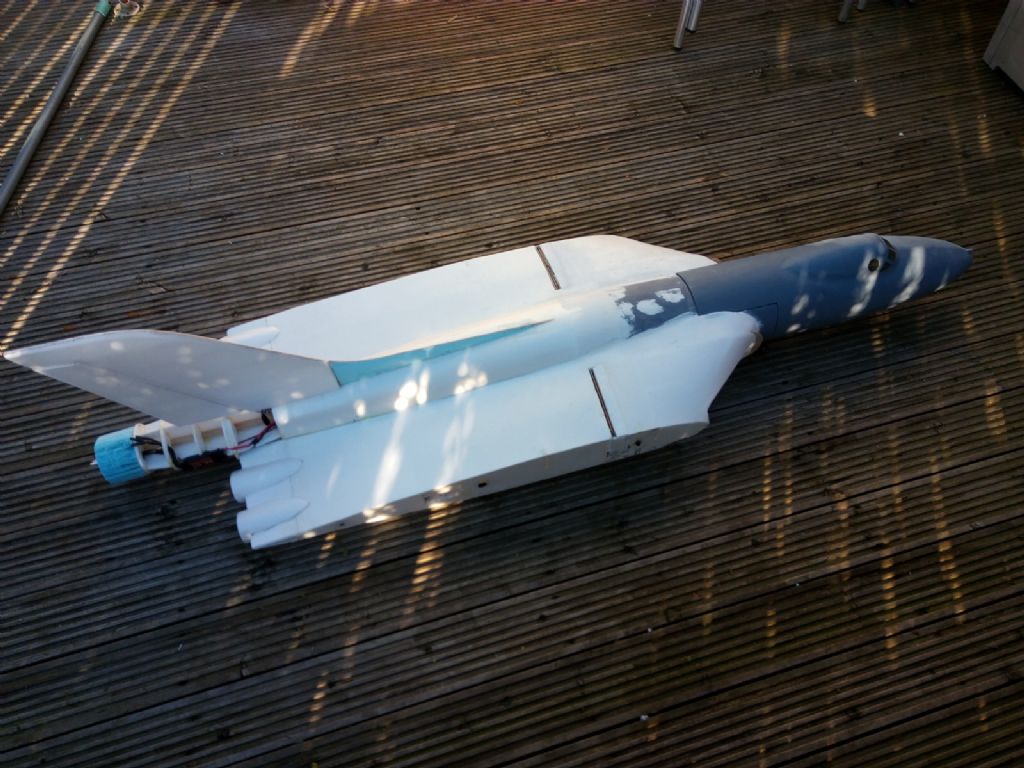
Edited By Electriflier on 11/02/2016 21:31:48
Edited By Electriflier on 11/02/2016 21:33:45
-
 Chris,
Thanks for the kind offer! I'll bear it in mind but I'm pretty sure there'll be no hold-ups with regards to getting the big Vulcan flying again.
This afternoon, I have been able to progress a little with the fuselage skinning. This time, i made a start on the topside of the fuselage. The flat sections of fuz that run alongside the central body, I in-filled the compartments with 6mm depron pieces. Not only does this give me something to glue the 3mm skin onto but offers further rigidity and alignment to the edges of the curved central section.
This shows the infills alongside the central curved section of the fuselage..
I've found, when working with flat, uncomplicated sections of skinning, that paper templates are definately the way to go. You can make as many mistakes as you want with the paper. Easiest if you pin the paper down to the structure you're covering then running firm pressure along each edge with your finger to indent the shape into the paper.

The edges of the root ribs can clearly be seen after running your finger along the edges.It's clear, working this way, that the adjoining edges of the 3mm Depron, where the flat skin meets the curved central section that I'll definately be using some 3mm grey depron neaded into the joints to provide a fairing between both surfaces prior to filling. On past builds, as I've mentioned previously, I've worked the fuselage skinning in many panels to follow the many complex compound curves. This way is far easier so far. The end results? well we'll see soon enough!
A few more pictures for anyone who's interested of progress to date.


Regards
Roy
-
The weather being the weather yet again today has allowed me to spend some time today preparing the fuselage for skinning. Checking over every interlocking piece of Depron for raised or sunken edges that will have an effect on the overall finish has taken quite a long time. All excess blobs of PU glue have been cut away and sanded again, to ensure there are no 'bumps' in the finish.
Before I'm able to commence skinning of the fuselage, I had to complete the remaining air brake unit. Sadly, I've had to 'borrow' two 17g servos from the larger Vulcan so as to match the two on the other air brake, The suppliers are out of this particular servo until next week at the earliest so rather than hanging on until I can get 2 more, 2 donor servos were used.
Made identically to the left air brake unit, will slot into place in a compartment in the fuselage.
Both air brake modules installed in the fuz.....
Although built identically, and as opposites (L&R), If I'm only going to use 1 channel for their operation (and I am), I had to install a servo reversing lead between the right and left pairs of brake servos.
The reversing 'Y' lead now ensures correct operation of the air brake units. So, to clarify, each brake has two servos, 'Y' leaded together. Each 'Y' lead is then plugged into the servo reversing 'Y' lead leaving the remaining plug to be plugged into Aux 1 on the receiver. (Clear as mud!)
Anyhow, it works!
Until I set the servo end points on the airbrake channel, care has to be taken if using the servo tester as it just throws the air brake vanes too far and strains the servos. So, I'll post a video once I have installed the radio gear and am doing testing of each channel.
Skinning could now commence. Having built this aircraft twice before, I have decided this time to approach the skinning process a little differently. By this i mean, rather than attempt to follow the intricate compound curves on the belly with panels of depron, I have cut away all curved sections of the fuselage formers so that the whole underside can be skinned almost in one piece. The pieces that I removed will then be re-introduced once the underside is skinned. Here's a picture of that very process Having smoothed off the underside of the fuselage skeletal components, I then was able to lay the fuz flat onto some 3mm Depron and mark around my glue points. I trimmed the sheet to size (plus 1/2" or so) and then set about applying the Uhu Por over the 6mm Depron edges that will make contact with the skin. Once done, rubbed UhU along each marked-off area on the 3mm sheet. By the time I had finished, the adhesive was ready for bonding and so carefully, laid the sheet in place on the underside of the model. Far easier than in past builds trying to work the sheeting around the many complex shapes on the belly.
That's about as far as I got today but it's been worth taking this approach as the finish is really nice and smooth.
A final picture showing the lower air brakes deployed.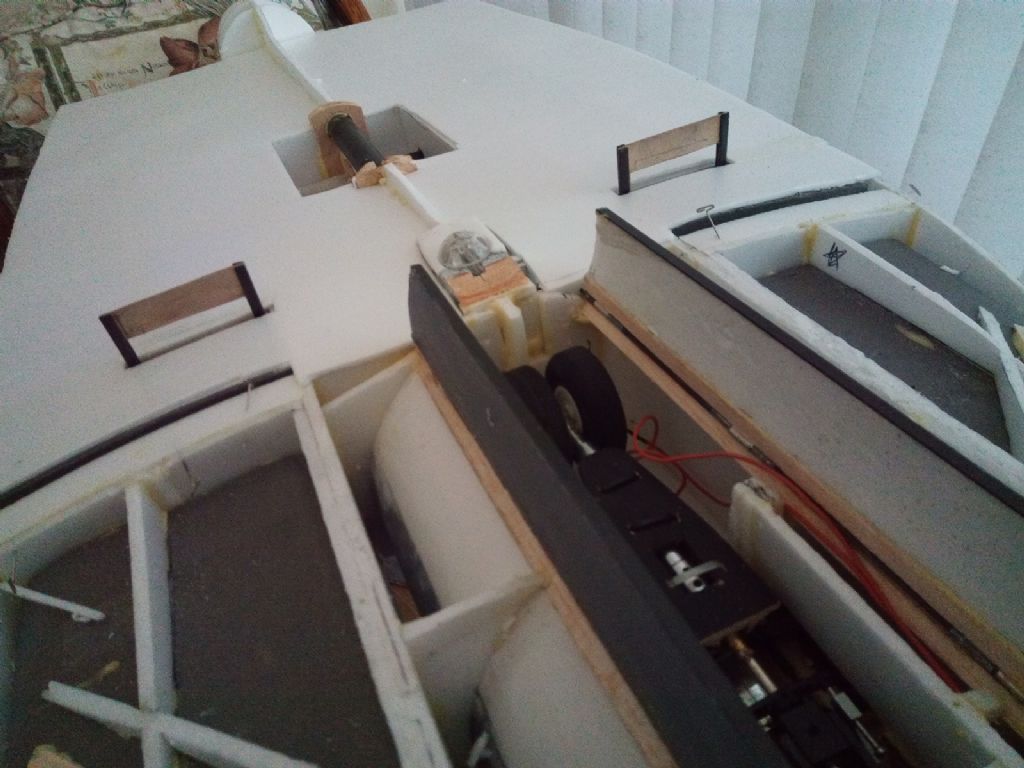
Til the next one.....
Regards
RoyEdited By Electriflier on 07/02/2016 20:14:56
-
Cheers Phil.
I think it's that I've learned to take my time

Again, a day of getting those niggling little jobs done. Even more servo wire has been added today in the form of 4 x 1000mm extensions to supply the right and left ailerons & elevators. Notice also in the pic below that I have added a 'pocket' on the outer fuselage ribs to house the aileron/elevator connections once the wings are in place.
With all wiring installed, I decided to remove the 'dorsal' fin of the Vulcan to enable easier application of the skin to the curved area at the very top of the fuselage. I've already decided to replace the depron dorsal fin with 1/8" balsa so that I can taper the shape more finely into the fuselage rather than with 6mm Depron skinned each side with 3mm (12mm).
With the fin removed, a more straight-forward job then to apply the first skin to the fuselage body. The curved 3mm upper fuselage section can be seen here before I PU'd it into place.
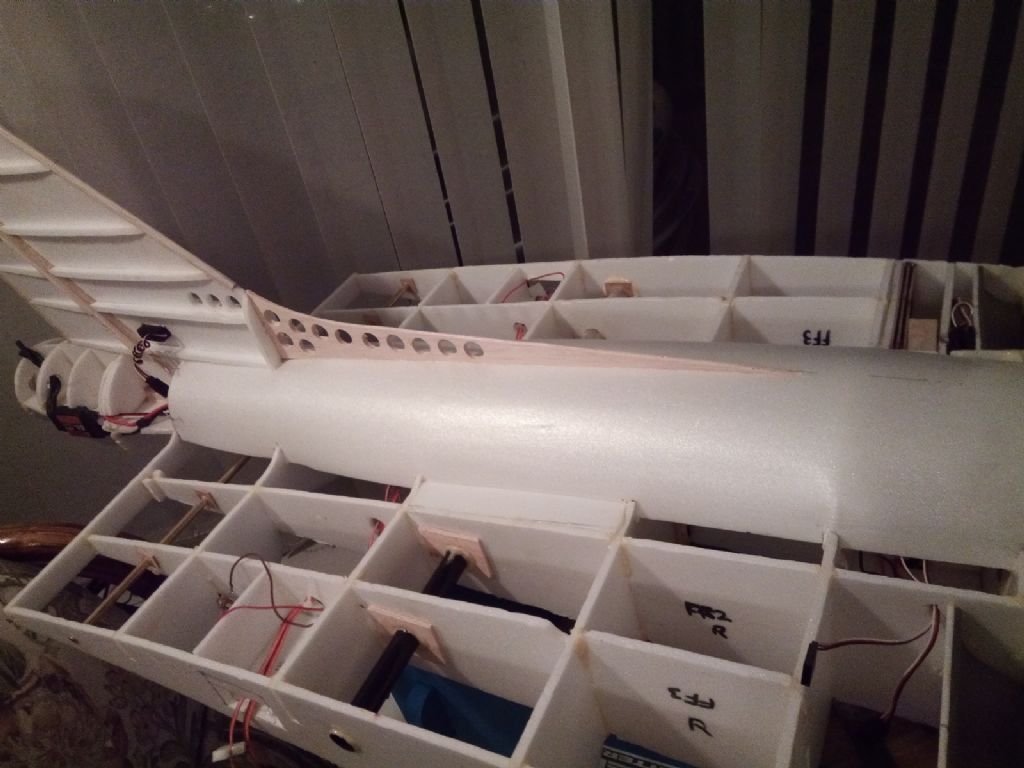
Once the 3mm skin had been applied, I reinstalled the dorsal fin, as already described, in 1/8" balsa. Cored-out to minimise weight.
I teased you a little yesterday with the inclusion of the picture of the Maplin's blue xenon strobe unit.
Ok, breaking away from the strictly scale aspect of the build, I decided that i'd like to see a working strobe running once gear was lowered. Along with the wing landing lights, switched when the gear drops, I've added a cheeky little xenon flash (white) just aft of the front retract. It doesn't exist on the real thing I know but hey, I think it will look great on finals
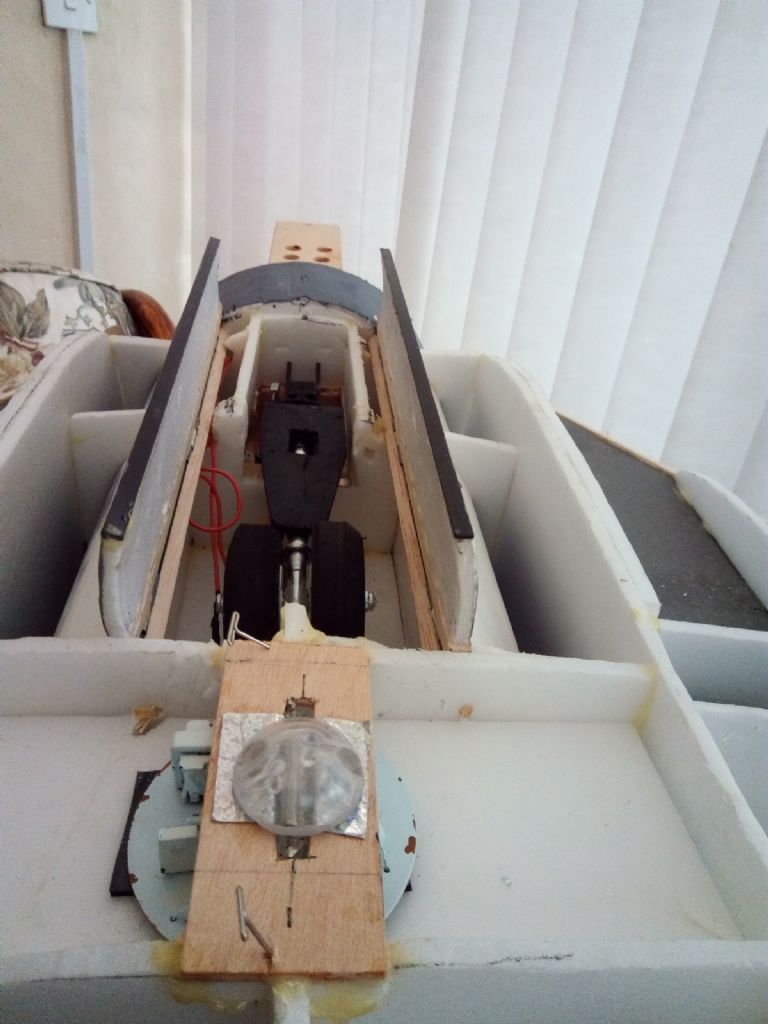
A clear plastic half-sphere will protect the Xenon lamp on belly landings although the lamp itself will be below the level of the 3mm depron skin...
For now......
RegardsRoy
Edited By Electriflier on 05/02/2016 19:38:02
-
Aileron and Elevator servos have now been installed into the wings. Blue foam, lightply and the trusty old servo mounts used yet again. (Hey, if it ain't broke.....)
I've used Metal-geared 17gm servos for the aileronsw and full sized servos for the elevators. It is my intention on this build to configure the model as 'Elevon' rather than, as in the past, simple elevator/aileron. Why? - I just want to see if there's much difference in flight characteristics.
The ailerons and elevators were made from 1/8" balsa sheet with 6mm depron ribs. The leading edge was made from 1/4" balsa sheet stripped down to allow for the taper along each control surface. (wider towards the inner wing and tapering toward the wingtip) Being made from 1/4", was thick enough to allow me to cut an angle in each L/E rather than using triangular section which I normally do. The anchor points for the bolt-through control horns was reinforced with 1/16" ply on each side fo the 1/8" balsa sheet before the components were finally skinned in 3mm Depron. Came out pretty neat

Cyano-type hinges were slotted in place ready for later.
Apologies for the lack of photographs of the building of the control surfaces but my camera/phone was playing up at the time.
The wingtips, like the control surface, were not photographed so suffice to say, i carved and sanded some blue foam blocks to shape once they'd been glued to the end of the wing plates.
Last job before thinking about skinning the wings was to ensure ALL the servo extension leads were functioning. I NEVER assume the leads to be working, even though straight from the packet as I once installed a faulty aileron lead and skinned the wing only to find it later. Lesson learned..........
Anyhow, all tested out fine, 3mm depron was applied to each wing. I'm not going to go into how to skin a wing with 3mm depron as I've described it many times in past builds. Other than to say, as usual, I used copious amounts of UhU Por.
Time for a few photo's now the camera is working

Oh yes, forgot to mention, notice, I managed to stick my thumb through the 3mm skin. It was very windy and whilst trying to set this picture up, the wing tried to make a break for it


Next update, I'll show you what I did with one of these......For now......
RegardsRoy
-
Chris,
Great update. I've got to say, in my opinion, your best yet! Its going to be a great year for new models at the field this year. Nice work. -
Not a great deal to report apart from the latest mvideo of the working landing lights coupled with the retracts. It's been ..... interesting, shall we say, setting up the micro switch and routing the wiring. I've decided that the lighting circuit connections from the wings to the fuselage will be mini jacks into chassis-mounted mini jack sockets which will be presented on the fuselage root rib. Not as mission critical as servos or retracts so I made connecting them up easier than standard servo lead connections.
I'll post some photos once I have tidied up the installation. I had wires all over the place when I took this video this evening but the object of the exercise was simply to ensure my wiring was correct and all worked fine which I'm pleased to say.....did!
The model, precariously balanced on the foam model stand (stood on edge ) so to allow for the lights and retracts to drop without being impeded.
See what you think.Gotta say, I think they look the doggie's ........!
Regards
Roy -
Posted by Ian101 on 24/01/2016 10:43:19:
This one is the same size, but just a display model for somebody so should be quick and straightforwards......
I've heard that one somewhere before

Colin, I understand that to be true after hearing it at a visit to see the old lady (Vulcan) at Finningley a couple of years ago. I'd be highly surprised and probably a little concerned if this one reaches anything near 76 MPH!!Anyhow, Sunday is usually the day for flying or, if the weather is not up to much, visiting family. The family again won through as, once again, the weather has been
 . Before setting off, I managed to wire-up the landing lights for their first test. What's more, took a little bit of video.
Forgive the less than perfect filming and post production but I was in a hurry.
CheersRoy
thinking about it, it might have been a good idea to switch them on

Edited By Electriflier on 24/01/2016 21:05:00
-
Morning....
Colin, I may have misled you regarding the wing. I managed to salvage the wing by hacking out the retract block and installing it on the opposite side. Being fully symmetrical, both wings were identical before I wrongly installed one of the retracts. Which, sort of leads me onto your question Ian.
I've built it, as I say, fully symmetrical and to try and build-in undercamber at this stage would be difficult to say the least. Having flown both under-cambered and symmetrical airfoil throughout, there seems to be very little difference, if any, in the flight characteristics. Bringing back memories? - you're not wrong but I have to say, I'm enjoying this even more than no's 1 and 2. I think I've learned to take my time and also, with the weather being as it is, there's no rush to get it finished.
Regards to you both
Roy -
Part 2... continued.
Tomorrow was a new day and so, with a new blade in the scalpels and the trusty balsa saw, set about hacking the retract block from the first wing that I got hold of. It didn't matter which, they're
 identical!
Before I progressed any further, wrote in rather large lettering 'RIGHT WING TOP, RIGHT WING BOTTOM and similarly, LEFT WING TOP, LEFT WING BOTTOM' on either wing. TO cut a rather blue atmospheric story short, did the required work and made good my mess. All told, I lost over a day rectifying my stupid schoolboy error.
Trying to put all this behind me, I wanted to spend some time thinking about how best to tackle the landing lights. After looking around for a while on the 'net, I found there was very little info' on the under-wing landing lights. My friend Charles came up with a rather good close-up of the lights and so, ferreted around in my 'bit box' and found some bits that might come in handy.
Some hard clear plastic globes that i had (I'm rather like a magpie when it comes to seeing things that I could use for building) squatted years earlier.
A bit of plywood and the led light clusers.

Now, if I stick these in here and glue that to this........... we all do it dont we?..... don't we????
I ended up with these.....
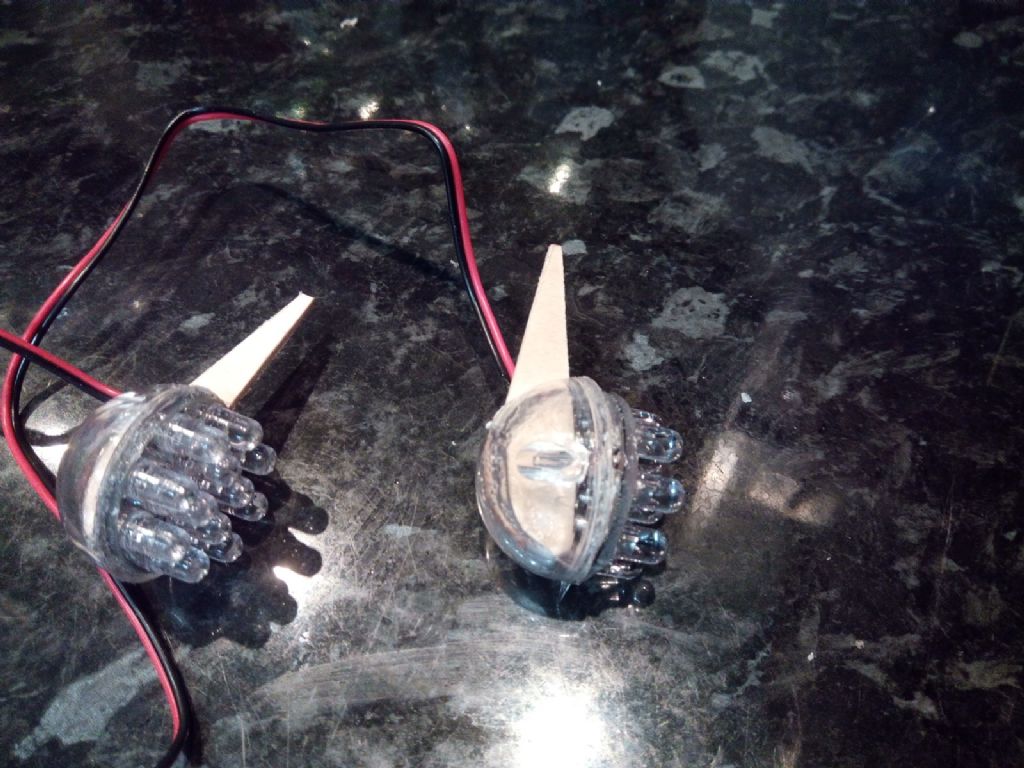
With a bit of grey paint splashed about and a battery connected...... RESULT!
Looking forward to tomorrow to getting them swiveling within the wings.
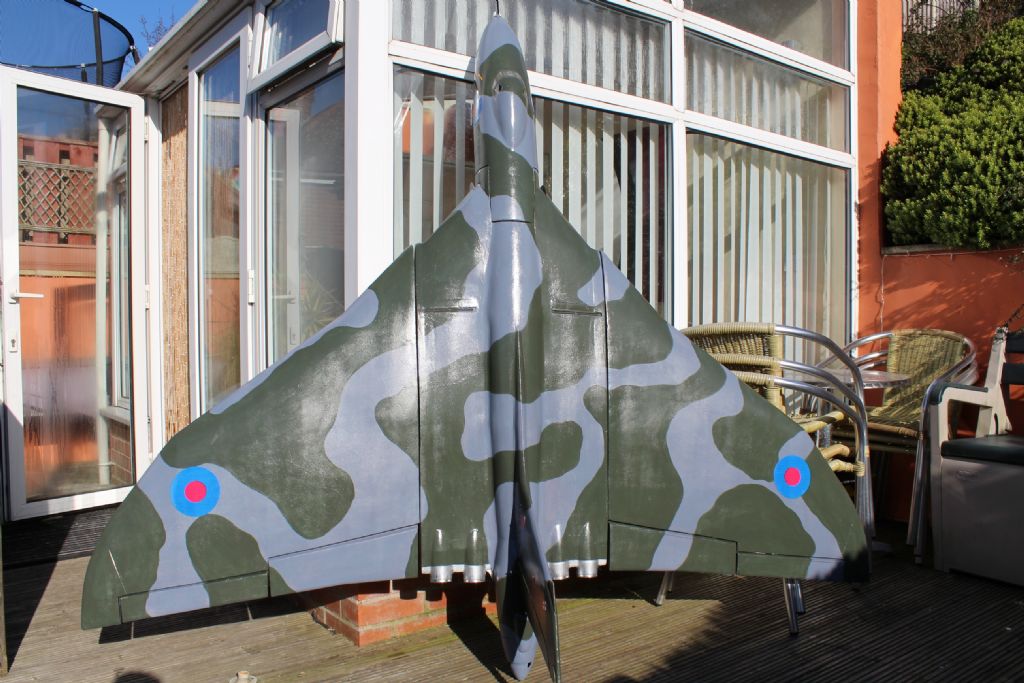
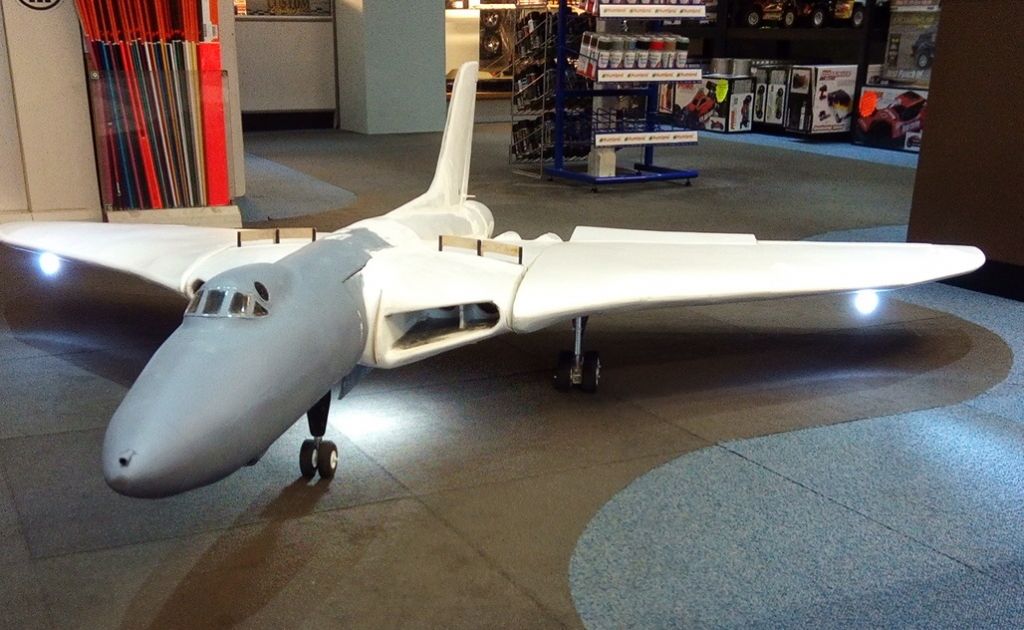
Anyhow,, to round off, a few pictures from today at the shop where I had the opportunity to set it up for one or two pictures.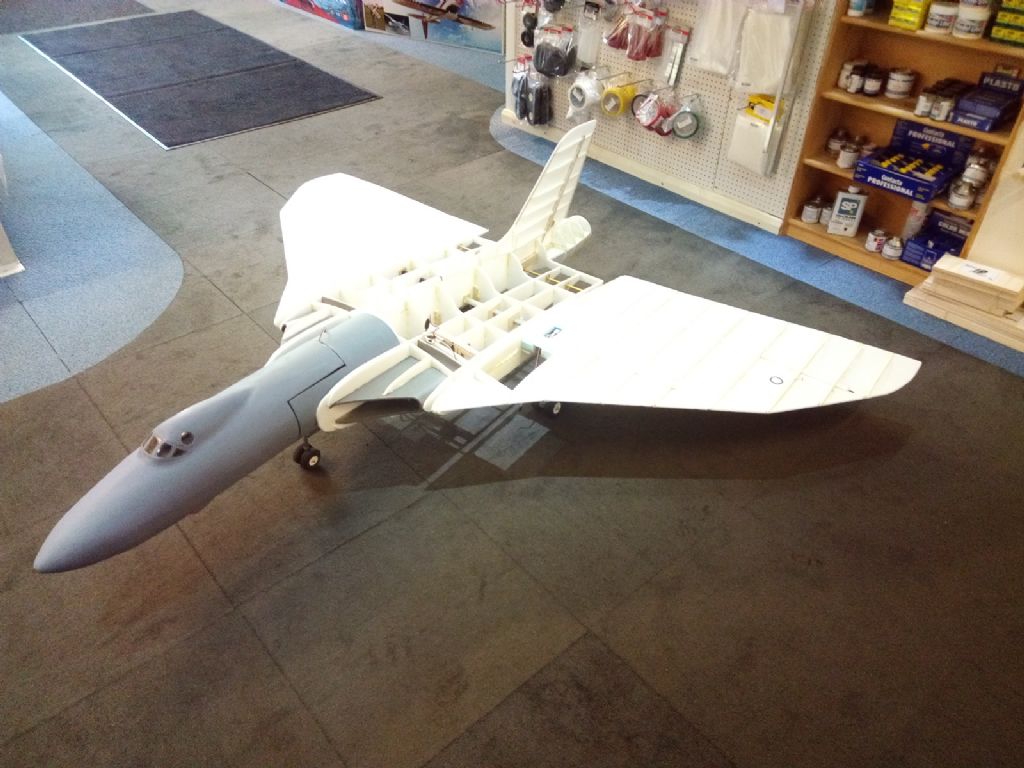
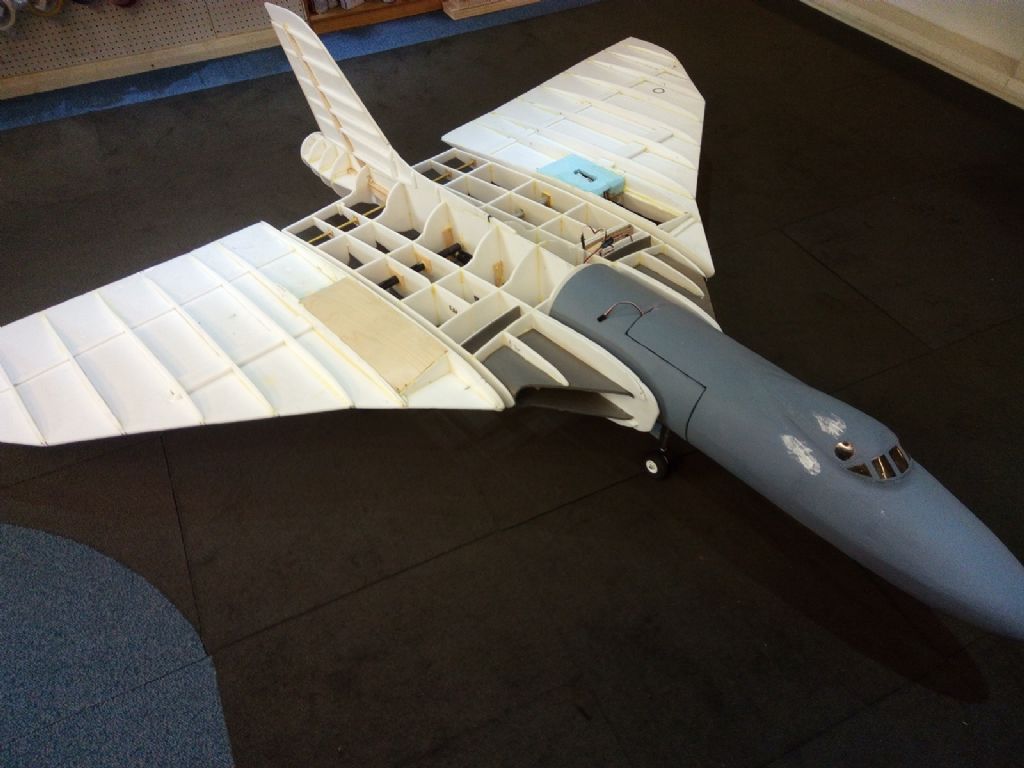
oooops,that reminds me, I must use glue to fasten the nose to the front and not pins,
For now,
Regards
Roy











1/4 Scale Twin Turbine A10
in Build Blogs and Kit Reviews
Posted
Beautifully appropriate floral tributes today at Geoff's funeral. Fantastic send-off attended by many of his friends and work colleagues.