-
Posts
108 -
Joined
-
Last visited
Content Type
Profiles
Forums
Blogs
Gallery
Calendar
Downloads
Posts posted by Paul Ashford
-
-
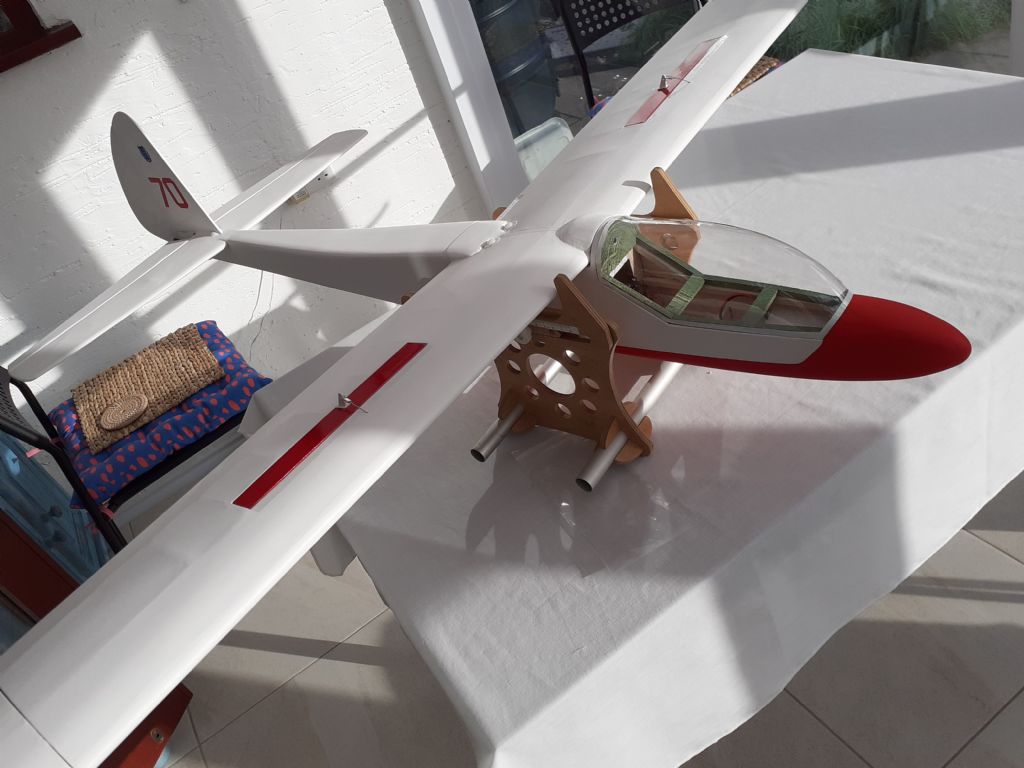
 Update on the Elmira build which has taken way too long but there is no rush at the moment. Airframe is now covered in Solartex that I just happened to have the remains of a ten metre roll I bought some time ago. The bare wood was primed with dope thin 50/50 with thinners and lightly sanded to remove the roughness. Paint trim is water based acrylic airbrushed on and sealed with clear varnish. Radio fit has been completed and control throughs roughly set. All I have left to do is fit the canopy and then set the CofG which I will try and get completed this weekend.
Edited By Paul Ashford on 13/11/2020 16:38:38
-
Nigel, thanks for the photos, I could have taken some more wood out of the back to round it off even more I guess, there is probably enough thickness in the wood there. The tailplane is sheared on the centre section at ribs 1 for support. I will be covering in solartex so hopefully it will cover ok. Time will tell.
-
The plan does not show in detail the fairings for fin and tailplane so this is my interpretation using soft balsa, the rear block was recessed to accept the fin post.

 Triangular balsa was also added at the base of the fin to increase the gluing area. This is the completed assembly, minus fin, dry fitted.
 -
-
Canopy update.
Just had an email from VMC to say they are redrawing the canopy and making a new plug, new canopies will be available soon.
-
And now to the canopy, I was forewarned by VMC that they had reports saying the canopy does not fit. So after making the canopy frame I then carefully cut the moulding as close as possible to the edge to leave as much material as possible. Offering up the canopy to the frame it is possible to get it to fit, JUST. However the rear of the moulding has some distortion formed during the moulding process but it is useable. For anyone else building this kit DO NOT CUT THE CANOPY MOULDING ON THE MARKED LINES, if you do it will not fit. I have emailed VMC with this information so it can be rectified when they update the kit.
-
Canopy framework in position, the rear former F3 had to be remade approx 3mm larger all round to cater for the original problem with F4/5 being undersize at the wing intersection. The canopy transparency will stretch to fit once this is all dry. Some adjustment was also needed at F2 to fit the profile, however, the supplied former could be used. Next step will be to trim and (trial) fit canopy transparency once all is dry I can then see how much the original F4/5 will need to be built up on the top edge.

-
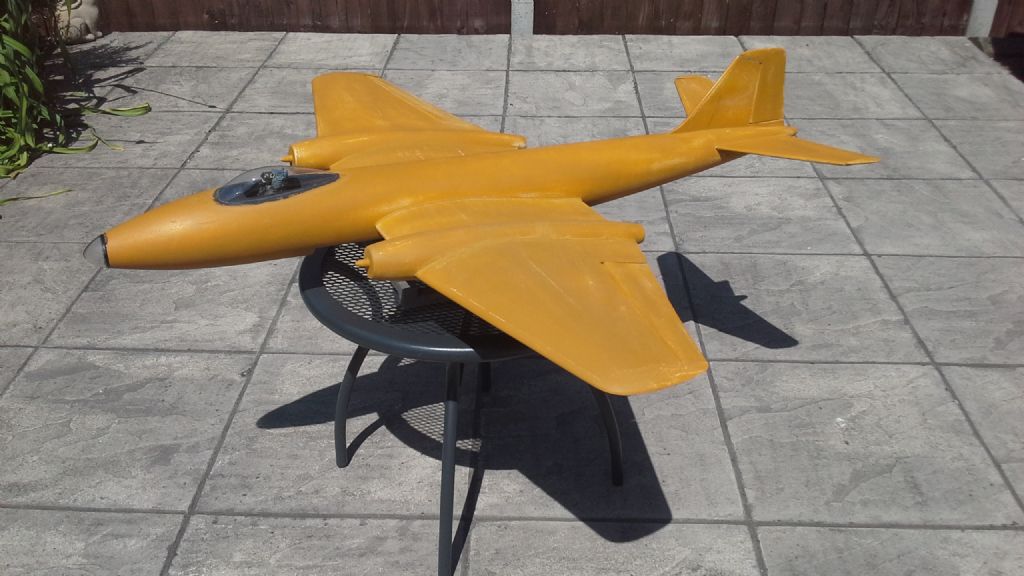
This is a very semi scale model built over 30 years ago and was adapted from the Pavel Bosak plan for a 40 powered model that appeared in one of the mags at the time. It's not got the detail that most PSS models have these days but it does fly well. The wing is a thindown version as on the plan cut from foam and covered in balsa, blue foam was employed for the engine ducts. I have recently recovered the airframe in glass cloth and paint applied by airbrush. I have been pleased to get this old beast back in the air. I think the thing is you can achieve something that looks the part in the air, may not be a Concors winner but will give a good account of itself on the hill in a good blow. For info I have created an album with some more flying shots. Good luck with your own design and I will follow with interest.
-
-
-
-
PacMac,
Thank you for the kind words, indeed I always admired the classic lines of this model and when looking to build Lockdown 4!! thought it was about time. It was originally intended to be a winter project but with time on my hands.... The build is progressing slowly, compounded by a few head scratching issues, but will be completed before the autumn. Photos will be added to the album as I go along.
Paul
-
-
Nige,
Thanks for the photos, makes it clear how the original kit worked. I guess the two 10 gauge wire are little more than incidence pegs and the mail flight loads are carried by the spruce insert. Shows it's free flight heritage.
When I get time I'll create an album on here to show construction progress.
Paul.
-
Posted by Piers Bowlan on 13/07/2020 20:40:13:
If Vintage Model Kits don't come up with a solution you could try some K & S tubing (ali or brass) to fit the wire you have if possible, or alternatively substitute a metric dia. steel or carbon fibre joiner and tube to fit. SLEC also do wing joiner tubes of all sizes.
Thanks Piers, normally I would just go down to my nearest model shop and go through their stock of K&S parts but difficult because of the current pandemic. I've never bought so much on line in the past months but sometimes you need to just go and look!
-
Nigel,
I had come up with the same solution, 5mm carbon rod slides in nicely to the 8swg brass tube supplied so I'd probably use that. Interesting you mention the spruce joiner, this isn't supplied in my kit and I plan to replace with another carbon rod between the spars to take the bending loads on the spar. I have also incorporated ailerons having heard of the turning problems and top surface spoilers to help control landing accuracy like on my old 100s models.
I am working with VM to resolve this and other problems with the kit and plan, it was a kit they acquired from another producer and they wish to update the drawing and get it right.
Thanks for your input.
-
Cliff,
Done that and they have been trying to sort it out with their suppliers, the problem seams to be tubing is now manufactured in millimetres diameter, and the 10 swg wire I suspect is the problem. They can find a fit at 12 gauge but this would not be optimum for the bending moments at the wing join. I and working with VM to come up with a solution but thought I would through this out there to see if anyone else had come up against the same problem.
-
I have come up against a problem with the Vintage Models kit of the KK Elmira in that the wire supplied for the wing join is 10 SWG (3.25mm) but the tubing in which it is intended to fit is 8 SWG, not a snug fit!
A route around in my spares box produced some 4mm ally tubing that will take the 10 gauge wire with a little persuasion. However I do not have enough for the job so ordered some more from a local supplier (ATM4), on receiving the new stock I found the wall thickness was greater and the 10 gauge wire could not be persuaded to fit.
Has anyone out there had this problem and could share their solution please.
Thanks, Paul.
-
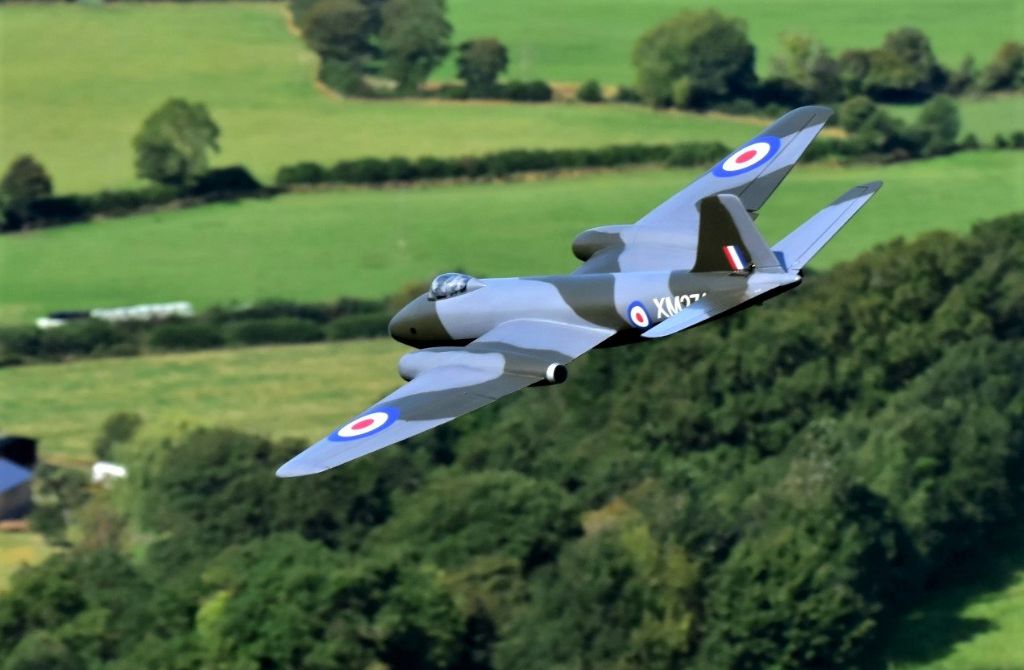
Today is a red letter day for me as I finally got my cranberry in the air. Flew straight and level out of the hand with no necessary trim changes, brilliant. Ok, I know I'm starting this blog from the wrong end but I wanted to share a successful outcome a quite a lot of work. I think you will agree she looks the business. The model is built from the Andy Blackburn plan and SARIK wood pack. The noticeable difference being the fighter style canopy of the B(I)8 a mark that has always been my favorite since seeing these aircraft in Germany when I was a teenager. If there is interest I'll gladly share my build progress although I have uploaded an Album which may be of interest.
Thank you to Andy for making this model possible.
Edited By Pauil Ashford on 18/08/2019 15:23:39
-
Love the Oblix Mike, takes me back awhile. Looking forward to following your progress. Paul.
-
Mike, apologies for jumping on your build blog but thought you might like to see a photo of the completed paint job. The comments by Andy B regarding the durability of a doped surface are spot on, the surface is easy to mark when handling in the workshop but I am pleased with the finish considering there were a number of firsts for me during the process. I would recommend going the glass cloth route. Decals are from Pyramid Models with the aircraft codes produced by a club member on his vinyl cutter, I still have to make the 3 Sqdn crest for the tail and am going to try and make a water slide transfer (another first!) Hope this spurs you on with your build. Paul
-
 2
2
-
-
Hi Devon Slopes and Mike if your here. I decided to follow Andy's lead and use tissue and dope, I should state here that it must be 20 years since I last used this medium so it was a bit of a trial. However it worked but I agonised over getting a good finish. The filler primer is from Halfords (didn't have any grey) and I'm using acrilyc paint for the top coat. The whole process is not what I would call speedy! I thought about glass cloth but doubted my ability to get a good result and didn't want to spoil all the work in getting the airframe finished. Pete's idea of using film would have been better and quicker. I met Pete last year at Leek and Moorland when he maidened his model, they are my photo and video on his build blog. I haven't started a build blog, bit new to this forum, but may start a retrospective but there are some photos in Album's under Canberra B (I)8.
-
 Hi Mike, just found your post and wanted to wish you a good build. Started mine last year when the wood pack became available from Sarik and I can concur with previous remarks regarding the free plan. Don't worry though it all goes together well and as Andy says, trust the wood pack. It was the first time I planked a fus for more years than I care to mention, in the end I made a template for the taper but only used this as a guide cutting each one in turn. It all turned out well and I am now onto painting and trim.
It would be interesting to see your B57, I decided to go for a B(I)8 with the fighter canopy and am pleased with the result.
Rgds, Paul.
Edited By Pauil Ashford on 04/06/2019 19:34:44
-
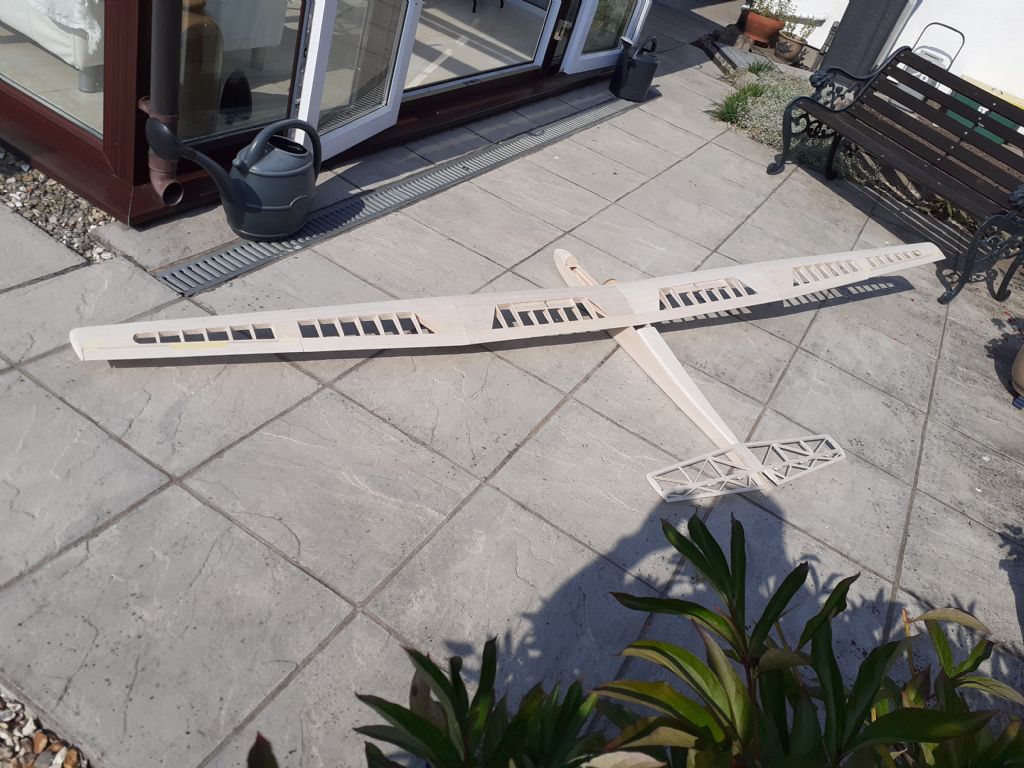
Thanks Andy, I am looking at the larger scale models, 4 metre is really the bench mark for good soaring ability and scale effect. Ideally if someone came along with a Teakle Pik 20 or similar that was flyable with minimum shed time I'd be interested having owned some of PT's models in the past. I hear what you say regards washout, the Salto is known for tip stalling if slowed up too much, of course the full size had trailing edge rotating air brakes, I put these on PT fifith scale version and it would almost stop dead in the air. Your comment are appreciated.




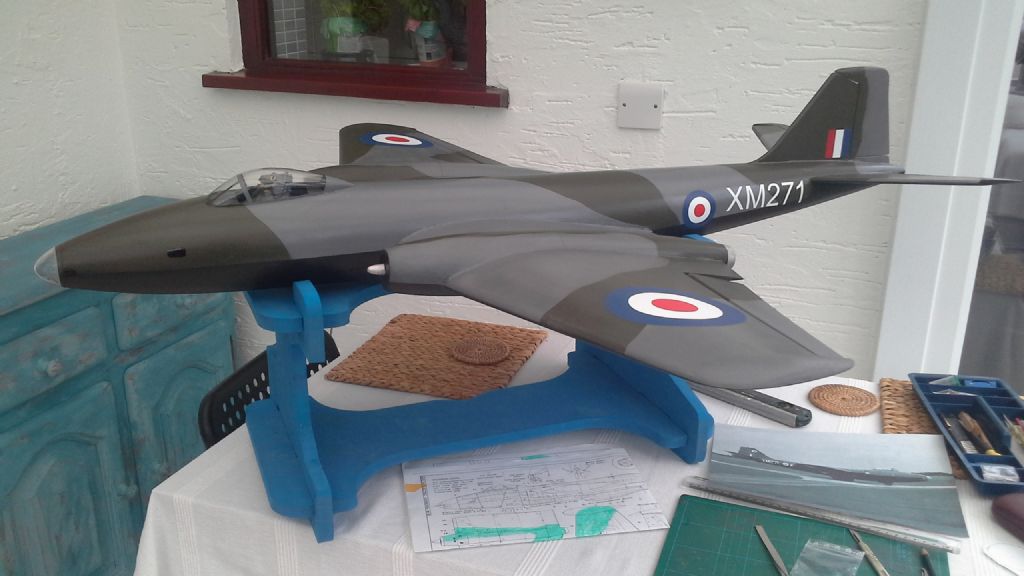
Vintage Models KK Elmira
in Vintage Kits, Semi-Kits and Plan Projects
Posted
After what feels like for ever the Elmira is finally finished! Balanced out at 55mm from leading edge and canopy fitted. The build has not been without it's problems, however, I am very pleased with the outcome. Admittedly I didn't make life easy for myself deciding to incorporate modifications along the way. There have been many reports that the model is sluggish to turn on just Rudder (even the legendary Dave Hughes reported this back in '71) so I have incorporated ailerons and spoilers to assist with the landings. I will report back on this after the first flight, whenever that may be. I am very pleased with the look of the model and can't wait to chuck it off the hill!
