


Ady Hayward
-
Posts
1,994 -
Joined
-
Last visited
Content Type
Profiles
Forums
Blogs
Gallery
Calendar
Downloads
Posts posted by Ady Hayward
-
-
Hi Folks. I have been "Off Grid" for a while building one of these for scale competition and started it in late 2022. I did the basic construction and at the rigging stage found that there was no wing sweep. A re check of dimensions found it to me more akin to the DH60M "Metal Moth" which did bear the name of Tiger Moth until the DH82 appeared.
Basically following DH's modifications of moving the cabane structure forwards, reworking the wing roots to allow for the sweepback plus extra dihedral on the lower wings had all the measurements correct. I then proceeded to get some stainless hinge parts and sundry other parts cut to allow for scale fittings for the struts, hinges, lower rear wing fittings etc.
She is now awaiting paint but am waiting for the temperature in my garage to rise as well as the rain to cease for a while. I think I used around 12m of Oratex for the covering and rib tapes. My kit did not have the plugs shown and would definitely reinforce this area as mine seems to have longer cross members atop the cabane structure with just through holes for the wing fixings.
-
So saddened to hear this news. Laser Engines are the go-to engine for scale aviation and will be much missed. Jon, I hope you can find a job that you can put your enthusiasm and talents into and thank you and the team for supplying and supporting us with this iconic brand of engines.
-
 1
1
-
-
Sorry Rich missed your post. I was with 493 Kings Heath & Moseley Sqn
-
Hi Geoff.
Sorry I missed your post. I'm guessing you sorted the tube bending but for the record I 3d printed a series of "Pulley wheels" of suitable diameters and carefully helped the tube around until it fitted the drawings. Small adjustments were made using firm finger pressure only to avoid kinking. A little perseverance paid dividends. I did find they often broke free so a little fine thread wrapped around will hold them firmly in place..
-
Hi Geoff.
I am a very experienced builder of model aircraft and found building one of these was a bigger task than first expected. The kit in itself has many of the metal fittings and fixtures on two laser cut plates and the mix of woods in the build is comprehensive and has most parts laser cut from lite ply.
I decided to build it as close to scale as possible as the side and plan profiles are pretty accurate. I intend to use it for stand off scale and went into the detail maybe a tad too far. I soon found that apart from the outline there were a lot of extra jobs to do. It is intended as a sport scale and is closer to a DH60M "Metal Moth" of which the DH82 is a direct descendant. In this respect the aircraft lacks the wing sweep on the top surfaces and the corresponding forward placement of the top centre section. I found this out when at the rigging stage and found the official measurements didn't correspond to the aircraft and thankfully a slight re adjustment of the centre section metalwork had everything lining up as it should. When built the bare airframe looks a bit like the incredible Toni Clarke super detail model but that is as far as the similarities go.
With respect to the cockpit I ended up making a new control box from an actual control box scaled down and still managed to get the rudder and elevator servos under it to operate the controls in a scale manner. I also ended up getting as many full size drawing files to scale down the instrument panels, seats and internal controls and other fittings which were then 3D printed. Not a task I would want to repeat too soon. The undercarriage is a very simplified affair and far from scale which is my next project to attend to. To be honest I would recommend it as a large semi- scale model unless you are willing and able to create the scale fixtures and fittings.
-
2
-
-
On 26/07/2021 at 13:26, Rich Griff said:
Nice chipmunk, anyone on here fly with 8AEF as a cadet ?
Hi Richard. Just found this. Yes this one represents the first Chippy that I flew whilst in the ATC. 8AEF had by far the most colourful and pleasing scheme of them all. A little bit of bending the rules regarding the markings and dayglow strips
-
I'm intending to go. Family, weather, pain and pestilence permitting.
-
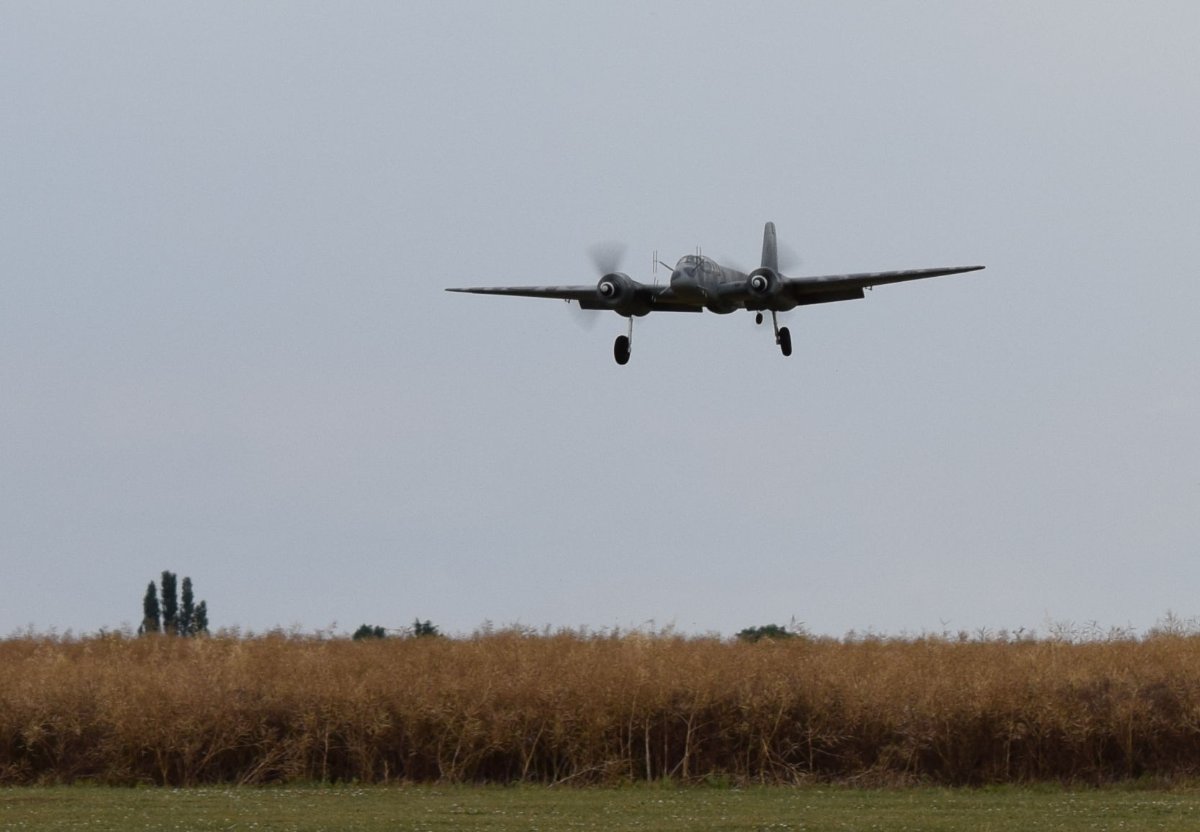
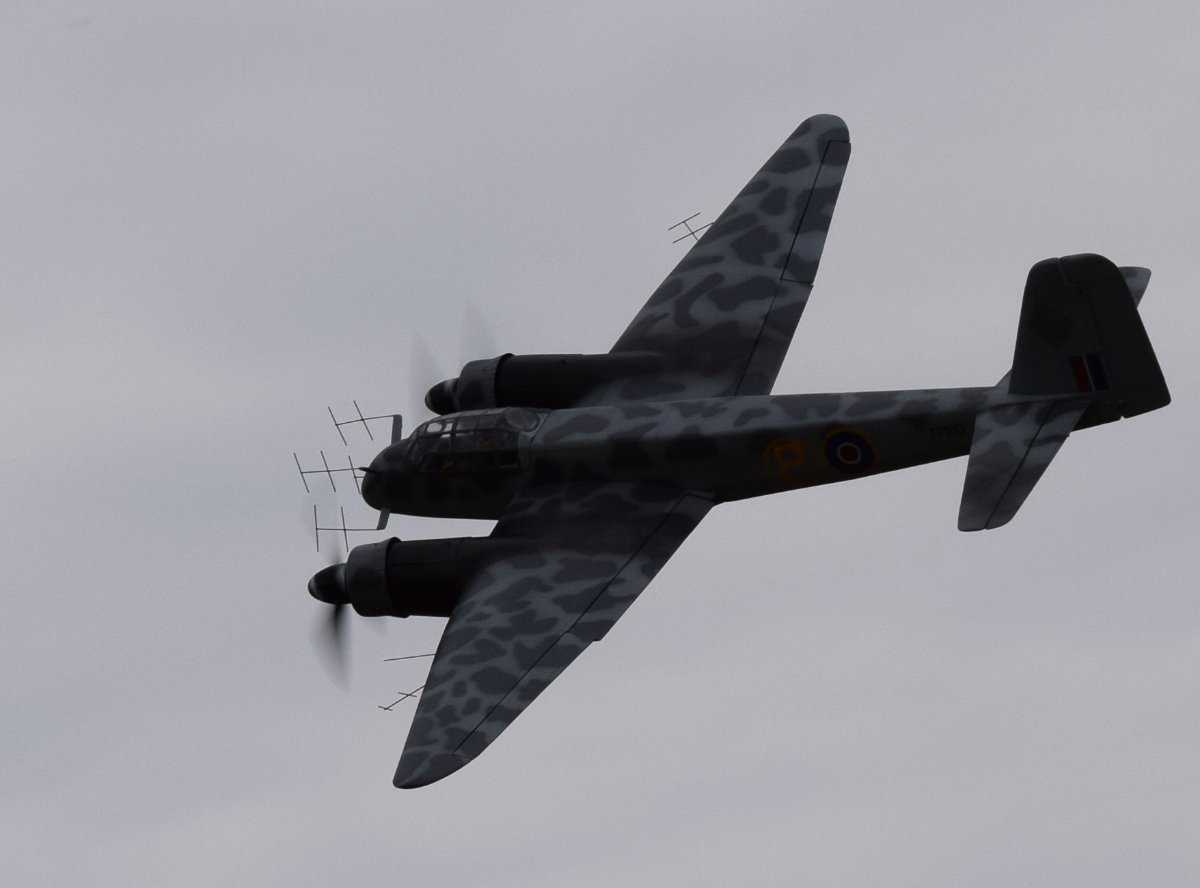
Nice flying Eric. I found with mine that dropping a just a couple of degrees of flap made the plane feel a lot better when flying scale like. The 88 is a lovely plane to fly

-
3
-
-
Hi Folks. Just chipping in. I found mine to be the sweetest twin I've ever flown and on the electric motors recommended has no shortage of power and flies well on one engine as I found out and the rudder is amply powerful to hold things straight. A video was posted of it in flight which you may have seen before:
-
3
-
-
Hi Folks. I thought the thread had closed and was surprised to see it was stirring interest. The Javahawk is still airworthy, and on its 3rd fan unit. A 55mm unit is the smallest I would suggest to allow the motor to be throttled back a little in flight.
-
I have a Laser 120 in mine and she's nicely powered. The engine is quite compact and has plenty of headroom (Foot room?) inside the cowling.

-
1
-
-
Hi. I use end grain balsa insulation boards. Easy Composites is but one UK supplier. It can be supplied in various thicknesses and has a cloth type backing which enables it to be glued in place. I fixed mine to a 12 mm MDF board 2 m long by 0.75 m wide, 25 mm thick and fixed it down with spray photo addhesive. I sanded mine perfectly level (as far as can be done) and it has been in use for a couple of years, with many more to come.
-
Yay! I got the maiden and a couple of follow up flights in yesterday. She flew as sweet as all the others that have been posted here. The laser 120 is maybe a tad low on power for the vertical manoevres but looks a nice scale like combination none- the-less and needs a gentle dive to do a round loop. The wash in on the port wing has crept back in a little so she will stall to the left in an accelerated stall but she's predictable. Spins either way are good, and to the right enters a 1 turn spiral before the spin develops and stops within 1/2 turn when recovery is initiated. Maybe the Spin strakes are having some effect. I practiced the scale schedule plus a few extra attempts at spins and loops and found I still had 2/3 of a tankful left. Very frugal compared to the Gemini 160.
The only issue in the three flights was on the 2nd flight when a flap clevis (M2 metal) that pulled off the threaded rod but even then on the approach when full flap was applied I saw the flaps come down together initially then an un-commanded roll which was easily overcome by the ailerons followed by another as I raised the flaps but made a safe landing anyways with the port flap flapping in the breeze.
Now I have to find some threaded rod that will take solder as most of the rods I have are of Oriental origin and are non magnetic and don't take to solder.
-
Hi Cliff,
Nice one. I'm really glad to hear things worked out well for you. I hope the York gets finished, its a nice subject.
-
Hi Folks,
I finally have my Chippy ready for her maiden. Has a new Laser 120 fitted instead of the Laser 155 so there is a little more space in the cowling for the baffles to surround the engine. All up weight is 5.3kg (11lb 13oz) so nearly 1 lb heavier than I wanted even with built up balsa tail feathers so I am somewhat bewildered how Seagull recommend a typical 4.8kg (10Lb 9.5 oz) auw on the box cover. No ballast is fitted and she balances out between forward and rear limits with an empty tank. With the original tail feathers she would have ended up closer to 5.75kg-6kg due to the extra nose-weight that would have been required. Still she is what she is and should fly OK at her weight. Engine runs were uneventful with no apparent overheating issues and sounds lovely with the stock exhaust and scale like exhaust. The last item to be done is to source a light weight pilot for the front seat.
Ady


Edited By Ady Hayward on 21/11/2020 20:12:11
-
I seem to recall a rather costly space probe crashed during its landing phase due to a similar Feet/ metres conversion issue. Murphy still rules.
-
Hi Jon,
Nice work with the inline twins. A 200 would suit my DH Gipsy powered projects where an 81" prop would be a 1/4 scale 20.25" so a 20-21 x 6 prop would be great.
-
Hi Martin, She is covered in Oratex light grey and the cowl is Oracolour light grey. The oracolour was supposed to match the film exactly but is quite a bit off the mark. It is not very close to the "Light Aircraft grey" used by the RAF, but the closest there is apart from a complete re-spray. Decals are vinyl and the dayglow is oratrim. Serials are airbrushed acrylic using home made stencils.
-
Many thanks for the kind words Folks.
The tailplane, elevators and rudder were rebuilt along the same lines as Danny's Chippy with the finished with all parts together weighing just a little more than the original tailplane on its own. (Liteply structure...Not!). I do wonder at the ply structures Seagull use at the back, especially the liteply skins. The Chippy is still in build as I am trying to get closely fitting baffles around the Laser engine which may enable use of a scale like exhaust if I can separate the hot areas from the carburettor. I was going to go to town on the flaps and ailerons but the structure of the wing trailing edge made the task way OTT so left it as-is
-
Many thanks Danny.
All being well she will be followed by a 1/4 scale one for F4C/H. I really like the 8 AEF colour scheme so if sufficient documentation can be found is the way it will go.
Cheers
Adrian
-
Hi Folks,
Just "Chipping" in with my Seagull Chippy. It was an all yellow version but I found the port wing had Wash-in which is quite undesirable. I had to remove the covering to remedy the warp so decided to strip it off and re-cover in Oratex to represent the Chippie I first flew back in the late 1960's at 8 AEF RAF Shawbury. The oleo fairings were replaced by ones I re-worked and 3d printed. Not great, but look a little more like they should. Power is via a Laser 155 which will have a closely baffled cooling system and if possible a more scale like exhaust outlet. I have still to do a bit more detail such as wing walks and other markings but getting there.

Port wing underside showing the wash-in.


Dayglow Oratrim and home made stencilled markings

Adorned with vinyl coloured markings

Edited By Ady Hayward on 25/08/2020 13:41:59
-
Hi, as John has said the light scale and Flying only is a great intro to scale flying. I'm in my 3rd season and enjoying it throughout the ups and downs. True you will be flying alongside the top flyers in the country but this is a great time to pick their brains, get good tips on building/ converting planes and of course flying them well too. As I found out they don't bite and are a source of knowledge and inspiration.
Flying scale means you have to learn to fly accurately and get speed, position and timing right to get towards the top of the leader board which really does benefit your club flying too. Seeing a Spitfire whip by at Mach 1 can look impressive, but will turn more heads when its done at the right speed and pitch/ roll rates and looks "Just right" in the sky. If you can pass your "A" you can already do the basics needed.
One of my best moments was a couple of decades ago flying a Precedent 1/4 scale Stampe at a Fete and after the flight an old gentleman came to me and said he loves watching the model planes, but watching the Stampe put him back in the cockpit of a Tiger Moth when he did his military training back in the 1940s.
Give it a go and check out the BMFA Scale site. I'm sure the bug will bite. Here is the link to the calendar BMFA Events
See you at the comps.
Adrian
Edited By Ady Hayward on 26/02/2020 16:15:32
-
Hi Dick,
Just caught up with the thread again and Wow!. I love the choice of subject and so well done too. Just shows what can be done with time, effort and a good model. Its a shame about the u/c mounting, but it looks like it went back in very nicely and would be taking to the air again in a short time. I'm sure that by now there will be a good few more flights under the belt and appreciating the handling qualities of Richard's designs. It is the sweetest handling Spitfire I have owned (Out of 7 built) and with the fewest vices, though if provoked will bite but recovers well if correct handling is carried out.
Please post more pics if available.
Ady
-
Yay! James's link did the trick and the Tx is no longer locked when I press trims together and switch on. I'm very relieved and grateful for the help.
Cheers All

Tiger Moth by Value Planes
in Scale Matters
Posted
Hi Geoff,
I'm glad to see Manish some good answers to your questions. I am fortunate in having invested in a couple of digital inclinometers. For the incidence they can be positioned on a suitably straight support that rests on top of the front and rear spars, and dihedral by using the same support resting on the rib tops over the hight part of the ribs/ over the front spar. Be sure to have adjustment on the rigging wires allow for a little stretch as the wires bed in. Like Manish I set the dihedral on the lower wings using the landing wires which also take the weight of the top wings via the struts. Connect the top wing at the roots supporting it until you get the struts in place. When they are at the correct lengths you can check the top wing angles and adjust before fixing the flying wires to the top wings. Usually after the first flights some slack will need to be taken up in the wires. I used the Mick Reeves flat strip with his left and right hand thread connectors for my rigging as it makes for easy adjustment. A wing root support is pretty well essential for the easy rigging and transport of the wing panels.