


Christopher Eeles
-
Posts
64 -
Joined
-
Last visited
Content Type
Profiles
Forums
Blogs
Gallery
Calendar
Downloads
Posts posted by Christopher Eeles
-
-
Hi all...HAPPY New Year from a very hot Australia. Flew the Fokker again today. Now flying well. Our local field is a bit dry and as a result it tipped over on landing. Luckily it just pulled a couple of those cabane "tangs" out of their sockets and no major damage. One annoying thing is that the axle wing/ airfoil won't secure in place and wants to tilt. I'd have to unsolder all the joints to somehow fix this. I've tried adding a bit if glue to the collet area but it's not helping...any ideas...happy to build a new undercart if necessary...
Cheers Chris
-
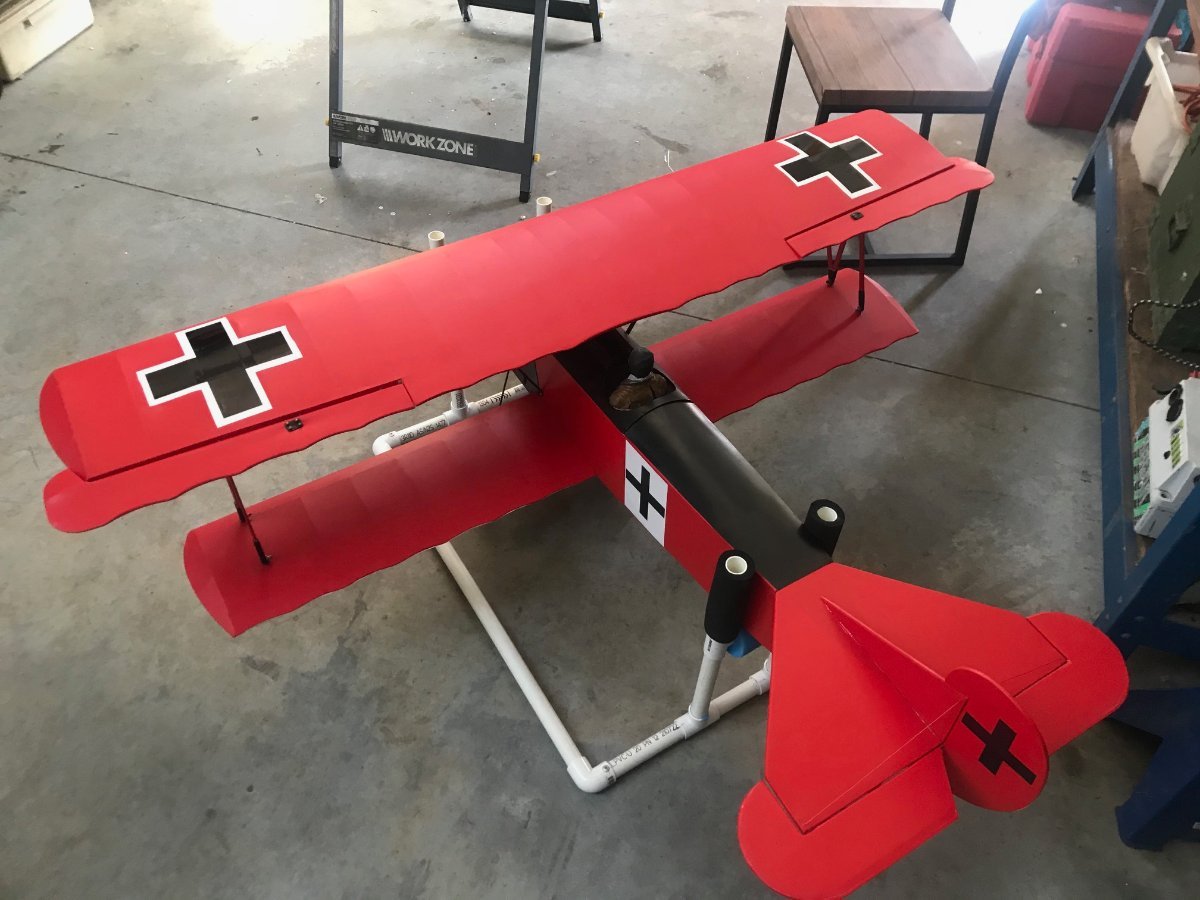
So, I've added some basic insignia. I hand made these using white Oratex and black vinyl tape.
I dulled down the tape by sanding lightly and covering with matt water based clear.
More flying after Christmas eh! Hope you all enjoy the festive season..
Cheers from Sunny Australia

-
 5
5
-
-
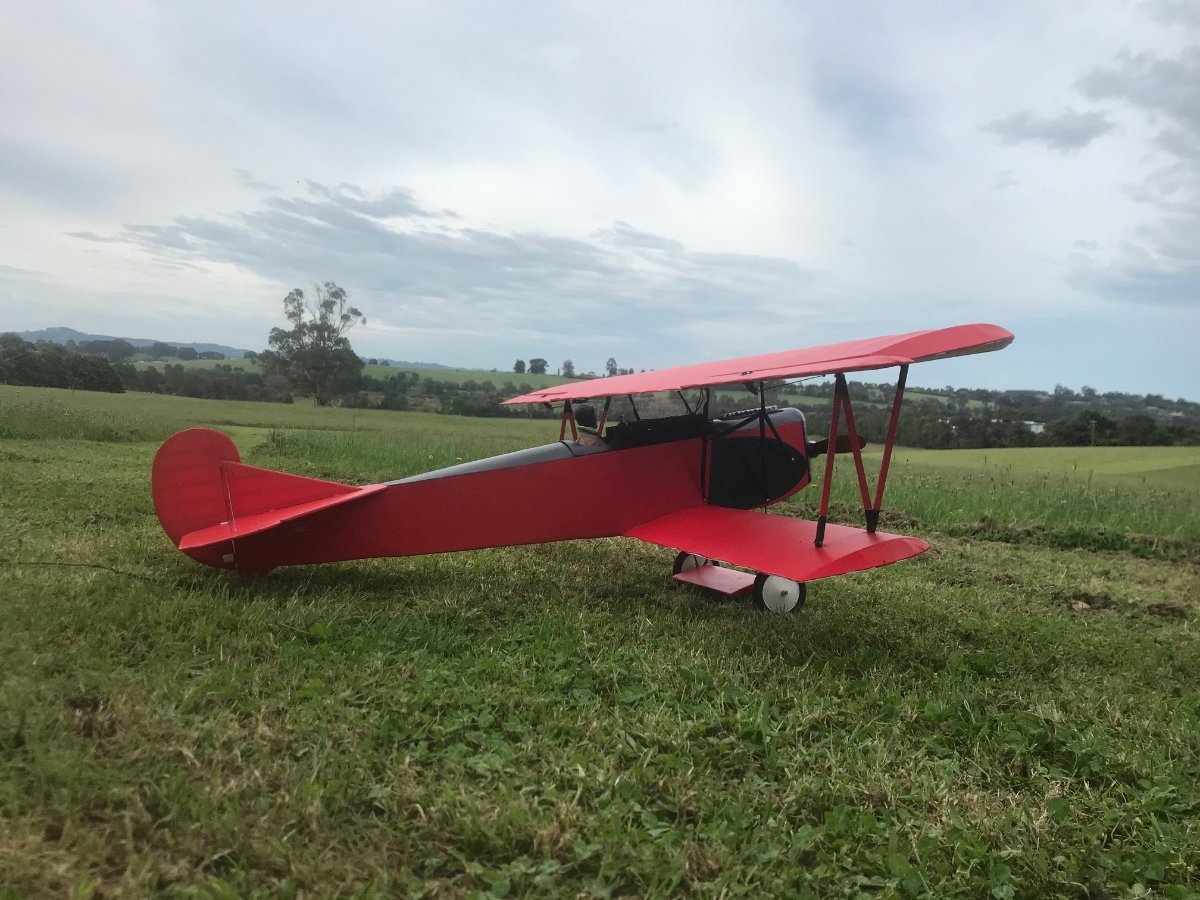
Happy days! The wing warp was the issue....Flew like a dream today, steady at all speeds, still overpowered but great cg so I'll prop it up one size and just fly around at low throttle. Based on today's flights, I'll easily get 15 minutes.
Cheers to all
Chris
-
1
-
-
Sorry for the delayed reply everyone...been a busy past month or so...
I haven't flown the Fokker since my last post, however, I did discover that I may have induced a warp in the left wing due to inaccurately building the rear leg/part of the left cabane strut 8 to 10mm higher than the right hand one, which induced a subtle but large area warp along the left wing. Fortunately, by swapping the cabanes to the other wing, I hope to prove this is the issue, as the plane should now tend to go either right or, hopefully, straight lol.
Weather permitting I'll try tomorrow and report back...fingers crossed...
Cheers
Chris
-
I added more right thrust and unfortunately it didn't fix the issue. Had a couple more flights and it doesfly well, but still need lots of right trim. Lateral balance is the next trial..even though it seems balanced, I'll tape weight to the rh wingtip and try again. It's not torque as it flies true on glide, motor off.
No warps in the wings or alignment issues that I can see or measure.
I guess if nothing seems to solve the problem, I'll just fly it with the added aileron trim...
More to come...stay tuned
-
Well...Today I finally got to maiden the mighty Fokker D7. It survived, but barely as aftervtakeoff it wanted to roll left strongly. Had to add full right trim to survive the flight...Annoying as I built it pretty straight, so if anyone has ideas, please post them up.
It's overpowered with the electric g60 motor 6s 4500ma pack and 15x6 prop, but it's easy to throttle back and cruise. I'll try a different size prop to slow it down too.
Very very easy to land...just keeps gliding...easy to flare (is that a pun?)
Decals still to add...need to sort out the aileron trim issue first however...
Cheers Chris
-
-
If anyone is following this looonnngggg post, the Fokker is now complete and awaiting maiden.
Covid restrictions currently closed our club but maybe I be able to fly locally....
Fingers and toes crossed!
Cheers
-
2
-
-
Another half year has flown and we've been on the road travelling outback Australia for 4 months. Victoria has been under many Covid lockdown and at the moment most of Metro Melbourne is locked down...so many flyers are stuck at home.
I'm on the last stages of the Fokker...looks like balance will be fine with 6s 4,500ma battery.
Only wing servos to be installed and the test flight can happen!
Cheers All...
Chris
-
Hi all,
Finished most of the fuselage sheeting and installed supports for the battery tray.
So apart from the undercarriage and struts, the main construction is complete.
Bottom wing bolt installed.
Jeff...I've looked at your photos and you used an incidence meter to set your top wing. Is that relative to the bolted-in bottom wing? If that is the case can I achieve the same result by setting the bottom wing level to the bench and measuring the top wing leading and trailing edges? I'm assuming because the bottom wing incidence is already fixed by the fuselage sides, front dowels and rear bolt, the top wing just has the be relative to it? Correct me if I'm wrong please.
I'm also interested in how you measured and made the temporary wooden braces to hold up your top wing and if you still have them, can I get the measurements please...
Cheers
Chris
Edited By Christopher Eeles on 31/01/2021 08:17:30
-
Photo is a mock up with pilot and guns roughly placed...and trimming needed on hatches...

-
Well it's now well into the New Year and here in Victoria, Australia is HOT HOT HOT...40C this Monday....even today at 29c the workshop got a bit warm....nevertheless, I've managed to achieve something that's been bugging my thinking over the festive season....as you know I'm converting this kit to electric and I've had to make the top deck removable to access a battery compartment. Thanks to Jeff's ideas and photos, I've made the front cowl and engine area removable and today I've roughly completed the rear cockpit area as a removable section too. This larger section will be held down via magnets and locking pins. I'll glue in a battery tray which will brace the entire middle section of the fuselage.
Cheers
Chris
Edited By Christopher Eeles on 23/01/2021 06:16:05
-
Just a quick post to wish you all a Merry Christmas . Fortunately we have no lockdown or restrictions so we've been out and about enjoying the Aussie summer. Meanwhile the Fokker sits awaiting further work...it appears that there's some history in these flair models...they seem to take a year or two to complete lol...
Guys...stay safe wherever you are and enjoy the festive season...
Cheers Chris Eeles Warragul Victoria AUSTRALIA
Edited By Christopher Eeles on 24/12/2020 10:44:19
-
So....not much building as I'm practicing for the next F3A aerobatics competition in December and of course, the summer means camping weather so we've been away for a month doing just that! My son is an excellent model painter for miniature war gaming so he painted the pilot for me. It's not a great photo but even the eyes have various shading and highlighting. Next build job is to definitely sort out the new firewall and removable deck as it's holding me up at the moment...
Cheers from Sunny Australia and no Covid (hooray)....
Chris

Edited By Christopher Eeles on 29/11/2020 00:27:58
-
-
Thanks Ted, my mate Joe also made the guns (as photo) but had to use a filament printer rather than the liquid printer of the pilot. Unfortunately this left tiny plastic fibers in the cooling casing holes which I couldn't remove easily but won't be too noticeable esp since my model will be "stand way off" scale lol...
Used a razor plane for the first time in over 30 years to begin shaping the leading edges and especially the ailerons. Worked a treat...forgot how satisfying it is to peel off curls of balsa!
Gorgeous hot weather here in Australia so off flying each day this week...
Cheers
Chris
-
Hi all....just returned from a month away camping in outback Victoria...so no building updates however a mate of mine 3d printed the "Red Baron" style pilot and the machine guns which was a great help and a welcome gesture.
He also tried to 3d print wheels but they turned out too heavy...and although not to scale, I've obtained some wire wheels and will add my own covers.
Need to order some robart hinges before too long....
Next job is the new firewall for the electric motor, and removable top deck for battery access...plus SANDING and shaping everything...
Summer is here so lots of flying and not as much on the build front but I'm enjoying the process...
Cheers
Chris in Oz.

-
Hi Trevor,
The V wing dowel plate is the actual one supplied in the kit.
It’s a great idea! Agreed that Ted’s installation is excellent!
I’m also going to follow his idea of covering... it will be a new experience for me to use koverall
cheers
-
Hi All...Ted....great photos and info. I’m currently away camping for a month so no modelling unfortunately but I did get most of the main construction completed before we left last week so all awaits when we get back!
I’ve managed to acquire some wheels and a mate 3D printed the guns and pilot for me so happy days.
I’ve sorted in my mind how to do the electric conversion so like Jeff I need to ensure the correct thrust lines for the new firewall !
cheers all
Chris
-
Maybe Nigel, but it won't be as nice as yours!
Cheers
Chris
-
 A wet and windy day here today, typical spring weather in Southern Australia. No chance to go flying so a productive day in the workshop. Top wing basically complete apart from servo covers and sanding. I've used LOTS of tips from members here which has helped a great deal to improve the build and avoid stuff ups etc. I also tackled the interplane struts which were actually pretty easy. Still need final sanding and shaping.
Next are the ailerons...building them like Jeff and Nigel with rounded leading edge, robart hinges etc.
I have to scratch-₩build the undercarriage "wing" because the ribs were missing from the kit but I have the templates on the main rib sheets and I can use the waste ply from the same sheets to make new ribs. Easy job...fortunately all the hardware for the undercarriage is still there. (I know the original kit owner started on the build but stopped almost straight away so I think that's where the undercart ribs ended up..in his shed somewhere lol)
I found, like Nigel, that the strut mounting system in the wings was actually pretty straight forward once I stopped stressing about it lol.
Cheers Chris

Edited By Christopher Eeles on 21/09/2020 10:58:19
-
Posted by jeff2wings on 04/02/2016 21:55:50:
A bit like this then


Jeff or Nigel...I'm assuming when building the aileron as a separate unit and using the method above you used a thicker or laminated leading edge piece so you could make the half round shape? I'm also assuming that the aileron ribs front faces are then cut square (perpendicular) as there's no need to tapes them like the original plan?
-
Posted by Ted Khinsoe on 22/08/2020 14:34:14:
 Hello good to see a fellow colonial
i built one a couple of years back. The covers supplied with the kit are very flimsy and I think would be a simple matter to make from ply and add vents from styrene or litho (aluminium cans are useful). I’d be happy to take measurements of mine if you wish. The photo is mine before I crashed and had to rebuild the front end requiring reshaping the lower part of the nose
Ted
Hi Ted,
Can you tell me about the finishing of your model please? Is it an antique solartex colour and/or painted fuselage etc...thinking of also goimg that colour scheme...
Cheers
Chris
Edited By Ted Khinsoe on 22/08/2020 14:38:14
-
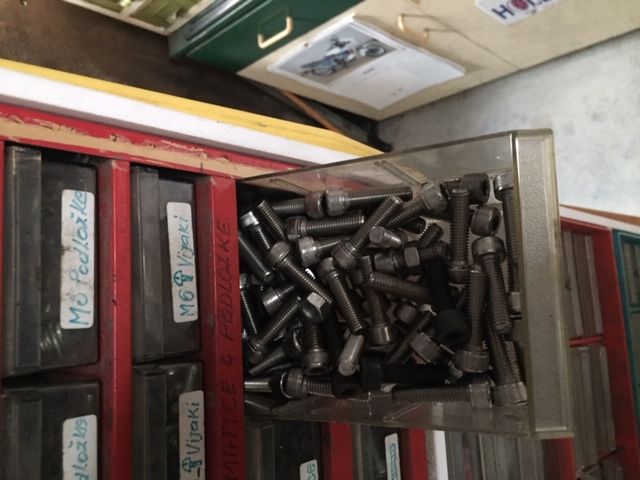
Hi Ted...I wish I could claim all the glory, but the stand with most of the bolts etc all came to me like that, including the German language for the labels. My late neighbour, Ernst, built and filled the stand, I've just added some of my own things. In his life, Ernst was a hoarder of GOOD things...his daughter told me they would spend their weekends going to clearing sales and sorting endless containers of bolts and screws. Shockingly, after his death, his family filled a huge dump bin with hundreds of Sheffield drill bits, taps, dies, tools etc...I managed to dumpster dive and rescue some, thank God, then spoke to them about a clearing sale where they made good money...they had no idea of the value!
 Cheers
Edited By Christopher Eeles on 15/09/2020 11:28:04

Flair Fokker DVII
in Build Blogs and Kit Reviews
Posted
Don,
I only just saw your reply...its been a busy couple of months. What a great idea...I'll get onto it asap.
Last Sunday our club held its annual scale fly-in event. Any type of "scale" aircraft are welcome and it's just a fun, social event. The mighty Fokker D7 flew four flights, all went well. It's definitely way over powered, so I'll drop down to 5s 5000 ma packs from the current 6s. Balance should still be ok as I can push the pack slightly more forward. I'm very pleased with the electric conversion overall.
Cheers from Sunny Australia