


Phil Winks
-
Posts
3,360 -
Joined
-
Last visited
Content Type
Profiles
Forums
Blogs
Gallery
Calendar
Downloads
Posts posted by Phil Winks
-
-
There is something unnaturally tidy about your workshop Tim OCD maybe
 nice trad build though.
 -
As a ps and not quite on thread did those early diesels not have a locking arm on the compression screw ??
-
Your initial thoughts ain't so far of though I'd go for a 3300Mah 3s lipo and this motor don't forget by the time you've added the battery the weight will have gone up a tad, also when fitting the battery try to get it some where near the COG or a little forward of it, usually right where the fuel tank was.
That motor will be somewhere close to the weight of the diesel engine you've taken out so getting the battery under the front of the wing will help keep the balance right.
I run one of those motors on a 11 x 6 prop I think, and she pulls just about 350W which isn't that much more than you need for that trainer and you can always not use full throttle plus the extra power helps with what is almost certainly a draggy airframe, mines fitted in an E-Pioneer and is just about right as a basic trainer the nice thing with that set up is the ability to step up to a 4s setup (with a slightly smaller prop) as you get better giving you slightly more in the tap for loops and the like and a shorter take of run mostly, though the added weight of a 4s does mean faster landing speeds, something best kept for a little way down the line.
-
I would agree with you normally Kevin but I really couldn't offer him any where near a half honest price at the min and until next year at the earliest wouldn't have half the time needed to do any venture like that justice though I am tempted to bid as that would keep my H2O & Hustle in the air for more than a few seasons and leave spares to move on possibly as complete kits
-
All lovely park flyers a real shame he couldn't make the business work but having said that two years ago I contacted him and offered to take most of his H2O spares at the last known retail price and haven't heard a word since I suspect he won't get that much for the job lot. I do wish I had the money to purchase the copyright and tooling because I'm sure that range of models could do better than they did they really are nice to fly in calmer (sub 10mph winds) conditions
-
Very good indeed I see your going for a trophy here

-
I'll be there without fail (I hope) this year
-
Posted by Richard Harris on 09/06/2015 06:22:29:
Phil,
Nice work, have you flown it with your new mods?
Rich
Not yet Rich I only got back from holiday fri afternoon and the weekend was spent putting her together in between getting ready to return to normality and catching up on my club secretarial duties, however I expect her to be as well behaved as before with the added bonus I can now get a 2300Mah in her as opposed to the 1300Mah I had before and the space inside lets me achieve the same balance with both bty's without adding/removing a portion of church roof, so there's the option of a little more weight for windier days, which seems to be a recurring theme this summer so far

-
To be fair it's all part of the learning curve, just remember, especially in gusty conditions, to watch for ground obstacles that can cause turbulence at low level on your landing approach, wind shear bites us all !! luckily this is a model that mostly can handle it, the benign stall does at least help it land on its feet, just one thing you might want to take the wing tube and roll it across a mirror to check for slight bending after a heavy landing, it's not the hard aircraft grade aluminium that you would expect, well mine wasn't!
-
Janos Watching that vid my conclusion is that you flew into a stall, mostly due to blustery conditions causing rapidly changing air speeds the pitch nose up just before the arrival is what makes me think this. a gust will have slowed the ground speed of the model and as the gust drops so does the air speed and with such a benign stall as this model has a simple drop is the result, I've witnessed this a few times on my own while on short finals in gusty weather plus as you were approaching the boundary between flat grass and the crop some turbulence would've been taking place just adding to the mix.
-
Post over confident flight rebuild is complete along with some minor mods
.jpg")
.jpg")
More details in this post on my build blog
-
Well it's been a while the trimming days have been and gone, I attended the 1st and very educational it was too, she has flow successfully quite a few times though on the last outing I got to bold and the damage to the fuselage meant a rebuild was the easiest route, along the way I incorporated a few mods that others have done and I'm happy the end result will be a better model.
First the general shots
She's subtly different but not so much as to be unrecognisable from the MKI
.jpg")
and now some of the altered details in close up
1st the formers were made from carbon reinforced balsa, lighter and stronger than light ply I believe
.jpg")
.jpg")
then there's the position of the head servo's, this means there are no cutouts in the mast housing hopefully making it stronger.
.jpg")
and I've shortened the elevator control on the head arm to give more elevator movement, the addition of two holes has given me three positions I can use to fine tune it
.jpg")
Finally, and there's no pics of this bit, the u/c is brazed together as one piece and I've sandwiched two layers of 1mm Epoxy glass plate into the mount area, one in the fuse under the ply plate and one outside on the ply plate, this has given me a rock solid U/C attachment that shouldn't wear to soon.
Now just to check the blade balancing and re-maiden her
-
That's one cool looking Atom Dani's built there. My rebuild of Diesels ride is done, paint drying as I type its back at home waiting to be put together so pictures can be expected when I get back of holiday on Saturday. I'm not sure its better than the Mk1 but it is subtly different, using some of the mods others have come up with and some of my own, mostly in materials and hardware layout.
Edited By Phil Winks on 01/06/2015 23:07:54
-
Looks like you enjoyed that Janos, one comment on the video camera placement. I used velcro to attach mine ( a small key fob style hd video camera) to the top of the wing far enough out to not see the prop in the video makes for a cleaner picture and saves you inverting the image to view too
-
No worries Bill sometimes things do get lost in the translation with those maualls though HK are getting better as they actually employ a European/ american to write them now common sense really
-
No problems Martin all being well I'll be there on the Fri evening looking forward to seeing you all there
-
Thanks Rich it was a thought as I felt she took a little longer run than most to achieve full spin however I will of course bow to your greater experience and not try to fix what ain't broke
-
Have you seen this **LINK**
-
Bill is there a model name or number on the ESC?
-
That's OK Martin I would add I'm seriously considering a 0.8mm shim once my current repairs are done and having seen what Richard had to say about a thinner TE decreasing the negative incidence
Re green acres , yes I'd seen the date change and must be one of the few it actually helps as my club attend and display at wood spring wings on the weekend it was planned for and I provide the marquee transport. So now I'll have an empty trailer for my camping kit and more room in the van for models
-
That makes sense to me Martin my bolt hole is 15.5mm from the LE trust me those AJ blades do have a spruce LE well mine do, and I have a 0.4mm shim as described 10mm behind the bolt hole centre and spin up is good though possibly could be better
-
Posted by Martin McIntosh on 30/05/2015 16:31:38:
Question for Richard or anyone who can help. Just finished balancing and covering a set of AJ blades to try. They are 460x42mm. Looking at Rich`s JPEG it would seem that the bolt hole is 11mm from the LE and the shim 10mm behind this. Before I drill them, is this correct because the CG of these is way behind the 11mm mark? Also, from looking at Rich`s, the shim was only about 4mm from the bolt hole centre. What do you use which works?
Martin the bolt hole should be 1 mm behind the chordwise cog, which is usually at the back of the spruce le section on those blades. Then 10mm from the blade root, and the shim should be 9mm behind the bolt all measurements from the bolt hole centre
-
Thats looking great Chris, good to see you've got your priorities sorted models V gardening, models must win every time
-
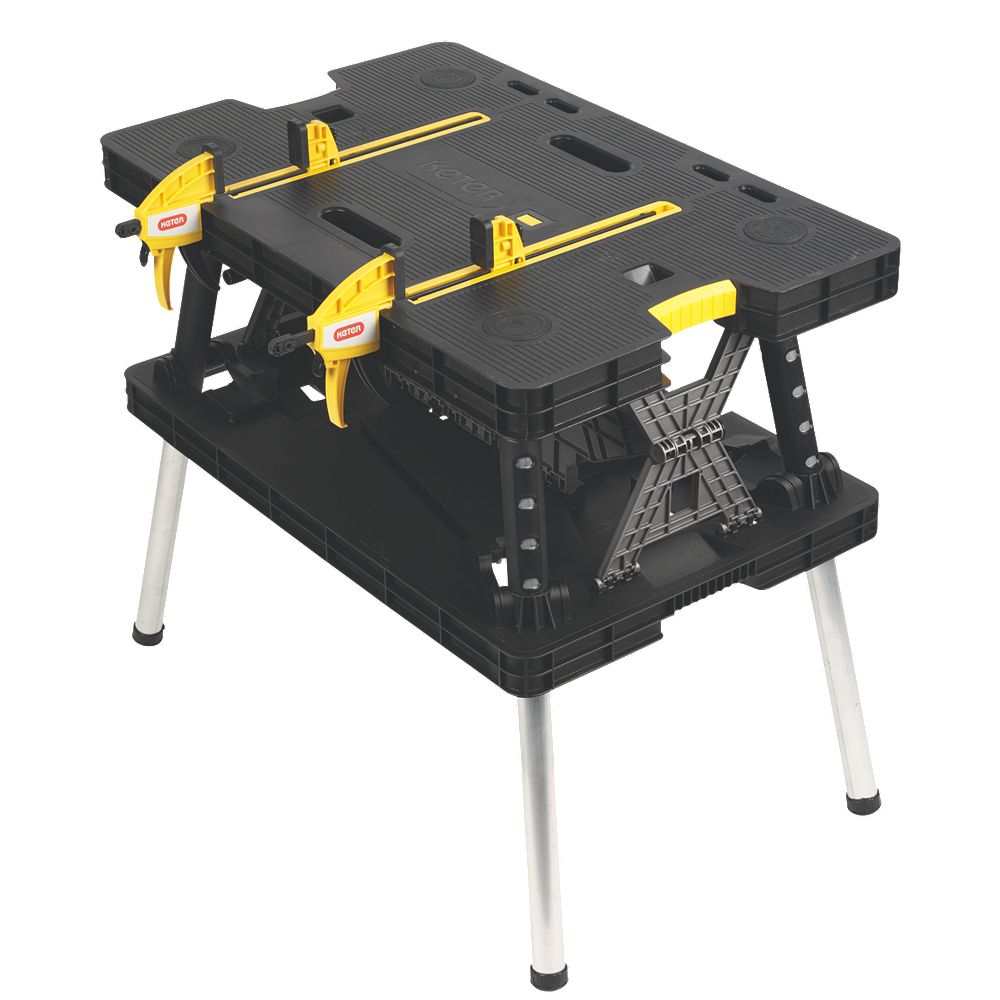
Posted by Chris Barlow on 14/05/2015 17:33:02:
Phil, treated myself to a new folding bench this week! Finally found some in stock near me!

Nice one Chris you'll soon be wondering how you did without it
Luscombe 8E Silvaire
in Build Blogs and Kit Reviews
Posted
I sort of inherited this part built from a late club members estate for a small donation to the local air ambulance fund and I thought it'd be a good subject for my 1st ever proper scale build, it does have some issues but I'm quietly confident I can lick it into some sort of acceptable shape.
Specs 80" span, expected AUW 7lbs, Engine 46 - 53, Designer Mike Lovell, plans published by Model Activity Press Herts. for Aviation modeller international.
That should date it for those of you who know that mag !! me I'd be guessing !!
This is as I got her so most of it there less the rudder, plus the plans, a set of wheels and all the card templates pre cut.
Scratching my head a little I found this and a few other pics of the real thing so I have some form of reference and this colour scheme is one I'm confident I can reproduce pretty closely
So where to start, well the most glaring scale discrepancy is the fuse area under and behind the fin, simply there shouldn't be any so that got chopped straight of and a little beefing up see's me with something that although isn't perfect, is a lot closer
the fuse actually protruded under the rudder, prob to protect it I'd say but with a good beefy steerable tail wheel I can't see a problem.
The next thing that actually offended my untrained eye was this
So brazing torch and 55% ag silver solder at the ready and it was speedily rectified
Followed by some fairing
Now that I'm a lot happier with.
Now a start has been made I need to source an engine, I'm sort of looking for an ASP 61 FS and if I can find one with a good petrol conversion so much the better, if not then a good on board intelligent glow driver will be fitted
Edited By Phil Winks on 21/06/2015 22:08:45