


Craig Spence
-
Posts
1,911 -
Joined
-
Last visited
-
Days Won
1
Content Type
Profiles
Forums
Blogs
Gallery
Calendar
Downloads
Posts posted by Craig Spence
-
-
1 hour ago, Nick Somerville said:
Getting close Craig! The wing root fillets came out beautifully! How much detailing are you planing for the surfaces and cockpit?
Thanks very much Nick, really appreciate the kind words.
I do plan on adding most surface details and have got some micro screws I’ll be installing to replicate the scale details.
Cockpit detailing will have to wait unfortunately.
There isn’t a canopy for this model on the market at the moment and I’ll have to make my own which really will be time consuming and the cockpit will have to wait until the canopy has been fabricated.
-
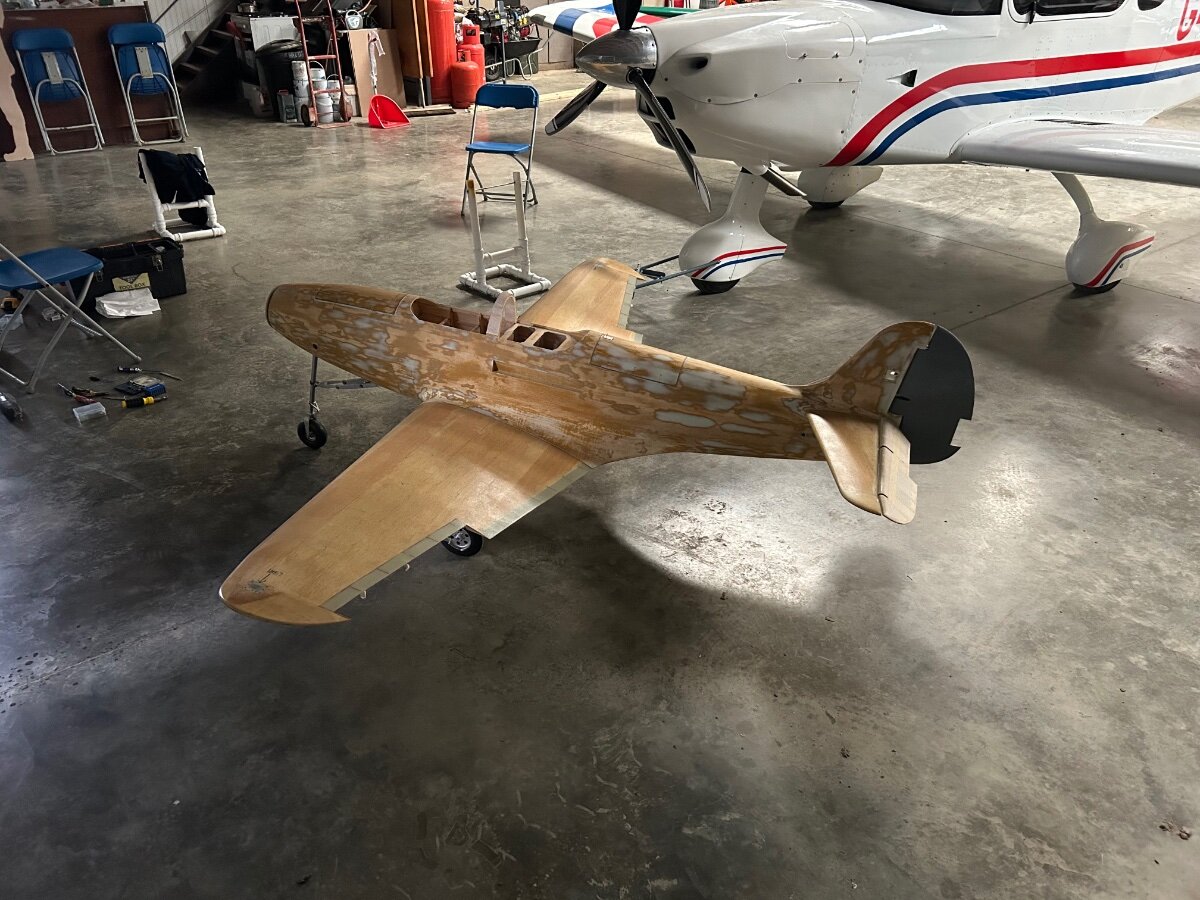
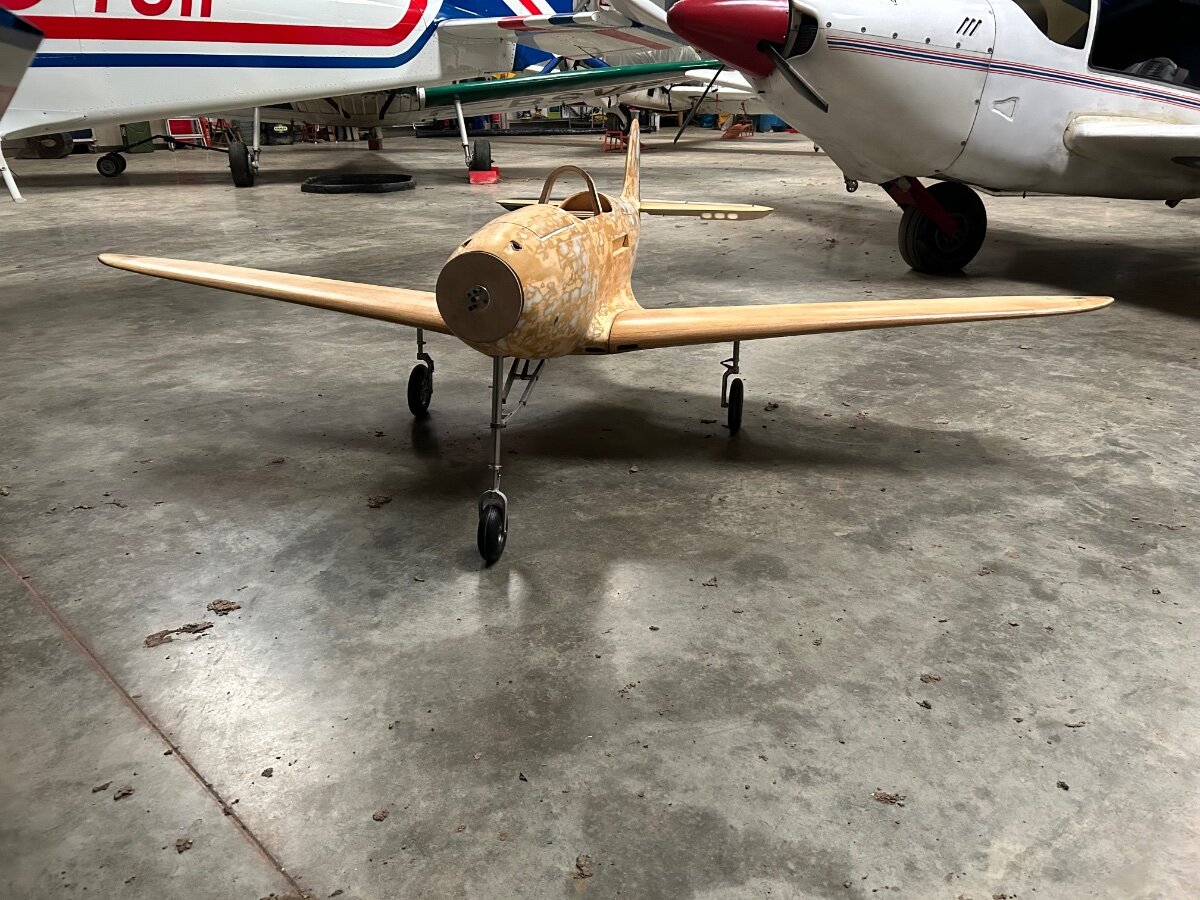
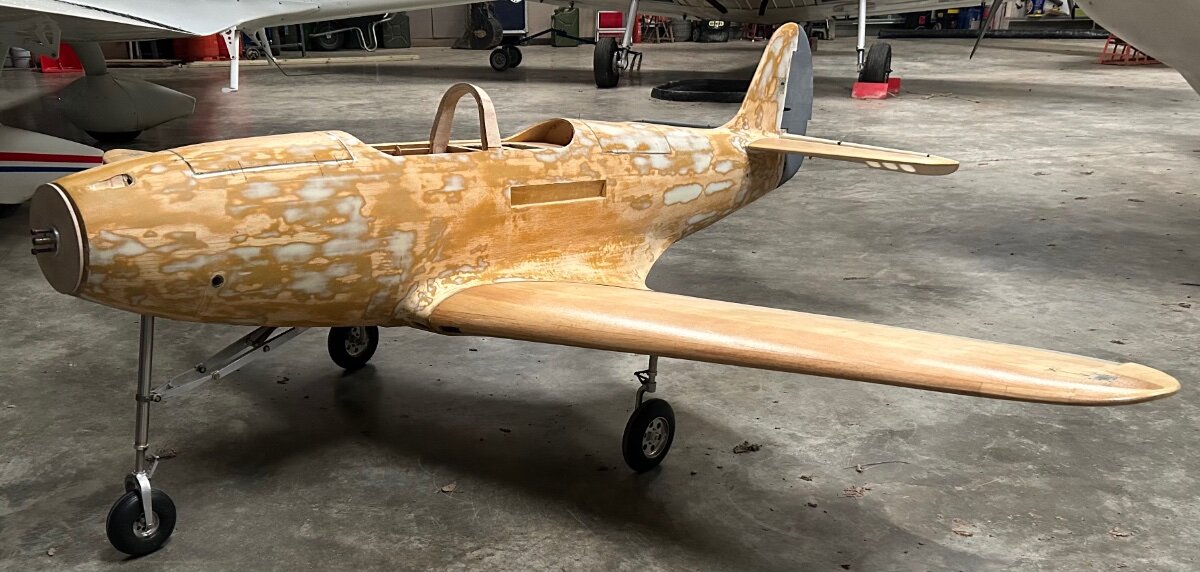
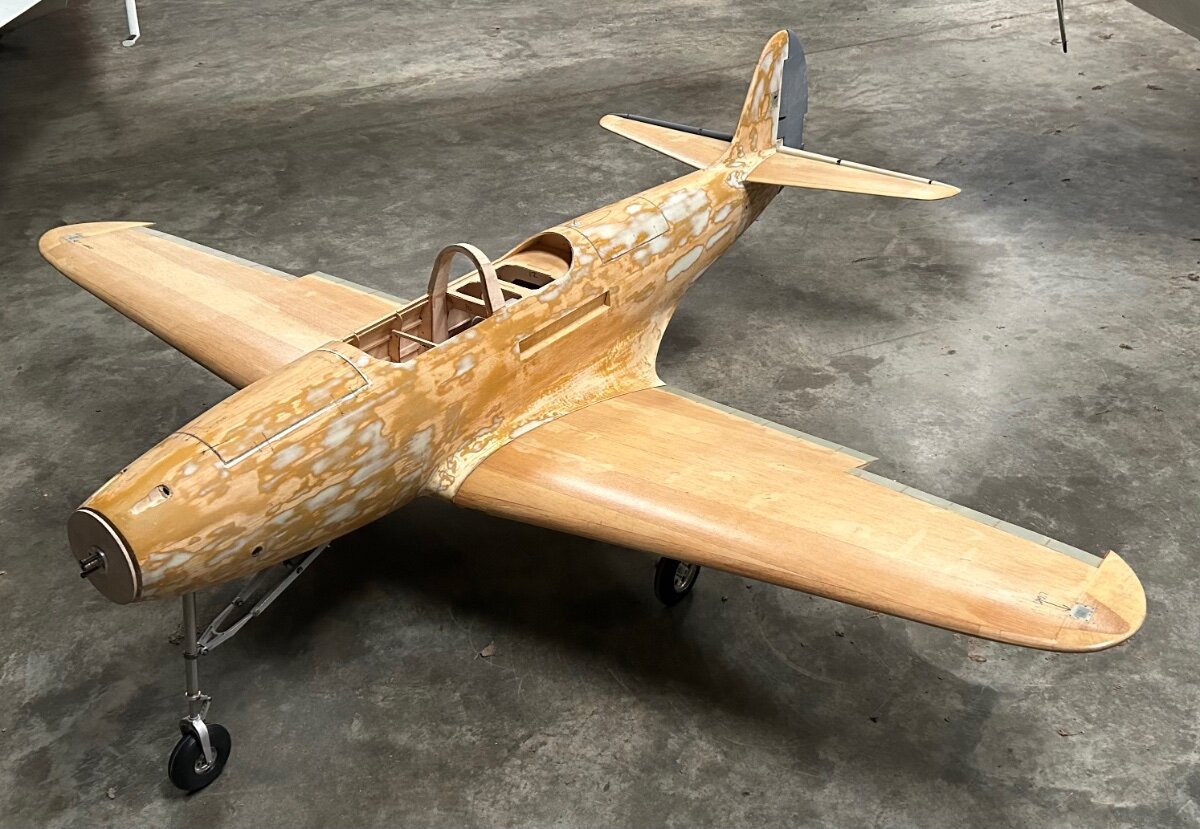
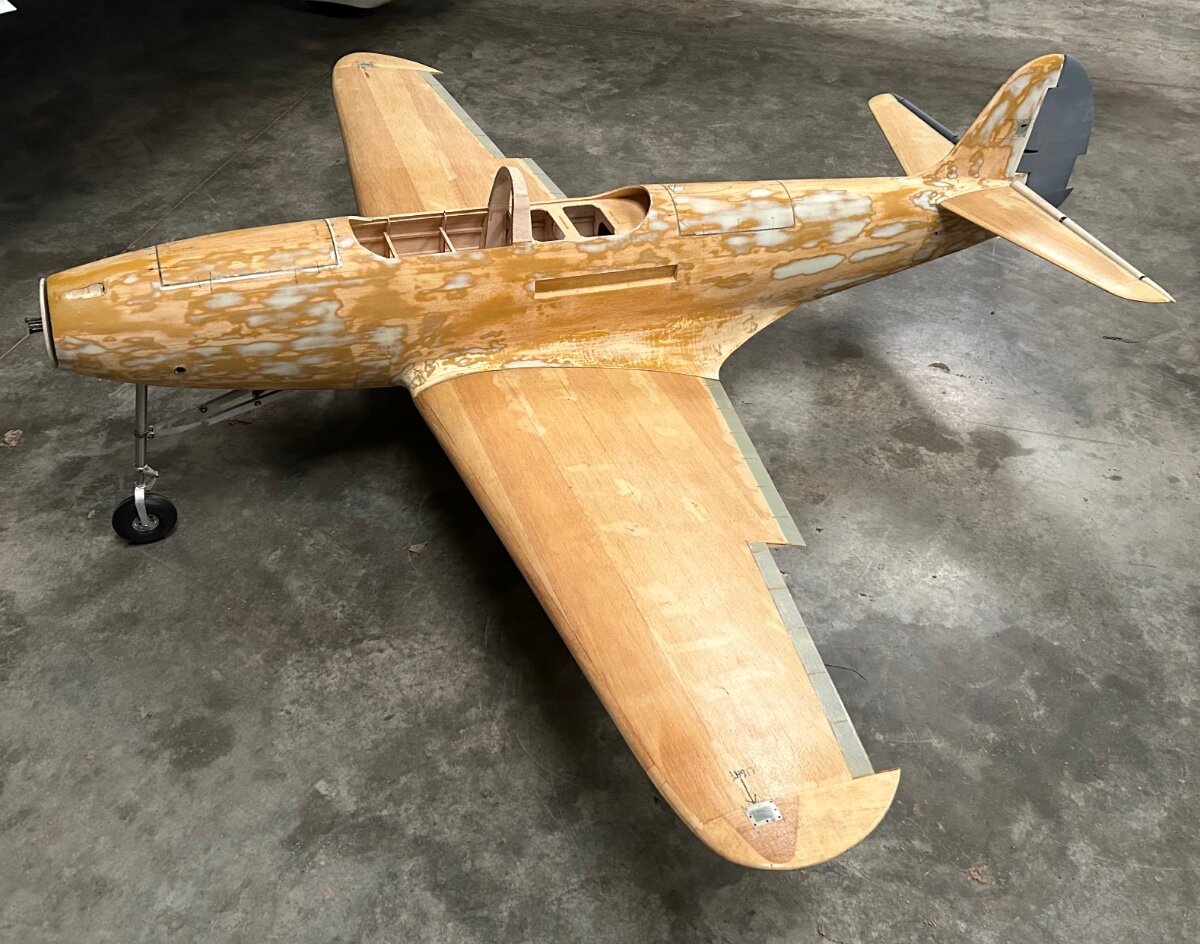
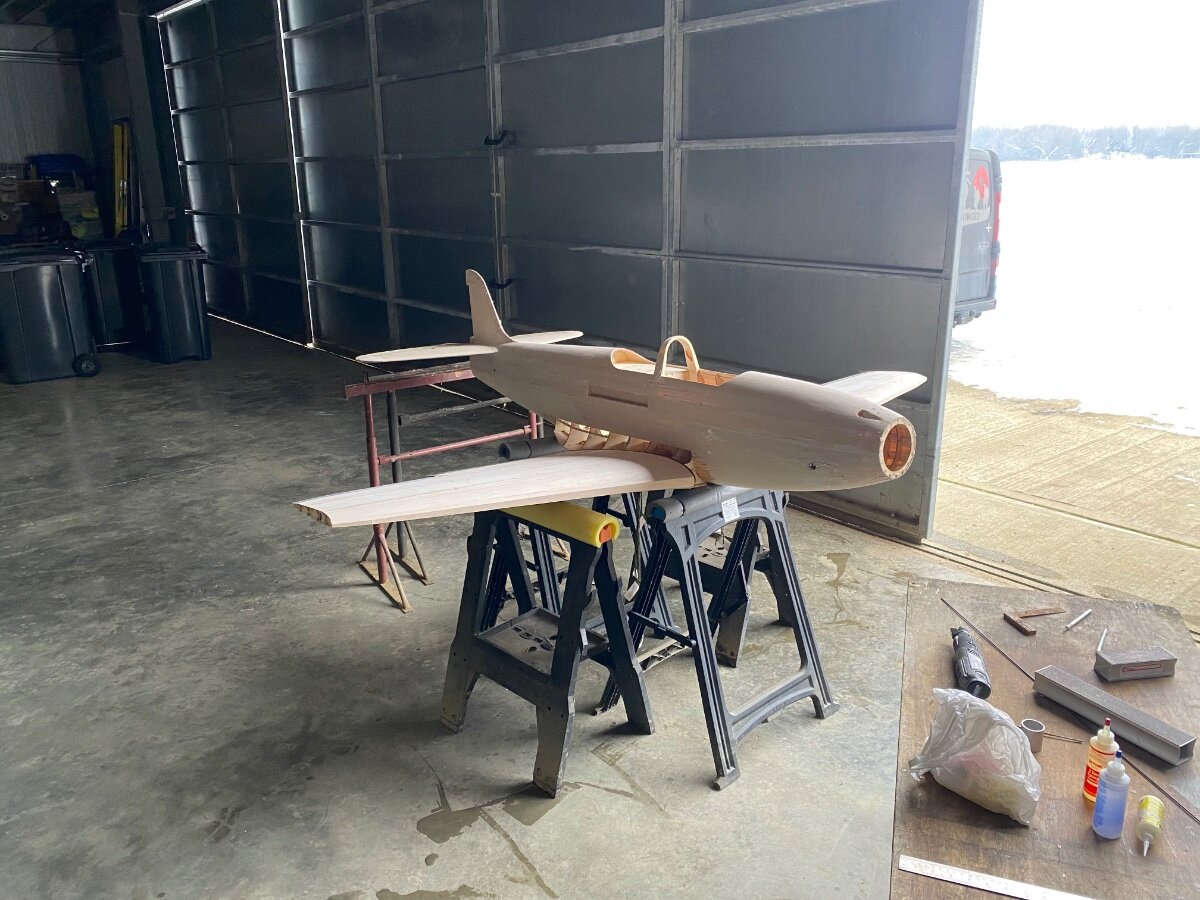
Have not done an update for a long time on here.
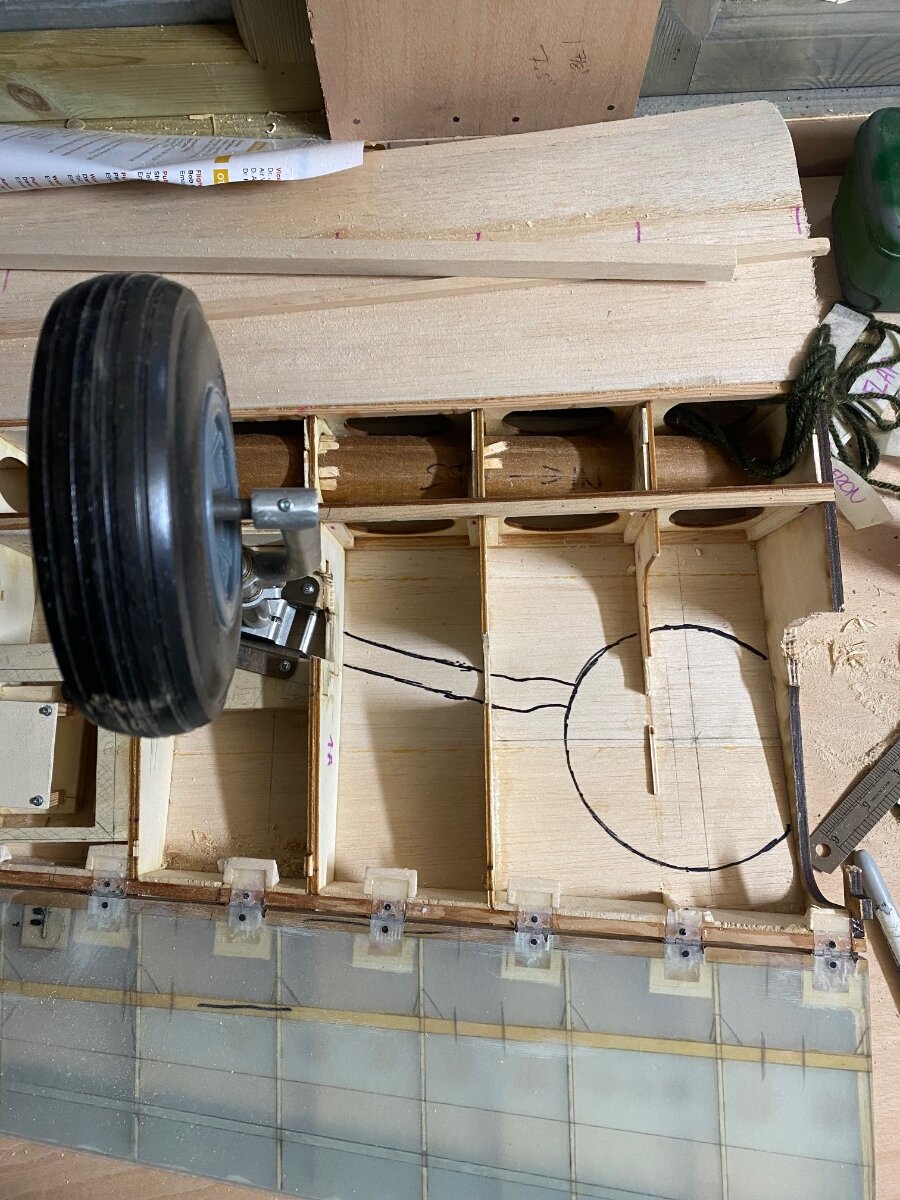
I got the plane on its wheels for the first time and all seems pretty good.
Still having some issues with retracts and getting them to sit in the wheel wells.
Hopefully I will try to add more content in the coming months.
Hope you all have a good Easter weekend and if you’d like to look at how I got to this point I have a build thread on Facebook as well
https://www.facebook.com/profile.php?id=100076796093601
Thanks

-
 7
7
-
-
1 hour ago, GaryWebb said:
I just pm'd you the details for our club bring & buy next week Craig
Thanks Gary 👍
-
1 minute ago, GaryWebb said:
Have a chat with Mark Tilbury at Modelworld/Century Uk he's Barton Point Chairman
Thanks again
-
13 minutes ago, GaryWebb said:
I'm in Tonbridge & with Medway Club ( 30 mile drive for me I admit ) which may be a bit too enclosed for you ... Barton Point ( Sheerness ) however wud suit your requirements
Thanks Gary, I’ll have a look 👍
-
Good morning all,
I’m looking for recommendations for a club that’s suitable for large scale planes in Kent (I’m based in Sevenoaks, closer to here is ideal).
Ive already been a member of Bickley so not interested in returning and currently a member of FOOHLS which is great but limited to two wind directions.
Any suggestions would be greatly appreciated.
Cheers.
-
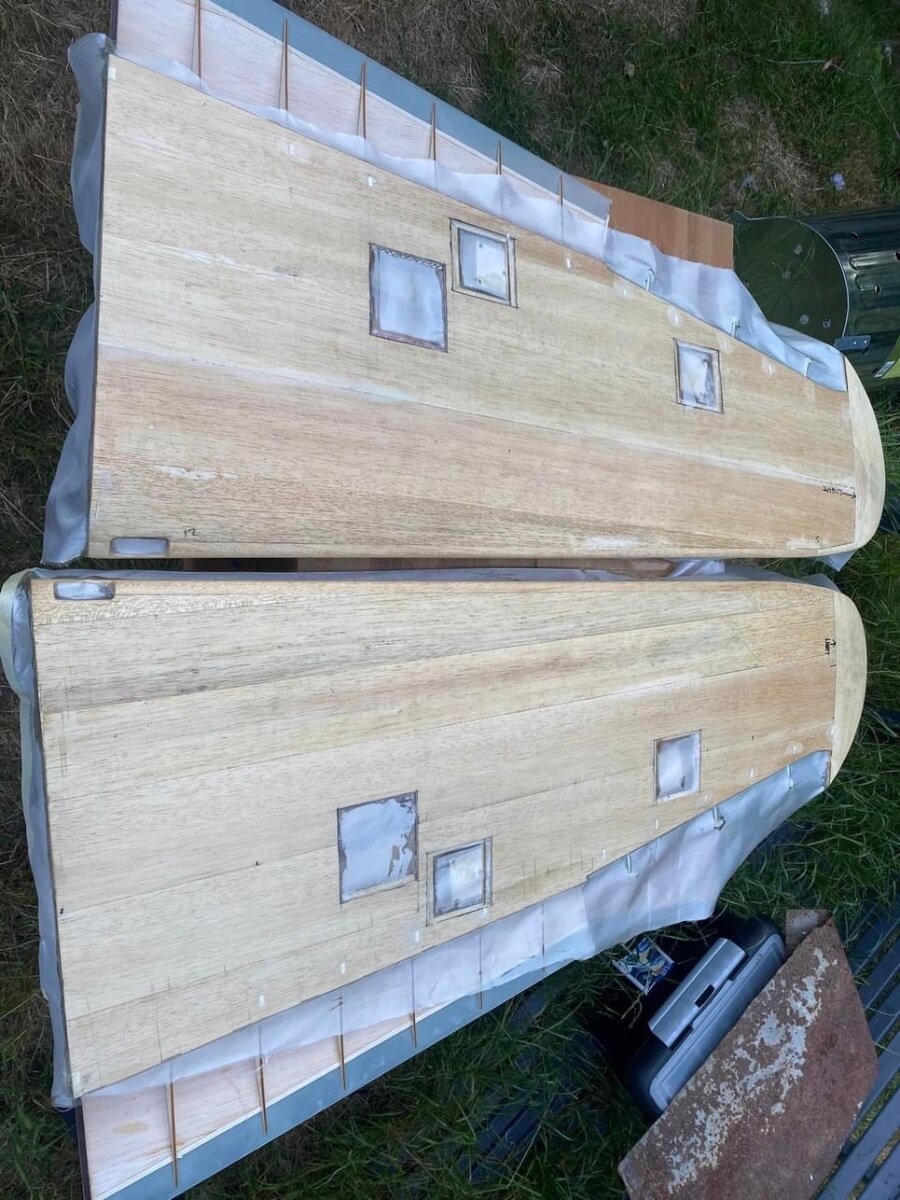
Haven't done an update on here for a while.
Both wings now glassed, offered up wings to check intake symmetry at the front and all looks ok.
More updates to come soon.
-
2
-
-
2 hours ago, trevor wood 2 said:
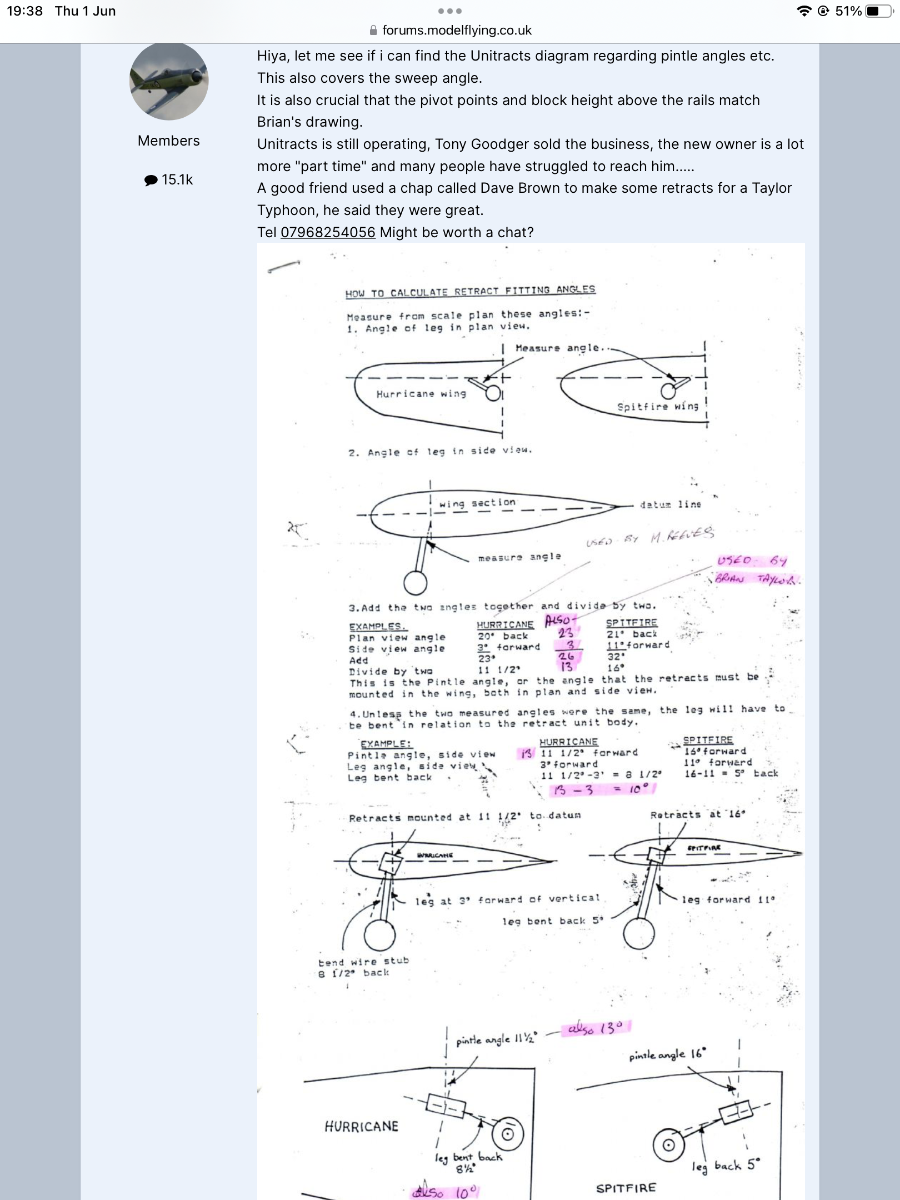
Looks like you might need to calculate a pintle angle that will allow the extended wheels to point fore and aft, and the retracted wheels to lie flush with the lower surface of the wing. Danny Fenton posted some very useful info in “Brian Taylor Hurricane Project” build topic.

Thanks Trevor, I’ll be going with the set up I have now but when Sierra make a set I will adapt to suit them.
Agree with everything above 👍
cheers
-
4 hours ago, Nick Somerville said:
That’s a shame not being able to get the retracts to twist a little, but understand that it would be an expensive thing to engineer bespoke for your model.
I just laid some carbon cloth down back to the spar and to the adjacent ribs around the mounts. Just used Gorilla PVA as it works well with Carbon cloth.
BTW compare the length of the mounts on my FW 190. I suppose with such long stalky legs it made sense to spread the load.
Thanks Nick, my original intention was to spread 3 bays (as I’ve done in my bolt) as you have but I went against in the end to reduce weight and make it simpler.
As you said you have long legs whilst mine are relatively short and it’s a tricycle gear plane.
I hope it pays off 😂
At present there rock solid but are behind the main spar which is different to what I’m used to. Only time will tell.
Thanks for all the info and I’ll have a look into the carbon.
-
1 hour ago, Nick Somerville said:
That looks as though getting the wheels to sit in the bays has been very frustrating!
The retract mounts are very small for such a large model. I would consider some carbon cloth in around the area to mitigate the top skin splitting on a hard landing. I have done this retrospectively on my Sea Fury and the weight penalty is minimal.
As you say, lovely curves.
Thanks Nick, I have some Kevlar pulp I normally use to beef things up.
I haven’t put as much info on this thread but the layup is;
1/4” birch ply laminated to 1/4” lite ply.
Then half inch balsa block as a shoe.
tye leading edge has a 1/4” birch ply sheet web as well.
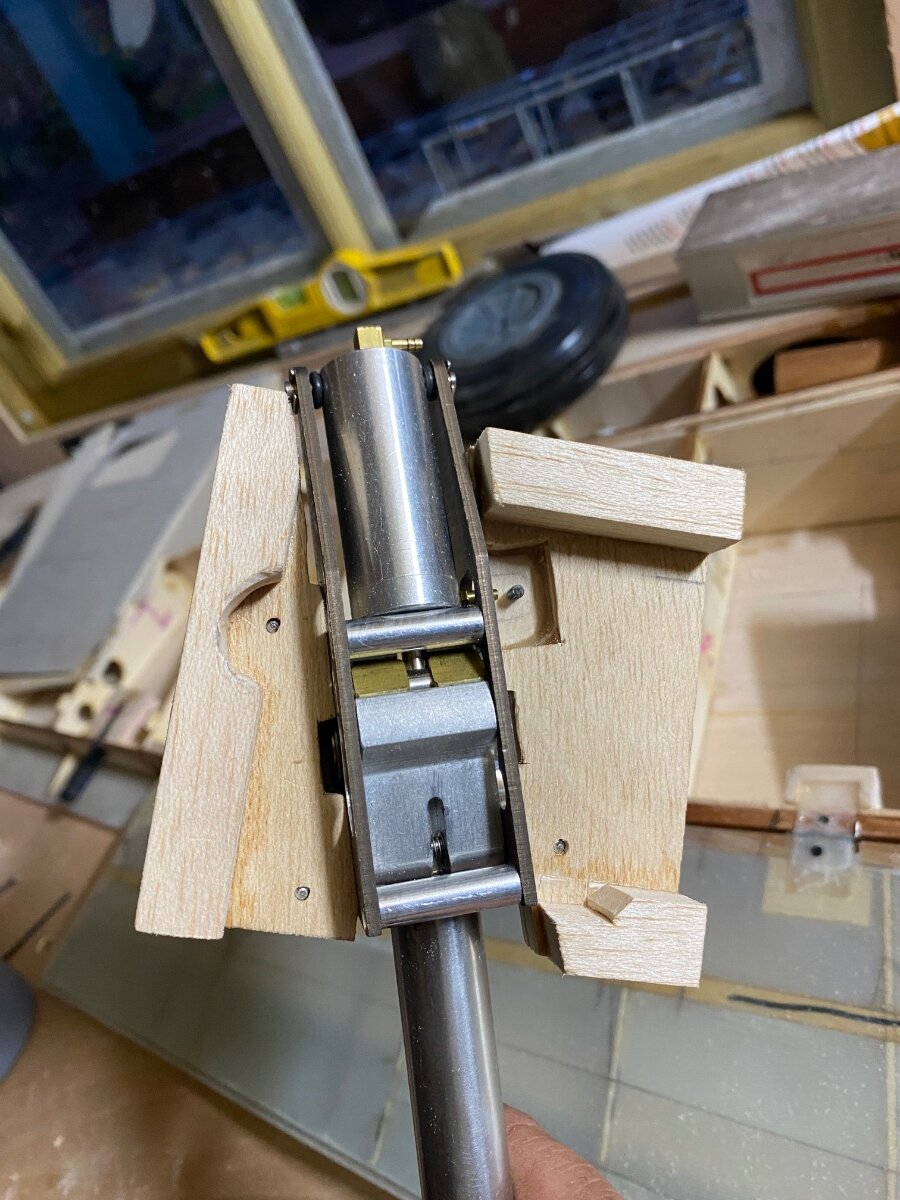
Trouble is with getting these to fit is that no one’s made a commercial set yet so I’ve had to get an engineer to help make the retracts.
They should rotate to fit the wheel well but it’s a mod I can’t afford on time so I reduced the wheel thickness.
Where do you use the carbon? On the doublers?
-
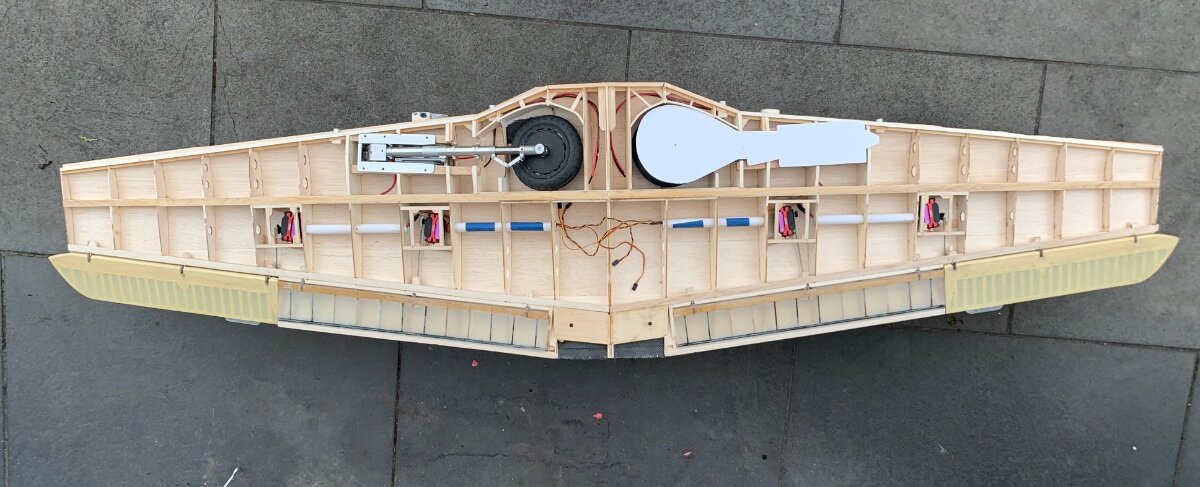
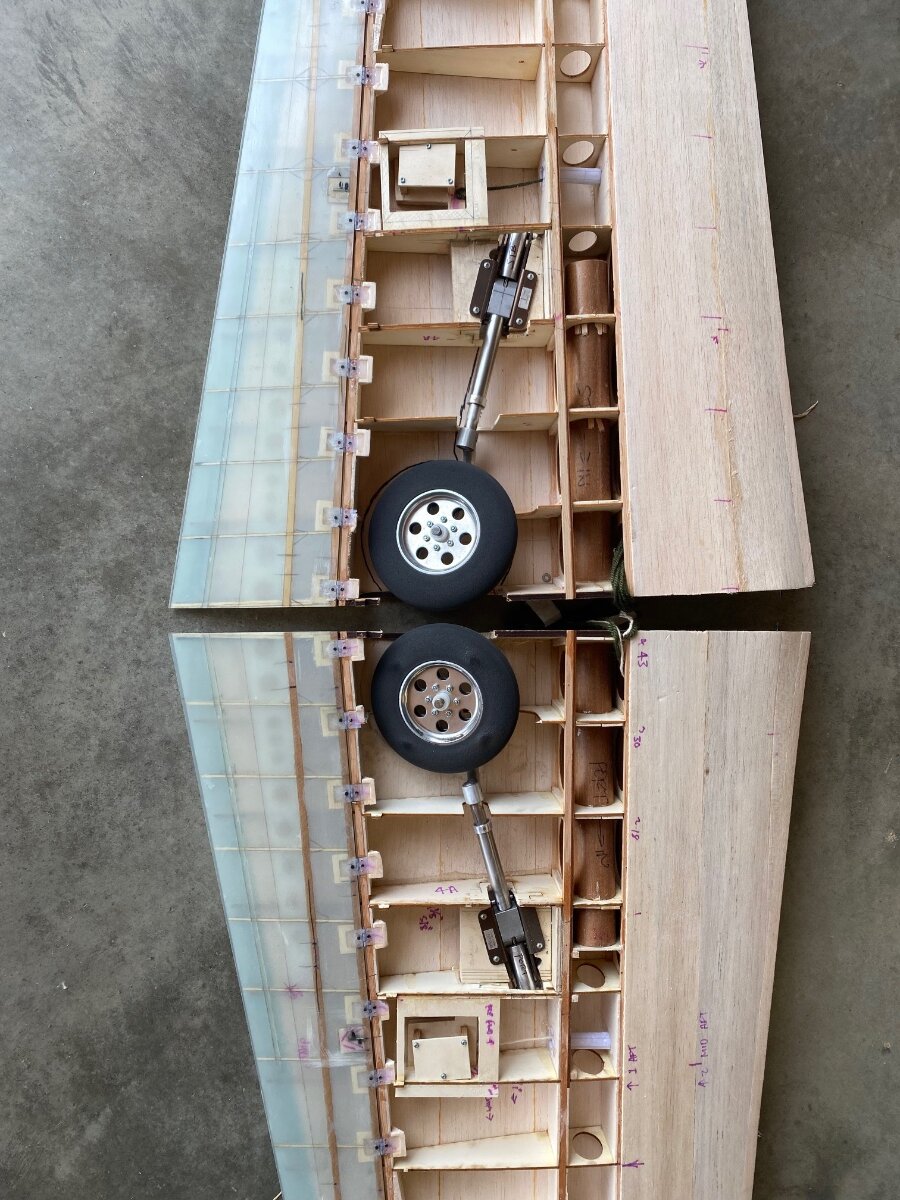
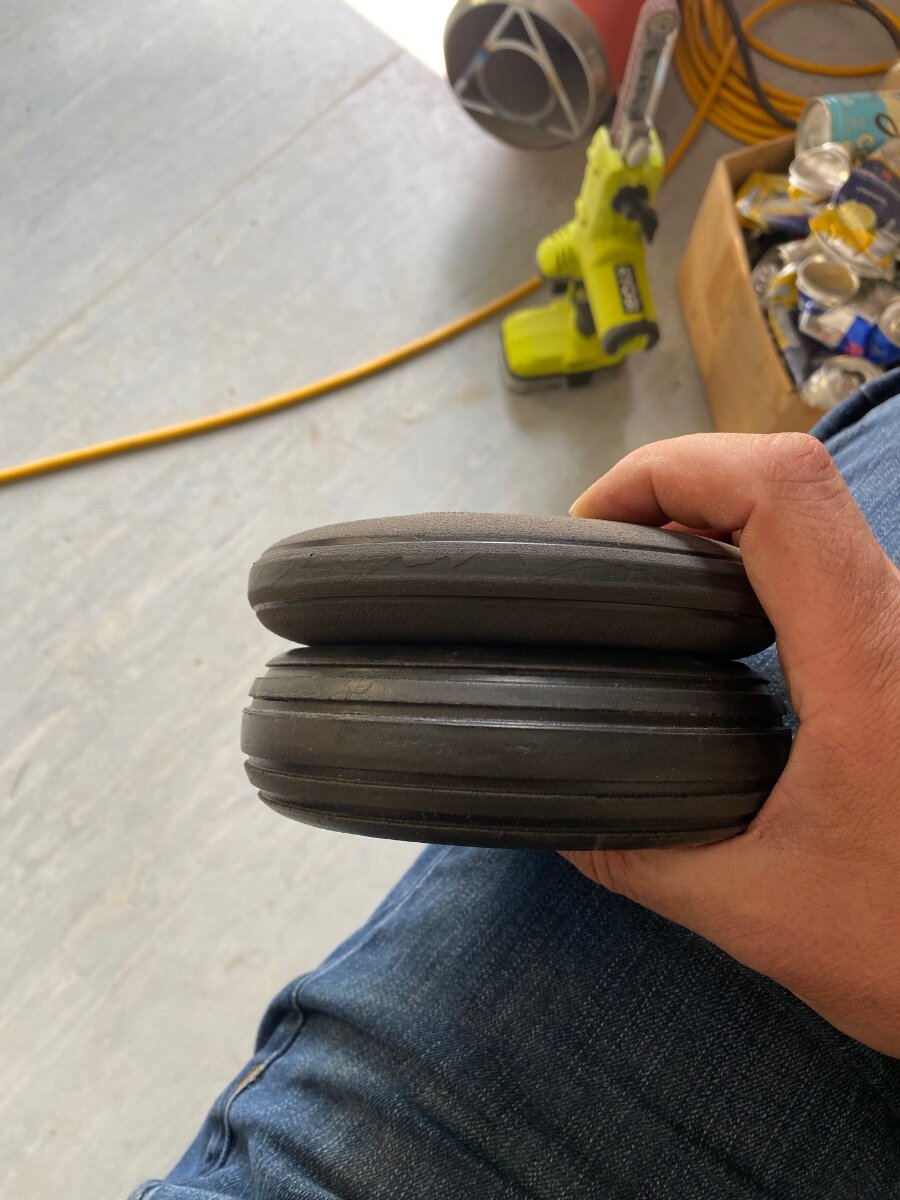
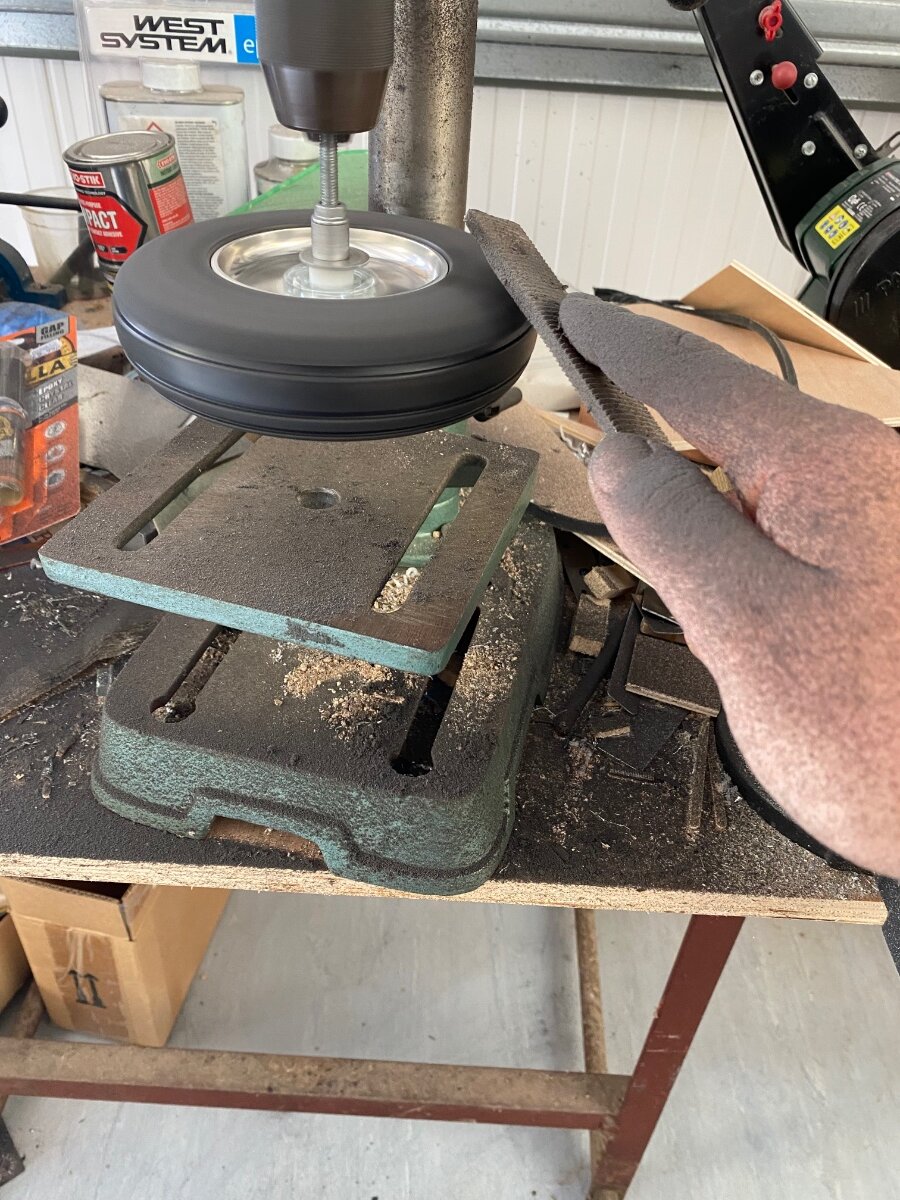
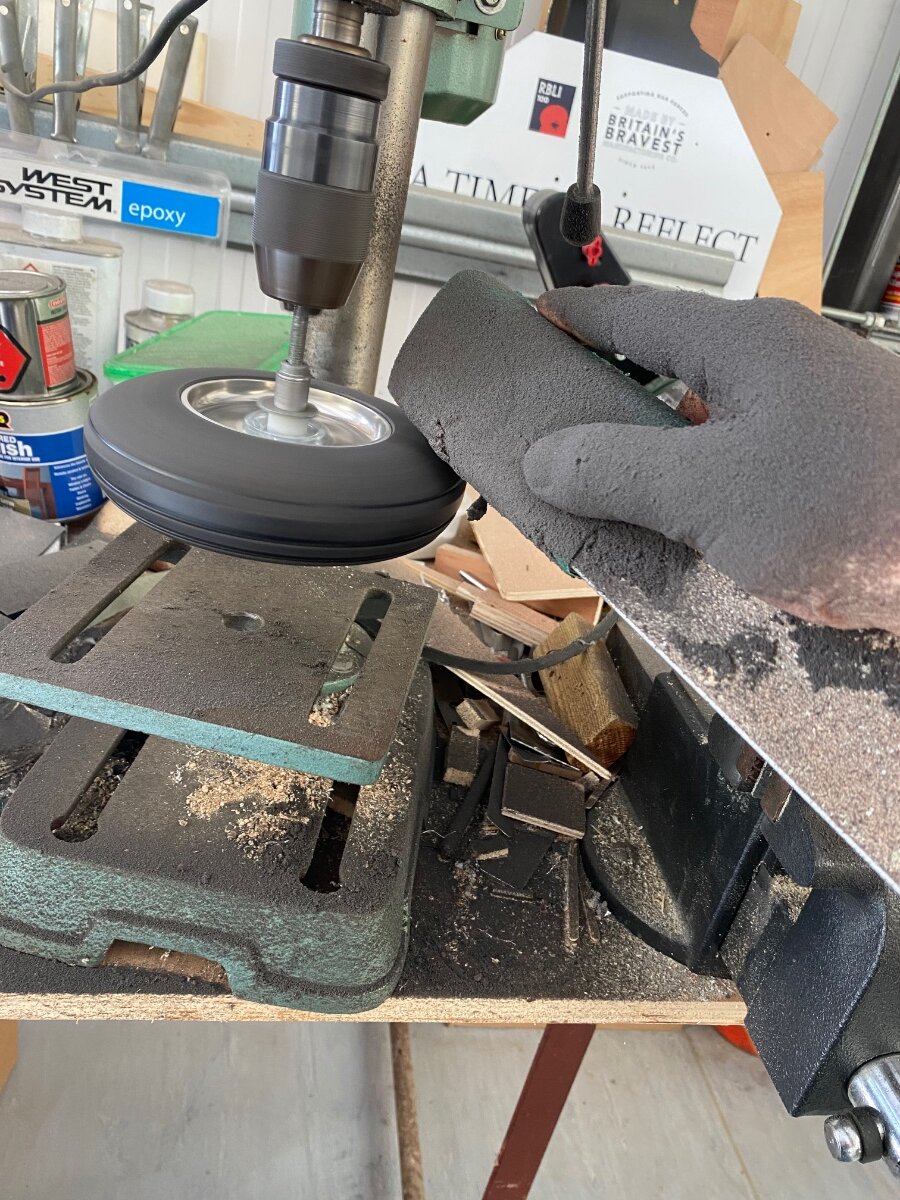
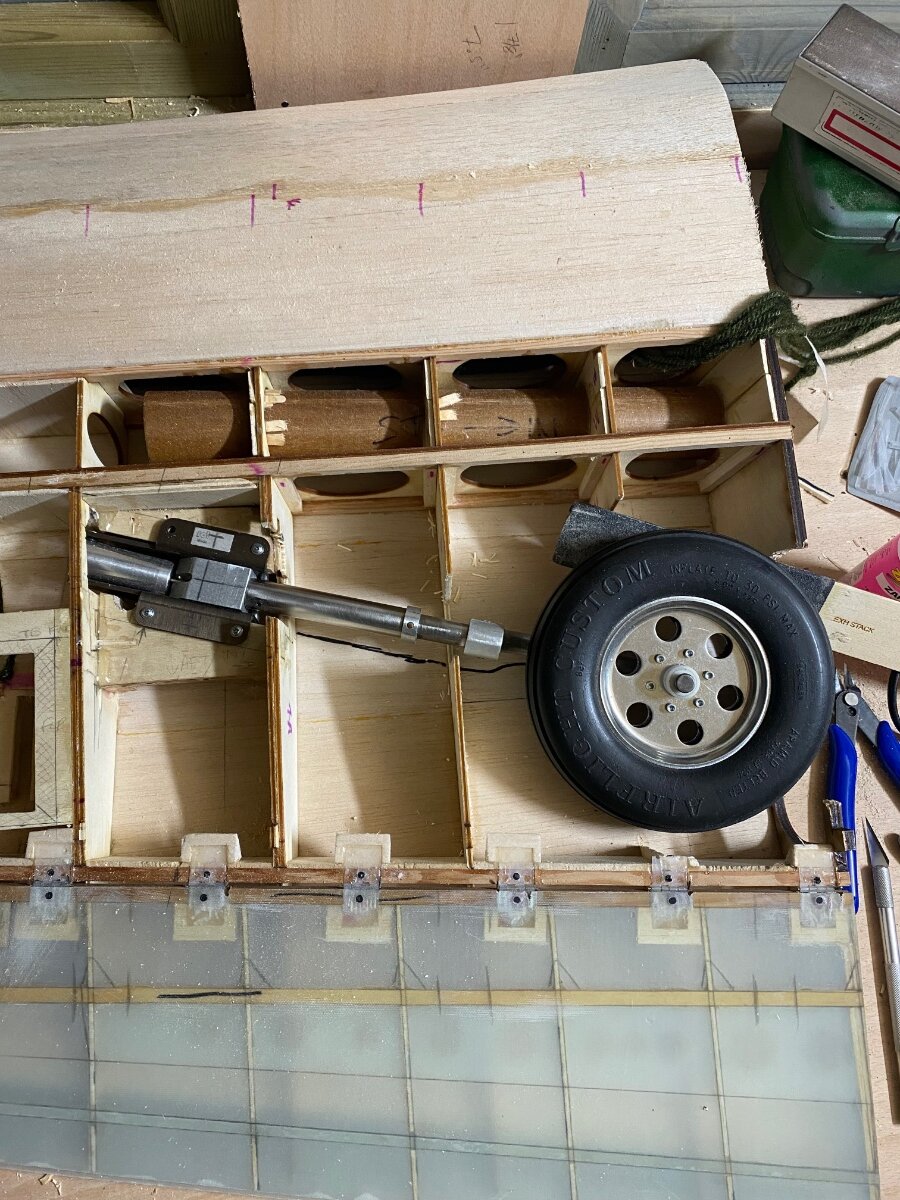
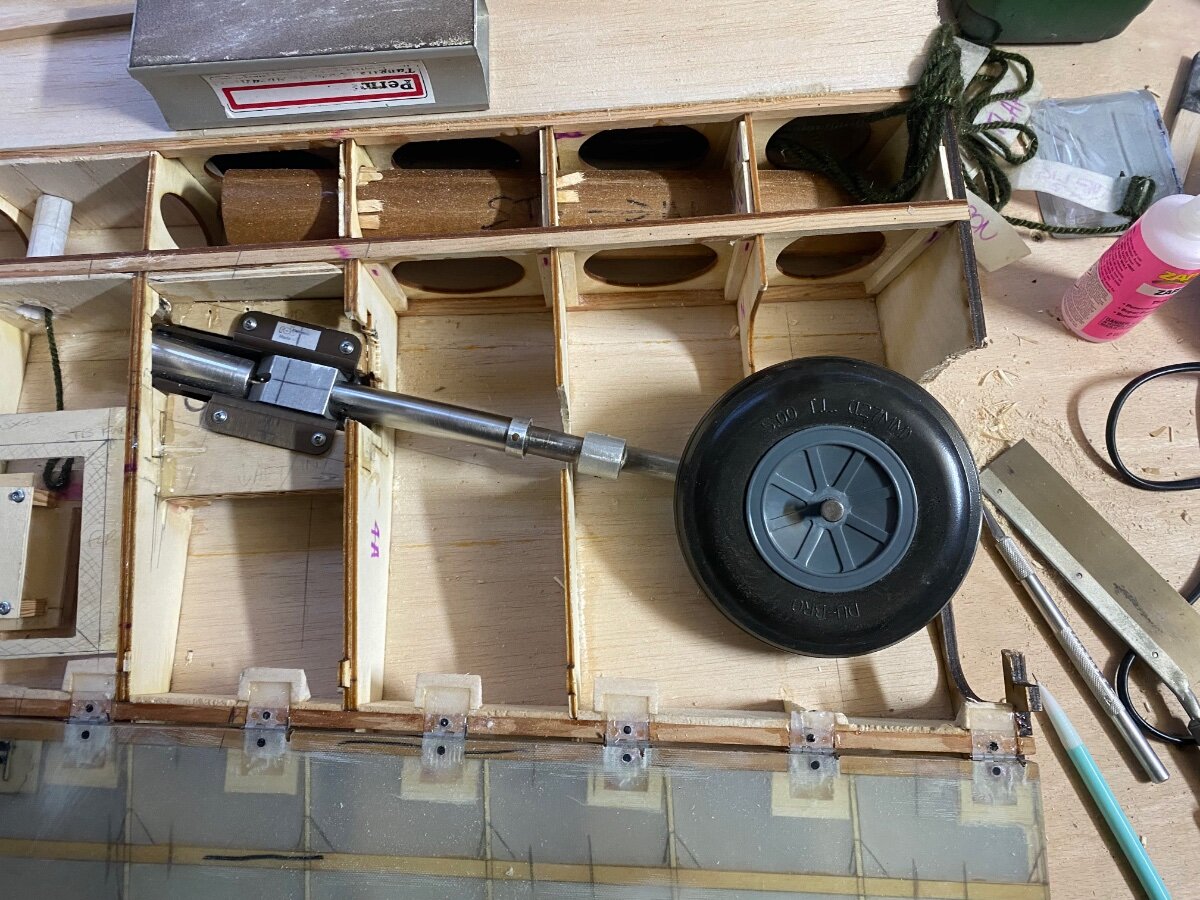
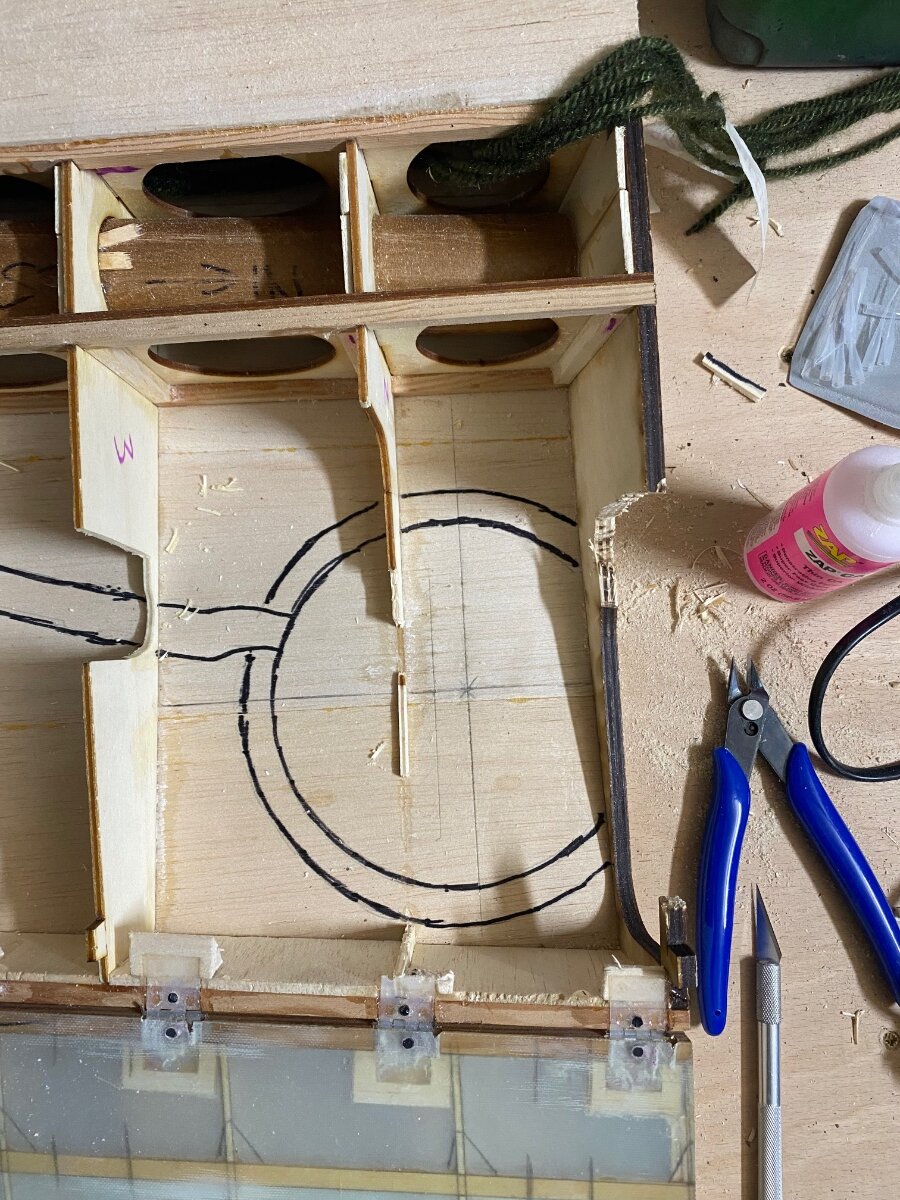
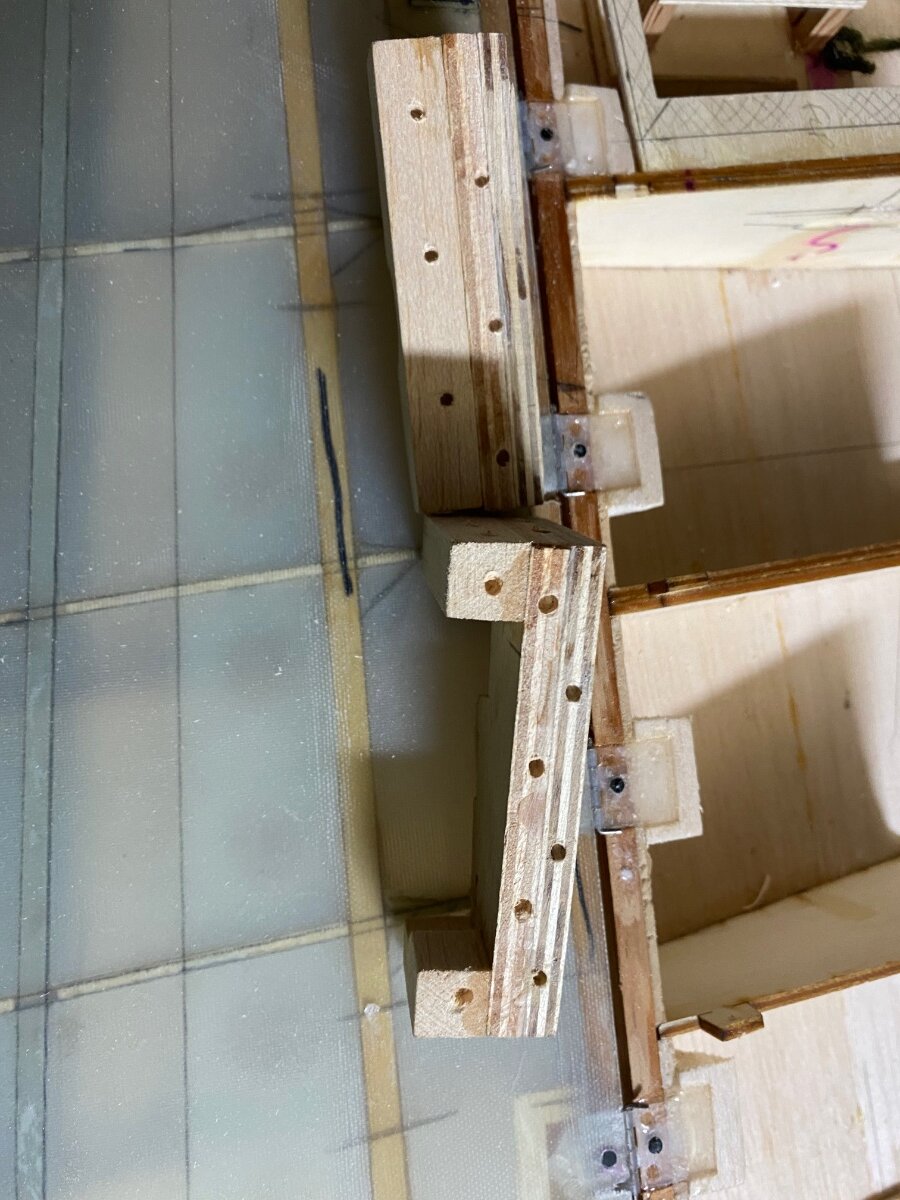
Retracts installed and I had to sand the wheels down.
I can’t find the spec I need for the wheels so I’ll make these good after sanding.
-
3
-
-
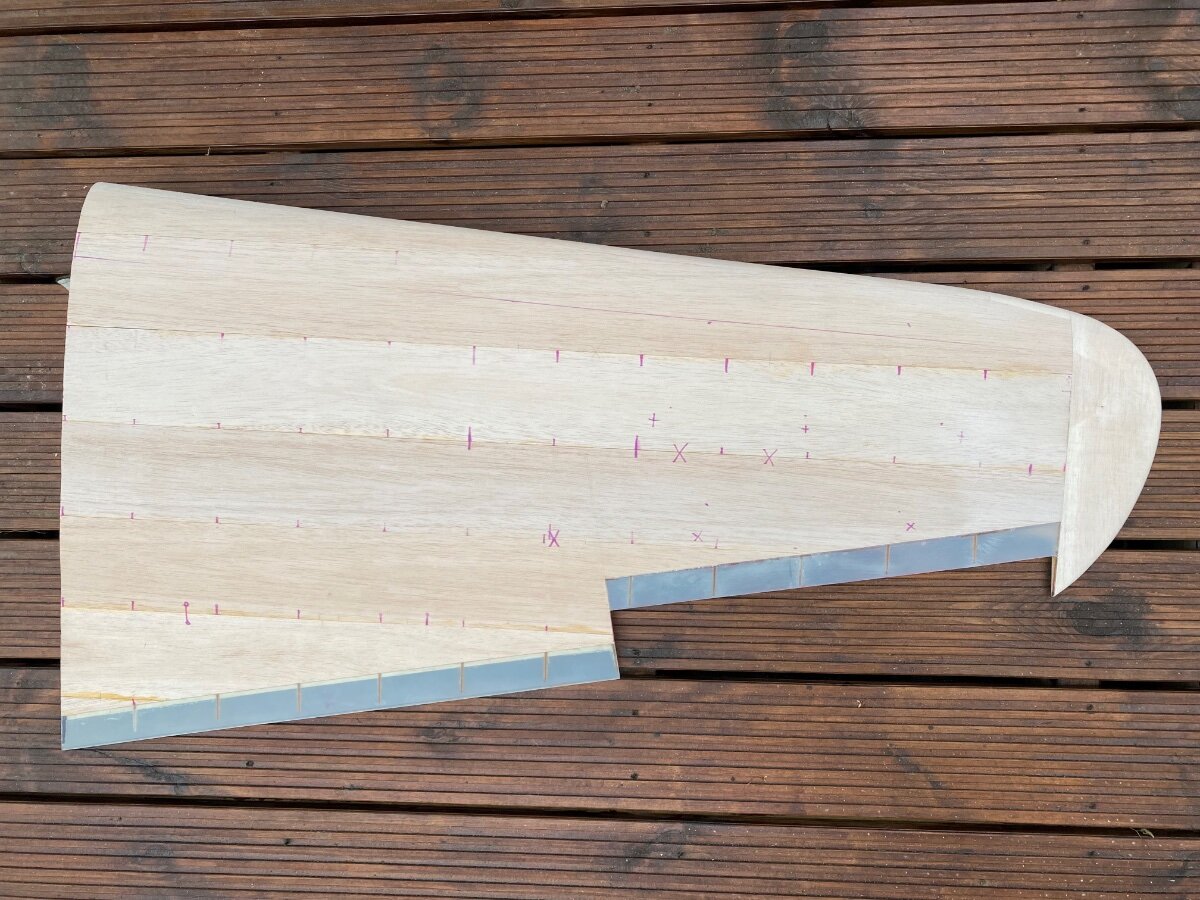
Another small update but good progress this week.
Both port and starboard wings have the tips on now, I spent a good few hours sanding the tip and leading edge.Gotta say I love the curves on this.
Rough sand today and once the Port wing is done I’ll fine down getting ready for glassing.
Although glassing may have to wait until the intakes are done and both wings offered up to the fuselage.
For that to happen I need to finish the other fairing!Anyhow, progressing well for now.
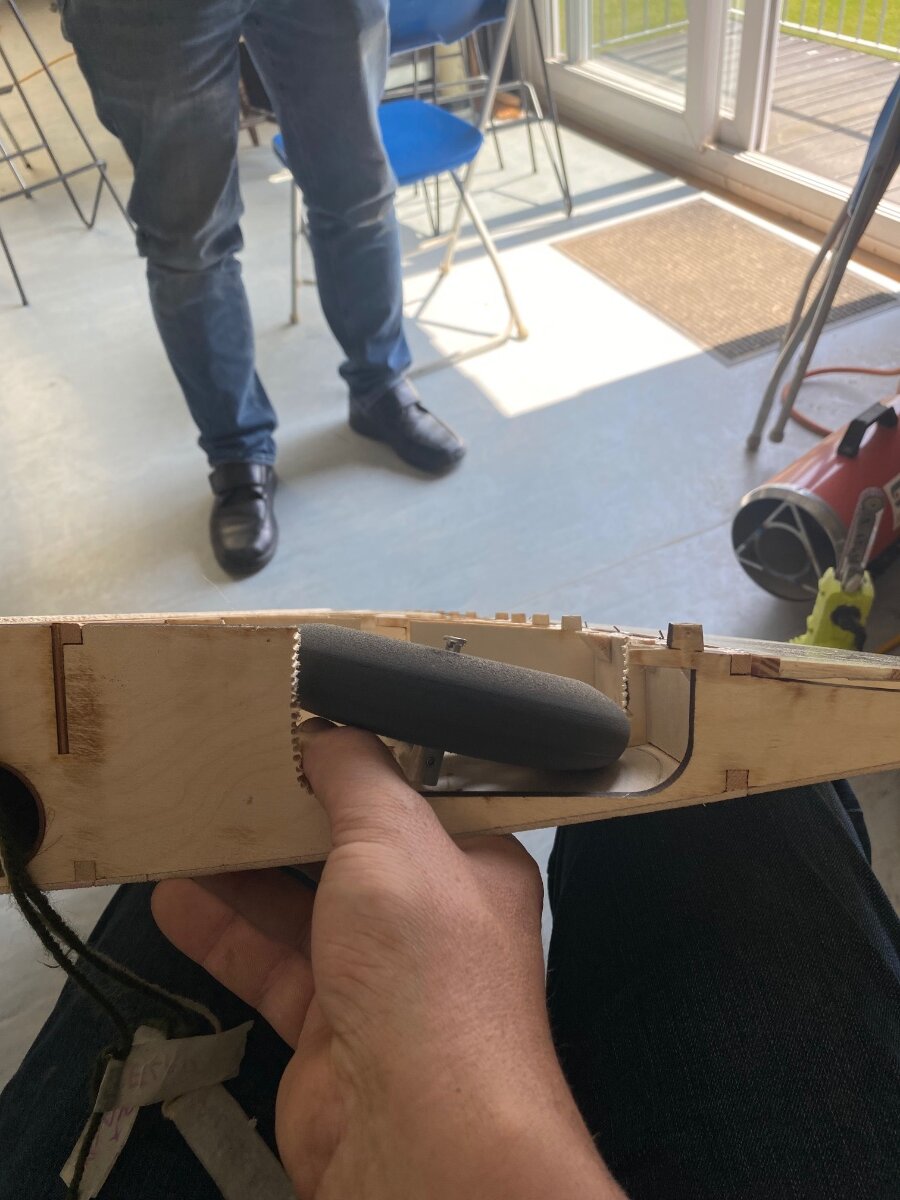
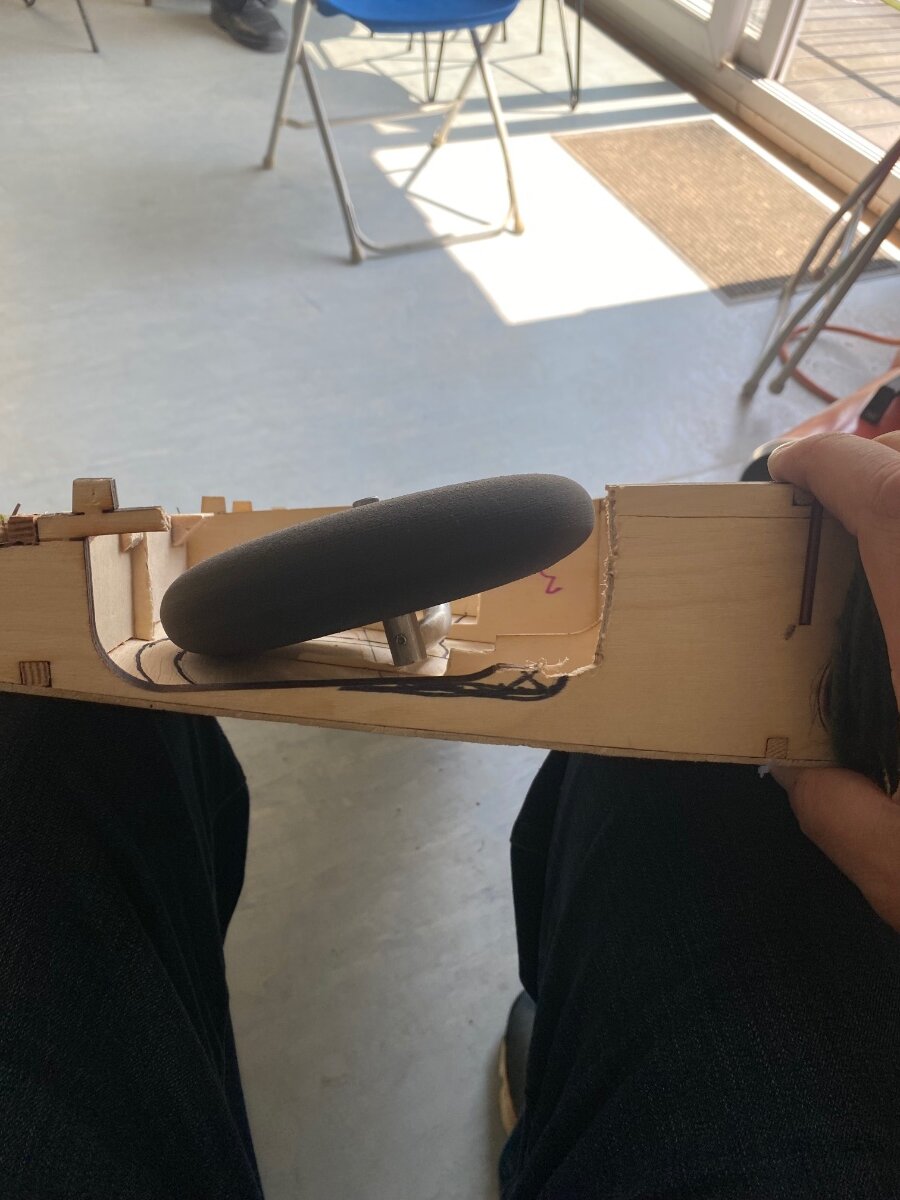
Oh, both retracts are installed as well and I sanded the wheels to fit
-
1
-
-
3 minutes ago, Ron Gray said:
That’s a fair bit of chopping about Craig!
Yeah I know, it’s been much more difficult than usual 😂
Especially when there are no standard parts for the build as well.
No retracts on the market, no spinner, no canopy etc…. All these other little bits will add to the time of the build.
-
Haven’t been on here for a long while due to a house move, workshop build, garden renovation etc..
Anyway, I have one retract plate glued in now and it’s been a pig.
the only way a scale wheel can fit in here is if you have slight twist and turn retracts.
I’ve had to adapt for this and will reduce wheel thickness and diameter.
Retract plate was reduced in size from my original choice to reduce weight.
more updates to come.
cheers
-
3
-
-
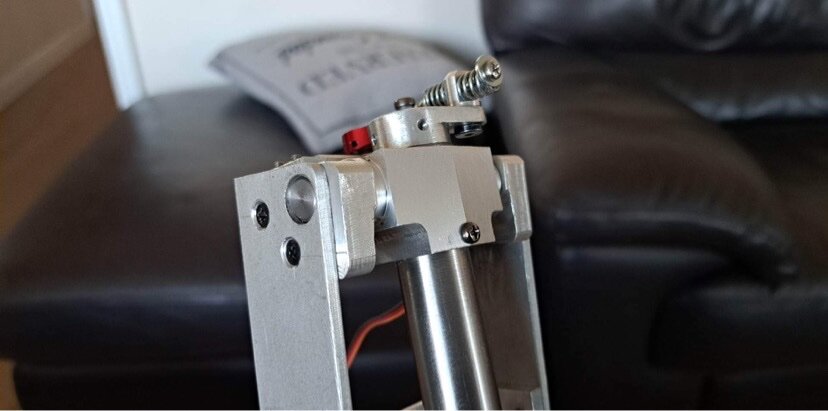
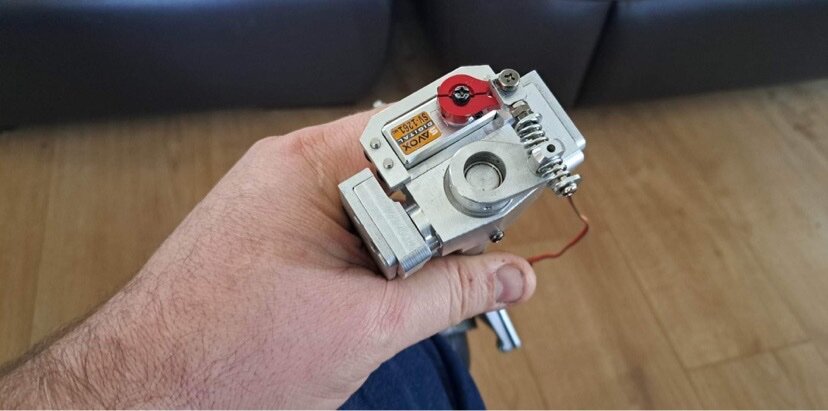
A quick couple of teaser photos of the retracts which are under development.
The gentleman I have working on these is an exceptionally skilled engineer and I’m looking forward to seeing the end result.Keep up the good work Gavin Lane, cheers.
-
3
-
-
Other than retract progress this will be the last update for a while as I’m in the middle of a move.
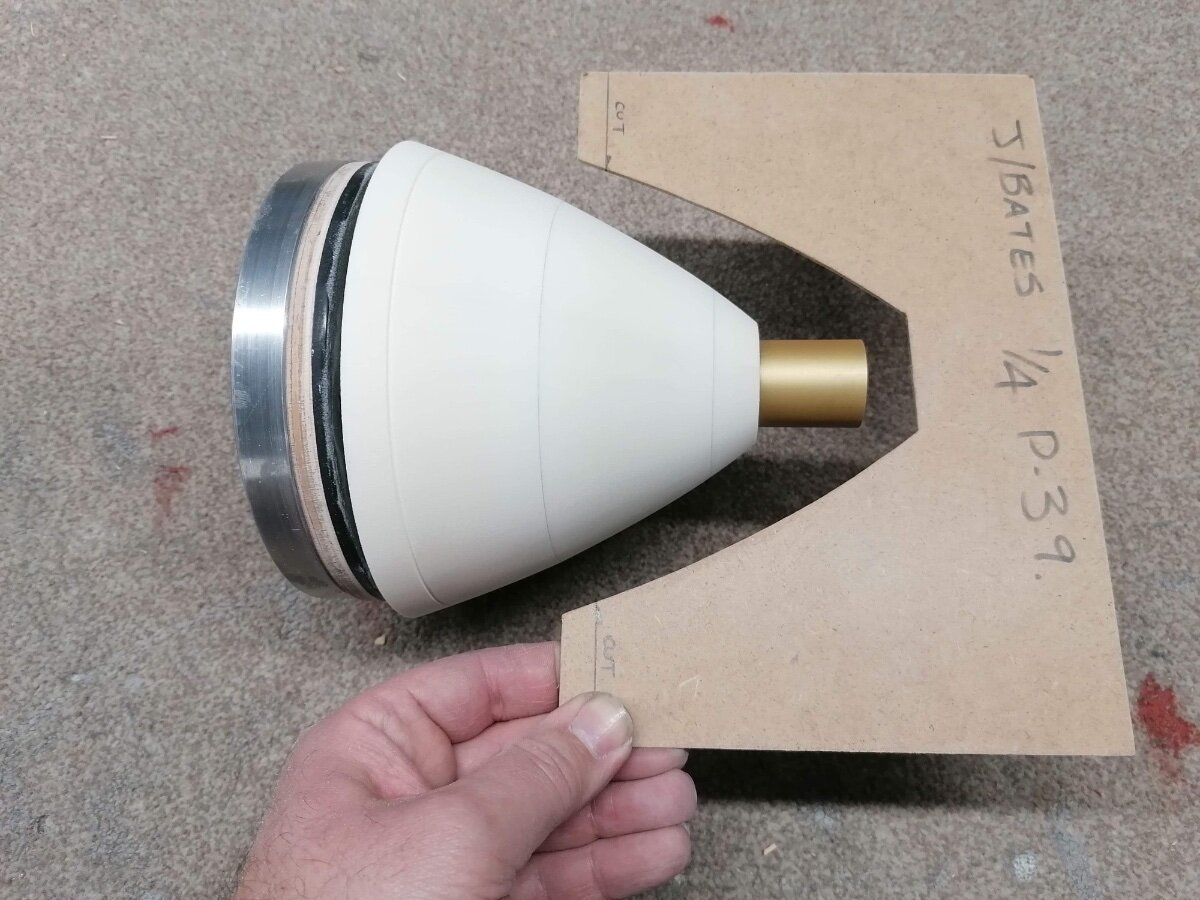
So, received my spinner from Fighteraces and I’ve gotta say the quality is fantastic. Most alloy spinners get dented really easily, this is not only a great finish it’s very strong. I’m future I’ll have to make cut outs for the prop and drill the backplate to suit (Fighteraces normally drill the back plate for you but my prop washer got lost in the post).
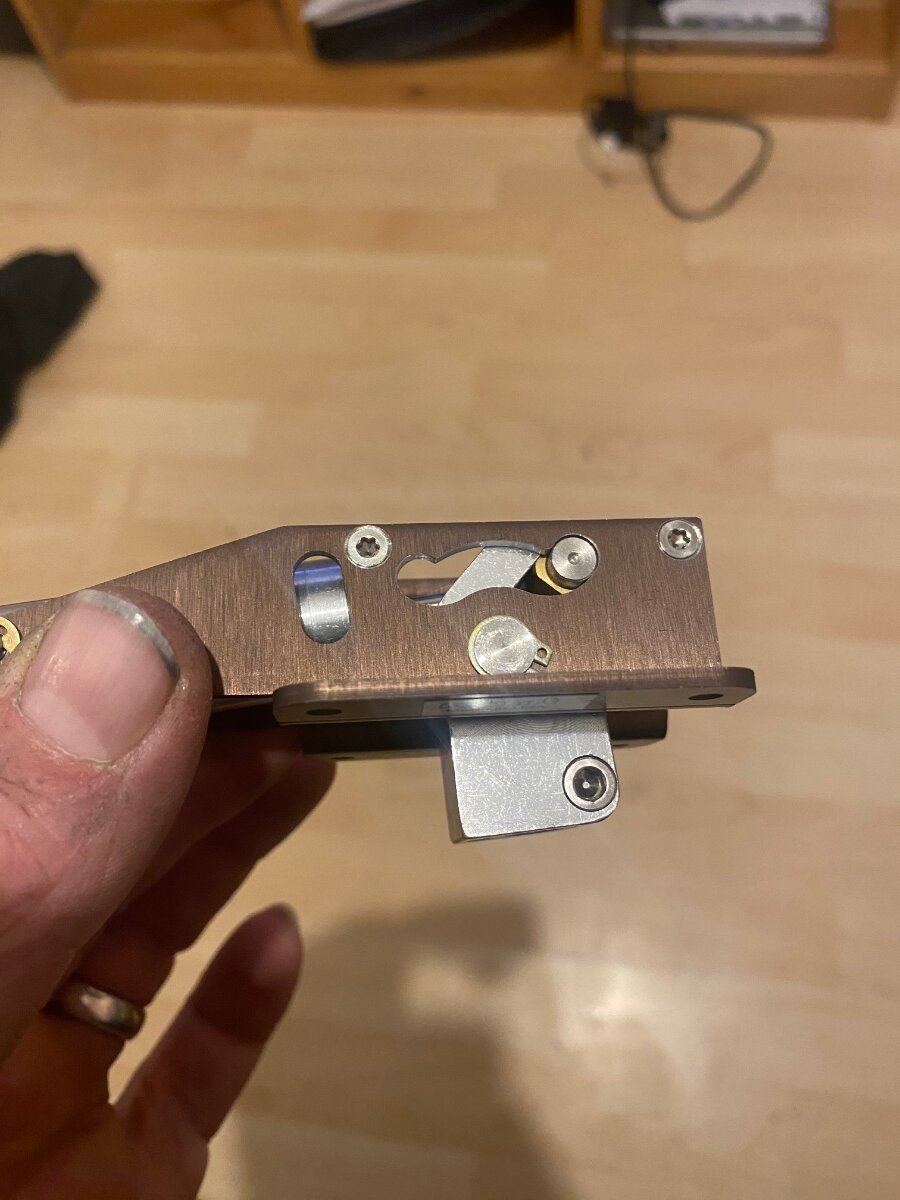
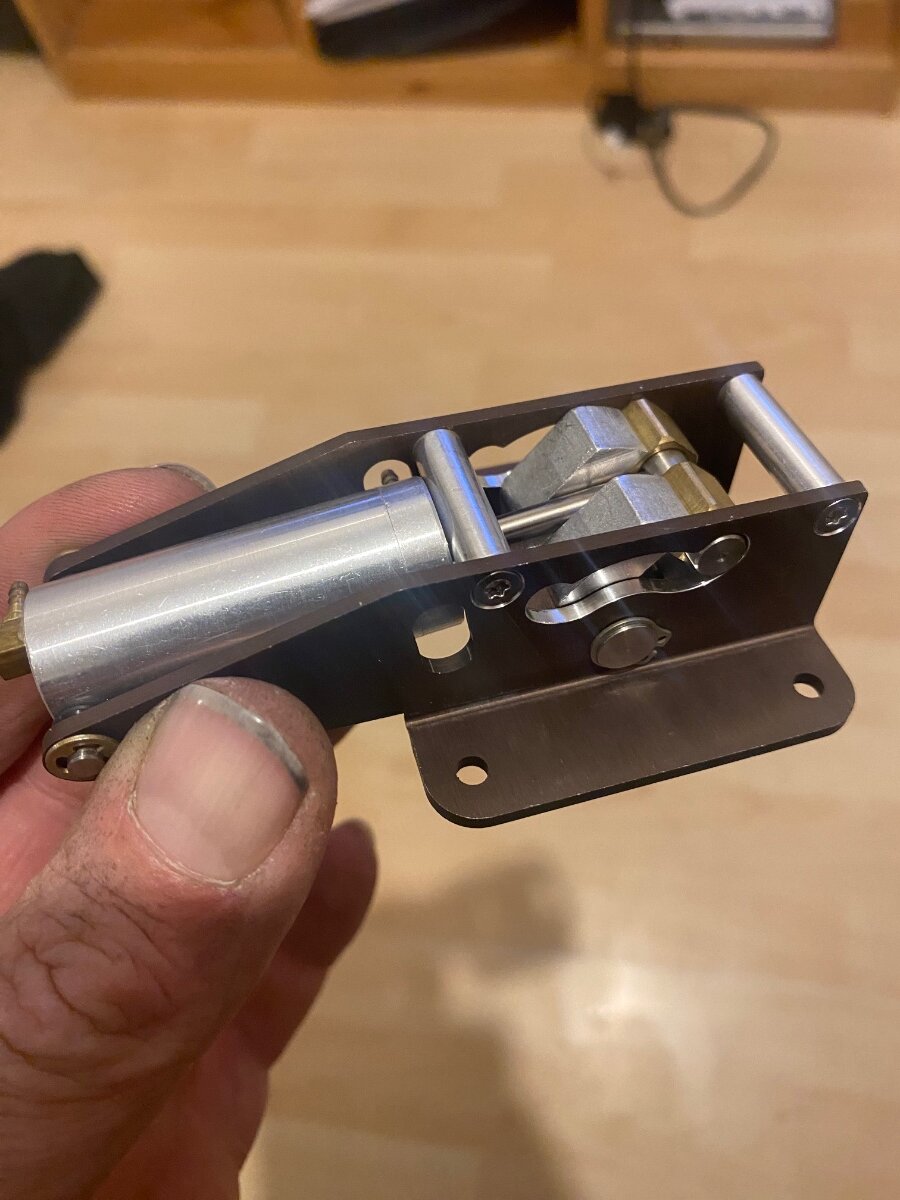
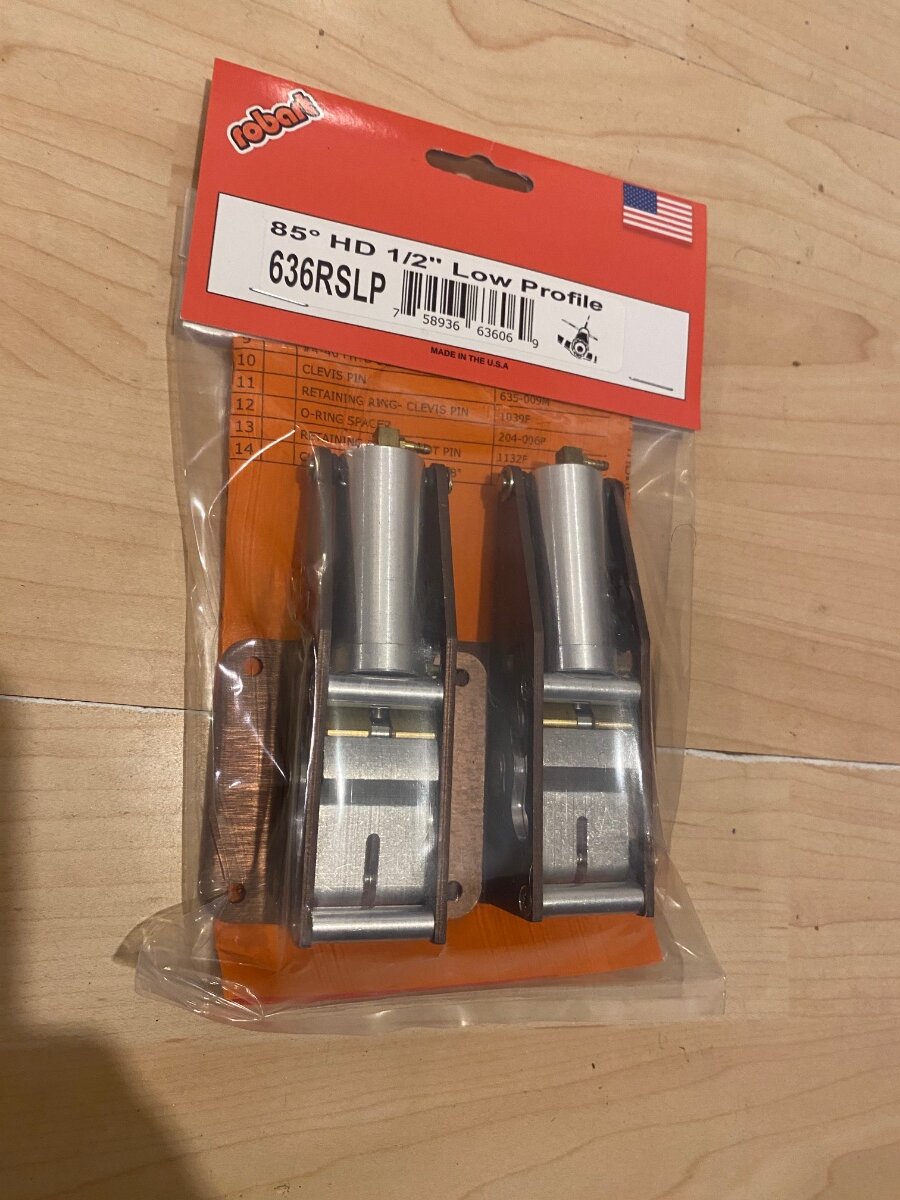
Also received my retract units from Robart. These are again great quality but it’s an unknown right now as to if there up to the job weight wise.
They are built for 1/2” legs which is quite thin for the weight of plane I will have.However, they are low profile which is what the model calls for.
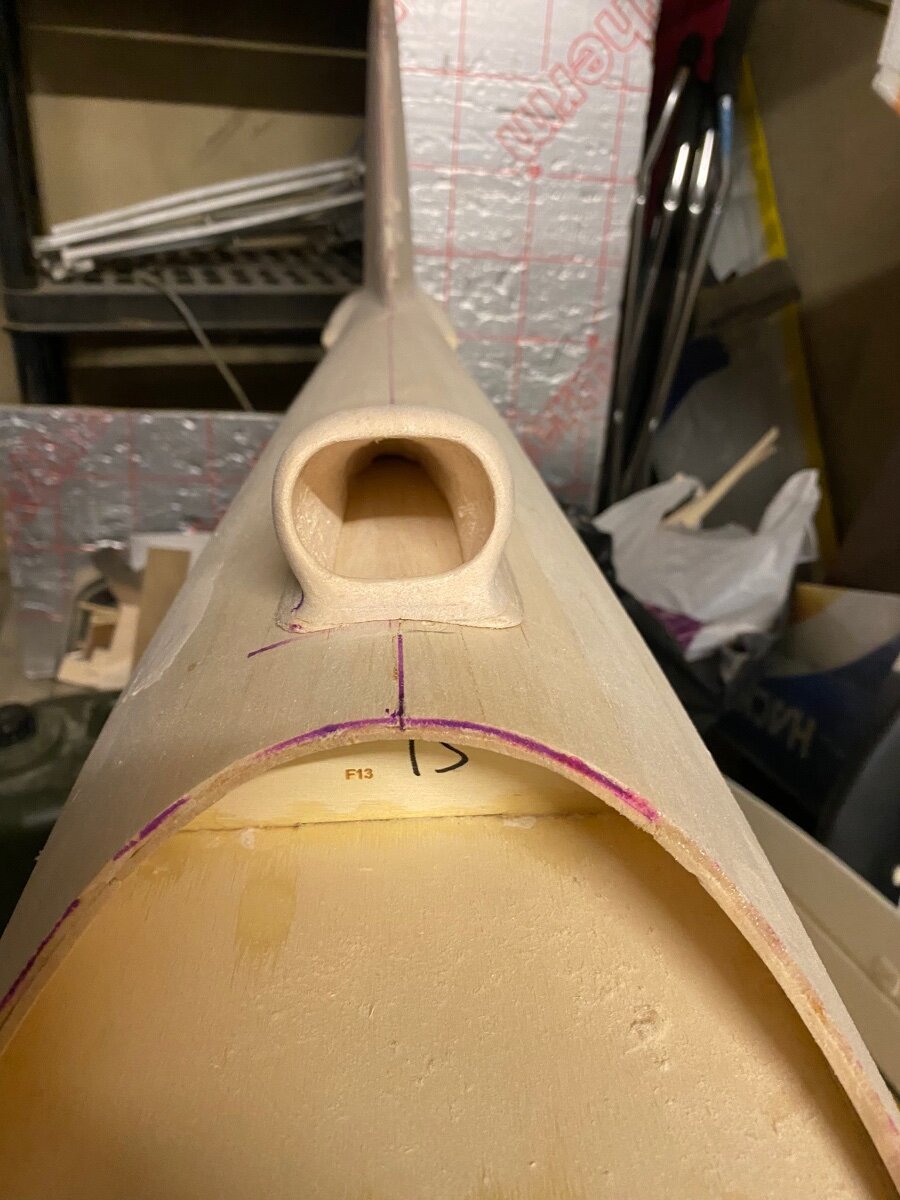
Lastly, I have near finished the air intake. This will be stored for a later date when the fuselage hatches are complete.
Quite happy now because as soon as I sort the retract legs out I’m good to start finishing the construction of this build - finally!!
Cheers all.
-
3
-
-
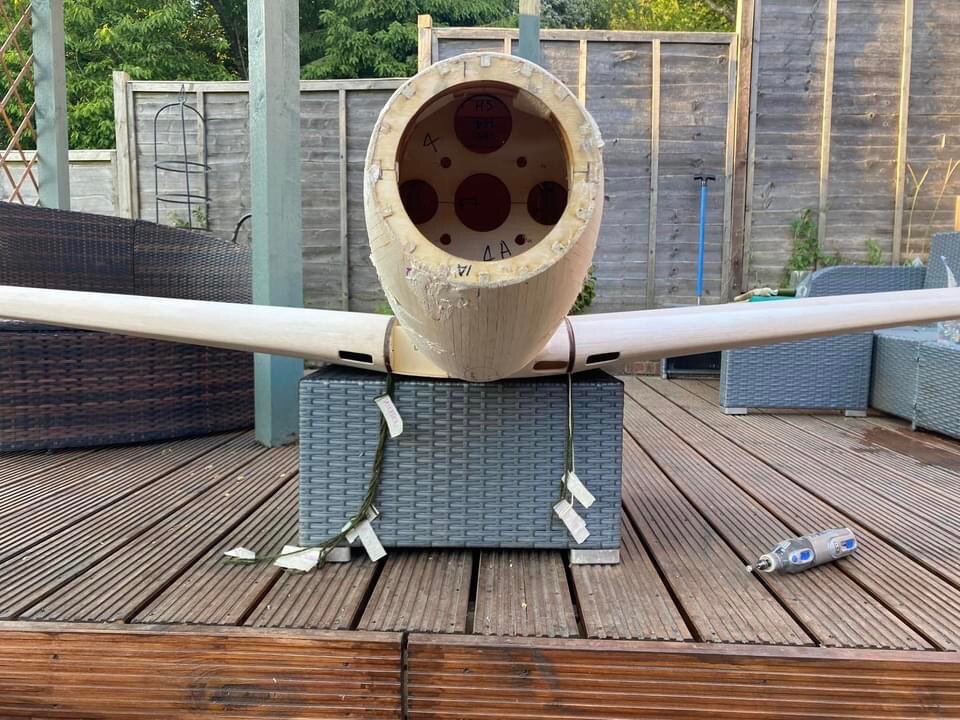
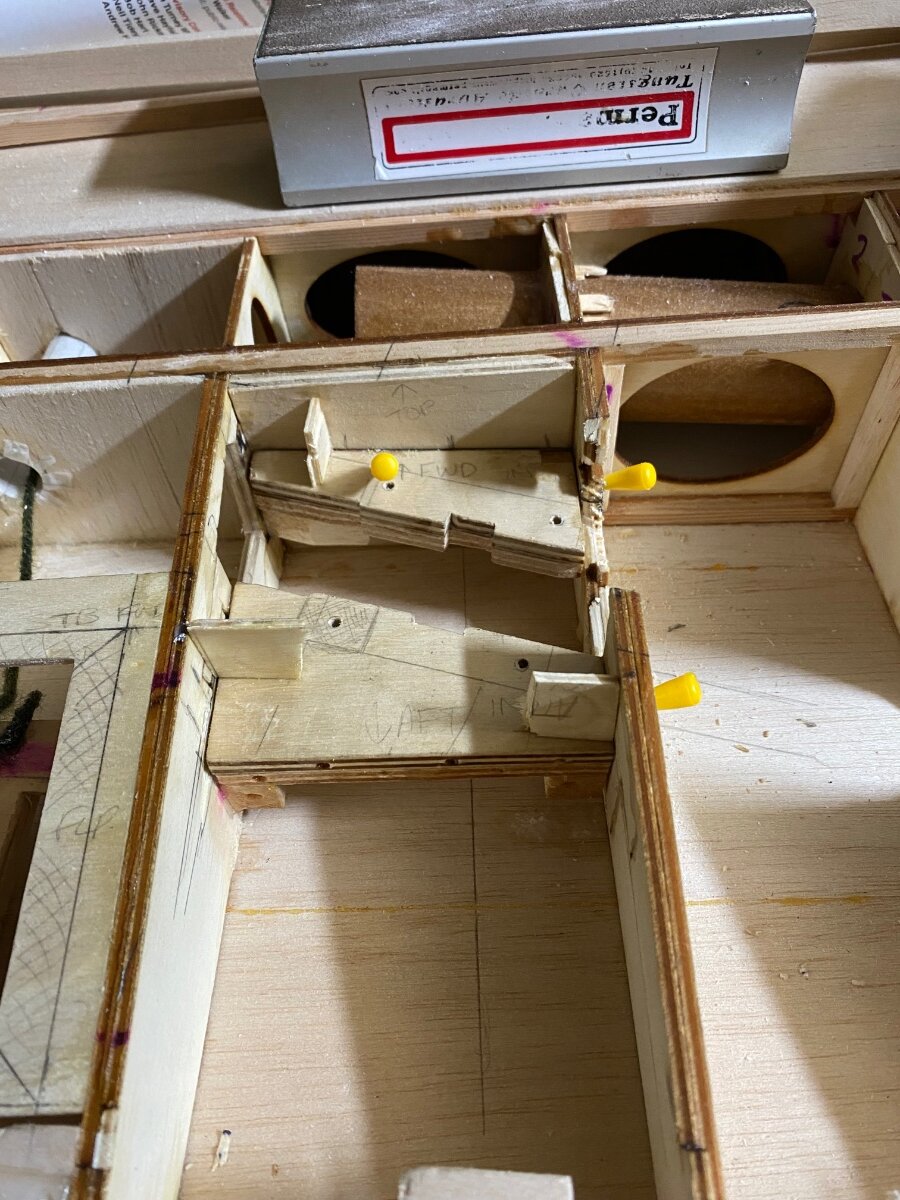
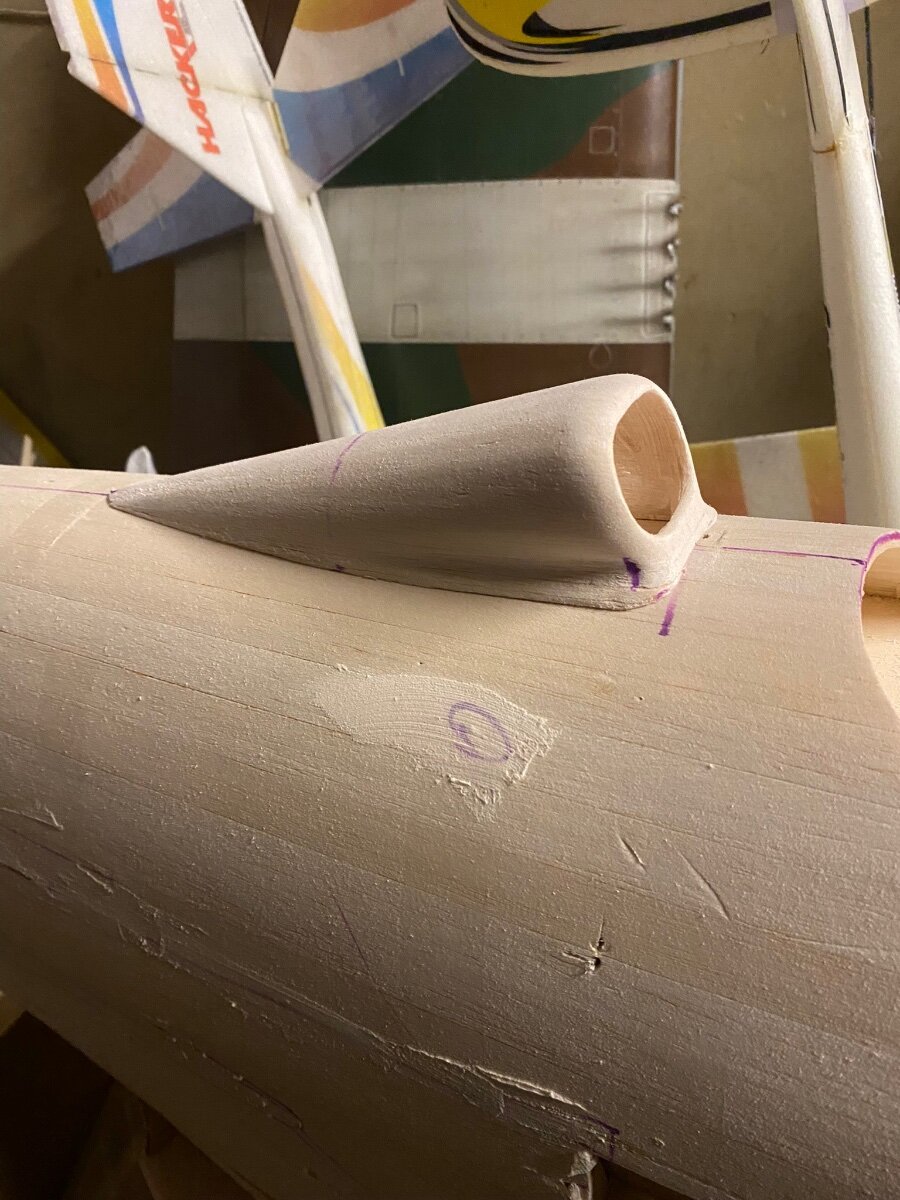
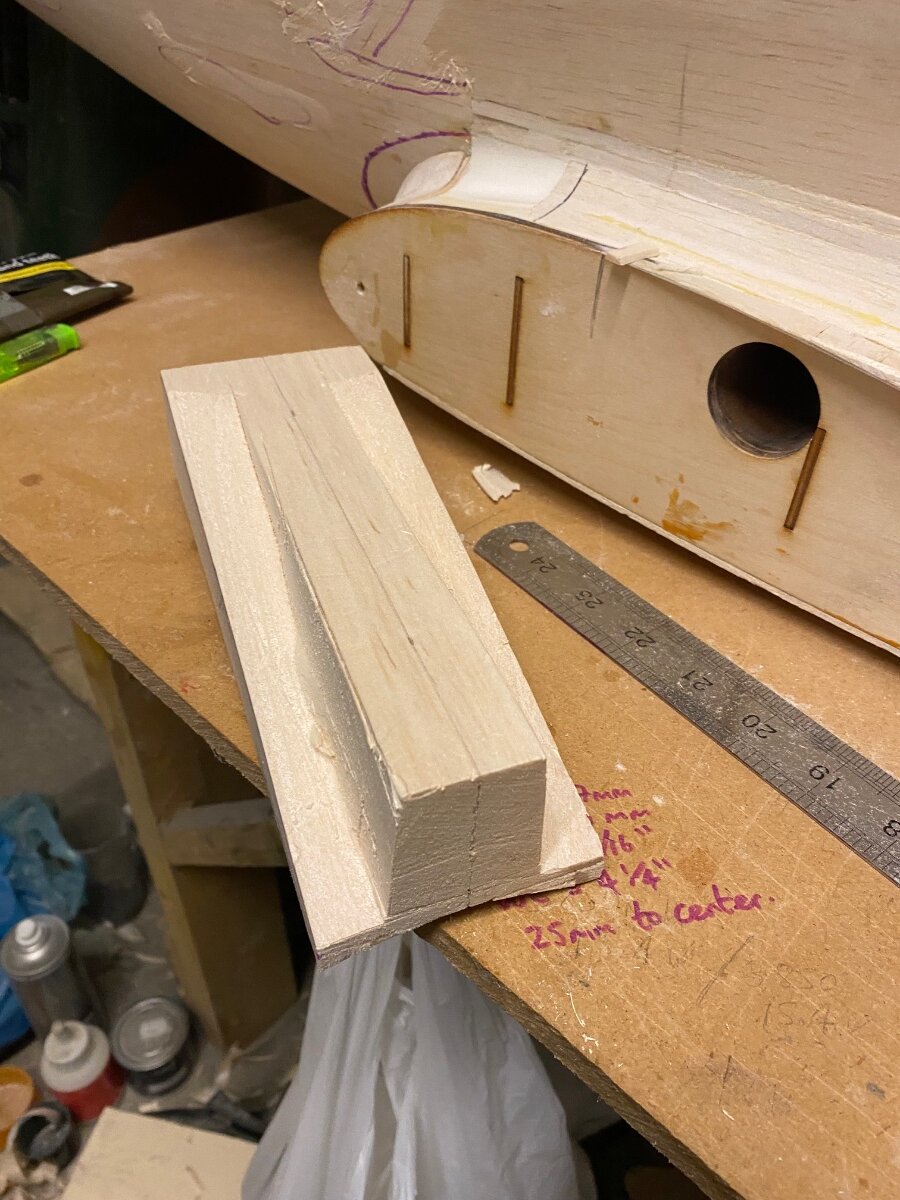
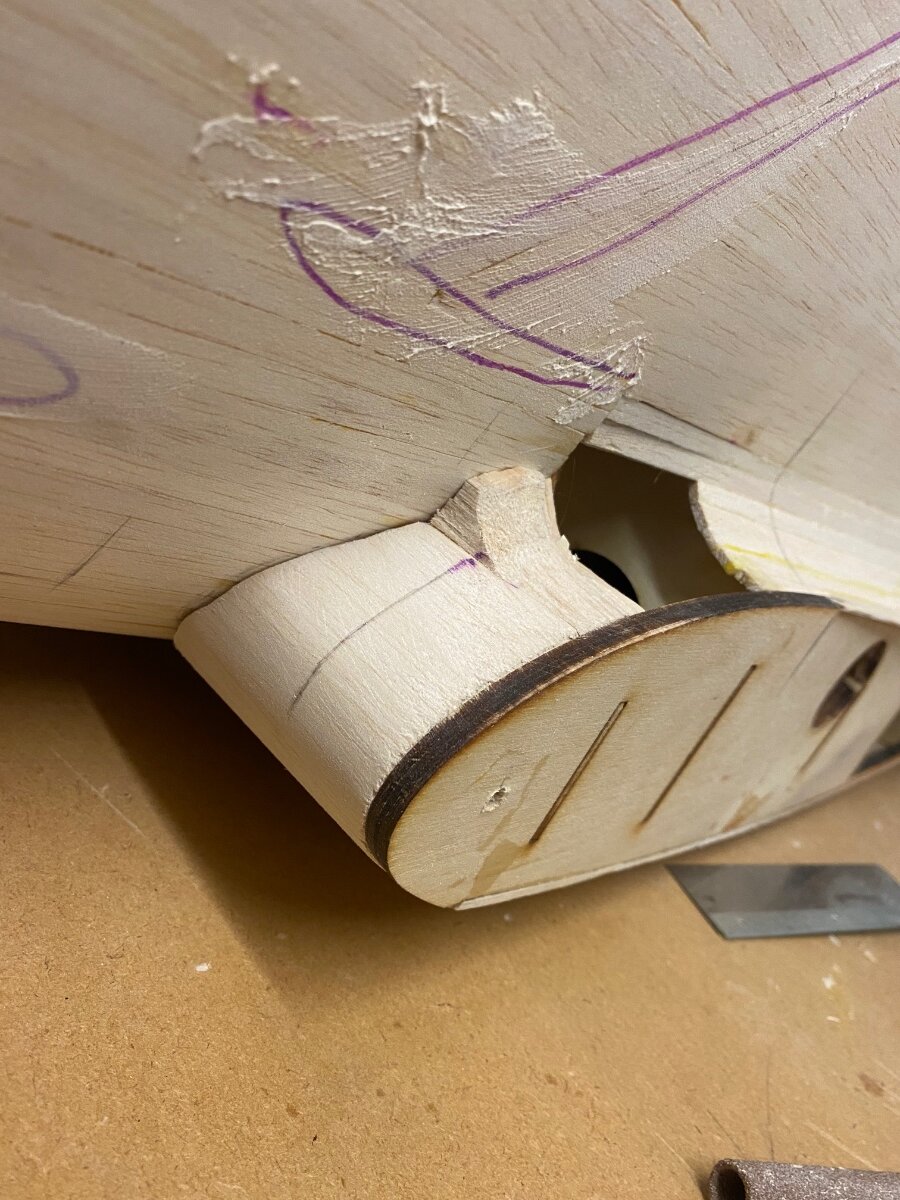
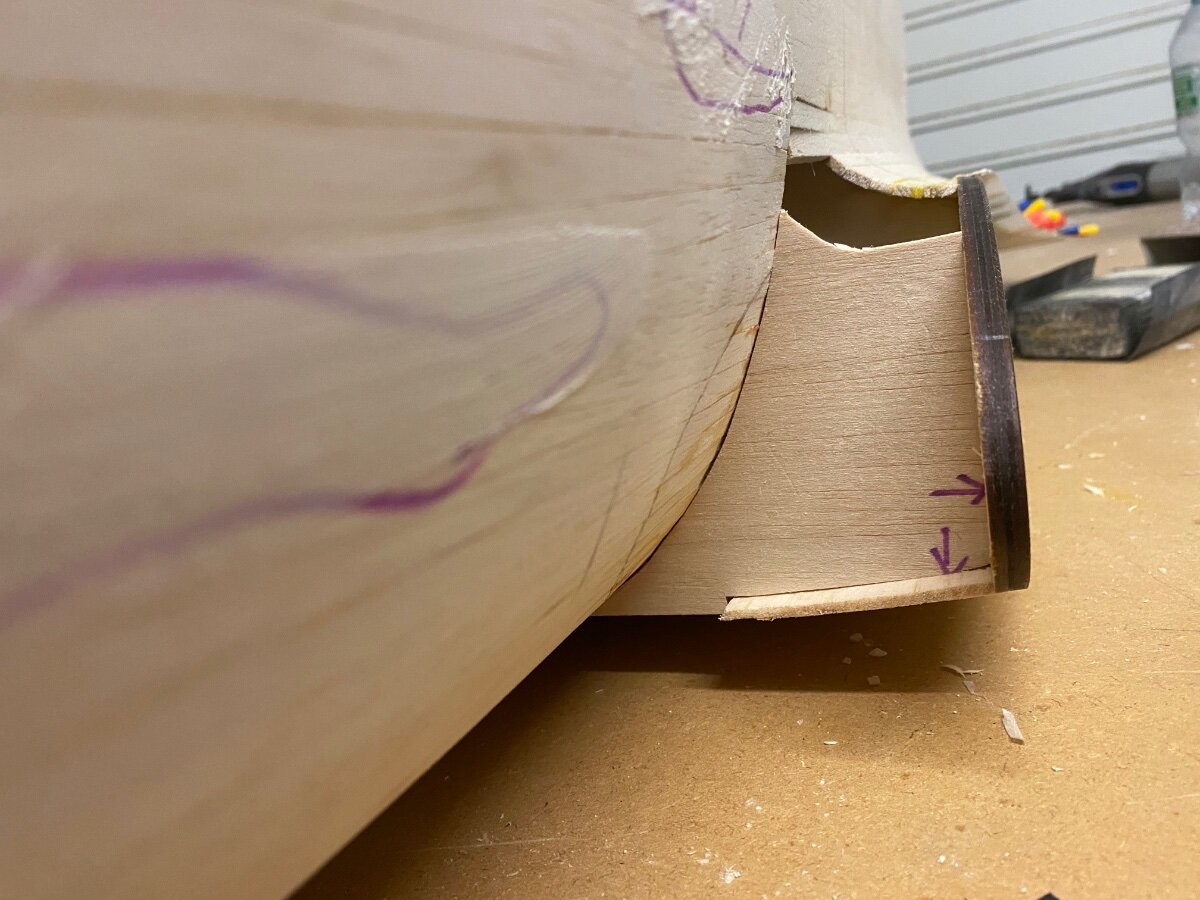
Still a lot of work to do to the aft fairing but it’s enough for a rough shape and has been glued in place now.
I started the top air intake on the fuselage and have hollowed out.
This intake is attached to the rear access hatch.The idea is that once I glass the model I will layer up glass cloth on the hatch area and replace the wooden hatch with a glass cloth hatch and the intake will form a handle to remove the hatch.
Through the hole I will place a hatch latch and to the rear I will have magnets. Hopefully this will do the trick.
Cheers
-
3
-
-
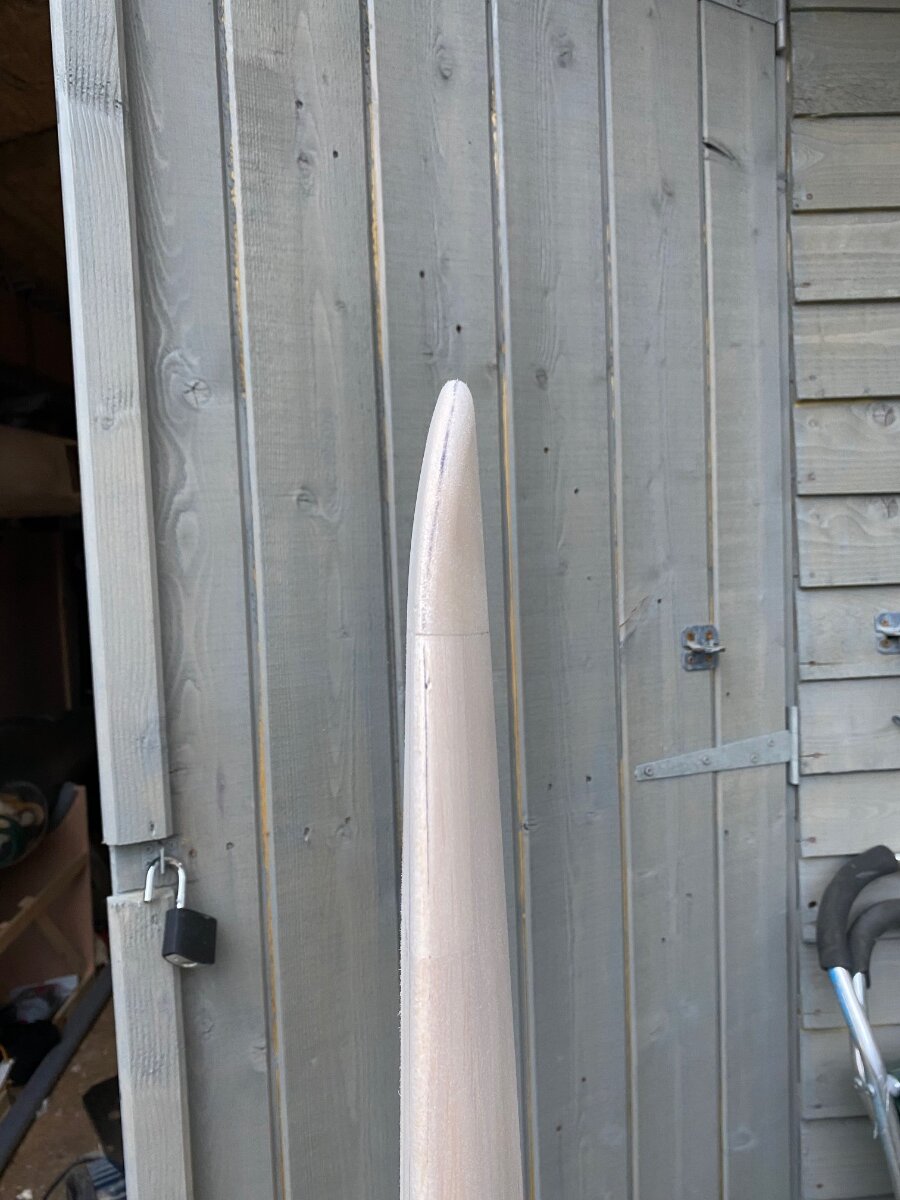
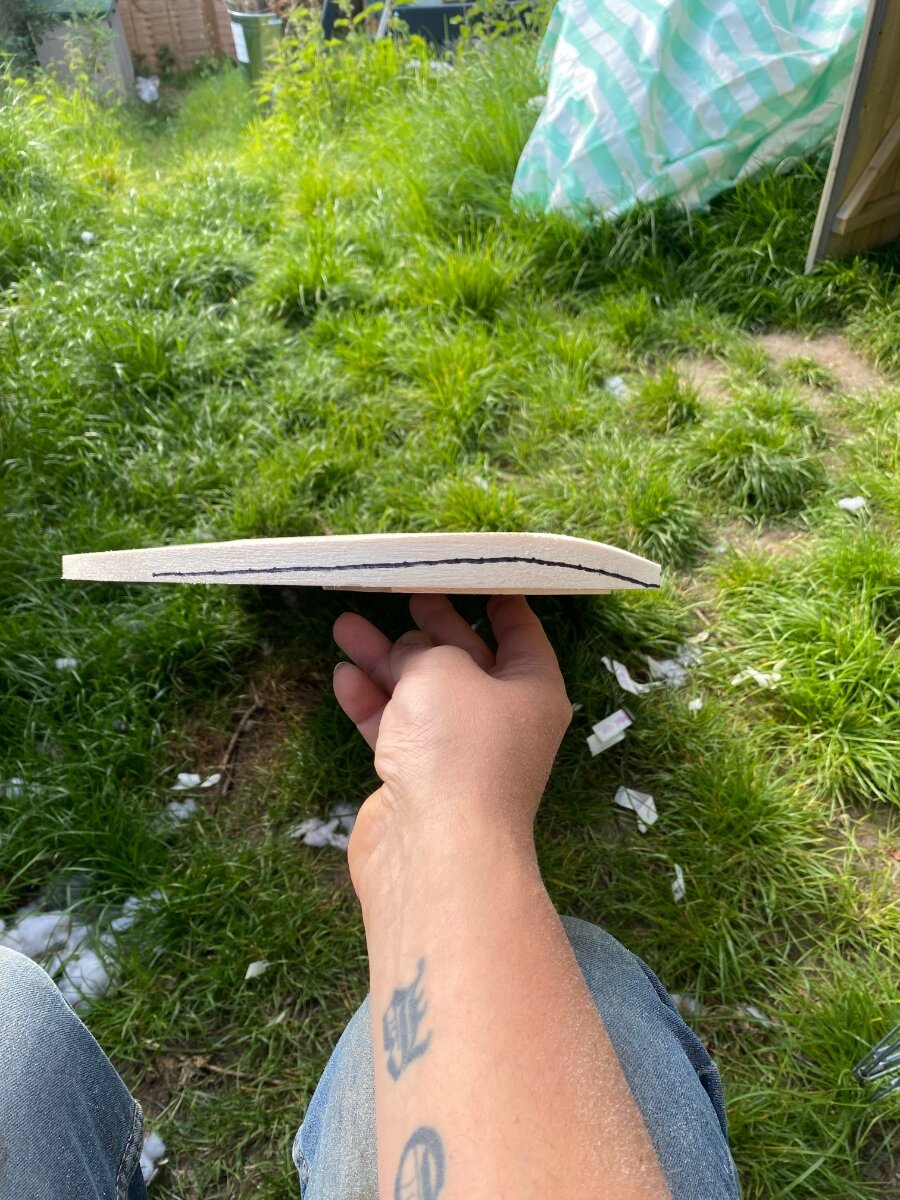
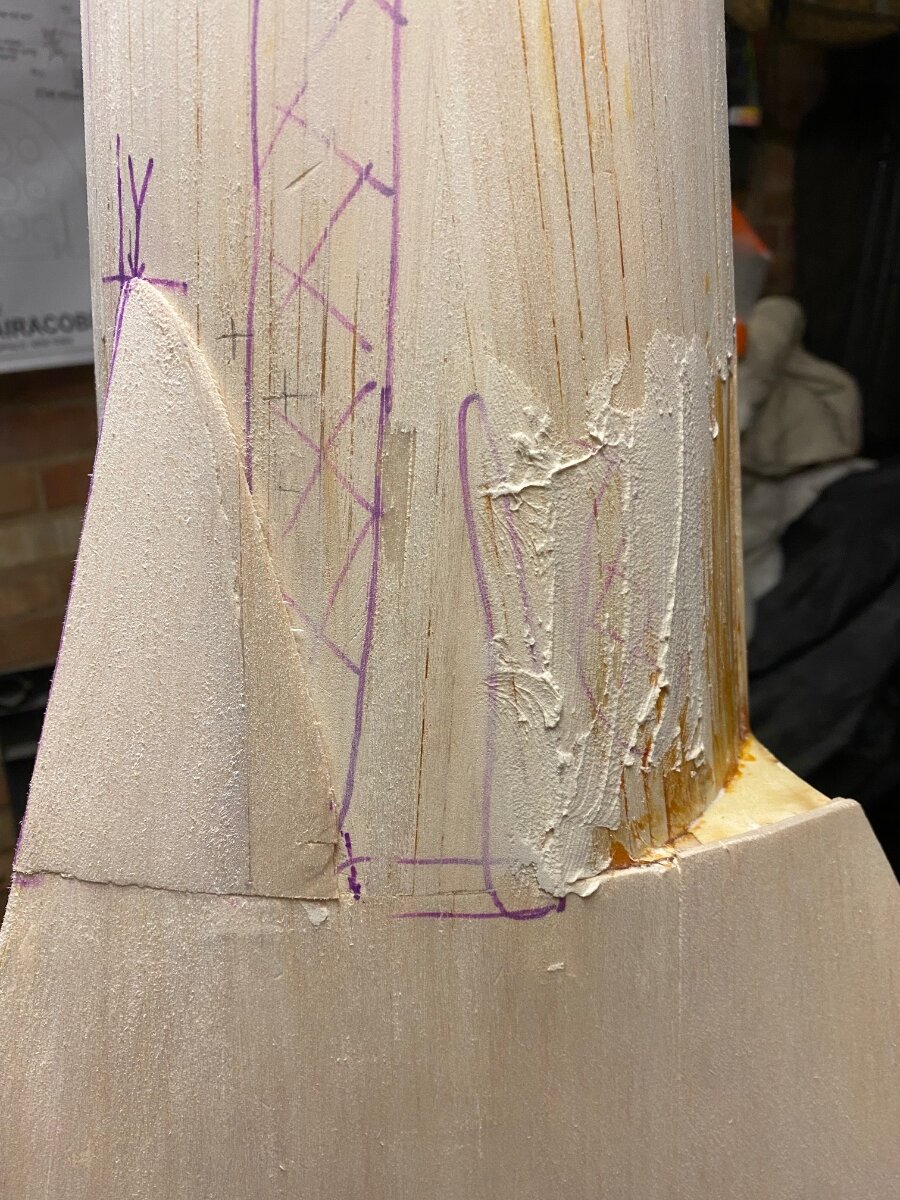
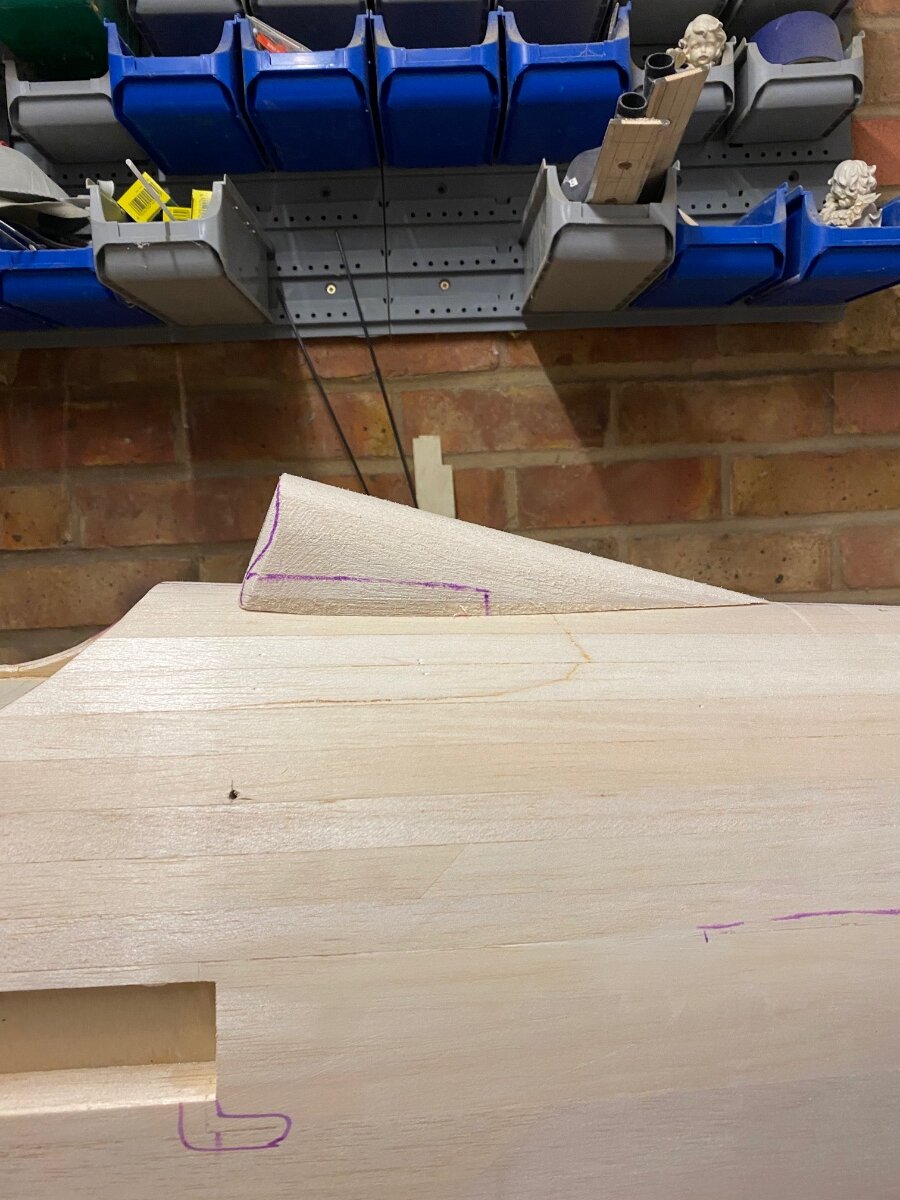
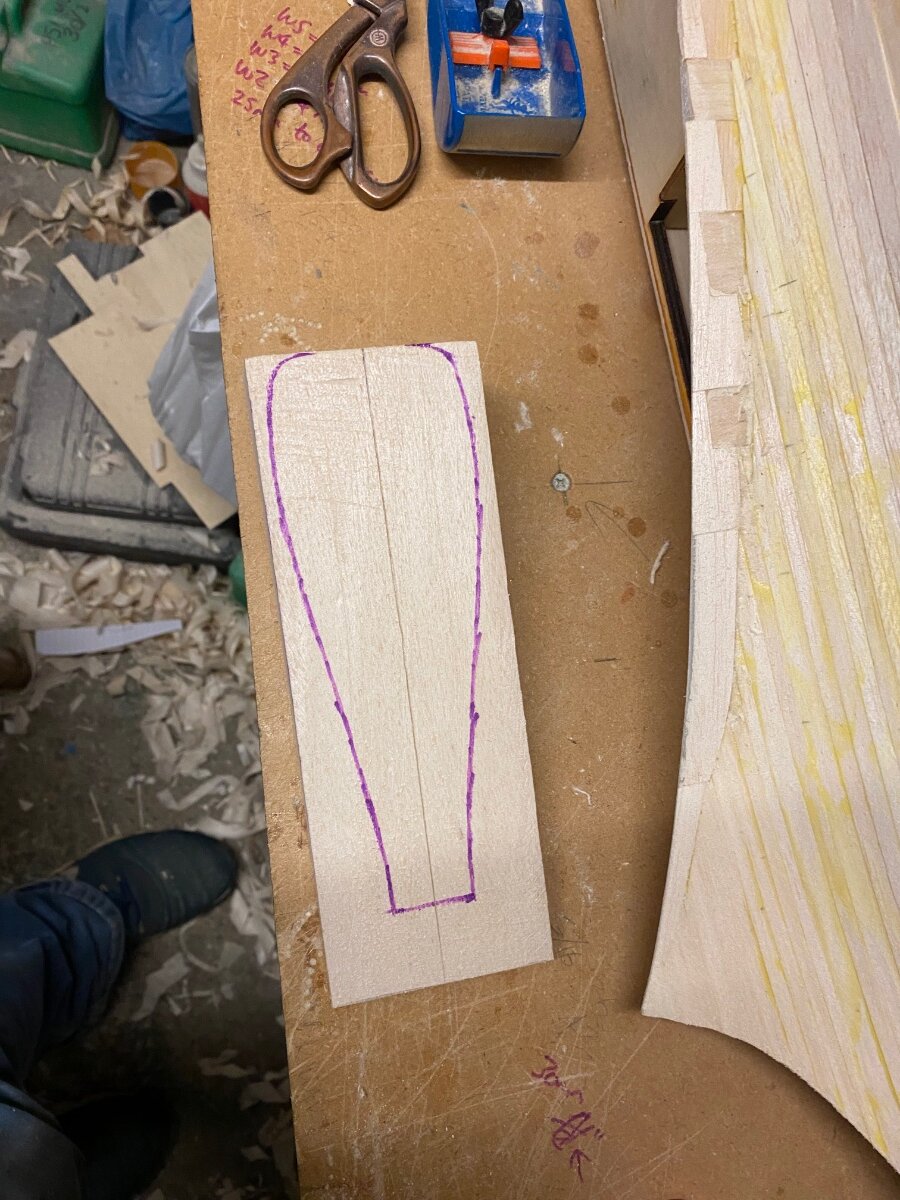
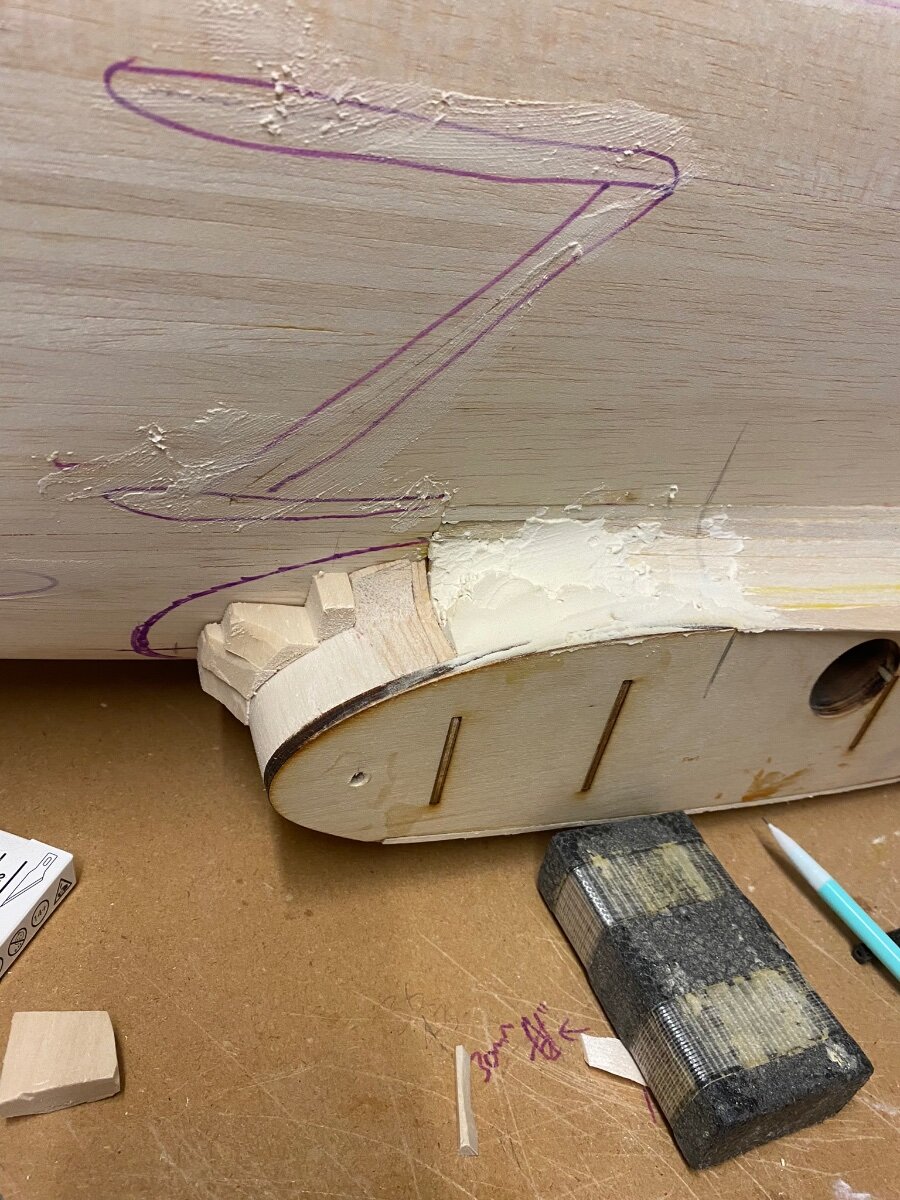
Been whittling away at the fairing trailing edge from solid block.
It will take time to get right but this will save a lot of work later as it will be nearly there before final sanding.I won’t bother hollowing this out as I will actually need weight nearer the tail.
Hopefully I’ll have this side complete this weekend.
-
1
-
-
4 minutes ago, dave parnham said:
Only stumbled across this build toady, Fantastic work and very inspiring. Keep posting looking forward to seeing more.
Thanks Dave, very much appreciated 👍
-
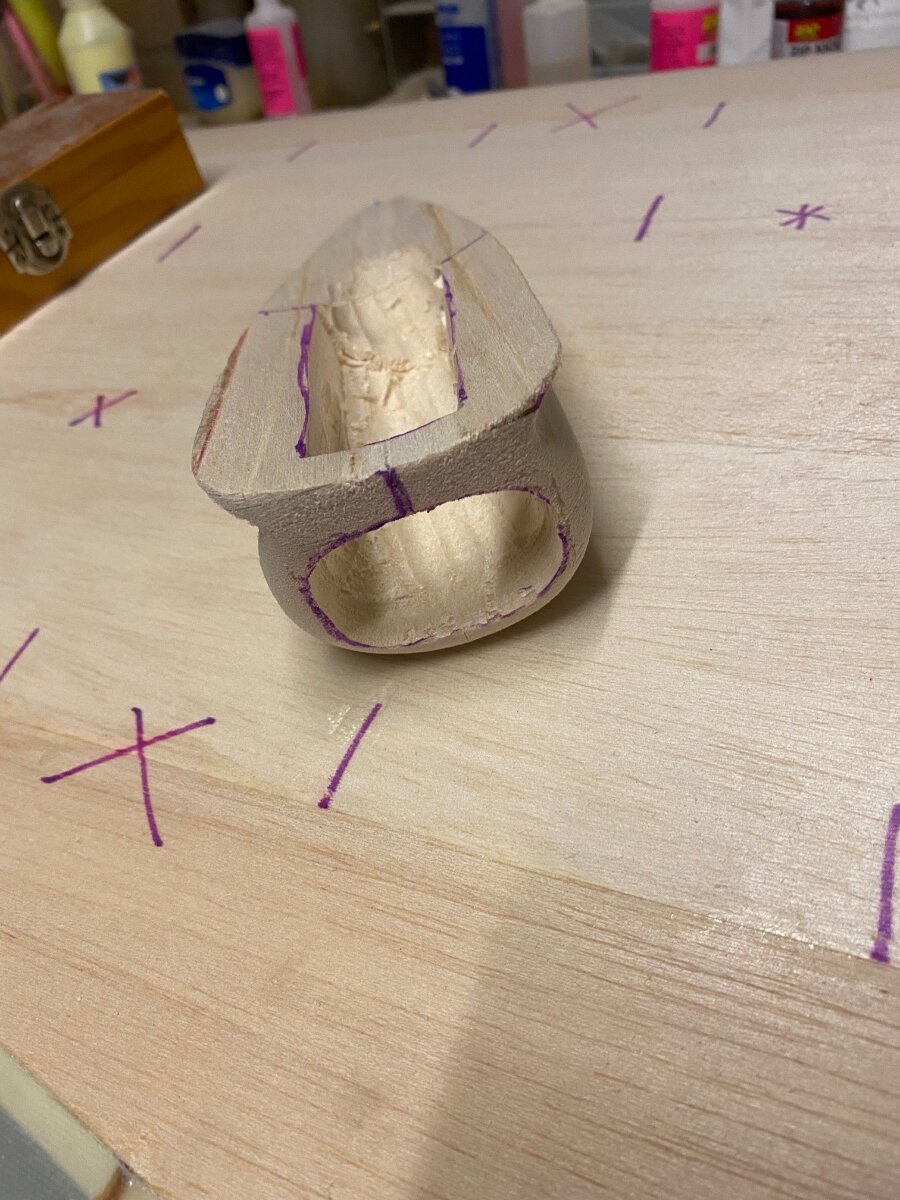
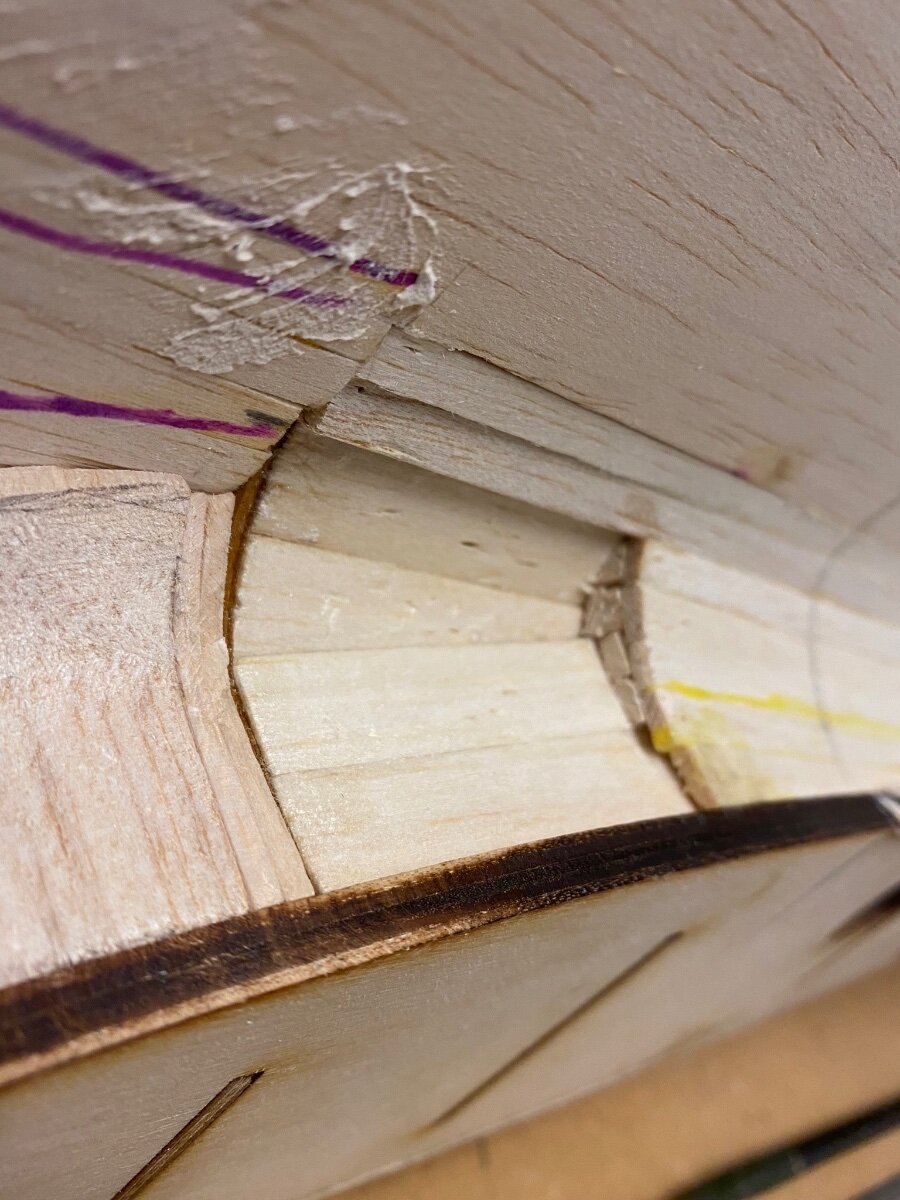
Been off the build this week as I had an accident last weekend resulting in a few broken ribs.
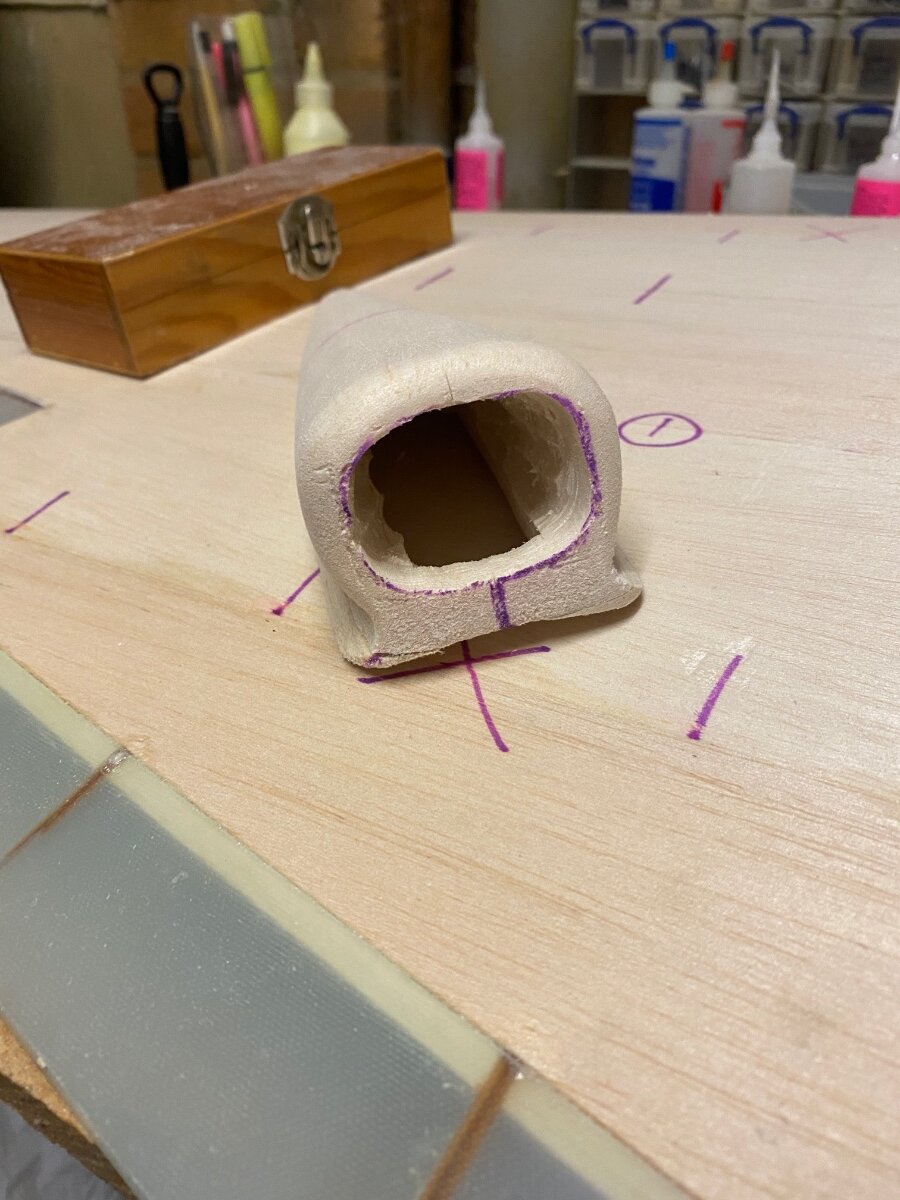
Anyway, did a bit today and it’s setting me up for a repeat on the starboard side.The leading edge intake has had rough fairings added. I then carved out the air intake and hollowed out the inside.
This hollowed out area along with the leading edge of the wing will serve as one of the wing fixing points.
I also had to take fill the area behind the intake, this part is far from finished and is a difficult curve to meet. I think this will be picked up in the glassing stage.
Everything I’ve done to now is to save weight as this plane will be heavy due to the set up in the nose.
Retracts are still an issue I’m trying to resolve but the fuz nose gear should be done in the near future now it’s in the right hands.
Cheers all.
-
1
-
-
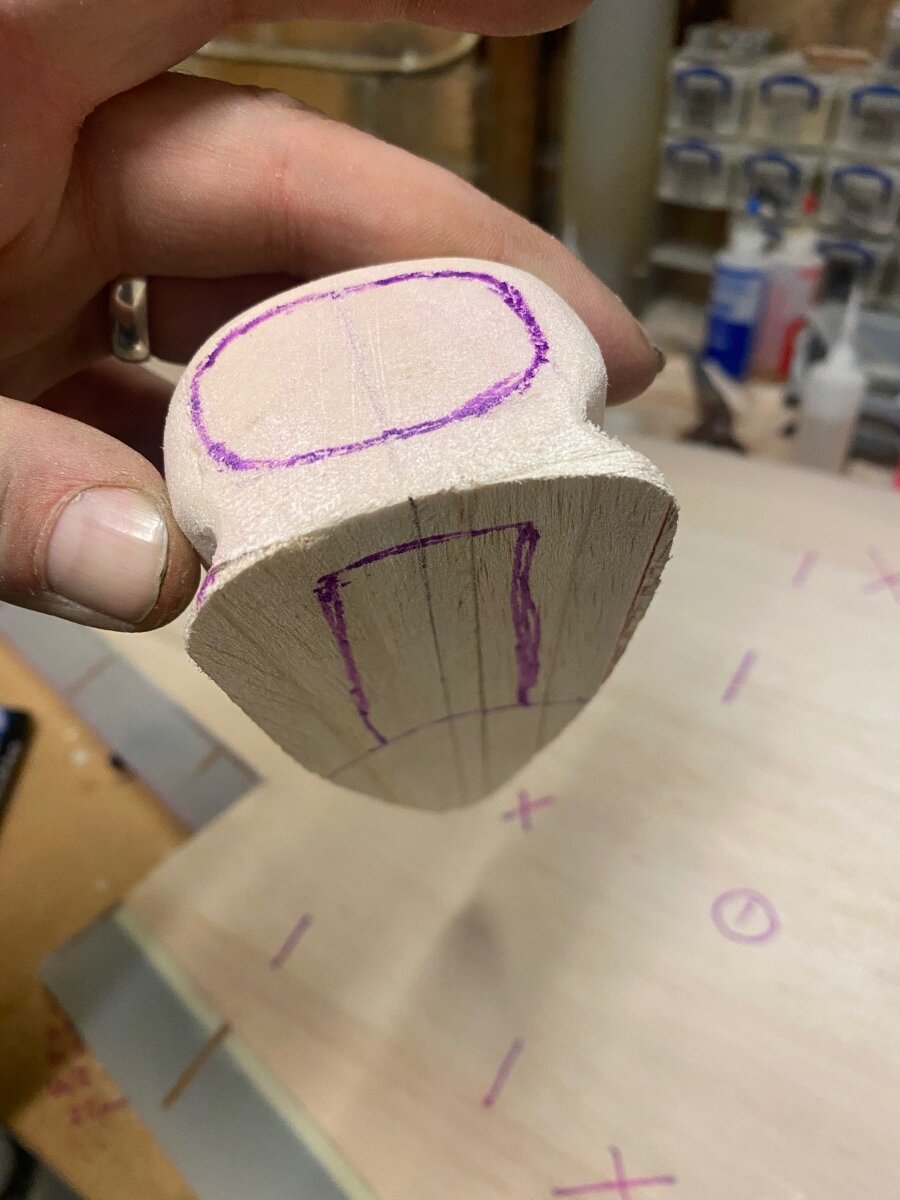
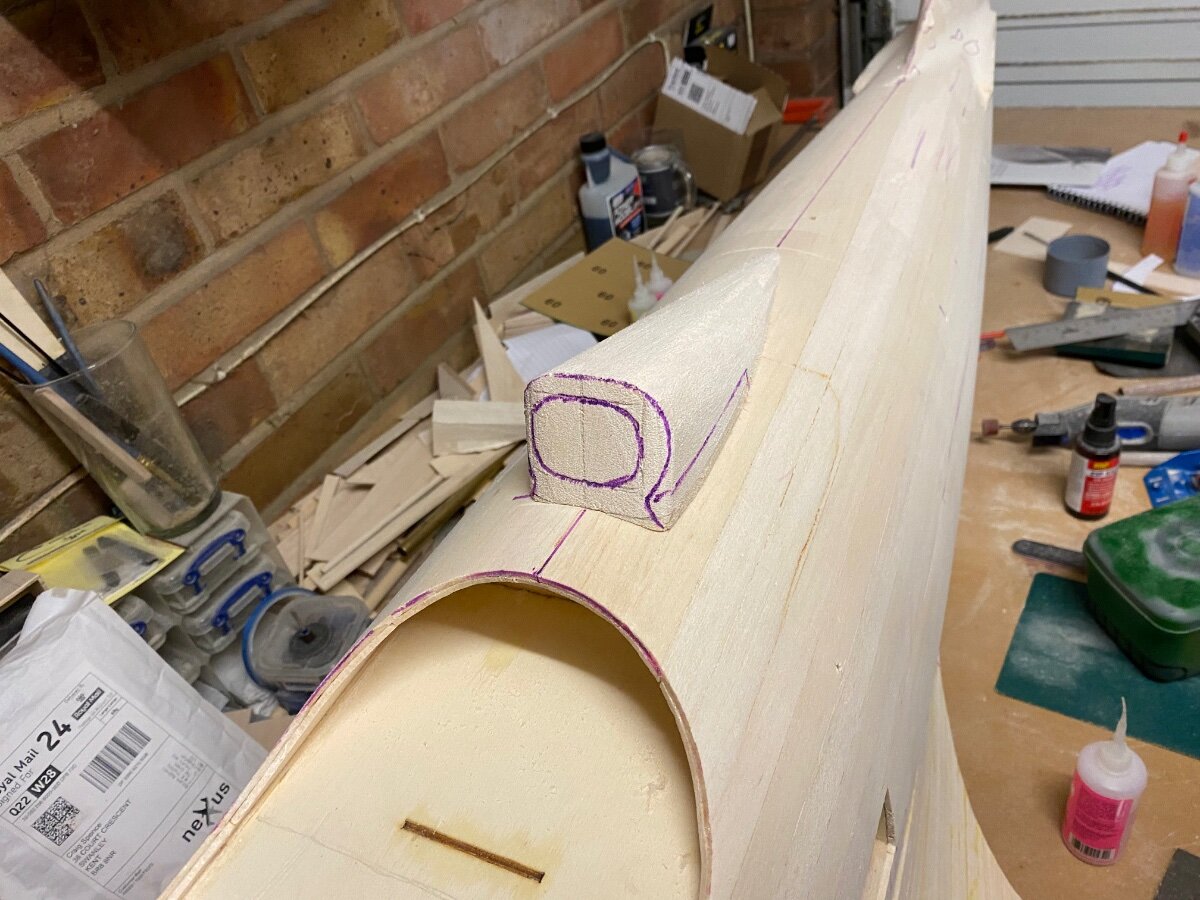
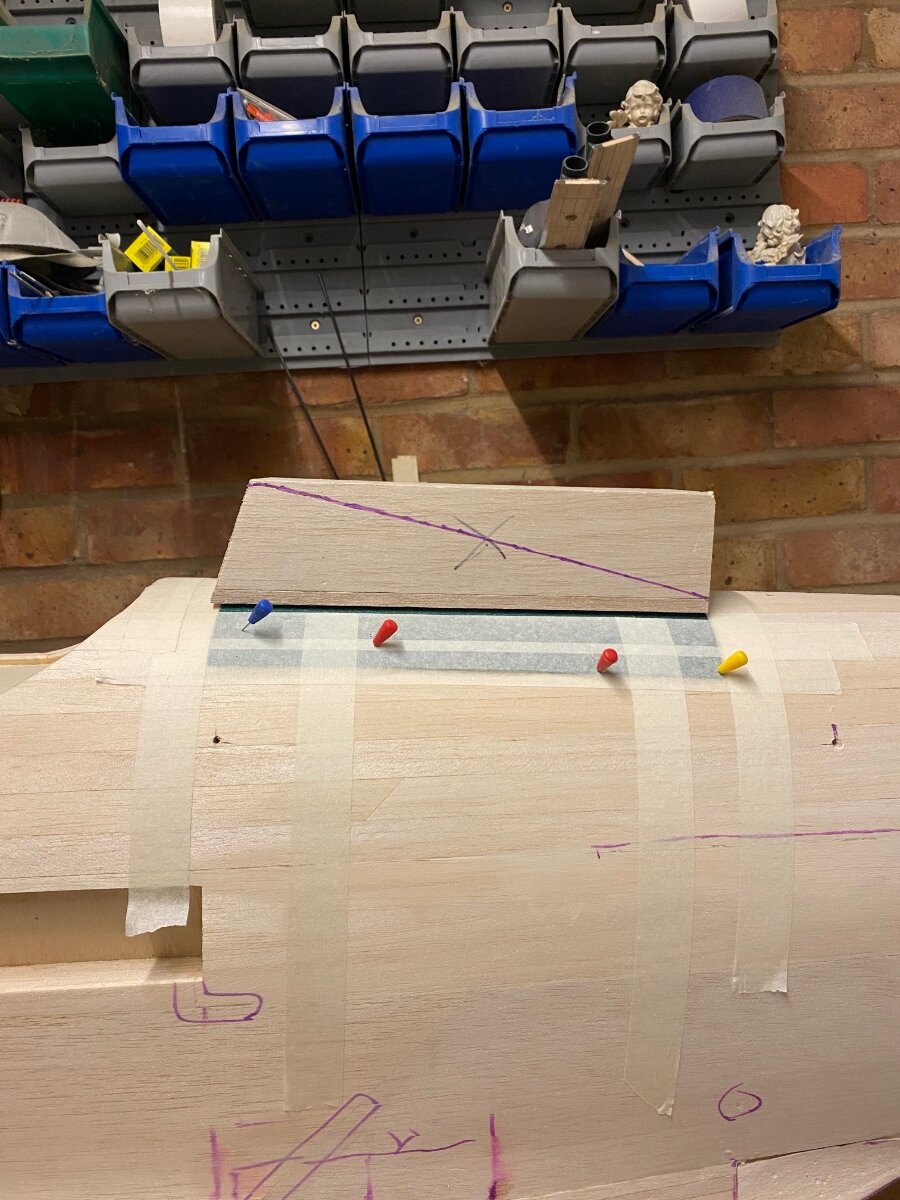
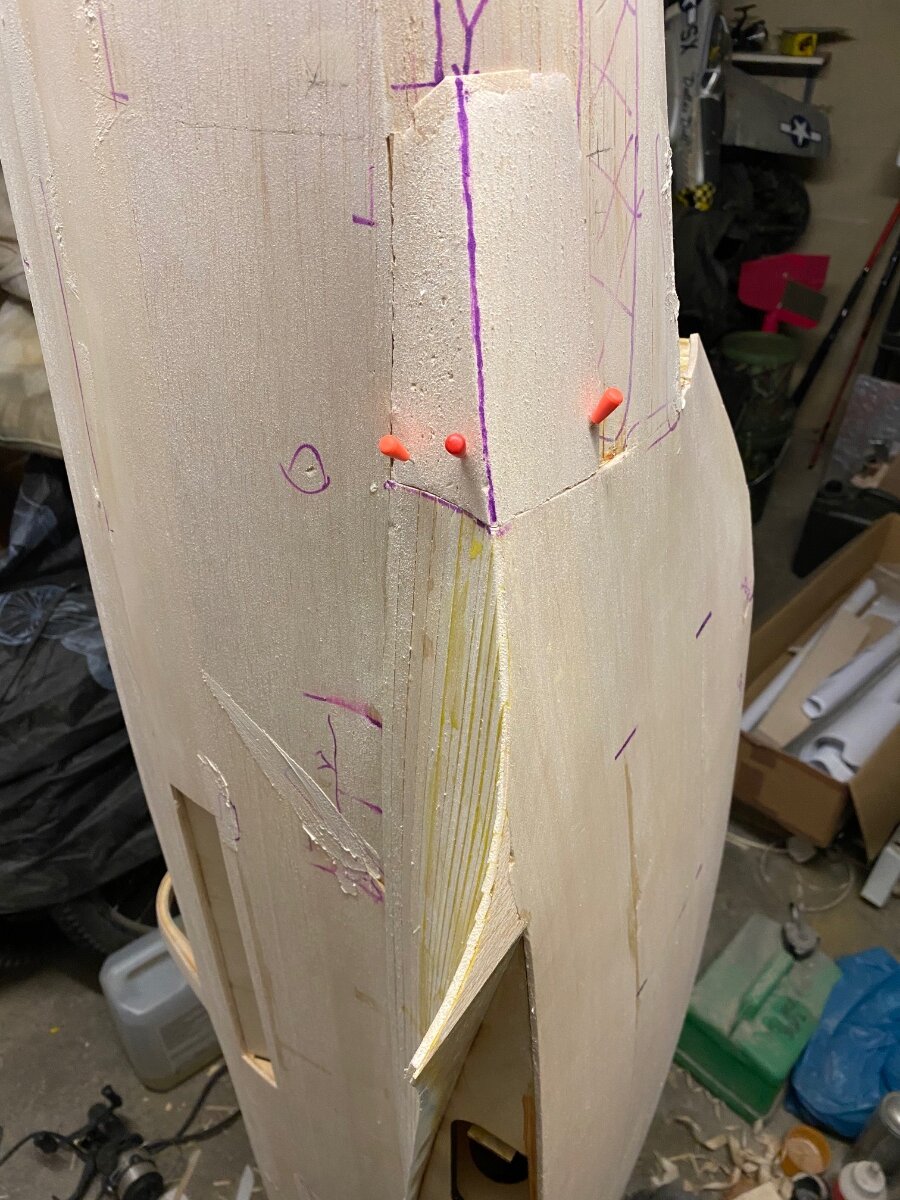
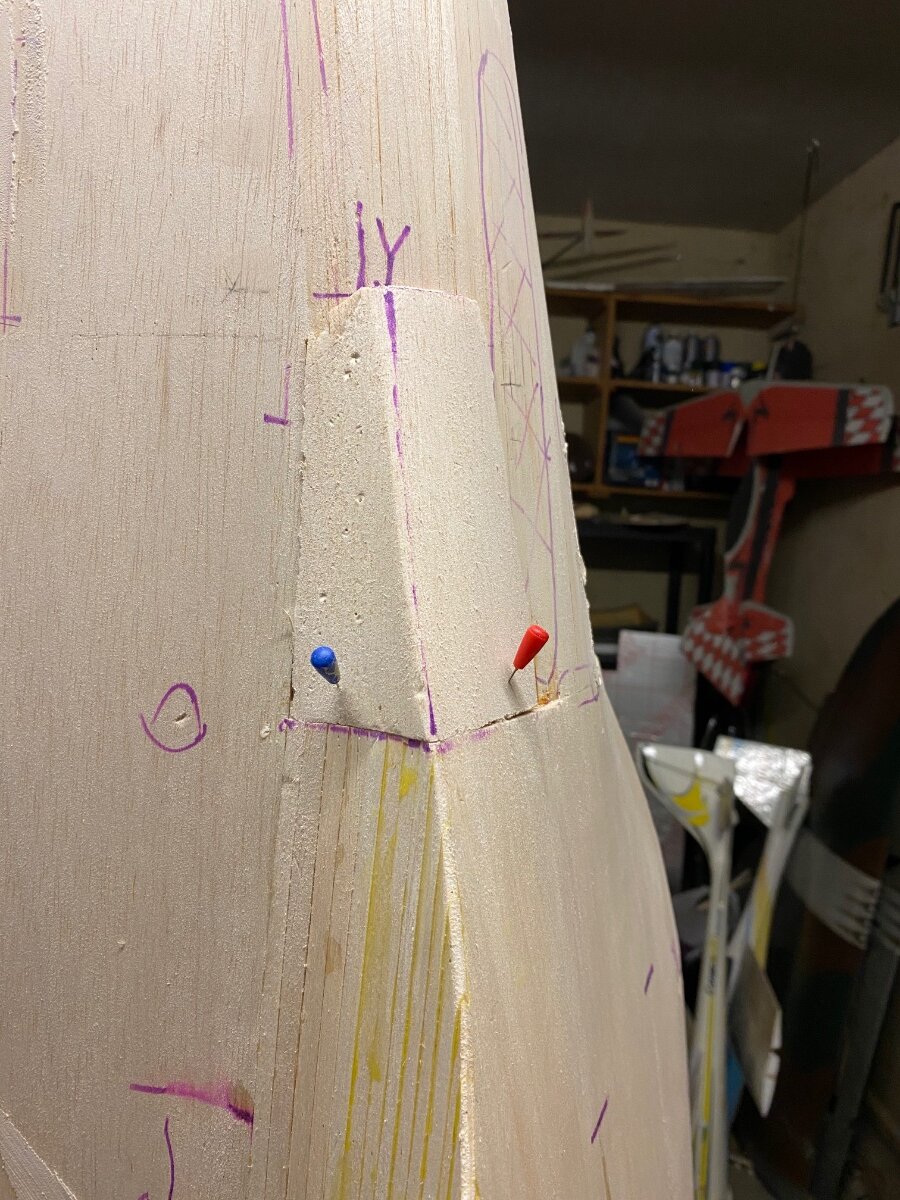
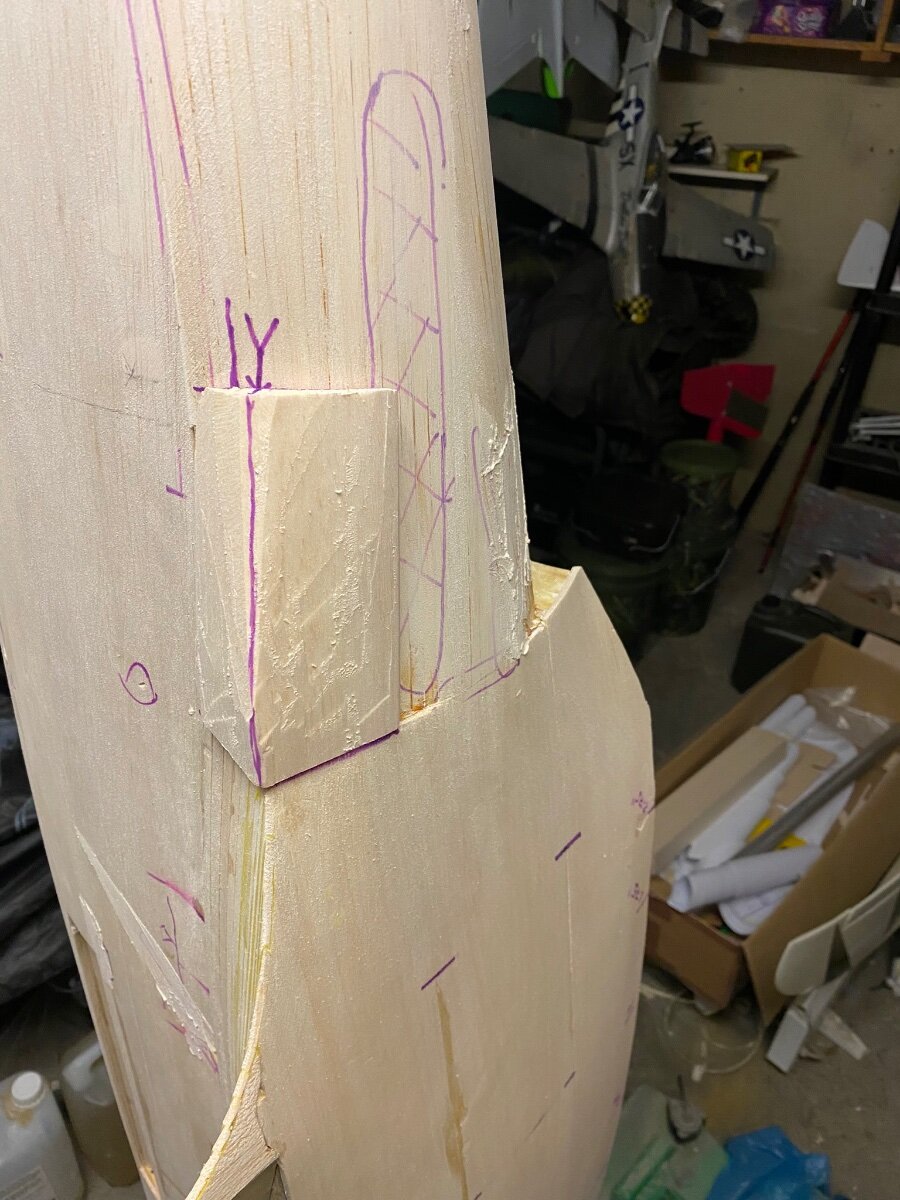
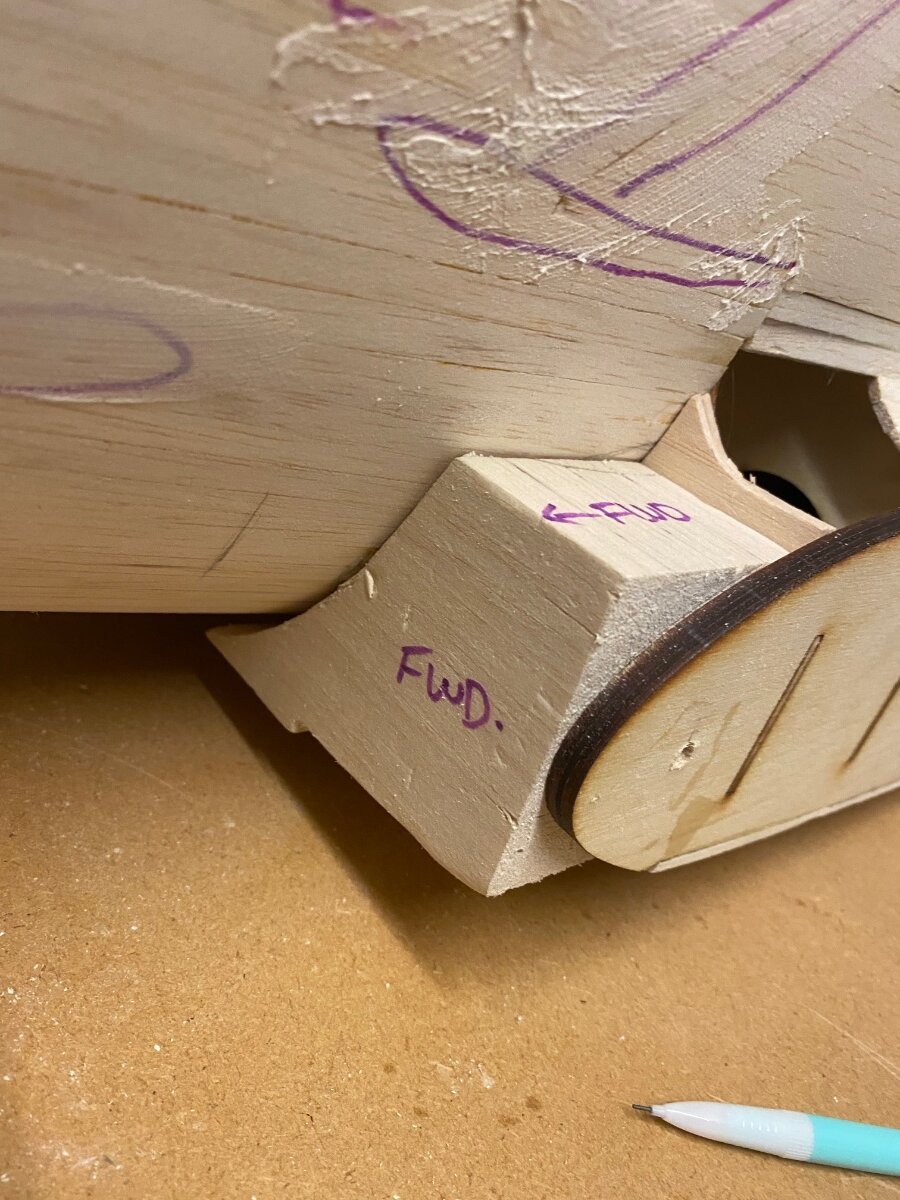
Slow progress but progress all the same.
I thought I’d really take my time on the filets and leading edge intake as there such prominent features for me.The fillet will be rough sanded to profile and I’ll build up the outboard edge with 1/16th sheeting and filler. It’s very thin towards the end so will have to be strong hence the G10.
The leading edge intake I decided to carve from solid block and still a fair way off.
The idea behind this is I get a solid join at the front and I’ll hollow this out before flying in position.This is one of my wing joining options (not detailed on plan). I plan to bolt the leading edge of the fuz to leading edge of the wing through the intakes.
They’ll be another bolt position behind the main spar which will be bolted through the wheel well.
This will keep external non scale fixings invisible.Gonna loose this weekend building as I’ve got plans and also next weekend so it’s working after work every night until I can take some time off to concentrate on this fully.
Cheers all.
-
1
-
-
First week back at work all I wanted to do this weekend was sleep 😂
Anyway, managed to drag myself into the workshop today and started the port fairing which is and will continue to be a tough one.The forward and aft parts will be shaped from foam or balsa later, the intakes at the front most likely to be balsa.
In other news as well, I’ve got a gentlemen working on the retracts so hopefully they’ll be updates to come in the coming months.
Hope you all had a good Christmas and new year.
Cheers
-
1
-
-
Haven’t done any building for quite a while now, work, play & weather all getting in the way 😂
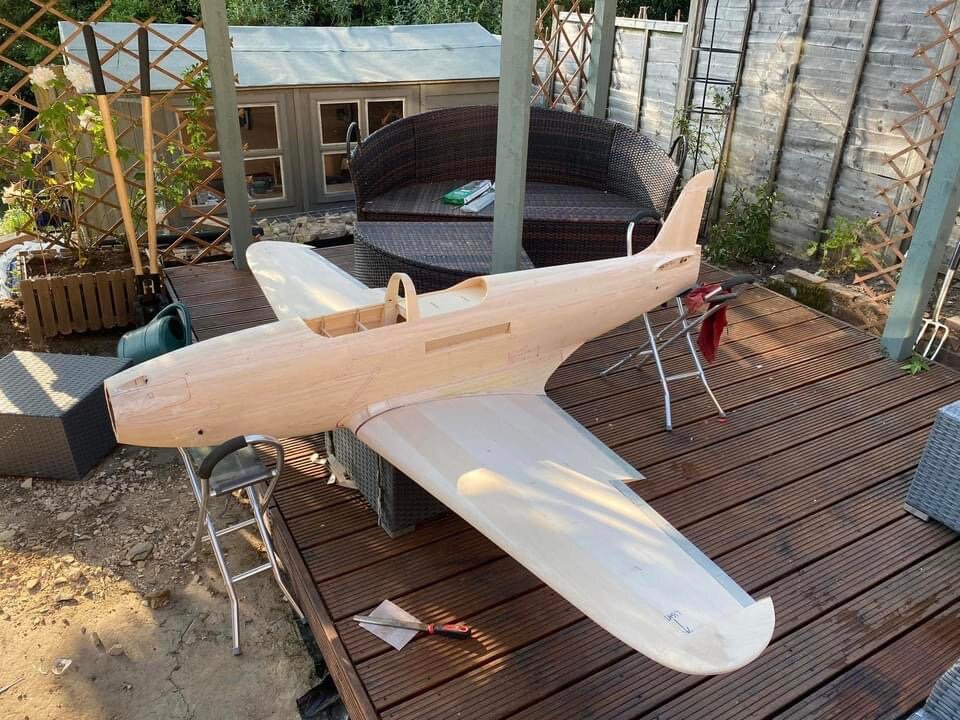
Also have been a bit disheartened by the issues with the retracts.Anyway, I’ve offered the wings to the fuz today for the first time and there almost bang on for alignment.
Tubes have been tacked in with thick CA for now and I will secure later with epoxy and discs.
I will need to add fillets to the inner wing ribs due to gaps but apart from that it’s all good.This has set me up nicely for the new year so I can work on the fuz and tail plane whilst I’m having new retracts made from scratch! Again! 😂
Merry Christmas and Happy New Year to all.
-
1
-
-
I’ve also commissioned fighteraces to make my scale spinner.
looking forward to getting this as I know it will the right quality.
-
2
-


1/4 scale electric Bell P39 Airacobra build (designed by Jerry Bates)
in Building from Traditional Kits and Plans
Posted
Thanks Nick, yes especially lucky with Robart there 👍
My worry is not just that they’re gone but for replacement parts in future if needed.
Fighteraces are great for quality products and service but I’ve been told by Phil he will only pull it if it’s 100% accurate.
The thing is Im not wanting him to mass produce it?
I was also going to get them to do the plug for me but at a cost exceeding £500 I just can’t afford it.
Id also begrudge it because they’d keep the plug (or make a copy from it) that I paid £500+ for and make money from it?
So unfortunately I’ve come to the decision I’ll have to do it myself and I’ll have to do it in two parts.
Being in two parts isn’t a major issue though as it has a kind of canopy roll bar.
I'm sure I’ll be able to do something with it.
Cheers 👍👍