


Bucksboy
-
Posts
774 -
Joined
-
Last visited
Content Type
Profiles
Forums
Blogs
Gallery
Calendar
Downloads
Posts posted by Bucksboy
-
-
It's a great system, I'm always surprised that it wasn't more popular. I rarely resort to the manual as I can normally work it out.
Feel free to ask again if you get stuck.
-
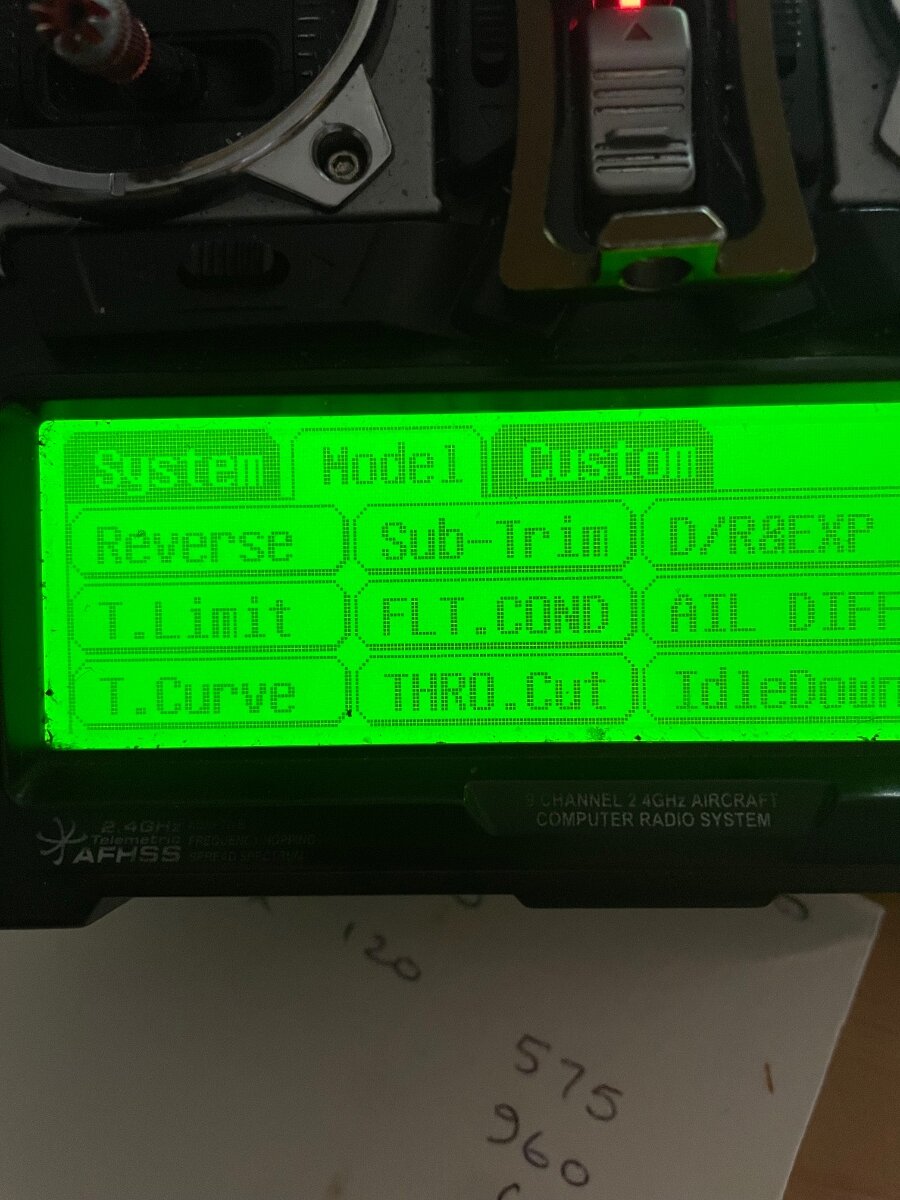
The first picture shows the 'model' sub screen.
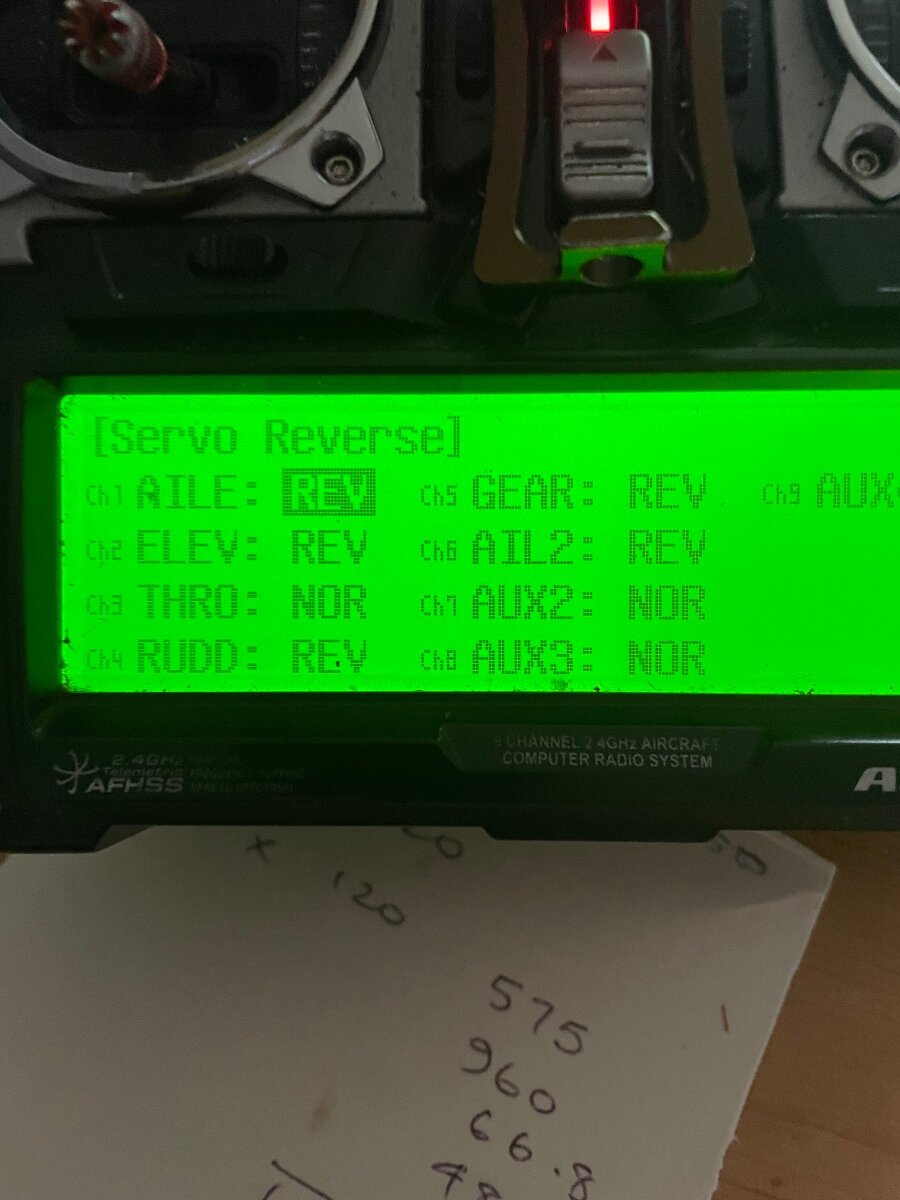
The second the 'reverse' screen.
That is if the pictures come out in the order I've added them....

-
 1
1
-
-
Geezer,
Getting there then? If one moves the opposite way, reverse one.
From the home screen with the correct model selected, touch the big plane icon in the bottom left corner.
The next screen should show a load of options under the heading 'model'
Top left is 'reverse', touch that.
The screen then lists all your servos, touch 'Ele 2' and then 'reverse' or 'normal', confirm that you are happy and that should be it. Exit the screen by touching the little door icon in the top right hand corner of the screen.
Again, if this doesn't work, come back to me, it's a really easy system to use.
-
1
-
-
Geezer,
1. select your model
2. select system (the key/spanner symbol bottom left on the screen)
3. Select channel4. select ch 5 or ch 6.
5. Hit the ‘Sel’ button, bottom right on the screen.
6. on page one you can choose whatever function you want, ele 2 I suggest.
i hope this is clear, if not I’ll add pictures.
-
On 12/06/2024 at 21:10, Kevin Fairgrieve said:
looks like your battery hatch is lifting as well!
No, that's all my own mistake, I followed the instructions and when I separated the hatch, I was a bit rough. The skinning behind the hatch came adrift and I glued and clamped it down hard. However, this introduced a step behind the hatch and the fuselage. I could have fixed it but never did. So, all my own fault.
-
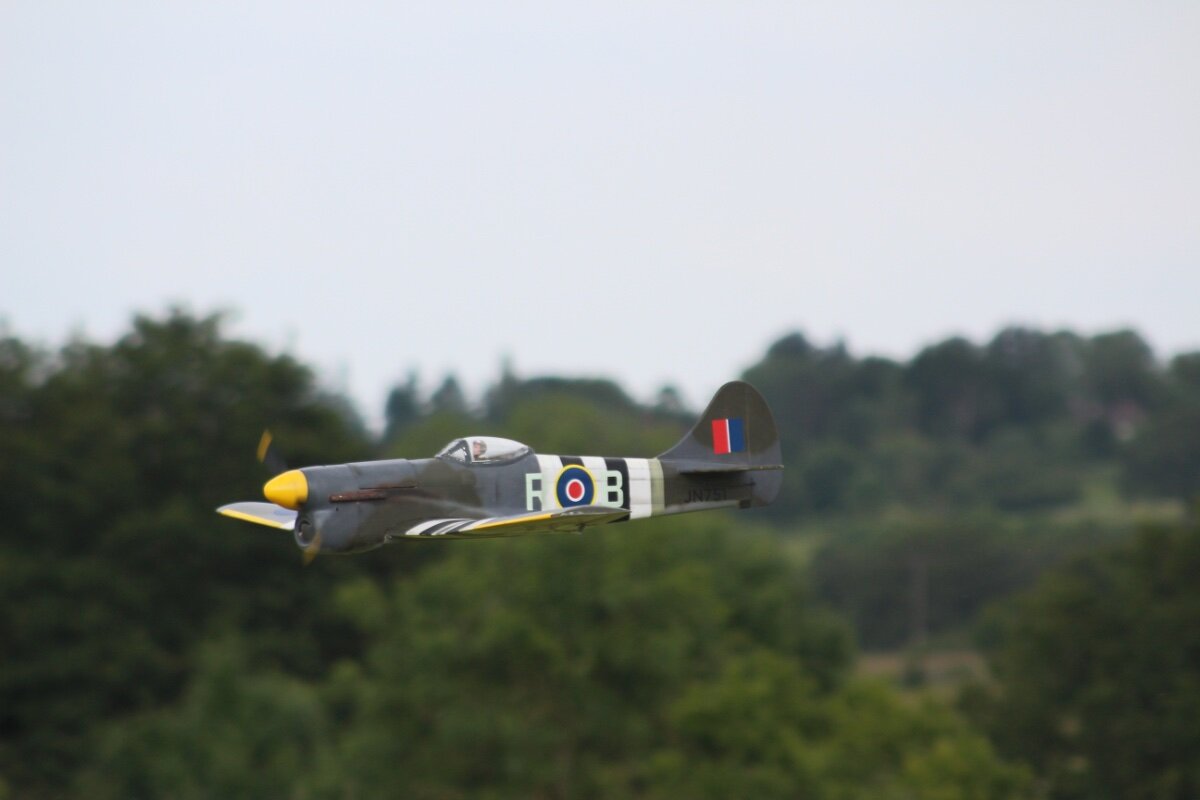
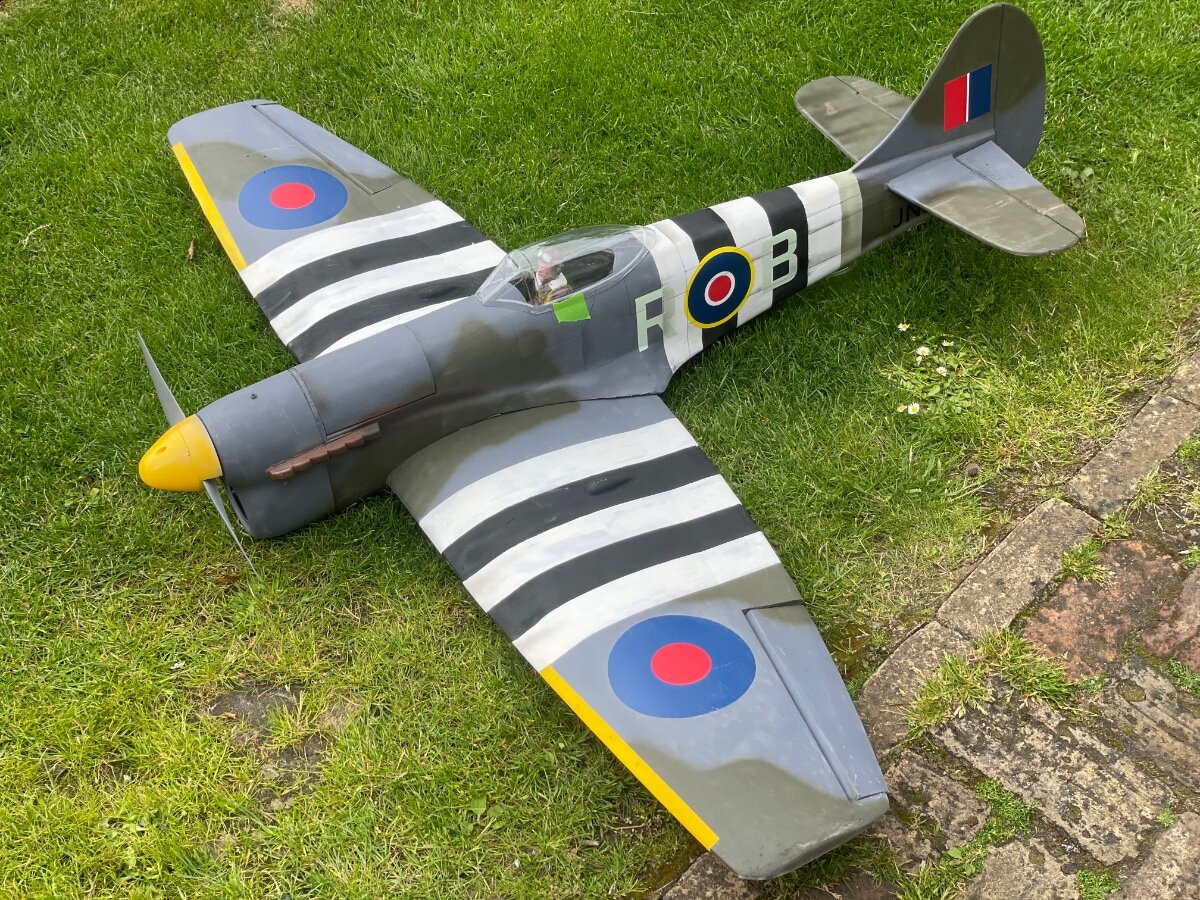
I maidened my Tempest today and it was a delight to fly. It fitted the FW 190 dolly with just a bit of sanding for the rear support, the Tempest must be a bit wider.
Anyway it leapt off the dolly and needed 2 or 3 clicks of aileron to get it flying straight and level. Mine is just under 5lbs without the battery, I'm using 4000 ones but I've not weighed them and set the timer for 5 minutes. The C of G is 90mm back as Richard said his flew on that. It was the same as the 190, smooth and safe to fly, a very pretty plane! It's a bit heavier than the 190 but with a larger wing area so they fly much the same.
Here's a (very slightly out of focus) shot as it came past over the strip.

-
6
-
 1
1
-
-
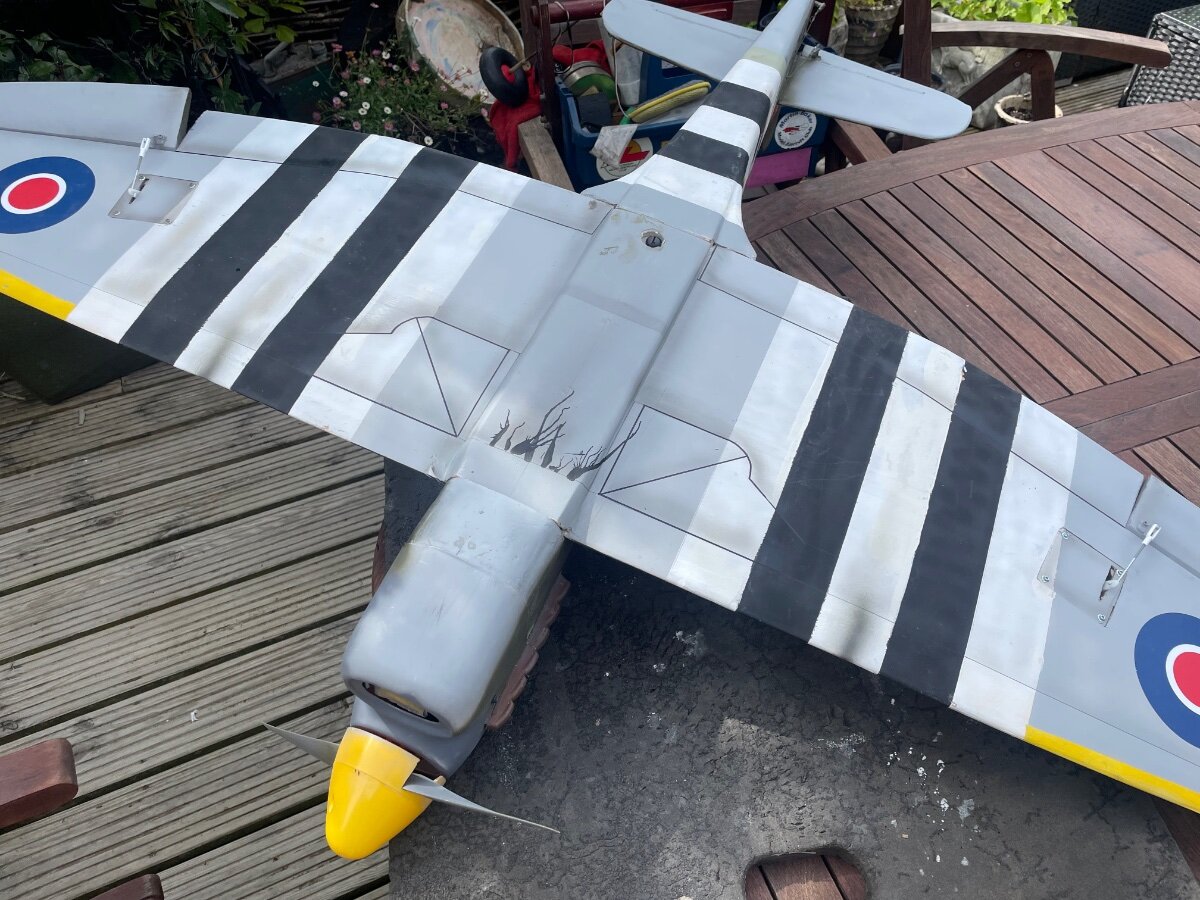
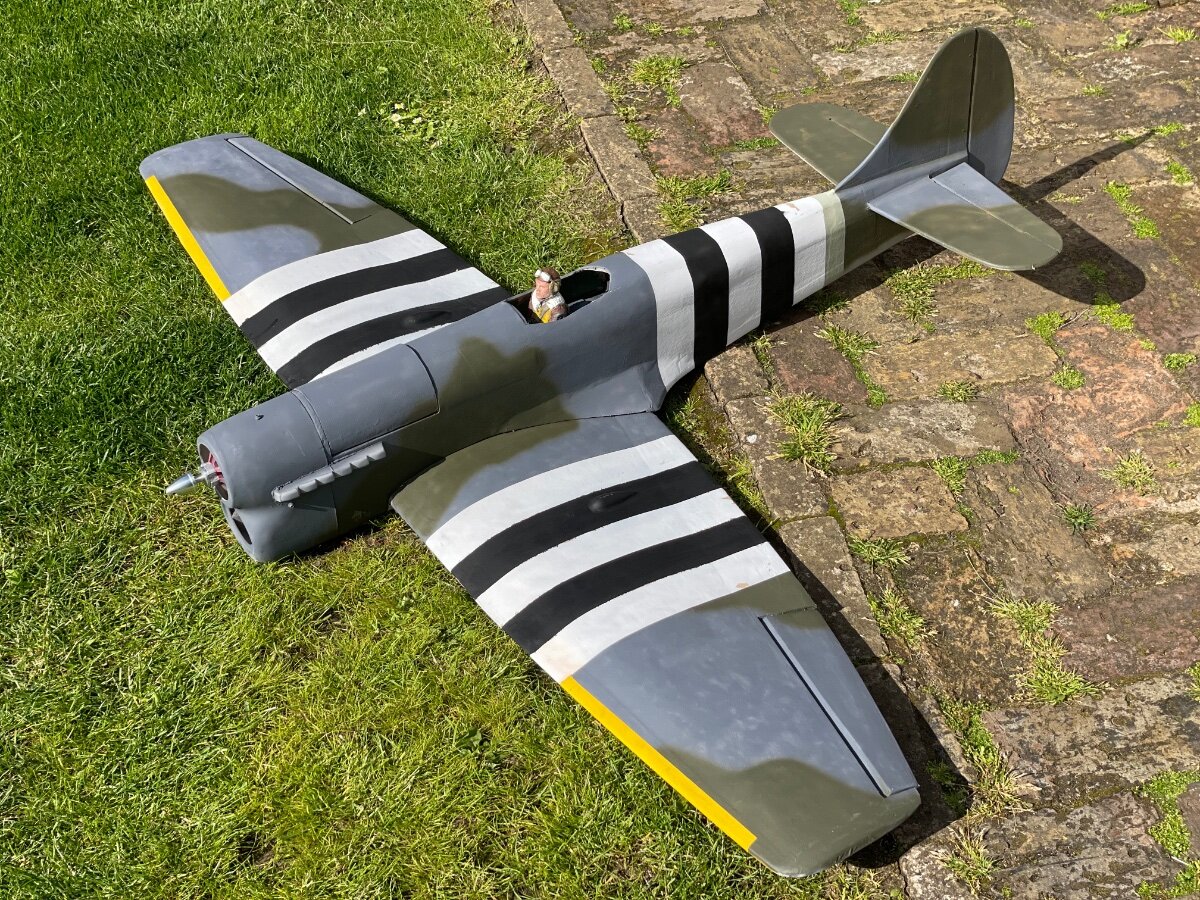
I've just been out to check throws and balance but the rain has started again! I've finished the painting and will seal it all in with a varnish, I've used Tamiya paints throughout, they spray nicely with an airbrush.
Here's the underside before the rain stopped play.
I hope that it will fit the same dolly that I made for the FW 190.
-
6
-
-
I’ve managed to catch up, nearly there. I’m adding the weathering but still have the top of the wing to complete.
-
10
-
-
If they don’t work, I’m sure they will though, I’ve got a couple of9 channel Hitec Optima receivers you could buy. Try the Delta ones first though.
-
Thanks gents, I think I’ll sand the ply core a tiny bit to give a tiny bit more of the classic leading edge shape, but they’ll be sharper than normal/ other planes I have.
-
1
-
-
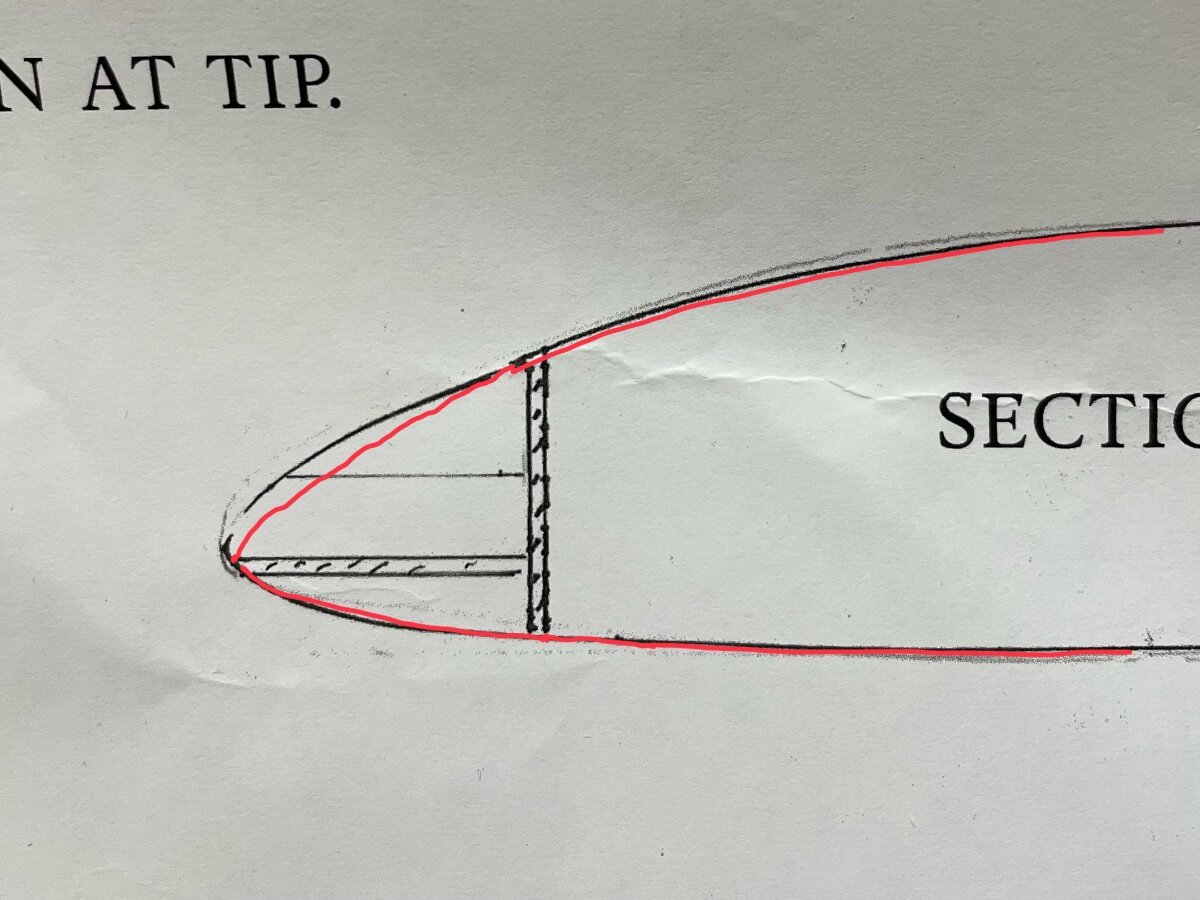
I’ve made a start on the wings and have sanded the leading edges, I think I’ve gone too far. I’ve ended up with sharp leading edges, the ply inner core giving the edge to sand too. I’m not sure if I should add balsa back and re sand or will it be ok like this?
The first image shows the second wing root which is still be undergo its final sand. The blue line is what I should aim for but I’ve gone to the red line.
The plan shows what I should aim for but the red line in the second image shows more what I’ve ended up with. The leading edge is sharp along the whole length. Will this be a problem?
-
I registered a complaint with Parcel Force after Sebastian couldn’t find my address/went for around of golf the other day. They replied promptly saying they had looked into the matter but ‘unfortunately there were no details about why the delivery failed’. So, a thorough investigation into the failed delivery, not.
I felt like complaining about the poor handling of my complaint but this could go on for a long time. So, like everyone else, I’ll put up with declining standards, poor service and just get on with life. Thanks heavens it wasn’t anything important. Hang on, it’s a Tempest, of course it’s important! 😂-
1
-
 1
1
-
-
Mine arrived just now, two hours later than the expected delivery time shown on the tracker. But after yesterday's performance, I'm counting that as a win! Looks great as normal, glueing starts tomorrow!
-
2
-
-
I've been tracking Sebastian from Parcel Force all day as he drove around in his van. At 2.30 pm I looked again to see the delivery window was between 14:35 and 15:35 so it wasn't long to go. Six minutes later it had changed to '14:21 delivery attempted, unable to locate premises'. Needless to say no Parcel Force vehicle has been down my dead end street, I was outside fiddling with my car. If you search my postcode it comes up with my street with 25 houses in it.
Sebastian probably fancied an early day, let's hope he tries harder tomorrow!
-
Parcel Force has been updated, mine was picked up this morning, 8th May. Fingers crossed that it will arrive tomorrow! 😄
-
I’ve just entered my tracking number into the Parcel Force tracker and it says ‘We have no tracks for your parcel yet, the status will be updated in due course’. How can their system be so bad? One person gets theirs delivered and yet my parcel isn’t even recognised?
-
I appreciate and understand that there are many ways to glass a model, I don’t use peel ply as the roller ensures that there is never too much in the first place. To me, it’s an extra step that’s not necessary. But, as I said, horses for courses and all that.
-
It’s epoxy based. I’ve used West Systems in the past but this time I bought from Easy Composites, labelled EL2. They do a fast or slow cured hardener, I’ve used both. I apply the resin by using a cheap foam roller from Toolstation/Screwfix which goes in the bin afterwards. I find that the roller leaves the perfect amount on, neither too little or too much. After the first coat has hardened it gets a quick rub down followed by a second coat. That too is quickly rubbed down before paint. Any minor imperfections are filled with Dolphinglaze putty.
-
2
-
-
Would it be worth offering the Bf110 again? Now that there is some interest from the FW 190 and Tempest? Maybe tweaking the design if needed? Just a thought.
-
1
-
-
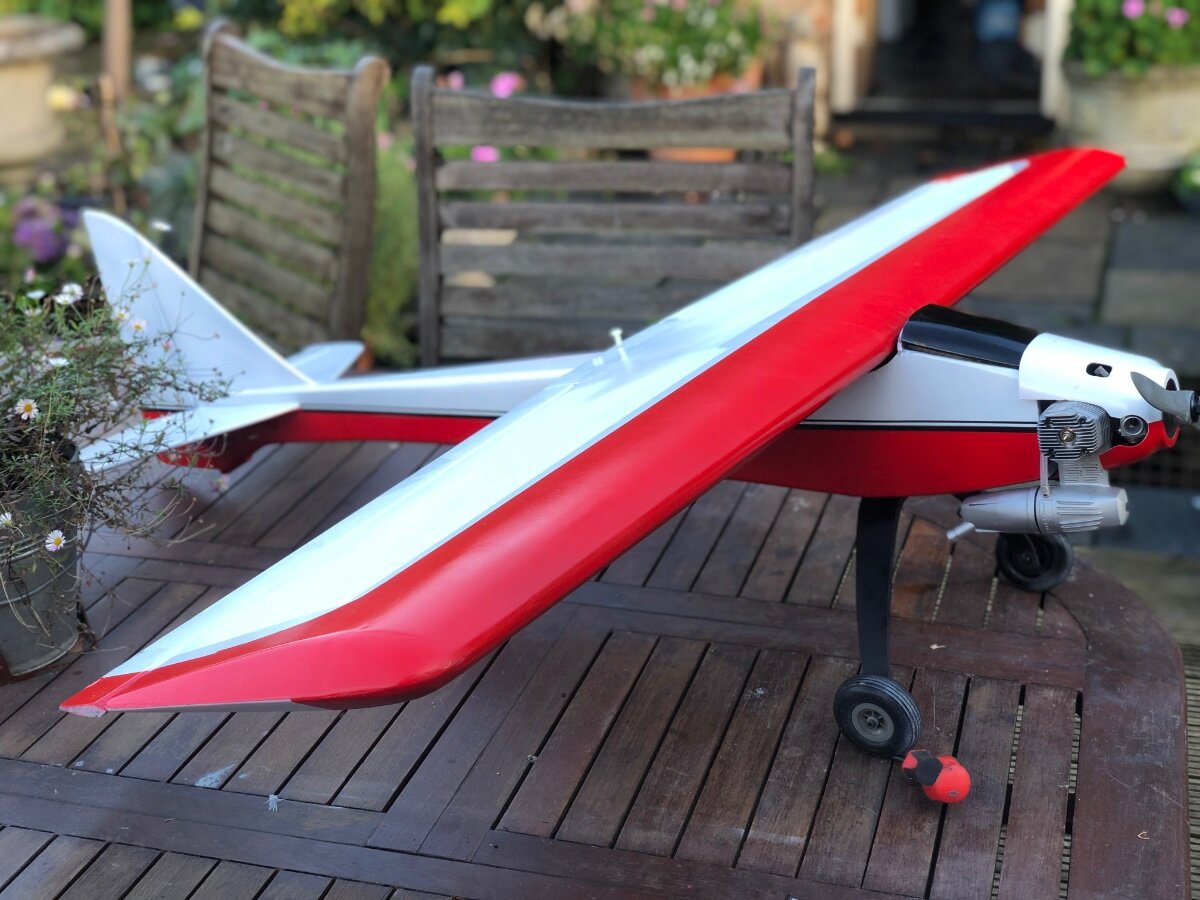
I’ve used the OS 55, mainly because it was what I had. A bit too big but it flies really well. I just wanted a model that was simple to operate and fliers in all weathers, it fits that bill perfectly.
-
I’ve built a Wot 4 and then glassed and painted it with 2 pack aerosol, the aim to create a Winter hack. It worked perfectly, the covering and paint are completely fuel proof and it only requires are spray of water with detergent and a wipe down. I don’t need to worry about film lifting and it looks the same after a flying throughout the winter as it did in September.
I agree that it is more work but it does create a fuel proof, durable finish. I used automotive aerosols where the aerosol had a hardener inside the tin, by activating it the tin was useable for at least two weeks. The paint is entirely fuel proof after being allowed a week to cure.-
5
-
-
I agree that it looks like a knock off rather than an original DJI product, probably why it failed to return to home/launch point. There is likely to be a small flap with the micro SD card inside. Have a look to see what pictures it was taking before it was lost, it might give a clue to the owner.
-
1
-
-
It spent the whole flight beating up the strip, a climbing turn and then return, the code looked great, even upside down! 🙃
-
1
-
-
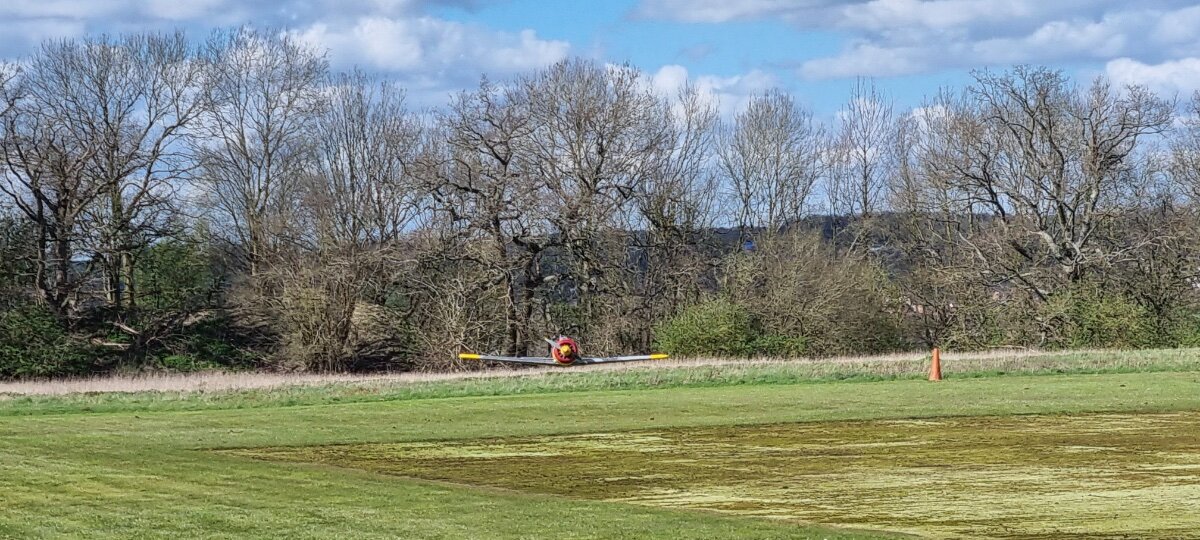
Today, 30th was a bright and sunny day with blue skies and white fluffy clouds to perfect for the 190. I tested the dolly on the runway to ensure it ran (fairly) straight on its own. I needed minor tweaks to the tail wheel to achieve this. Then onto the main event which was highly successful. The plane left off the dolly which was retrieved at the end. We're lucky enough to have an Astroturf runway so it's smooth and long. I estimate that the plane was off the ground in 10-15m and that's without ramming the throttle to the max.
Anyway, we managed some photos with a mobile as it was on the landing approach so the prop had virtually stopped and the phone has frozen the movement. I was aiming for the grass as it's slightly softer than the AstroTurf.
Very pleased with it, a great plane.
-
5
-

The Big Question ?
in Warbird kits
Posted · Edited by Bucksboy
Added photo
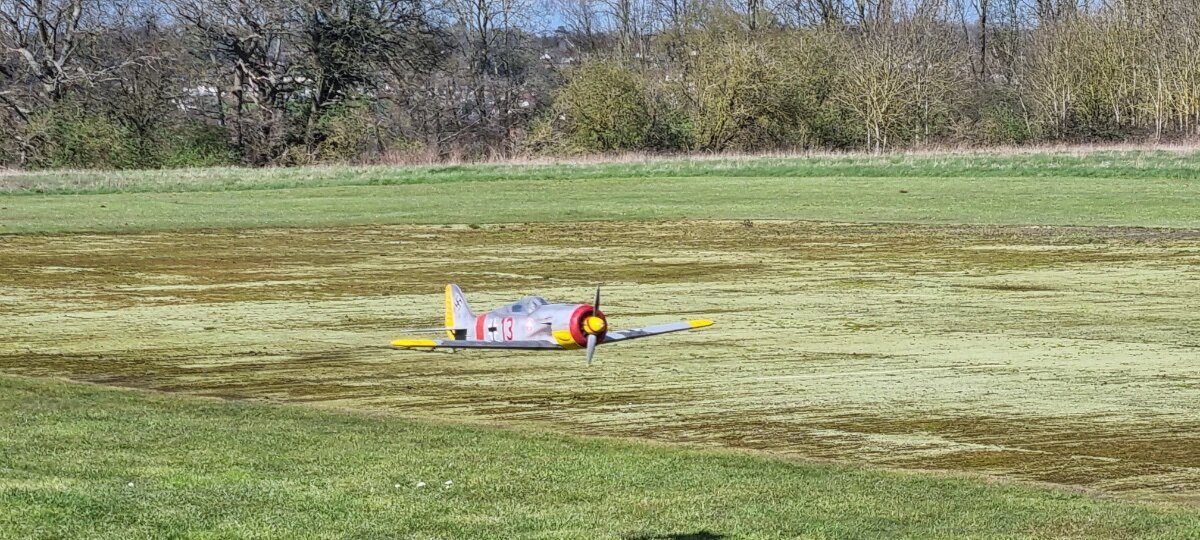
Yes, the yellow tipped 190 is mine! We held Family Fun Day at West London and I took both the 190 and Tempest along. I even won an award for the Tempest for Best model built and flown by the pilot.
The colours on the 190 were deliberately exaggerated to help me see it in the sky. At one point we had five planes in the air, 2 Spits, a Hurricane and a P47 all ‘chasing’ the 190.
By taking some models to the field and leaving them in a friend’s van, I was able to take and fly my larger Laser powered La-7 too.
I told everyone who asked about the planes and the slightly unusual path needed to buy one in the future. A couple have expressed interest in buying one for the Winter building period.
The weird colours are a complicated combination from a printer having an off day and viewing the picture under artificial lighting, the dark grey ended up near purple. I don't care, it still flies really well and looks great. The La-7 has a Laser 80 in it for power.