


Bucksboy
-
Posts
739 -
Joined
-
Last visited
Content Type
Profiles
Forums
Blogs
Gallery
Calendar
Downloads
Posts posted by Bucksboy
-
-
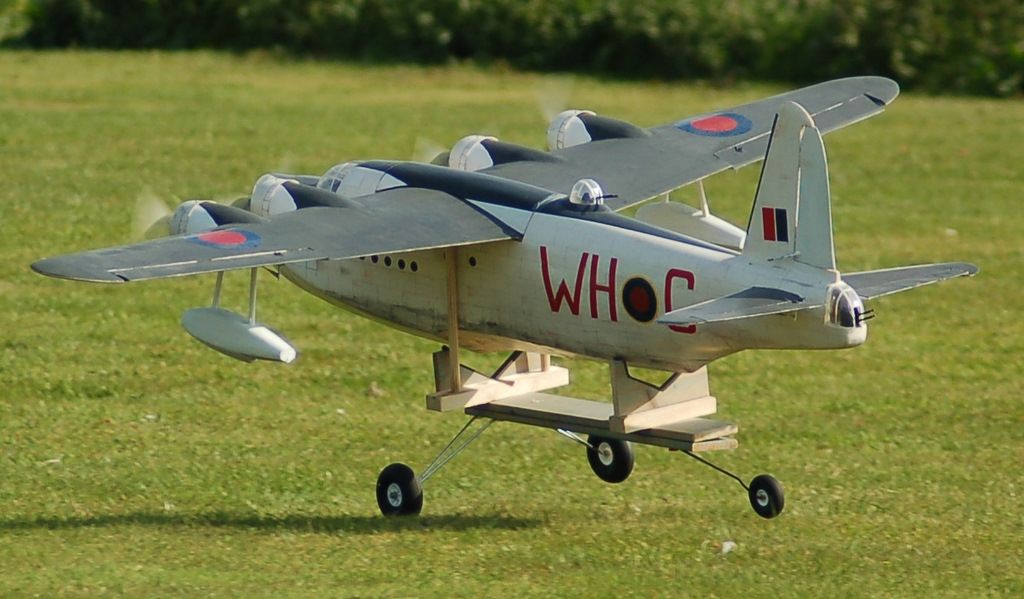
Sorry but I've posted this in two different threads, here's the Mk 2 coming in to land.BB

-
Dear All,here's my second version, the first one crashed after a soldered joint failed. She fles really well and I'm very pleased with her, when the field floods in the winter, I'll still be flying!
BB -
I ordered by the internet on Sunday eveningand the bits turned up Tuesday morning, that is fantastic service, from the shop and the Post Office!BB
-
Excellant shop though, loads of bits and a decent selection of kits in stock. I agree that they probably have to order it themselves before sending it to on to you, hence the delay. I'm a fairly local user and stick to the addage 'use it or lose it.'BB
-
Dear All,Thanks for the prompt replies, the new head at £33 seems the best way forward. Or shall I just send it to John and ask him to fit it? It really depends on what I can sneak past the accountant. Okay, wife.Marvellous, at least it's not going in the bin, it's repairable. Thanks again chapsBB
-
Dear All,My SC 90 met the ground too fast yesterday and has stripped most of the thread out of the head for the exhaust. There are a few remnants left but I don't think the exhaust would stay on for long if I flew it again as is. What to do?Throw it all awayBuy a new head but from where?Repair it but how?Any suggestions gratefully received!BB
-
Fred,I flew no 2 yesterday, I went to the field but had forgotten the dolly. Yesterday was a beautiful day, we're not likely to get many more, so I either waited again or flew it off grass. She leapt off the grass and into the air, she flew beautifully. I kept the first flight short and trimmed her out, then landed, checked everything and flew again. She flies at just under half throttle andthe four motors sound great. Will try and take some video today and post it.BB
-
Sorry to hear that Fred, we considered going to the Nats but decided to fly instead. It's still blowing a gale but we managed to fly, smash, glue and fly the FunJet. I never even bothered taking the Sunderland, when will this wind stop?BB
-
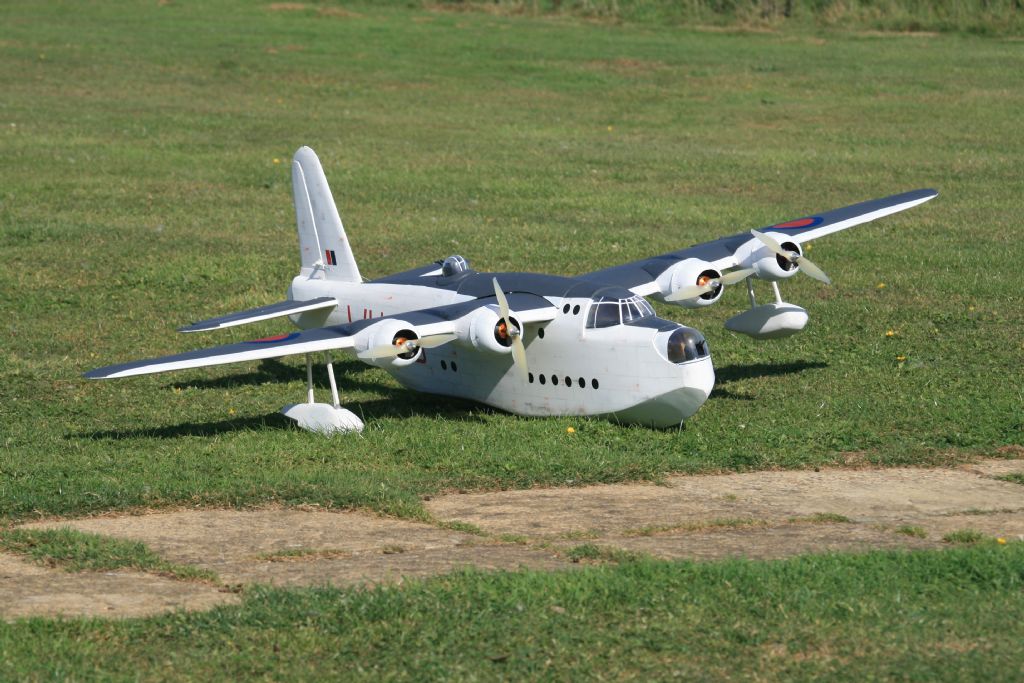
Here it is, siting waiting for the wind to slacken. It didn't!
-
Number 2 is as good as ready! I've built the second one but not yet flown it, there seems to be constant high wind this sumer. I managed to do away with any lead in the nose this time. I moved the servos an inch or two towards the nose and also got the batteries another inch further forward. I left the front turret off but it balances without the need for any weight. I covered this one entirely in film so I didn't need to paint the bulk of the fuselage as it's white.I also moved the ESC's into each seperate nacelle, all connections where sealed with heat shrink and hidden away in the wing. The big advantage over number one is that I don't have a real mess of wiring and ESC's hanging down from the wing that just sat in a jumble in the fuselage.I'll add some snaps later but it's very similar to the first.Have you flown yours Fred?BB
-
Fred,Fear not, when it flew it flew really well. I made a dolly and it shot off that. Mine only had about 6 oz in the nose but I'm building a new one, this time I intend to leave the front turret off until the end. This way I can insert my receiver battery in the very front together with any balancing lead.BB -
I crashed mine the other day and it's totally smashed I'm afraid. It lost power on the climb out and then stalled and went into heavy scrub, the fuselage broke in two with the front reduced to match sticks. The rear is complete but the wing has broken all spars outside the port engine. I looked at re-building her but took the easy option and re ordered the ribs and former set. I'm going to move the battery tray forward another inch to reduce the small amount of lead that I used to balance her. The servo's can move forward another inch too. Other than that she'll be the same, one engine feels a bit rough so I'll change for a new one. After the crash all was checked and found to be working but later I found a broken soldered joint in the power train. I think one motor failed, I failed to spot it and stalled her. I had wired her up so that the two inners or two outers were together, to try and stop what eventually happened. I'll check my soldering this time!BB
-
Drewpy,I've used a kitchen scourer to take the shine off ATRF covering. Use one of the green plastic scourers not a metal one. It leaves loads of minute scratches so use this to your advantage and rub in the same direction. To dirty it up afterwards use ordinary pencil graphite applied on a finger. sharpen a pencil and rub the lead on a piece of fine sandpaper to get your dirt. If you apply a bit of masking tape to a section and then rub the dust over the tape onto the plane, when you remove the tape you are left with a hard line. This gives the impression that a panel is leaking oil, apply sparingly and keep looking at the effect before you dirty the whole plane!BB
-
Dear All,Here's mine, had three flights now.

BB -
Fred,No real tips, it flies well. I've kept it high and fast for the first flights out of sheer nervousness, it was a bit windy too. On the third flight I managed to get her lower and slower for photos. I'll experiment getting her even slower next time. She flies at half throttle and really leaps off the dolly at full throttle. The drone of the four engines is great though, the other club members have all landed before I took off so that the noise could be heard!BB
-
Dear All,Yes, she floats! Alas the new pond is not big enough to take off from though, but bid enough to prove she floats. Maybe a bit nose down but good enough. She flew for the third time the same afternoon, I take off from a dolly after the first flight ripped a float off. She flies well and lands nicely too. Power from 4 2200 Loong Max Li Po's, into four speed controllers and onto the motors.

BB -
DougThanks for the quick reply, I'll try that method too. Where did you buy your retracts from and where are you hiding the air tank? What size tank have you fitted? I've seen some on Giant Cod but I'm worried about where to sit the tank.BB
-
Can I check something please? I've got the basic frame and spine all stuck together and the 3 longerons along the front to support the sheeting. Its says to add former 4a which is the plate at the rear of the cockpit. My longerons have splayed wider than the pre cut 4A and there is only a tiny area of contact. Do I pull the sides in and make 4A fit? I thought about making the cockpit floor now as this would give increased glueing area allowing the stress to be carried in a piece of wood bigger than 4A. Any suggestions please?Thanks
-
My CNC pack and wood pack arrived today, I'm off to write part numbers on all the bits now!I'm still not clear on the retracts though, I take it that I can buy mechanical retracts and then slot sprung oleo's into them? The sprung legs do look a lot better.
-
Boulton Paul DefiantMe 110StukaThanks!
-
Charles,
It looks fantastic, what motor did you use and where did you buy them from? Let us know how it flies please.
BB
-
Glenn,
I feel such a fool. I've become so fixated with building the fuselage first that I've not even thought about the other sheet. I've carried the first around for ages studying it that I forgot about the other one. Apologies to all, will sit back and watch someone else build for a bit. No, not really, will carry on tomorrow.
Thanks again
Studid BB
-
Glenn,
Great shots of your build, pictures speak a thousand words. I still can't find F3 though, the headrest is F4A. I'll have to line up F2 and F4 and draw my own F3. I think it's been missed off the plan.
Off to a cold shed now!
thanks
BB
-
Is it me? Is F3 shown on the plan? I want to start cutting this week and have studied the plans in preparation but still can't see it. Can anybody point it out to me please?
Thanks
BB
Phoenix Sim
in Simulators
Posted