

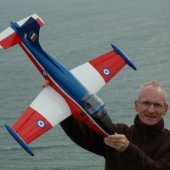
Steve Houghton
-
Posts
1,096 -
Joined
-
Last visited
Content Type
Profiles
Forums
Blogs
Gallery
Calendar
Downloads
Posts posted by Steve Houghton
-
-
Phil,
I have no recent knowledge, I'm afraid, but back in 1976 I came 4th in a Cross Country slope competition at Darwen Tower organised by the Ribble Valley MSA. There were a few top names there, including a certain Mr Sean Bannister. The wind direction was wrong for Pendle so we all migrated to Darwen and had a fine day's flying.
-
ED: Thanks for your tip. As far as I know it was warm enough - just room temperature but inside the house rather than an outhouse/shed.
Jason: Thanks for the heads up. I thought I'd try the SP113 just to see what happened, with nothing to lose by trying. I have mixed up 7 or 8 batches of resin now, and each has set well except for the one mentioned above. I strongly suspect I used an incorrect quantity of hardener.
I'm pleased to report that my third attempt was successful. I managed to lay up 11 layers altogether, using two separate mixes of resin laid on top of each other.
Lay it on: Layers as below, with the uppermost layer of c/f cloth (when viewed from the top) at the bottom of the picture. The underside (top of picture) was finished with a layer of glass, since earlier attempts left the bottom c/f surface rather rough since I didn't use any press to smooth it down:

Mould: My mould was made from ply and scraps of balsa for spacers. Two coats of sanding sealer, then 8 coats of release wax each buffed up:
Let me Out: Since the mould tapers toward the feet, I made the front surface of plasticard removable so that I stood a chance of removing the product:
Drying Out: After drying for 18 hours it felt hard enough to release. The front popped off nicely:
Free at Last: The main moulding needed a little persuasion to release, but finally it popped out cleanly without bring any of the mould with it - Phew!
Voila: It won't win any concours prizes, but I'm quite happy with the result. All the resin dried nicely and the layers seemed to hold together. I haven't mastered the art of getting a shine on the top surface yet - the surface against the release wax is smooth but matt finish.
It just remains to be seen whether it is strong enough and how easily it can be drilled without breaking. Approx thickness 3mm. Unfinished weight before sanding is 20g.
Thanks to everyone who has chipped in.
-
 3
3
-
-
Thanks. I'm making a third attempt today, concentrating on thorough mixing, and will show how I got on in due course.
-
Thanks, Andy. Useful to know that you have used 'wet' layering successully.
I used 2ml and 10ml syringes for measuring by volume, mixing approx 6ml resin to 2ml hardener each time. I strongly suspect I got the ratios wrong for the second mix.
I left it in the warm since last Sunday night, and finally pulled it apart tonight, to find that layers 1 to 5 had set but layers 6 to 9 hadn't.
-
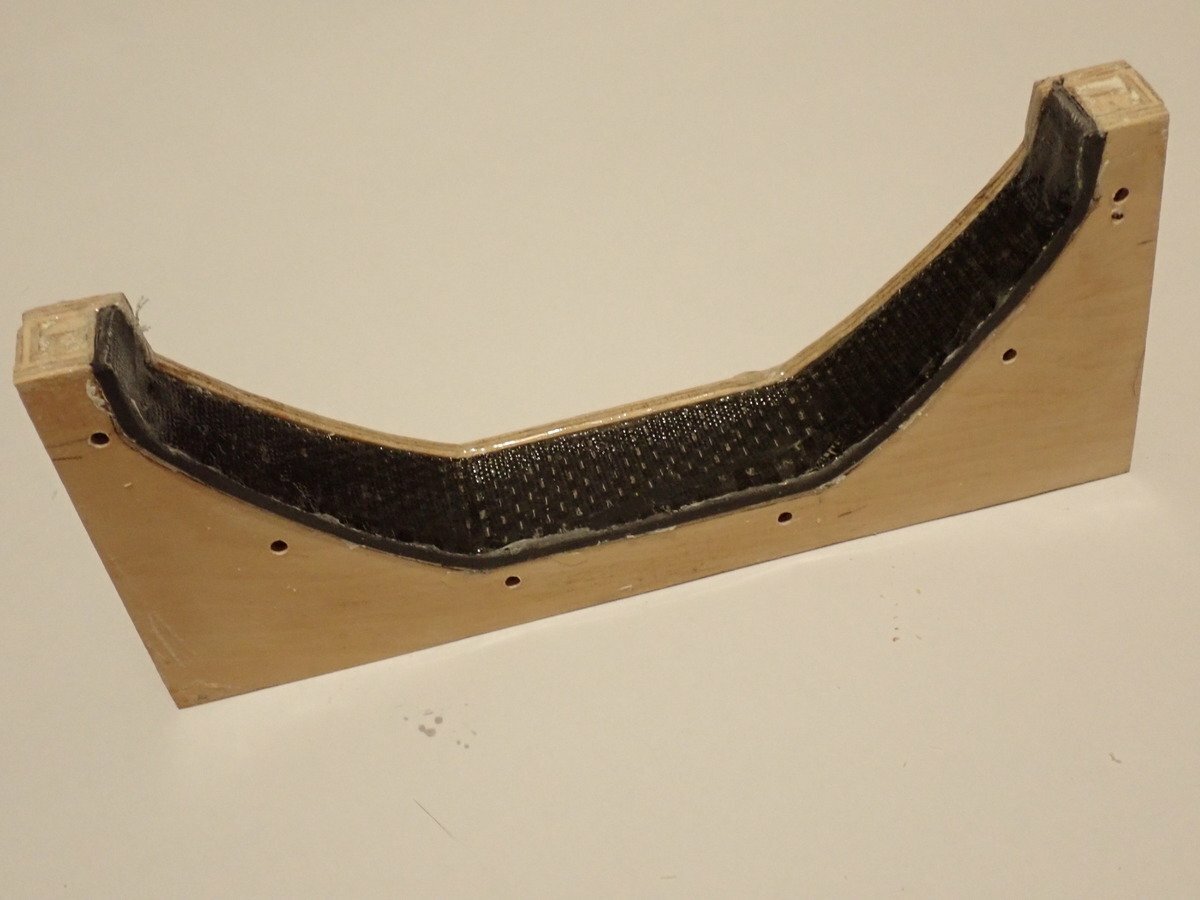
Hi All,
I'm attempting to mould my first carbon fibre/glass laminated undercarriage, for a Sssshhwept by Geoff Dallimer (as updated by Shaun Garrity).
My first attempt set fine, but it was too thick and heavier than I wanted, at 28g. I managed to laminate my planned 10 layers (4 carbon interleaved with 6 glass) just before the resin started setting.
Second attempt, using the same 10 layers again, I refined the process using thinner cloth. This time I mixed up the resin in three batches and applied them without letting the previous layers set. I ended up with the middle layer not setting. Is this likely to have be caused by not letting the layers set before applying the next?
The other possibility is an incorrect ratio of resin to hardener in one mix. I'm using some very old Ripmax SP113, but all my trial mixes have set correctly, in the ration 3:1.
Any ideas from the experienced moulders, please?
Thanks, Steve.
-
1
-
-
Hi Richard,
Just to confirm my recent PMs with you, please could I ask for a Tempest when they become available?
I have joined in several of the PSS mass builds, and a 'noisy-ish' one would make a nice change. Looking forward to supporting british business as well.
Steve
-
3
-
-
Hi Rich and Caveman,
Thanks for the Enya lead. If nothing comes along second hand I may try that approach.
-
Hi all,
Does anyone have an unused Enya 09-IV TV R/C carb lying around that they would like to sell? I purchased my Enya years ago without the carb. Although I only need the carb, I would also consider a complete engine - condition of the engine is not too important as long as the carb is good and operational.
My Fournier RF5 is drilled to suit the Enya, so I'm not looking for an alternative engine at this stage, unless there is no other option.
Thanks, hopefully.
-
I can back-up Gary's recommendation for 1/32 ply. I built Sean Bannister's original Algebra from the RCM&E plan, which had the entire fuselage made from 1/32" ply with 1/8" square spruce longerons and cross-pieces. It suffered many hard arrivals and nose-first impacts without a scratch - the ground always came off worst! I still have it, some 40 years later.
-
Michael,
You may be thinking of the Bay Flyers: Bay Flyers.
You'll have to drive around the estuary from Arnside however, as they are on the Grange side.
Or, of course Kendal Club itself, which is also South of Kendal: KMAC
-
Martin,
Fizzy Vimto bottles used to be ridge free but the latest ones have tiny ridges, although much smaller than those in your picture. Maybe you can find some old stock!
-
Thanks Pete, I think I'll just not say anything to the family!
I know the JR DSX-9 has a Flap Trim adjuster, so maybe this will be my equivalent of the Futaba rotary.
-
Thanks, both.
Pete: I like the adjustable trim idea. I'll have to check whether my JR DSX-9 supports that. It has no rotary controls, but a few spare sliders. Something to dabble with after the Christmas Dinner, I think!
-
Thanks Martin, Yes I will have flaps and have started experimenting with programming crow brakes - never used either before, so it will be an interesting exercise.
-
Hi Martin, Thanks for that.
The main restriction on up elevator on my model is the leading edge catching on the fuselage. However, I don't think it needs to move that far for the movements quoted on the plan. If I now remove the -1mm tailplane incidence in line with your recommendation, that will give me even more clearance at the LE and TE..
-
Hi David, Thanks for your query. The fin fairings are now finished and shaped, but I didn't think they were significant enough to post pictures. I'll try to post some shortly.
Tailplane Incidence
I wondered if anyone can tell me what incidence the all moving tail should be set at relative to the wing? With my wing propped up at 0 degrees (parallel to my bench), I have -1mm at the leading edge of the tailplane. Alternatively, with the tailplane propped at 0 degrees I have +2.5mm at the wing leading edge. Does this sound about right?
Regards, Steve
-
1
-
-
Thanks Phil, and well done to all the builders who completed on time.
I'm hoping my continuing efforts may inspire others who haven't reached the finishing line yet. At least it will keep the build threads active until the next Mass Build!
-
3
-
-
They think its all over!!
It isn't now!
A 6 month deficit of spare time has set me back a little and I missed the main event, but I'm pressing on....
It was great to see that stunning array of 16 Sabres at the Great Orme in September - I'm sure there must still be a few in hiding, along with mine.
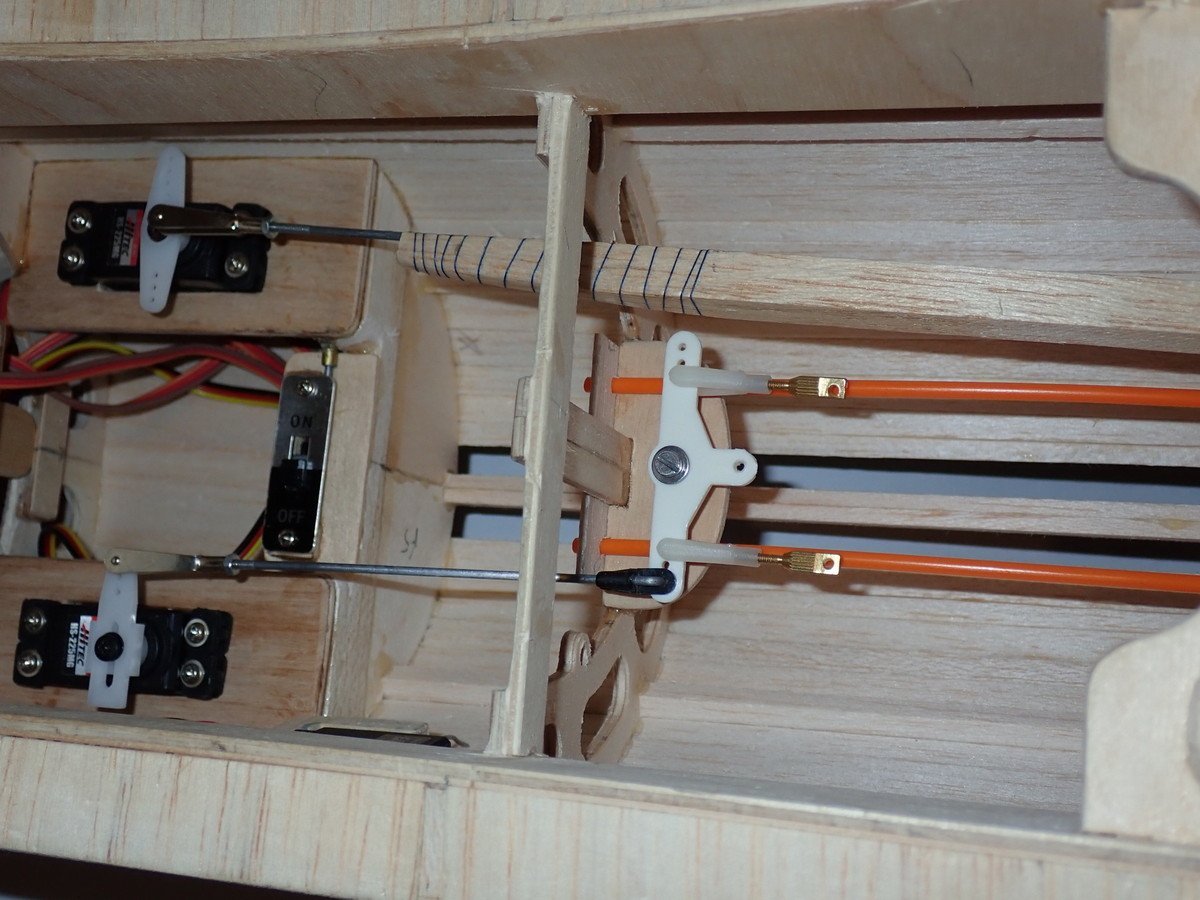
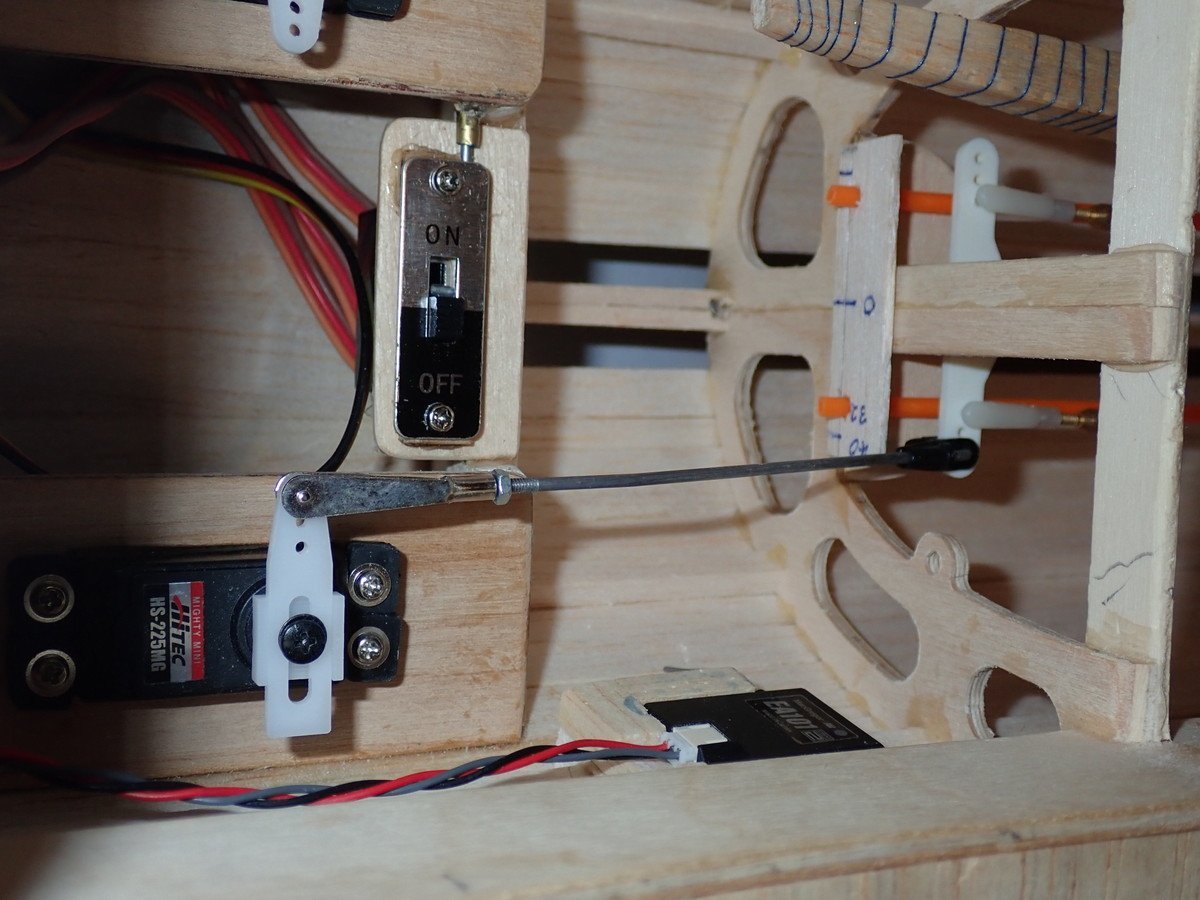
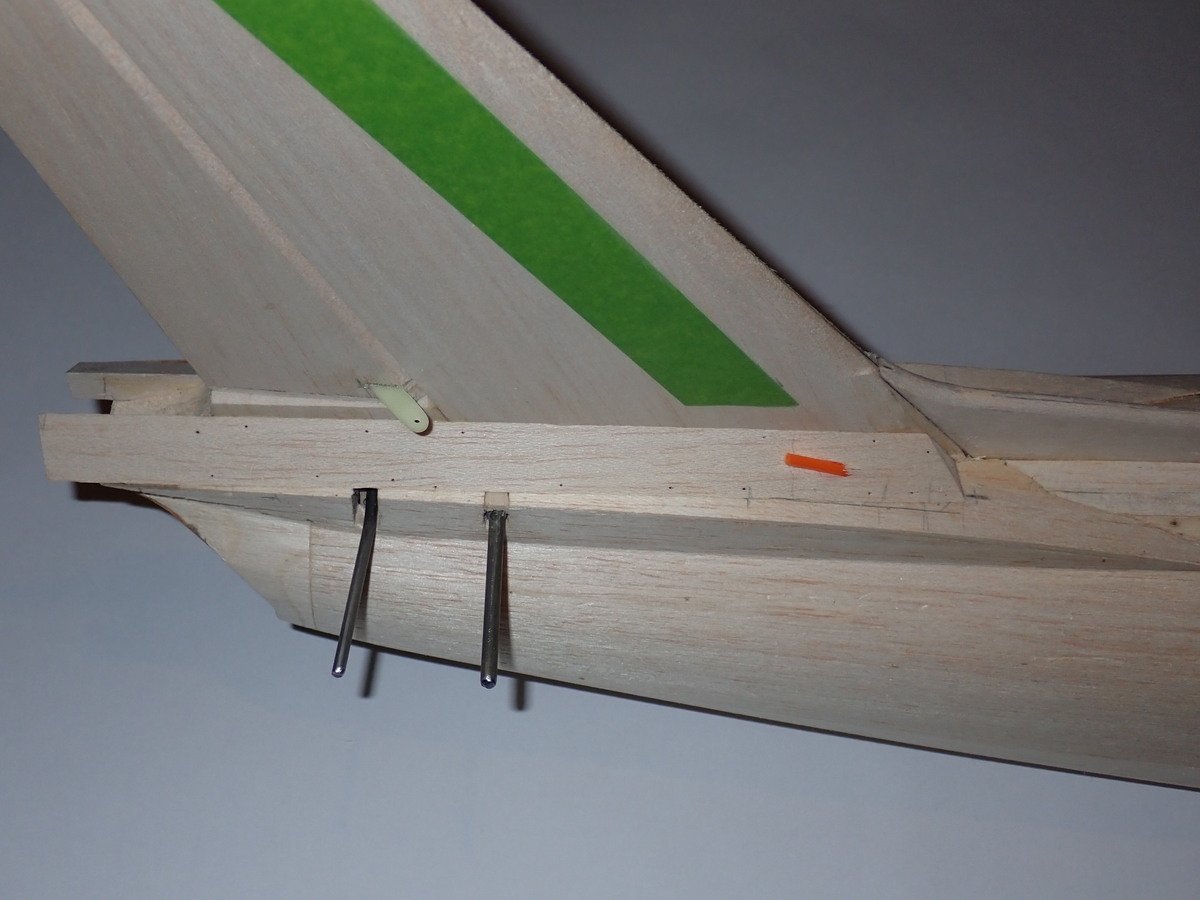
Closing the Loop
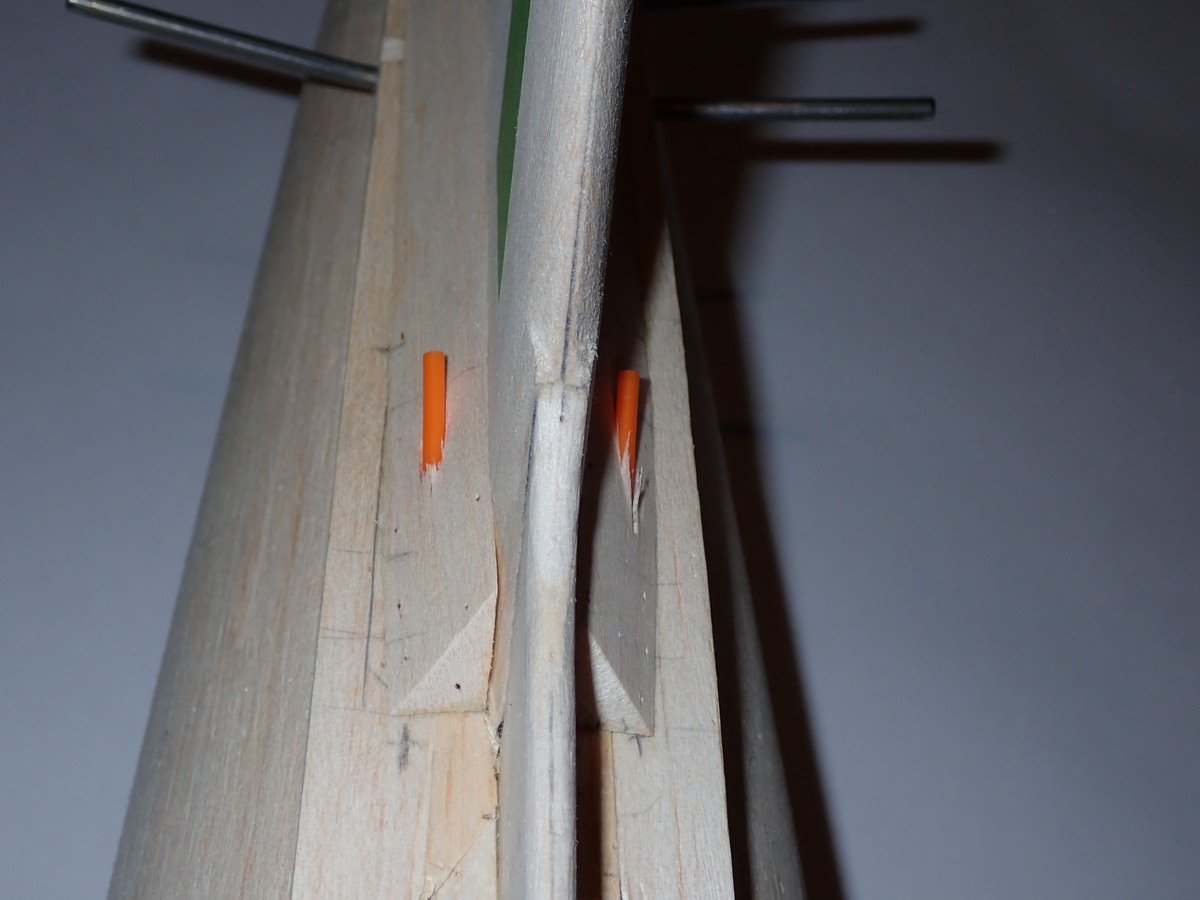
Here's a general shot of the radio bay progress. The elevator pushrod is disconnected to show the closed loop operating crank - I like to take any strain off the servo bearings if possible. The take-off points for the cables (not yet attached) are +/-16mm from the pivot, to match the spacing of the holes in the rudder horns. The cable guide tubes are still free to slide back into place when I'm ready but I aimed to set them to the same spacing as the attachments to the crank, which I managed fairly well.
I couldn't get the required rudder throw from the standard Hitec servo arms, so I've used one of these Hitec adjustable arms for the first time - it works a treat, and allows very fine adjustments to the throw (I prefer mechanical to electronic adjustments - it doesn't matter if I lose the radio settings then!).
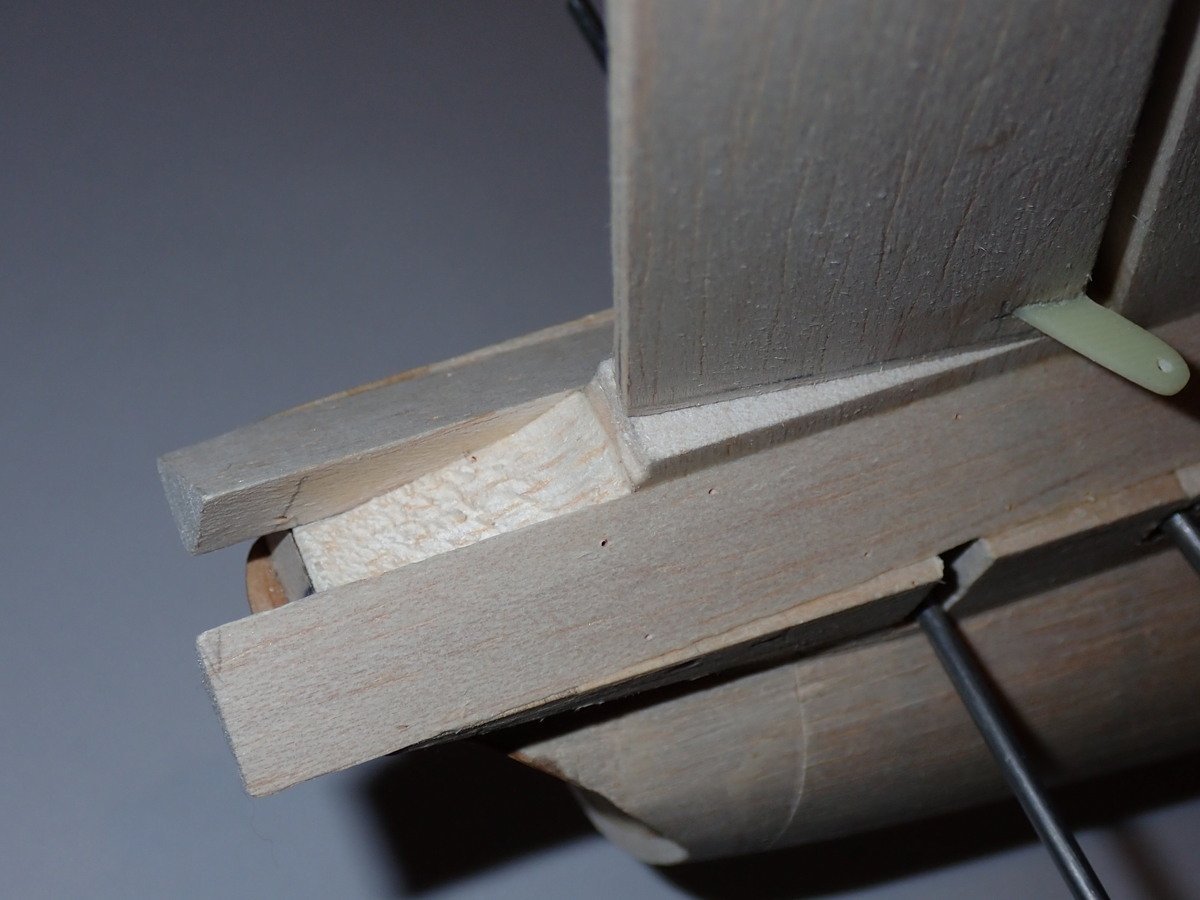
Blending In
I'm fairing the fin with 1/2" triangular stock along the base of the fin, and will use thinner stock along the strake.
I chose to keep the fin fat while I add the fairings, and then trim the trailing edge later to blend in with the rudder. The reason being so that I didn't lose any width from the fairings - on my photos they seem to be the full width of the tailplane fairing and then taper off towards the front. I hope I can achieve the correct rudder blending shape with this method.
For the strake at the front of the fin I used 1/4" balsa. This leaves quite a step in front of the leading edge of the 1/2" fin, even after shaping the LE. The triangular fairing has to bend downwards and sideways at this point, so I applied many saw cuts underneath, and a dampening of the top wood, to coax it into shape while the glue dried. Again, I tried to keep the closed loop tubes +/-16mm apart, and they'll eventually be trimmed flush with the wood.
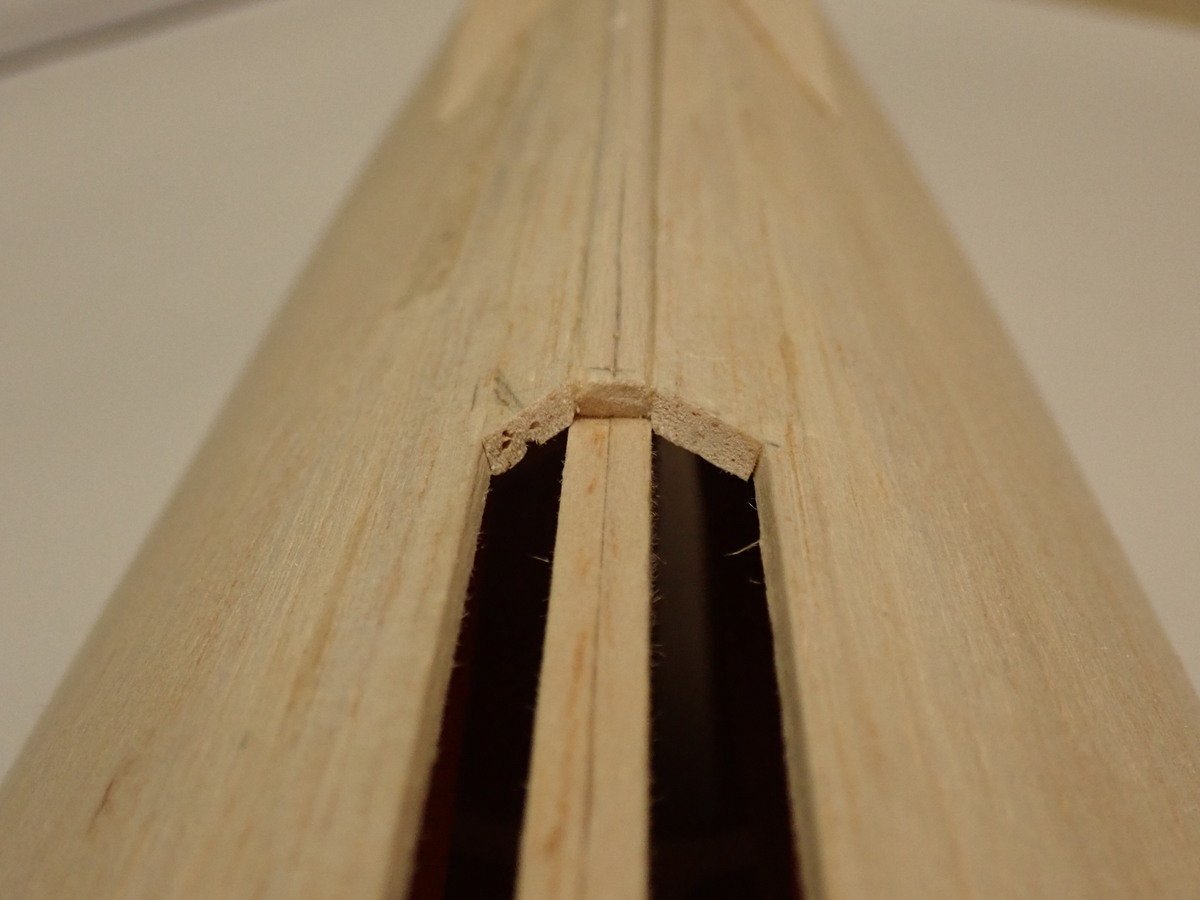
I glued the fin strake onto the top stringers rather than onto the planking because I wanted to leave the last pieces of top planking until the last minute in case I needed to see inside to re-thread the cable guide tubes through the fuz. Having satisfied myself of an adequate cable routing, I then butted the top planks against the fin sides:
-
2
-
-
Very interesting, Skip; thanks for finding that video, and thanks to Paul Stewart for making it.
The running commentary about the CAC Sabre's history is fascinating, and the tail end pics look almost as good as my model!! I've not yet decided how to model the tail lights, but I am noting carefully how other builders have done it.
-
Chris, Many thanks for the reminder of your link. I have already downloaded your orignal Ballerina posts about the sauce, to save as a reference document.
If anyone wants references to the glassing technique (after reading the excellent blogs on this forum, of course):
- RCM&E Special Issue 2019, article by Danny Fenton.
- RCM&E June 2018 Workshop Supplement, article by Tony Nijhuis.
- I ordered some materials from Phil Clark at Fighteraces, and he also sent a helpful article of his own.
Skip, glad my struggles are helping. It will be great to see some photos on your Avon Sabre blog in due course - I hope the shoulder is clearing up to allow you to proceed. You have some useful photos, especially of the tail end, which I have only just spotted.
-
1
-
Thanks Gents,
Chris, I did draw inspiration from your roll. It all helps us to develop new ideas and techniques. I am seriously contemplating my first glassfibre covering for this build, so may be coming back for advice on the Sauce. I've read your's and Phil's blogs on the matter, so I think I understand the principles and ingredients.
I'm still hoping to meet the September deadline, but progress needs to be significantly faster than last year!
-
1
-
-
Chris, I love your attention to detail. It really makes a model stand out from the crowd.
-
Roll Your Own
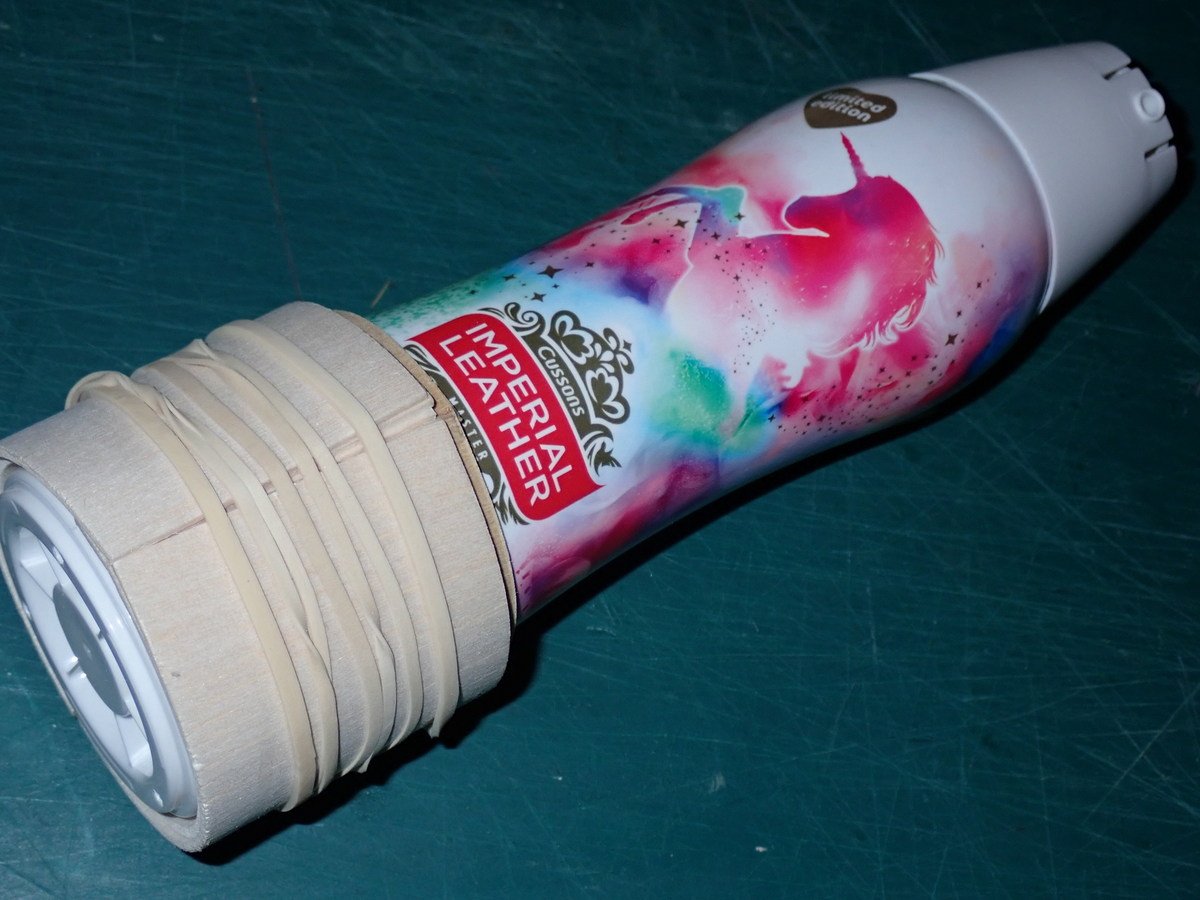
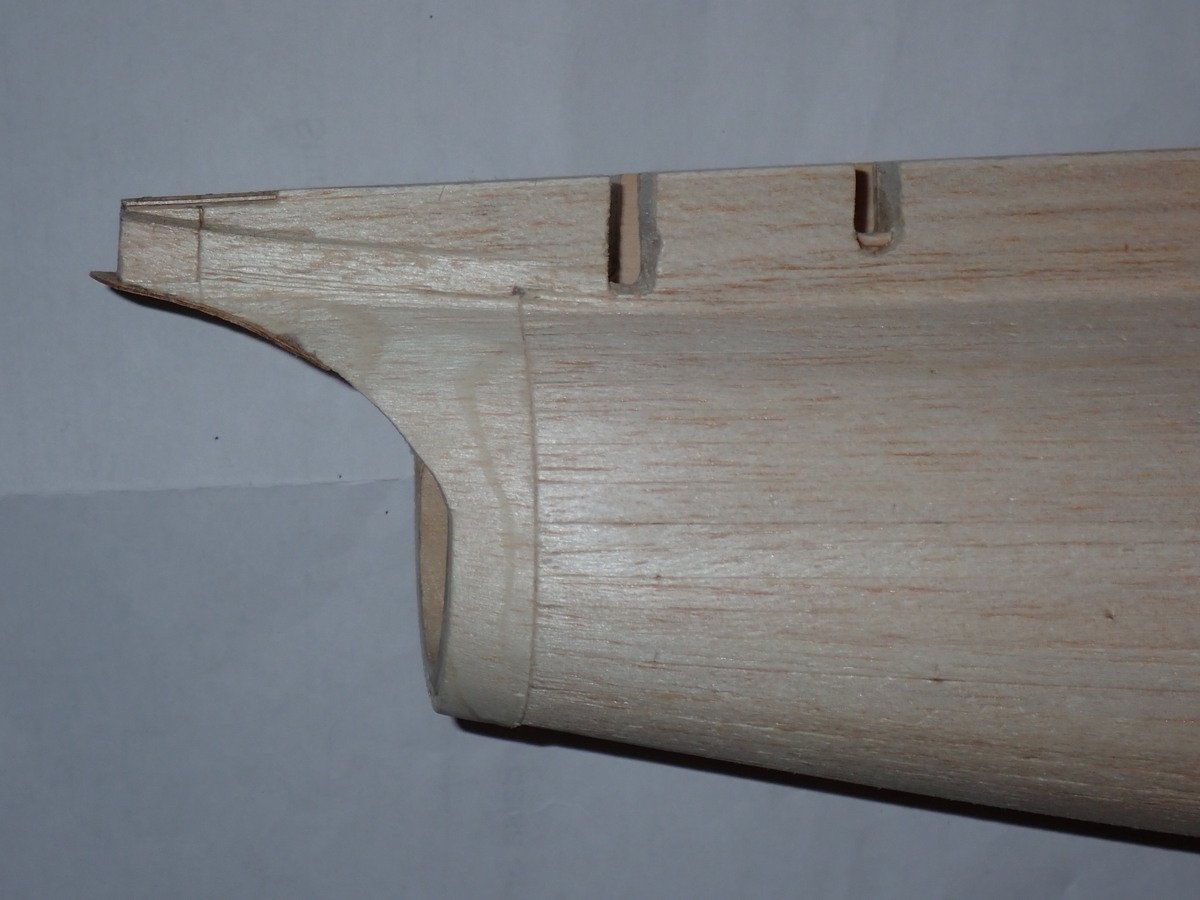
Following a similar principle to my Jet Provost tailpipe, and a few ideas borrowed from Chris McG, I made the tailpipe by rolling a ring of 1/32" ply around the best sized former I could find (other body cleaning products are available), and then added a few layers of 1/16" balsa to thicken it up. This was all wetted with water and left to dry:
After overnight drying it was all laminated with aliphatic glue, the top flattened off, and a location tab added to the top to fit between the tailplane fairings. This allowed dry-fitting to the fuselage and rough shaping:
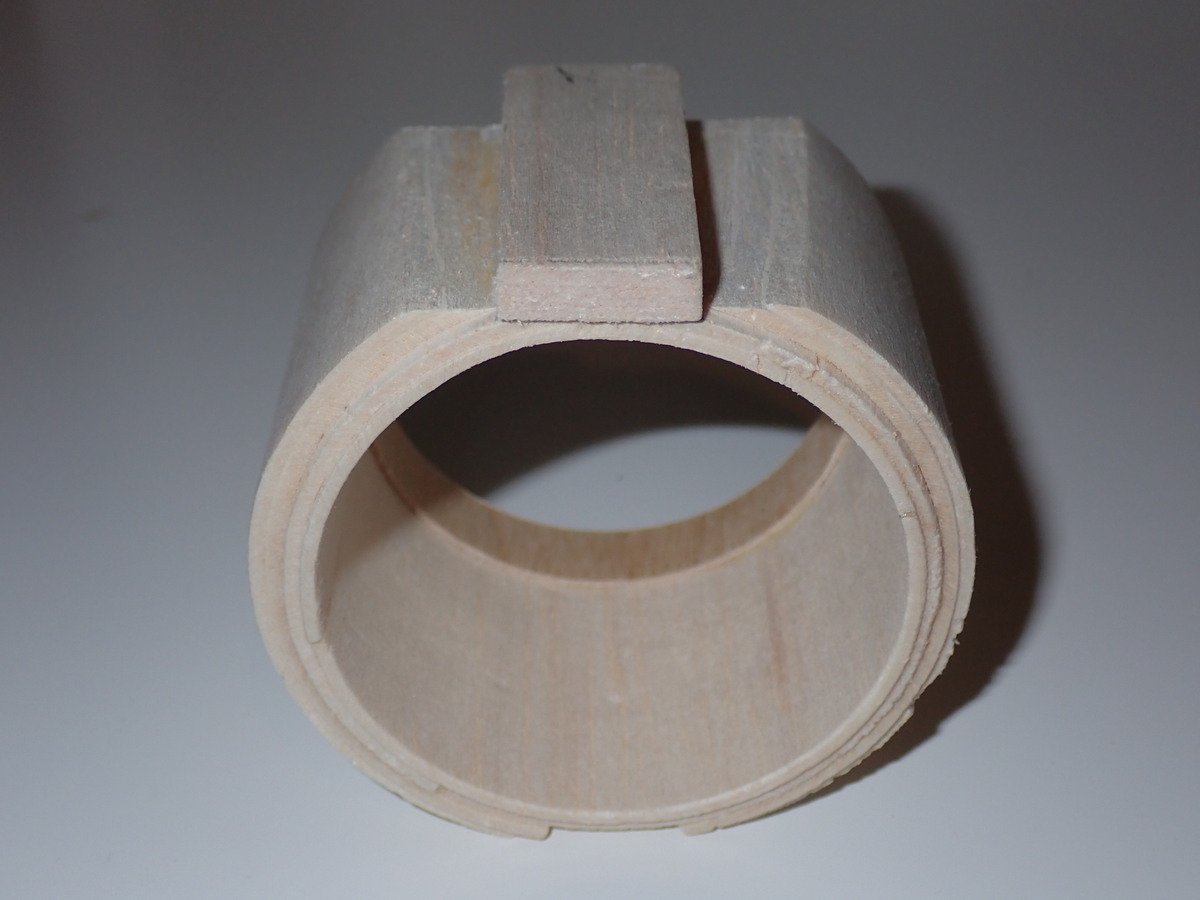
Put Another Ring On It
I wanted the ply ring to be as near to the fuselage skin as possible. However, my fuselage was not an accurate round shape and with the initial ring size it would have been too high up the fuselage to allow enough meat for carving the streamlined duct shape. Hence I added two more inner rings of 1/16" balsa and another 1/32" ply ring. This seemed to be adequate to carve a nice shape, albeit giving much thicker side walls than I wanted:
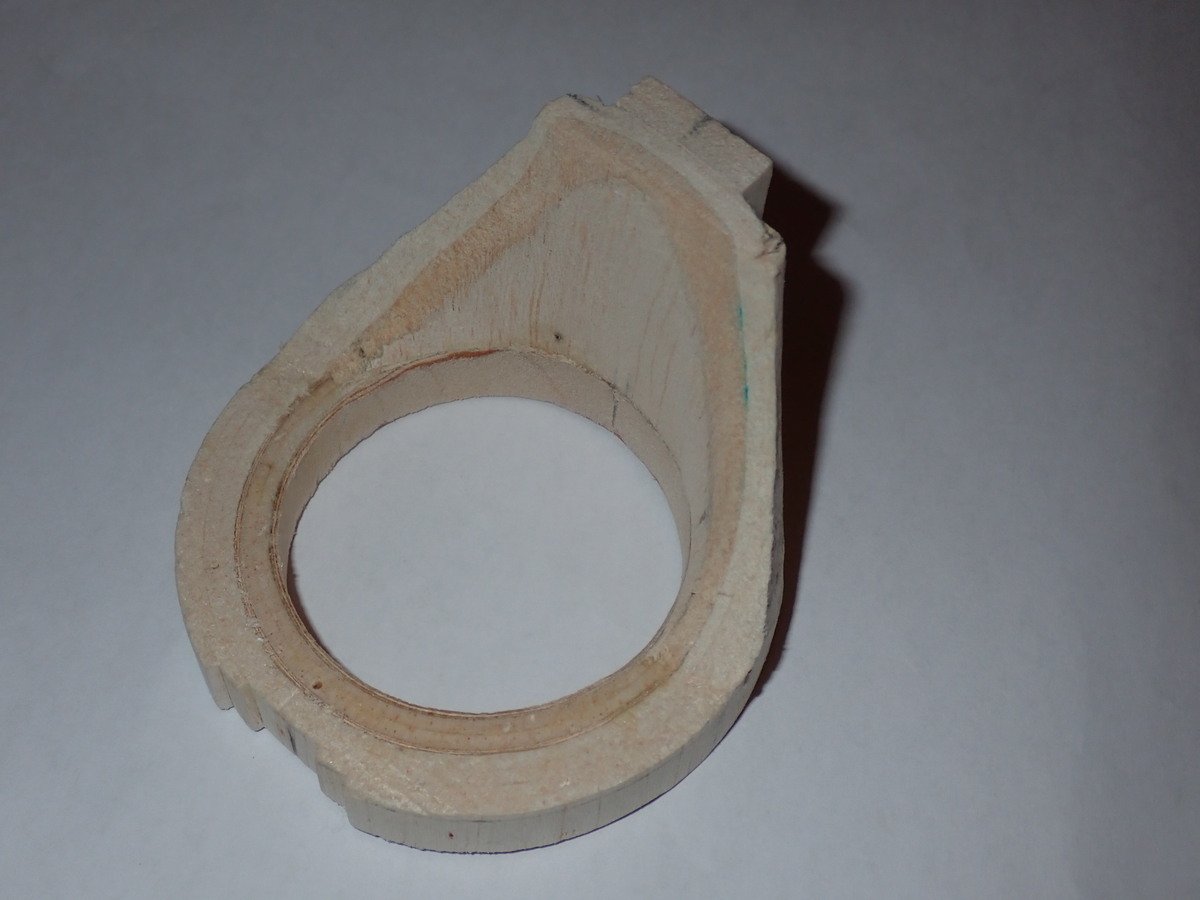
With the duct still dry fitted I could remove it to carve the initial shape onto the tailplane fairings:
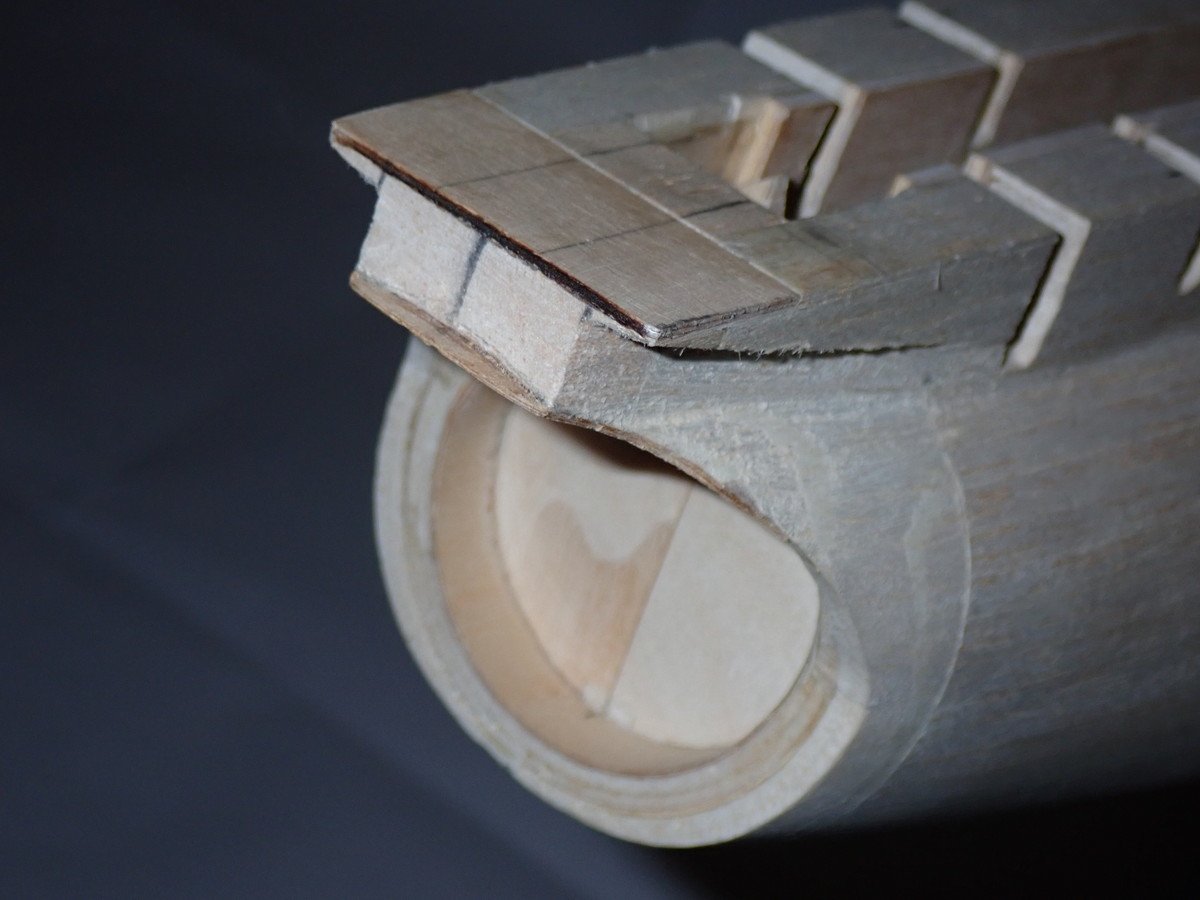
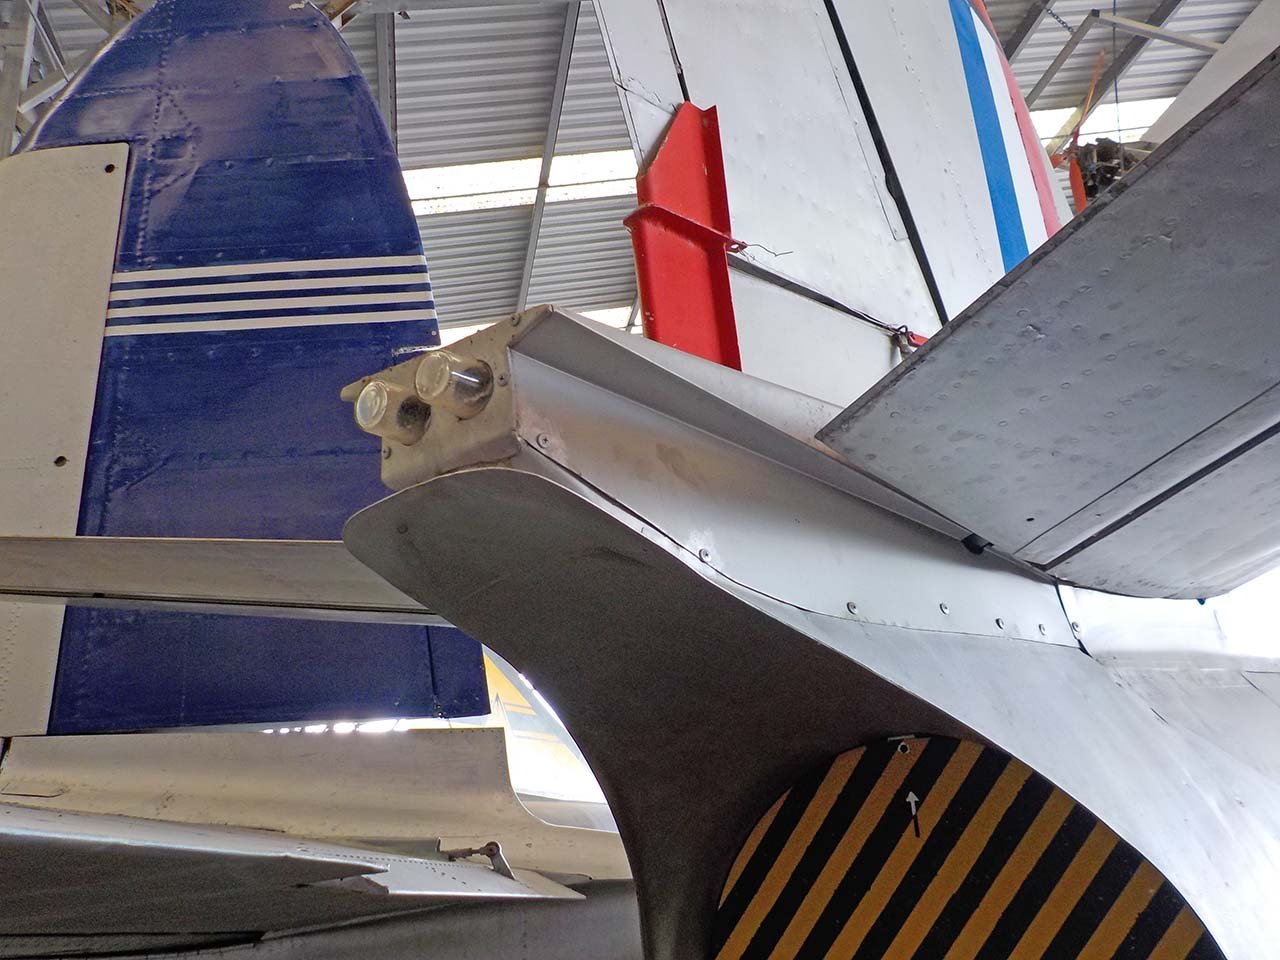
Mistaken Identity
Further study of the Avon Sabre's duct showed that it needed a different shape to that which I originally carved, which was based on other F86 marks. After gluing it all together, with a top ply plate as used by other builders and a further 1/32" ply liner inside the top of the duct, I ended up with this:
The taper on the tailplane fairings extends further forwards and higher up:
Here's One We Made Earlier
It should have ended up with something like this, from a different Avon Sabre, but the shape is the same for mine:
... and this is how it turned out - final shaping and sanding still needed:
The inner lining will be smoothed down in due course. The side walls of the duct can be thinned a little, but I can't get them down to the thickness of one layer of metal. It will definitely be 'stand well off' scale. However, I'm fairly pleased with the overall effect.
-
4
-
-
In a word, Phil....STUNNING!
You're showing us all the way to go about scale modelling again.
I reckon you should let someone else judge this MB, so that you can be in the running for a prize at last. How about inviting a modelling celebrity to help with the judging - Mr. D.Fenton, for example (other celebrities are available!).
-
 1
1
-


Warbirds Replicas Hawker Tempest V -Mass Build 2024(part two) .
in Warbird kits
Posted
Please don't forget me, Richard....I signed up on the Big Question thread but I'm not on the list above. I have liked the list (very much!).