John Timmis
-
Posts
576 -
Joined
-
Last visited
-
Days Won
1
Content Type
Profiles
Forums
Blogs
Gallery
Calendar
Downloads
Posts posted by John Timmis
-
-
-
Hi all
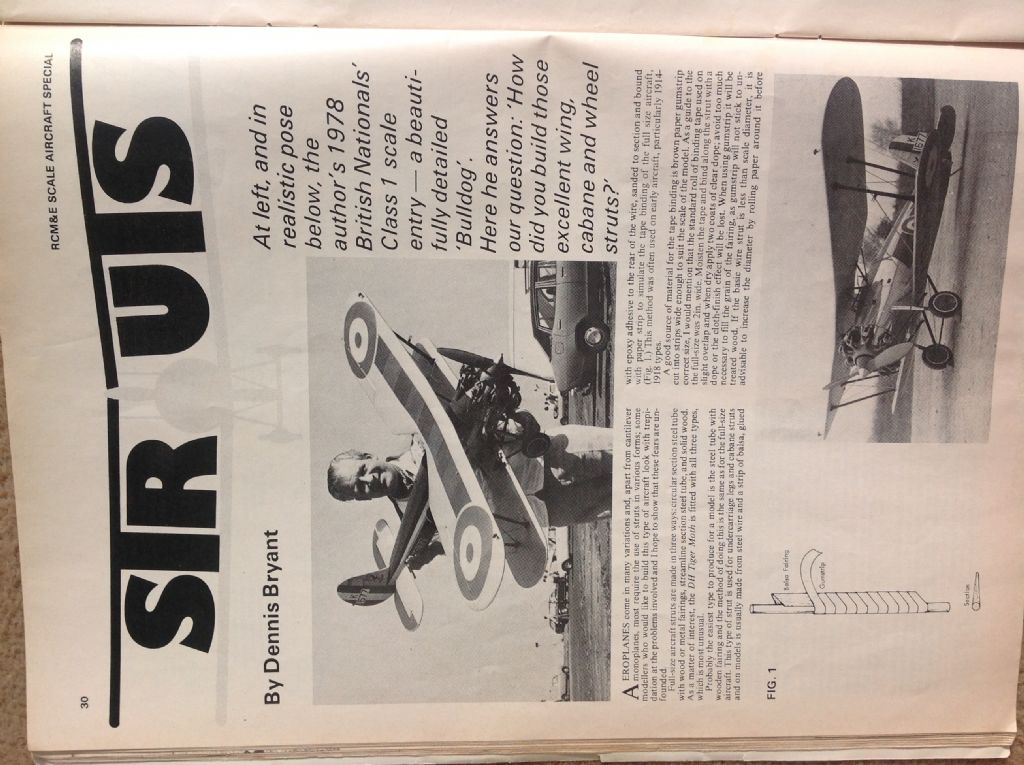
I thought that this might be of interest. It shows a magazine article from 197? by Dennis Bryant in which he shows how he make struts for biplanes. The magazine cover featured Dennis Bristol Bulldog. The metal panelling was kitchen foil attached with double side tape.
Cheers John.
-
Hi Danny
Got back home from Cosford yesterday & tipped the contents of my goody bag onto the bench. There was a Fury plan. Include me in.
Cheers John
-
Well done Colin. Nearly there . They fly a treat.
Cheers John.
-
Hi Martyn
It's looking good. Glad to see that your back on the job again.
My chippie has been grounded for about the last 9 months with duff lipos. I flew it again last Sat with new batteries.
No problems apart from a tendency to tip onto it's nose. The new lipos are a bit bigger physically & about 4 oz heavier. Need to check the cg.
Cheers John.
-
Hi all
Well, apart from some framing around the cockpit, that's the litho done. ' jobs a good un"
Definitely not a job to be rushed, & still lots to be learned. Flat or single plane curves are dead simple. Panels with compound curves are much more work. I started with the top panel. This took quite a bit of working to achieve the amount of 'belly' in the panel. There was lots of annealing , I found the most useful tool was a desert spoon worked on a fairly hard foam surface. If the belly in the lith doesn't match the fuselage you will never get it to lay down neatly. The forward side panels looked quite easy, not so, took longer than expected. The rest were easy. To simulate the panel fasteners i made a punch tool which was simply a washer glued onto the shank of an old drill with c/a.
Finally . I know it's not modelling or litho, but I have recently watched, on utube, some very informative video on panel working. Try entering ' English wheeling machine' if your interested.
Cheers John
-
HI all
Danny, thanks for the advice. I'll move the reciever to the back of the wing bay.
Chris, thanks for the comments, glad you like it. It's always nice to get some feedback. It's a very rewarding build, I'm sure you will enjoy yours when you get started. Everyone love a Hurricane.
Here are the photo's of my second attempt at the tail fairing. It's quite a steep learning curve but I think the results don't look too shabby.
What have I learned? Take your time, scrap anything your not happy with, any mistake you make will help you make a better piece next time anneal the metal frequently
Next time it's the fuselage panels.
Cheers John
-
Hi all
Here are my first attempts at litho bashing. I decided to experiment first of all with the tailplane fairing.
I enjoy experimenting with new materials so this was quite interesting for me. There was lots of trial error cutting card templates, probably more error than trial actually. Anyway here are the results of the first attempt. Not quite 100% but not too bad for a first try . Still got lots to learn. Now need to make a matching pair.
Danny, thanks for the photos, just the effect I would like to create. Two questions , if I can pick your brain again.
What sort of glue do you use to stick down the litho ( por, canopy glue , spray mount?) . Does the Litho have any screening effect on the radio signal?
Cheers John.
-
Managed to get a bit more done. The fuselage & tail surfaces have bee covered in nylon. Everything feel very stron g & stiff now. One piece of nylon covered the top & sides as far forward as the windscreen, another piece for the lower fuselage plus a few smaller pieces for the rest.
Today I've been tidying up the wing root junction withe the fuselage. Next job is to glass epoxy the wing.
I quite fancy replicating the forward fuselage panels with litho.I've not tried this before but it doesn't look to difficult as there isn't much curvature in the panels. If anyone has done this before , tips would be appreciated.
Cheers John
-
Hi all
Back again. Not very much has happened since last time. I decided to give myself a change of pace & started to build a thermal soarer that I could fly with my grandson. So the Huricane has been on the back burner for a while.
Also a holiday, 2 family visits from the USA complete with grandchildren & a 3 week dose of food poisoning.
Anyway, back on the job now. Last week I splashed out on a couple of 6s lipos. So a battery installation has been sorted, it looks as if it will work out ok. There is lots of room under the battery plate for ballast or perhaps a sound system?
It had to be tried out . On a freshly charged lipo with a 15 /8 prop fitted the watt meter showed almost 1,1/2 Kw. That should get it up ok.
Cheers John
-
Well done Nev. that looks fantastic.
John
-
Well done Nev. that looks fantastic.
John
-
Cracking result Martin. Well done
-
-
-
Hi all
Hi Simon, glad you like it. The Hurricane is a great build, it's a real builders model. I've been at it for about 13 months now. The Chippie is also good & flies well.
I've been back to the wing finishing off a few outstanding jobs. Adjusting the flaps & linkages. I found a way to fit the flaps from the underside of the wing. This will simplify things a bit when it comes to covering & finishing. Also have made some doors for the under carriage. The doors fit well in both the open & closed positions, very pleasing. Also made the radiator housing & the carb intake. The inlet rims are laminated from 0.4mm ply.
So, just have to finish off the skin on the top surface & the construction will be complete.
There is quite a lot of work in this area of the model.
Getting there now.
Cheers John.
-
That is looking really good Nigel.
Cheers John
-
-
CThanks Colin. I always appreciate your comments.
Talking to Danny at Greenacres & seeing his Hurricane was the inspiration for this build. I'm quite pleased with the way it's turning out. It's a step up for me in many ways but it's not quite in Danny's class. It would be nice to see them side by side. Perhaps if we all manage a Chippie fly in we could include the Hurricanes?
Time has been short this week but I have managed to mold the covers for the wingtip nav lights & cut out the LE for the landing lights. Also fitted the ally spinner to the prop.
I cobbled together ( is this the same as a bodge) a rig to check the CG position. With all batteries etc in place this showed the CG to be about 1" too far back. Airframe is complete but uncovered. Weight is 10lb. Am I still in the right ballpark?
Cheers John
-
Hi folks
The fuselage is just about finished now. I had one last go at the cockpit before gluing on the top decking. The pilot is now a happy bunny because he now has some legs even if they don't quite reach the rudder pedals.
There is lots of space in the battery bay. The floor has been left off for the time being.
Eventually the cowling will be glued in place but for the moment it has been fixed with 4 screws. The battery hatch was cut out with a junior hacksaw blade on the scale panel lines. A 0.4mm ply tongue locates the front of the cowl while the rear is securely held by magnets, two on each rear corner. There is also a lot of space in the bottom of the cowl that could accommodate a sound system speaker. A similar hatch could be cut out in the base of the cowl.
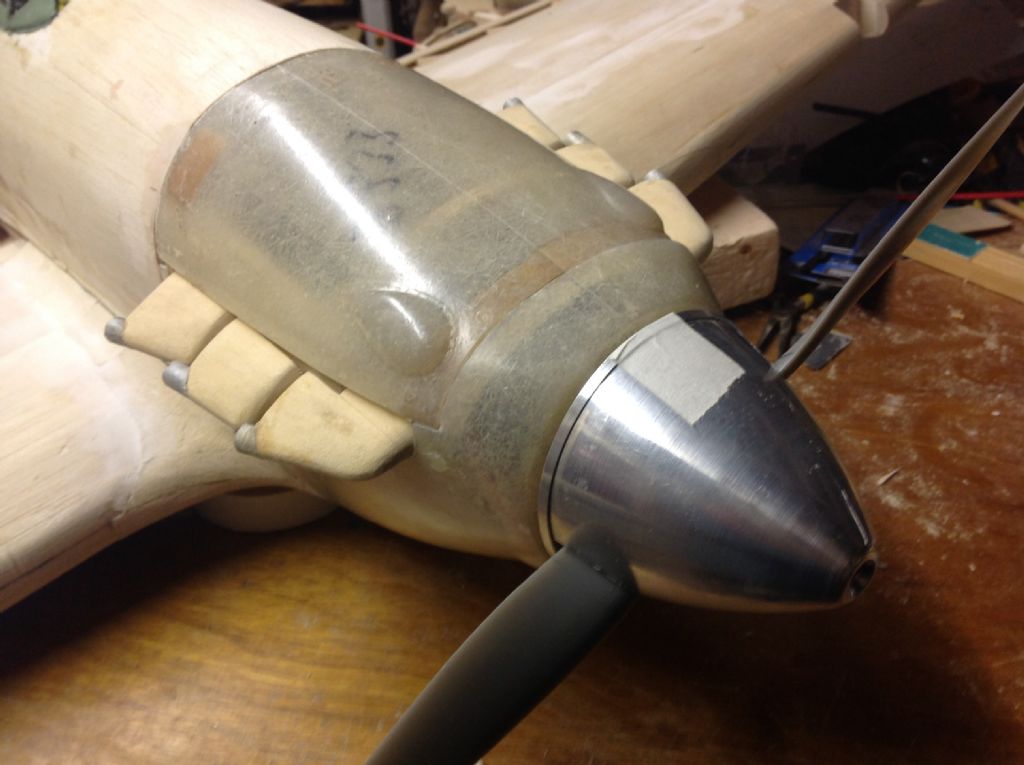
The exhausts. Each manifold is slightly different in shape & of course there has to be a LH set & a RH set. The manifolds are shaped from 'Jelutong" which is a very easy to work wood, easy to carve & with no difficult grain. I often use it for nose blocks cockpit patterns etc.
A blank was prepared for each side, grooved on the inside to take a wooden locating spline & then bevelled on the top surface. Individual manifolds are sawn off & shaped with the disc sander & sanding blocks.
The exhaust pipes were rolled from strips of litho plate, like a Swiss roll, round a dowel. Double sided tape is the jam.
The manifolds can be assembled onto the spline & later will be glued onto the fuselage sides.
Just now I'm finishing off a few small jobs on the wing. Next thing will be to assemble it all for a CG check.
A picture is worth 10,000 words.
Cheers John.
-
Colin,
Do not undersell yourself, anyone who has been an aeromodeller that long will have achieved significant bodging ability.
To those of us brought up in the 'make do & mend' time of the 40's bodging was an essential part of our upbringing.
It might have been darning socks , leather patches on your jacket elbows, mending your bike etc ......everyone was at it.
I had a very talented uncle who could just about turn his hand to anything. He used to say " An engineer, ie a bodger, is a person who can do for sixpence what any fool can do for £1".
Back in the day "Aeromodeller" had a monthly feature of bodges, it was called "Gadget review"
I recall, with some pride, a motoring bodge from the 70's. Two of us had been slope soaring at Moel Famau. We were going home in his Morris Marina when the engine died. This was Wales , on a Sunday, miles from a garage (which would be closed anyway) & it was starting to get dark. The problem was that the fuel pump had failed. The bodge was to fill the washer bottle with petrol, connect the washer tube to the carb & drive home on the thumb pushed washer pump. Got us back home ,50 miles.
I can think of many successful aeronautical bodges. Spitfire IX ( a mk 5 with a merlin 61) , Avro Manchester became the Lancaster. Probably the best of all, " Miss Shilling's orifice" If you don't know this one "google" it.
That just about completes the circle.
Cheers John
-
Hi Davey
In the olden days the method of hinging sheet control surfaces was to stitch them together using needle & thread to create a number of figure 8 hinges. Makes a very free hinge in both senses of the word. All my C/L models & early single chanel models were done this way. I still use it sometimes.
I never built a Madcap but have happy memories of the Magna ( Amco .87). I often fancy building another one. Happy days.
Good luck with the build.
Cheers John.
-
Hi Martyn
I think that's a much better way of fixing the under carriage. I didn't like the tin straps shown on the plan at all & used this method on both my Chippies. They have both survived all my arrivals so far. I turned the torque arm round to face the rear so that the torque reaction would be absorbed by the mainspar. The photo shows my 2nd chippie.
Love the Hornet Moth, a real work of art.
Cheers John
-
Hi Martyn
I'm in the Crewe /Nantwich area. Not too far/
Cheers John


Hawker Hurricane by John Timmis
in Build Blogs and Kit Reviews
Posted
Hi all
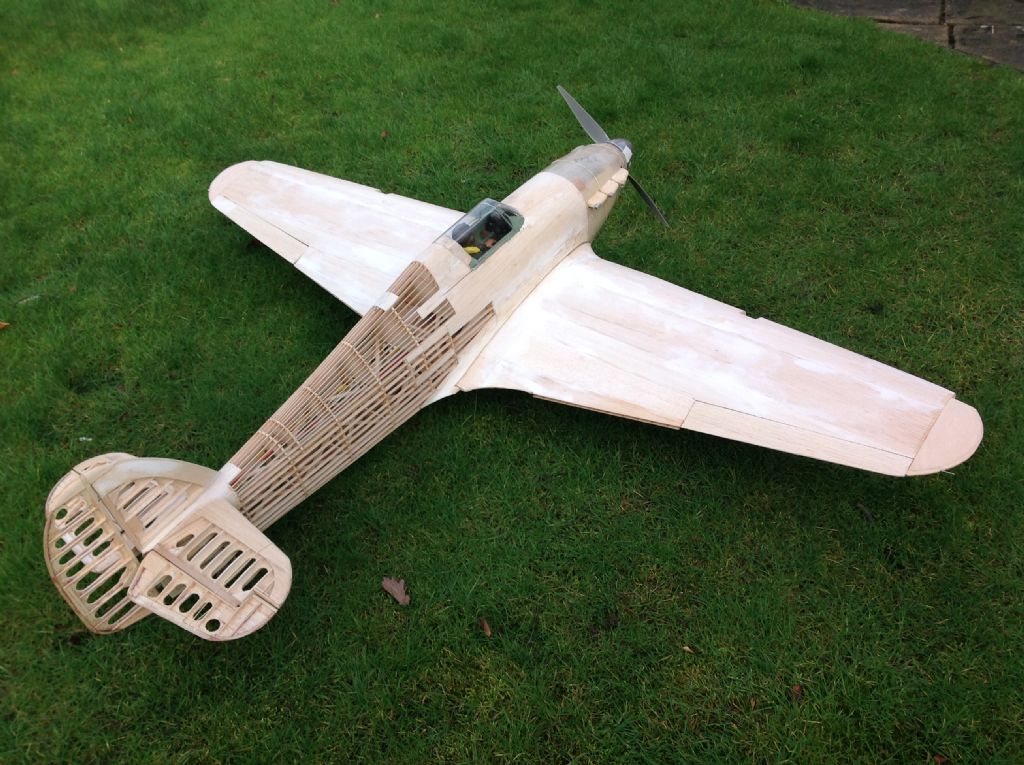
It's all been a bit slow what with holidays & other stuff. Anyway the wing has been glassed & has also had one coat of high build primer which has been well rubbed down with wet & dry.
Cheers John