


Martin Fraser
-
Posts
151 -
Joined
-
Last visited
Content Type
Profiles
Forums
Blogs
Gallery
Calendar
Downloads
Posts posted by Martin Fraser
-
-
Oh dear, how sad never mind. 🙄
Despite my best efforts to get my Saito to drag the Yak about at a decent lick, I think I'll convert it to electric. Prior to this sudden arrival, it flew ok ish but needed full throttle most of the time and wouldn't go anywhere near vertical. It seemed very slippery on previous landings so on this flight I chopped the throttle earlier as I was just coming out of a banked turn and lining it up for the strip. Yep, the engine cut out and a classic tip stall resulted, made all the more embarrassing having just attended a talk given by a senior club member and pilot of full size aircraft on - Banked turns!
So I'm looking for recommendations for an electric motor. If possible to take a 7s lipo (I have 5 x 5800 doing nothing) that will give me good aero performance.
Cheers, Martin

-
Hi Ken,
Some very useful and interesting info in Peter's findings regarding dihedral and flying characteristics. His Saito 125a is quoted as 2.2hp and it 'hops off the ground' so I'm beginning to wonder if my Saito 120 R3 is going to have enough oomph.
Anyway, many thanks to you and Peter for posting. Cheers, Martin
-
What about the BMFA national centre? Camping on site or there's a very nice hotel in the village of Buckminster a few miles away.
The Tollemache Arms (tollemache-arms.co.uk)
And - it's always calm and sunny.🙂
-
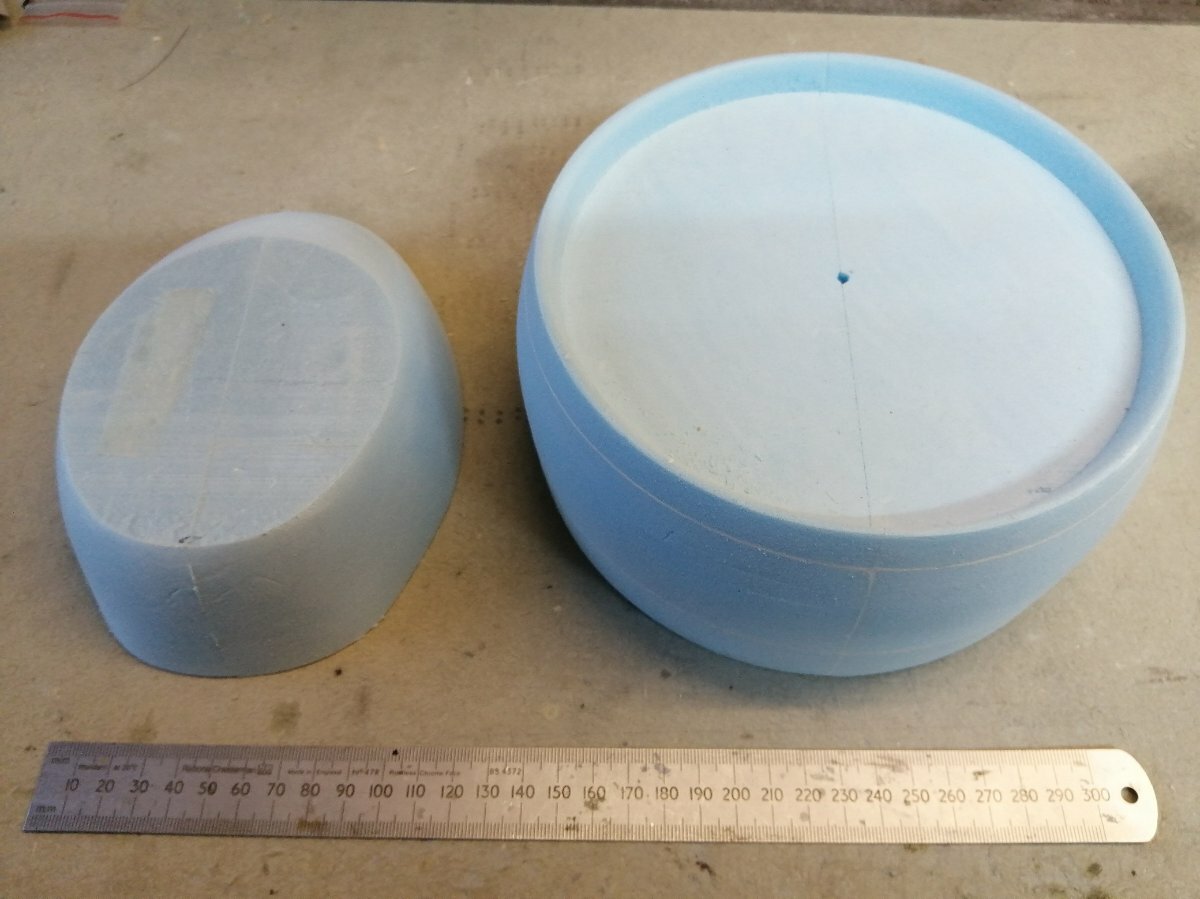
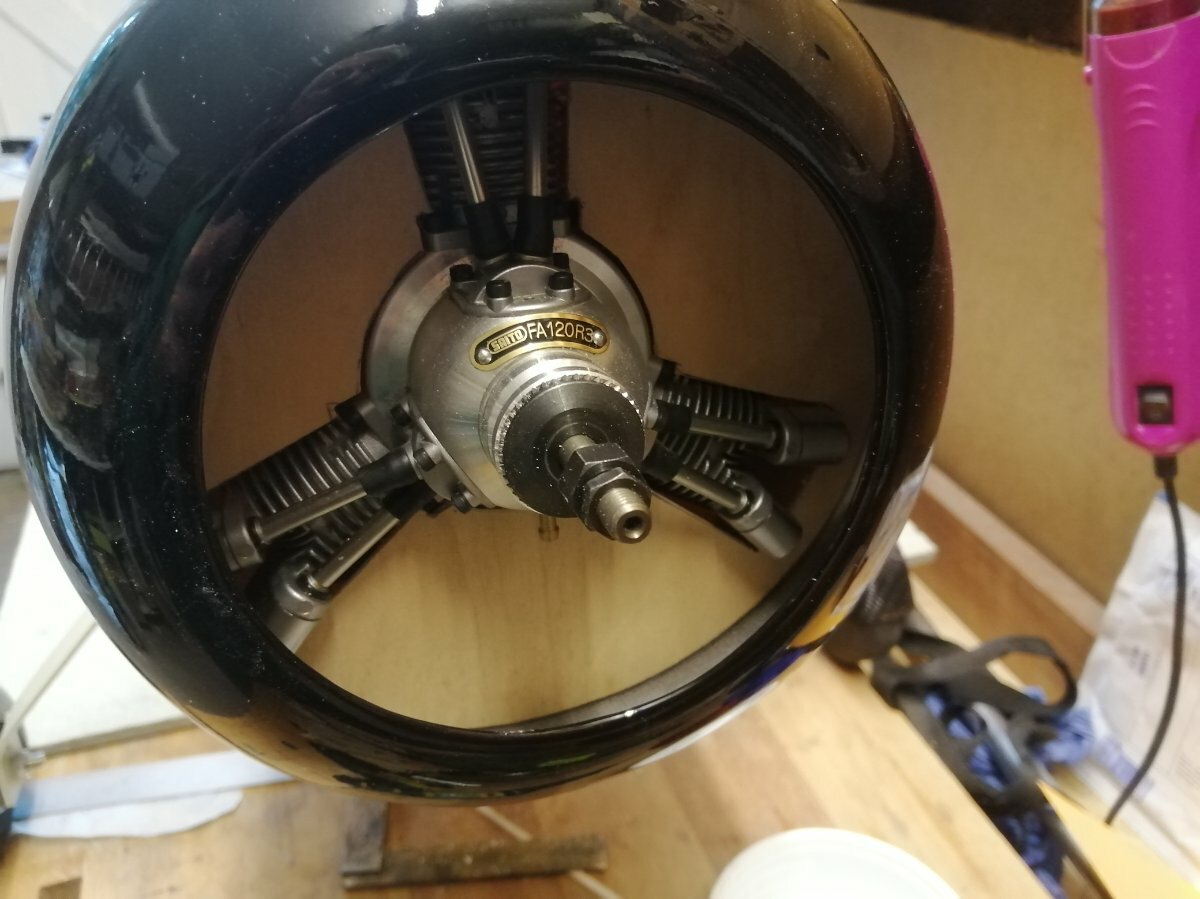
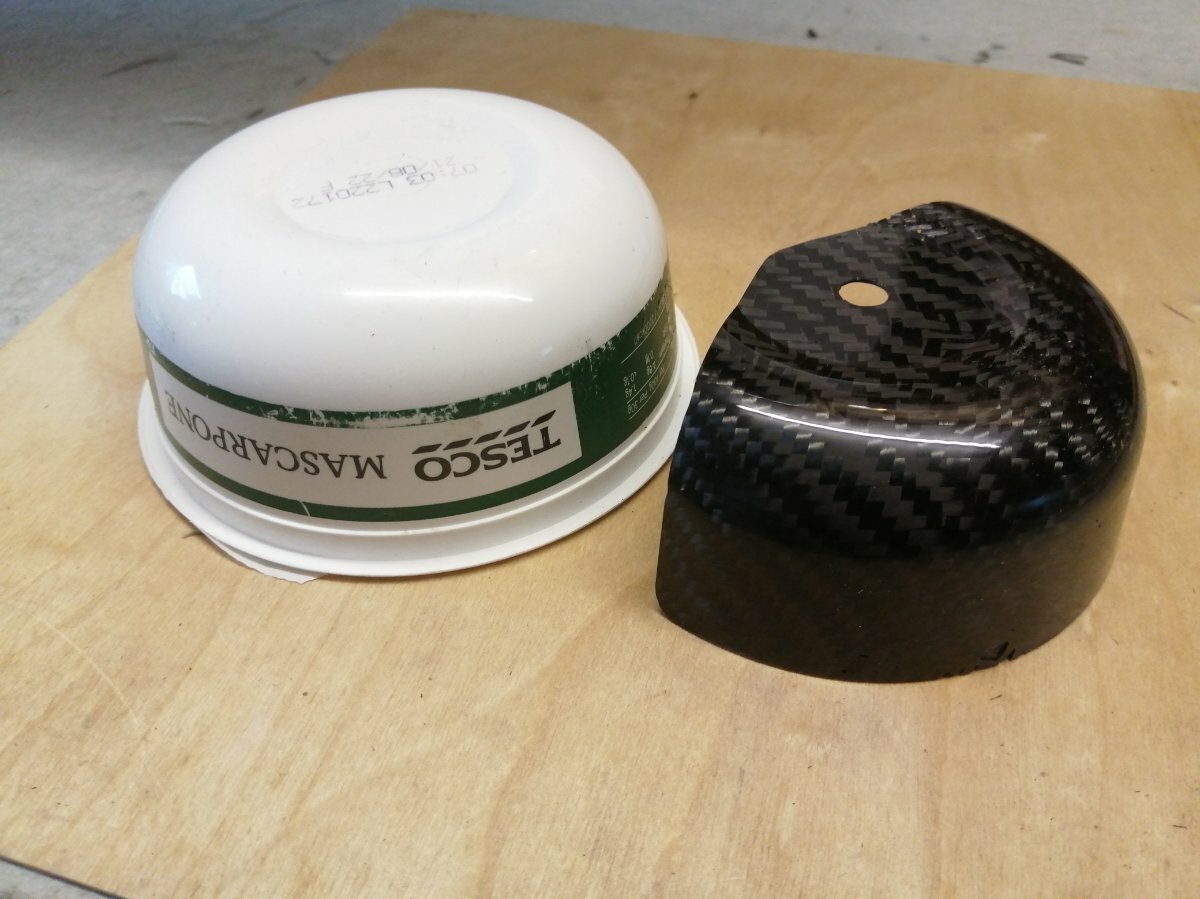
I've been tinkering on with the build and because of the Saito's architecture, I've decided to mould the nose section and the engine cowling in GF. Maybe it's the camera but it looks too big but it's as per plan. These are just the plugs to make the moulds. I will provide some hard points for their attachment.
-
 2
2
-
-
Hi Martin,
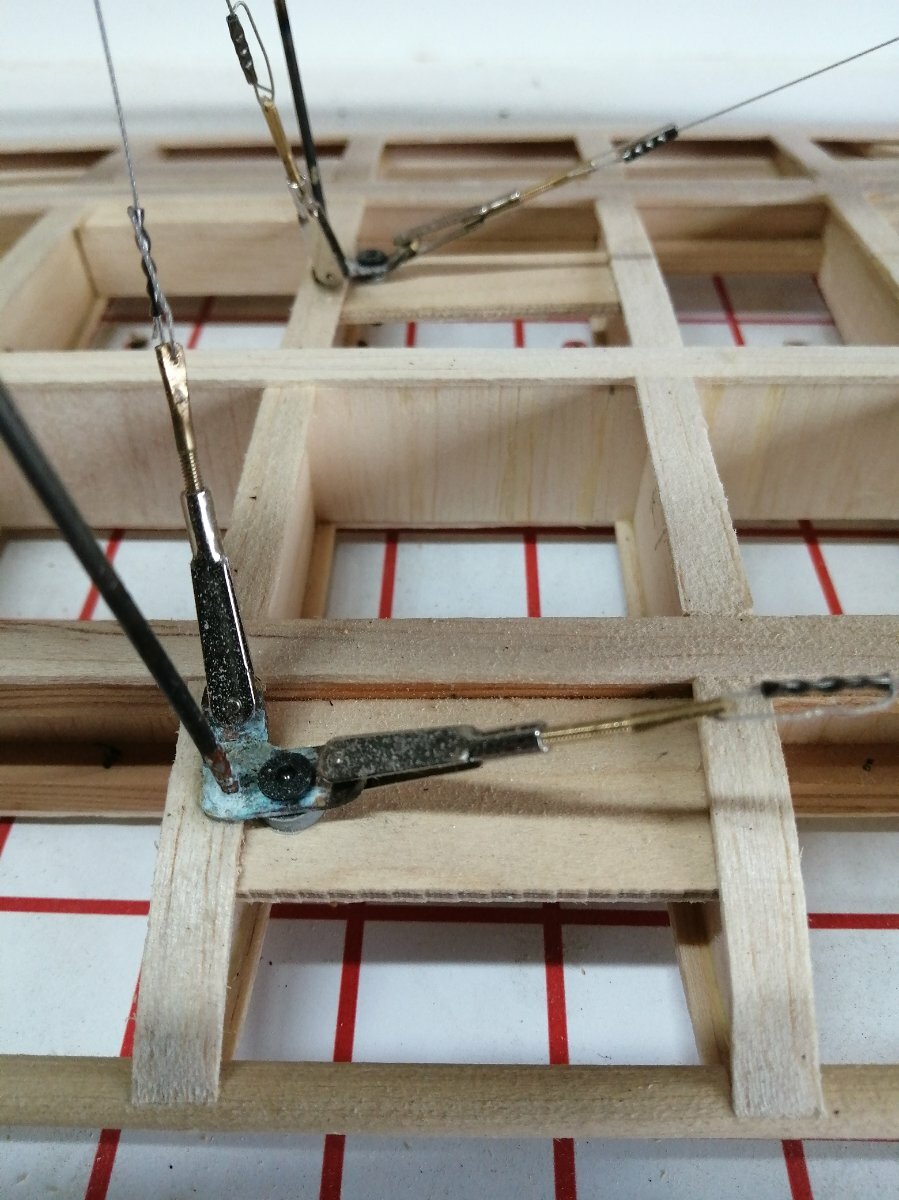
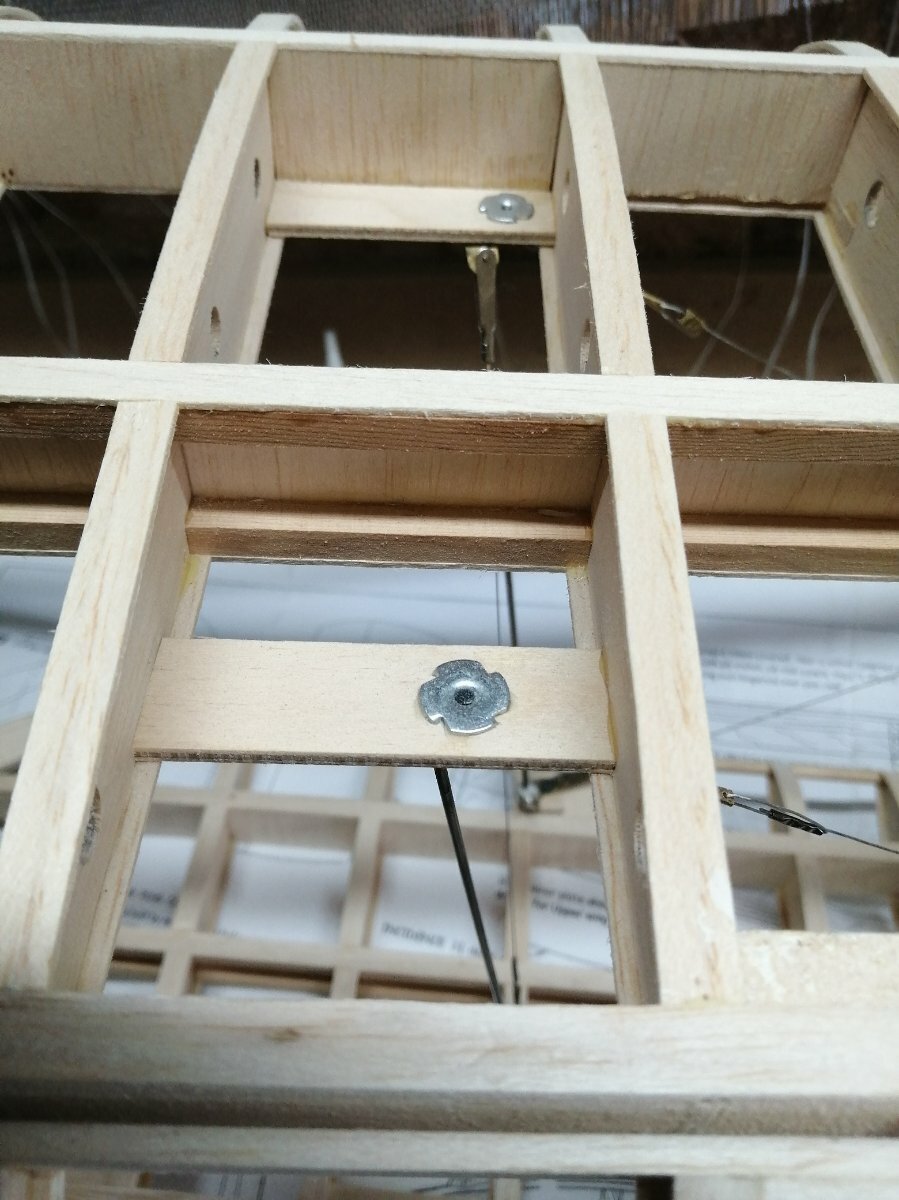
If possible, could you post on the thread or email me two or three or four photos of the top of the top wing where the plywood plate attaches to the cabane metal plate and a photo showing the bottom of the top wing at the cabane attachment area to the wing. I have a good idea how this is done but a picture is worth a 1000 words. I hope you don't mind me posting on your build thread. my email is [email protected] or Illl see the pics on the thread. thank-you - ken kalynuk
Hi Ken,
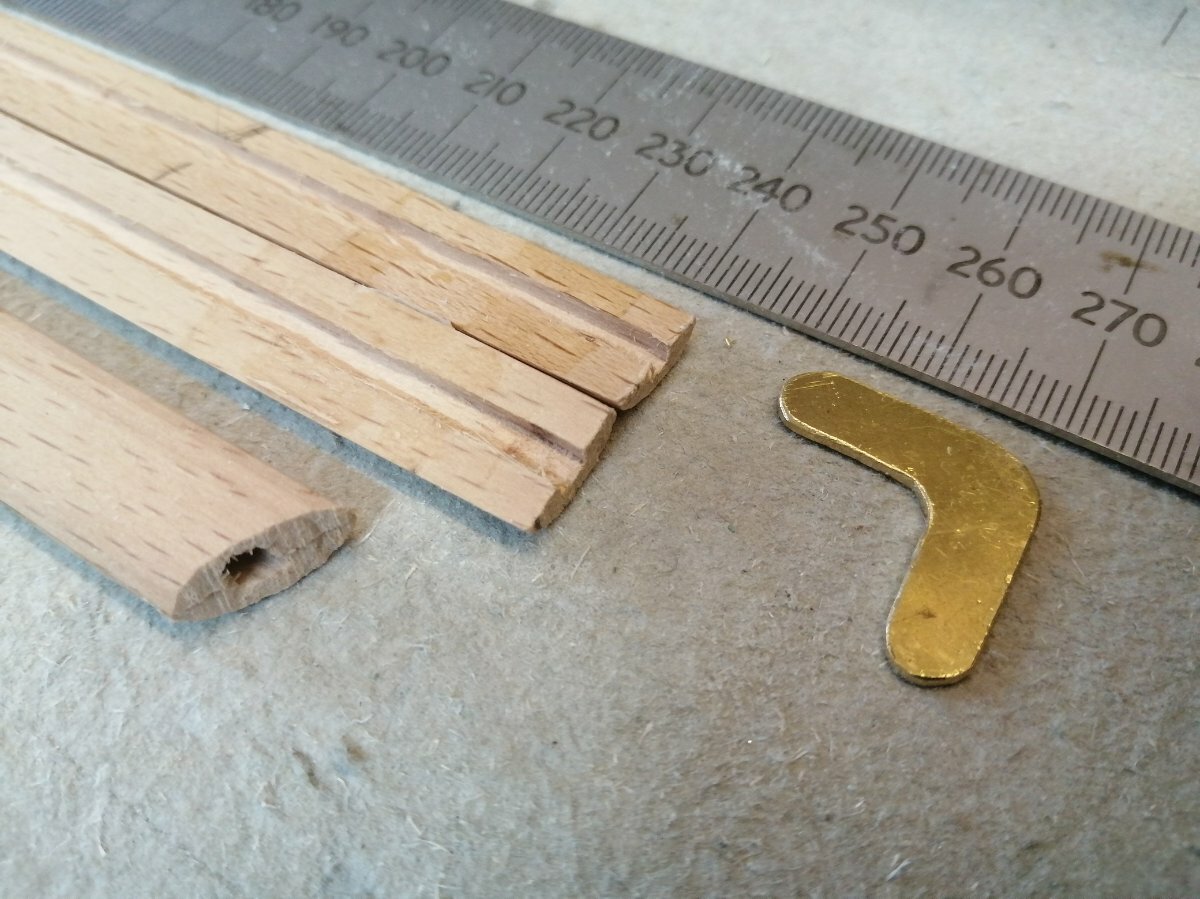
Yes the plan is a bit sketchy here. I've made up some brass L shaped plates that I've silver soldered to the ends of piano wire. As you can see they form the attachment points to the T nuts in the wings and the diagonal bracing wires. These struts will be clad in beech and given a streamline section - they should be strong enough me thinks.
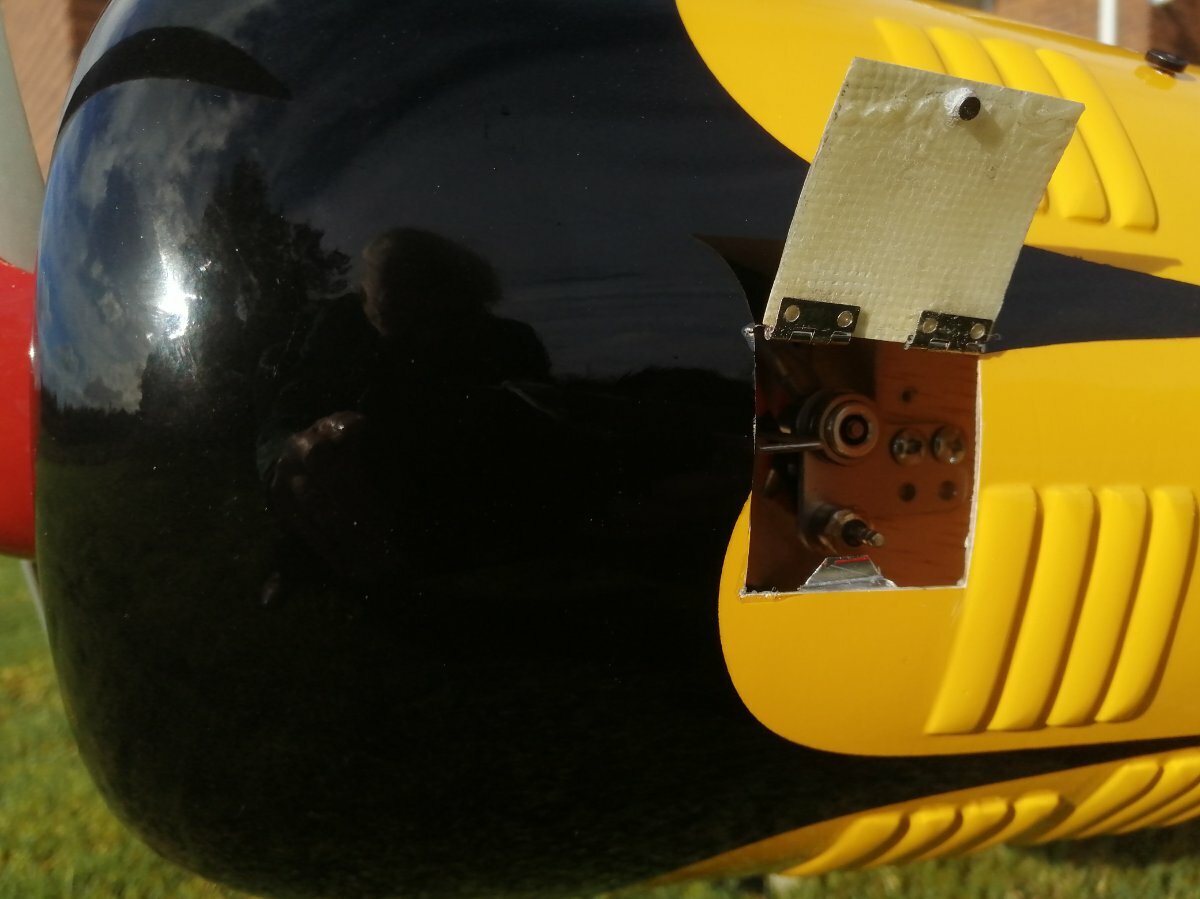
I think I've resolved my fuel tank access problem, through the firewall via a removable panel that I'll seal with silicon. It will entail an engine out job if I need to get to it but hopefully no surgery!

-
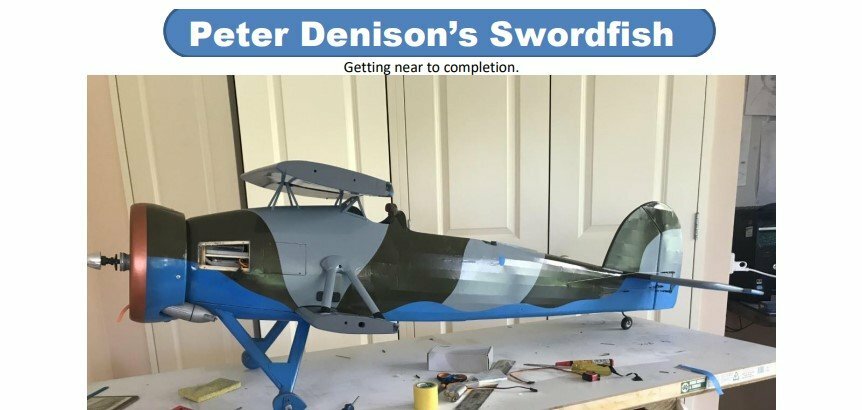
Wow, that looks great. Does Peter have a build blog anywhere? I wonder if he will maiden it this year.
Thanks for sharing the photos Ken.
-
18 hours ago, kenair18 said:
Flying you lucky guy, we have a weather alert for freezing rain, 200km further west of me the area has a blizzard warning. I did find a CM Swordfish build by Peter Denison out of the Hibiscus Coast Flyers in Auckland NZ, his last entry was that his CM Swordfish is at this stage back in 2022 or so. I've sent Peter a message to see if he has flown his swordfish. cheers - ken
Hi Ken,
Unusual paint scheme, NZ navy maybe? I wonder if he's hinging the wings?
Cheers, Martin
-
Hi Ken,
Yeah, that's what I did as it saves the plans a bit. Cliff's model looks great - nice scheme! I wonder how many Swordfish have been built from his plans? I was down at the Navy Wings hangar at Yeovilton a few years ago to look at the full size and spotted a model of one up on top of a container but I could get to it unfortunately.
I served there as a young air mechanic in the early 70s and the historic flight's hangar was just a 100mts from ours and I didn't pay that much attention to the old 'String Bag' but when they wheeled the Sea Fury out everyone downed tools for the start up and subsequent flying display. Now 50 years on I can appreciate what an amazing aircraft the Swordfish is and what it achieved in the hands of true heroes.
Enjoy the Tempest build but save some balsa for the Swordfish.
The sun is out so I'm off flying now.
Cheer. Martin.
-
1
-
-
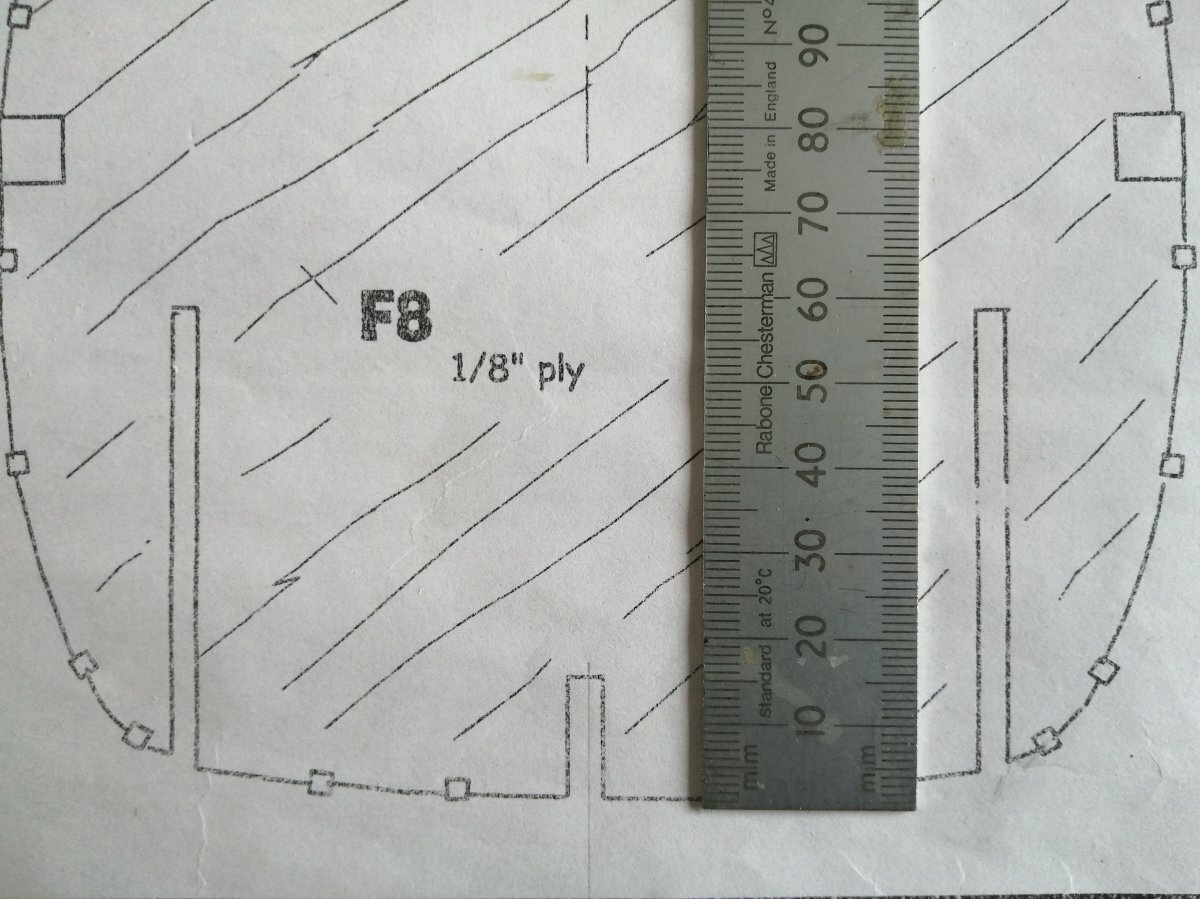
Good morning Ken,
Well done on getting the plan.
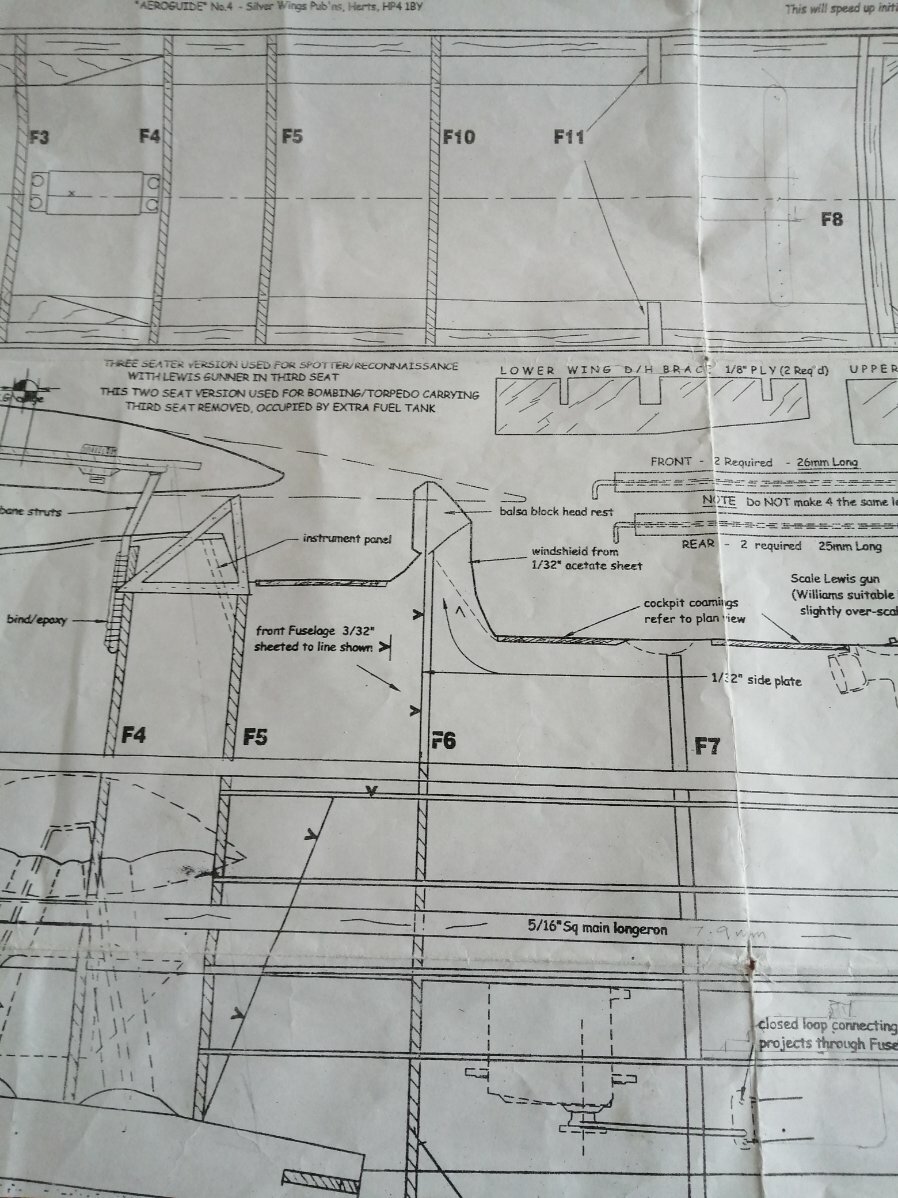
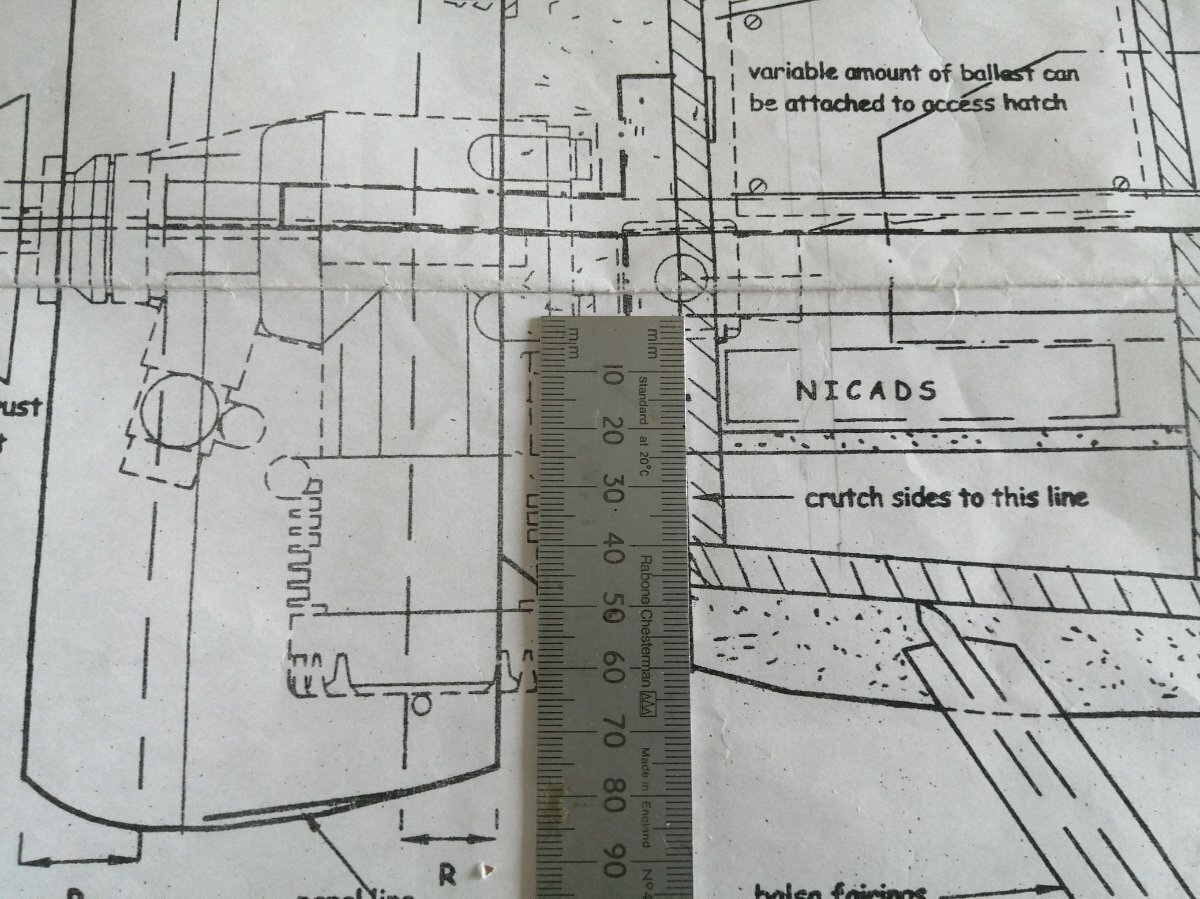
I know what you mean, a template wound have been most helpful. However, there is a straight line showing its top edge and I identified it by measuring the slots for it in the fire wall and F8. Similarly, its bottom edge can be checked by cross referencing with the other frames.
As plans go, it does need a bit of deciphering and there is some confusing labelling of things. The side view of the fuselage shows the frame numbers logically but the top view has them going from F5 to F10 and F11 then back to F8 ??? Knowing what I know now, I would cut out the frame bulkheads 1 to 8 and dry fit them onto the two plywood sides. Once happy notch F1 and F8 to accept the upper and lower square longerons and then notch the other frames to suit. Same with the stringers as the cut outs for them on the plans are a bit out of whack. Also, there's very little detail on where to place servos so think about their locations and their control runs now and make provision for them in the frames. I'm going a bit scale and using closed loops for the elevator and rudder - yes it's a right fiddle!
Please fire away with any queries and I'll do my best to shed a light.
Regards, Martin
-
Welcome to the forum Dave,
All good advice above there. If your budget will stretch - I've been buddy-box flying with a learner at our club and have been quite impressed with his Xfly Glastar. It flies well on a 3s 2200mHa lipo and will take a 4s pack for sport flying. Nice big wheels and there seems to be a good spares backup. Have fun with whatever you decide on.
Cheers, Marty
P.S. No connection with MSL.
Xfly Glastar V2 Bush/Trainer 1233mm Wingspan PNP XF105PV2, Model Shop Leeds
-
13 hours ago, Jon - Laser Engines said:
I dont care for either fuel but absolutely stick to the opti given the two fuels you have available.
That confirms my experience with Prosynth Jon. My LHS ran out of the Opti juice so I tried their 12% in the wee Saito 60 twin and it just didn't perform or sound the same despite retuning. I think that's why I've still got half a gallon of it left over.
Cheers, Marty
P.S. Snowing in Denbighshire today!
-
40 minutes ago, Paul De Tourtoulon said:
My Enya 90-4c throws props now and again, my OS 120 compressor all the time in summer, a club members saito 100 all the time, till I put another thicker head gasket on it, this week another members OS 120 two days ago, a four stroke only needs to be flooded when starting or a bit of dirt in the fuel line making the mixture to weak for it to throw one when at full throttle.
Take heed, Four strokes are renowned for throwing them, and some of the Saito Triples have fuel problems with different cylinders, there are plenty of videos on them, and also 'inlet kits' that seem to cure them, Google 'saito radial problems'.
Hi Paul, The only time I've had a prop throw its self was with my OS91 4c when I back flicked it with a chicken stick, probably prop nuts not torqued up quite enough. But point taken and I would never let anyone else in front of it while starting or running.
Cheers, Marty
-
1
-
-
3 hours ago, Jon - Laser Engines said:
Are they? Not had any engine throw a prop on me since about 2007, and even then it was my fault!
Martin your engine sounds pretty good but i would take the time to make sure your slow run needle is as lean as possible. Do this with the glow support off. It will not cure the no2 issue, but it will help. I recently did some mods to a saito 170 radial and was able to make changes to the induction which improved the engine a fair amount. I also confirmed my suspicion that a geometry issue with the master/slave conrods causes each cylinder to have slightly different cam timing which is why they all run differently. I did have some other ideas for improvement, including an air bleed for the no2 cylinder, but it ran well enough and was totally reliable without glow support so i just left it alone.
As for the cooling, i would leave it for now. The cooling will not work very efficiently on the ground as its lacking the slipstream it will see in the air. Once in the sky it should work much better.
Hi John, Yeah I'm sure there is a bit more room for improvement with both low and main jet tuning and also fuel choice. At the moment I'm running it on the same juice
(Opti 4st 15% nitro) I run my Saito FA -60T on but I've got some Prosynth 12% that I might try it on once I get it to the field.
Thanks for your input, Marty
-
Hi folks,
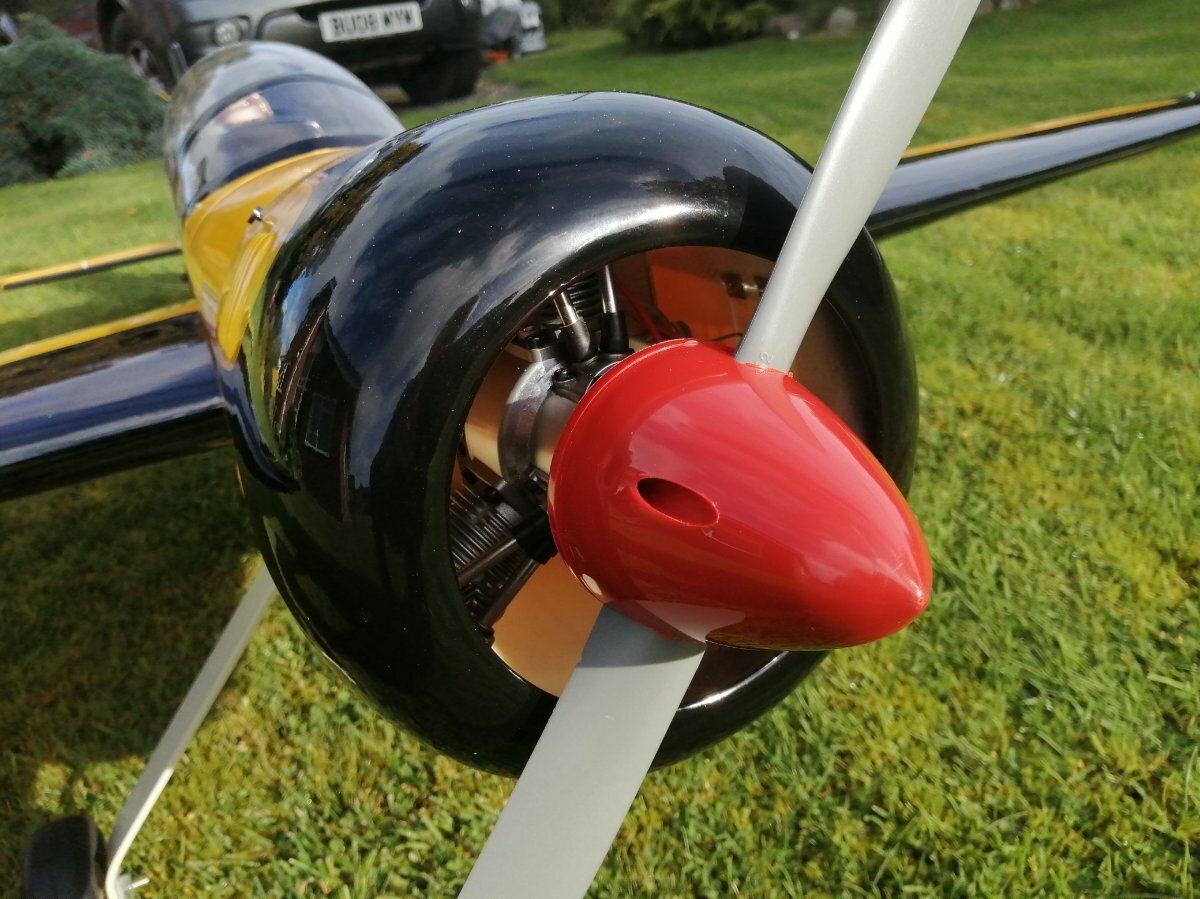
I've been doing a few ground runs on the Yak and trying to get a feel for the Saito radial. I've bit the bullet and installed a 3 pot onboard glow driver powered with a 1s 6000 mAh hard case lipo. My starting technique is to block the exhaust, cold crank with the starter until it sounds juicy and then heat the plugs. A few blips with the starter and it normally fires and ticks over.
As others have found, number 2 pot is a bit slow to join in from cold but once warmed up by 1 & 3 it runs well. See FLIR images at the end of the video. I've installed a temp probe on No1 cylinder head and have had a reading of 117*c after a good full bore 30second run. I've no idea if this is good, bad or ugly but as a precaution I've opened up the moulded in louvers on the cowling to provide a bit of through flow. If it pulls this well once in the air I'll be very pleased but that isn't going to happen until the weather improves.
Cheers, Marty
P.S. I don't make a habit of standing in front of a revving engine.
-
Hi Ken,
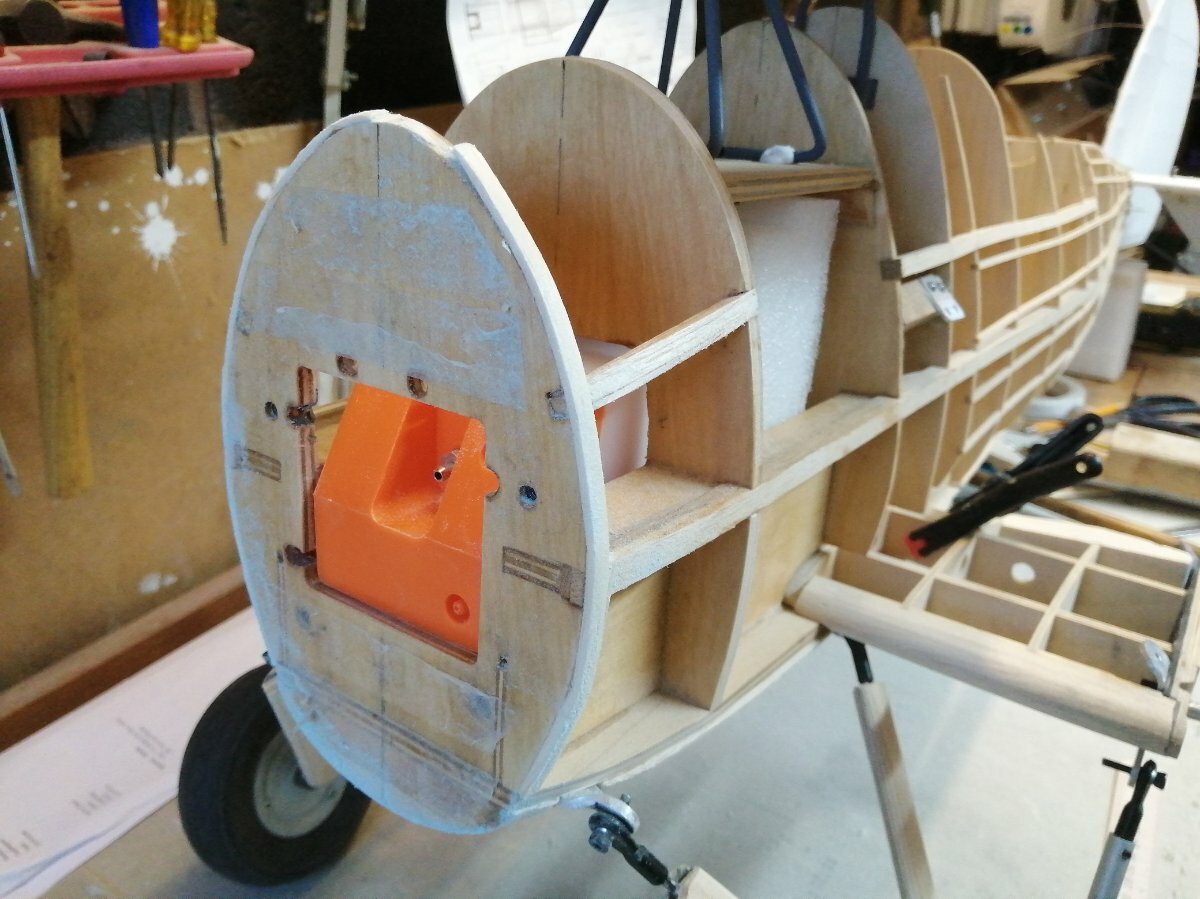
The Swordfish is inching along and is pretty much as you see it above. As far as the plans go they are fine if all you want is a stand-off scale model. It’s drawn with built up main planes i.e. upper and lower to be rigged at the field. Having watched people spend an hour or two rigging biplanes I didn’t fancy going this route so I embarked on redesigning the wings to fold as per the full size aircraft, thereby enabling me to transport it in a normal estate car. So that’s where the fun begins!
The more I considered this redesign the more issues became apparent and different stresses would have to be accommodated. The hinging geometry is quite 'interesting' in that the upper centre panel is narrower than the lower and a good bit further forward. The full size lower wings have no dihedral and the upper wings have about 3 degs and are swept back. I wish I had thought to angle its ribs so that they are parallel with the air flow On the plan these are drawn as 7 degs for the upper and about 3degs for the lower. I’m sure it’s this way to give easier handling but compared to the full size it looked daft. So I’ve followed the full size and will fit leading edge slats to the uppers and may even install a gyro!
Anyway back to the plan. I had thought of getting the ribs and bulkheads laser cut but glad I didn’t as many of the cut-outs don’t correspond to the plan view. Also, some of the ribs on the tail plane are not a mirror image of one another i.e. the left side spacing is exactly 1/8th out from the right side. No big deal but something that is there to catch you out when installing some hard points for bracing struts and rigging wires.
The U/C is drawn as bent piano wire but I’ve gone for a wishbone with a sprung oleo as per full size. There isn’t much detail where to put servos and access to the fuel tank is worrying me at the moment – I do like to be able to service everything.
I hope this doesn’t sound too negative about the plan as it’s quite old I guess and drawn in the traditional way without the help of CAD and some of my problems are due to inexperience in balsa bashing and the others are with going off piste design wise. If you keep it simple and watch out for a few googlies then I would go for it.
Cheers, Marty.
P.S. As far as engines go it might have the Saito radial installed but it sounds a bit sporty or a single 90 or 120 up front. I’m guessing AUW is going to be 5Kg ish.
-
1
-
-
Ah OK John, I'll probably put 3 on each surface.
Many thanks, Marty
-
Hello Folks,
Well it sure is shed weather and I've run out of excuses for not progressing the Swordfish. I've got to the stage where I have to think about a lot of things all at the same time. I'm fairly happy with my sprung main U/C and the wing fold hinging but now need to think about servo placement in the lower main planes and in the fuse for the closed loop runs to the empennage. Also, wiring for the landing and nav lights. At the moment I'm dithering over the choice of hinges for the control surfaces. I've got some of the pinned nylon type but not sure if they are up to the job. Any recommends?
Many thanks, Marty
-
10
-
-
I've not used this Shoe Goo on PP before but it's great on other plastics such as clear PETG for cockpit glazing etc. It remains flexible and the makers say you can use it to repair wet suits and even shoes!
Might be worth a try.
-
My primary R/C interest is in scale helis so it was nice to see Neil Parris's excellent article on our recent meeting at Buckminster. However, I'm always interested to see what other disciplines are up to, such as the rubber fanciers, you can certainly learn a few things about aerodynamics from them.
Cheers, Marty
-
2
-
-
Hi All,
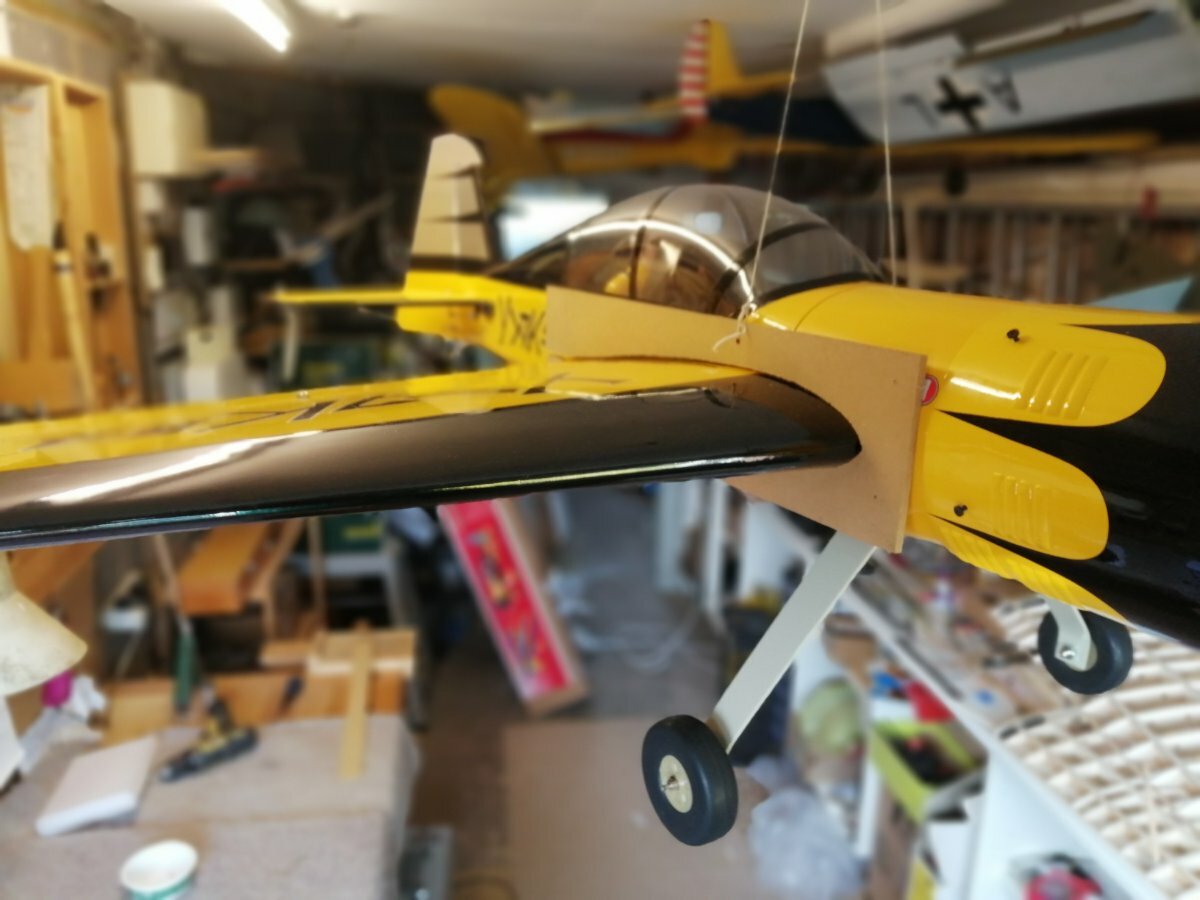
Still waiting for the exhaust collector ring so I'm pottering about with some small jobs on the Yak. Following on Jon's advice and Frank's post for a cowling baffle I've found some thin ply and knocked up my own which is a snug fit within cowl.
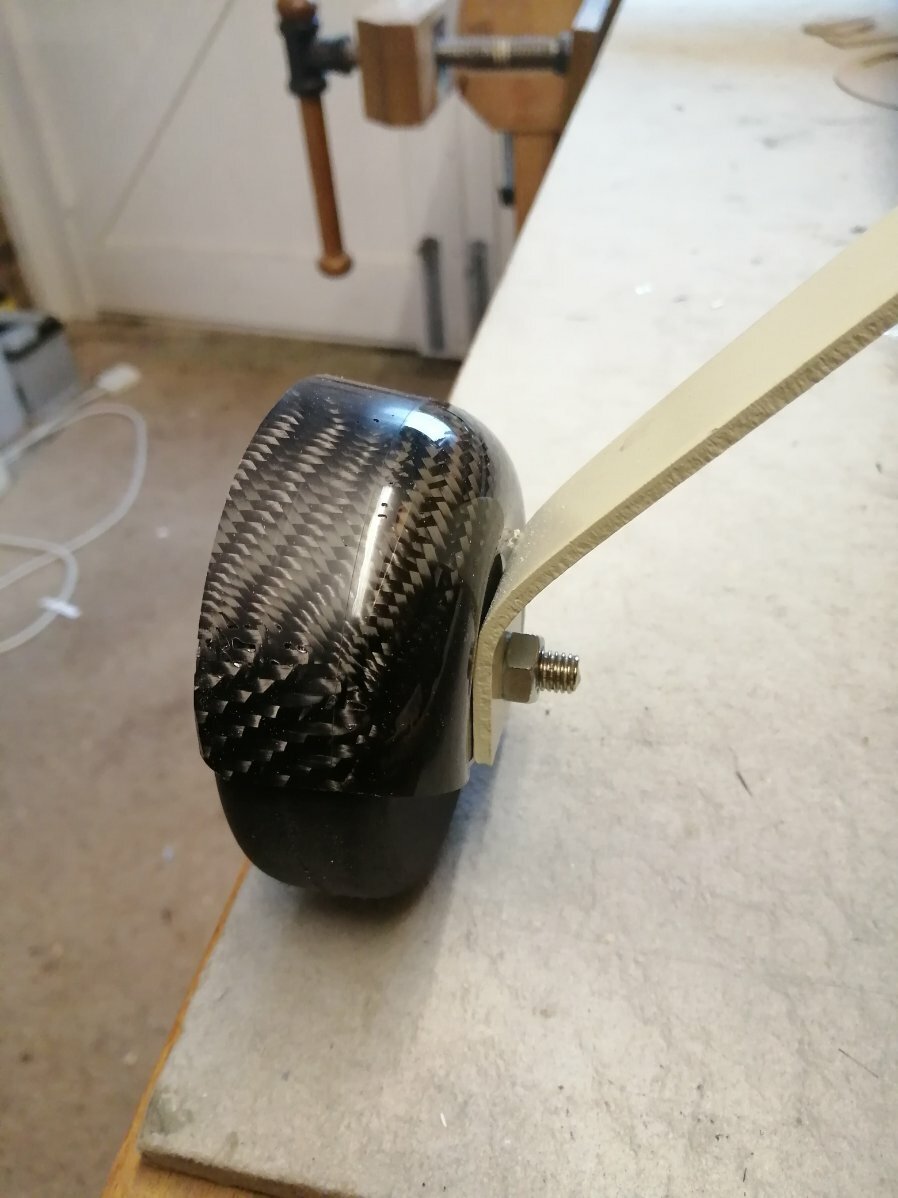
We share our field with about 500 head of sheep and they don't half leave their calling card on the strip. Whatever they eat, it's fast setting and a nightmare to clean off!
I had to hose down the underside of the Fly Baby's wings last week. So with this in mind (I've not fitted the spats yet) but made some mudguards out of carbon fibre to try and keep the worst of the sheep sh1t off my new toy.
Cheers, Marty
-
1
-
-
Ah! good call Frank, I had forgotten these were available.
Many thanks, Marty
-
Very neat Jon,
Thanks, Marty
-
Wow, those baffles are really snug up against the cylinder fins. I'll have to devise something in thin alloy.
Thanks for the heads up Jon, Marty
-
Good morning folks,
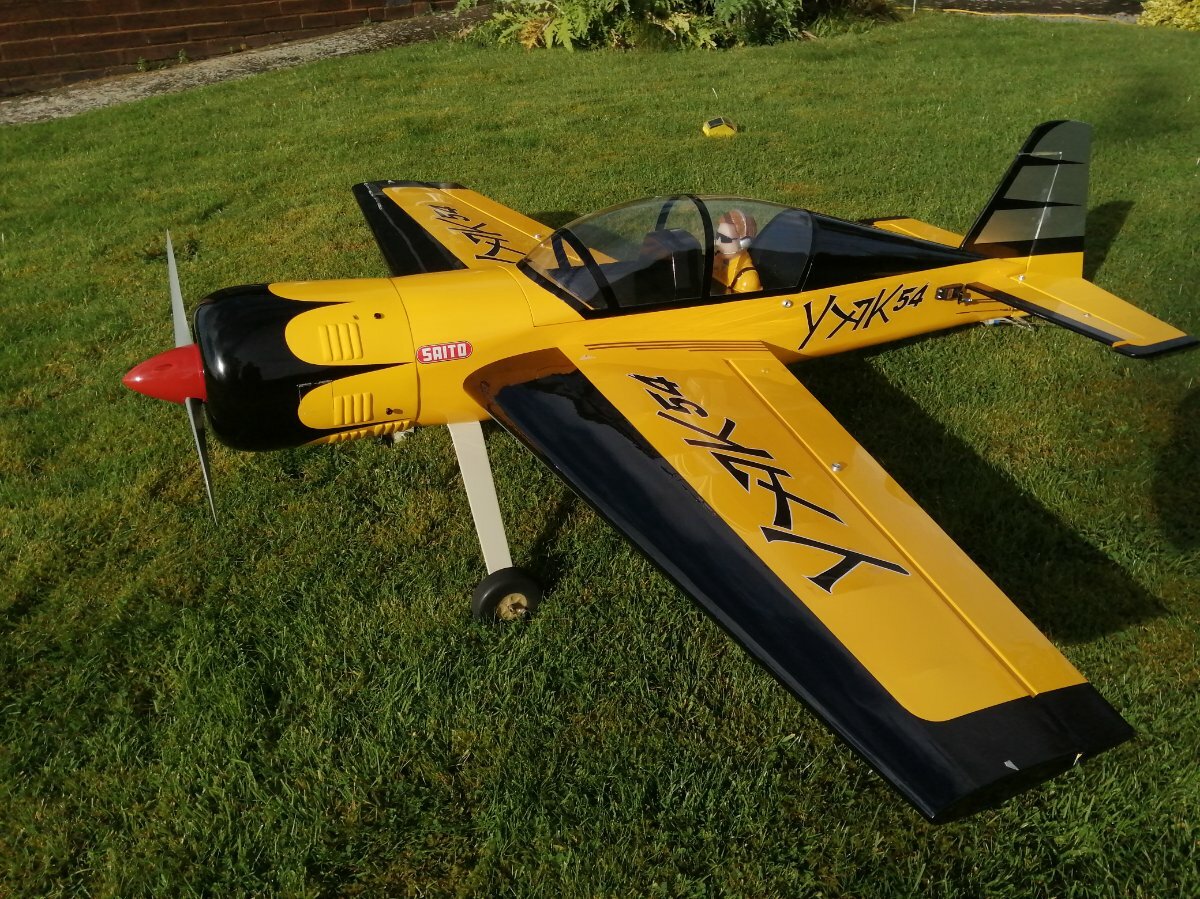
I’ve just put this Seagull Yak 54 together having read Ross Clarckson’s excellent build thread of 2010 and can concur with his observations.
I’ve installed a Saito 120R radial in it, partly to run it in and to see how it performs and sounds as it was intended to drag the Fairy Swordfish about one day. I know it won’t sound like a 28L Bristol Pegasus 9 cylinder engine but if it’s too sporty I’ll have to rethink it.
It’s a nice fit within the cowling and with the RX battery up behind the fuel tank, the c of g balances 75mm back from the wing tip. I’m still waiting for an exhaust collector ring from Morris Mini Motors so that might add a bit more nose weight.
However, I’m a bit concerned about heat build up. The full size has a heavily louvred cowling so I might have to open up the moulded louvres in mine rather than hack great holes in it.
Cheers, Marty


.jpg.57b206a8f92ab25e9b34b1d77f90e6ee.jpg)

Seagull Yak 54 and Saito 120R
in Sport, Aerobatic and 3D kits
Posted · Edited by Martin Fraser
Hi Jon,
On the ground runs I was getting 9500 RPM on a 14x6 prop which is pretty much what Saito quotes in the manual. Anyway, after quite a few hours in surgery with new ply frames, sheeting, covering and a new cowling it's all fixed up - apart from a power plant. I shouldn't say 'plant' really!
Fortunately the Saito came to no harm as did its prop probably due to soft ground and the crumple zone of the cowling so Paul I'll bear you kind offer in mind 😂
Cheers, Martin