


Lucas Hofman
-
Posts
1,183 -
Joined
-
Last visited
Content Type
Profiles
Forums
Blogs
Gallery
Calendar
Downloads
Posts posted by Lucas Hofman
-
-
I had a long time ago ordered some vinyl and waterslide inkjet printable paper. This is the first time I use it. Not difficult to use and to apply and it gives some more detail to the model:

Cheers, Lucas
ps. 10 cm snow again this morning. Now it has been enough winter!
-
-
1 hour ago, Peter Miller said:
I am not on Facebook or at least have never used it and it doesn't recognise my log in.
I did not record it, but I will try to get hold of the file so I can upload it here.
-
I am not sure whether you can see this video, but if you can this is the link: https://www.facebook.com/100002633049738/videos/3039134676396042/
-
Done:
Next is landing gear and tail wires. This one has spats, which is a new challenge for me to make.
Cheers, Lucas
-
 1
1
-
-
Hurra for 3D printing, which makes it a doddle to get the prop disc exactly where you want. A little down and side trust is included too. I have experience that nearly everyone with a 3D printer feels it is not used enough, and are therefore glad to get print jobs.
By the way, I found out that the full size has side thrust too.
Tonight I am getting the decals, kindly cut for me by a fellow club member. So the next picture will be in "Jarsberg Airshow" mode.
Regards, Lucas
-
1
-
-
On 16/02/2023 at 09:14, Peter Miller said:
Possibly slight toe in might help. A friend who built one finds that it wants to tip on its nose at the end of the landing run.
Mine seems alright although it is some time since I flew mine.
Sorry that I can't be more helpful.
That did the trick. Now she tracks straight, both on take off and landing! Thanks.
-
23 hours ago, Peter Miller said:
You will love her.
I converted her to electric power and she was just as good with the 3541 1070 motor.
I did. But I sold her when a moved to the (windier and more open) coast. I have regretted that but the buyer would not let me buy her back so had to built the RANS.
Regards, Lucas
-
22 hours ago, Peter Miller said:
Ballerina was something else.
Hi Peter,
What is/are in your opinion the most relevant difference(s) between Ballerina and Rans?
Lucas
-
Did you mean this video:
It is a good commercial for emergency parachutes. Not likely the pilot would have survived without one. Now it seems he walked out before the plane burned. It looks like a wing folded and broke off during a negative g pullout.
-
No problem Peter, I was just asking.
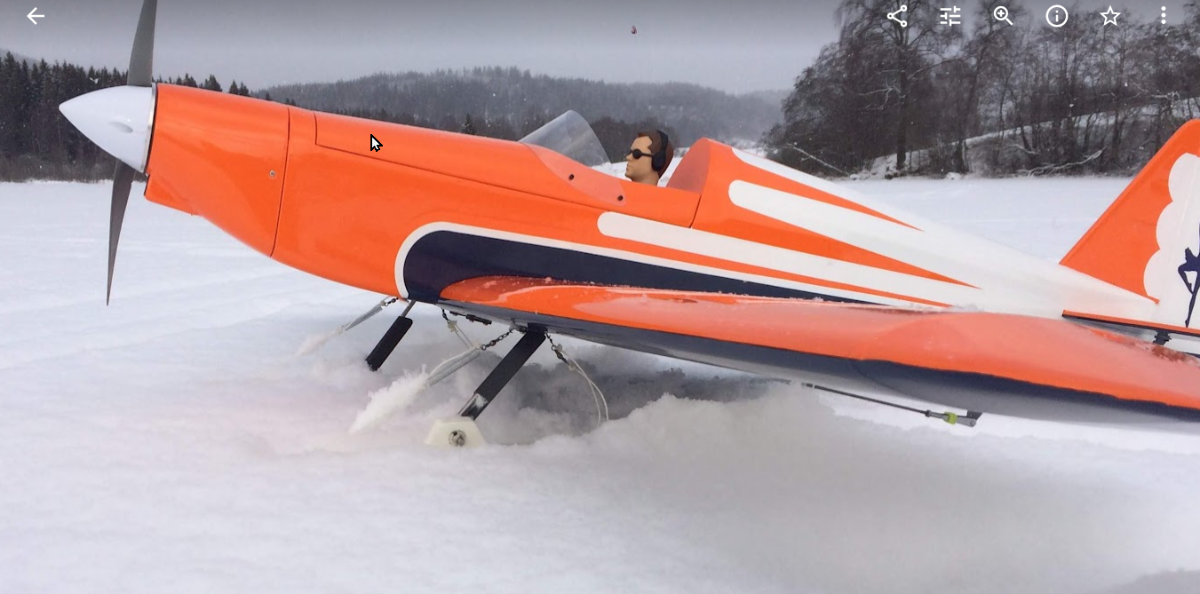
Flying on asfalt does not help with regard to bouncing. And rubber wheels in sub-zero temperatur do not absorb much energy either. In the summer on grass I expect it to be better.
Ballerina was more stable in directions but even bouncier when flown with wheels on ice. I prefered skies in the winter for that reason.
I will try to bend the gear to a slight toe-in and see if that helps with stability.
Did you know that the Rans S-9 has flaps? I downloaded the manual for the full size. Must be a mechanical mixer of some sorts.
Regards, Lucas
-
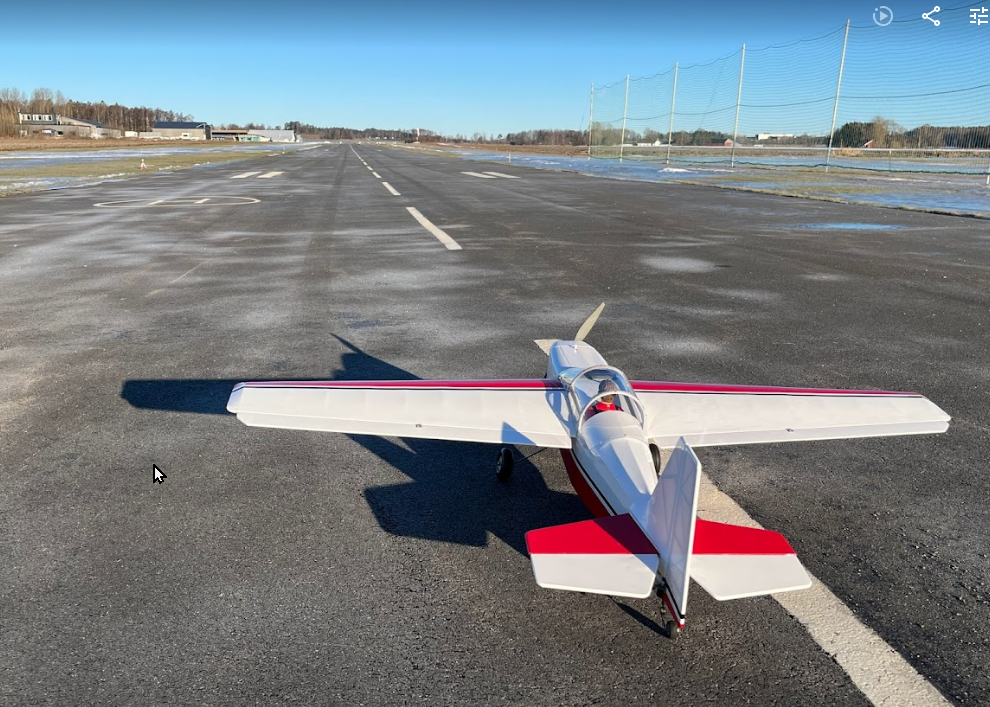
Very pleased with how the RANS is flying now. However, ground handling (wheels on asfalt) is challenging:
- The plane is unstable and has tendencies to ground loop. One needs to be very carefull in take-off to keep her straight. Same when landing, as soon as some yaw occurs (think sidewind) the oscilation gets worse.
- If not landing very carefully (3 point landing) the plane will bounce up. Espicially when it is a little gusty this is not so easy to achieve.
Partly this is probable due to the short tail moment, which we cannot do much with. The gear is as drawn, 4 mm steel wire. Currently with slight toe-out.
Any ideas if this can be improved, and if so, how?
Cheers, Lucas
-
A 1070kv motor on 3 cells will turn the propeller about as fast as a 800kv motor on 4 cells. The power used is a function of the propeller used.
-
Since I used less then 2000mAh of the 4000mAh capacity in over 10 minutes flying I changed the motor from a Turnigy 4240 to a Turnigy 3542 that weighs 50 gram less. That made it possible to remove 20 grams of lead from the tail.
Testing this with a 4S 3000 mAh (that weight 300 gram) instead of the 5S 4000mAh (that weighs 450 gram) showed that the RANS does not need that much power. I could still do 2 rolls in a vertical upline before running out of steam. Actually the plane felt smoother, with both 200 grams less weight and less power.
This will be the "goto" plane for winter flying, also because I can transport it assembled and then one only needs to pop in a battery in the cold.
-
Maiden today! -6 degees, no wind and sunshine. And (of course) no other pilots on the strip.
I needed a lot of up trim to get her to fly straigth. Adding another 25gr to the tail helped with inverted flight. After some fiddling with expo (back to 0%) the plane behaved well. It took another battery to feel at home, but now we are friends. Thanks Peter for yet another good design!
Snow tomorrow, and a lot of wind in the weekend. Time to work on some more scale details.
-
6
-
-
The weight is 2250 gram ready to go. A bit heavy I would say. But I am using 4000mAh 5 cell batteries (because I have them), and a motor on the bigger side. The battery is halfway under the wing; I cannot get it further back and still have i on the battery plate. If I like the plane I can invest in 3000 mAh batteries, that should already help a 100 gram.
Today was a nice quiet day. The coming days are not, so it will be more towards the next weekend before we give it a try. I could do some details, but now I feel more like taking a break from building.
-
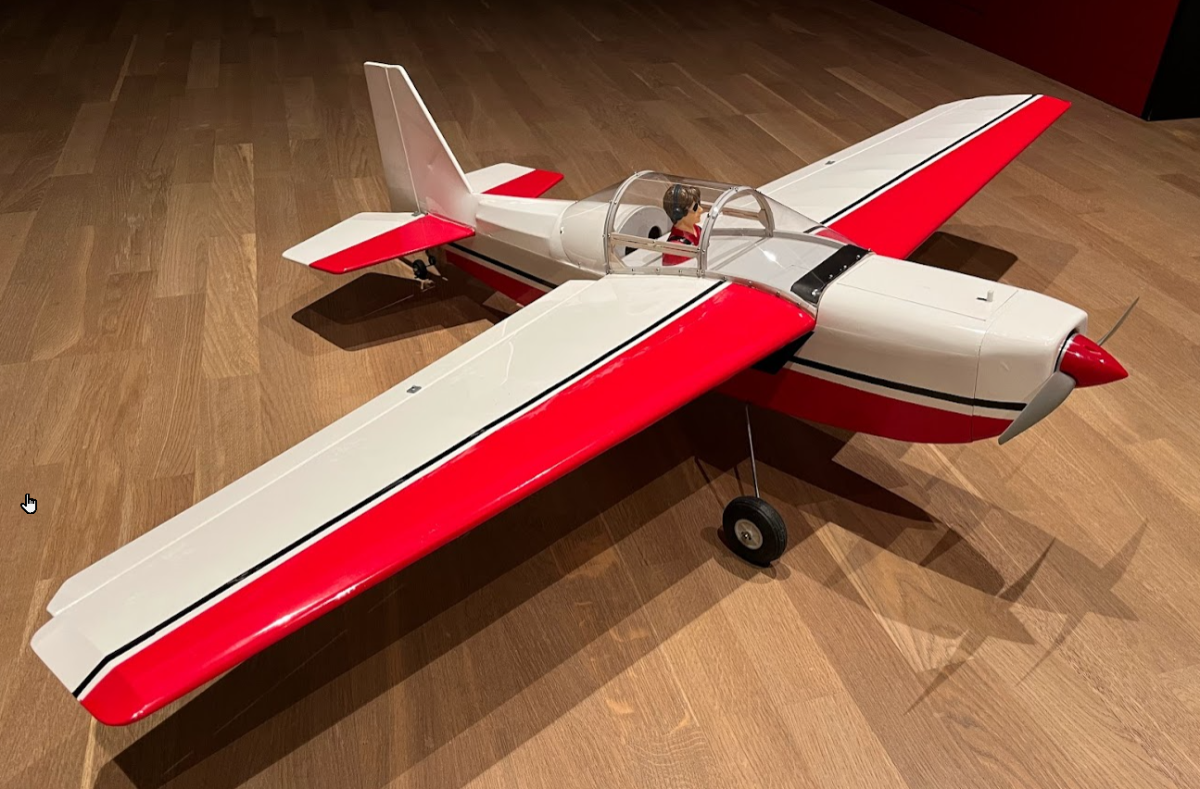
Ready for maiden:
Some scale details are lacking, and I needed 60 gr lead under the tail to get the CG right, but we should be able to fly.
Lucas
-
5
-
-
Servo's are mounted in the wing and the leads pulled out. Aileron horns are mounted. I usually make the connections between the two (for the ailerons) by cutting 2mm carbon rod and glueing this with epoxy in the clevises.
I prefer ball links, mostly because they do not add any slack. I addition here there is no good alignment due to the tapered wing. Ball links absorb minor misalignments gracefully.
-
2
-
-
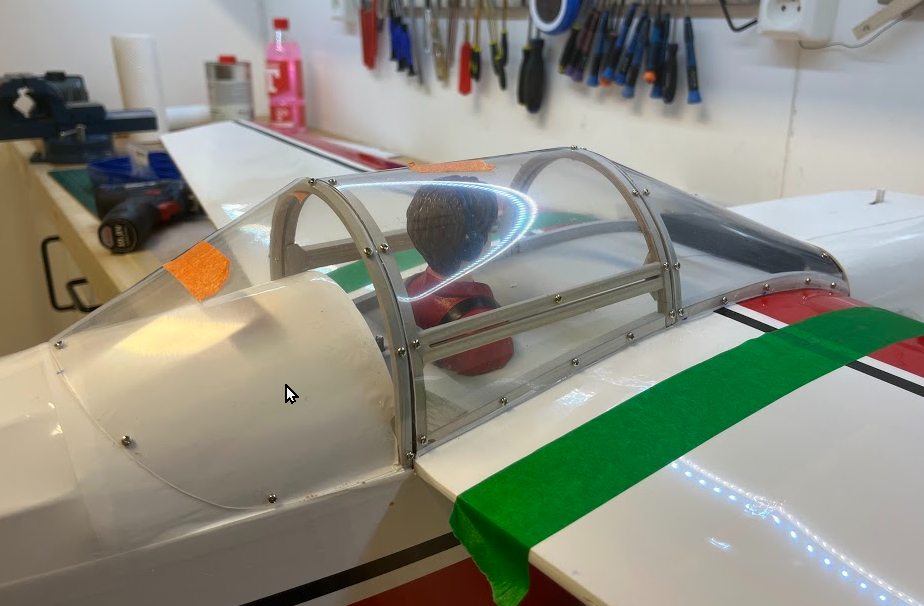
The cockpit is very nice after the protective films are removed from the PET sheet!
Glueing the hinges is done:
and this time I did remember to mark where the slots for the hinges are while covering, so it was not difficult to find them back!
Soon the flappy bits will start flapping...
Cheers, Lucas
-
3
-
-
And the last part went smooth:
Now take off all parts, impregnate the holes with CA and mount again.
Cheers, Lucas
-
Second part done. This one took a lot of time to get (more or less) right:
I did not like the yellowish shine from the PETG I bought. And it was not very clear either. But by accident I found out that this was due to the protective film on both sides....
Better to leave the film on until everything is finished.
Cheers, Lucas
-
1
-
-
10 hours ago, Nick Cripps said:
Remove all the screws and the canopy then put a drop of cyano in each screw hole to harden the threads. Leave it for several minutes until the cyano is completely dry and then reassemble. No need for glue, the hardened threads in the balsa will be more than adequate to retain the canopy.
Thanks Nick, this is so great about the forum. I would not have thought about this myself. I may also do this in the holes I have to make for the aileron, elevator and rudder horns so that the balsa does not compress so easily.
-
2
-
-
Screwing the canopy down worked like a charm. I am temped to leave it like this (without glue).
However, the laminates on the wing are balsa, so the screws do not hold that much. Probably better to glue the canopy down.
-
35 minutes ago, Peter Miller said:
I use very small screws, about five round the bowed frames and a couple along the side members.
Only screws, no canopy glue?


Lucas's Rans S-9 Chaos
in RCM&E Plan Builders
Posted
I had tried it once before and then found out that the ink was not water resistant. But one coat with a clear akryl varnish (spraybox) solved that quite well.