


Monz
-
Posts
581 -
Joined
-
Last visited
Never
Content Type
Profiles
Forums
Blogs
Gallery
Calendar
Downloads
Posts posted by Monz
-
-
Decals need a good gloss coat to adhere properly so on foam models a coat or two of gloss WBV will give a nice surface to work on. Once the decals are on then another coat of gloss varnish will seal them in and also get rid of the 'silvering' (edges of the decal). Then a coat of semi or matt varnish for whatever finish you're going for. A couple coats of thinned varnish on large models adds hardly any noticeable weight.
Here are the decals I made for my two Impalas, one 1/4 and the other 1/10 - Both sealed after with a gloss and the edges of the decal disappear completely. Again, the white is hand painted over a grey text decal.
-
Posted by Harrier Mate on 12/12/2019 21:40:46:
Monz,
amazing scheme. And so much cheaper than Arizona Models fabric (about £150 for just the wings). Could you tell me more about that technique. You have clearly covered the model in a base layer first.... plain tissue or fabric? And then applied the printed lozenge to tissue???
The model is covered in jap tissue with a coat of dope to seal it. I built a test frame to see how the decal would react to it. On the test frame I had different sections with different treatments - non shrinking dope, banana oil, shrinking dope, matt, semi gloss and gloss varnish. In the end it was three coats of very thinned Tamiya gloss varnish over one coat of shrinking dope that worked the best.
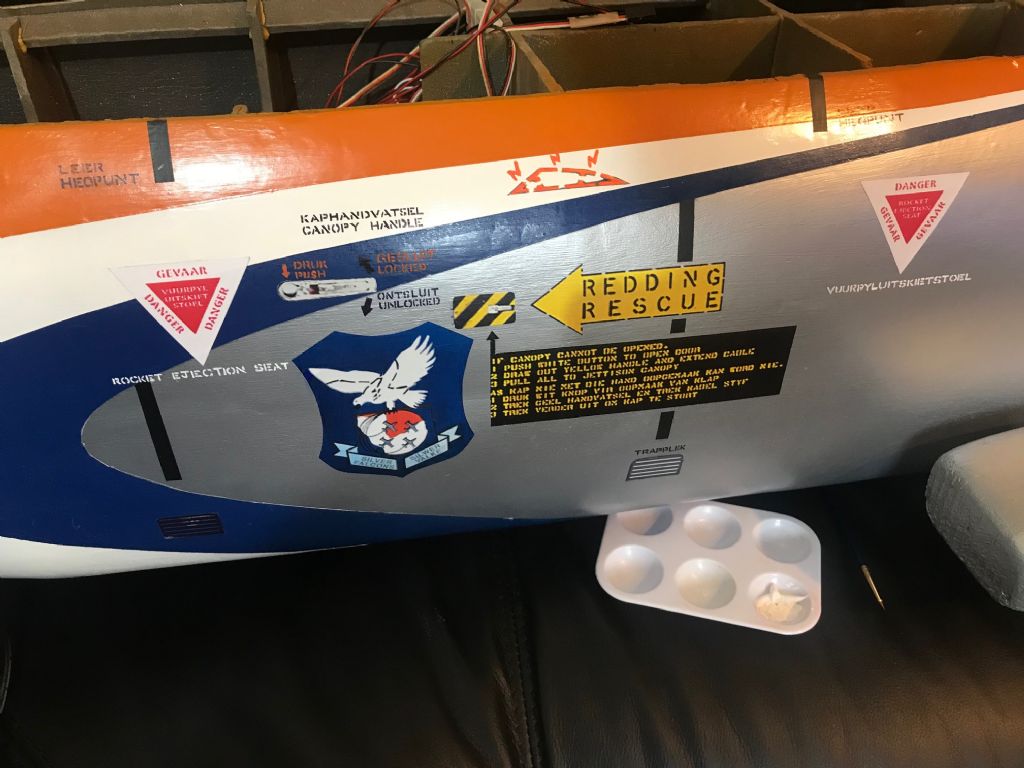
I drew up the lozenge pattern in Photoshop to match the lozenge on the reference aircraft, along with the other decals like stencils, markings etc and scaled it to match the three view I built from. Where there were white stencils I did a light grey decal and then hand painted over that with white enamel. The white rib tapes are all 2mm wide strips of white decal paper applied individually. That and the hand painted stencils were an exercise in patience!
The domestic laser MFP's are a much better investment over any domestic inkjet.
-
Posted by Don Fry on 12/12/2019 20:27:41:
How big is that bit of flying art?
1/10th scale, rubber powered.
-
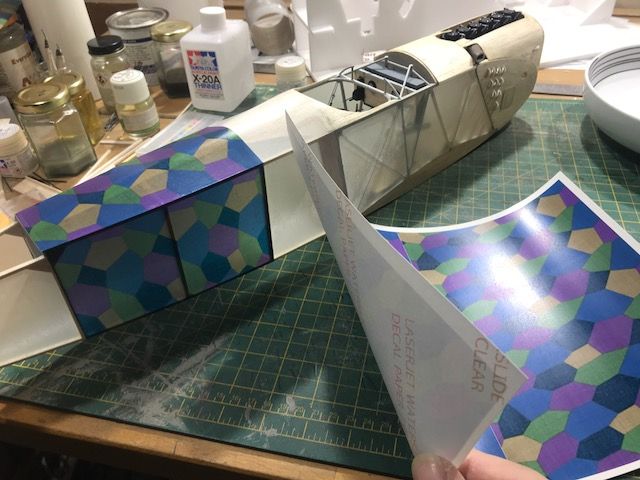
I've used Laser water transfer decal paper run through my HP home laser printer. Everything on my DVII except the pink paint was laser printed decals over the tissue. I drew everything up in Photoshop. I used a combination of clear and white paper. The clear gives some transparency while the white is opaque, though does take some planning as domestic printers don't print white! The advantage of laser printed decals is you don't have to seal them with anything - Print, dunk, apply.


-
Another one almost ready for the Orme. Will get the last of the details done and radio in tomorrow. The thread heading is incorrect, it's actually a 1/10 scale kit, not 1/8.
-
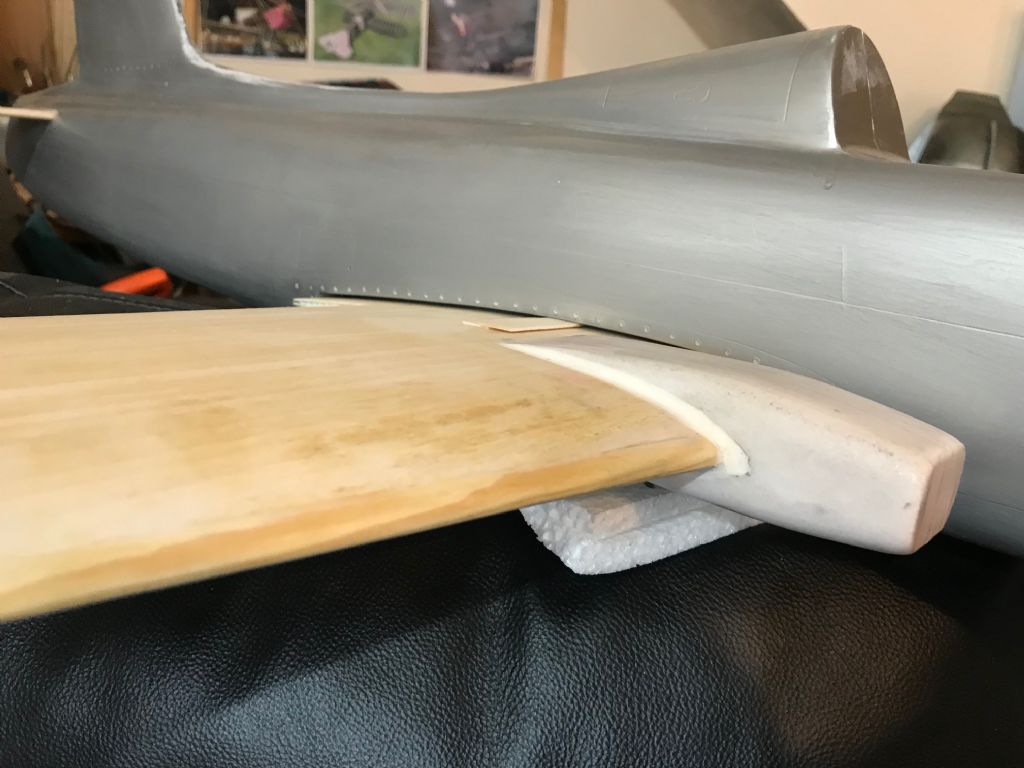
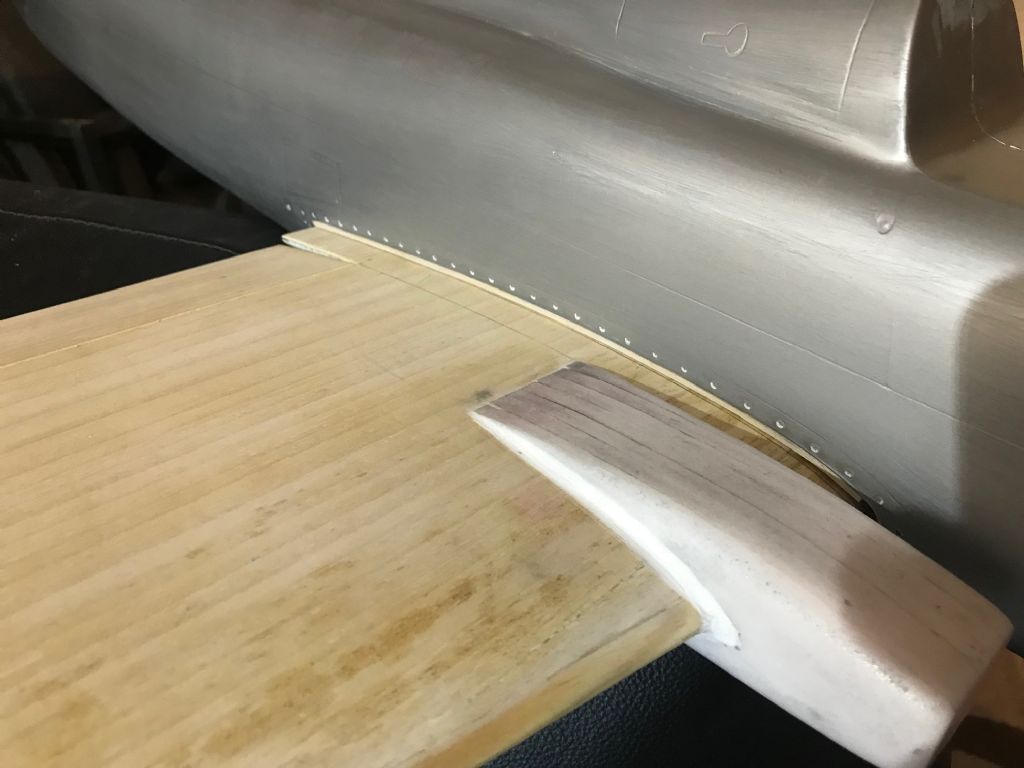
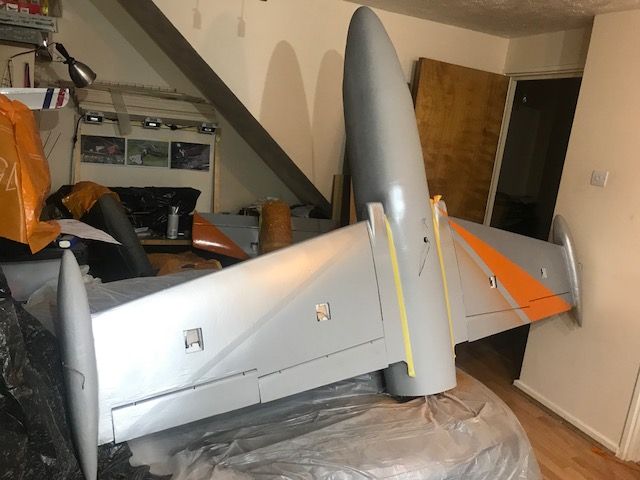
The wings have been joined and glassed, tip tanks glued on and I made some air intakes from 6mm depron laminated together and sanded to shape.
Also spent some time sanding the seams on the fus joint down and sanding the stab balsa to shape.
There is a pre cut slot in the fus for the stab which once in is square to the fin, but once the fus is on the wing its out of square. Turns out the one wing seat is 2mm less than the other, so a quick bit of balsa filled in and now everything is square. Well, almost, now the canopy base and front fus is out, but I can live with that as they're not really visual. I'd rather have square wings!
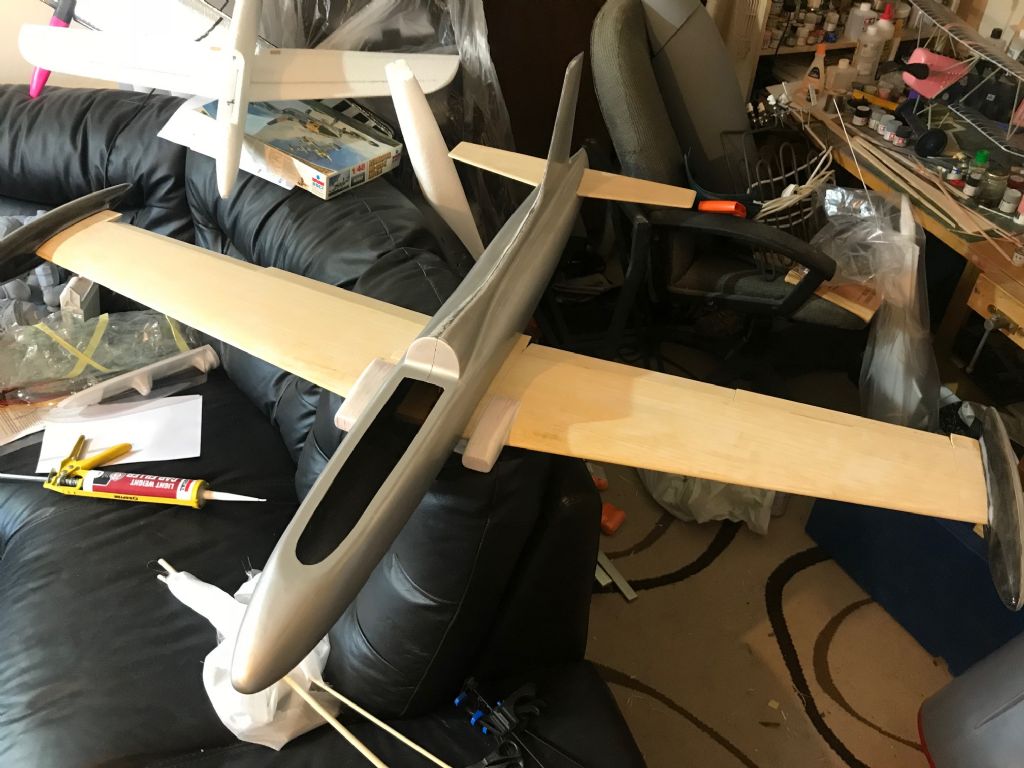
The stab has been glued in, the elevators next, and then the wing. A shot of it together shows a nice little Imp in the making.
Hope to get primer and silver on it during the week.
-
Hi Chris, I remember seeing that on SABC news as a kid. Very sad, especially as he was a friend.
I know Dave's son, Andrew, editor of Aeromodeler, also a gentleman that shares his dad's passion.
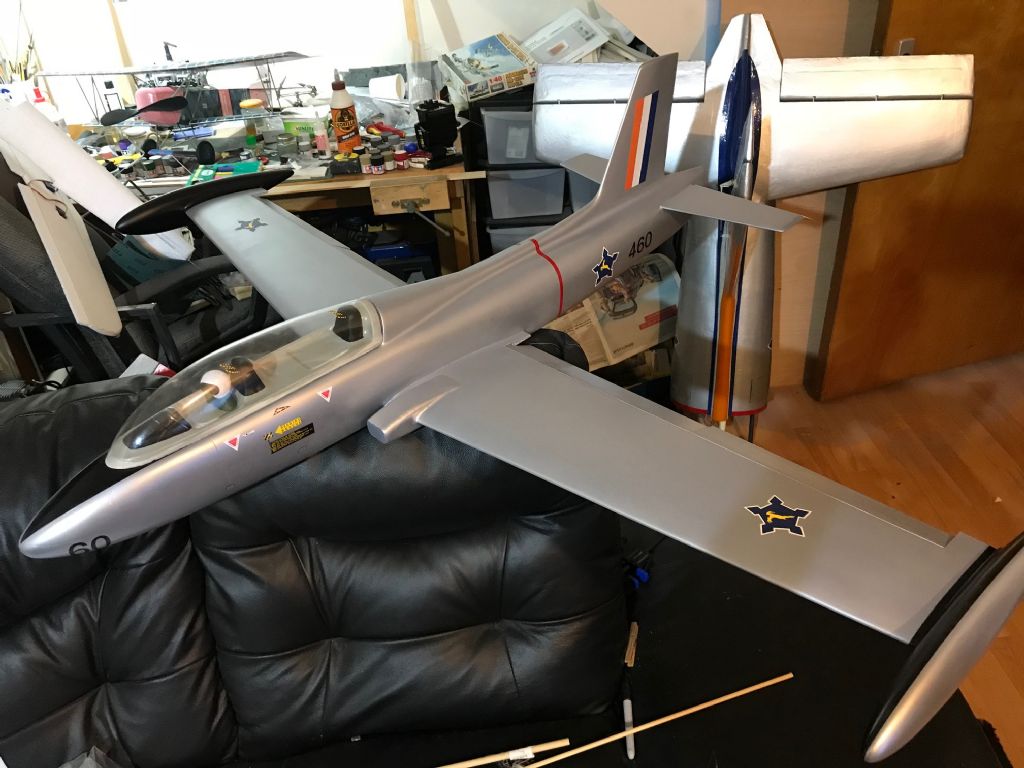
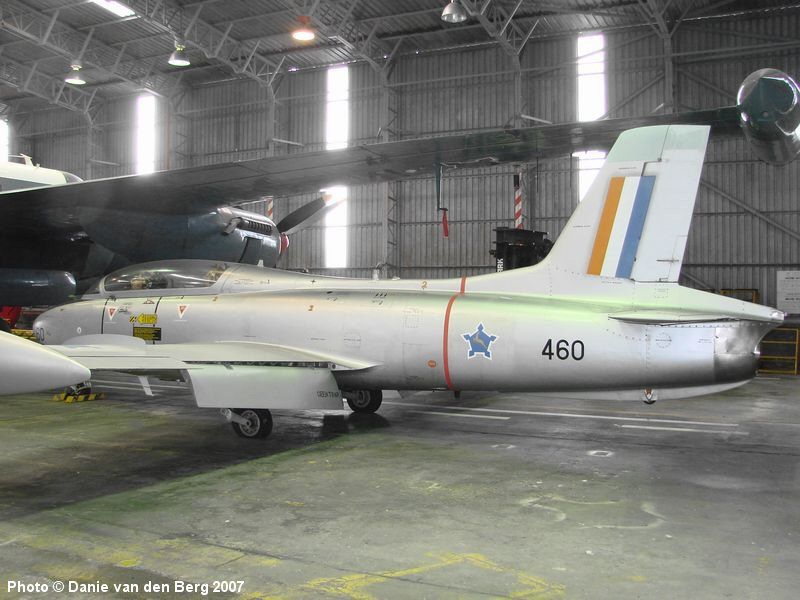
The pics were before I had numbered the Imp, it now wears 517. Being that I'm originally from SA, if I build a model and the SAAF used it then it must have some bokkies on it! The small one I'm busy with will be 460 in 4 Hangar at Ysterplaat.
-
Very nice Martyn!
-
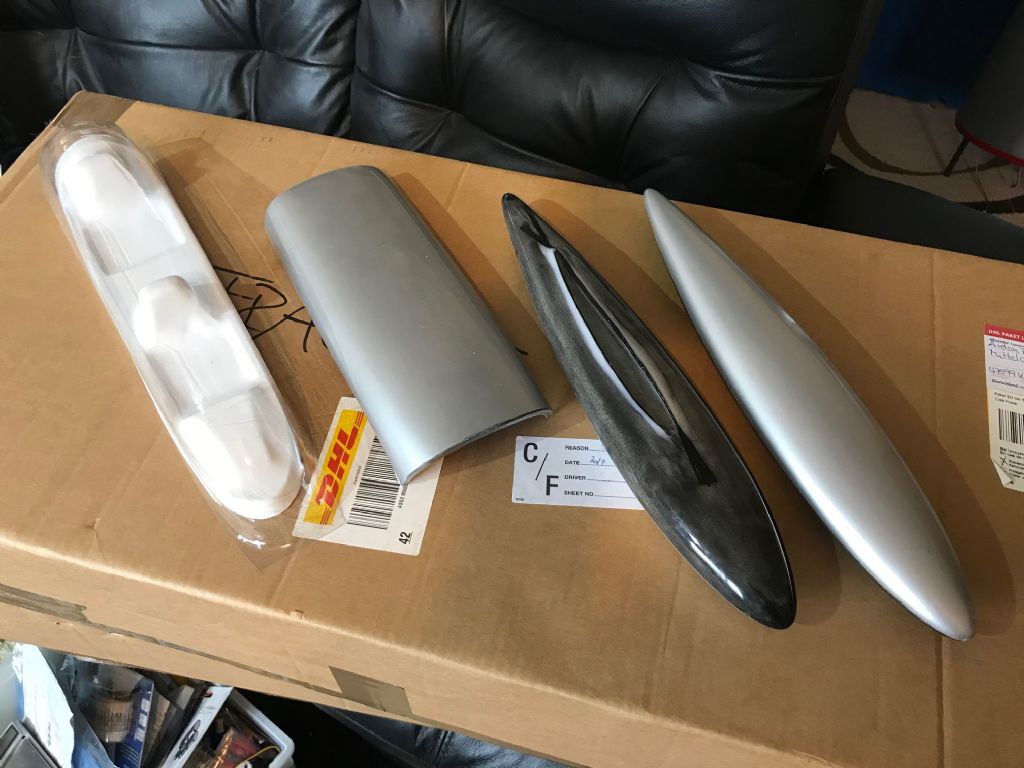
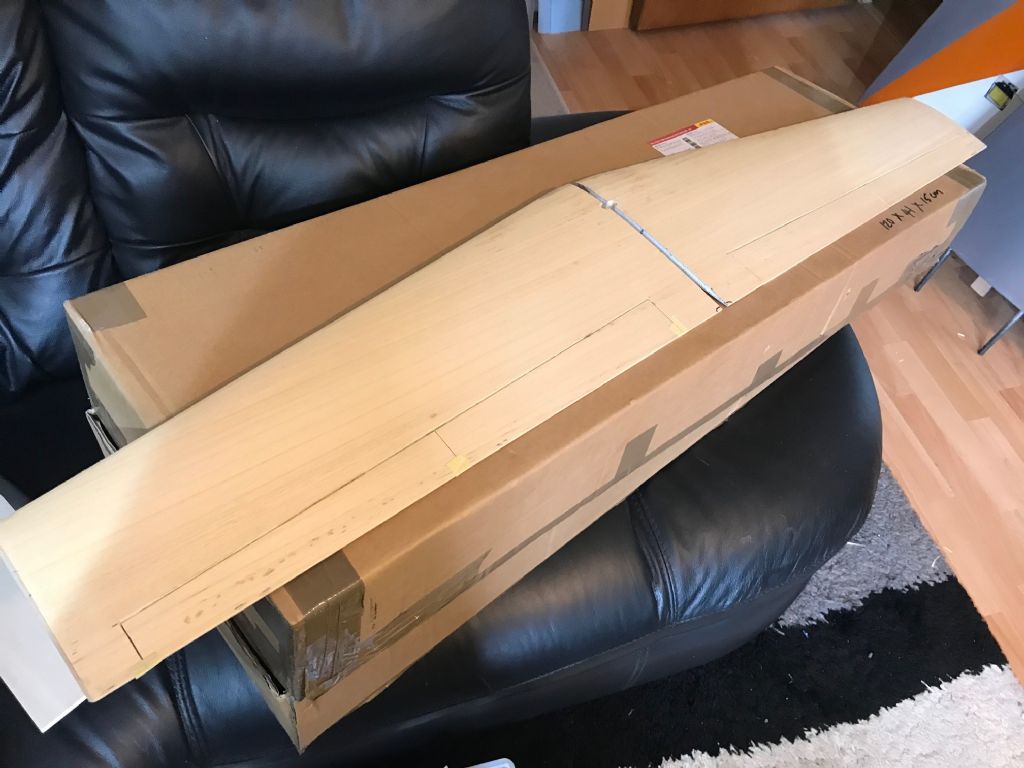
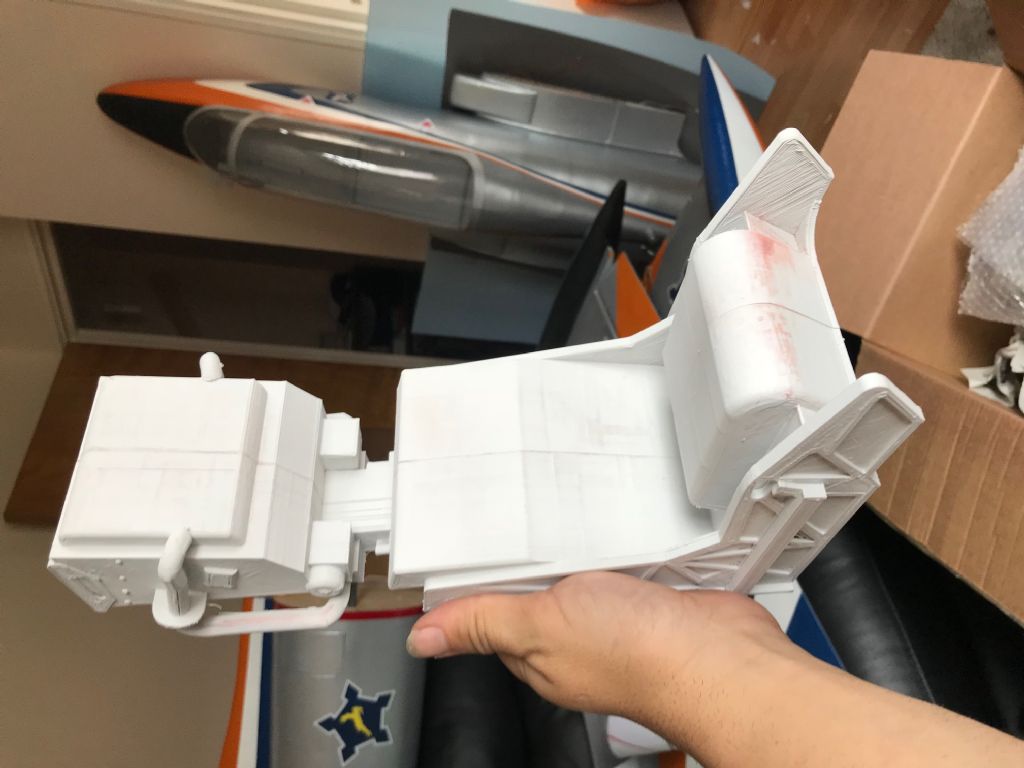
Next up as a quickie will be this 1/8th scale kit from AB Models. Kit comes with a glass and CF fus, tip tanks, belly pan, canopy and cockpit base. The wings are foam core with Obechi skins, spruce LE and live hinged flaps and ailerons with built in gap seals. How cool are these!
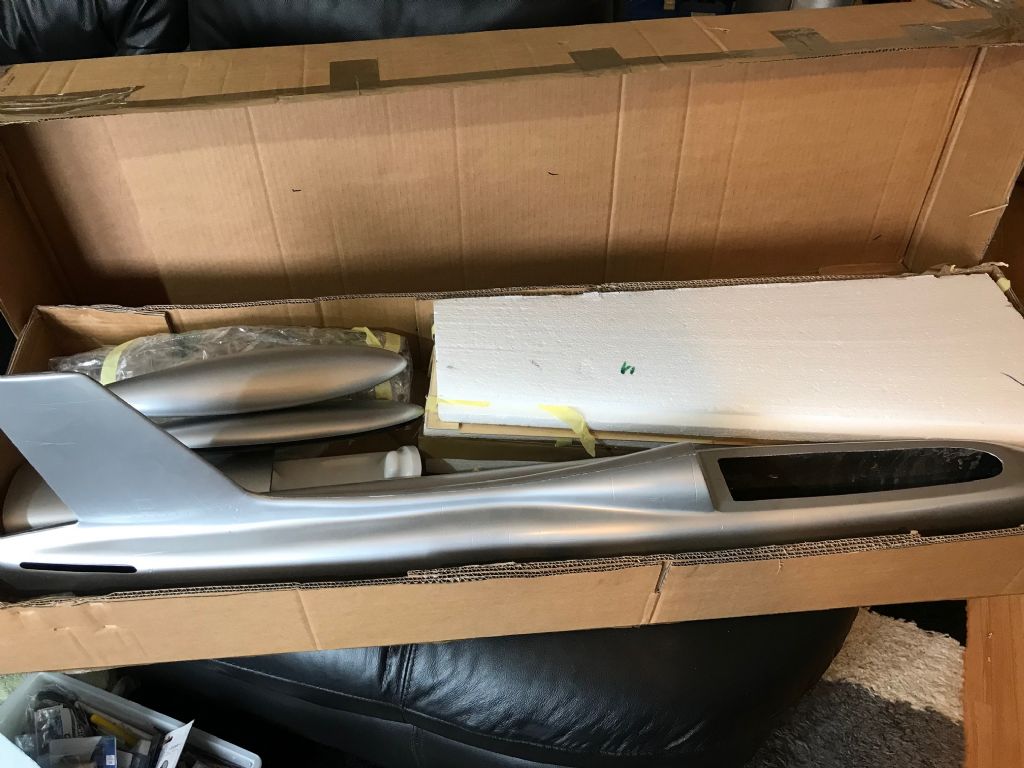
I'll be doing the all silver trainer scheme as below.
-
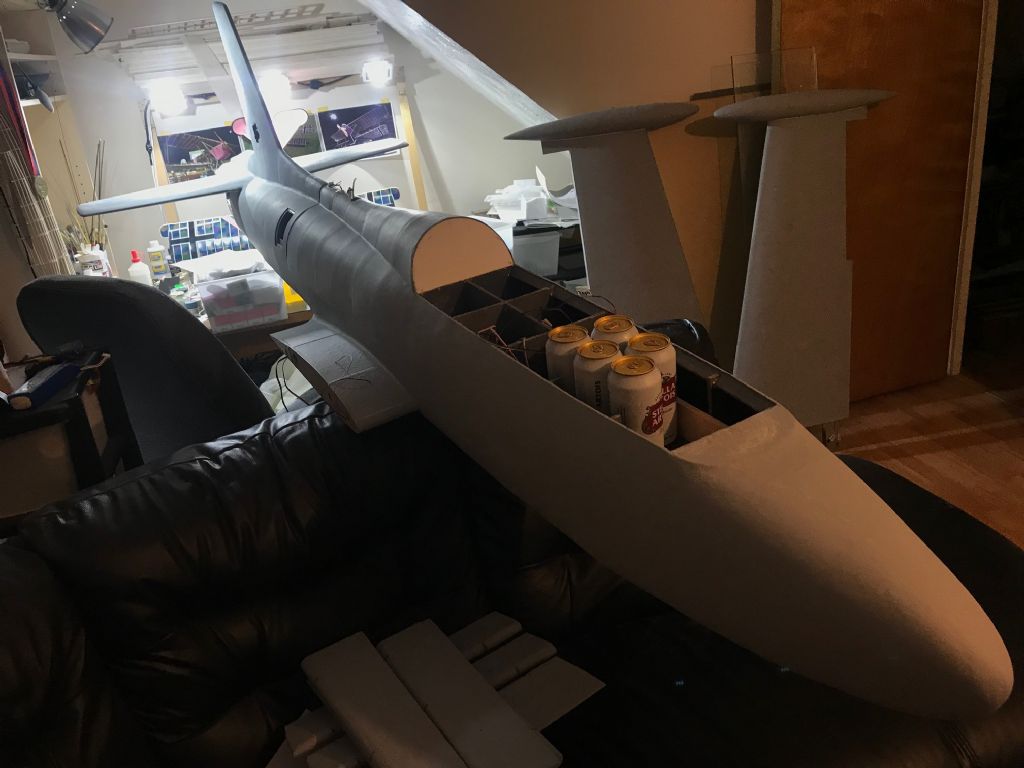
Forgot about this thread on here, so time for an 'update' and almost wrap. This project did languish for a good few years due to work, other modelling interests and just a lack of space in my flat. But with some mojo I found under a pile of balsa I got cracking with it again a few months ago. It was a case of 90% done, 90% to go.
I started by glassing the front fus, getting that filled, rubbed down and primed. I used Soudall lightweight filler in a tube which worked really well.
Then it was on to painting. I used lots and lots and lots of masking tape for this scheme. I used the yellow Frog tape which worked really well. The only bleed I had was where I hadn't rubbed the edge down properly and this was very minimal. This is good stuff to use if you're spraying.
I used B&Q rattle cans for all the painting, the stock colours matched what I wanted pretty spot on and after many hours of masking, spraying, masking, spraying, masking..... this was the end result.
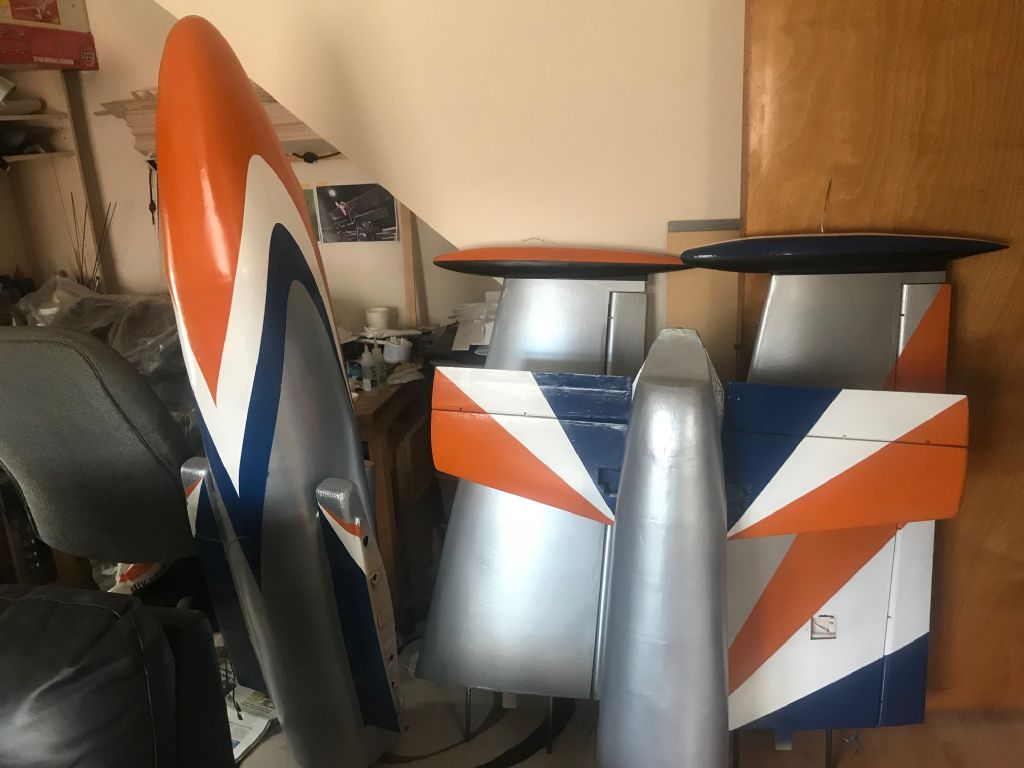
Then it was time for decals. I make my own laser printed water transfers. The black, orange and white lettering was hand painted.

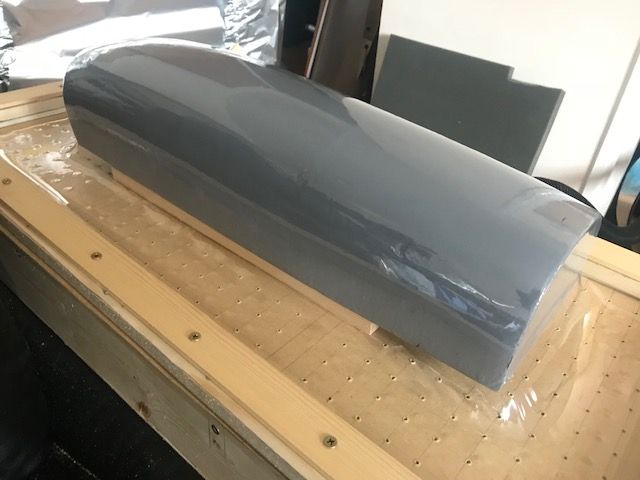
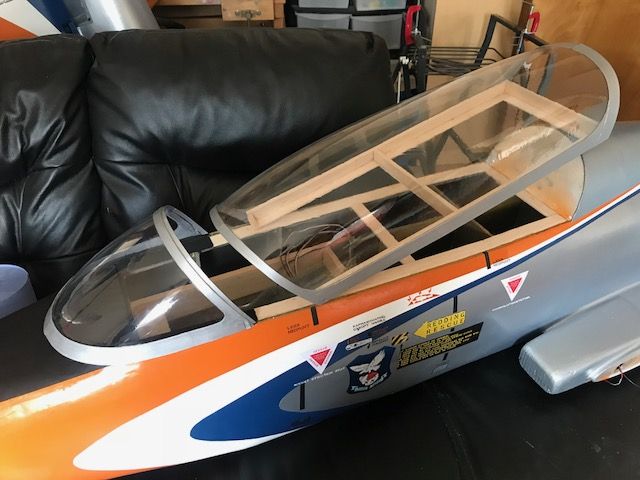
Between decals I bought some 1mm PETG sheet, built a vac box and made a canopy plug. The canopy is 80cm long by 20cm wide by 15cm high. I initially tried pulling it in one piece but couldn't get enough heat to the edges of the plastic so had to split the plug at the canopy joint and do it in two pieces.
This actually worked out better in the end as I now have easier access to the fus for the radio and lighting bits.
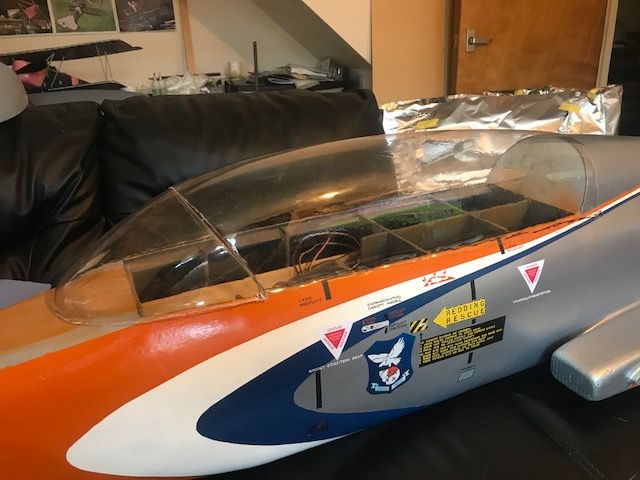
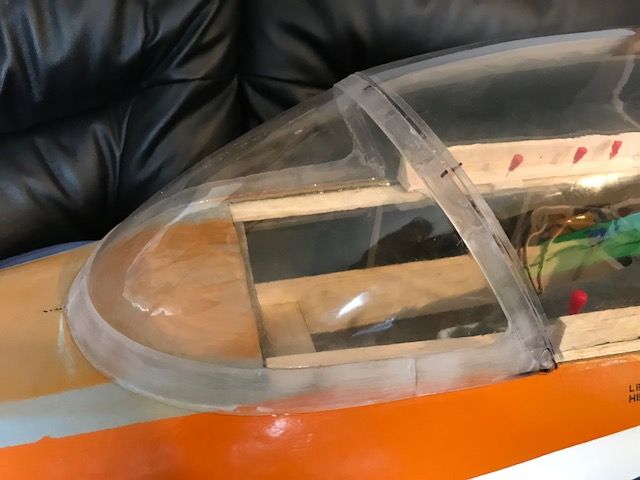
The canopy frame is made from the same 1mm petg cut to shape and glued to the molding.
And after some silver paint I was quite chuffed with the result! The canopy had been bugging me for some time. I couldn't find anyone that was able to do one that size and after some prodding from certain fellow modellers....
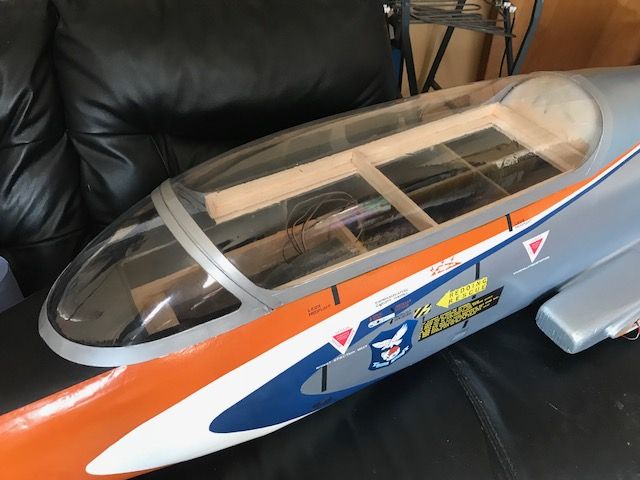
A bit of a cockpit mock up tub type thing...
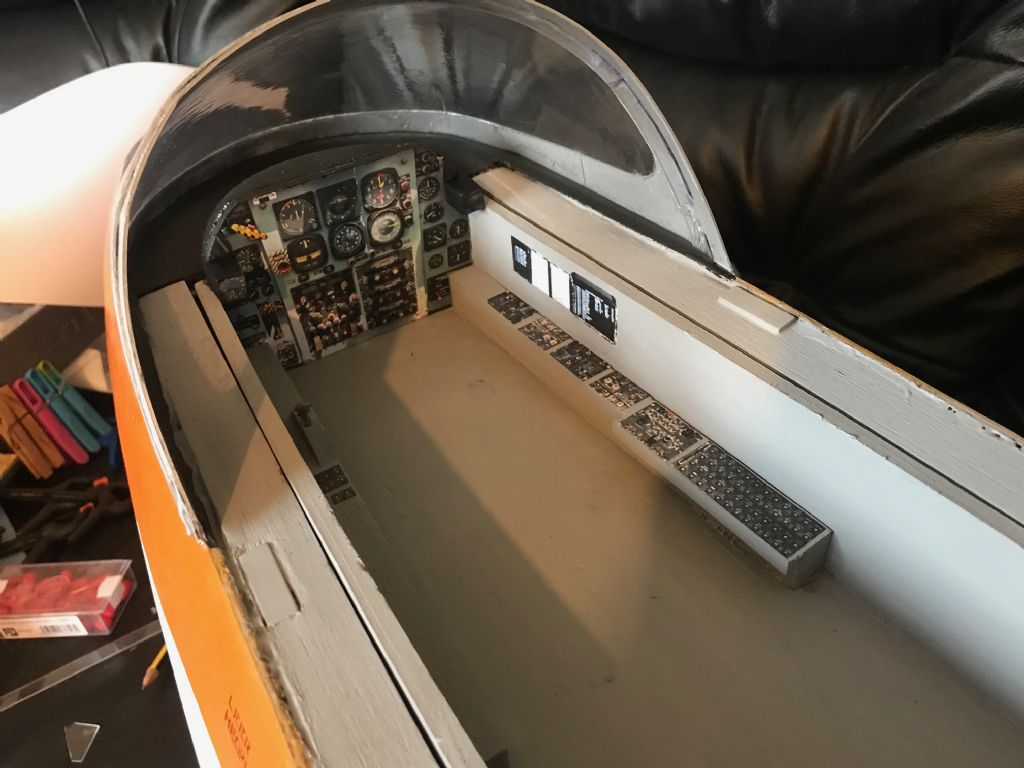
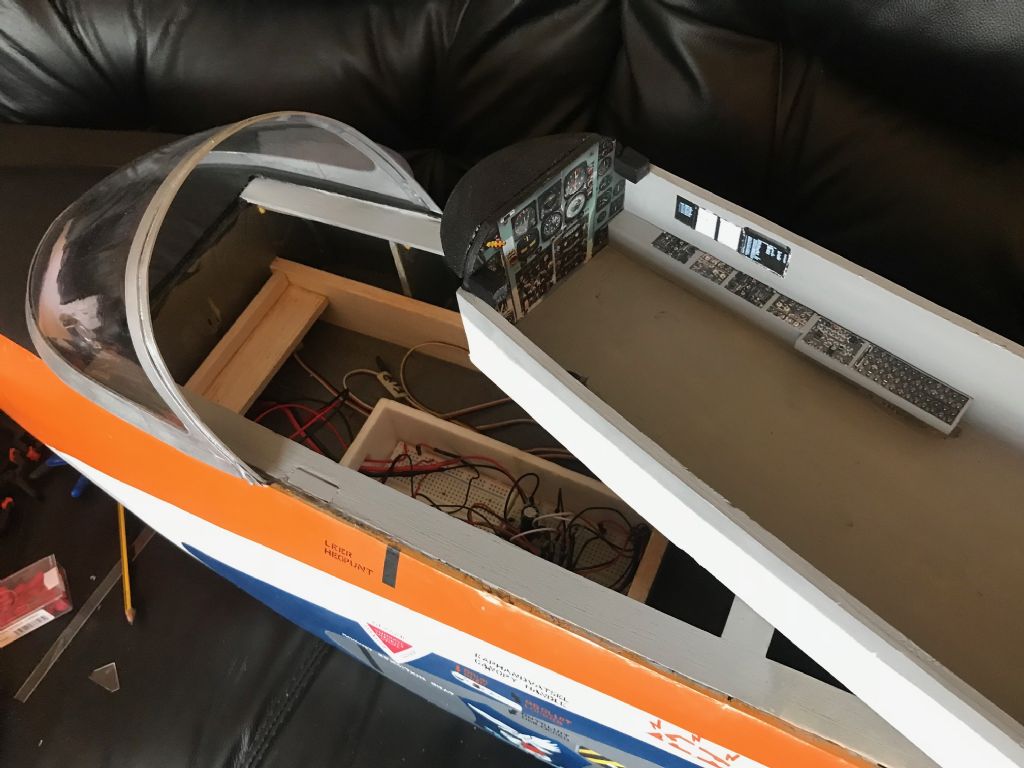
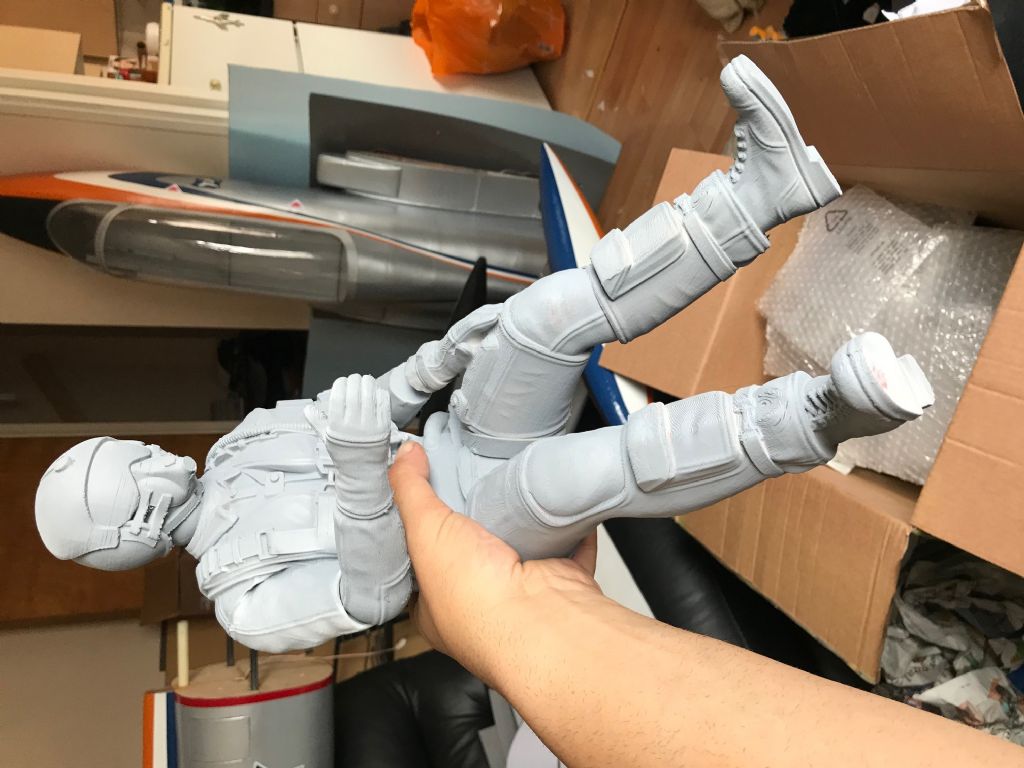
... ready for a pilot and seat to go in. I ordered a print of a pilot and seat from Andy Meade to go in, but with that only being an after thought I couldn't fit him in without some serious surgery. I couldn't bare to cut the prints up so have ordered a a bust and top half of the seat from Andy instead. The original full figures will go into something else

These are the full figures. Friggin awesome!
The servos have gone in and a few small details added and next will be to get the radio set up. The weight is about 10kg so far as a guesstimate. Soon as the weather improves I'll get it outside for an assembled shot.
-
Posted by Alan Gorham_ on 10/08/2019 16:30:46:
Just checking that everyone appreciates we are talking about a slope soarer here and not a power model.
Correct! This'll be a glider, in a very loose sense of the word!
-
Thanks for the help guys. Having a play around and the NACA 3414 (assume you meant that Peter?) fits almost perfectly at 2°.

-
Busy planning the next build, a quarter scale BF109 E4, and a bit stuck on which section to use.
I'd like something semi symmetrical to keep the lines between the fus and the wing. The Matt drawing says its similar to the NACA 2315, but that looks a bit thick for the slope.
Would the E374 thickened up a bit be ok? Any other ideas?
Thanks.
-
It's a 'short kit'. All the hard work of cutting out ply formers, ribs and other bits is already done. Great for people like me that can't set up their wood working tools.
The extra wood really isn't very much 'extra'. 8 sheets of 16th at £1.27, 10 sheets of 8th at £1.62 and a sheet of half inch at £3.84 is just over £30 total, add the rest of the bits from an extra sheet or two...
The plan is also in there, but the time and effort that has gone into the design and testing of this model, to be able to sell it on to us, is worth lots more than the £70 I've happily paid for mine.
I'm getting two kits soon that will require almost 200 sheets of 'extra' wood. They're still "a kit" to me.
-
Ooooh, I always fancied a JP but the mass build one was a bit small for me. Any details on the short kit? The link above doesn't have the JP?
-
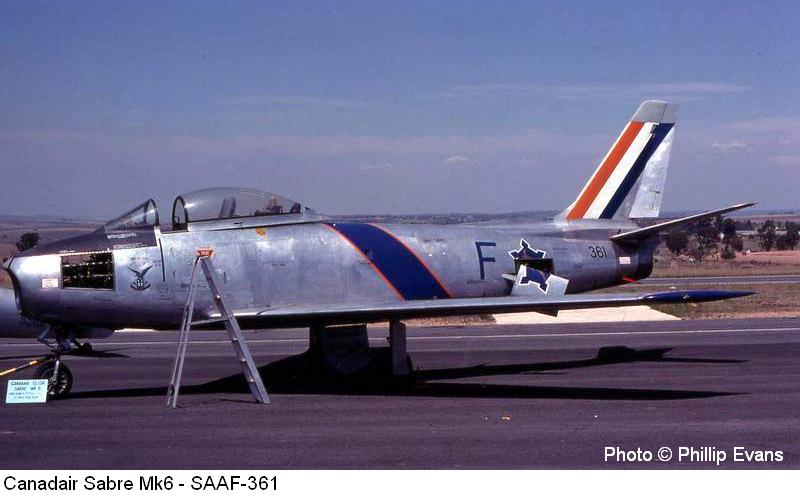
Mine will be of a SAAF 2 Sqn Sabre that flew in the Korean War.
Sherdanor II

The SAAF also operated the Sabre (Canadair CL13 Mk6 variant) in various schemes.


-
Really excited for this one, can't we start the MB a bit sooner? Pleeeeaaasssee!!
-
I'm in too! Here's a hint of the scheme I'm going with...


-
Love the F86. Check out the Horsemen doing a routine in three of them. Stunning formo flying.
-
Hi Lindsay, is your plan available to purchase? I fancy building one for rubber free flight based on your plan.
Thanks
Monz
-
Posted by Chris Freeman 3 on 24/01/2019 13:14:58:Posted by Monz on 23/01/2019 15:14:17:
Ai Chris, that's too funny! And sad at the same time. As an ex Capie I know what you mean about the cost of things. Living here in the UK has opened up modelling for me like I could only dream of in SA.
Hi Monz
Good to see that you are still following the blogs, what is your latest project as we do not see any of your latest projects. I miss seeing your masterpieces.
Hi Chris, ja, I still pop in here every now and then to see what the PSS okes are up to! Not really much free flight here and some of the okes have kak attitudes towards it.
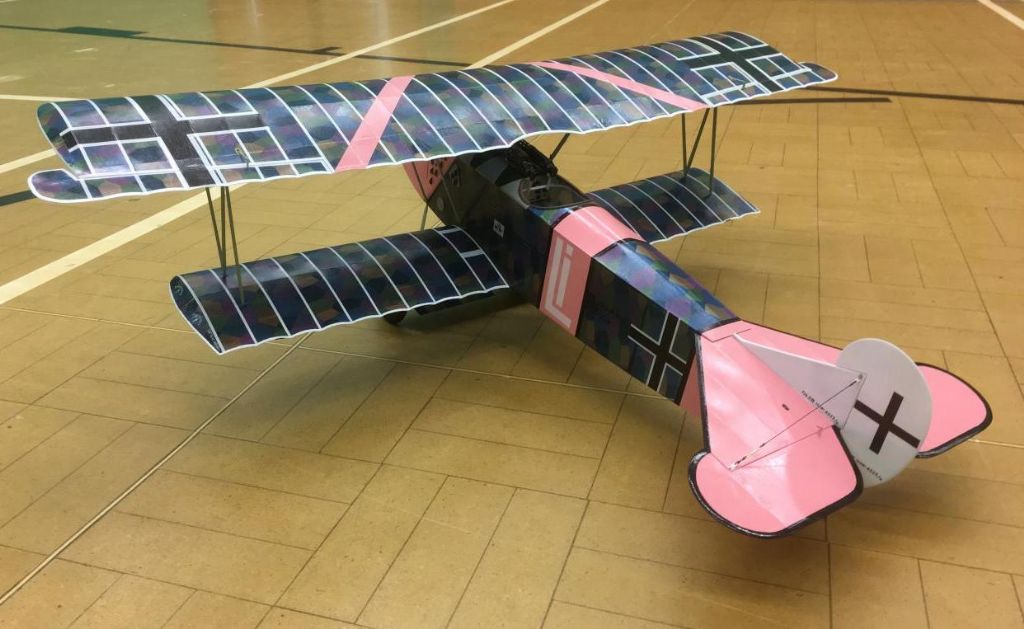
I'm busy with a 1/10 Fokker DVII for indoor rubber, build blog is over on HPA where I spend most of my time. A few Saffas there too.
Also recently gotten seriously into DLG or F3K. Something I would never have done in SA, R20K for a 1.5m glider? Are the SA boys sending a team to the Worlds in Hungary?
-
Ai Chris, that's too funny! And sad at the same time. As an ex Capie I know what you mean about the cost of things. Living here in the UK has opened up modelling for me like I could only dream of in SA.
-
Placed a single order on the 12th (six days ago) with the bits coming from all three warehouses in the checkout. UK bits arrived in two days, Hong Kong bits arrived today (new radio, receiver and vario, to the door, no customs charge) and EU bits at the post office to be collected.
A DLGing we'll go, a DLGing we'll go, hi ho dehideho a DLGing we'll go
-
Or just use an ad blocker.
I use Adblock Plus, a tiny little free add on for my browsers. No ads or pop ups anywhere. Especially good for viewing youtube, no ads anywhere.
9 ads blocked on this page alone just while typing this and almost 3.3 million in the past four years or so.
Bespoke water slide decals
in Hints and Tips
Posted
I am getting the impression that Monz is creating his Decals from scratch. That is coating onto a surface such as a gummed paper with WBV. Then printing or hand painting onto this substrate. Finally over spraying the art work.
Such work is beyond both my abilities and patience. I just buy in Decal paper onto which I print. My over spraying the art work is to both protect it and to increase the total thickness.
My methods are about deskilling the process. Which I have to do.
Not sure how you come to that conclusion?
All I do is buy in laser decal paper onto which I print....