

Tim Flyer
-
Posts
1,892 -
Joined
-
Days Won
2
Content Type
Profiles
Forums
Blogs
Gallery
Calendar
Downloads
Posts posted by Tim Flyer
-
-
The cowl should be quite repairable with no outward signs of damage. . Once cleaned up I would stick gaffer tape on the outside to retain shape and use epoxy and glass from inside then use polyester filler “P47” on outside. Basically re make the “tube construction” then re cut out the openings afterwards. It should be as good as new afterwards.
I’m sure you will do a great job . -
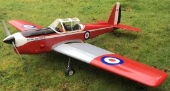
Superb model with great performance . I really enjoyed watching it!
-
Sorry to hear that Ron . It’s really frustrating when you can’t see exactly what went wrong. Good though you can get it back in the air ok . I find repairs are quite fun once I actually get “stuck in “ it’s the initial frustration/disgust that’s the worst bit , .
-
Aha get it … I thought he was referring to my earlier post
-
I think you need to let everyone in on your joke Paul ……although I’m sure it’s very funny and sophisticated. I’m not sure what you mean by posting the picture with website listed on it ?
-
15 minutes ago, Paul De Tourtoulon said:
oh dear who has been telling lies,,,?
Do you care to elaborate?
-
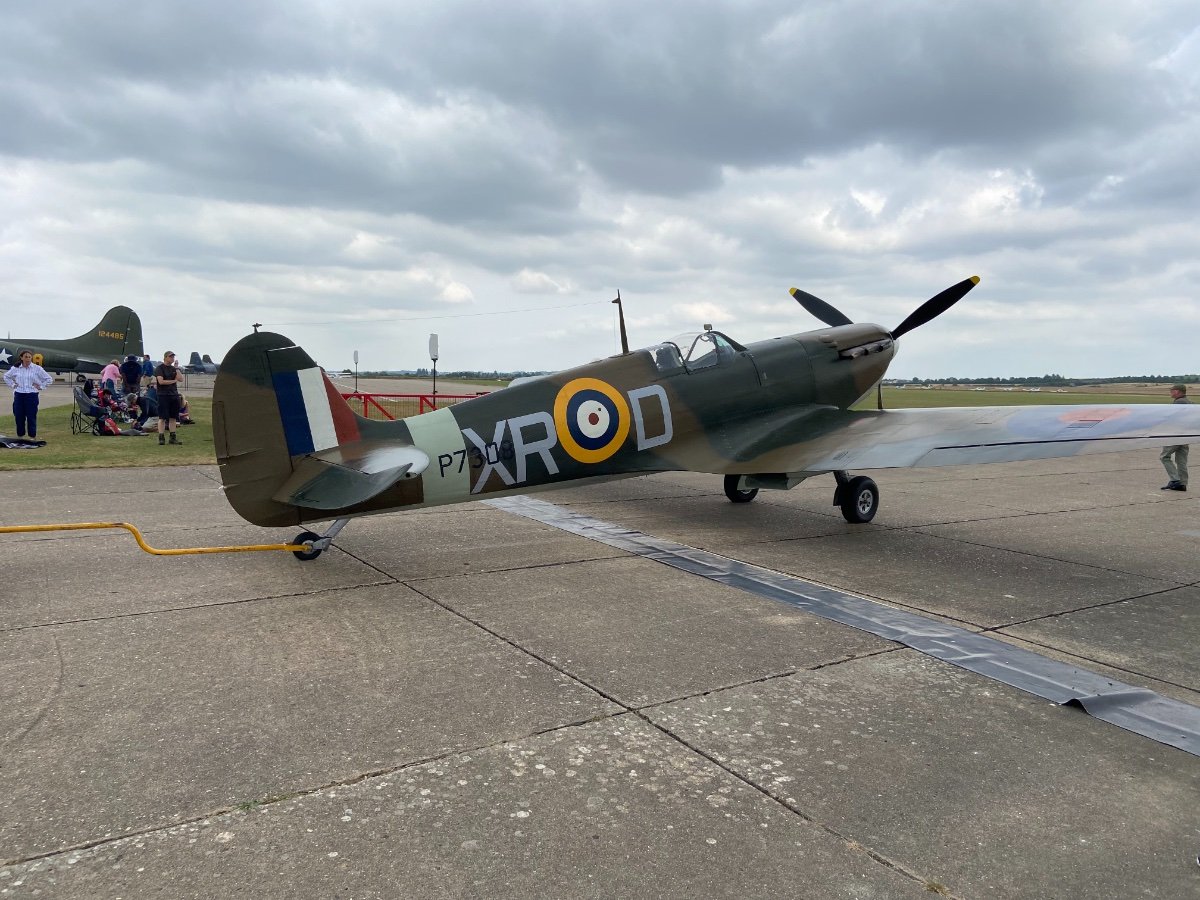
Cheers Nick your P47 Looks superb ! You did a great build.
I’m really pleased you now have sorted it out. I really love flying my P47 too . I have often heard they are a “really friendly Warbird to fly” , and I certainly agree. My model is only an ARTF Seagull with a Laser 100 but I definitely enjoy it very much . It’s the plane that really got me hooked on Warbirds. -
Thank You very much for your detailed reply Jon …good to hear. As you said It seems the main issue is simply being able to apply the required torque
-
Thank you. I see that might reduce the torque required to prevent loosening …. Certainly when I do up the steel nuts with a spanner, I put a fair bit of torque in.
-
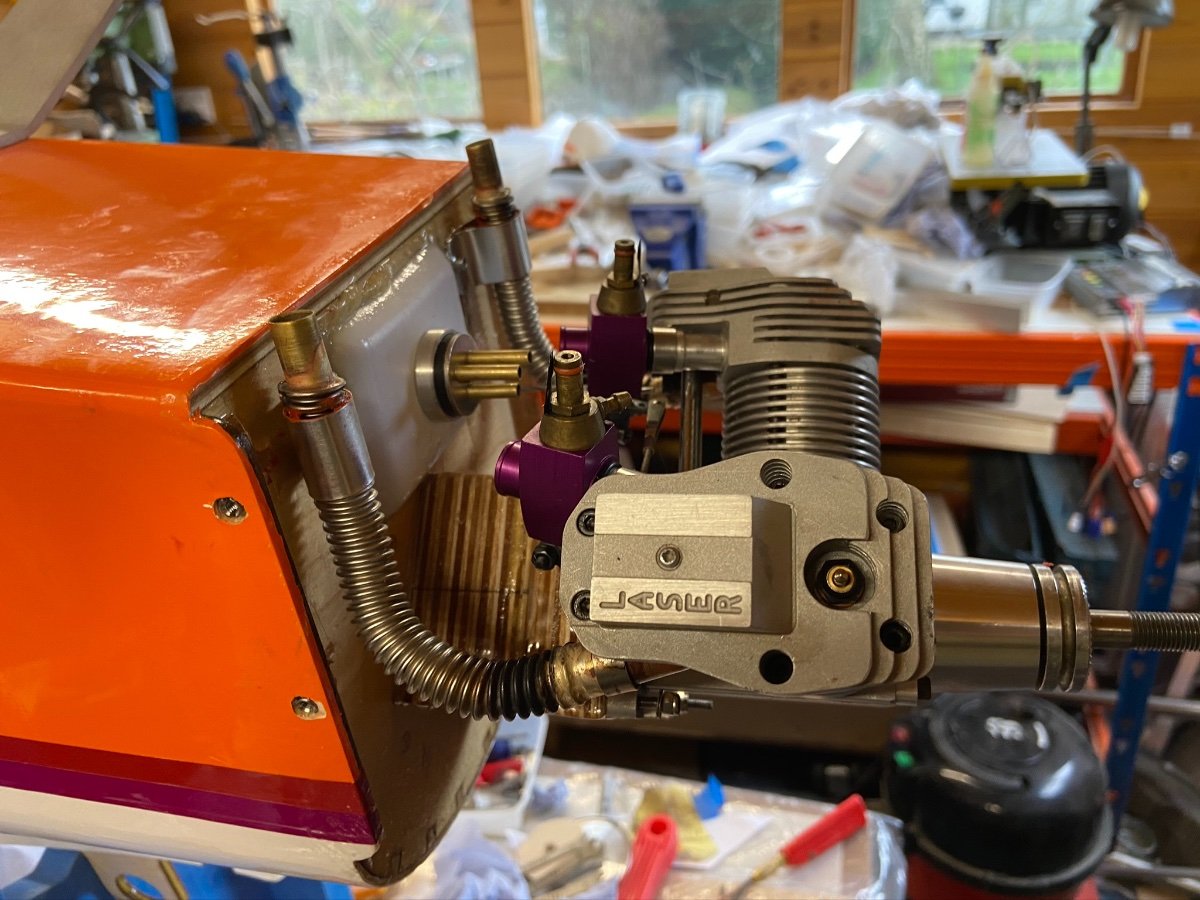
I would be interested to hear peoples views on the use of aluminium domed nuts as prop retainers especially for large four stroke glow engines.
Obviously they have been used over the years on smaller 2stroke glow engines.
What I’m concerned about is that an aluminium thread is subject to wear and it would be hard to generate sufficient torque without distorting/damaging the nut in order to safely retain the propeller. Given the high torque of a 4s engine and occasional low rpm vibration I don’t think a single aluminium thread is suitable.
I think the domed nut design where the rear is hollowed out to accept the manufacturers steel nut and washer behind it is much safer for larger engines.
Please see pictures of by my P47 domed nut from Just Engines.
This nut allows the steel manufacturers nut and washer to be used to properly retain the propeller behind it.

-
I love dogs but certainly would not want to encourage owners to bring their dogs to our club.
As many have said safety is the prime concern for both people and the animals. If dogs are present they need to be properly looked after and on leads in a safe area, and not roaming around. Not in pit areas or even worse on the flight line/runway. Tethering a dog might restrain it, but it can also trigger protective and guarding behaviour in some animals, as mentioned in the earlier post.
-
Hi Nick . Thank you! I’m afraid my workshop is a complete mess( especially the bits you can’t see?). The paints I’m using are Guild enamel aerosol spray and some tins for brushing. I find that paint the easiest to work with and easily available.
-
Thanks Jon. He was a £6.00 generic WW2 3d printed eBay job . He was way too short so I added balsa scrap to the base and carved it with a dremmel. After that I sealed and primed and painted it with artist’s acrylics .
-
I thought I would give a quick update to say that finishing work is still ongoing and must admit I’m actually enjoying it as long as I can make myself go slowly ! I have realised the maiden flight will realistically be in the spring . That will allow paint to harden properly plus allow me to enjoy the final build stages.
I have painted the fuselage now and the wings are waiting for their top brown camouflage. I have also started making panel lines with a sharpie pen. Thanks for all the advice on that chaps! I will be weathering them in etc. later.
One other thing I would like to say is THANK YOU PYRAMID MODELS!
https://www.pyramidmodels.com
I ordered a number of suitable decals to replace the incorrect Mk 9 ones DB supplied for this kit.
I will be basing my model on the mk1 AR213 EJZ.
I ordered the decals on Tuesday from Pyramid Models and they arrived today(Thursday). They seem excellent quality and I’m looking forward to fitting them! Pyramid seem to do loads of different decals… I wish I had discovered them earlier.

-
Back in the day we sometimes used to use Taylor long reach idle bar plugs on our model boats powered by 2stroke engines.
I can’t recall the bars coming off, but I remember them sometimes being worse on top end. They did seem to be slightly better for extended idling where in boats sometimes stray oil/water puddles could spray the carburettor and get into the engine. I guess some of the engines then had poorer fuel metering plus the tuned pipes we were using sometimes reduced low rpm reliability. Oil could accumulate in the rear can with too much rich idling. The solution was keeping on the gas ?.
Since returning to modelling years later one big thing I have noticed is how much better the glow plugs are!
The OS plugs like no 8 for 2stroke and no4 on 4stroke last ages.
When I used to do boats plugs lasted only one or two sessions. I guess rpm has something to do with it but the quality must be better now?
-
Amazing sound it certainly seems close! Very close?
-
Oops as Bob said !
-
I bought mine from Just Engines they do large and medium dome spinner nuts with various thread types. They work well but obviously make sure you buy the correct size and thread !!!
-
One important advantage I believe in the short and straight carb inlet tube on lasers is that it avoids fuel accumulation particularly in an inverted engine.
This reduces risk of prop throwing or severe spluttering and hydraulic lock when starting. It’s easy for a laser to spit out excess fuel which can happen just after tank filling.
-
Very neat Martin . I also made an installation on my laser 200v a year ago using SS conduit piping and concentrical sized K&S tubes as end adaptors.
The two pipes were clamped to the firewall using thin aluminium straps with high temperature silicone inside to allowing slight movement of the pipe as the engine cycles in order to prevent future pipe cracks.Cans were not used as my site is not noise sensitive and the relatively small diameter and length of the pipe prevents the sound being too loud
-
 1
1
-
-
I haven’t got a spare fuselage to put the flat twin into at the moment and would need some rearranging of my collection to put it in so it might be some while before I could test it .
However if you are looking for people to buy them to make it worth a production run please put my name down for a 200FT.
I would really like to try it in an Extra or similar aerobatic plane. A black and silver anodised look like your 200i would be fantastic ?
-
Thanks for your ideas chaps some very good methods. Making me think I may have a go .
-
This is a mk IIa I believe, but it shares the shorter nose of the MkI and also had the 4 .303 guns , I think the cannons were first fitted on the MK IIb. I don’t want to fit wing cannons and would rather keep as simple as possible ?
-
Just a short update. I have been busy painting. I decided not to bother with rivets and panel lines as my painting isn’t good enough to warrant that detail, and thus us still a stand off scale model.
I have modified Mick Reeves 1:5 instrument set to fit and trimmed the canopy, painted the pilot, cut out and painted the spinner.
One slight frustration is that the decals DB Sport and scale provide for this model are those for a MK IX and this is clearly a MK1. I’m exploring other methods to make the proper ones.
I would like the paint scheme to be similar to this one At Duxford


I 'lost' my LA-7 today!
in Incident Reports
Posted
Sorry it’s Isopon P38 I meant ?. Good stuff although there are many alternative polyester fillers . Their adhesion is great and easy sanding plus they set very quickly