

Tim Flyer
-
Posts
1,983 -
Joined
-
Days Won
2
2 Followers

.thumb.jpg.507e8e41f64a8a0ae8fbd699d456cbca.jpg)
Recent Profile Visitors
2,845 profile views


Tim Flyer's Achievements
194
Reputation
-
 I’ve used it quite a few times and to be fair the catalyst amount isn’t an extreme precision requirement. Just make sure you stir it very well. The danger is overdoing the catalyst and setting taking place to quickly especially in warm weather like today. I would tend to use a bit less in hot weather. I’m afraid I have just brush painted so cannot advise on thinners, but would advise some caution there as too much dilution might impede hardening . Probably worth experimenting on a non critical surface first.
 -
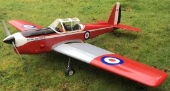
I managed 5 fun flights on my Hangar 9 Mustang this afternoon despite some less favourable cross winds.
-
If the exhaust is really short I would still miss out the joiner as silicone will very probably melt on your 4s despite efforts to keep the cowl cool. Four stroke exhausts run very hot. What I would do is make a flexible mounting bracket instead. That means the bracket takes the stress rather than the exhaust pipe.
-
I use aluminium boiler tape on some of my bulkheads which are near exhausts and it seems do deflect some of the heat quite well . However there should always be some space between exhaust pipes and wood. The important thing with mounting is not to clamp the exhaust too rigidly to the fuselage so it is allowed to oscillate with the engine. Otherwise a totally rigid system may crack. I have found straight through exhausts are acceptable on most of my nitro 4strokes as long as the pipe is of sufficient length and outlet of small enough diameter. I use flexi pipes straight through with tapered brass outlets on my Laser 200v and it isn’t too noisy. It would probably be more challenging to keep a large single cylinder quiet on straight through pipes such as a Laser 180 and a can would probably be required.
-
Great to hear you’re enjoying it Ron . Agreed its fantastic on knife edge. I found for landings I have to do a relatively flat approach and come in slower than I would expect . It seems to have very benign stall characteristics possibly due to the quite thick leading edge , although as you say it is still a slick model and can run on a bit on landings.
-
It’s a great plane and very stable in high winds and very precise . I definitely prefer mine to the Acrowot XL . I use upwards flaperons as air brakes in still conditions to shorten landings. I have a bit of nose weight as I have tail servos and an OS120ax to power it but have reduced it somewhat as I gradually have been trimming it to improve its inverted flight.
-
As Jon said in comparison my Laser 180 gets 7400rpm on APC 18x8w on Laser 5% low oil fuel.
-
Mountain Biking for me ( probably as first hobby! and skiing when money and time permit!) . The models compete for space with bikes and wheels in my garage!
-
Thought I might add my recent flight to the thread, I made last Friday as it was a bit “exciting “. There was a bit of cross wind gust and I had to go around a couple of times because I thought one of the main wheel retracts wasn’t extending . After flipping the switch and manoeuvring few times to try to help i, I realised I was going to need to make a belly landing as fuel was running low. I retracted the other main wheel and tail wheel and decided to try the main grass runway rather than rough grass. Anyway I made a normal approach with flaps and managed to hold the nose up until the last moment. The plane came in sliding along the grass absolutely flat. No damage whatsoever was done! It is almost like the oily exhaust residue under the plane helped it slide. The prop didn’t get broken either and the brass fuel and engine oil vents on the bottom of the cowl were fine. I wonder if having the tail wheel retracted prevented the nose damage as it slid along the grass. Anyway the tail retract unit has been a nice addition and makes it look slick in the air. On inspection I found that one wing oleo leg and the door had fallen off in the air . The pin was still held in the retract by its grub screws but the oleo had pulled out. This was obviously a result of me recently bending back the oleo without re doing the epoxy which I use to seat the pin inside it. I epoxy the pins into the oleos and only use the grub screws in the retracts. This has been successful so far and has prevented loose wheels. I have ordered some new wheels and a new pair of legs! I’m probably not going to bother anymore with the oleo doors as they are quite vulnerable and I don’t think I will notice their absence. Given the larger engine size I am using it probably would have been better using a stronger oleo but the kit ones I’m using are easy to repair even if they are a bit under spec for the job. I just have to land carefully! I am getting a lot of flights with this plane and am really enjoying its great performance with it now in its second season.
-
As Ron said as long as the speaker isn’t loud and blaring I think it’s fine. My club mates use them without a problem. I also find it quite useful as I know when they need to land before they tell me . Most systems I understand can be programmed for volume and how many different messages are actually given so there doesn’t need to be a constant din. If my transmitter had a speaker I would use it.
-
One “modern” feature I would not be without on my Futaba 14SG is Telemetry. I use it to test the receiver TX battery packs before each flight and check the reading on the transmitter . The telemetry makes it very easy to test and I can see to voltage drop when operating the servos together. Once in the air i don’t use telemetry much at all but probably would appreciate voice warnings for low battery /timer if a speaker was built in.
-
Not making claims on stuff “ I have seen in discount diy places”. Was comparing two different Stihl units we were actually using on site. I’m certain the torquey 4mix units would be much better on line trimming especially on very large areas with long grass . Luckily I don’t do that. This particular machine was recommended to me and purchased in person at Highland Industrial Supplies HIS in Inverness who know quite a bit about Stihl. I often have to carry my unit up trees to trim fast growing Leylandi hedging so weight is extremely important for me.
-
Quality agricultural engines are set up for that purpose and most do an incredible job operating in very very harsh conditions and have to move heavy and variable loads . They tend to be solidly built and ultra reliable to withstand the abuse. Some engines are designed for torque rather then simple power e.g a line trimmer going through long grass and some for power and RPM like a chainsaw. The 4 stroke strimmer engines tend to be the ones tuned for torque rather than lighter high speed 2stroke chainsaw engines which need to be lifted for tree work. Yesterday I was cutting the dense thorn bushes at the end of our runway and really appreciated the high rpm working with the metal blade on my Stihl 2s brush cutter. I preferred it to a colleagues 4mix Stihl which has more torque but less rpm and is a heavier machine . I am also pleased I use Aspen fuel as it’s so clean and doesn’t generate much smoke and looks after the engines well. Only downside is that Aspen is now £30 including vat for 5L locally .
-
Southern Modelcraft fuel is great and I know they are still running as one of my club mates got his fuel from them just last week.
-
High rpm engines especially 2 stroke on tuned pipes often need more nitromethane and are often designed to run on it . Too much compression and high nitromethane can cause pre ignition and knocking though due to its rapid combustion and head shims may need to be added . I run my little Rossi 28 in my hydroplane on 20% Nitro Bekra which is also high oil as it’s kind to the engine at very high rpm as it uses a lot of full throttle and develops lots of power. My main flying fuel is 5% as it is relatively economical and runs fine in my 4 strokes and OS 2strokes .
