

Richard Ashworth
-
Posts
201 -
Joined
-
Last visited
Content Type
Profiles
Forums
Blogs
Gallery
Calendar
Downloads
Everything posted by Richard Ashworth
-

-
Pegasus Models Galaxy Hornet
Richard Ashworth replied to Richard Ashworth's topic in Build Blogs and Kit Reviews
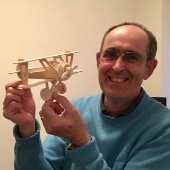
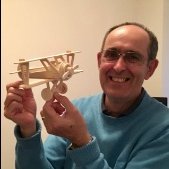
Nearly there. Today, 7 weeks of fun. Motor Thumper 3845 900kv 750w, Overlander 60amp ESC, Turnigy 4S 3300 30c. Maiden when weather favourable and someone with more skilled thumbs is available. If she passes, she gets her stripes. (I will add a post when I have flown her) Well, she is a Hornet (hopefully non stinging!). I hope that one day this blog may give someone the confidence and desire to build that other blogs have given me, and I apologise for its amateur nature to all the real pro builders that post and whose skills I have tried to emulate. Richard -
Pegasus Models Galaxy Hornet
Richard Ashworth replied to Richard Ashworth's topic in Build Blogs and Kit Reviews
A lot of covering and final fittings ESC Velcroed under battery tray (with access hatch) A little bit of fun Completed wing pre servo & pushrods Main u/c Edited By Richard Ashworth on 08/09/2018 22:34:58 -
-
Motor installed on standoffs with dummy former sandwiching nose wheel wire
Richard Ashworth posted a gallery image in Member Albums
-
-
-
-
-
-
-
Pegasus Models Galaxy Hornet
Richard Ashworth replied to Richard Ashworth's topic in Build Blogs and Kit Reviews
And now as before, thank you to HWDMAC for the next process, "making the removable cowl". After a lot of measuring I will let the pictures tell the story. It worked! -
-
-
-
-
Pegasus Models Galaxy Hornet
Richard Ashworth replied to Richard Ashworth's topic in Build Blogs and Kit Reviews
I used 15 min epoxy so as not to be rushed and initially thought to leave the wing on overnight to fully cure but 10 minutes after putting the fitting in realised that I did not know where the epoxy may have gone so gently removed the screws and lifted the wing. Just as well, there was a small scrape of epoxy on the wing and its seating which would have been fun sorting when set! Note to self - next time CLING FILM ON WING. Sucess, the wing seats properly, the bolts go straight in, after the spacer was cut out the aileron push rods fit nicely between the ply plates. Relief! -
Pegasus Models Galaxy Hornet
Richard Ashworth replied to Richard Ashworth's topic in Build Blogs and Kit Reviews
And then the area I was dreading but hoped that I had a way that would work, putting the ply blocks with Tnuts in the fusalage. Firstly I cut the ply blocks to the minimum size I could that would take a full Tnut , drilled them and forced the Tnuts in by squeezing them in the bench vice. I then put a temporary spacer between them so that they were a tight fit in the fusalage. By measuring the centres I worked out where the wing dowel holes needed to be. With the wing propped on the bench with the lower surface horizontal at the dowels I put a 2mm pilot hole through the wing. Using scalpel and drills I made holes through the wing for the dowels which I drilled out 1mm oversize to give wriggle room.The dowels were then epoxied into the wing checking that bolts going through went into the receiving Tnuts. When the epoxy was set with 3/8 spacers between the dowels and ply plates and all screwed up fairly tight, protected where possible with masking tape, then epoxy on the insides of the fusalage and outside of the ply plates, everything was slid into place. Edited By Richard Ashworth on 08/09/2018 21:33:47 -
Pegasus Models Galaxy Hornet
Richard Ashworth replied to Richard Ashworth's topic in Build Blogs and Kit Reviews
Jumping ahead - end product -
-
-
-
Ts all fastened to wing for inserting in fuz
Richard Ashworth posted a gallery image in Member Albums
-
-


