

Nick Somerville
-
Posts
902 -
Joined
-
Last visited
-
Days Won
7
Content Type
Profiles
Forums
Blogs
Gallery
Calendar
Downloads
Posts posted by Nick Somerville
-
-
That looks as though getting the wheels to sit in the bays has been very frustrating!
The retract mounts are very small for such a large model. I would consider some carbon cloth in around the area to mitigate the top skin splitting on a hard landing. I have done this retrospectively on my Sea Fury and the weight penalty is minimal.
As you say, lovely curves.
-
No sign of the wind abating later this week as yet. Had hoped to go to Buckminster on Thursday, fly camp and fly again on Friday before drive home. Tbh I wouldn’t drive 35 mins to my home patch on the basis of the current forecast so no point driving 7 1/2 hr round trip. Pity as was really looking forward to meeting some fellow Laser enthusiasts.
-
1 hour ago, Nigel R said:
Have you tried using a different charger? My first suggestion would be to work out whether all four packs have developed the problem, or if the problem follows your charger.
Thanks Nigel, I do have a more basic charger that can be set to LIFE charging so will try that. Good call! The Overlander D100 V2 I use is a replacement to the earlier version I had that went Bang!
-
33 minutes ago, Denis Watkins said:
Connection Error’
Nick. Is most definately not you pack
it is your leads or plug connection broken or bad connection inside
check your leads or plug
your charger is doing a perfect job of telling you Connection Error’
Thanks, will make all the necessary checks.
-
38 minutes ago, steve too said:
@Nick SomervilleAre they Smart? If so they will have a management board that may be causing your problem.
No, nether of the planes have the smart ones.
-
I have a pair of Spektrum 2S LIFE receiver packs in my P47. For some time when charging them my Overlander charger will complain ‘Connection Error’ after setting either to be charged. I generally charge at 1.0amp using either the LIFE balance ir Charge settings. The issue has been more frequent on one of the batteries. Usually after several re starts the charger stops complaining and they get charged.
However, the more troublesome battery is now not prepared to be charged at all. It reads 66% on my checker so it’s not as though it has gone flat. I don’t tend to fly for more than 4 10min flights on an outing so they hardly get much of a drain.
weirdly the two batteries in my Sea Fury are also Spekie Life batteries and the charger also complains in the same way from time to time. The issue worsens when charging both batteries simultaneously on the two channels. In fact for both models I always only charge one at a time now because of this. Incidentally the charger sometimes takes up to a minute or so before complaining.
When charging LIPO batteries I never have any problems with the charger.
Any advice would be most welcome
-
Thanks Peter, a relief not to have stuffed up the painting. My third model using spraygun and airbrush and I am starting to work out the procedures. Klasskote paint is brilliant stuff and for the insignia etc I use SMS acrylic lacquer from a local model shop in Frome. No second guessing the thinning as it goes straight in the airbrush with very high pigment. White over jet black is a doddle! I used about 25ml of black and 20ml of white for all the markings.
-
 1
1
-
-
Cheers John, garden certainly lush with all the rain.
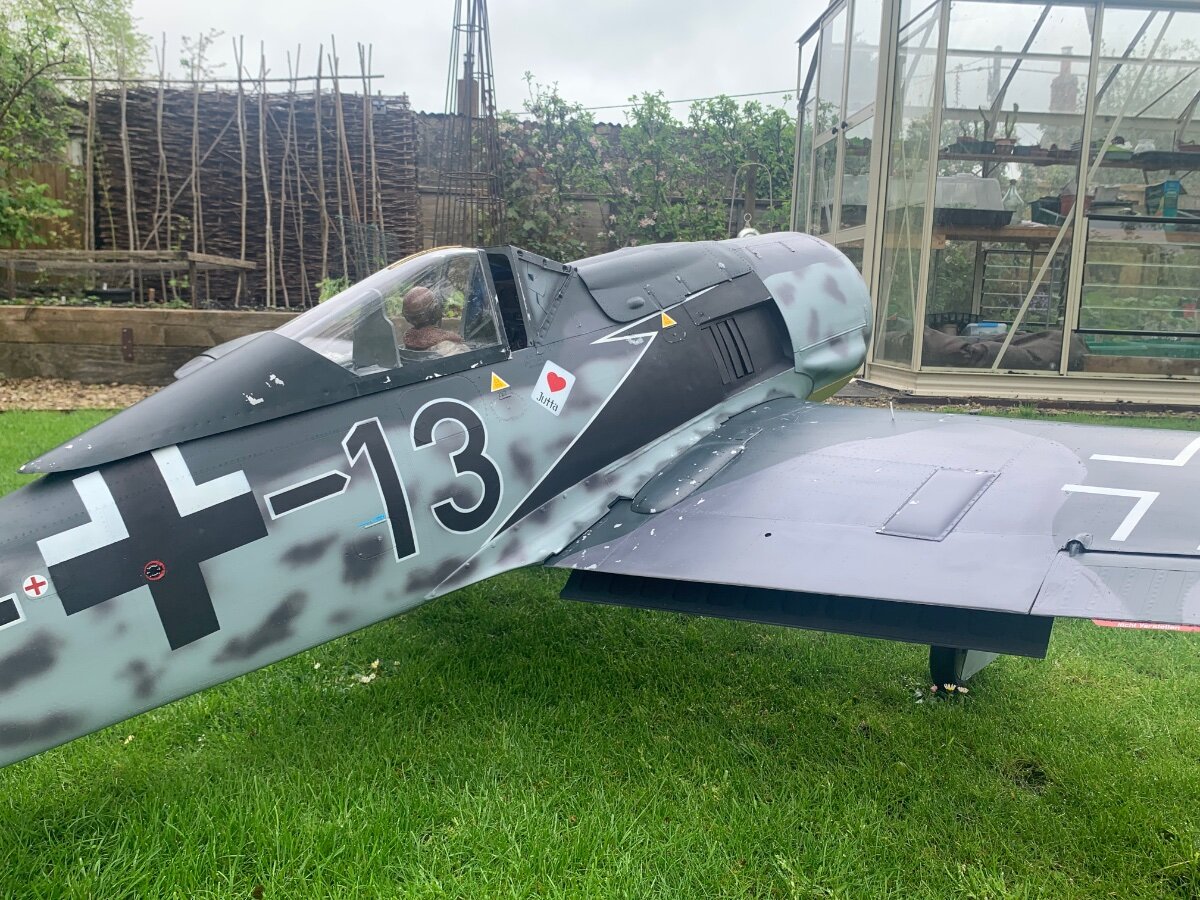
In fact it rained most of the Bank Holiday so completed the insignia and nomenclature. Stencils and dry rub decals courtesy of Flightline Graphics.

One of the working flap indicators and the little red post that indicates Gear Down.
-
7
-
-
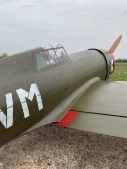
fuselage marking on now.
-
2
-
-
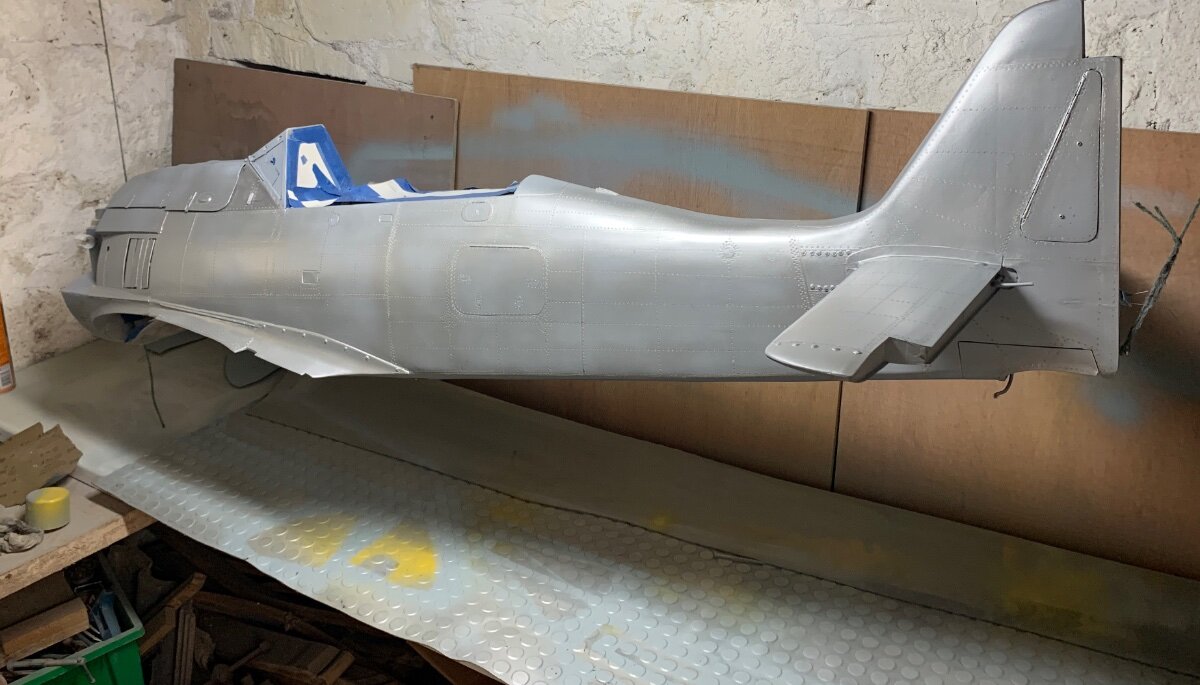
First time on its legs for a while. Looking forward to adding the markings and weathering next.
-
1
-
 1
1
-
-
Wow, such tiny stencils. Looks perfect!
-
Like PJ said, a bit terrifying letting loose the airbrush to blow camouflage splodges. It is was it is once underway so hopefully I won’t rue what I have done. There is the darker almost greenish grey to add on the upper areas and cockpit. Wings have had the tops covered in this grey and when cured enough the final large Camouflage patches can be added with the same dark greenish grey.
-
6
-
-
Finished up the mounting of the drop tank onto the rack and now ready for painting. It’s all adds up to a fair payload! 3 1/4 oz for the rack and almost 8oz for the tank. The tank can be easily removed from the rack and the rack also is easy to remove from the aircraft so three options for flying.
-
2
-
-
Painting at last, as the weather seems to have almost caught up with the time of year. I gave the all but the moving surfaces a fine coat of rattle can aluminium to give something to rub back to when weathering. With that thoroughly dry and first up to get the spray kit ‘warmed up’ was the RLM 04 flat yellow for the cowl area and rudder. Next the RLM 76 grey, which is actually a light blue grey, for all of the underside and the fuselage and fin sides. Leg covers also in the same colour.
Klasskote paint goes a long way and I had purchased the smallest available amounts of each colour (1/2 pint). I imagine once finished I will have enough left over for two more similar sized Luftwaffe aircraft. The paint is mixed equal parts with a reducer and catalyst. For this model I am using the matte catalyst. Compressor is a Bambi ex dental job off ebay and the HVLP spray gun a low cost Fast Mover panel touch up gun. Works lovely.
-
4
-
-
Interesting discussion. Today I attended my first ever BMFA scale flying league competition. Hosted by a most welcoming club based at RNAS Merryfield. I didn’t know what to expect but was disappointed that it turned out that I was one of only four entries on the day. Have to feel for the judges who had made the effort to be there. Thanks guys. The forecast had been very gloomy leading up to today, so maybe that had an impact.
Of the four models flying there was, an FMS foamie Tigercat, a Hangar 9 RV Vans (recovered for scale), a Top RC Zero (nicely weathered) all 3 electric powered, plus my Laser engined plans built Sea Fury.I had fun and learnt plenty from watching the three other very accomplished pilots, but really had hoped to meet some other builders with their models to share a common interest. There is another event coming up towards the end of May, so let’s see what that brings. In the meantime I need to sort some technical issues with my engine (2 deadsticks on tarmac 😱) and keep practicing.
-
Thanks for the comments David.
There weren’t too many 190’s that had the inner doors, Frank and there won’t be any on my A8. If there had been then sequencing would have been handled by a UP-3 valve as per my Sea Fury. Clever little device for pneumatics. The Powerbox unit is the lower end Pioneer and doesn’t have gear sequencing built in btw.
-
Still too cold to paint in my unheated spray area/shed so spent a bit of time working on the ETC 501 rack. A bit more fiddly than I had expected but hopefully a near enough rendition. It will be removable for transport as it bridges across the lower wing and onto the fuselage behind and in any case with the drop tank in place it will be an easy casualty of hangar rash. Phil at Fighteraces is supplying the 300l drop tank and when that arrives I can finalise it’s fixings on the rack.
-
4
-
-
Looking very good indeed, David. I guess if you have plenty of channels available on your receiver and transmitter then its just a matter of individually fine tuning each flap servo. For my Sea Fury I had just 9 channels available on my old DX9, so used just one for all 4 flap servos through a JR Matchbox. Takes a bit of fiddling to get them all synchronised and reminded me of adjusting servo travel on my old Fleet radio gear a rather long time ago.
-
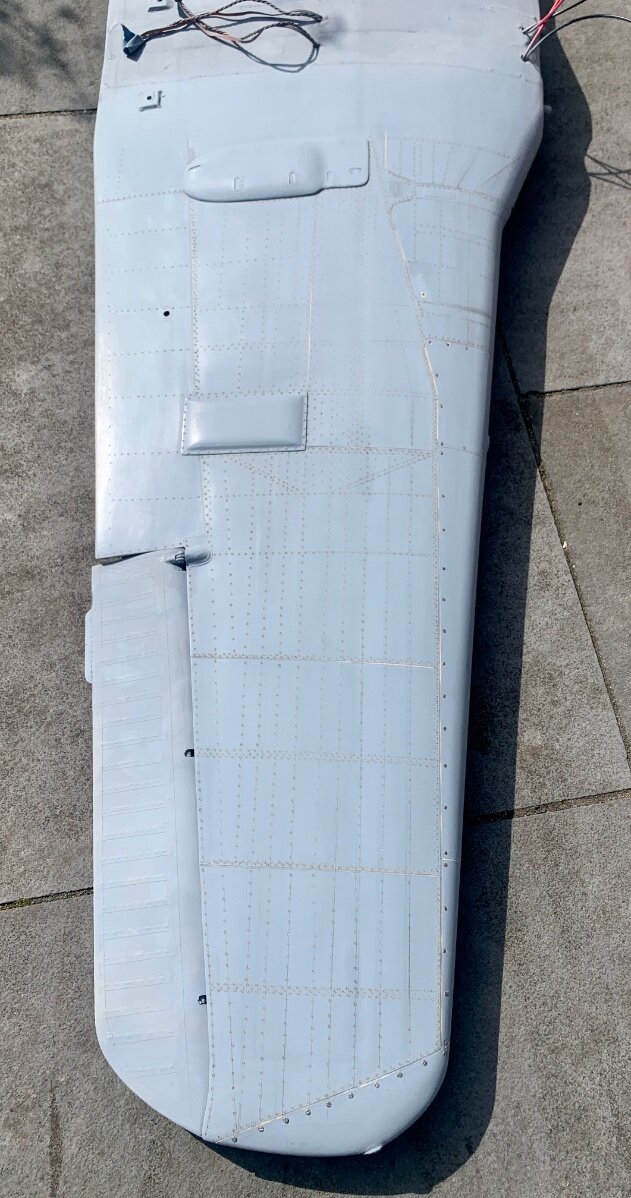
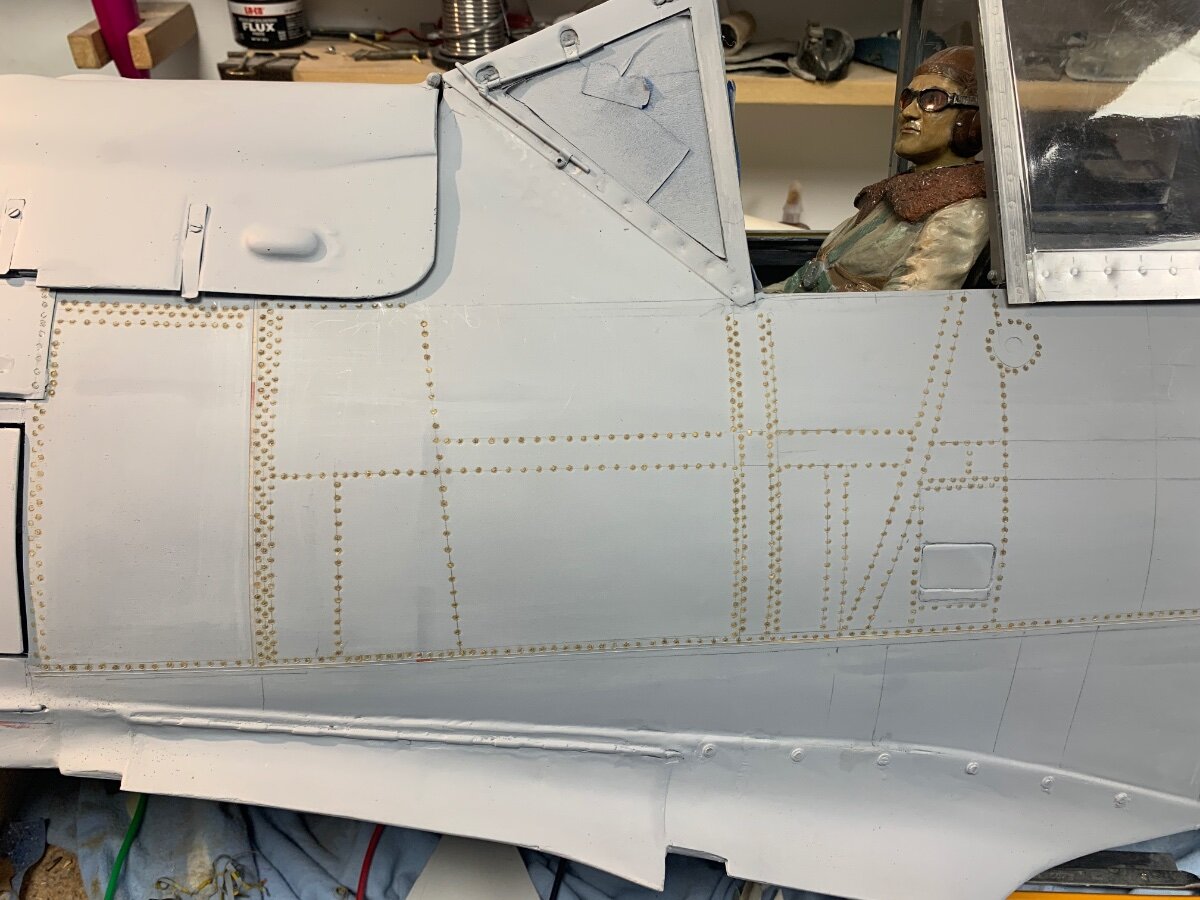
Rivets all completed so whilst awaiting some decent weather to start laying the final Luftwaffe RLM colours down I have started to make sense of the wiring and airlines.
I have 11 servos operating over 10 channels (the little cooling flap servos are on a y lead) plus two more channels required for the ignition and on board starter.
A Powerbox Pioneer is being used to manage the twin Li ion power packs and servo distribution and this will have a pair of receivers connected each with dual receiver circuits for added redundancy. The four flap and aileron leads from the wing run into a single female plug with the male very securely fixed to the side frame to mitigate against any disturbance to the receiver connections.
The air setup is pretty straight forward with a simple UP-8 valve feeding air to the tail and main retracts. Air fill valve and switches (radio & ignition isolator) are located under the gun hood.
-
2
-
-
Well almost there, just the flaps and the wheel covers left to add rivets to. My Aldi soldering iron died halfway through the process, so popped into Screwfix for a £10.99 one. That lasted 2 hours so took it back for a replacement and that one has lasted the course.
-
3
-
-
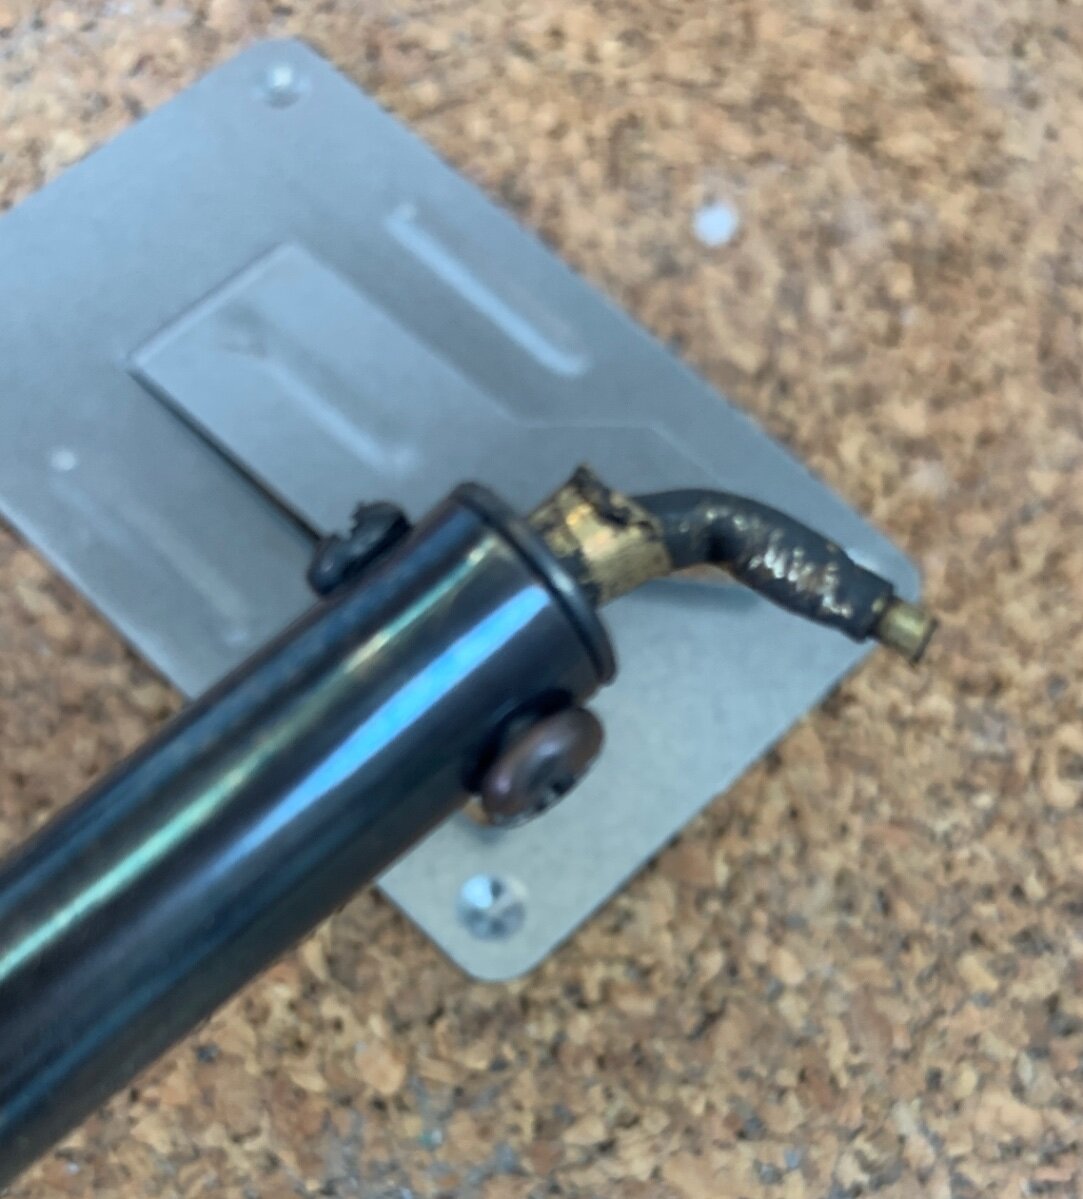
I have a preference for hand crank pumps as it’s one less battery to charge. However I am on my third in four and a half years back modelling. Perkins, Prolux and a Hangar 9 one. Tbh they all look the same and certainly they all leak the same! Do others experience the same leaking issues or do the pumps have a grudge against my winding technique?
-
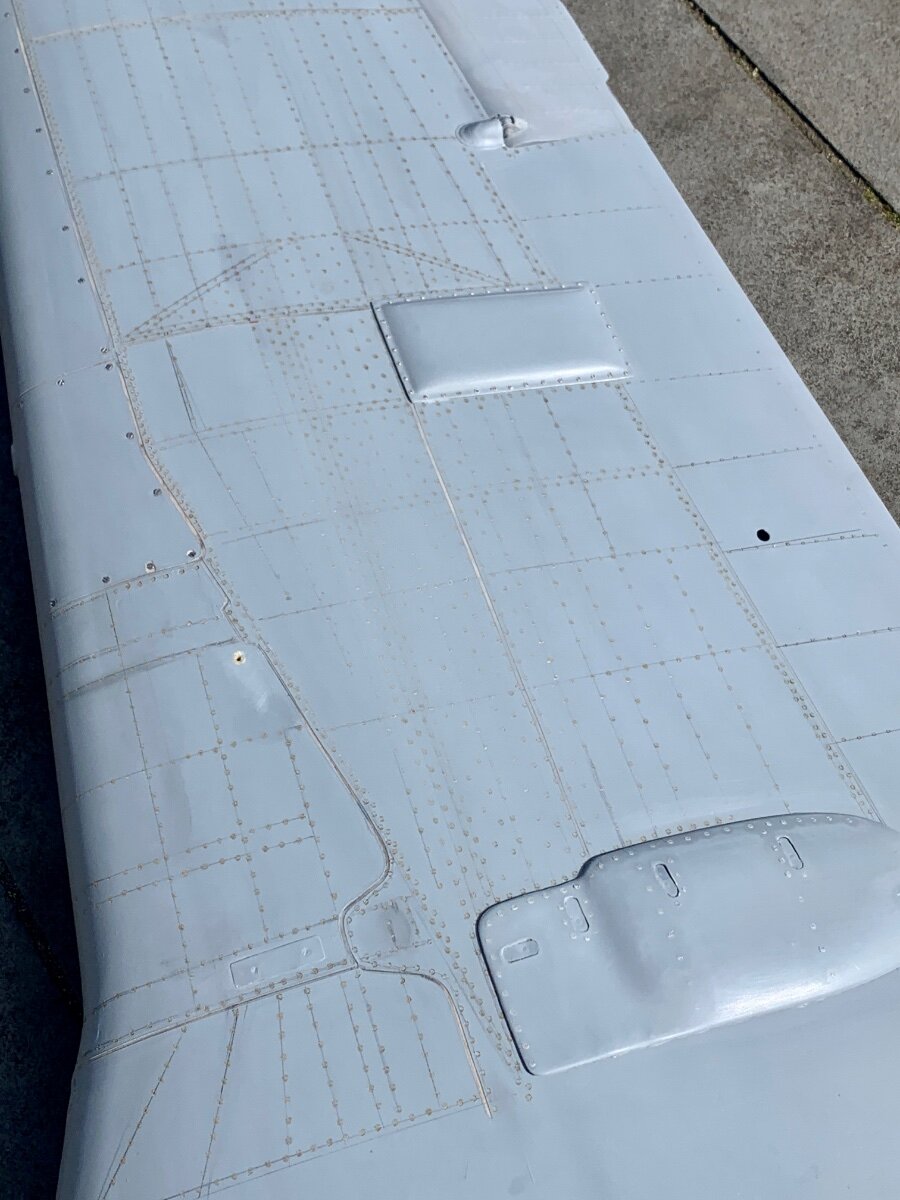
Takes as long to count them as to burn them so, as that would mean twice the work, I am not counting. There are a lot though. Actually the time consuming work is calculating the position of the lines from the Bentley drawings that I have for reference. Those with the rivets shown are all 5.23 x smaller than my model, so I spend fair bit of time punching numbers onto my phone calculator before transferring to the model. Once done, the rivets burn in fairly quickly by eye and it is a surprisingly therapeutic task.
-
The riveting begins. My pilot ‘Gunther Raal’ looks on to make sure I keep the lines on track. 2mm sharpened brass tube set into a cheap Aldi soldering iron.
-
2
-
-
Thanks Arto, yes if Jon had a radial 90 I would have chosen it for sure. Second choice was the Saito FG 90 but someone had the new Valach for sale at a reasonable price so went for it. The fan is scale and moves a lot of air. I shall only partially baffle as I want to avoid back pressure from the fan, which I have read can actually reduce peak rpm. There is a lot of exit area for the cooling so I don’t anticipate any overheating issues.
-
1
-


1/4 scale electric Bell P39 Airacobra build (designed by Jerry Bates)
in Building from Traditional Kits and Plans
Posted
That’s a shame not being able to get the retracts to twist a little, but understand that it would be an expensive thing to engineer bespoke for your model.
I just laid some carbon cloth down back to the spar and to the adjacent ribs around the mounts. Just used Gorilla PVA as it works well with Carbon cloth.
BTW compare the length of the mounts on my FW 190. I suppose with such long stalky legs it made sense to spread the load.