

Nick Somerville
-
Posts
902 -
Joined
-
Last visited
-
Days Won
7
Content Type
Profiles
Forums
Blogs
Gallery
Calendar
Downloads
Posts posted by Nick Somerville
-
-
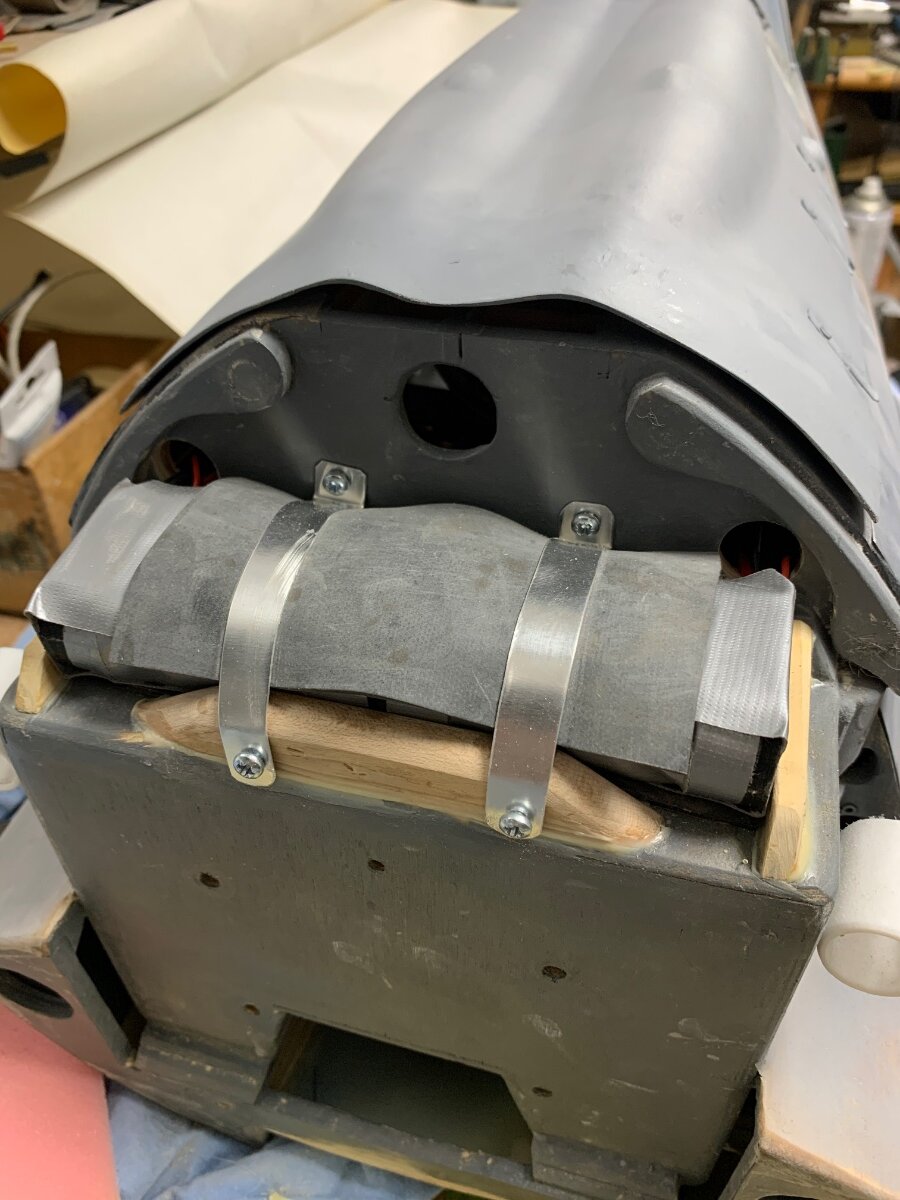
I know it’s got a petrol twin to power the model hut there are no less than four batteries required. Two for the receiver/ servos, one for the ignition and one for the on board starter.

Here we have a pair of 4300ma Li Ion Molicel packs on top of the engine box. Another of the same sits inside the box along with an 1100ma 4s lipo for the starter. Hopefully the oversized batteries should mitigate against having to use too much lead to balance the model.
-
 2
2
-
-
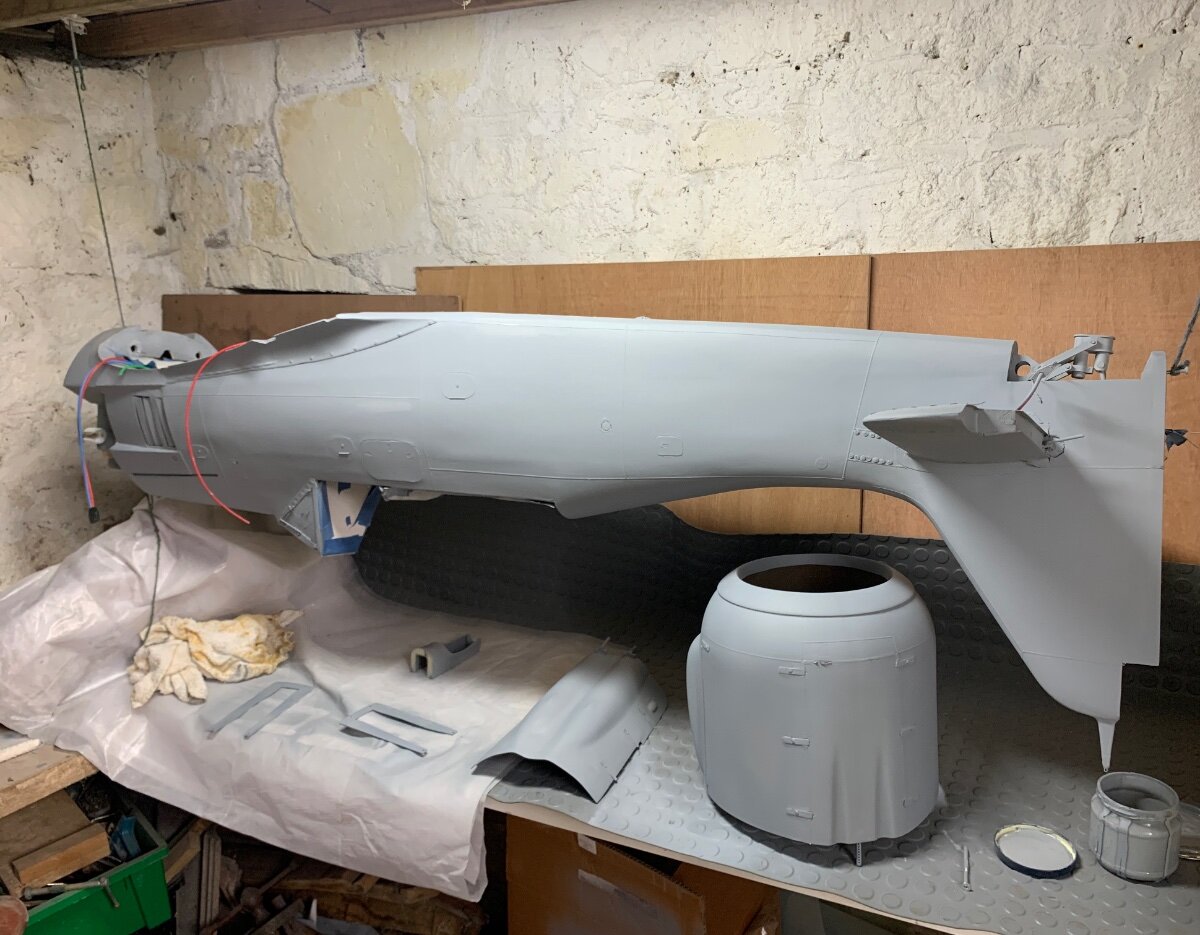
With all the surface detailing completed, finally time to commit to the primer coats.
It’s good to see it all one colour again as I have been getting a bit tired of endless weeks at the scruffy stage.
Back on the model bench with a pile of peeled panel line tape. I do like peeling that away to reveal the lines.
Wings up next.
-
2
-
-
Great. Thanks very much David, good to know such a narrow attachment works ok. No photo needed as I can easily redo my arrangement to hide it. On the job list for tomorrow.
Old habits die hard for me from my large sailplane days, so I still use a little coordinating of rudder with aileron when commencing turns, unless at full chat. -
Glad you posted this Dave as I am interested in how you plan to operate the rudder. When I constructed mine I looked at/measured the fin post and rudder leading edge (22mm) and considered it too narrow for a reliable hidden closed loop to operate. So I fitted a small external horn and minimalistic shrouds for the exiting pull pull wires. I note however, unsurprisingly for F4C this will loose static points. Have you hidden a closed loop for rudder actuation before with such a narrow distance between the wire attachment points?
Tape on the elevators and rudder looks great.
-
Great video Chris and a lovely colour scheme. I guess this must be a later version of the Kite as it has a wheel. The one I built in 1988 from the John Watkins plan just had a sprung skid.
-
Thanks Thomas. Nearly there with this stage of detailing so hopefully next week I can lay down the final primer coats and set to some rivets. I may be a while!
-
Looks brilliant David. Great photo of the front end too that really shows just how long it is up front. You won’t be needing any lead up there for sure.
-
Good observation on the curve there David. Might just go check on mine; though they are done and dusted with stitches and pinked tape, so won’t be starting them over. What covering material are you using. I used some Oratex but wasn’t convinced it is as light as some other options might have been.
-
Interested to hear about opinions on this as have ordered 3 packs of 2s Molicel Li Ion’s. 2 for dual battery setup and one for the ignition on my Fw 190. All 4200ma, which is more capacity than I need in reality but I am going to need ballast up front in any case.
-
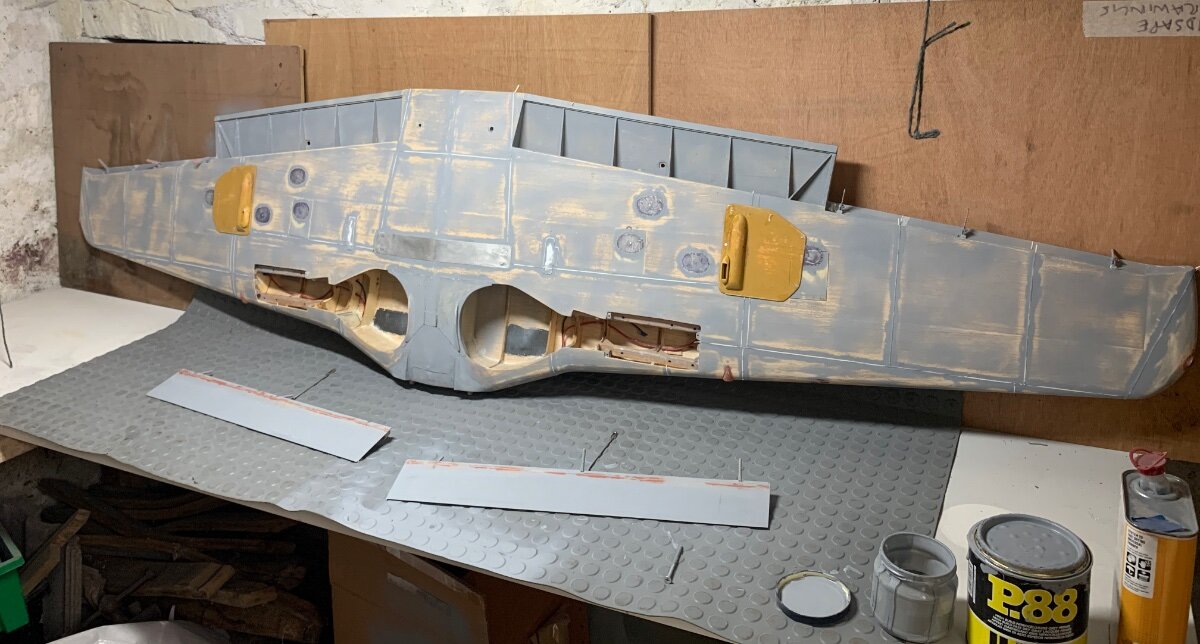
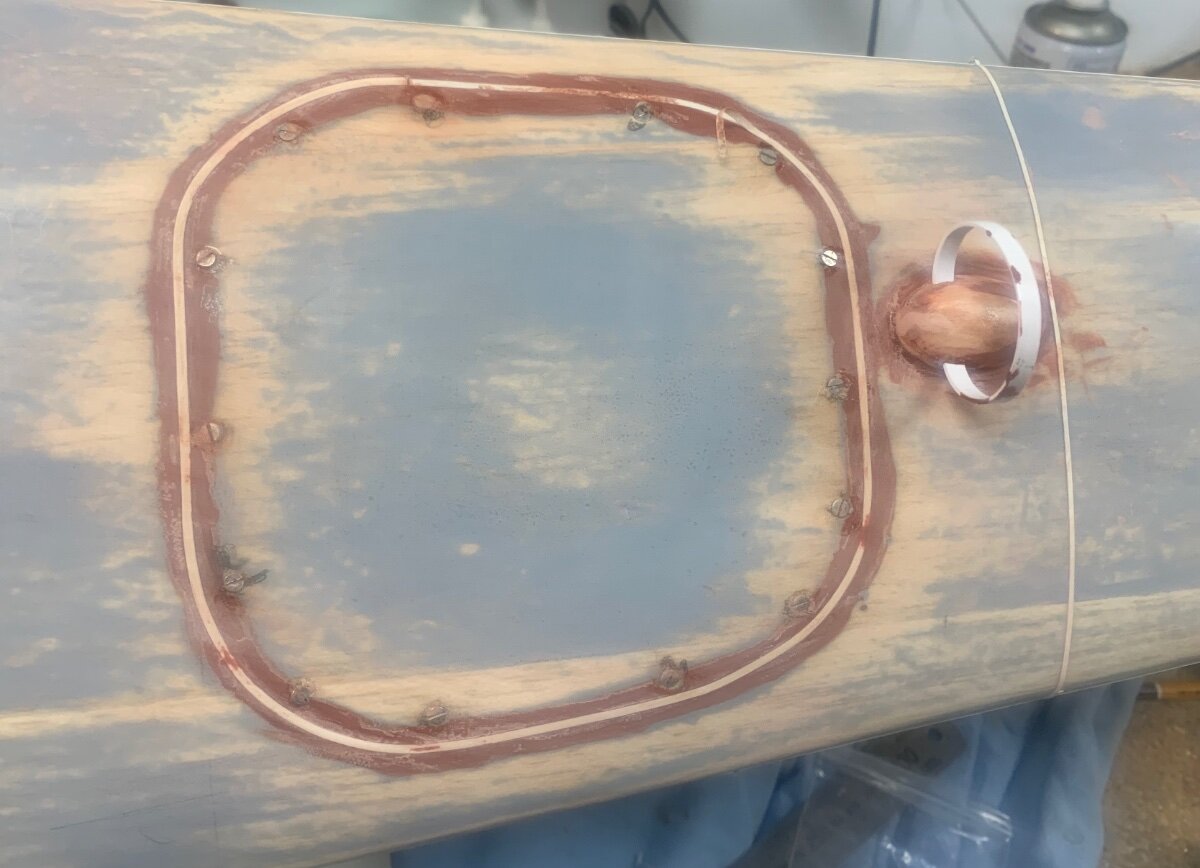
Work continues laying panel lines and adding access hatches on the fuselage. The large lower access panel has been simulated with thin tape to accentuate the edge, but no litho added as I am low on the really thin stuff and I am trying to avoid adding any weight aft. The raised blimp behind for the loop antenna which will be removable for transport. For now I have simply cut a strip of 1.5mm plasticard which seems to work well enough. Fixings are 2m csk machine screws.
The port side hinged large hatch I have added with litho as it makes simulating the latches easier. The piano hinge is brass rod sanded flat on one side, so it doesn’t sit too proud, and slots cut with a razor saw.
This cold spell of weather has been helpful as there is still quite a bit of surface detail still to add. Hopefully all will be ticked off by the time it warms up and I can then lay the final few primer coats ready for adding rivets
-
1
-
-
Here’s the completed lower outer gun cover fitted with the cartridge exit chute. The front outer corner has been separated and glued to the servo hatch.
-
1
-
-
I saw it Bert. I like the scarf on the pilot flowing in the airstream. Looks great!
-
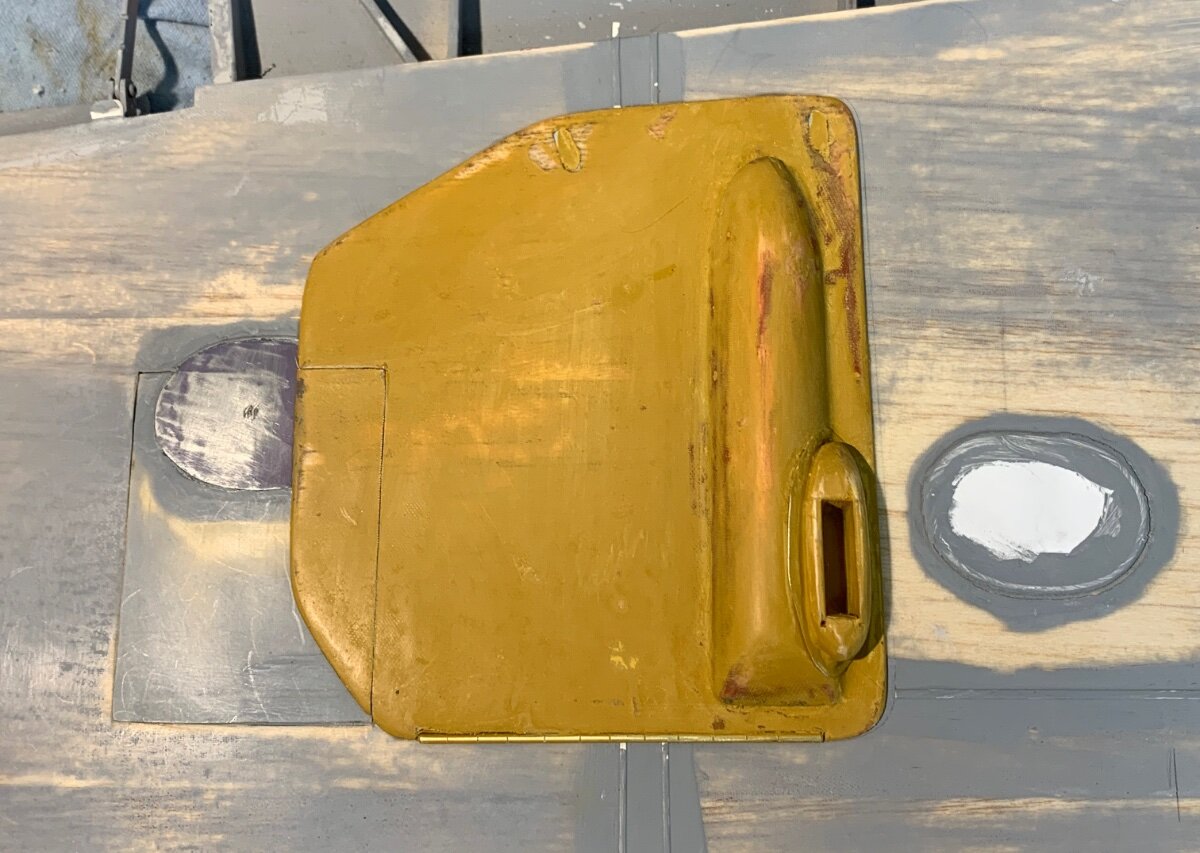
Moving onto the lower wing the first job is to fabricate the outer lower gun covers. Pity these weren’t included with the other vacuum moulded abs parts from Vailly Aviation as they are a bit tricky.
To keep weight down I have started out with 1/16 balsa and some shaped block. I shall glass cloth these and then add the spent cartridge chute made from formed Lithoplate afterwards along with the latches. The cover overlaps the aileron servo hatch so I will have to decide whether to fix them in place with screws or separate them along the servo cover line and glue in place.
-
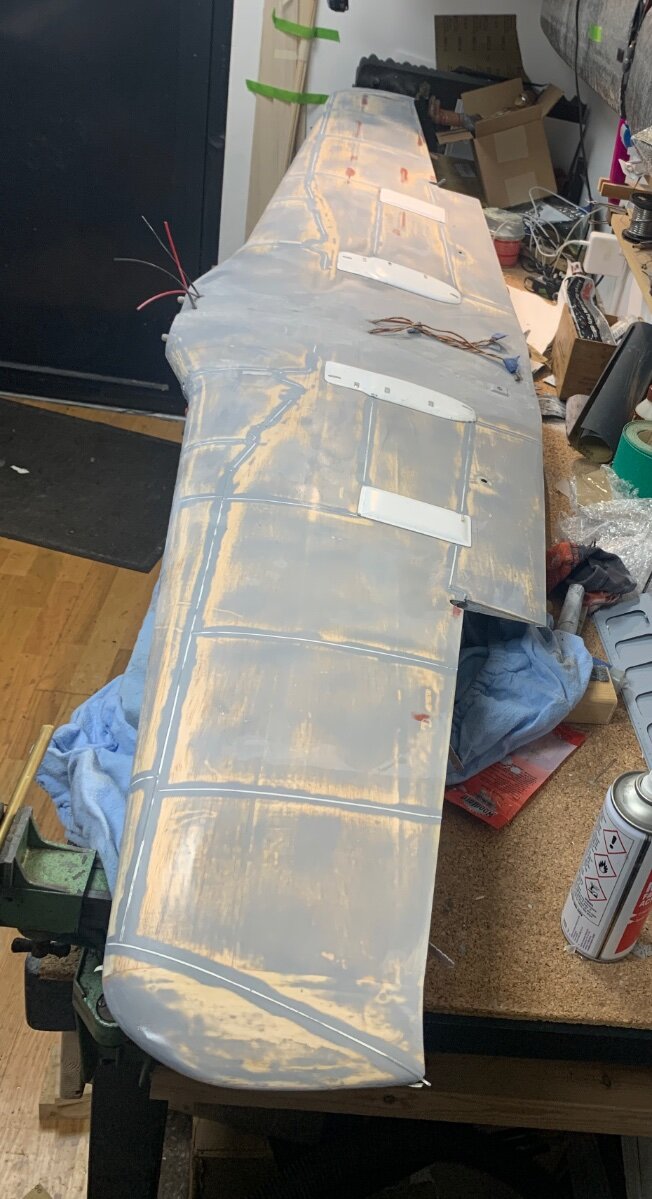
With most if the primer now rubbed out I have been working on the detailing of the wing. Top surface first I marked out the panel lines and applied a double layer of pvc insulating tape cut to 1.5mm width. My previous warbirds at a slightly smaller scale used 1mm chart tape but by the time the top coat was applied the impression was somewhat slight.
With the tape in place I have brushed two layers of undiluted grey primer filler either side and when dry sanded back to blend out the brush stokes. The wing will have two coats if diluted primer sprayed on before removing the tapes and then some silver/aluminium applied along the panel lines and other high wear areas. I had considered a whole coat of silver/aluminium but Luftwaffe aircraft tend not to show much wear or oaint flaking due to the use if quality etch primer undercoating. Unlike Japanese fighters and some American examples.
Also added are the gun and ammo covers. These came as vacuum mouldings so not too much work involved.
-
On the hunt again for a four servo connection between wing and fuselage. Found these after some googling
cheap and robust looking but the blurb says for 18-20 gauge wire. Given that heavier duty servo wire is 22 gauge the unit may be a tad robust. The model will have twin 3200ma li ion receiver batteries on HV servos. Any electrical gurus who can comment please. They do look somewhat easier to solder up than some others discussed here, which will suit my less than perfect soldering skills.
-
Nest solution and material choice for the high wear wing mount area. That’s going to be very satisfying when you come to assemble at the field. The greater the span the harder it is to be precise when mounting.
-
4 hours ago, Brian Cooper said:
Strangely, the worn out engine sold for more money than the good one. . . Weird, eh. 🤣
I am afraid I can top that one Brian. Many years ago I purchased a second hand camper-van. It came with a, still in a sealed wrapper, compact Portapotti. As we didn’t want it I asked my daughter to list it on Ebay. There was another Portapotti of the same model being sold at the same time but this was listed as ‘Used and a Firm Family Friend’! To our amazement it fetched more money than our new one. Figure that one out if you date!
-
With some warmer weather this week a chance to lay down a first primer coat on all of the parts. Most of course will be rubbed back after spot filling any areas required with 3M cellulose putty. Happily not too much required. Primer is U-pol P88 thinned 50% and sprayed using an inexpensive Fast Mover panel touch up HVLP gun.
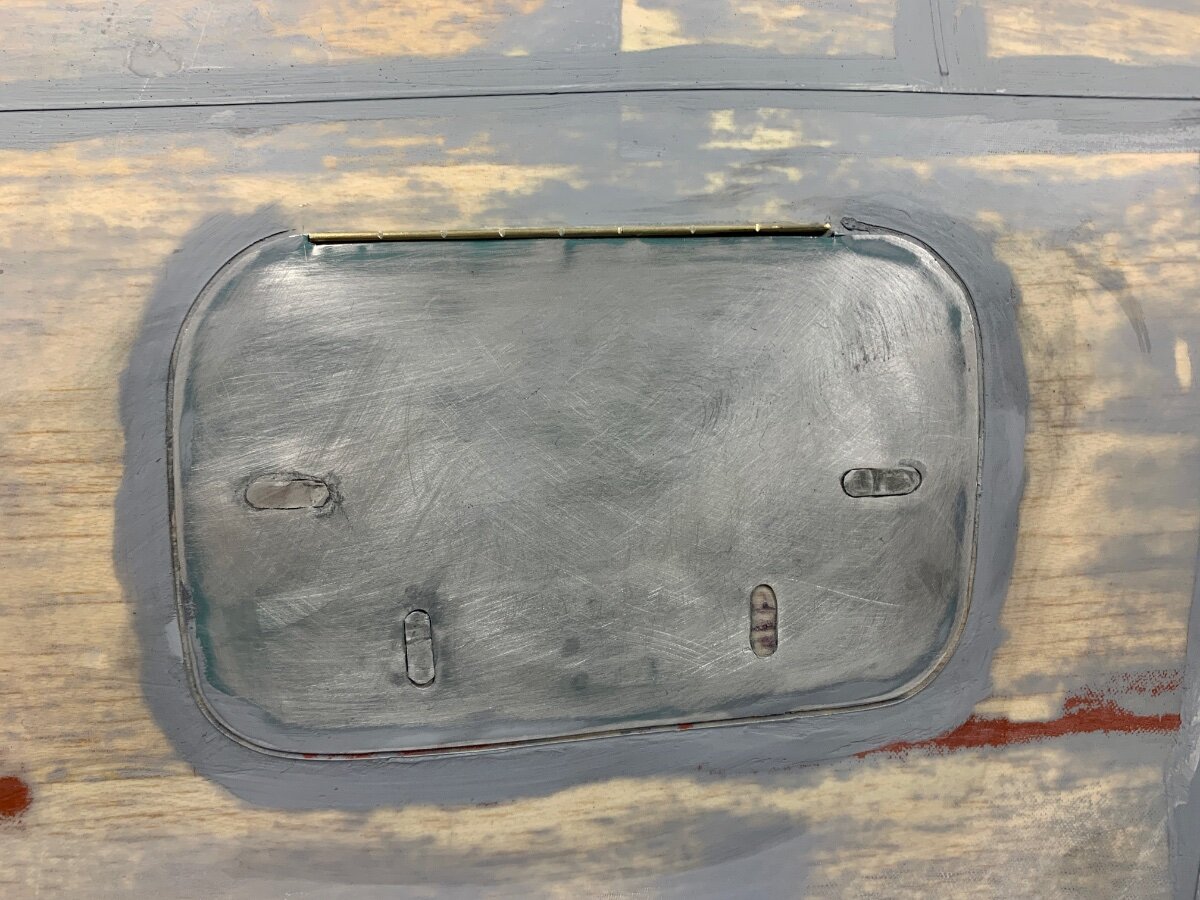
once all the rubbing down has been done I can move on to the numerous access hatches and panel lines. For the hatches the plan is to cut slightly oversized panels from plasticard, temporarily adhere in place and then spray around the edges with primer filler and blend back. This should give the appearance of the actual sized hatches being recessed.
-
Slightly off topic but I consider worth mentioning. I subscribe to the Laser Engines FB group and purchased a V200 advertised thereon by a Georgia Ward. Without going into details I was scammed. Turns out he has sold Laser Engines he has said to have purchased from ‘Steve’ at Kings Lynn Models before but also these never appeared. Naturally I feel a complete idiot for being scammed for the first time in my life and trust I have learnt my lesson. I do like Laser engines though.
On a positive note I rarely have good things to say about banks. However, after a lengthy phone call to Lloyds, they have refunded the the whole amount regardless of whether they can retrieve it from the scammer.
-
So how often do people change their plugs? I have been back modelling for four years now and have been running four Laser engines (one a twin) and an OS 120 fs. All have OS F plugs and I have a few spares, but haven’t had cause to use them. Do they get stuffed due to improper power to them or do they just eventually wear out. If so what is the typical life expectancy?
-
Fabulous looking wing, David and the gun sight is superb. Interested to note the V you need to remove/soften at the lower wing joint. That’s been bothering me a bit on my 190. I am hoping to disguise most of it with the bomb rack, but the rear portion will still need some work.
-
This stuff works very well for iron on fabrics. Reasonably price too.
-
2
-
 1
1
-
-
Its Sunday Ron. Hands in pockets and just admiring the snowdrops!
-
 1
1
-
-
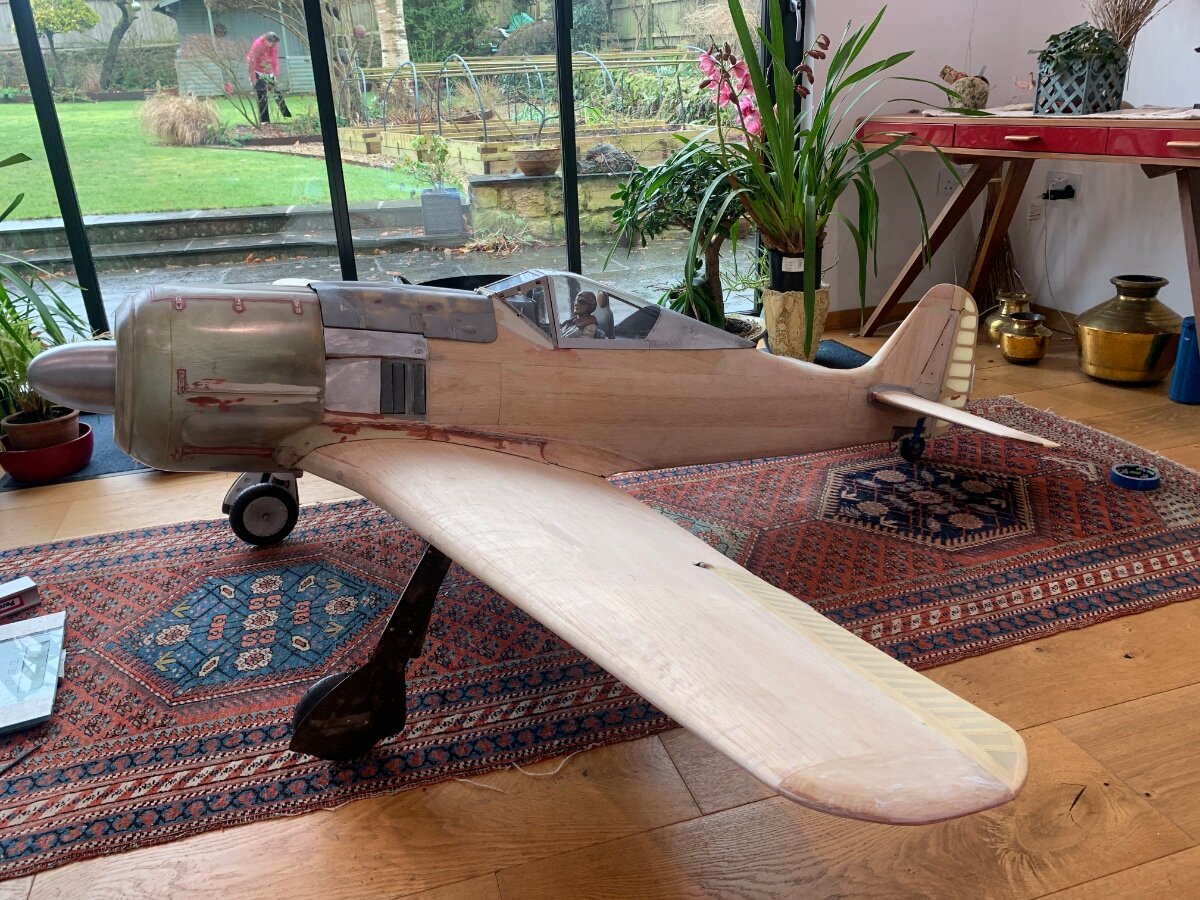
First time with almost everything assembled less prop, batteries, receiver, ignition and paint. On the scales at 26.2 lbs. C of G about 3cms behind for now. Happy with that!
-
4
-


 To keep weight down I have started out with 1/16 balsa and some shaped block. I shall glass cloth these and then add the spent cartridge chute made from formed Lithoplate afterwards along with the latches. The cover overlaps the aileron servo hatch so I will have to decide whether to fix them in place with screws or separate them along the servo cover line and glue in place.


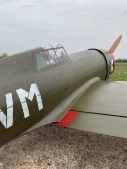
Vailly FW 190 1/4.5 (Nick Somerville)
in Scale Matters
Posted
Vallach 85. swinging a 26 x 12 prop.
With a fan.