

Nick Somerville
-
Posts
902 -
Joined
-
Last visited
-
Days Won
7
Content Type
Profiles
Forums
Blogs
Gallery
Calendar
Downloads
Posts posted by Nick Somerville
-
-
Flew my BT P47 for the first time this year at the weekend with beautiful weather at our patch. Despite the cold the Laser 180 was thriving on the conditions and gave me it’s absolute best. However the only slightly thawing permafrost played havoc with monumental frozen worm-casts sporting to nose her over both on take offs and landings. Despite touchdowns being as gentle as possible they were still brutal on the uc/retracts. As per G Gnome the clean up was afterwards was also significant. Two flights and I retired whilst still ahead, so to speak. Roll on spring.
-
Hi Skeet, you are not wrong about the way pushrods sticking out of the underside of wings can really spoil a scale model. However 1/4 scale is big and the weight of both the surfaces and loads of ailerons and flaps can be considerable. For that reason alone the exterior pushrod setups are both easy to set up, easy to service and are very reliable.
Danny Fenton, who regularly posts here is a champion of the RDS (rotary drive system) and following his guidance I set up this for my 1/5.6 Bates Sea Fury ailerons (page 2). It’s also worth noting that the majority of composite Thermal and slope race soarers use hidden linkages and certainly for the F3F type model, these need to be very powerful and slop free. Interestingly we don’t really see this type of precision technology being used much to hide control links in large scale warbird builds.
Back to the RDS system I employed, it wasn’t without its challenges. The hardest part is finding the necessary servo output parts to hold the torque rods. I had one failure of what I had done that fortunately didn’t cause a mishap and I have re fabricated the output discs to make that weak point more reliable.
With so many variables in model design/proportions every subject requires individual decisions to be made. I suspect there is a hidden linkage solution for most, but the extra work and serviceability can mitigate us from exploring them. Just my opinion. BTW I was pleased to find that my current build Fw190 has an external aileron
horn as scale. Though the flap links are hidden.
-

Framing of the sliding canopy all finished and just the aerial pulley and top hinge to put in place. The tail doesn’t quite sit down as tightly to the fuselage as I would have liked but I shall have to live with that.
There is just enough room to fit a 100mm Hitec linear actuator to operate it, but as the weight is creeping up and I still have some hopes of completing the model to under 15kg; that can wait.
-
 1
1
-
-
5 hours ago, Jon - Laser Engines said:
. Although i am slightly sad that i no longer have an excuse to bug the boss for my 75 or 90cc radial!
😖😱😩
-
The 36Ov engines sure are powerful! Those are all very respectable weights David and ideally matched to the engines from my limited experience.
Had me searching for some scales to weigh up all the component parts of my 190 less receiver and batteries of which there will be four (ignition, on board engine starter and two x receiver). I am up to 29-30lbs and no paint yet or balancing additions. If my bathroom scales are half accurate I am going to be very touch and go to achieve a sub 15kg model. My hope however, is that it is still possible as with engine and cowl in place and all tail surfaces attached the model is less very close to the c of g (wings not attached). Despite the short nose the heavy engine, cowl and spinner and fairly lightly built rear seem to be in my favour, plus all of those batteries when fitted will be well up front. -
A real bonanza of photos Dave! Lots of terrific work to admire and certainly a very interesting build and subject. It really is quite a wingspan and high aspect ratio for a warbird, so I can understand there has been a few issues keeping it all straight. Interested to know where the issue was and how you got around it. Many years ago I scratch built a 1/4 scale Bergfalke mk4 (4.3m span). Using blue foam blocks I hot wire cut the negative forms of the wings top and bottom, incorporating the required washout and blended airfoil sections. The wing was then built over the forms. Some extra work but very accurate and a much more solid base to work on compared to packing strips and rib t/e tabs. Chris Williams did a feature in Silentflight magazine on the model.
-
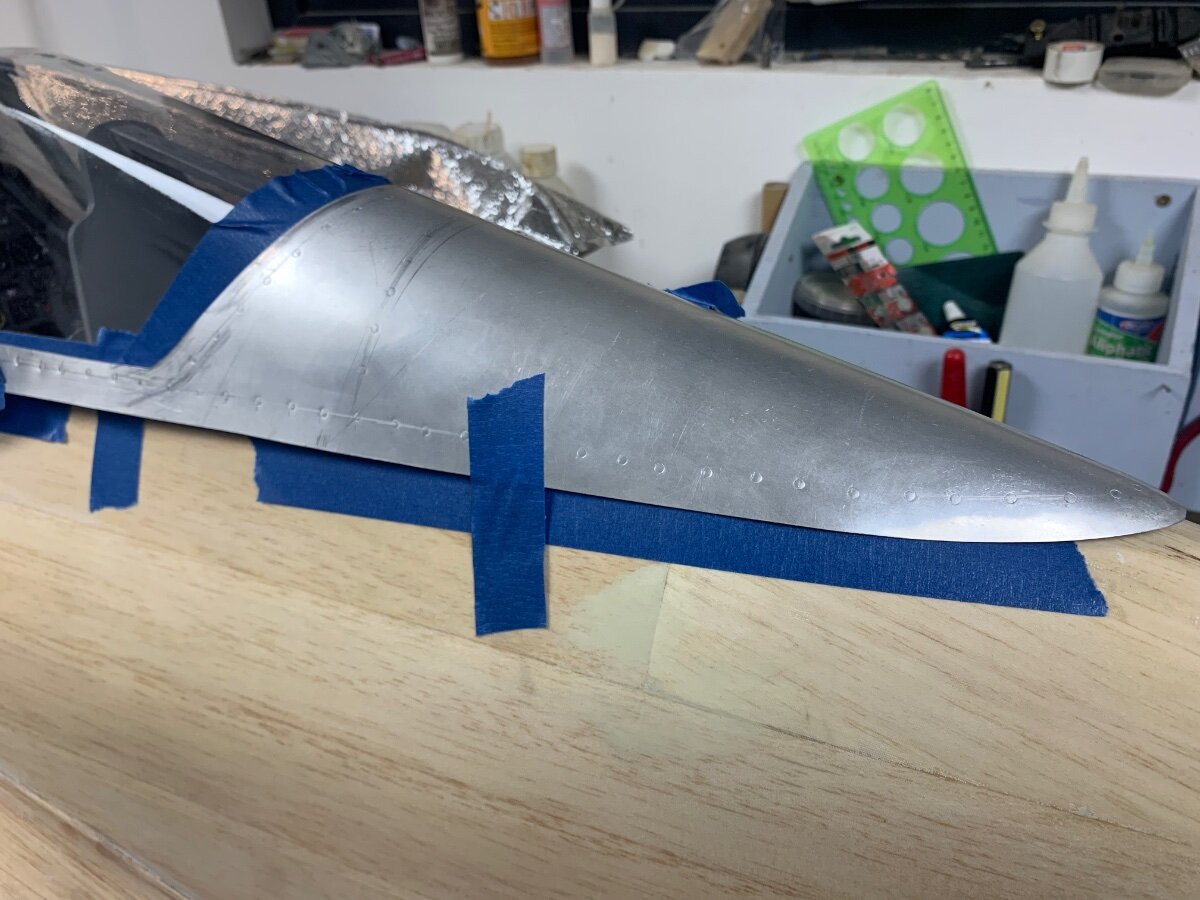
The canopy is quite a sturdy polycarbonate moulding, but just spraying the covered parts would not be particularly durable nor have a realistic appearance at the frame edges. So a paper template was taken for the metal part and the shape transferred to Lithoplate. Flush rivets punched with a sized piece of brass tube whilst flat and then formed to shape. I didn’t want to anneal the part as although it would be easier to work the tighter curves, I would be far more likely to introduce a crease and it would also be less ding proof when complete.
I started using a small kitchen roller on the main spine and followed this by some scraping/burnishing with some smooth old cutlery knives. Finally the trickier tail end was burnished with a teaspoon whilst gently pulling the compound curves. I have done a glue test with some offcuts of roughened polycarbonate and litho using Evostick and am almost convinced this will work well….. so long as I can line it up first time.
-
3
-
-
A little litho work over the weekend. The stab to fin fairing needed a but of heat to soften the litho enough to work the shape.
The exhaust area was going to be just the G10 beneath but as I have settled in the exhaust exiting here it made sense to provide a little more protection.
-
3
-
-
7 minutes ago, Ron Gray said:
What, no silencer Nick?
As mentioned there isn’t room for the one I have and as I don’t have the skills to make a pair of custom ones I am going to try without. Have a listen to this:
certainly doesn’t sound as bad as a two stroke petrol.
-
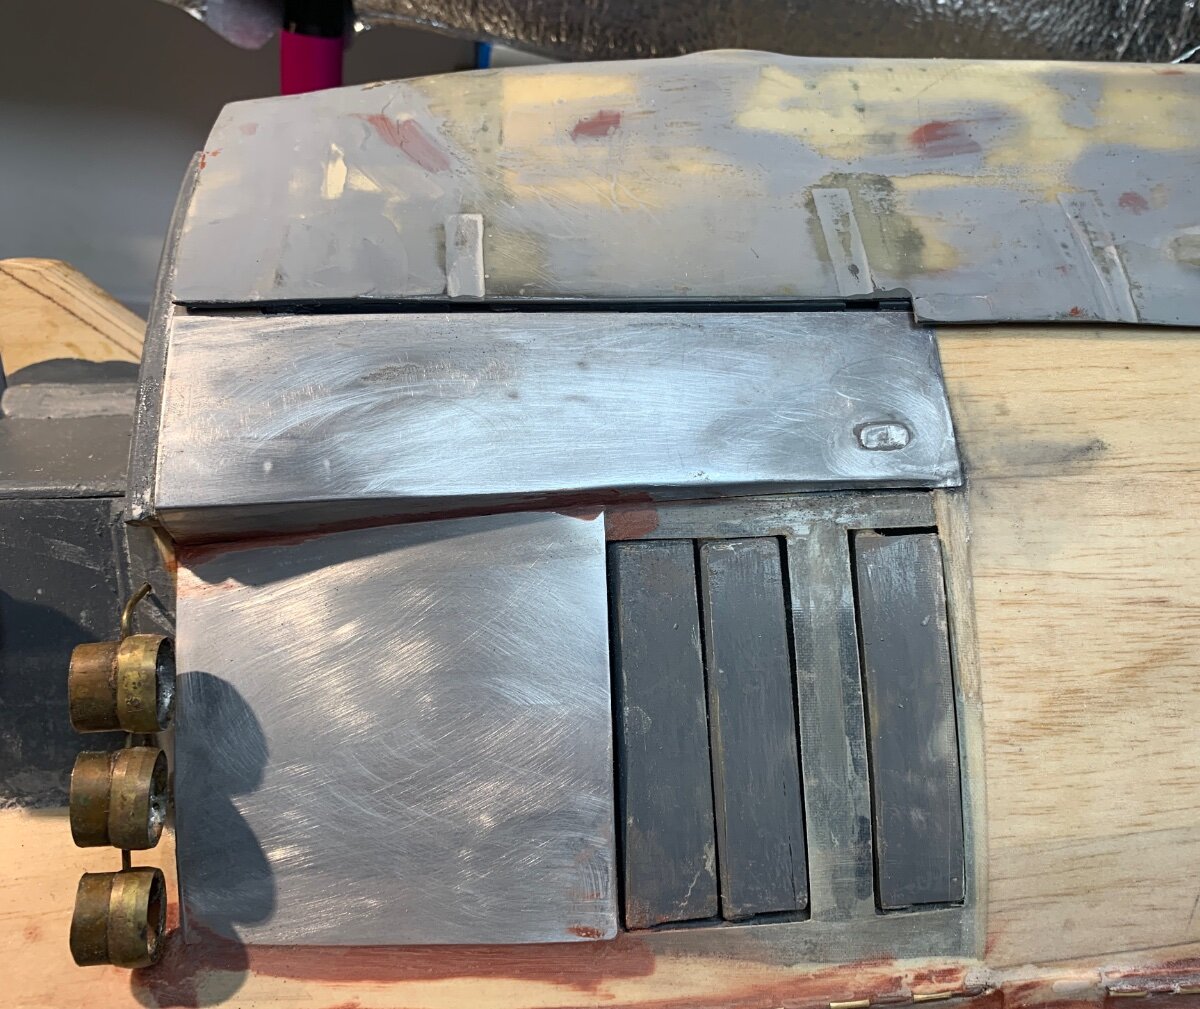
Finally making some decisions and sense I hope of the exhaust. I gave up on finding a way off adding the muffler I had and have settled on this. Note that the fuselage is inverted. The Three stubs on each side are 15mm copper pipe with olives to give a thicker appearance. A brass rod soldered at the rear allows them to be glued in place once painted.
-
Crunch time for the cowl fixings. After repeated checks, De Luxe Materials constructional epoxy was applied to the two upper magnetic plates and the two lower bolt blocks and they were set in place. I really like this adhesive as it doesn’t move from where it is placed and so hopefully no creep to the adjacent front former (which I had smeared with soft wax just in case). Once the glue cures I can drill through the two blocks from the wing dowel holes and then add captive nuts. One more fixing point still to be added at the top. The cowl is very rigid and will be even more so once a baffle plate has been added, so three bolts plus the magnets should be man enough.
The new fan and matching backplate from Fighteraces lines up nicely. The fan I acquired with my plan pack was rather flimsy and Phil at Fighteraces assessment was, “I wouldn’t bolt that to an engine if you paid me”! The fan he had made for me is not only far superior but also is the correct size and the new backplate is both recessed to match and drilled to match the multi prop fixings. Thanks, Phil.
-
This photo didn’t show on my post.
-
5
-
-
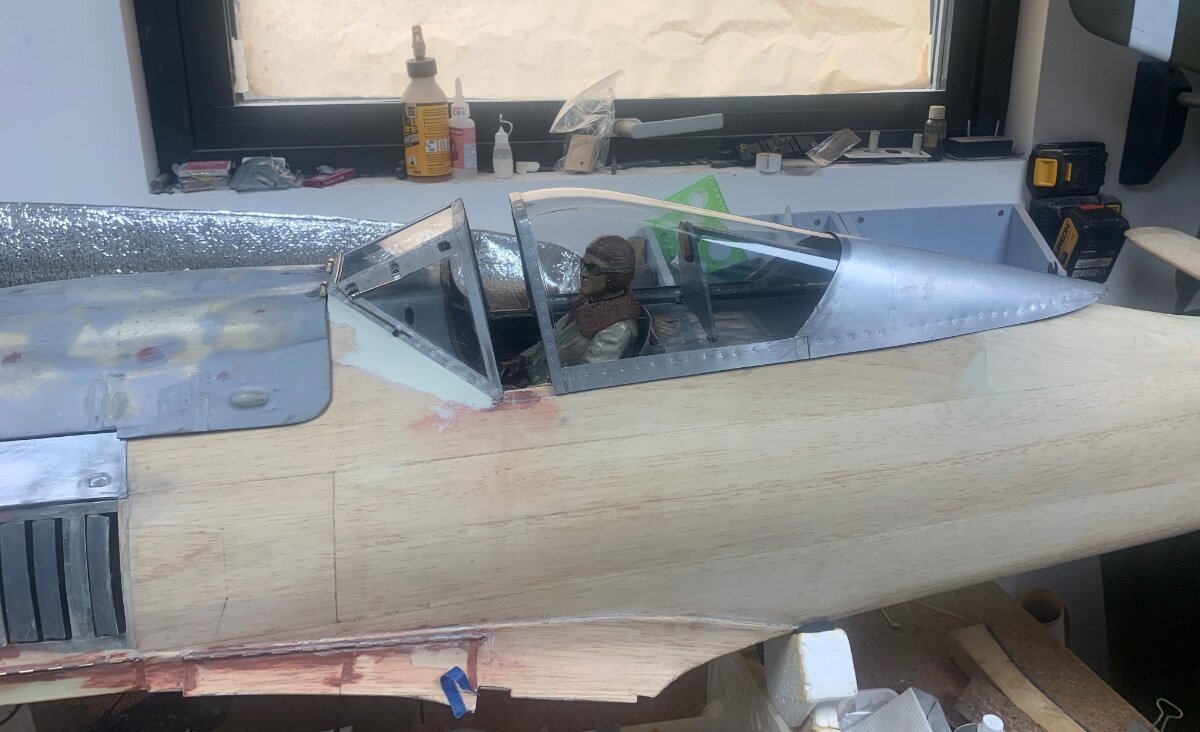
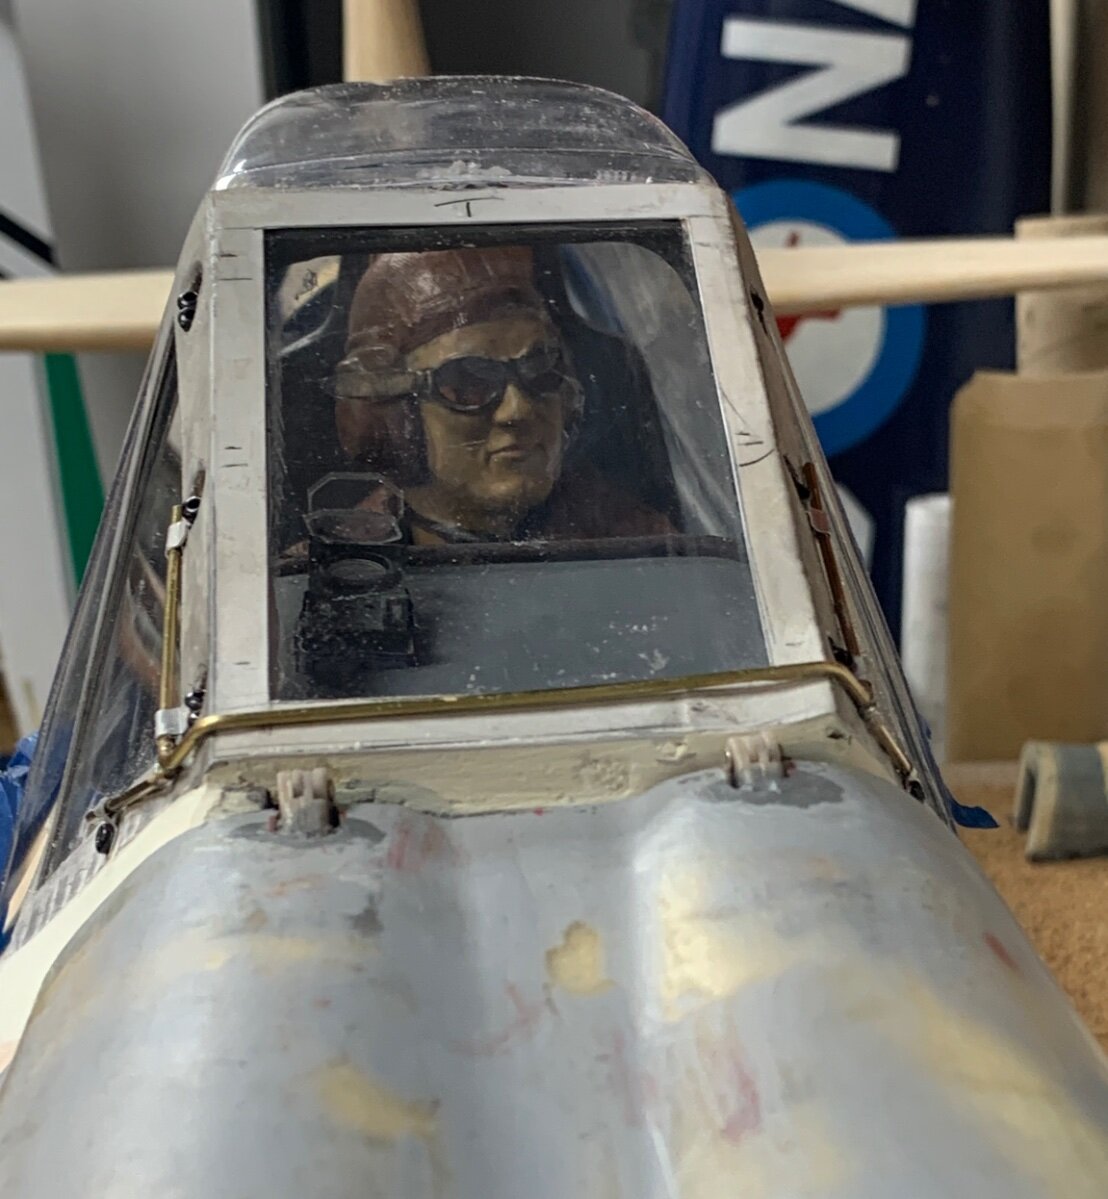
Been working on the front wind shield/canopy parts. Thick acrylic sheet for the bulletproof front windshield and cd case perspex for the quarter lights. A single piece of Lithoplate for the frame which fitted perfectly to my amazement. The pipes are the de-icing system. I still need to simulate/disguise the Robart pin hinges on the gun hood but otherwise it's starting to look the part in that area.
-
1
-
-
After an enforced break from the workshop for some weeks I have been able to get back in to almost complete the cockpit interior and pilots seat. One thing I have learnt is that it’s worth ensuring that your pilot has firm fixings and so I spent a few hours ensuing I this fella won’t budge, unless I want him to. Fortunately for this model the canopy slides and is removable, so at least access is there if needed. He just needs a control stick to play with now.
-
8
-
-
It’s a tough time Jon, I know as my mother was buried yesterday. Take care and celebrate all the positives of her life.
-
 1
1
-
-
Switches for me with assigned voice acknowledgment. Three way for flaps (up, half and fully down with servo slow. I tried flaps on a slider but didn’t get on as well.
-
Personally I would find the task of reworking a ‘duff’ model disheartening. Building from plans gives you complete ownership of the build with the ability to add as much or little scale detail as you wish. That said, the cost of putting together a 50cc ish sized warbird from scratch is eye watering and far greater than going down the artf route. If you rate the DB Hurricane so much then why not crack on with the DB Spitfire?
Sorry to hear about your Mum, Jon.-
1
-
-
Thanks Denis, that’l be next spring then 😖
-
I am at a point with my latest build when I shall shortly need to spray the first undercoat, cut back and then build some further undercoat layers as I detail the panel lines, hatches and rivets etc. But here we are at a properly cold time of year and my spray space is an unheated small stone stable with a tin roof. I have power for my compressor and can get some short term heat using a greenhouse heater/blower but am wondering what temperature is considered the minimum for spraying cellulose primer with a small panel spraygun.
-
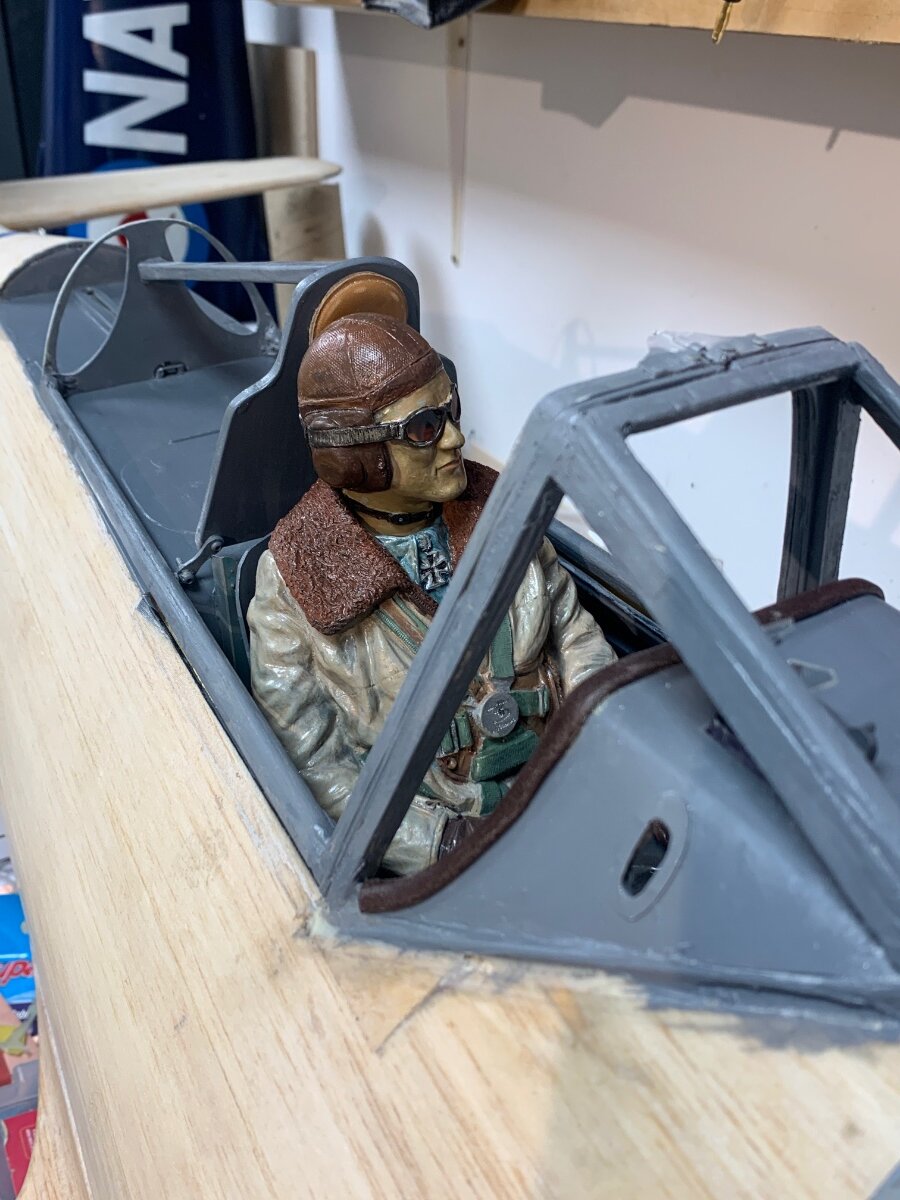
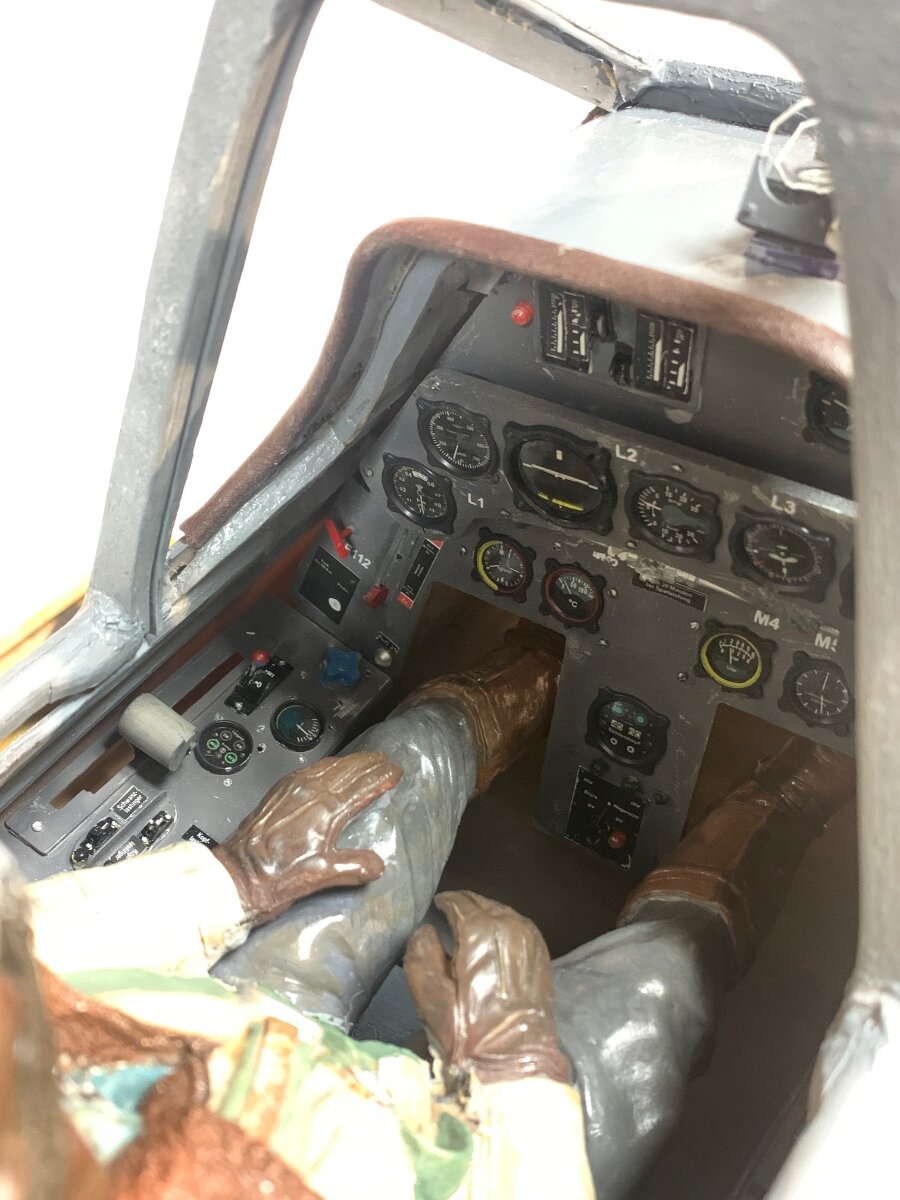
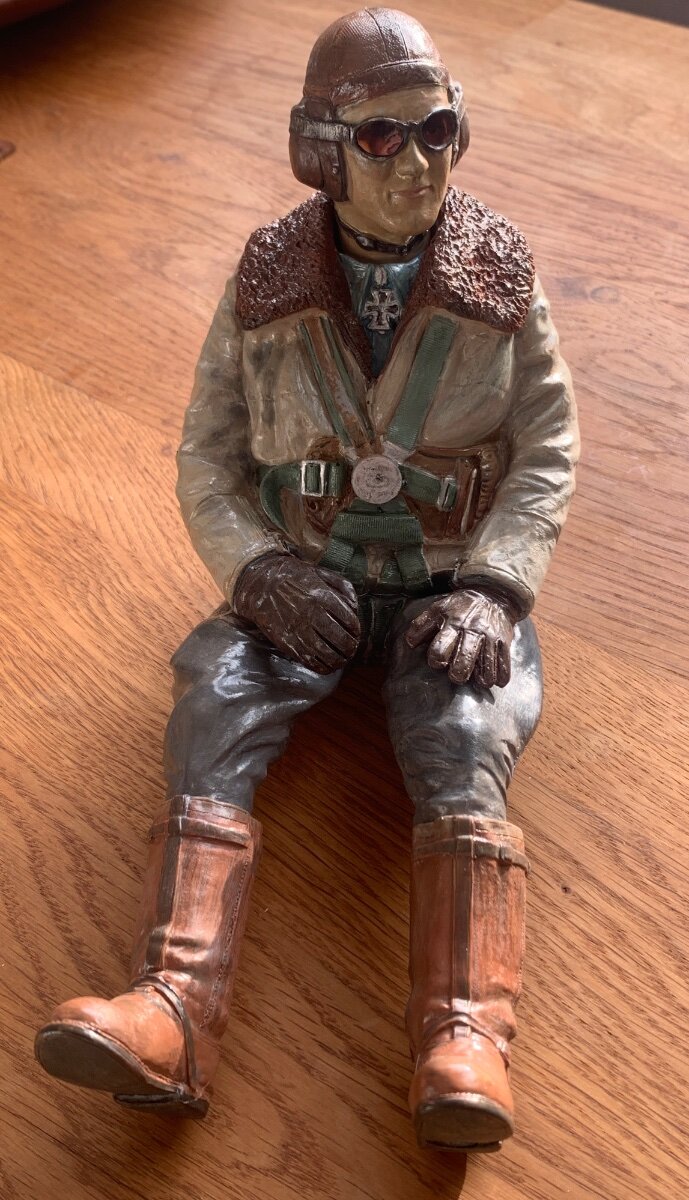
My Best Pilot’s unpainted Gunther Rall (Luftwaffe ace) arrived a few days ago from across the pond. A beautifully modelled and moulded pilot that I enjoyed painting, mixing a few basic colours I had in acrylic pots. He is 1/5th scale so strictly speaking a tiny bit undersized. I have made up his seat from the scrap drawer )just needs a leather cushion) and with these completed I can get on and complete the cockpit area.
-
3
-
-
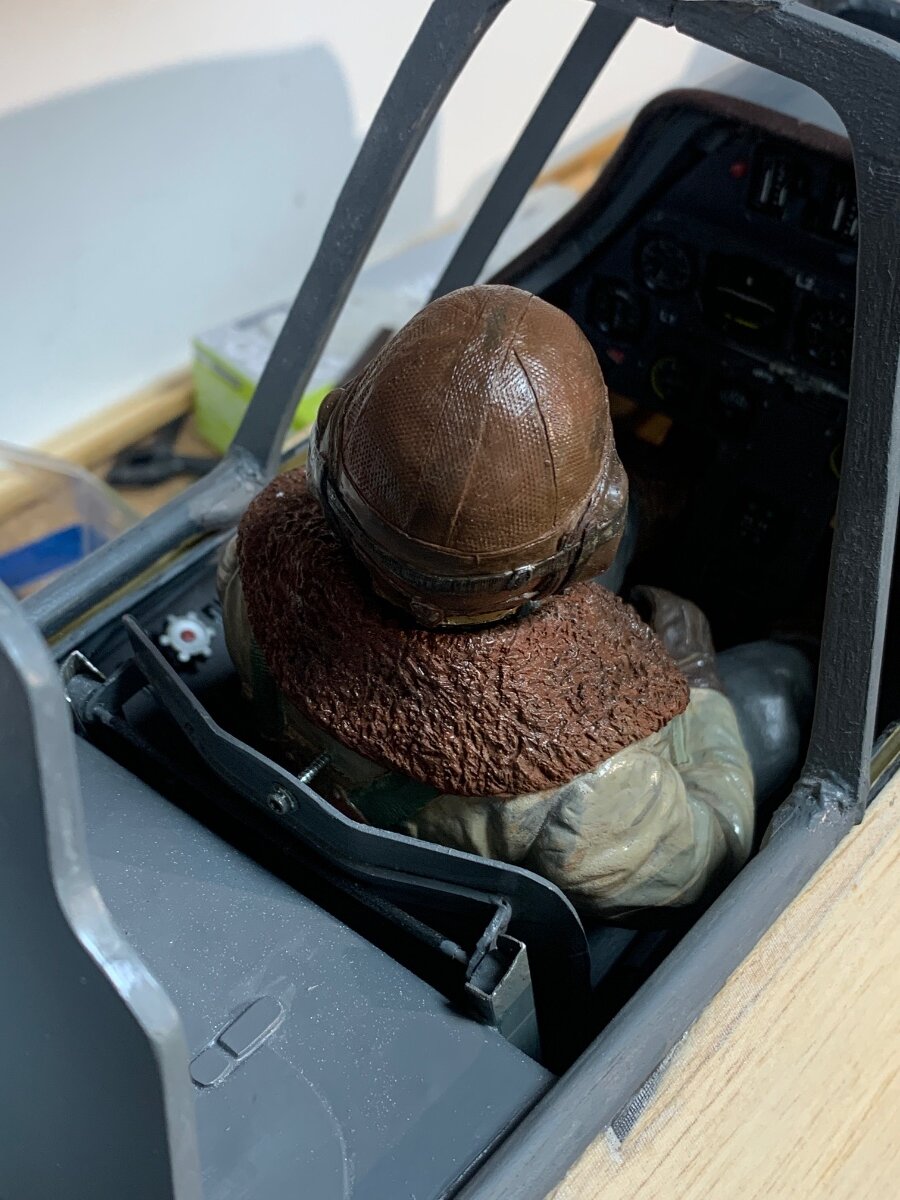
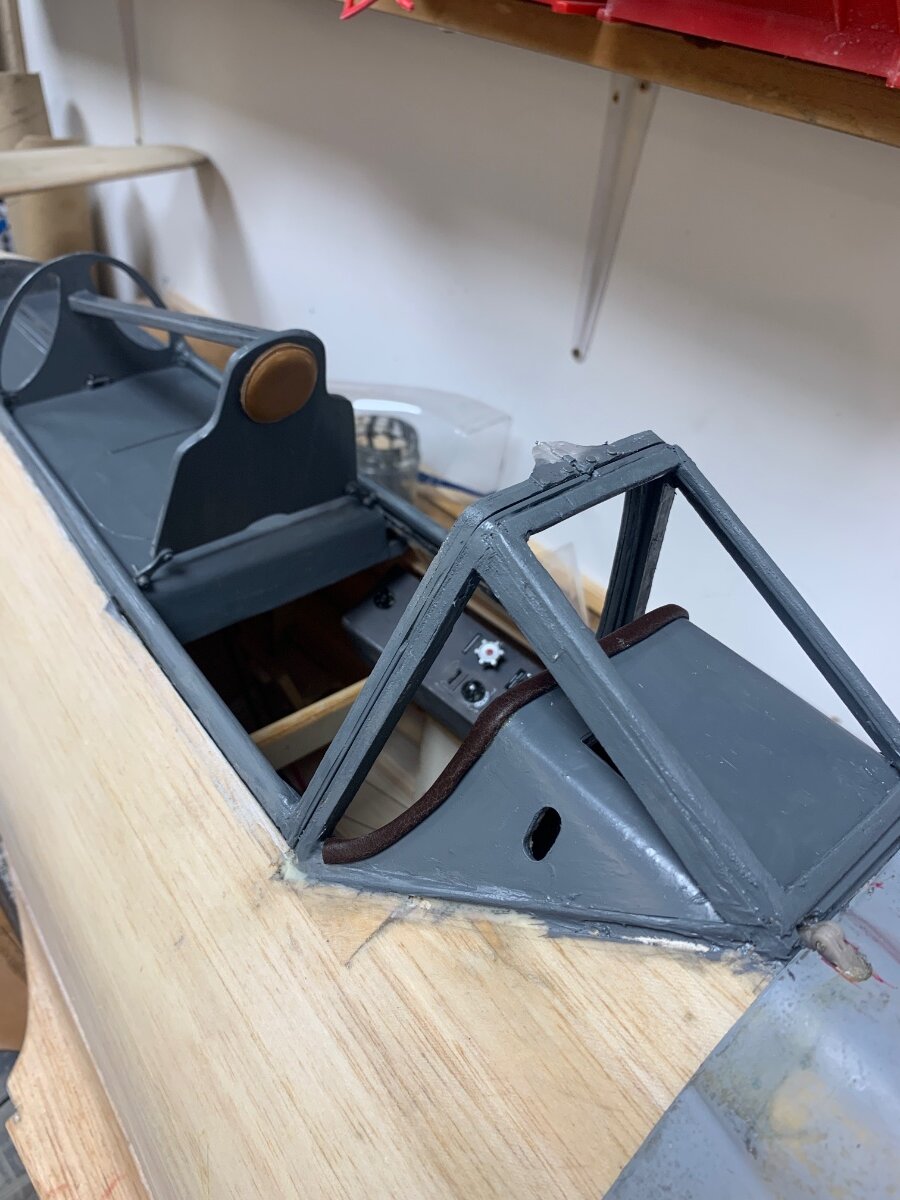
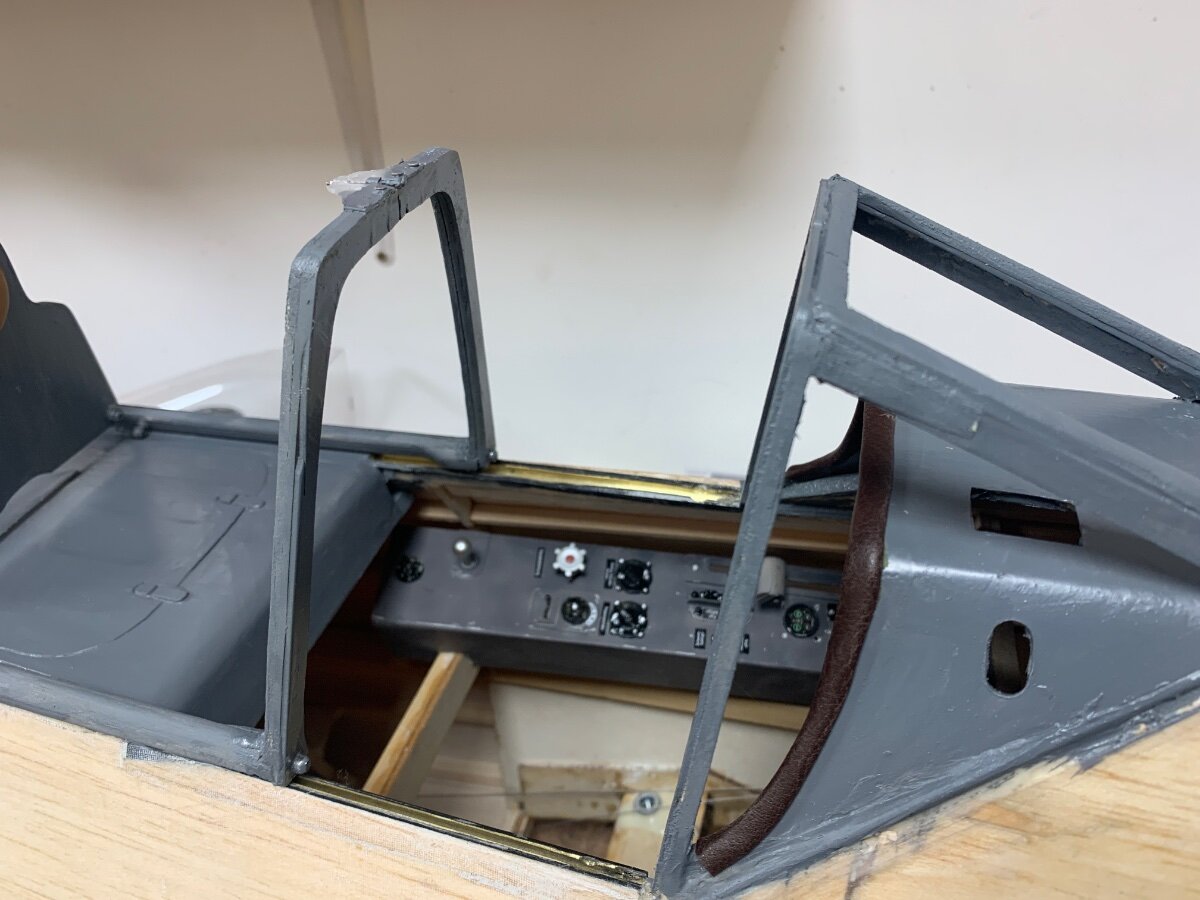
A little progress on the canopy and cockpit. The sliding canopy fits a treat to my amazement and the articulated mounting of the armoured headrest functions as it should. The forward part of the canopy is now all fixed along with the cockpit coming that has handhold cut outs and the aperture for the gunsights. Just a seat to make up and a few other embellishments.
-
3
-
-
Basil, I have made my own nav lights and covers following someone else’s technique.
It’s very easy, just by enough plastic sheet for a few goes to perfect your technique.page 8 of my Sea Fury build I think
-
Great stuff Jon.
I shall endeavour to get there with these three Laser powered models. Now, how to fit them all in my little camper?
-
1 minute ago, Ron Gray said:
Radial!
Absolutely! 90cc 🙏
-
1
-


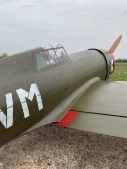
Vailly FW 190 1/4.5 (Nick Somerville)
in Scale Matters
Posted
As the cold weather negates any chance of spraying primer in my unheated stone shed, I have been hacking on with surface prep and fiddly details. The cowl has a total of 13 latches and although simple in their appearance attempting to gain some realism has been surprisingly tiresome. Ideally some from of 3d printed part could perhaps have made the task both more accurate and faster. As I don’t have either the equipment or necessary skills for such wizardry its been old fashion fettling of bit and bobs.
The four piano type hinges had previously been added and blended in with car body filler. For the cowl latches I cut and drilled them from thin alloy sheet and epoxied them in place. As they should be flush I built around the edges with 3M cellulose putty and sanded back. The flat head slotted screws were the smallest brass screws available from my local independent diy/hardware store with the dome sanded of on a disc sander. The cowl panel lines are deeper and wider due to the fact they are openings with inside ledges so two layers of insulating tape were cut and used building ip with the putty again. Only the front circle, not moulded on the cowl, has a single layer of tape and will just have the primer paint to accentuate it.
side
bottom
top
Its looks a bit scruffy at this stage, but fingers crossed once the primer goes down the detail should come to life.