

DaveB1
-
Posts
171 -
Joined
-
Last visited
Content Type
Profiles
Forums
Blogs
Gallery
Calendar
Downloads
Posts posted by DaveB1
-
-
Looks fabulous, looking forward to this one 😃
-
 1
1
-
-
My motor's prop adaptor shaft wasn't long enough for wasbers so I trimmed the spinner backplate (quite a lot) with various dremel bits and files to allow an APC to fit - but the result works ok
-
2
-
-
That cockpit looks great - well done !
-
2
-
-
Would like to build a Sea Fury - still undecided whether to build the next one as a Tempest or convert.
After that - out of the choices being discussed it's gotta be a Mozzie
😄
-
Batch 2 will be gr8 for me, enjoying another couple of weeks in Japan 😄 so in no hurry
-
1
-
-
Loving the wing shape of the Tempest, it's going to look so good in the air
-
1
-
-
Great colour scheme....nice one !
-
I fly mine with a 14 x 8.5 " prop Chris, (on a 620Kv motor) and I think it really contributes to the realism. It can stooge around at low rpm and pull off some lovely low passes. It sounds much better than the whine of high Kv motors, but has enough grunt to pull some gorgeous large dia loops
-
Fabulous. Nice simple, but very effective construction 👍
-
1
-
-
Oh my goodness, that's going to be superb Richard. If it's not too late to add to the batch build, please add one for me - I would like to build a stablemate to the FW190
-
1
-
-
This has been a good week for the FW190. 2nd in the club 'Winter build' concours ( the Sopwith Pup float plane was superb!), and a successful maiden today. The sun even came out.

Set the Cg 75-80mm back and she flew great. I cautiously dialled in a touch of up elevator prior to the first hand launch, then ran out of down trim to compensate so took it out again. Hand launching was easy, although my finger grip holes proved to be a bit small.
I fitted a 620kv motor turning a 14x8.5 prop and am really pleased with it. Pulls away from a light launch easily, is less buzzy than higher Kv motors and flies at scalish speeds. I was easily getting 9 1/2 min flights using 1800 mA out ouf 2600 4S batteries.
I preferred mid rates (about 80% of the plan deflections) but then dropped the elevator further to 60% which helped scale flying. It's a keeper :)
-
9
-
-
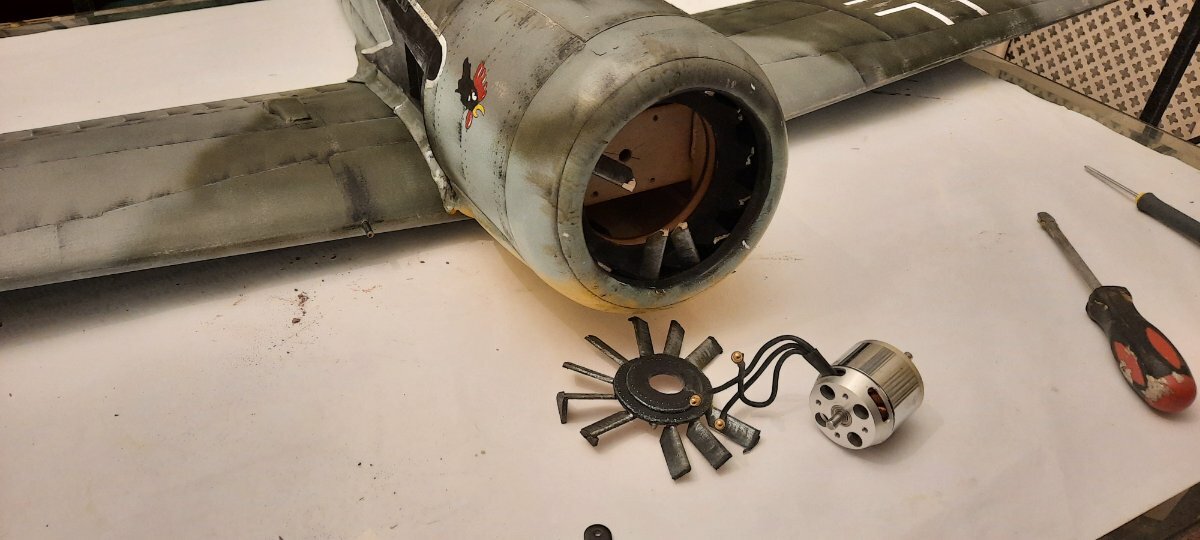
Well that was a gaff, but a good lesson learned and better now than in the air.......
I hung the FW190 up from its prop shaft to spray a coat of matt acrylic sealer. So far so good
But then when I came to bring it down, I knocked it and the motor casing and shaft pulled out through the motor - taking my fan blades with it.
My mistake was I'd pressed the shaft out of this motor and turned it round. I'd filed a flat on the shaft and refitted the front grub screw but didn't realise I'd have to replace the rear circlip with a collet to take the thrust loads....whoops - but better now than the prop coming off doesn't bear thinking about !
-
 2
2
-
-
Superb, well done. Love the shading on the ailerons
-
Great information - thanks all. I only plan to do this once more, so I think it'll have to be the X20 🙂
-
I'm looking to upgrade a QX7 transmitter and having a number of receivers would like to stay with FrSky. I'm an intermittent flyer, and although I've managed with OpenTX I have to go through a difficult relearn process every time I set up a new aircraft, and hope the Ethos system would be a bit more intuitive.
I see there is now an X14 alongside the X18 and X20. Is there anywhere to see, feel and hold these transmitters before committing ?
-
On 15/02/2024 at 09:36, Ron Gray said:
I had to replace the motor on mine, the Overlander that was in the model was faulty so I had to get another one. Tested it yesterday and at WOT with an APC 12x8 it's pulling 60a and producing just over 800W which should be more than enough! A word of caution though if you have the alloy spinners, test them for balance, mine was quite a bit out, turning the front section through 180º helped but it still needed a bit of balance weight.
Hi Ron, Just thinking about what you said here...How did you rig up a check of the spinner for balance ?
-
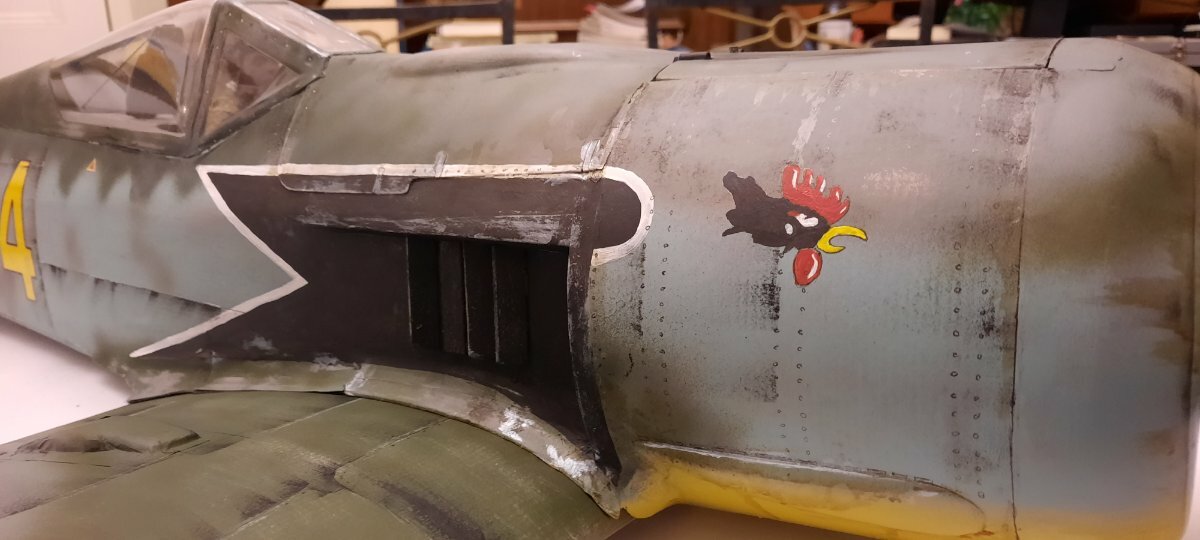
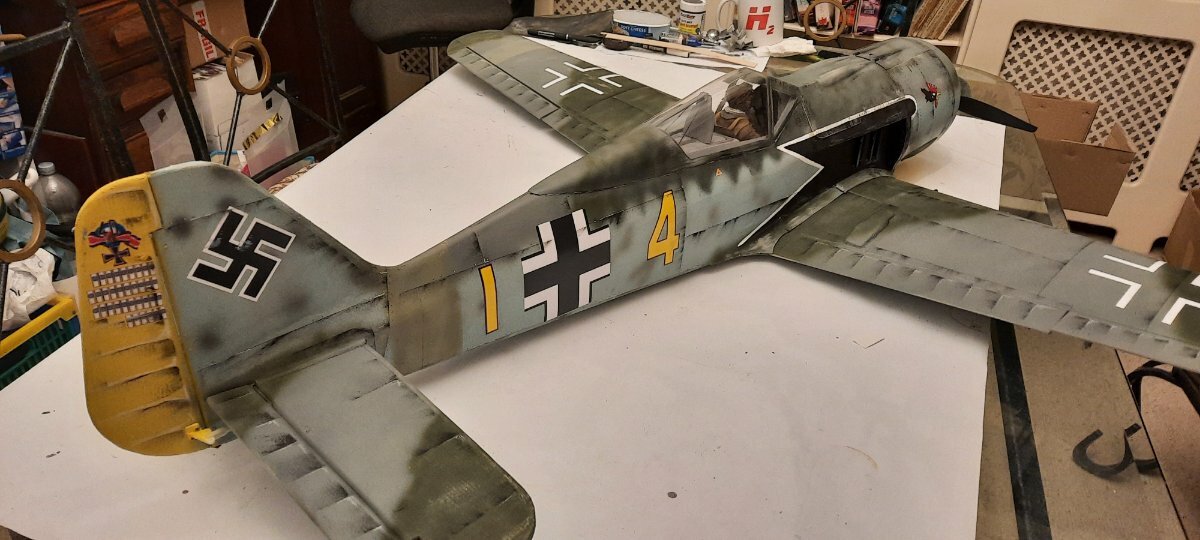
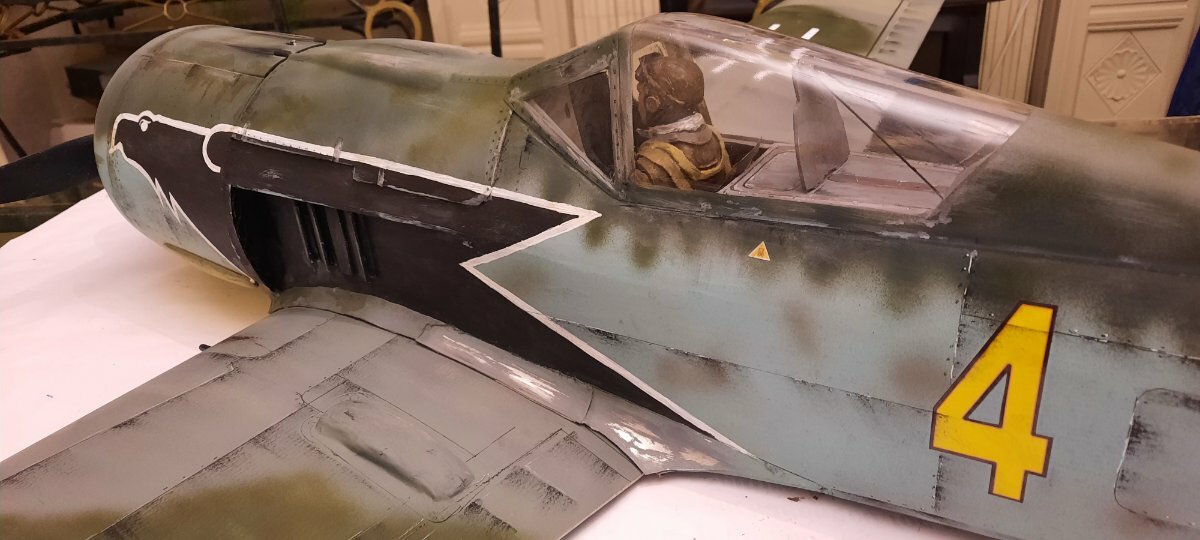
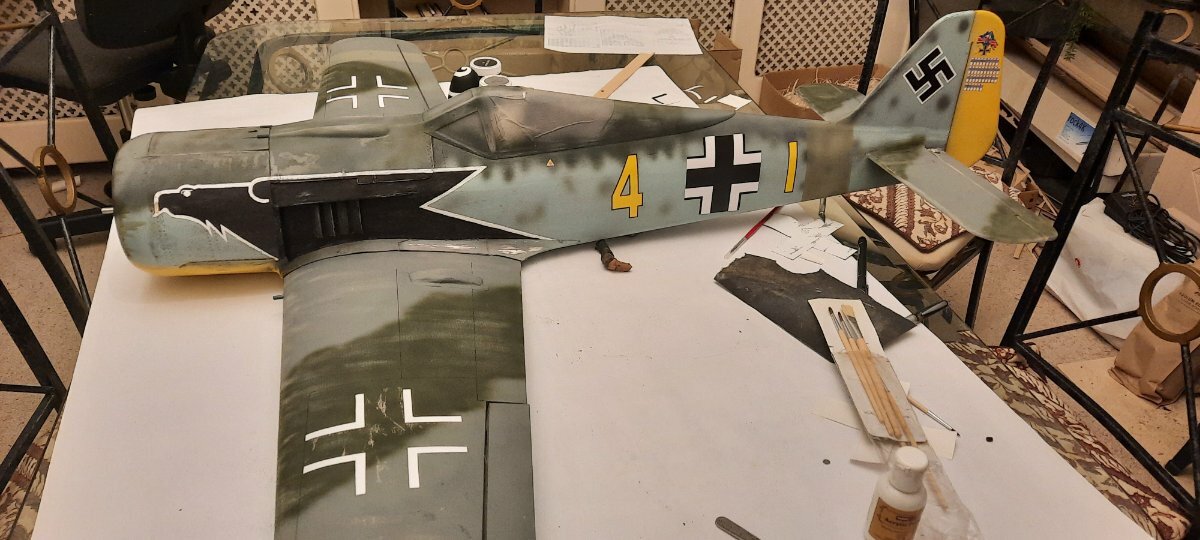
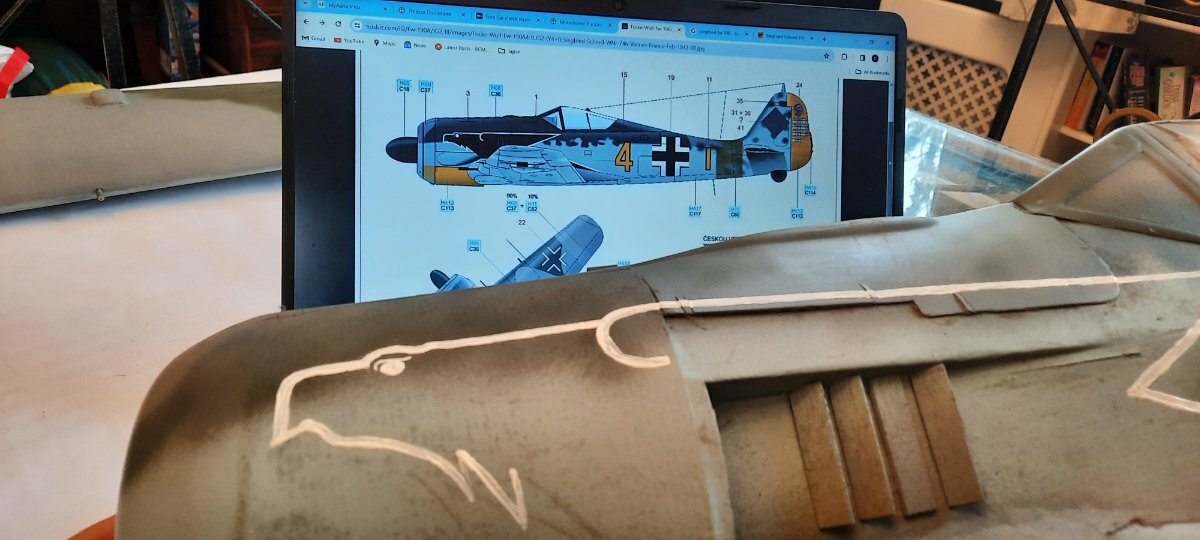
Ghx Silver Wolf,
I scoured the net for an image of this aircraft's markings, zoomed in and snipped the rudder view into a powerpoint ( or free equiv) file and printed it onto white vinyl inkjet sticky paper, then cut around it ( as the yellow wasn't a good match) before applying to the rudder
-
Looks like with a bit of lead (or two batteries maybe) it'll weigh around 4 lbs 8 1/2 oz
-
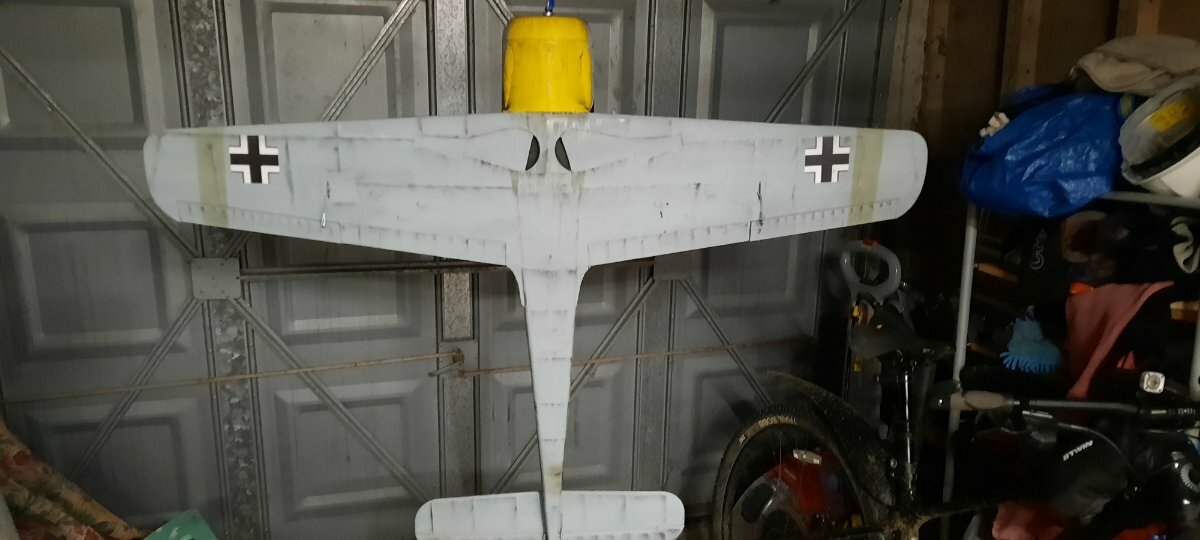
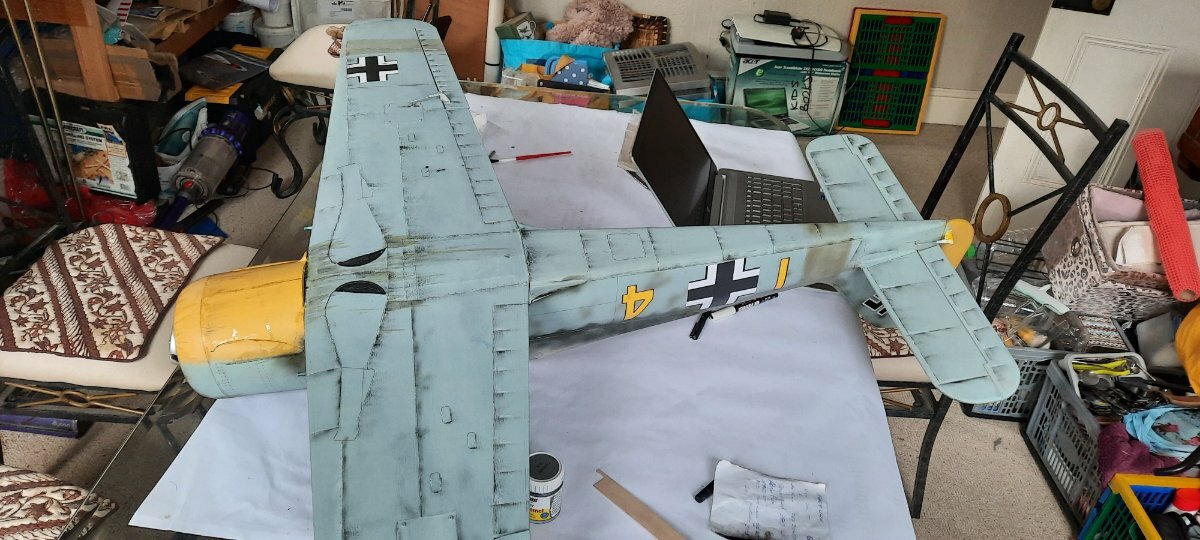
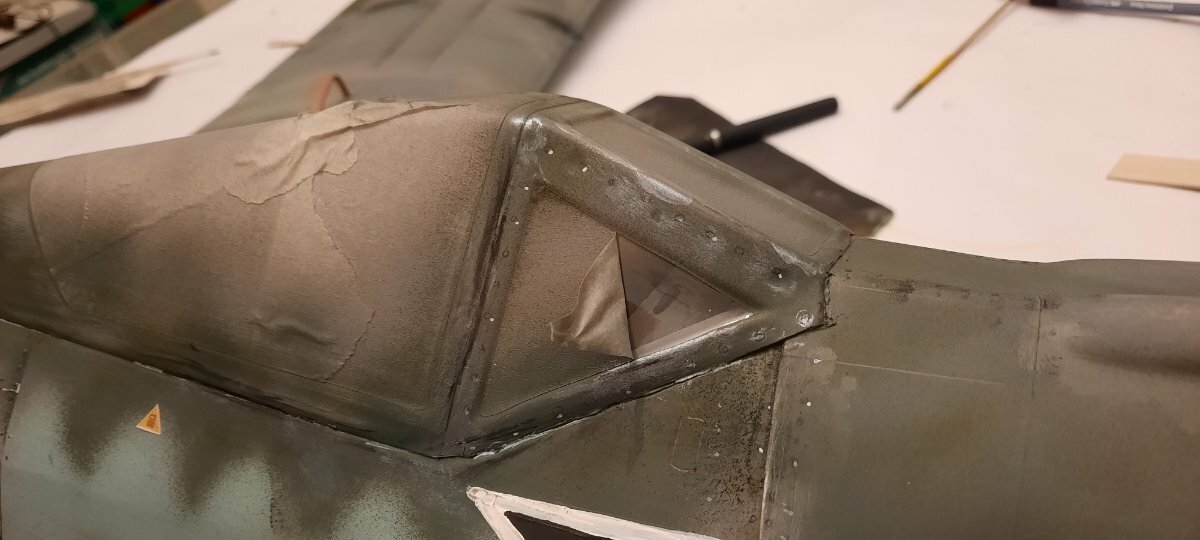
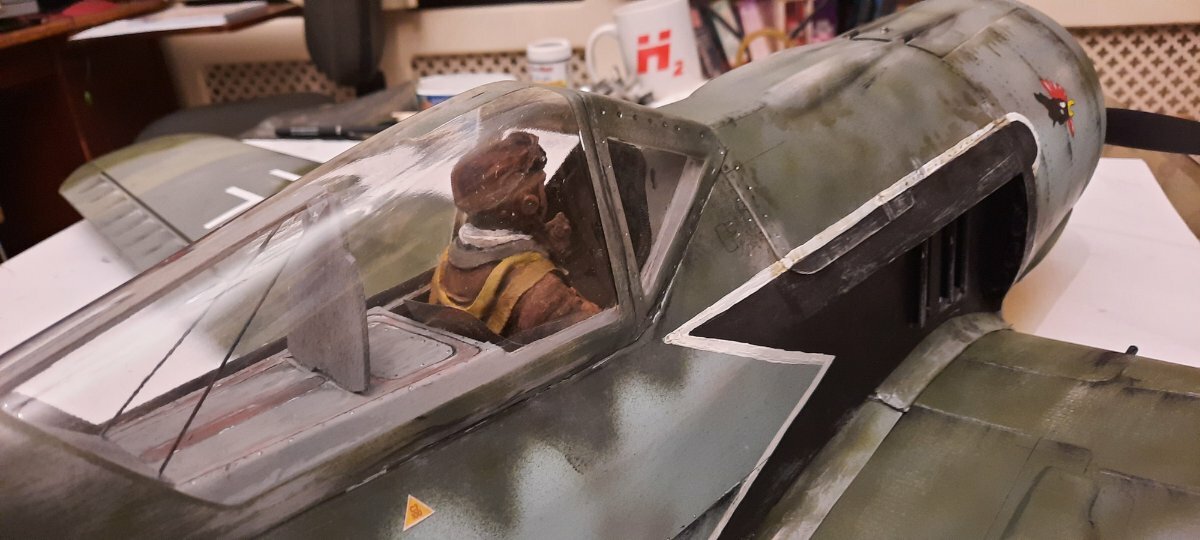
Weather was grim outside so did a spot of weathering inside...
Underside
Tailplane
Rudder
Wing
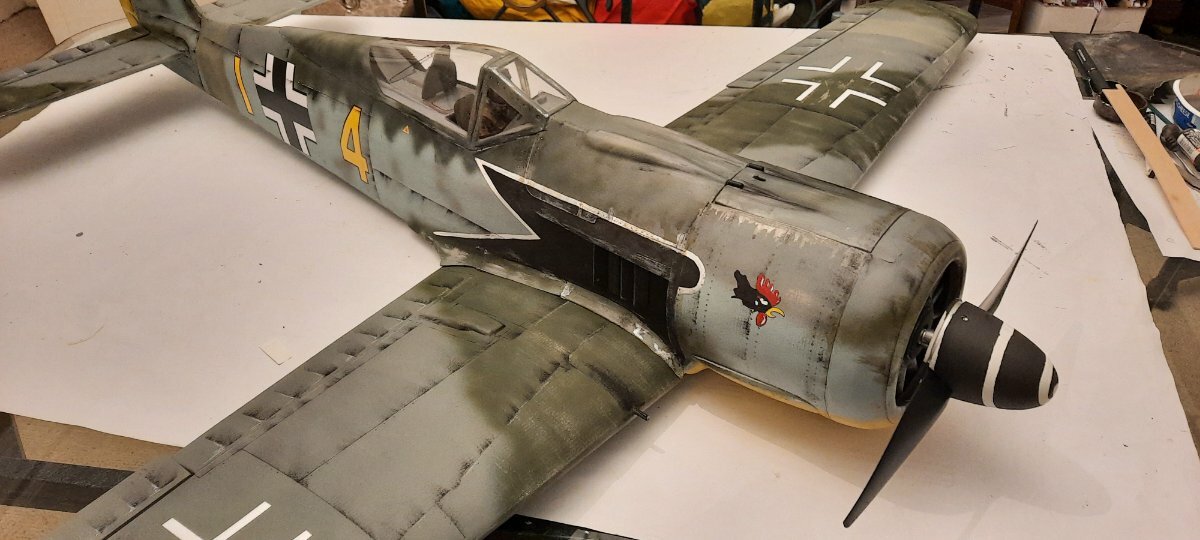
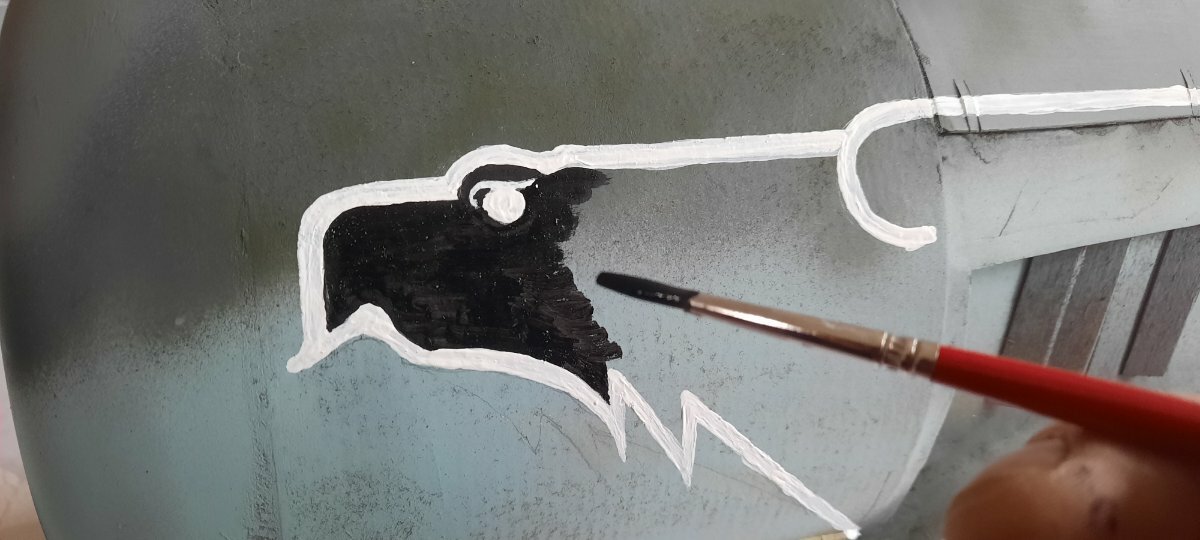
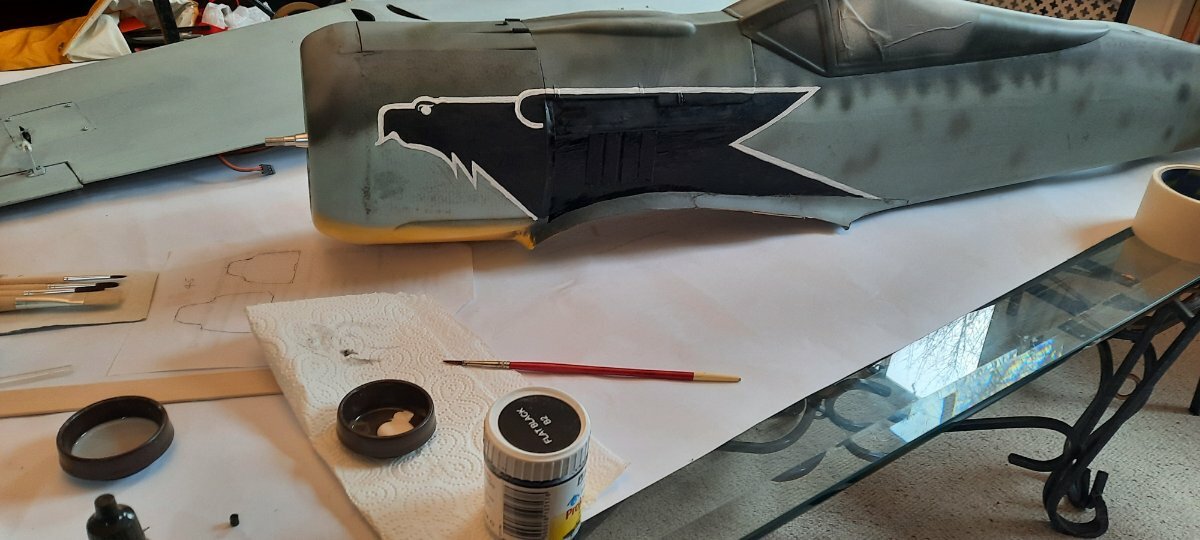
Doh, missed printing out the insignia when I did the main number vinyls and am too stingy to use a whole new sheet for just one decal, so out came the paints again
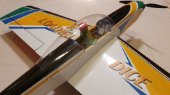
This is a cool moment.....
I'm sure I'll keep fiddling with some more detail, but we're pretty much done...
Thank you Richard and Paul for setting up this project and to all those who sent encouragement along the way - it's been great fun. That was my 2nd scale (ish) build and I'm now hungry for more 😃
-
12
-
-
Made a start weathering the underside of the wings. I have a double action airbrush that should be ideal for the fine work around the panel lines, but I'm still struggling to get reliable paint flow and the frustration takes the enjoyment out of the process, so I've reverted to the chalk techniques shown by Richard and on Ron's great videos
-
4
-
-
Fantastic ! ....Well done Ron, such a realistic effect
-
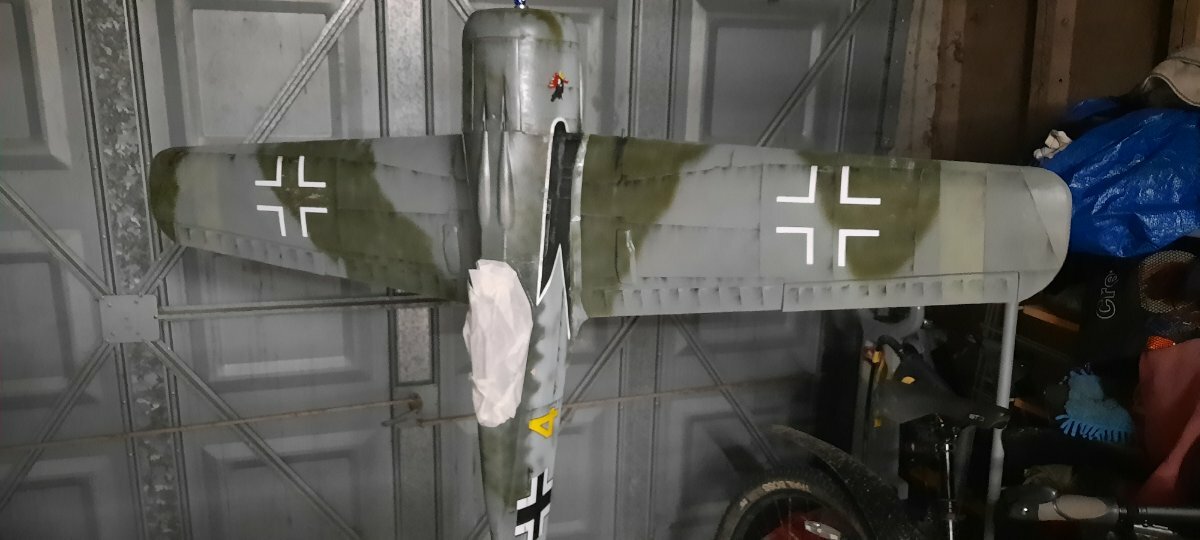
Added the supplied insignia, and then produced some of my own using injet vinyl sticker paper ( and a new printer as the old one clogged up !). Some just in ppt, others scanned from internet images
Stared on a bit of weathering to simulatr oil stains and wear around the cowling and engine
-
11
-
 1
1
-
-
Don't think I'll ever make signwriting a profession, but this should do...
-
10
-
-
Whoo hoo - cracking job !
-
1
-


Warbirds Replicas Hawker Tempest V -Mass Build 2024(part two) .
in Warbird kits
Posted
Kit box arrived safe n sound. Thank you Richard and team