


Lipo Man
-
Posts
239 -
Joined
-
Last visited
-
Days Won
2
Content Type
Profiles
Forums
Blogs
Gallery
Calendar
Downloads
Posts posted by Lipo Man
-
-
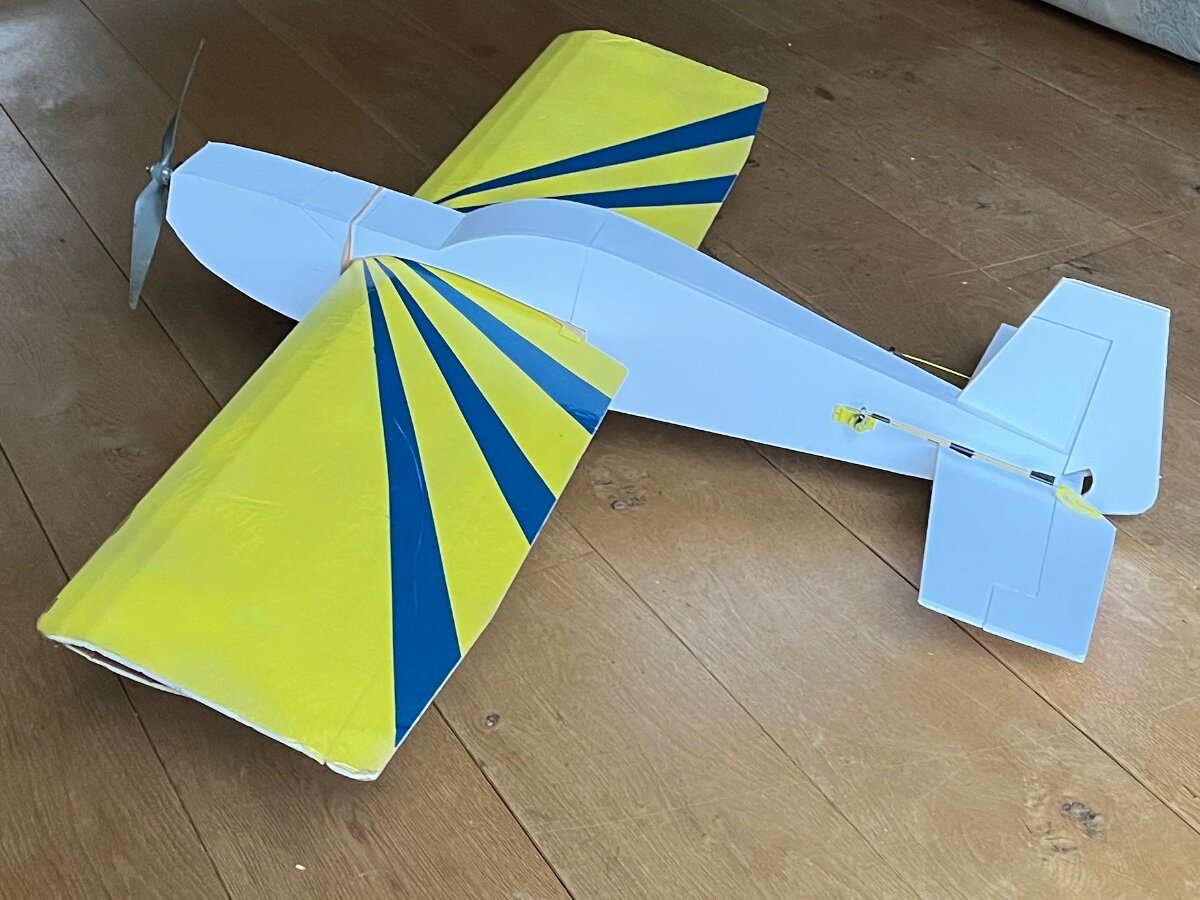
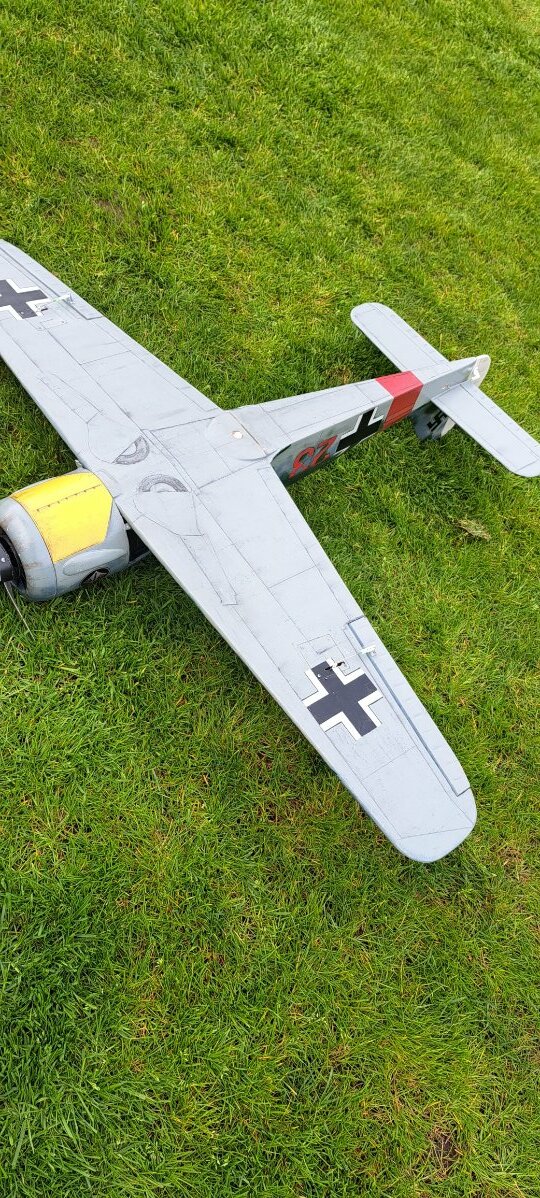
I had a very basic little foamboard aerobatic hack. I built it in one evening without plans, and it flew beautifully off a 1300 3s battery for about eight minutes. I say “had” because last week I finally crashed it one time too many and broke the fuselage in half (not for the first time…). Bottom photo is of the plane before the mishap.
Anyway - last week I built a new fuselage to re-use the wing which survived the crash unscathed. Again a one day build with no real plans other than a basic outline of something aerobatic (an Extra?).
I was really pleased with how it turned out, and I just got home after the maiden. Just like before, eight minutes off that little 3 cell, but now with the increased fuselage side area it will knife edge! I must admit I’m quite pleased with it. Should be a fun little plane to keep in the car for spontaneous summer evening flying.
-
 6
6
-
-
22 minutes ago, David Davis said:
What did you use for the yellow covering?
It's just yellow paint from an aerosol. I think this one:
-
1
-
-
Was flying my foamboard ugly stick hack having a great time yesterday. I was doing so well I tried a rolling circle with some limited success. So I tried again, only lower…
The wing was undamaged, so today I’ve hacked out a sort-of Extra style fuse so I can still fly the wing. Waste not, want not!
-
5
-
-
4 hours ago, John Timmis said:
Hi, here is another one ready to go. I wanted to try Richard’s monochrome finish, I think it has worked well.
It has a Quantum 40 motor, about 700 watts on a 12 x 6 prop & 4s 4000 lipo. The cg is at 85 mm. Is that OK?
Can you remind me of what the control deflections should be please?
I have really enjoyed this build & following the numerous threads, can’t wait to start on the Tempest.
John.
You must have the CG spot on as it’s so stable inverted!
-
 1
1
-
-
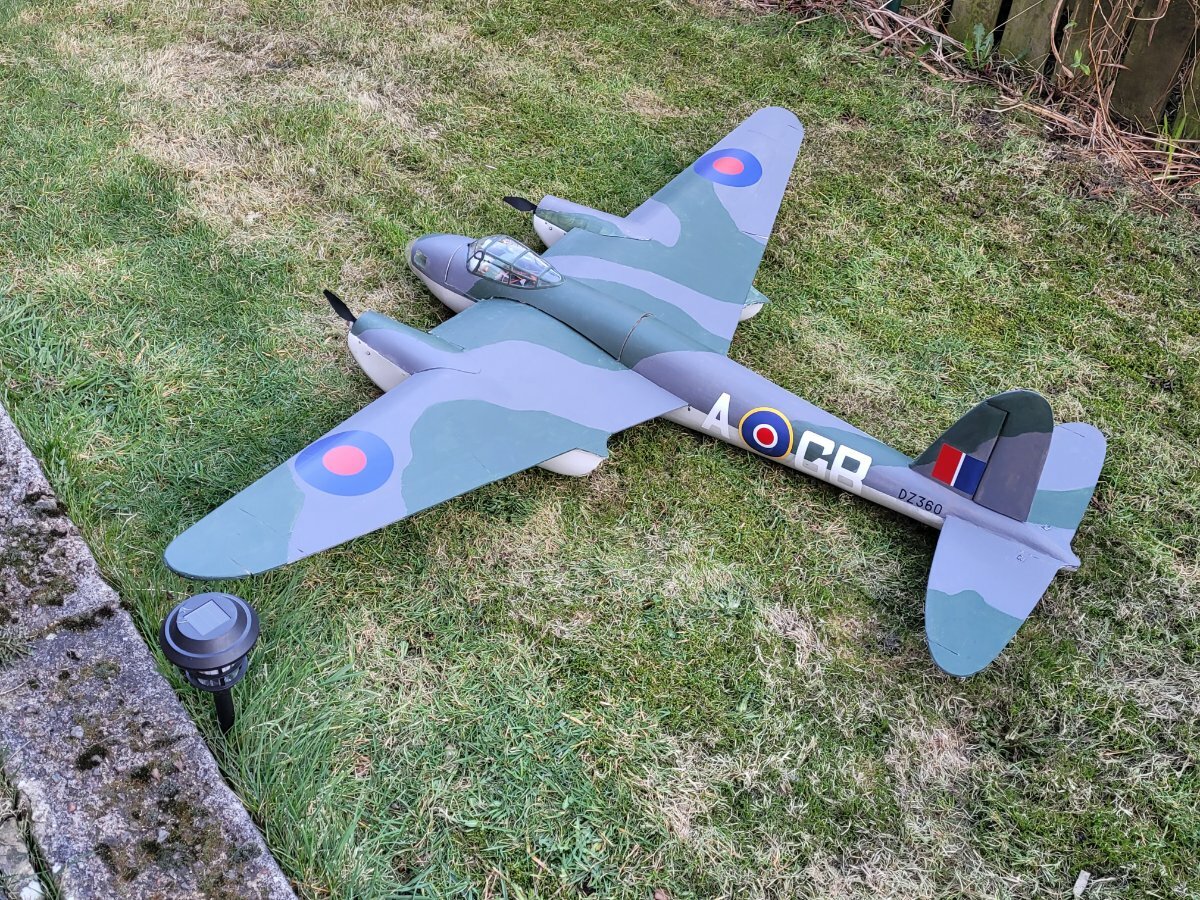
26 minutes ago, Eric Robson said:
That's why I made mine from depron and foamboard same size less than half the weight. At present uses 2 3s 3000. It would be better about 60" with a single battery. I tend to fly the 110 more as it is one piece, twice as many flights with the same batteries and I can hand launch it myself. Now I have the dolly I will see how the Mosquito goes from that.
What type of foamboard did you use? The Hobbycraft stuff or something more exotic?
-
21 minutes ago, mightypeesh said:
Hi folks, still ticking along....
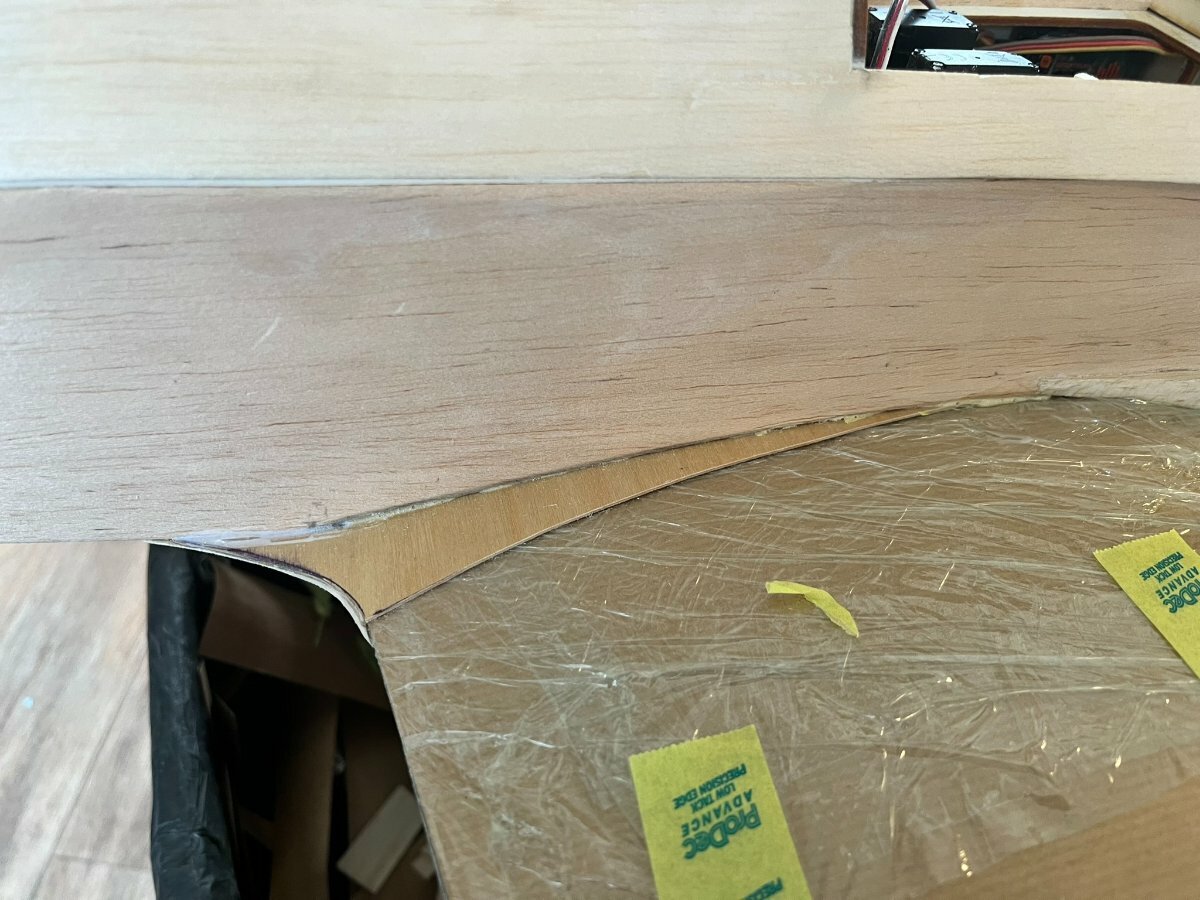
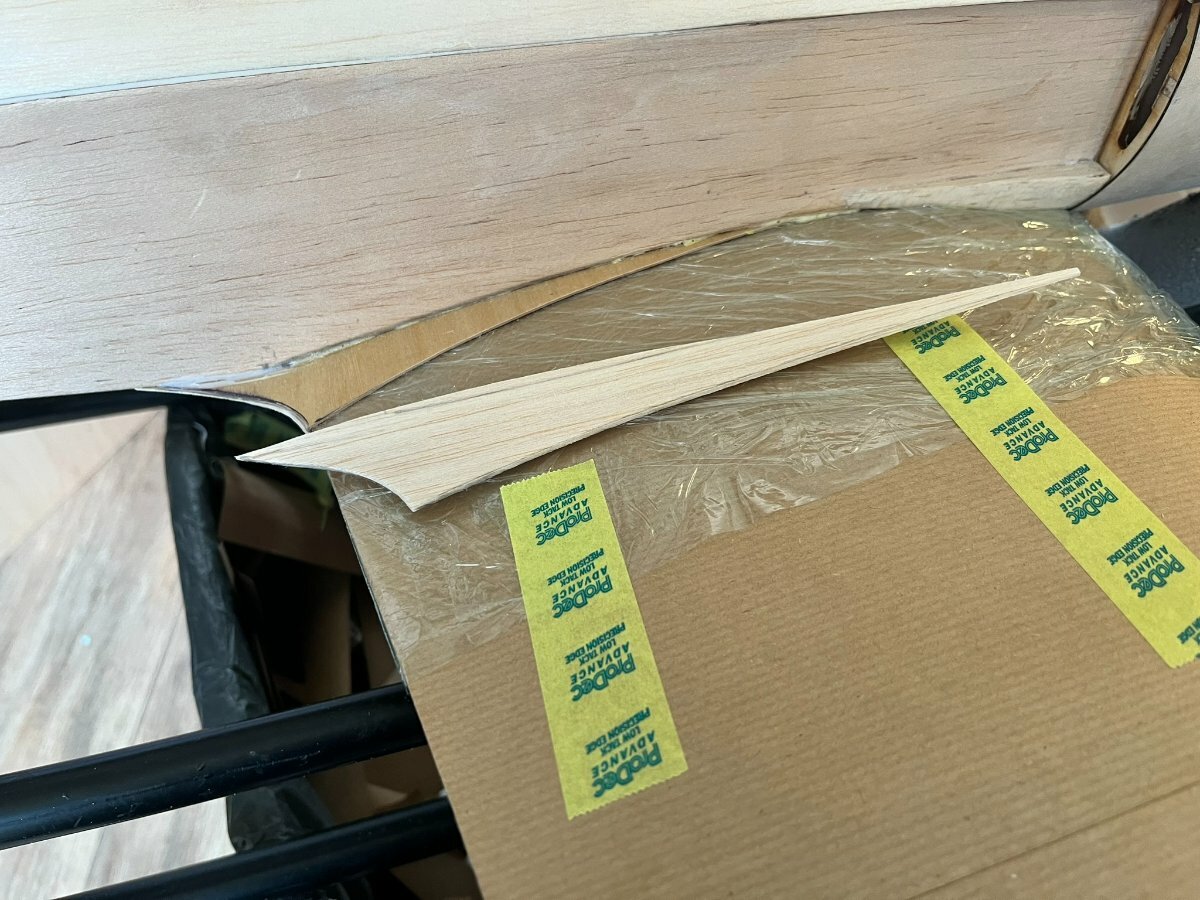
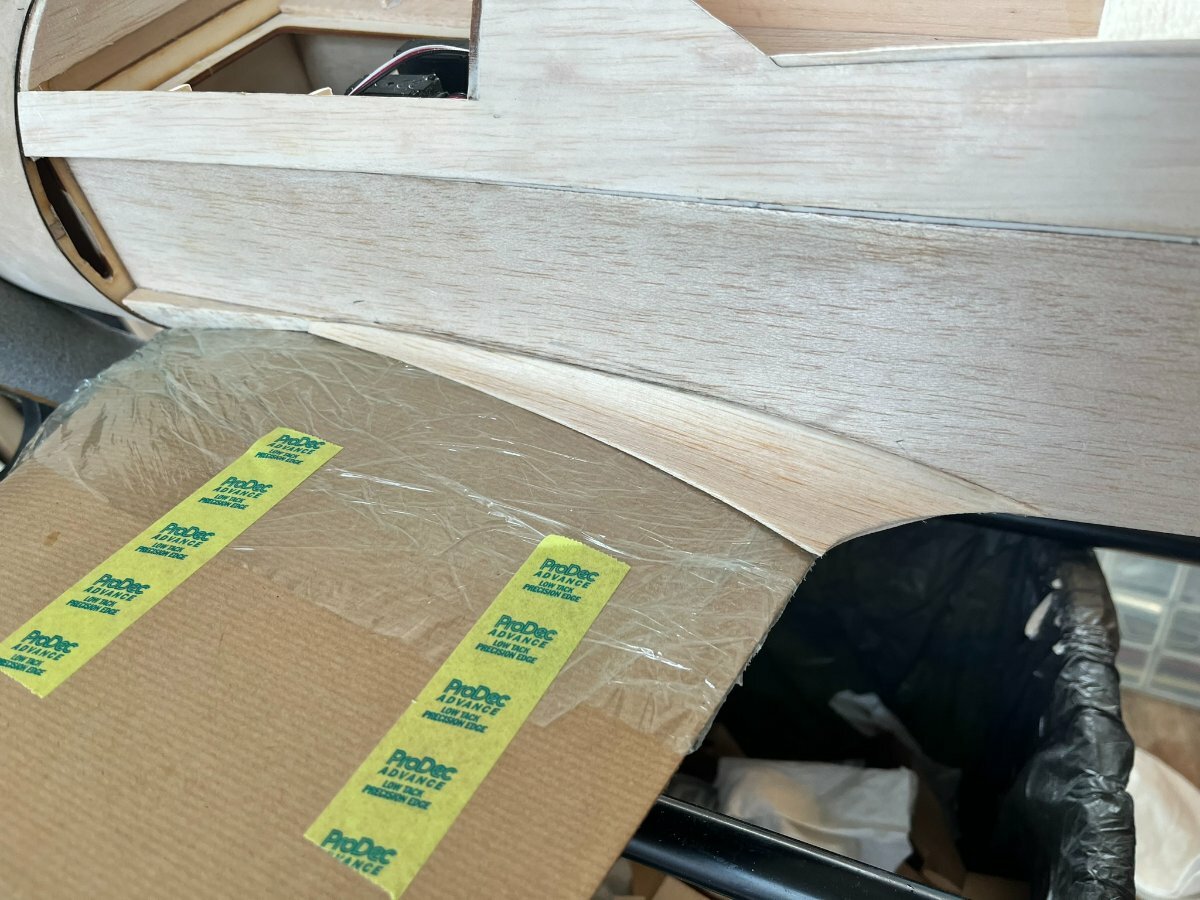
I decided to do the wing fillet using thin ply and curved balsa as I had used the method on other aircraft.
First made a template and cut some very thin ply to shape. I glued it on with Gorilla brown glue as it expands and fills gaps nicely. The clingfilm on the wing stops it sticking. Next I used some trusty cereal packet cardboard to make a template and cut out the balsa fillets.
Bit of a soak in hot water and some super glue and jobs a good'n' 🙂
Next onto the covering stage. I used Sainsburys brown paper (£1.50 a roll) and Evostick exterior glue for no other reason than I had it on the shelf. This I diluted with about 5% water. What can I say..... it works absolutely beautifully!!!!! Thank you Richard for the technique. It was a stress and wrinkle free process. I painted it on the back of the paper then applied almost immediately, smoothing down with a dry cloth. quick wipe with a damp clothe to remove any glue that gets on the surface then a going over with a hot iron (150) with a sock on.
Amazing how it can go round curves, brilliant. when all was dry for a few days I sealed the surface with some Ronseal interior acrylic varnish, once again watered down 5% and applied with a sponge so as not to use excessive amounts. Lovely surface and only used one roll of paper, will definitely use again!
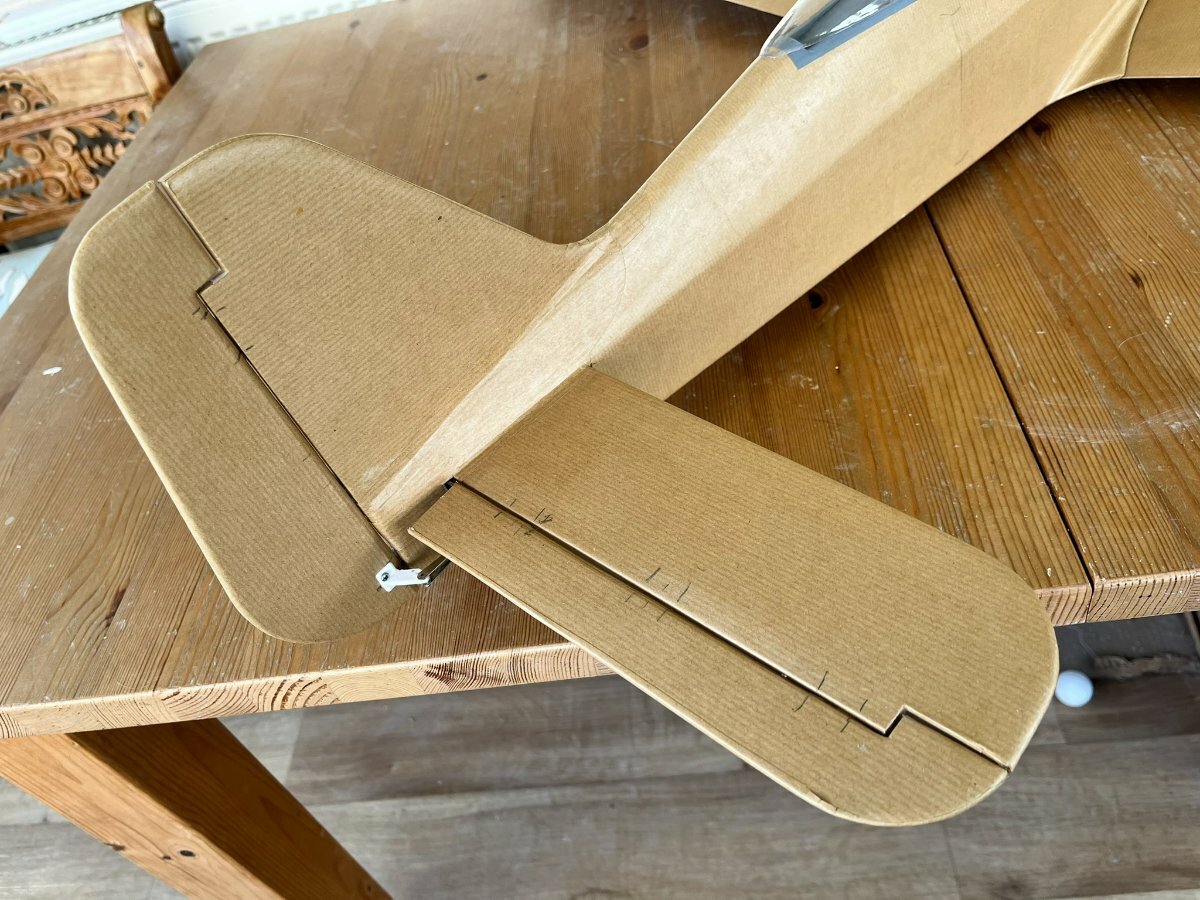
I also added a bit of detail to the tail feathers just for interest.
.
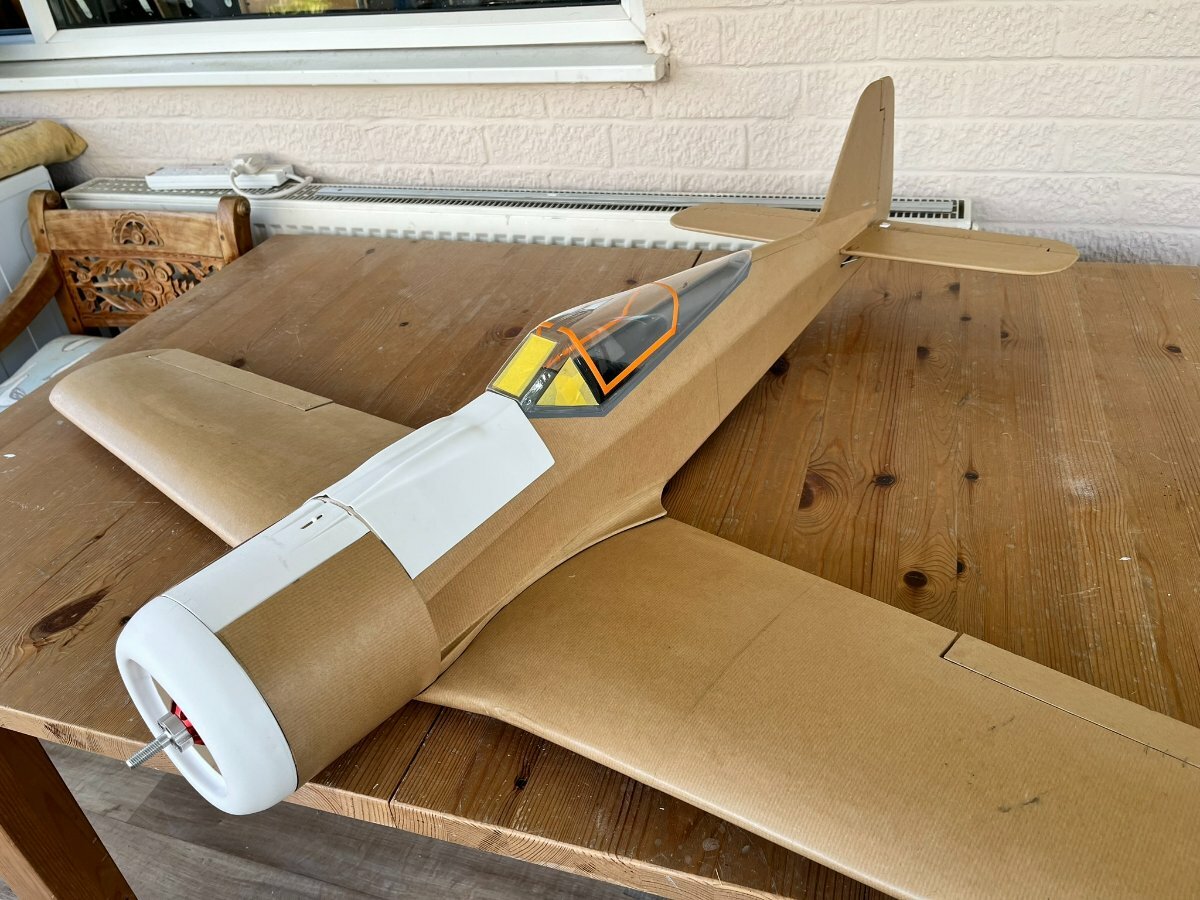
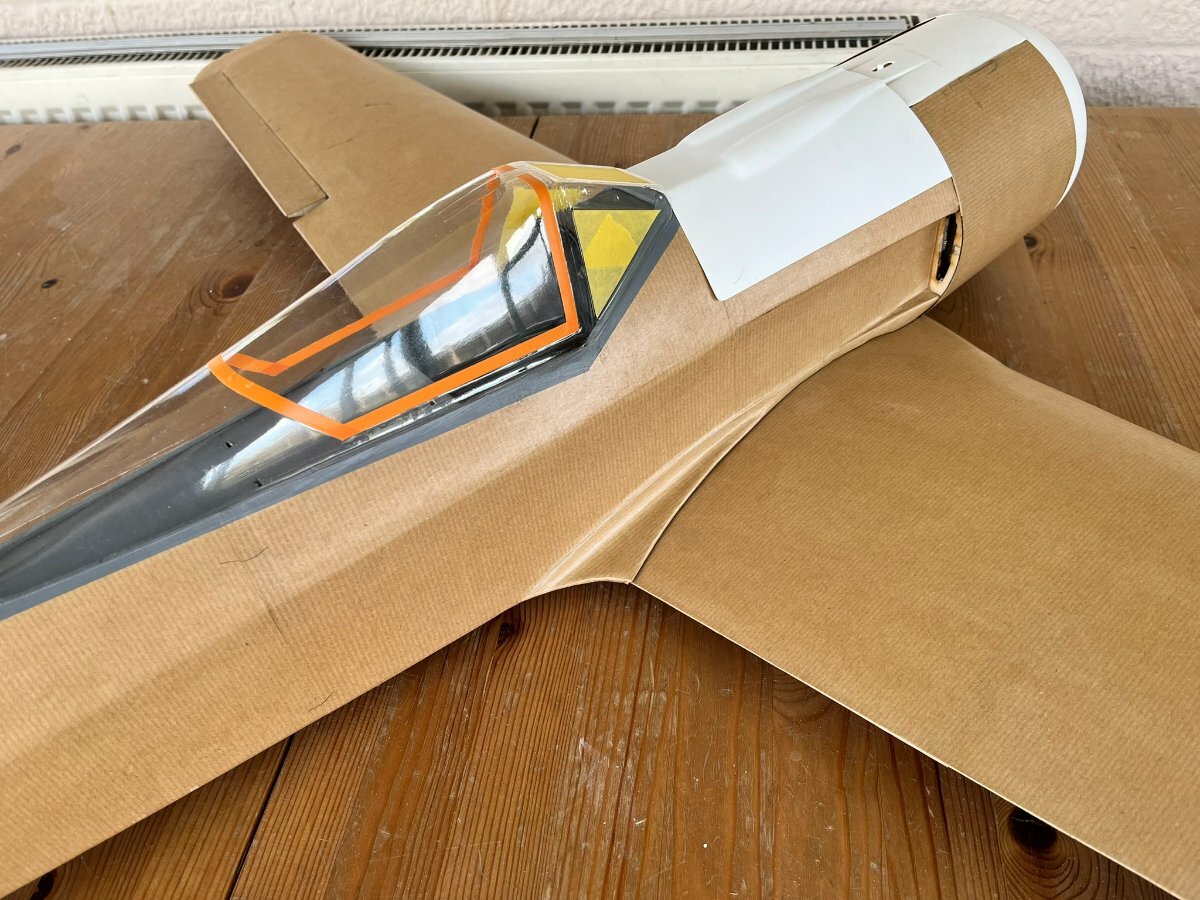
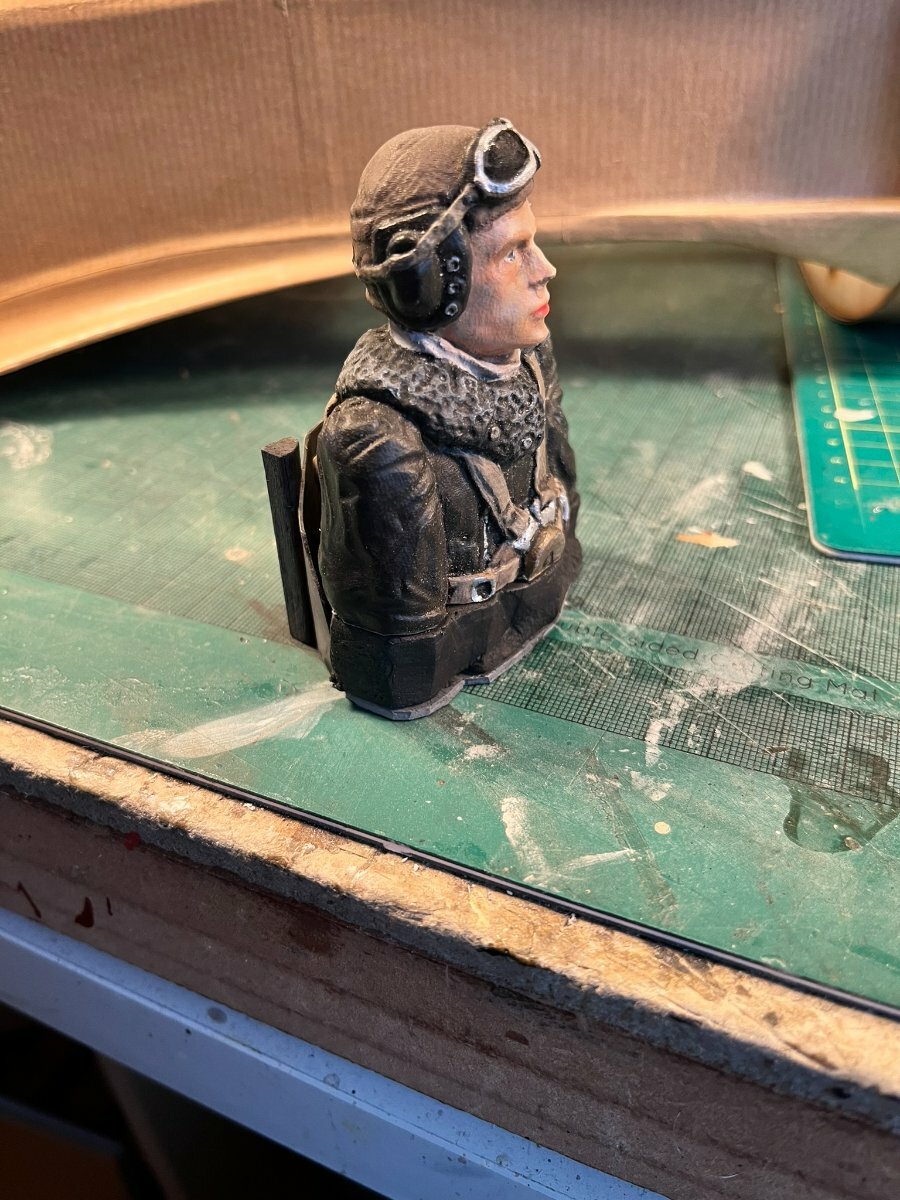
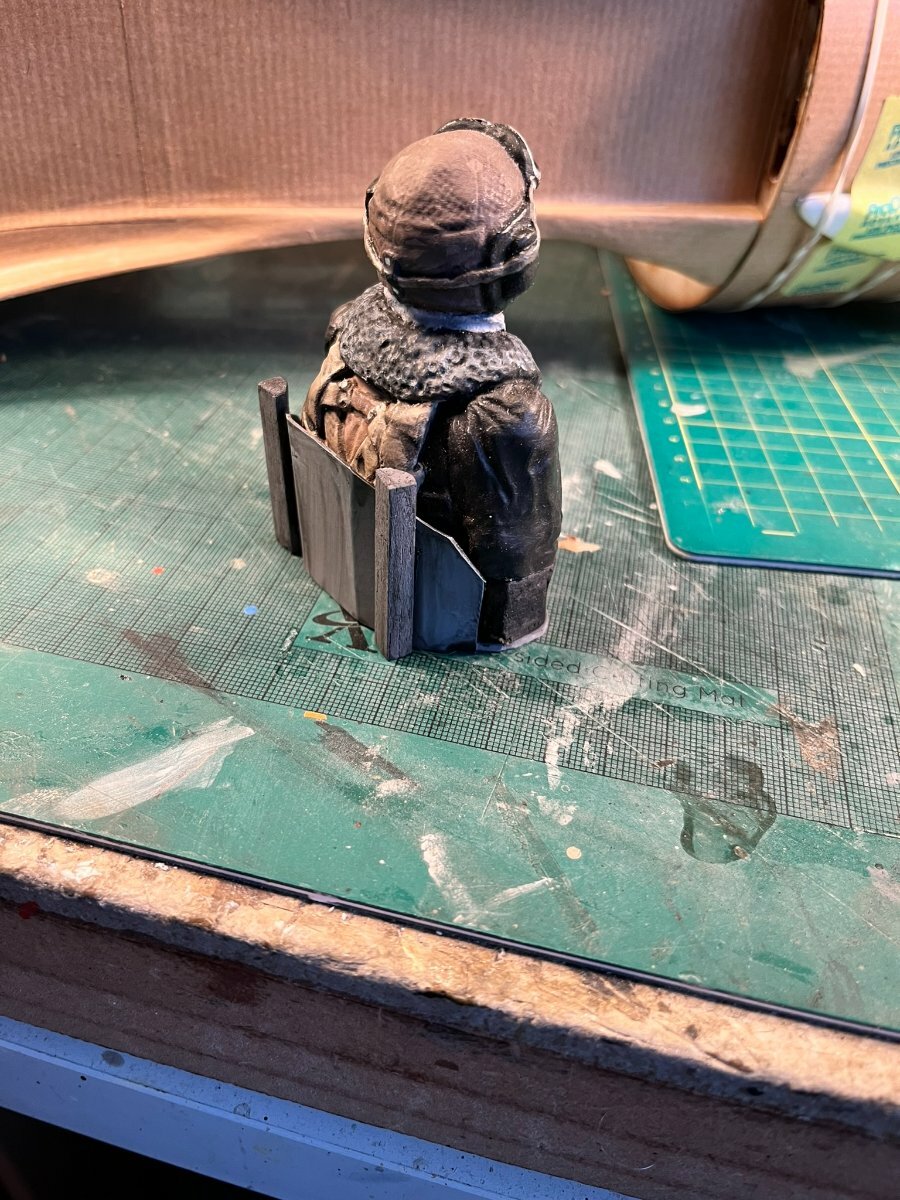
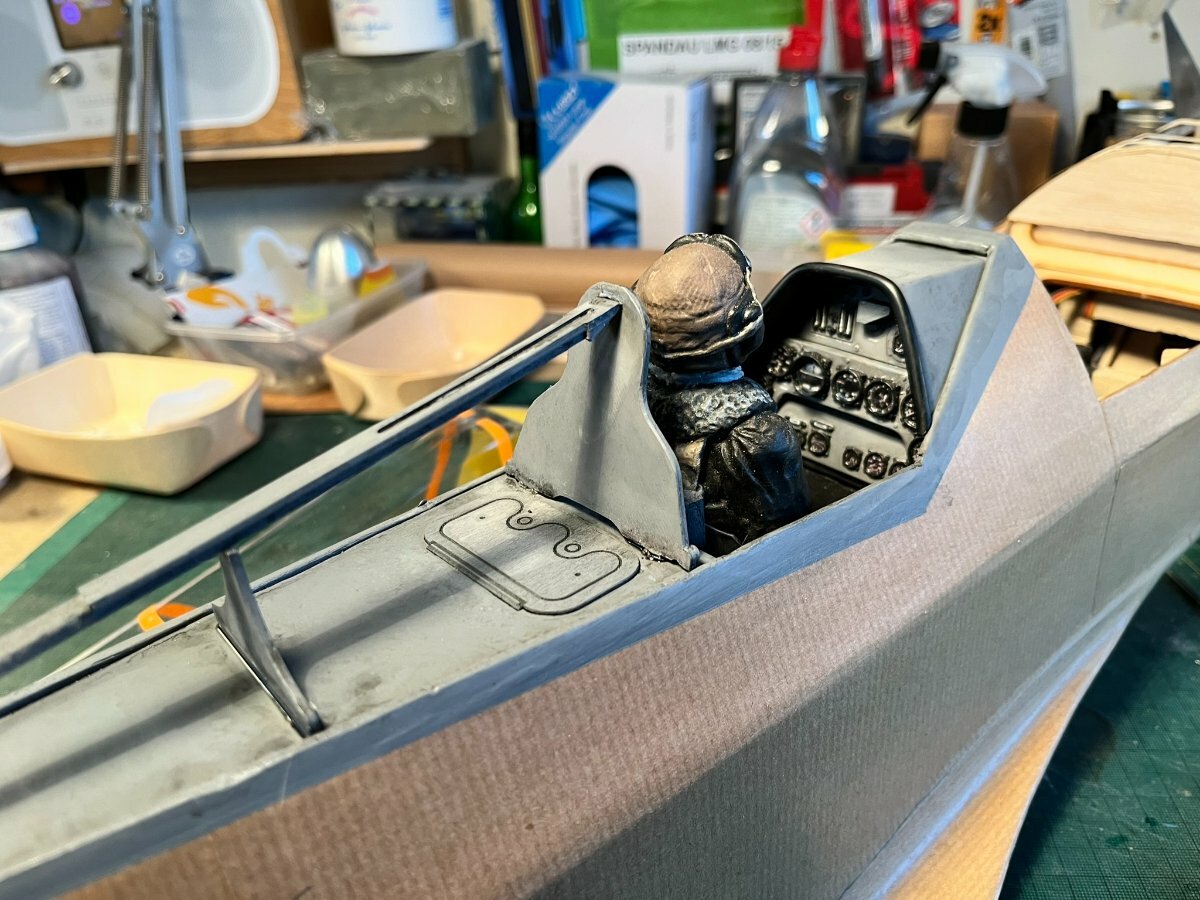
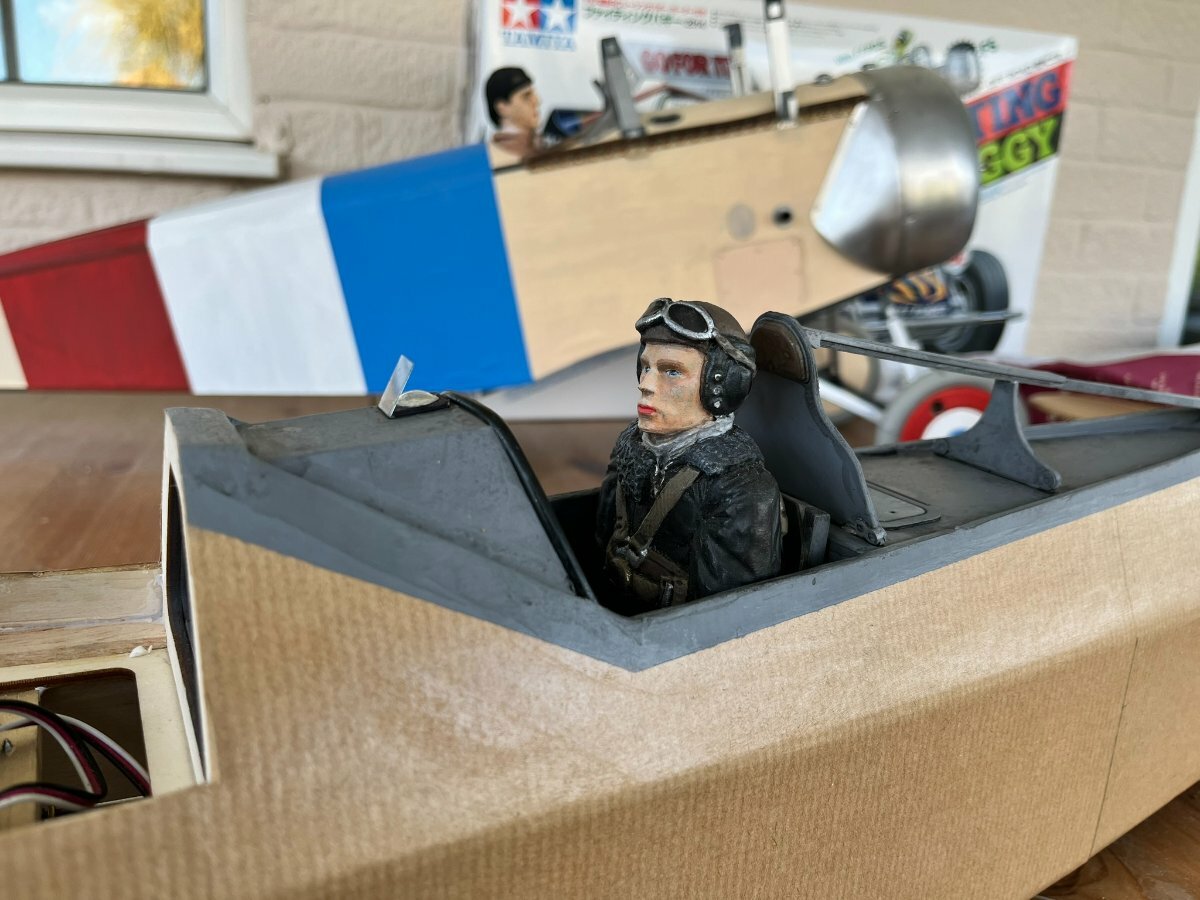
On to the cockpit detail bits. I know that all of this is invisible when you are flying past at 200ft but it is one of the things that I always get huge enjoyment from. It is made from a combination of my 3d printed bits, Weetabix box cardboard and scraps of foam and balsa. All the cockpit parts weighed in at just under 15g which is good. Mr Pilot was a bit short in the body so I gave him a booster bit of foam to raise him up. The gun sight is a bit of food packaging and card. Pleased with how it turned out, he looks happy in his office!
In the back ground is my other ongoing project, a Flair Legionnaire being built as a Nieuport 11.
Next on the list is to get the vac formed parts glued on and the canopy - then its paint time!
Hope you are enjoying your builds as much as I am
Cheers for now, Simon
Wow - that is on a whole other level to mine. Brilliant work! Will have to try something like that further down the road - thanks for the inspiration!
-
1
-
-
I know that adding yet another option into the mix is entirely unhelpful, vis a vis the herding of cats here. However, as the possibility of a twin has been well and truly broached I can't help noticing that the Douglas A26 Invader is a very handsome beast and not often modelled? Some very nice schemes as well. Just saying - my preference is still for a bigger than FW190 single engine but very much open to other possibilities!
-
1
-
-
1 hour ago, Ron Gray said:
Here's another one! Clubmate Steve had never built a model before so this is his first attempt, personally I think that he did fine job. He asked me to maiden it and after adding some nose weight (he was using a 2200 mAh 4s battery) it was ready to go.
Please accept cookies to access this content
Looks like another excellent flier. There’s a trend emerging here…
-
22 minutes ago, leccyflyer said:
Yep - in my experience, which isn't huge, EDFs need to either have tarmac runways if fitted with retracts, be super powerful if aiming to use retracts on grass, be small enough and with sufficient excess power to be hand launched or need a bungee. Fixed gear is right out. My clubmates have had lots of success with the wee Arrows 50mm Hawk and T-33, my attempts with the tN Gnat and Jet Provost have been much less successful.
If you are really into jets, those hurdles are surmountable with some effort, but as a dyed-in-the-wool propellor fan I'd have to think twice about whether to go for a large EDF build. Unless it were a Hunter, or maybe a Harrier, or a Phantom. 🙂
I built a TN Hunter last year - my first balsa build attempt (FW190 was the second). I have never really been comfortable flying it - which was one of the reasons I was (unnecessarily) so nervous for the FW190 maiden.
After having so much fun with the 190 I decided to revisit the Hunter yesterday and see if a smaller battery (and therefore reduced weight) would help. Switching down from a 2200 3s to a 1300 3s transformed how it flew - but WOT is really straining the pack and flight duration was two and a half minutes. It looked great on a slow flyby, but the FW190 I also flew was much more fun in the air.
I would definitely consider an EDF after the success with the Focke, but that market is quite well catered for with the TN kits in various sizes. I’d love to do something bigger than the 190 next, but obviously the majority will prevail.
I’ll continue to follow with interest!
-
1
-
-
Realised at the field this afternoon it was the first time I’d taken more balsa models than foam. Had a few great flights and finally got comfortable flying the TN Hunter (after switching today to a much lighter battery). As ever the Warbird Replicas Focke was flown the most, but all three were great despite the wind!
-
6
-
-
58 minutes ago, leccyflyer said:
Rain stopped play today, so moved onto motor tests for the FW190, three motors (AXI 2826/12, AXI 2826/10 and Thumper T4240/10 with multiple props to test, around 11x7" - 12"x8", including making up some adapters to allow mixing the 3.5mm and 4mm bullets which are fitted to the various motors. Tried three different battery packs too, some older G-Power 4s1p 4200mah, standard HRB 4s1p 3300mah and my newer Zee Power 4s1p 3300mah- the latter working out slightly better. If I find I need more weight to balance there is always the option of the HRB 4s1p 4000mah packs, which are meant for my P-38 Lightning and so still have their horrible XT60 connectors.
Results were good, giving an informed choice between 500-600w in, with current draw at WOT between 34 and 45 amps, which I guess will rarely be needed and that equates to an estimated 130-150w/lb, if the model comes out around 4lbs AUW..
For reference I’m getting six minutes of scale type flying from a 2200Mah 4s so you’ll have plenty of flight time on those batteries! (Motor is a generic 4250 size can 800kv and a 12x8 APC prop).
-
2
-
-
9 minutes ago, leccyflyer said:
The Betty bomber is way out there - doubt that one in a dozen modellers would recognise one if one rocked up at the field, so would likely be a not very saleable kit. Japanese aeroplanes are rather unrepresented here. I have a few Zeros, but from my Airfix building days, always liked the Mitsubishi Dinah twin - IIRC Hirobo used to do a small ARTF version and Royal did a magnificent Raiden, with a spun aluminium cowl, that I fondled quite a few times in the shop, but never bought. I doubt that any Japanese aeroplane, other than the Zero, would gather enough sales to make it viable.
For anyone wanting a Betty Bomber, there is a solution - but you’d have to switch to foamboard. I’m a huge fan of a father/son group of modellers in the US, Steve and Jack Niezgoda. Jack started designing foamboard models as a teenager, and has a real talent. They did a Betty Bomber that looked good and flew really well - the plans are a free download on their website. You can find it at:
-
2
-
-
11 minutes ago, Ron Gray said:
There's always one isn't there? --------- Tail wheel?
I was so excited at the thought of actual real life RETRACTABLE wheels I totally forgot there’s a wheel at the back. Honestly I’d be happy with a little stick, but I’m new to all this.
-
2
-
 1
1
-
-
32 minutes ago, RICHARD WILLS said:
Another useful tool here . The sanding drum . Makes lightwork of the edges and tidies up nicely .
Just fits in a standard drill chuck .
That is pretty much it .
Apologies for mine looking rough , but I'm sure you appreciate I dont really have time for hanging about .
I reckon you could do the whole lot in an hour if pushed . But to be fair .......Ive done a few .
Any questions?
Well that doesn’t look too tricky. I suspect even a newcomer like me will cope - with a sensible measure twice, cut once approach. Only question from me - for those of us flying off rough strips is there any scope to upsize the wheel diameter further, or are we maxed out in the space at that size?
-
3 hours ago, Flying Squirrel said:
What was the general consensus on C of G for these models, I remember seeing some discussion around it but can't find it now..so may related threads!
Thanks
I'm flying mine at about 80mm with the standard control surface throws. I'm not a very experienced pilot but like that I'm finding it very user friendly. Good luck!
-
1
-
1
-
-
28 minutes ago, extra slim said:
And to think I get nervous hand launching over a flat field! Chucking your new pride and joy off a cliff over the sea must be an additional level of scary! Beautiful looking model - congrats!
-
2
-
1
-
-
A bit chilly and breezy here today but very flyable. As well as my new Warbird Replicas FW190 (quickly becoming my default first plane in the car) I was experimenting with my homemade EDF - the “Flat Gnat”. Slowly shifting the CG rearward and it’s getting better. Only remaining thing to address is the wierd reaction to rudder input. I’m going to drop the throw way down to see if that helps.
-
1
-
-
7 minutes ago, Paul Johnson 4 said:
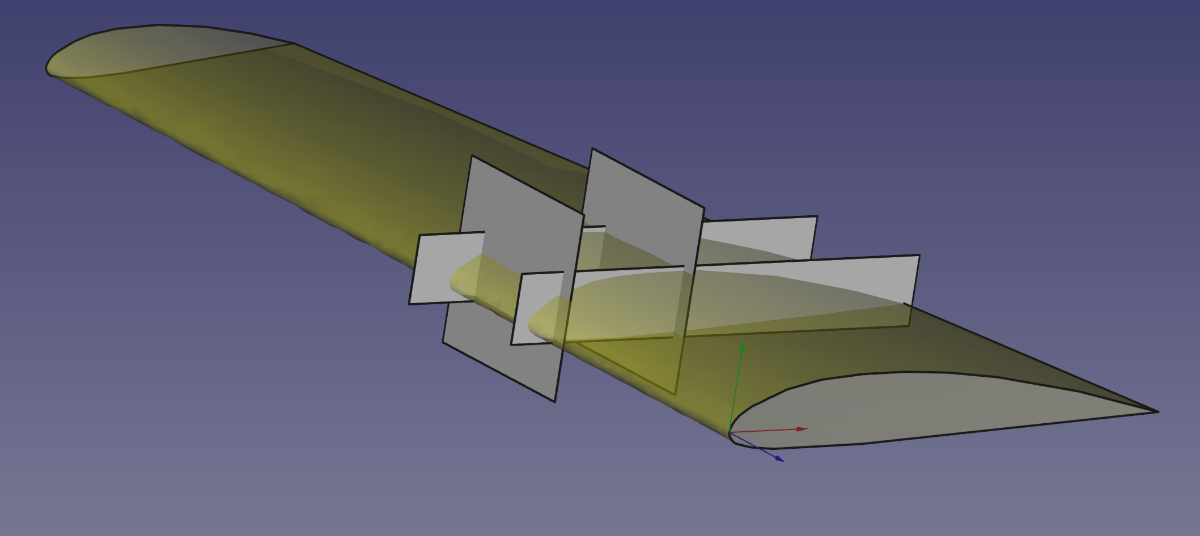
For those who thought we had forgotten you and those who are still awake this is how we developed the retract unit for the FW190.
The cutting profiles used where imported in CAD as a 2 dimensional drawing in the form of a DXF file. The Wing Root and the Wing Tip. The Tip is rotated the correct amount for the washout chosen.
The outer Profile is then moved the correct distance from the Root Profile.
This is then 'Lofted' as a solid 3D object which is the cut foam core without the wing skin.
Next two planes are created across the wing to create a section that the retract plate/assembly will go in.
These plans are used to perform a 'cut' of the wing to create a section of ribs to support the retracts firmly in place
These sections are then given a thickness equal to the ply to be used to create these 'Ribs'
Very much looking forward to fitting these to my own little Focker, and it’s fascinating to see the design process. Looks like the use of CAD adds the precision my build skills can’t manage!
-
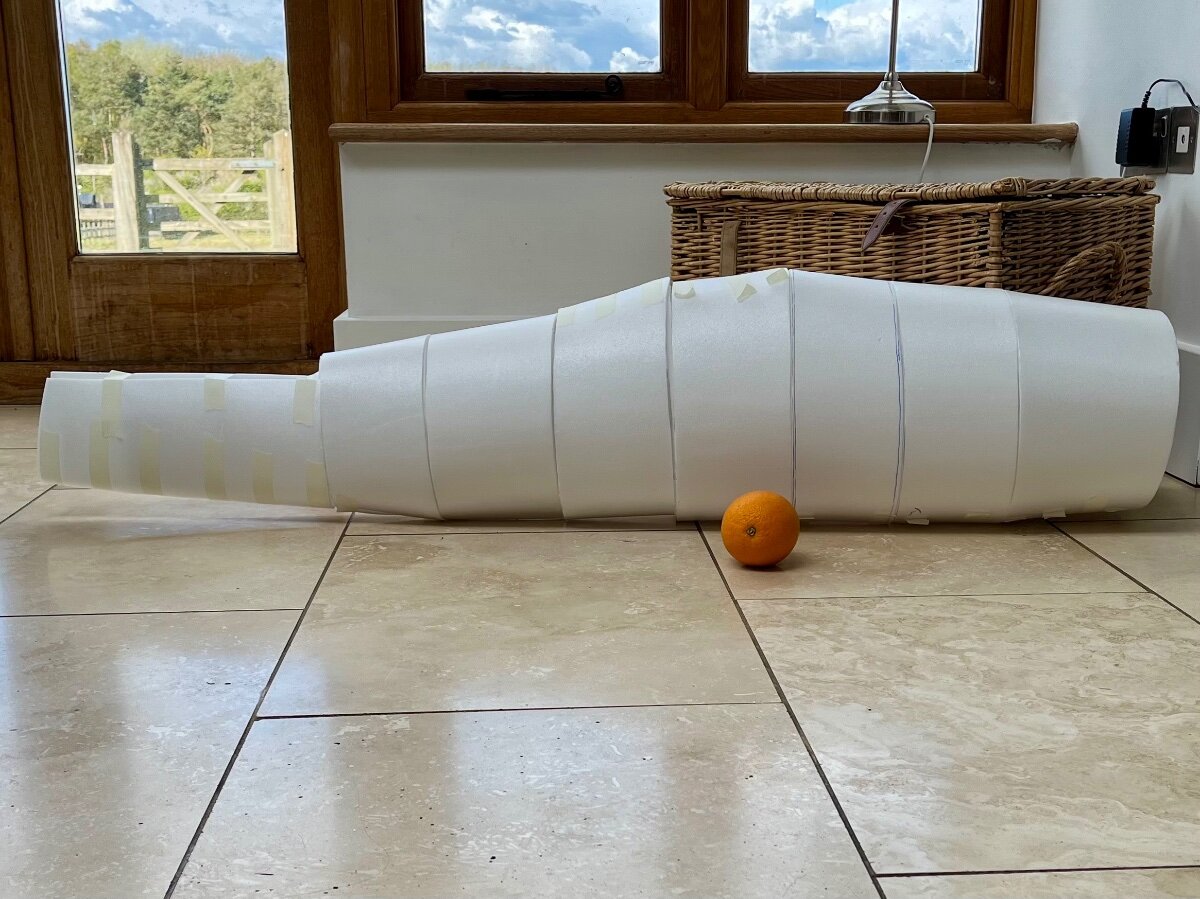
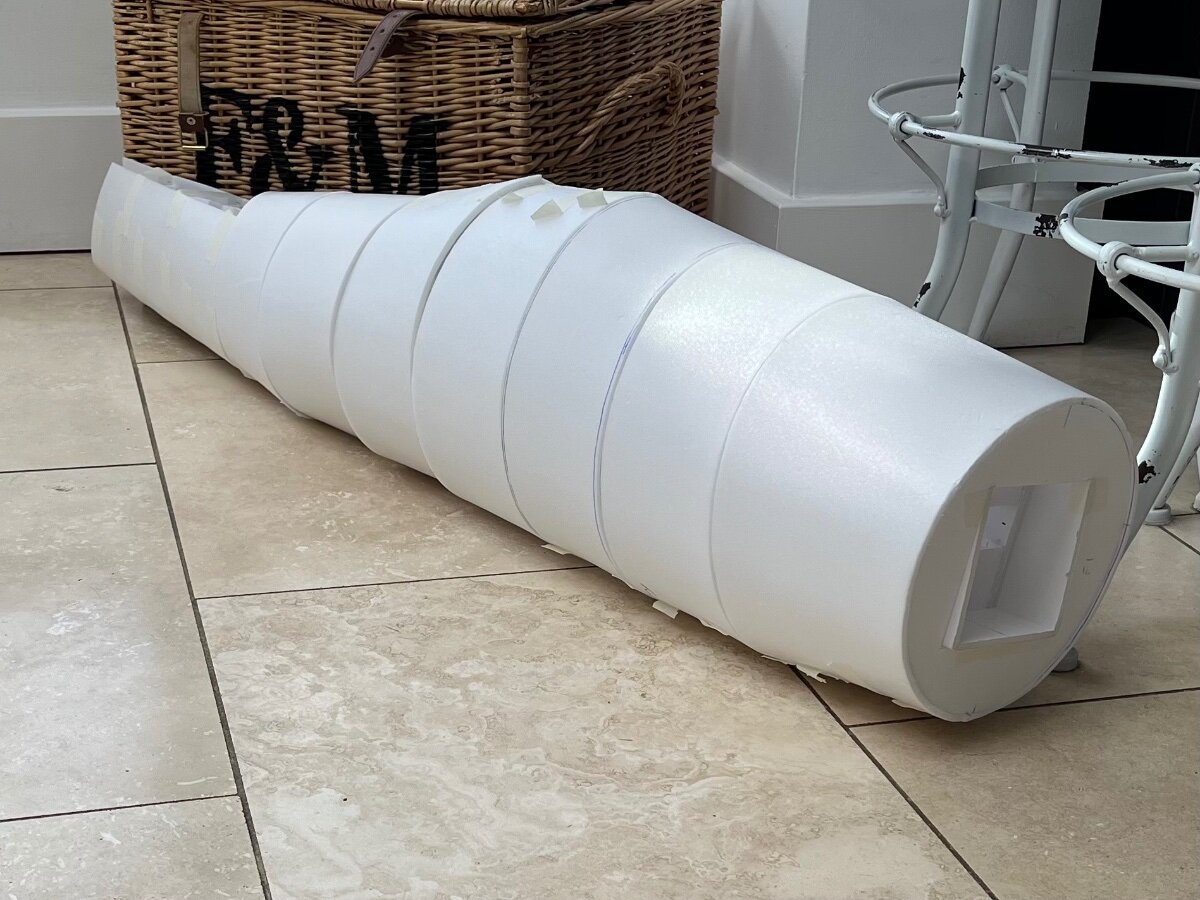
Have finally got back to the Bearcat, and all the fuselage skins are roughly cut out. I will fine tune them to fit more precisely when I glue them in place, but I need to sort out the wing/fuselage fixing method first. It’s looking pretty big, but the motor is huge so I’m not currently worried.
-
3
-
-
22 minutes ago, Flying Squirrel said:
Not sure why but the wings now look like a pair of nora batties tights, been OK up until now and looks OK in the picture but lots of bubbles now?
Mine also has quite a few “wrinkles”. Has only had positive comments at the flying club, and no one has noticed the things I keep seeing! I think yours looks brilliant.
-
28 minutes ago, Flying Squirrel said:
Having not documented the build elswhere I thought I'd share my efforts here, was hoping to maiden today but alas, was not to be..
Love the spinner in particular. Lovely job!
-
1
-
-
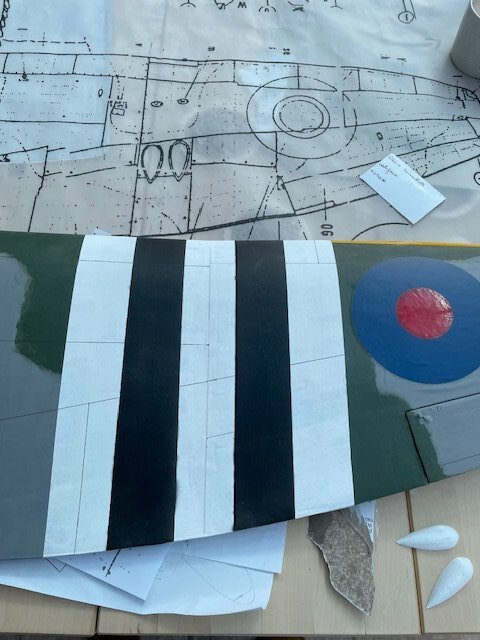
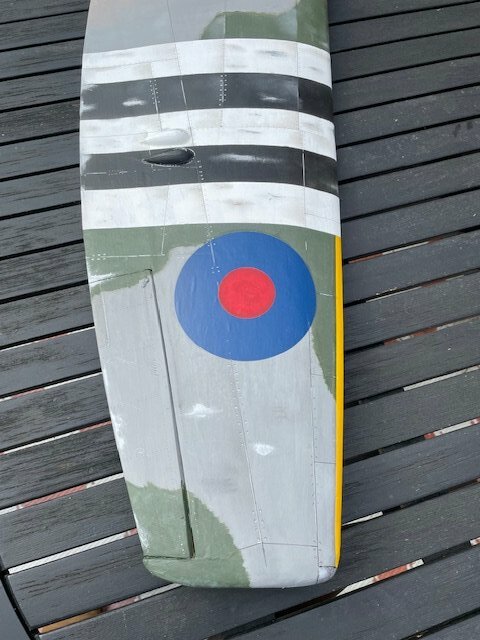
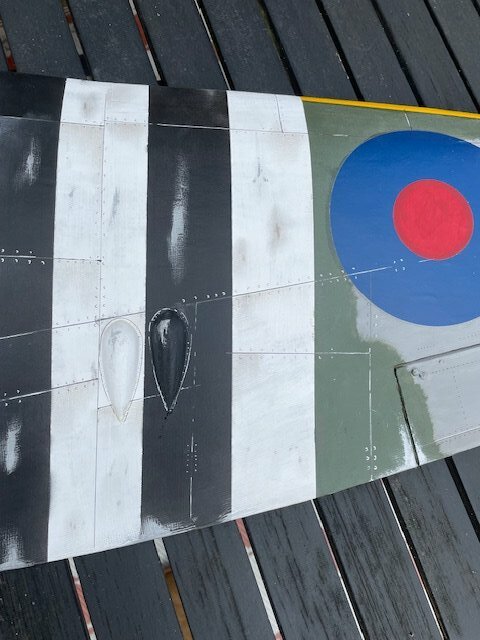
10 minutes ago, RICHARD WILLS said:
Well the wind has come back again , so its back to painting the Tempest .
I quite enjoy this bit as I can do it indoors and its relaxing !
I have some fine indelible black pens . You can buy a whole set of different thickness nibs for about £8 on line . I dont get too hung up on getting the panel lines dead right .
Lets face it , I'm not going to meet anyone who actually built a real Tempest am I ?
So a three view in A4 size downloaded from the web is fine for accuracy . I already have a scale plan as I needed it for the design stage .
I just draw on the main panel lines first in black . Then highlight the lines in some places with a white gel pen (from WH Smiths , about £1.90) .
You can see that I've also added some rivets which I do free hand , but you can use a ruler if it helps . The trick with the rivets is to draw a little black "C" about 3mm high.
They represents the rivet . The other side of the circle can be completed with the white gel pen as if it catches the light . You do need to be consistent though ,as you are telling people the light is on one side or the other, so all of your black "C"s should point the same way .
You don't need to do all the rivets as some would catch your eye and others not . Its very quick to do but to get confident , why not practice on the underside ? If you really cock it up , just paint over it .
I'd like at least some of you to have a go at this kind of finish , so please feel free to ask as many questions as you like .
You can see that Ive also added the rather neat little cannon blisters which cover the breeches of the 20mm Hispano cannons . Mine are 3d printed (thanks Paul ) , but yours will be vac formed as its quicker for us and gives you a smoother finish . I gorilla glued them on , but painted them first .
In the next post I'm going to go into a little more detail about the weathering .
You can also see that Ive corrected the red part of my roundel . Your decals will be the as shown with the correct larger red portion .
I had stopped adding any more weathering on my FW190, but you’ve inspired me to try doing some rivets. I’ll have a go next week - fingers crossed! As you say, I can always paint over if I mess it up. Come to think of it, the bottom of the wing will need painting anyway once the retracts modification is ready to go, so nothing to lose there!
-
2
-
-
Final piece of the jigsaw on this build - I decided to gather my thoughts in a video review. Not done one of these before, and there was a lot of annoying background wind noise, but production values aside it's an accurate reflection of my thoughts about the kit - its' design, the build experience and of course how it performs in the air. It's quite long, so if you just want the highlights - I think it nailed the brief almost perfectly. I'm impressed!
-
9
-
1
-
-
Finally got some video of the FW190 flying in a "finished" state - paint and decals all done, canopy fitted etc. It was very gusty so not ideal conditions but I'm getting comfortable with the plane so the wind wasn't a major problem, except for the wind noise on the camera phone. Resolution isn't brilliant but it's proof of flight at least!
-
6
-


Spring is here again - who's been flying?
in Flying Field Reports and Chat
Posted
Well this afternoon I enjoyed the glorious weather flying this little aerobatics hack. It’s made from stuff I found in the shed and wasn’t even “designed” as such, but it’s the most fun to fly plane I own. Go figure.