


Nigel Sharp
-
Posts
227 -
Joined
-
Days Won
1
Content Type
Profiles
Forums
Blogs
Gallery
Calendar
Downloads
Posts posted by Nigel Sharp
-
-
Chris,
Use some fumed silica to make the epoxy thixotropic next time. (makes it thicker like gel coat), Add micro balloons to make it lighter mix the epoxy and hardner before adding the microballoons and silica to ensure you get it activated. I use 1 teaspoon silica, 3 teaspoons of microballoons to 13mls of mixed epoxy.
You won't get sag if you use the silica. Here is a link to a UK supplier that I use (https://www.easycomposites.co.uk/fumed-silica-thixotropic-powder) I'm sure there will be other suppliers in Europe/UK.
Consistency becomes like that lightweight filler you can get for home e.g. fluffy/thick whipped cream.
Nigel
-
 3
3
-
-
I just print them my self from Adobe Acrobat Reader (the free version)
when printing check the poster option, scale 100% and cut marks....
Then its just a bit of time to cut edges to overlap and bit of paper glue....

-
I can endorse a Wayfarer (https://outerzone.co.uk/plan_details.asp?ID=5908)
and had I known about this its younger sibling Acrostar (https://outerzone.co.uk/plan_details.asp?ID=6256) being almost identical...
both on outer zone.
There is a slightly modified suppliment to the Acrostar called AcroFury (https://outerzone.co.uk/plan_details.asp?ID=6242).
All are standard balsa / spruce /ply straightforward construction. Ply Cabane struts and Rubber bands for Wayfarer and Bentwire plus nylon bolts for Acrostar/AcroFury.
This was built last year on returning to aeromodelling due to pandemic furlough free time ?
Mine is a very nice flyer on 4S and 650-700 watts - 8 mins of conmfortable clubman aerobatics. Knife edge, Loops, Bunt's, Vertical Eight's indefinate inverted flight etc...
Walking pace landings what's not to like.
Just make sure you use sufficent "Rubber bands" to hold the top wing! My first few flights were interesting until the penny dropped... became a very very nice predicable machine exactly as described in the RCM article (plus make sure you build with 1/4 medium solid sheet tail as recommended by the original designer as a revision in a Svenson kit review also available on outer zone).
Balsa/Ply, wheels, Wire etc cost me about £120 from Balsa cabin.
-
1
-
 2
2
-
-
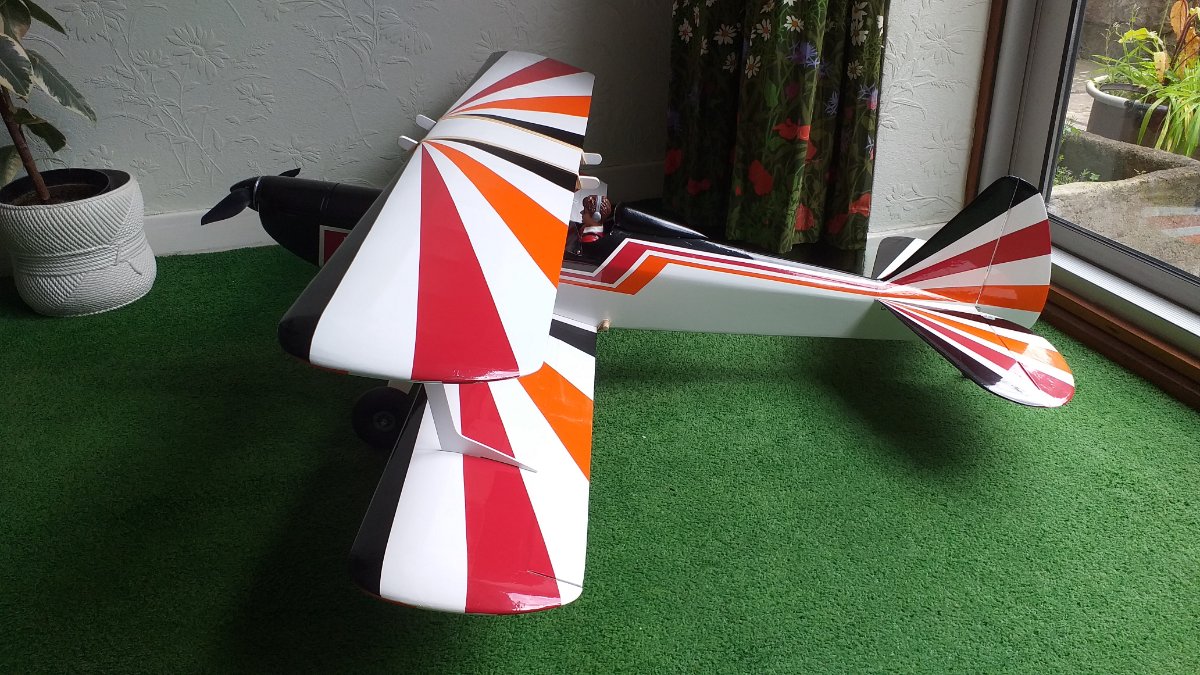
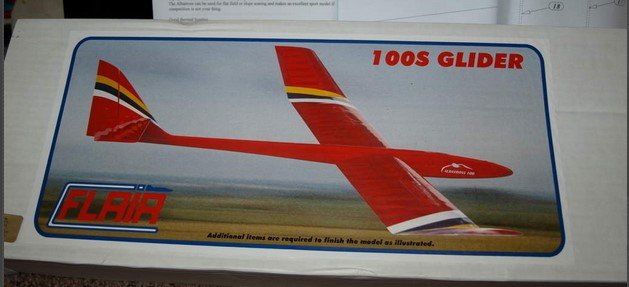
I think that is possibly a Flair Albatross 100S modified for a fixed tail standard elevators or possibly then a self build copy... Certainly it was my first thought when seeing the picture. I have one... Two 8 gauge steel wing joiners but All moving tail.
2500mm = 98.42"
-
David,
You can print off a copy from Outerzone https://outerzone.co.uk/search/results.asp?keyword=radio+queen
use the free version of "Adobe Reader" to view and print. When printing choose poster print from the options ans also make sure you pick the tick box for cut markers. Then using pritt stick or similar paper glue trim and stick those pages together.
Bonus is you can also use the "SnapShot" function of adobe to print sections of the plan e.g. formers/ribs to stick on to wood for cutting.
I have found it a boon since I came back after a long(ish) layoff from aeromodelling.
N
-
1
-
-
Same here ... sauce, sand, high-build, wet dry, u/coat, wet dry, u/coat, wet dry, talc spot fill. Wet dry sheesh.
And mine isn't scale just an old pattern design. Got four colours to mask and spray yet and now the winds come round from the north it's gone all cold not good for out door spraying!
Had to take some days off monotonous - and ridiculous effort compared to film.... but it is this prep that makes the difference at the end.
No seems in film or wrinkles in the sun.
Each bit done is one bit nearer and a journey of 10,000 miles starts with the first step.
Keep the faith!
-
2
-
-
You could buy a 1 1/2 litre "7up" bottle they are green. Should be able to flatten it after being stuck to the frame with a little heat from a hairdryer.
Might be worth a try.
-
1
-
1
-
-
Very nice indeed.
-
1
-
-
At my fathers I was looking through an old book from the 1940's (Odhams Railways, Ships and Aeroplanes) and on the second page of the Aeroplanes section are two photo's of an Army Auster doing it's business (scanned here for your pleasure). If the photo's have not been superimposed (I am looking at the shadow and elevator position in shot 2 which are dubious ) its pilot has quite impressive flying skill or a death wish.
Fancy doing this as a "Scale" manoever at a contest? Here is the photographic evidence.
As a youngser I used to pour over that book looking at all the illustrations of Steam engines, Ships and Aeroplanes. There is a picture of a Quantas DH86 airliner and plenty of shorts flying boats all very period even the "new" jet gets a mention. It has that lovely old book aroma too :-).
-
1
-
1
-
-
I like that - you can see why they were called Kite's
-
I can't take credit for the sauce I got it from here ? but it does work nicely.
-
Filleted and smoothed since the week end.
Re-masked and as the early evening today was light and dry the High Build primer applied to the fuselage.
There are some obligatory blemishes that require some remedial work and touch up surface filler but on the whole good progress has been made. Adding the primer uncovers those hidden in the grain sub optimal snags. Wont be ready for release from lockdown there is still a lot of work to do but early spring is still looking promising.

-
2
-
-
Phil
A very impressive build an example in fine detail ... something I aspire to.
Dirk's Fouga Master and Chris McG are others I've been watching since I came back to aeromodelling last year in the enforced lockdown and a life re-set.
There are some very fine craftsmen on here.
There was another picture on https://www.thisdayinaviation.com/tag/north-american-aviation-f-86d-sabre/
Nigel
-
1
-
-
Great Build(s)...lots of skill on display in all the various mass builds.
It looks like the F86D has a single light just in front of the nose gear.
-
2
-
-
Thanks for the comments.
Had to resist further attempts at smoothing the epoxy this was done before lunch but is still not quite fully hard. Tomorrow it will sand down nicely ? so the rest of the afternoon was spent rubbing the highbuild applied yesterday back off the wing, control surfaces and cowling. I packed in at about 5 and I'm sat here feeling quite exhaused.
Starting to think hard about the colour scheme to apply.
I am torn between the Game Bird style (swap green for Red) I have a Green CCM Hypnosis and that disappears against a blue sky! Or the original Terry Westrop Red/White. Except it would be black red orange and white as that is bright and contrasts well with the sky.
-
-
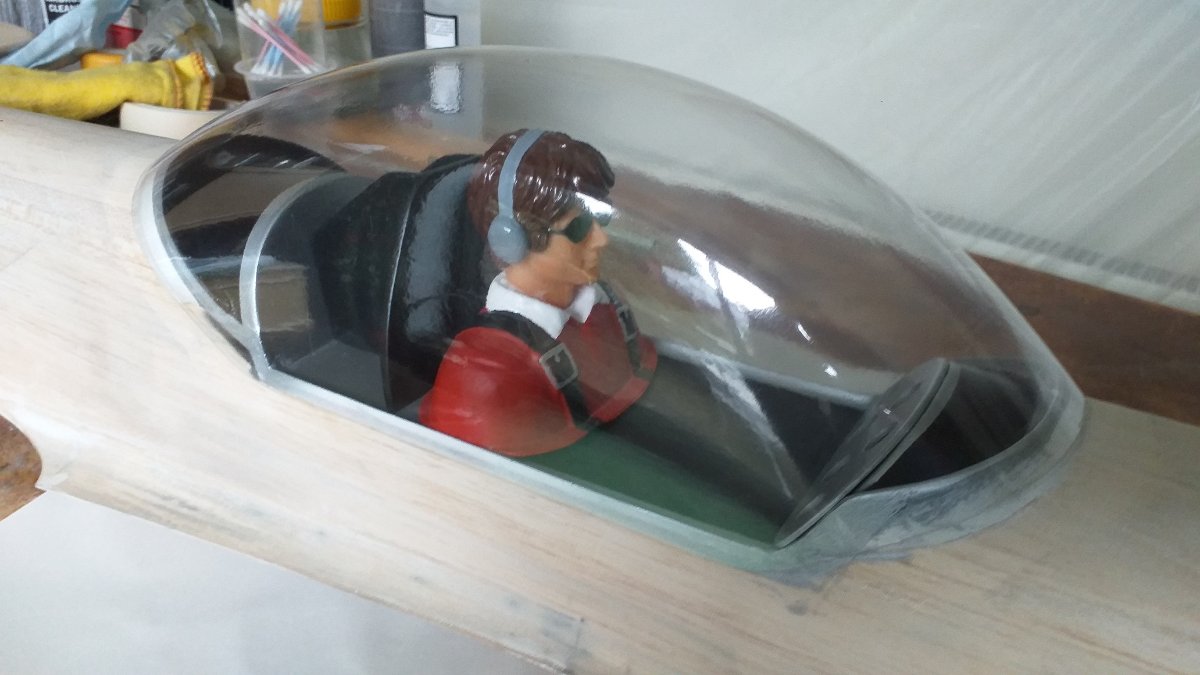
Had a bit of fun during the week getting to grips with an airbrush... got around to painting the inside of the "Bubble" its just too big and a focal point not to do something.
As this is an aerobat I've given it a bit of a sudo instrument panel.
The last dry fit and look before it was all covered with tape and epoxy/micro balloons.
Masked up to protect, and to help line up with the surround.
Lightly roughed on the inside to key...
Fixed to the fuselage tomorrow will see the copious and large micro balloon fillets added but I limited myself to keeping the bonding simple tonight.
Good progress today - up here in West Yorkshire its been warm and sunny for the most part hence a nice day for a bit of paint applied outside in the garden. Elevator(s), rudder ailerons and wing given highbuild primer most of which will be labouriously wet/dried back off ?.
All ahead full after a few weeks of doldrums wading in treacle.
-
Looks great.
-
1
-
-
This company does all sorts of spares just search your dremel model number.
-
Ooo it will fly faster now ?. Good solution
-
 1
1
-
-
It was in Chris Mcg6969 Bella Ballerina build log here page 35.
But I made mine from Ronseal "Diamond Hard" clear acrylic varnish, Polyfiller "Advanced" light weight filler, Talcum powder ( cheap supermarket stuff) and a drop of white acrylic paint to be able to see where I'd brushed.
Basically "Heaped Teaspoon" of the lightweight filler, slightly more talc, Mixed with the Ronseal and the paint. Add water until it is like single cream. I mixed about 50 ml by the time I had thiined it to the cream consitancy and that easily did the wings with quite a lot to spare. - Acouple of days later I mixed a second lot to do the fus/tail again lots left over.
Then its simply a case of brushing on, wait a couple of hours and sand it all off ? leaving the fine talc/filler in the weave. Sands down very easily.
-
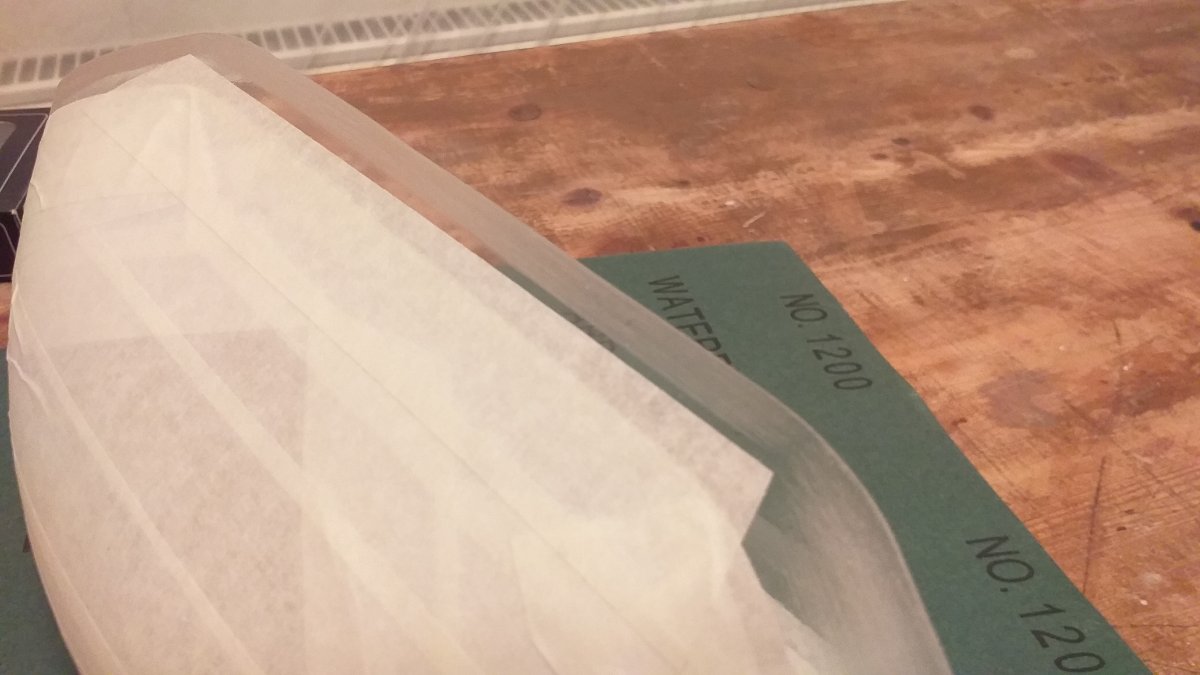
That was a lot more work than I anticipated... but the glassing is now complete and the surfaces are silky-smooth curtesy of "Freddy B's sauce" and ready for primer.
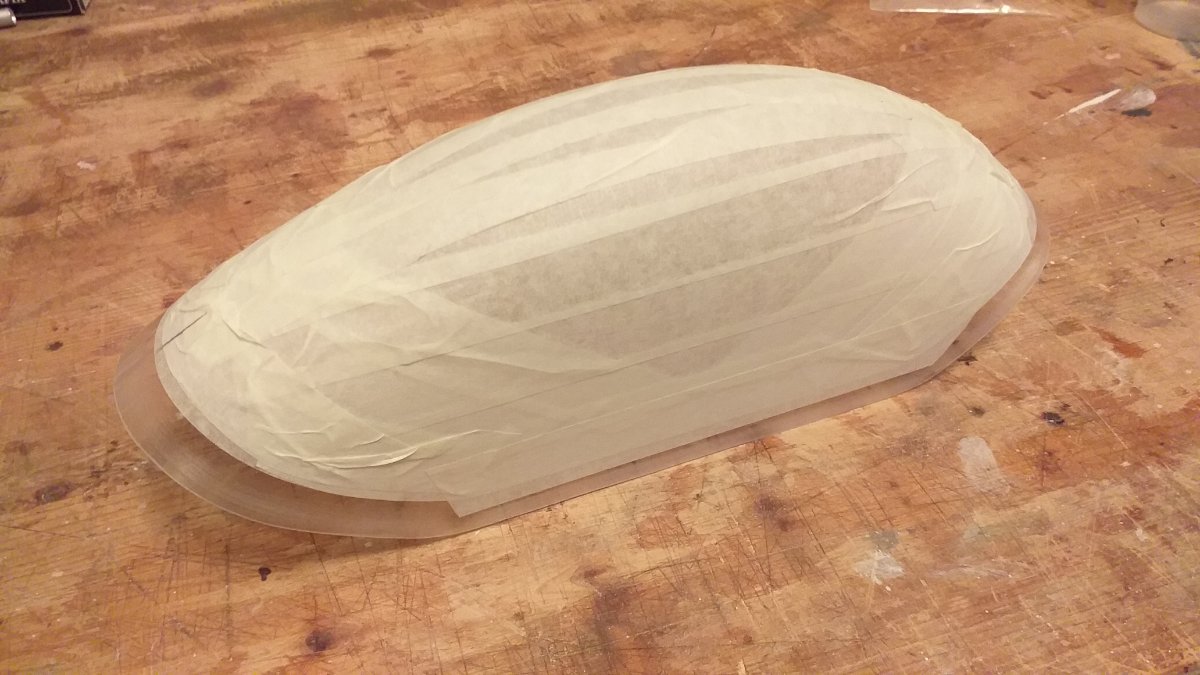
I took the trouble to re do the canopy as I wasn't entirely happy with the first one. It took me four goes! You can just see one of the failed ones to the left of the picture. I'd been experimenting with some upstands to help align the pet-g plastic but they turned out more of a hinderance. One of the positives of the failures was that it gave me one to use to build an epoxy and micro-balloons internal fillet that will help to hide the glue line when the actual one gets fitted. Was hoping to have that done today but I didn't get around to painting the cockpit.
Got a nice new airbrush and compressor but had to wait for paint to arrive -now I've got some learning to do...
-
1
-
-
I'm asking if it is possible to adjust your displayed name like you could in the old forum. When I look at the edit profile you can change just about everything else so why not this?
I'm not super fussy about having my name different but it would be nice to be able to use a nickname as that helps with restricting identity theft.
-
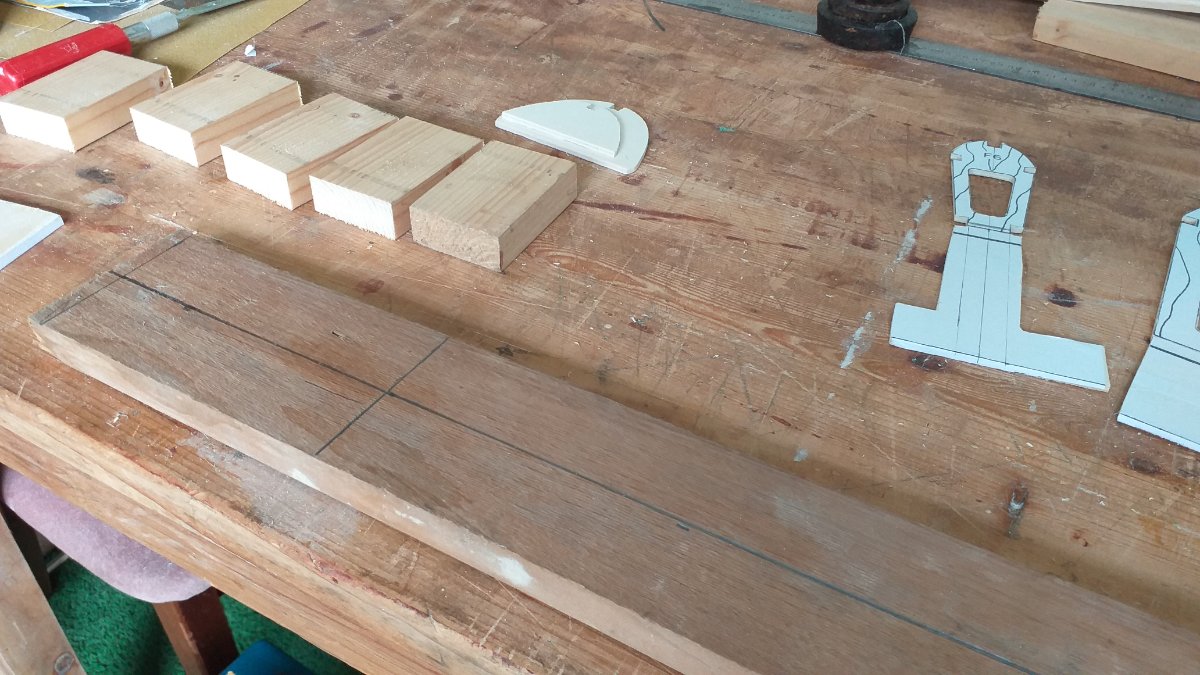
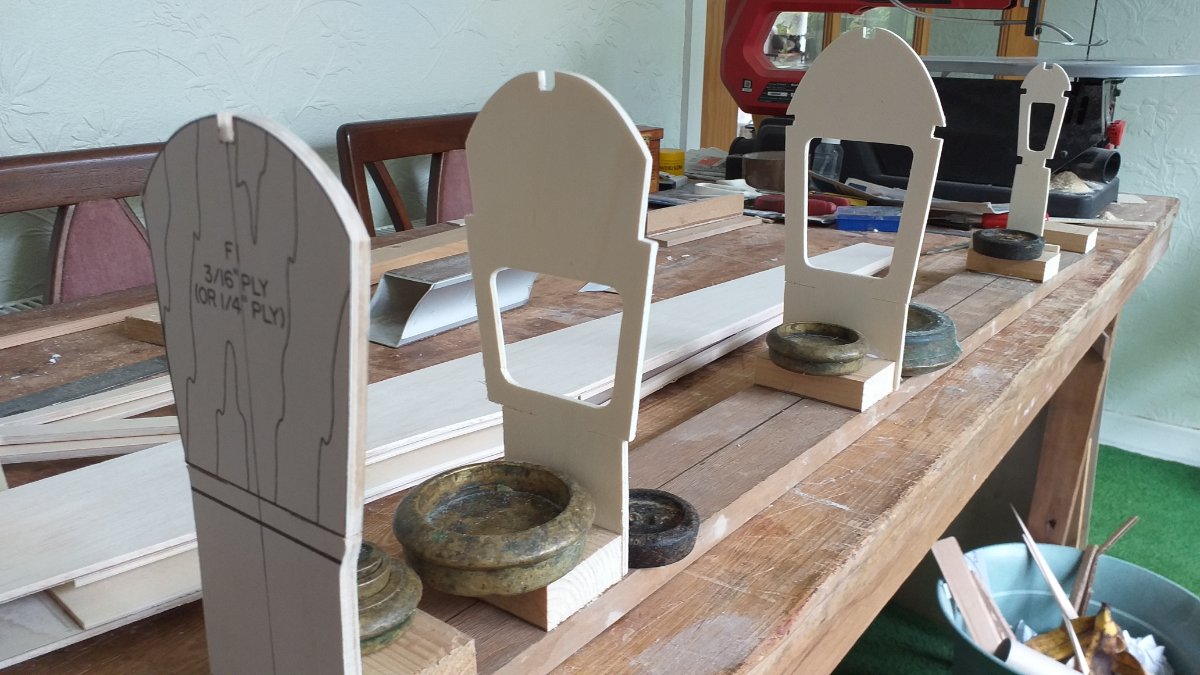
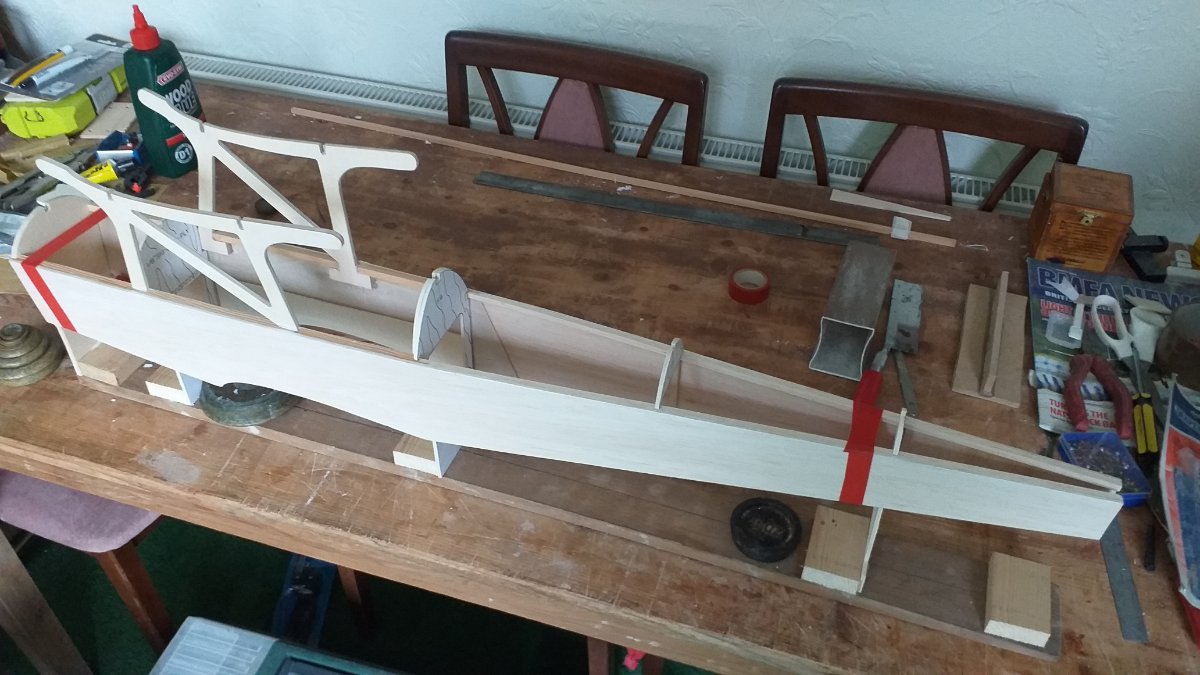
I like a good fixture/jig but I also like simple.
Mk1 bit of wood, pencil line and extended formers and electrical insulation tape colours various for clamping ?
-
1
-


.jpg.29a51da8ca06ef753ef7e9fa4e754a15.jpg)


Loaded Dice 66" 1991
in Classic Aerobat Build Blogs
Posted
Bank Holiday weekend and rain stopped play... its an ill wind!
The good thing about rain is you need to do something else instead of going flying ?
The Dice has been on a hiatus as April has been excellent for flying and not so for building and I sometines just can't face doing building after work.
Anyway here is a little update after a pleasent day making/masking the lines for the colour coats. As you can see it's getting a nod to the "Terry Westrop" schemeal be it a little simpler.
Just need a few sunny evenings now to add those last coats I feel the build mojo returning.