


Richard Harris
-
Posts
4,686 -
Joined
-
Last visited
-
Days Won
2
Content Type
Profiles
Forums
Blogs
Gallery
Calendar
Downloads
Posts posted by Richard Harris
-
-
13 minutes ago, Rich Griff said:
I think quite a few of us are eagerly awaiting the plans and article on these two models that fly well from a slope etc..
For myself smaller models are a better option these days but I still have a few larger ones...
Rich,
Encouraging to hear, thanks.
I'm no sloper so it will be a personal learning curve to see how it is modified and performs in more capable hillside hands.
-
9 hours ago, Steve Adams said:
Is both versions ie canard and delta Shifty to be published together Rich?
They both look brilliant 👏 👌 😎👍
Thanks Steve,
Yes, the plan and article incorporates both examples.
Looking forward to seeing yours finished Steve.
-
 1
1
-
-
Chris,
I did notice the arc was different on the top half of your fuselage, best place to have any extra mass I guess.
Regarding the fuselage, I've been half tempted to draw up a full bodied version as I think it would look quite good. It would go against the ethos of the Gyroo so maybe a complete new model would be on the cards for a future project.
Rich
-
Looking good Chris,
On both of the flying models we have added ballast nose weight. Steve's more so than mine which is probably down to his tail plane holder being made from birch ply rather than lite.
The plan will be altered to take this into consideration with either a marked area or ballast box to add lead.
We have both had to move our motors upwards a tad to which they are pretty much identical, with Steve's he had to get out the scalpel to cut his mast fairing to be able to achieve this. On reflection I would stick with the plan motor mount and mast whilst trimming and setting up, then pretty things up after.
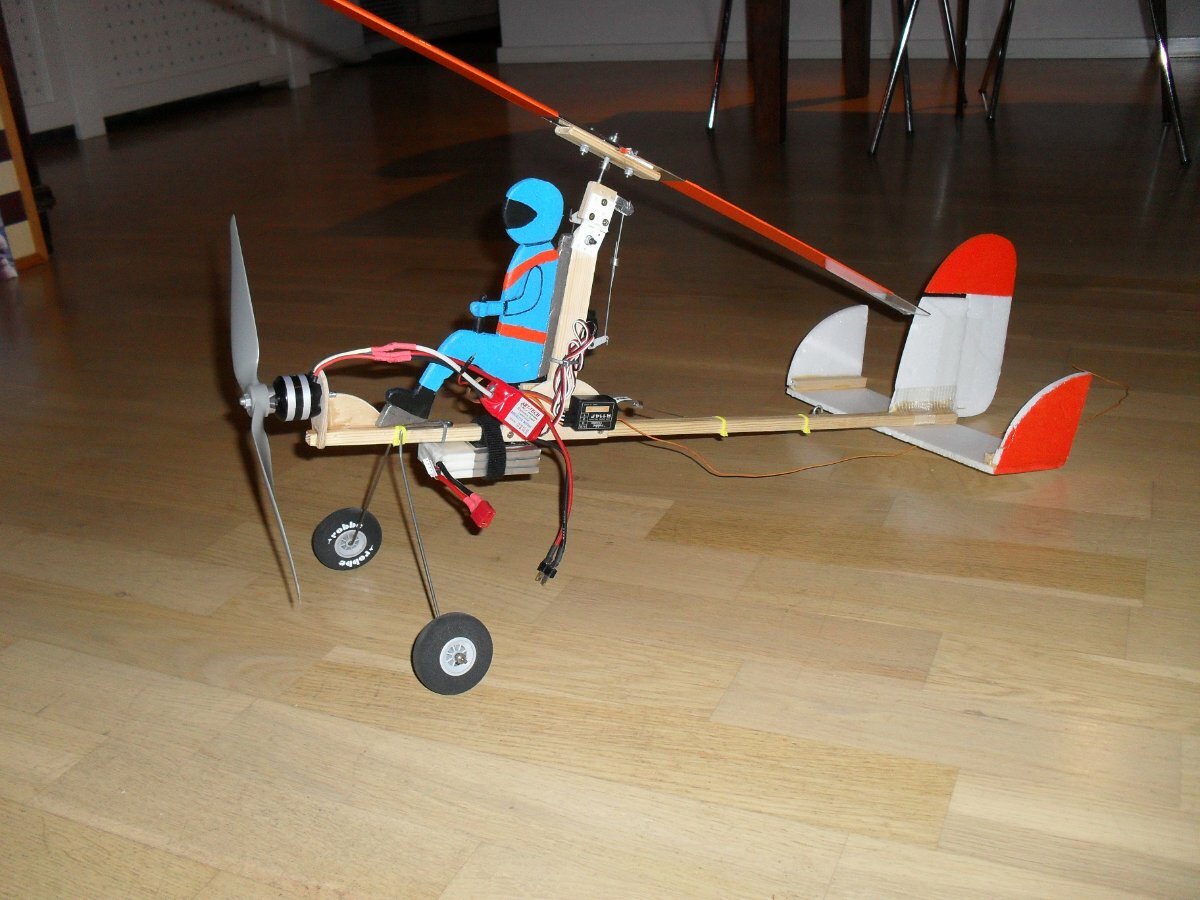
Nice 3d printed blades by the way, I would go for the longer 560mm length as the best replicates what we are using up this end of the world. You will find that the extra lift/drag along with the generous tail plane area will dampen out a high motor thrust line, I will take a photo of mine hanging to give you a good idea when I get chance.
Both flying models are very predictable, the transition in airspeed as you throttle up takes a little longer with the 8" prop is very smooth which will be perfect for the first time pusheroo.
Keep us updated of your progress please?
Rich
-
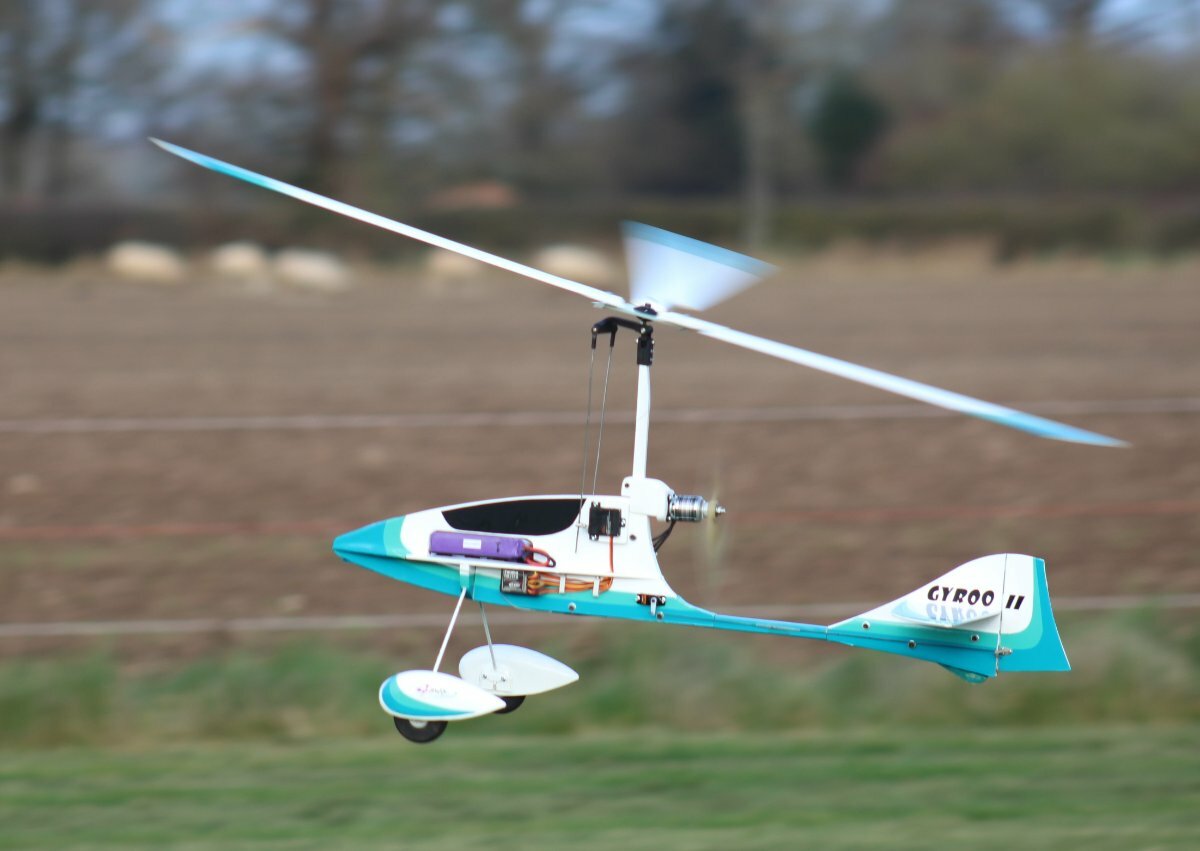
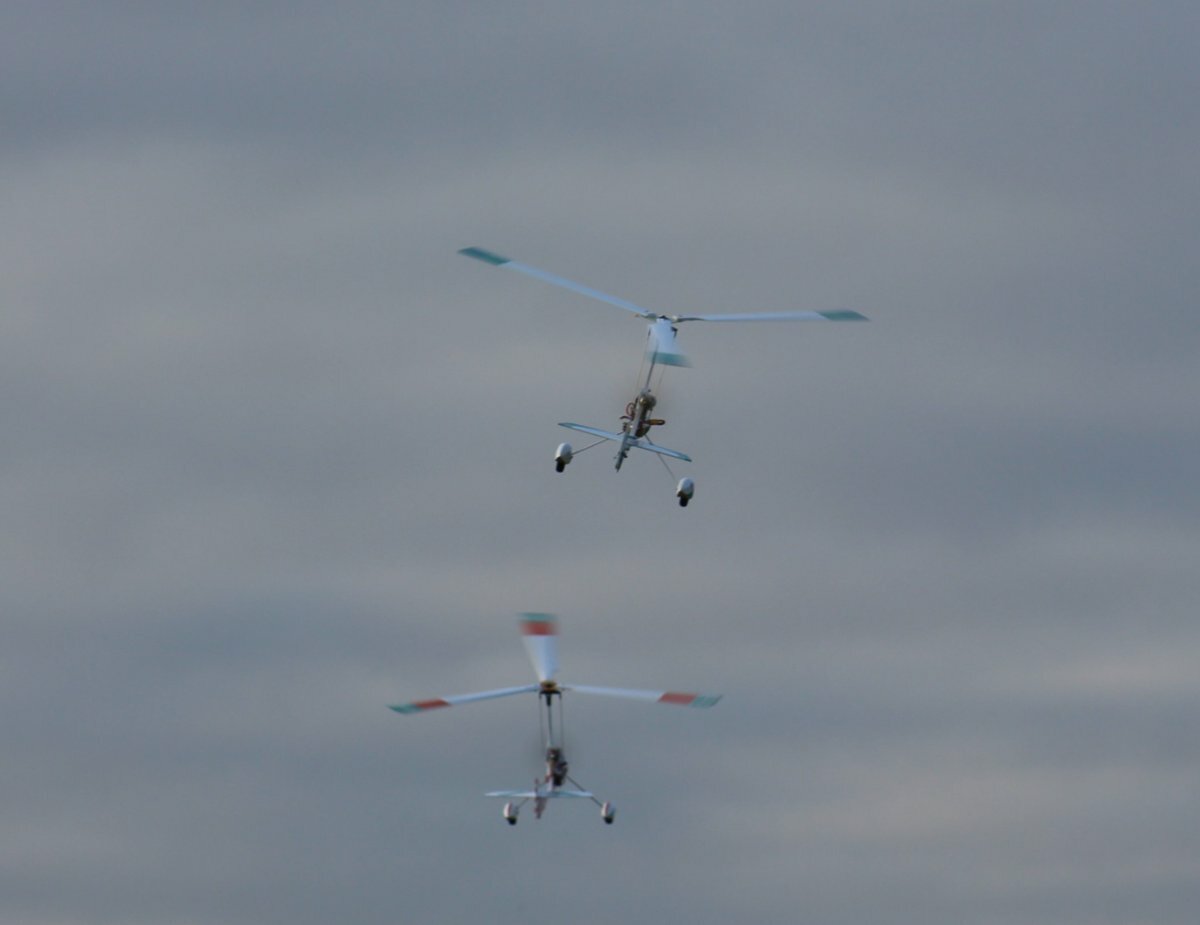
Here's some snippets of video taken yesterday of both finished Gyroo II's flying. There's also a bit of syncro flying, not an easy thing to do.
Hopefully in the next few weeks we will have a few more nearing completion.
-
5
-
-
A few photos I took today of Steve's Gyroo II on its maiden voyage, after a few adjustments it was flying like is was on rails. His model was then set up on a mode 2 transmitter for Rich E to have a go with to which the pair undertook a bit of formation flying with the pair.
Video will follow once I have had chance to look through them.
Well done Steve, a stirling job

-
4
-
-
7 hours ago, Paul De Tourtoulon said:
A long time ago, I used fishing rod line guides on my closed loop controls.

I will be borrowing that idea Paul, thanks for sharing 👍
-
Excellent job Steve, as always 😎, you will have no problems with seeing that. Good luck with the maiden 😅
Chris,
The motor mount is made to the same drawing I sent you and is the final revision....for now 🙄
-
I'm sure the powers to be are on it. just a minor glitch in the matrix.
-
Not sure whats going on but I keep getting a pop up box appear, strange.
Anyway, I got out again today for my first fly of the year.
The new motor mount is now fitted, had to move the motor up a tad as it was pitching up a bit under power.
There was virtually no wind so I could confidently fly it at close quarters once trimmed.
The flight was a good 8 mins long according to my unedited footage which is encouraging. There was about about 30% left in the battery, that's with me flying it in an autogyro fashion and not like a pylon racer.
It's pretty much dialled in now so time for me to sit back and see if the Beta testers models reflect the same excellent flying qualities of mine.
Here is today's vid, enjoy.
Rich
-
2
-
-
Chris,
It is something I've not experimented with much, when I have I needed quite a lot of side thrust to compensate the yaw effect generated and it looked a bit daft if I'm honest.
That said, this was with lower KV motors swinging larger diameter low pitch props with a shorter tail to CG moment arm.
If you do try it let me know how it works out? the beauty of you experienced beta builders are you always throw in excellent ideas. It's no problem for me to change things to the plan at this stage so I am all ears, simpler the better in my eyes.
Piers,
Yes, that how I have always understood it, there are several ways to overcome the propwash effect.
Offsetting the motor is the easiest way of getting around this as it keeps the thrustline square on through all of the power range (this helps when the rotors are off loaded with reduced airspeed).
You can also add a variable rudder trim mixed with throttle, Micromold tried to get around it by shaping the fin/ rudder into a flat bottomed aerofoil.
-
Well done gents, always good to know bits fit together OK and it wasn't a fluke!
There will be a certain Australian Gyronut joining us also all being well.
Just the motor mount to get to you, on the 5th Revision!
-
Vince from Malta posted a photo today over on FB , he's had 4 successful flights with his Gyroo this morning and is deservedly pleased.. His clubmate Ruben has been assisting in his autogyro journey. Weather looks a little better over there!
Thought it was worthy of sharing here.
-
On 22/12/2023 at 21:54, Futura57 said:
Oh, and XPS foam sands well and without producing hundreds of statically charged balls.
Futura, thanks for the info.
Might give it a try in the New Year.
-
Merry Christmas folks.
-
2
-
-
That's coming together nicely Futura57, look forward to seeing it completed. How does the foam your using compare to depron?
-
On 19/12/2023 at 16:10, GyroJ said:
Thanks very much for your reply. Something similar to the Revolver would be perfect.
If you look through the autogyro section there are several tractor design threads, most are supported with plans via Sarik hobbies.
There is also a simple tractor model designed by the late Tom Wright, if you follow his instructions you won't need a plan, it's called the Cranfly and flies really well.
There are also several plans available at www.coolwind.co.uk
-
On 15/12/2023 at 16:37, Outrunner said:
Well done Richard, your pusher Gyroo looks really nice 👍
RCM&E plan next year?
Thank you.
It would be wrong for me not to share the Gyroo II as it flies so well, so yes I will submit it.
Next thing to do is redesign and make a new motor mount now I know the thrust offset position, then get out again and test.
Just a case of tidying the drawings up and passing them on to the ready and waiting 'nuts' to confirm fits and CG position etc.
I'm sure they will post their efforts as they get going.
-
3
-
-
Cheers gents,
Here's the vid, sorry for waffling on and the poor light conditions.
-
9
-
-
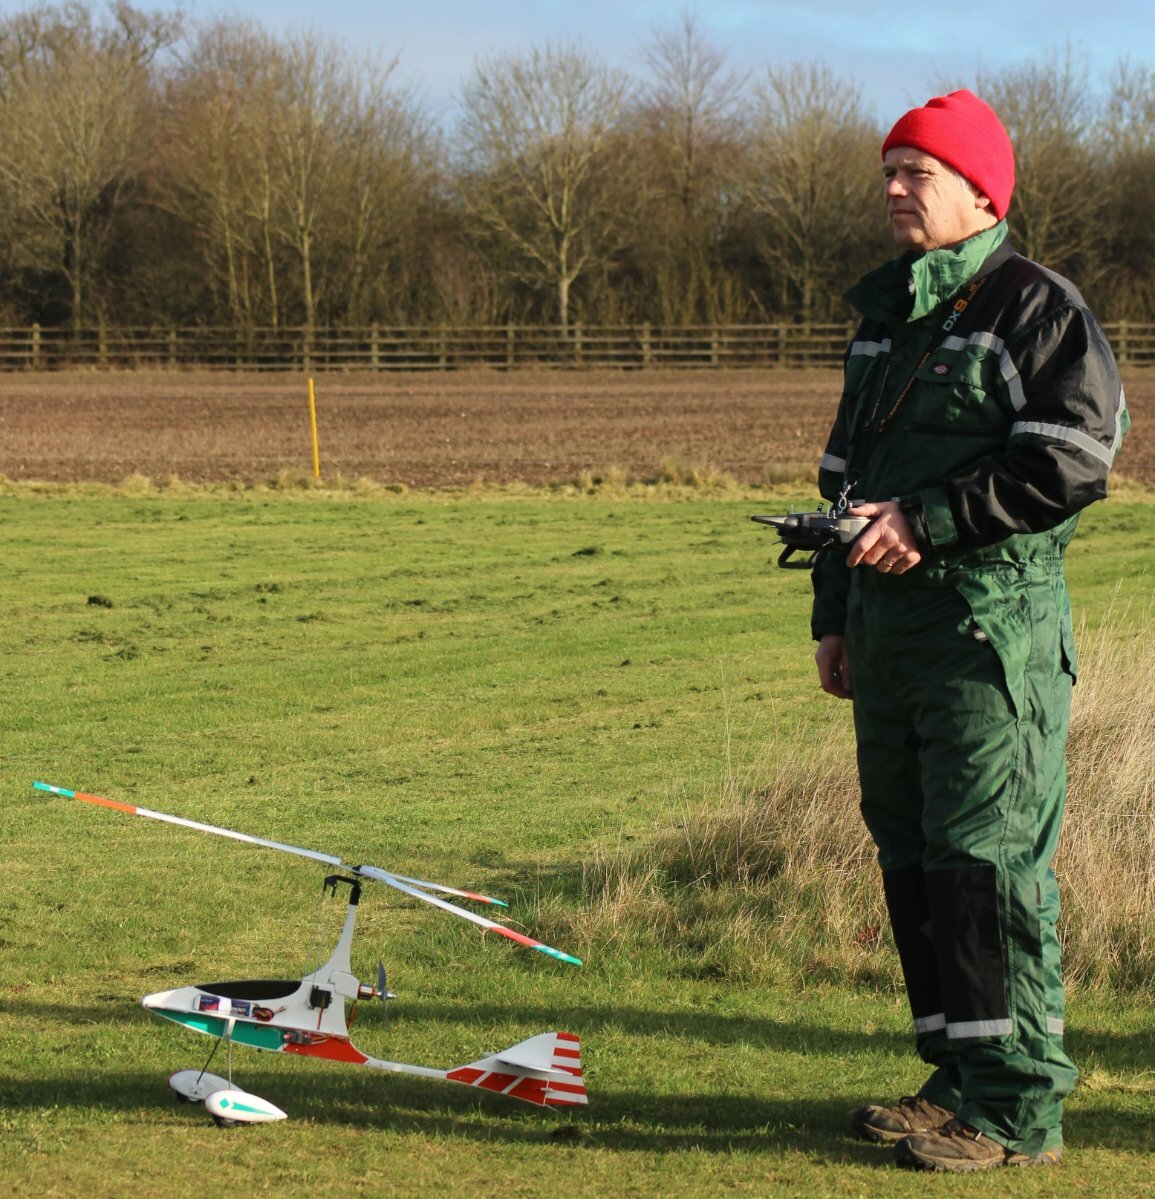
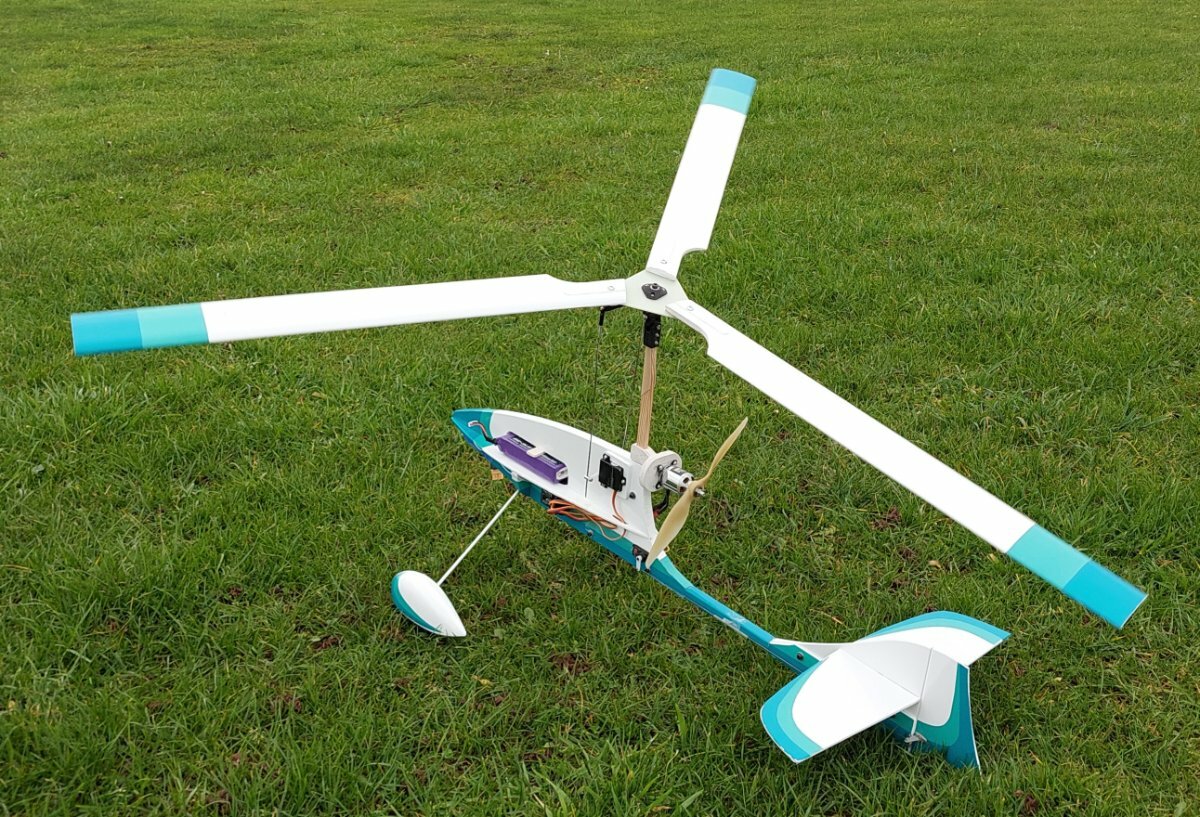
Managed to get the Gyroo II flight ready, as the weather was calm today I went up to the patch and maidened it.
It made several small trimmingbhops before committing to one circuit to get a feel of things. A little bit of lead was added to the nose as a temporary gesture, I will cut the battery appature out a bit to move the battery forwards so it can be removed.
It's probably the most hassle free maiden I've ever had, couple of clicks of left trim and five of down and it was almost flying hands free.
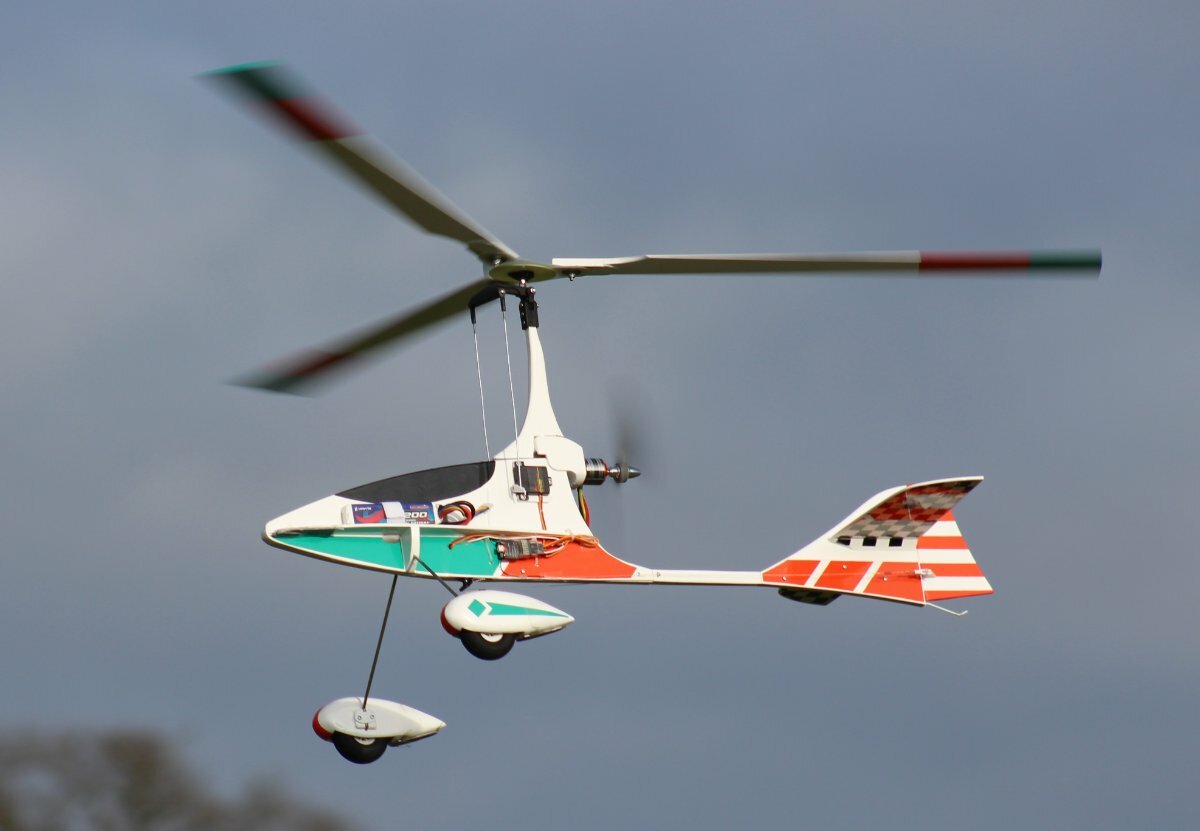
The tail dragged configuration works fine despite the higher thurst line and there seems to be plenty of power though not to the same extent as the tractor.
I've only had one full flight but I'd say it's even easier than the Gyroo to fly, possibly something to do with the smaller prop.
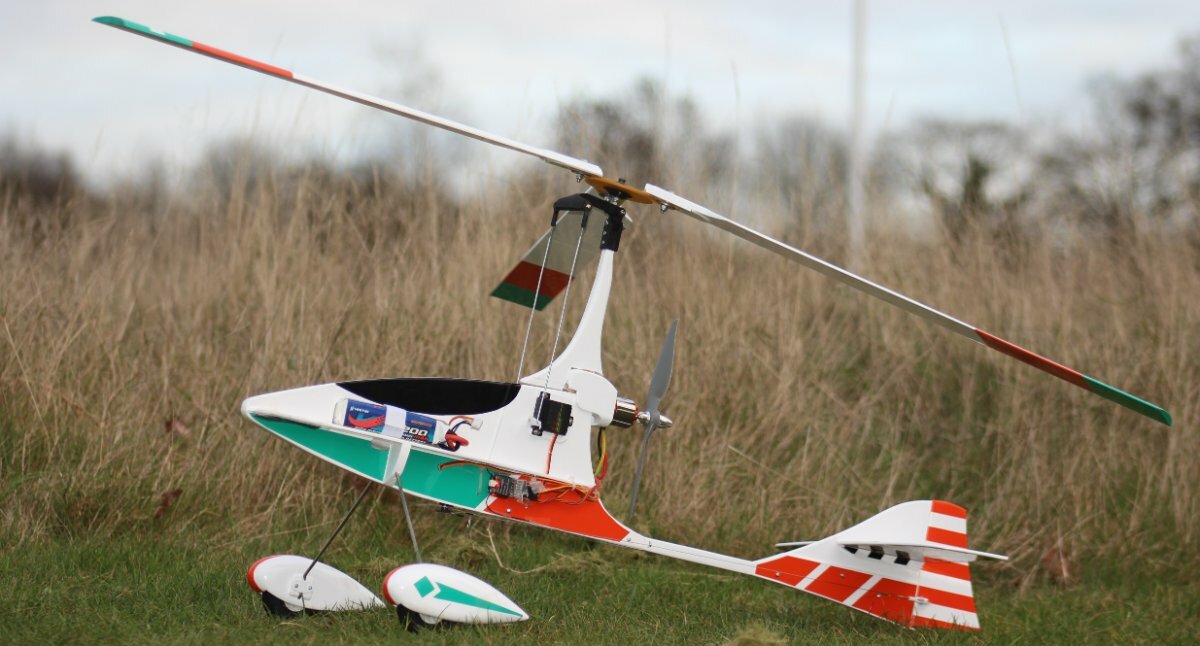
A few snaps before it took to the air and some of it flight ( these are just snap shots from the video)
I will make the necessary amendments and try again on a brighter day, I'm pretty chuffed.
Video will follow.
-
3
-
-
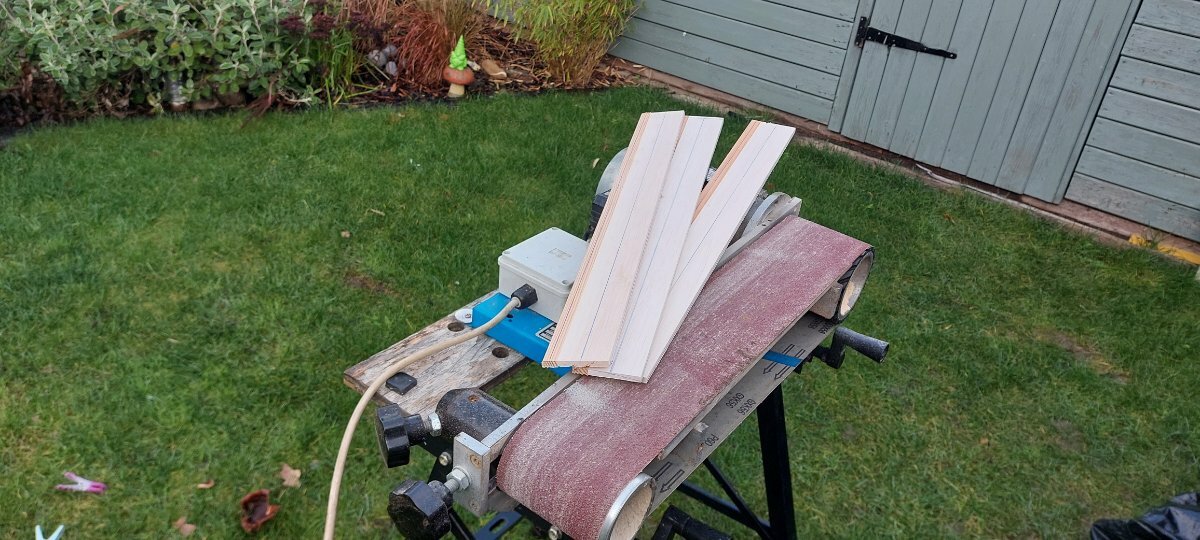
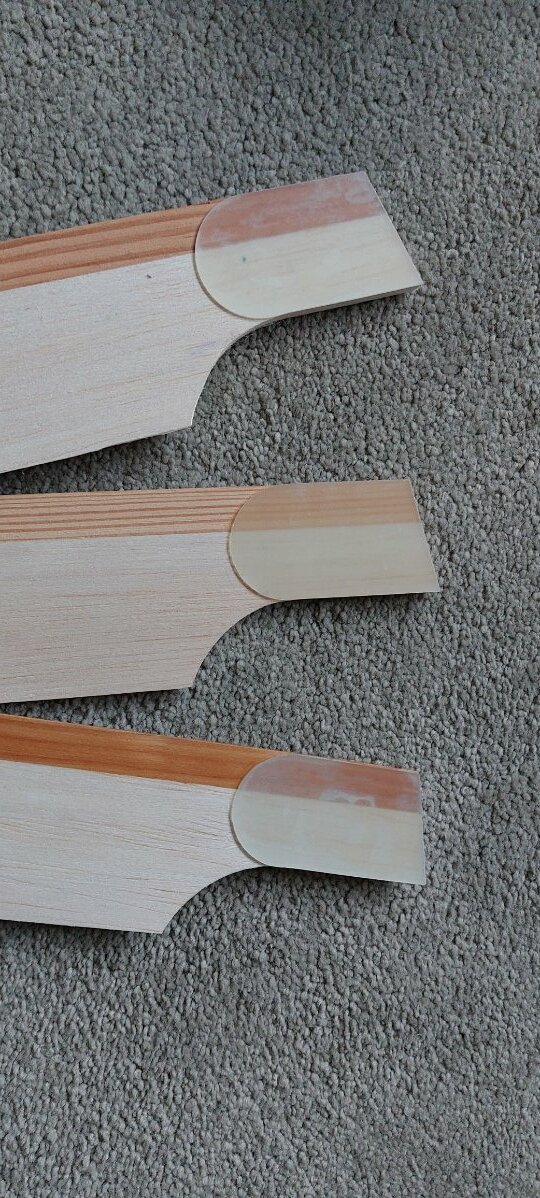
Had a break in the weather this morning so moved my modified belt sander outside to profile my blade blanks.
I've stretched this sander long enough to sand my standard blades in one length and had some abrasive belts made up to suit, seems to work quite well.
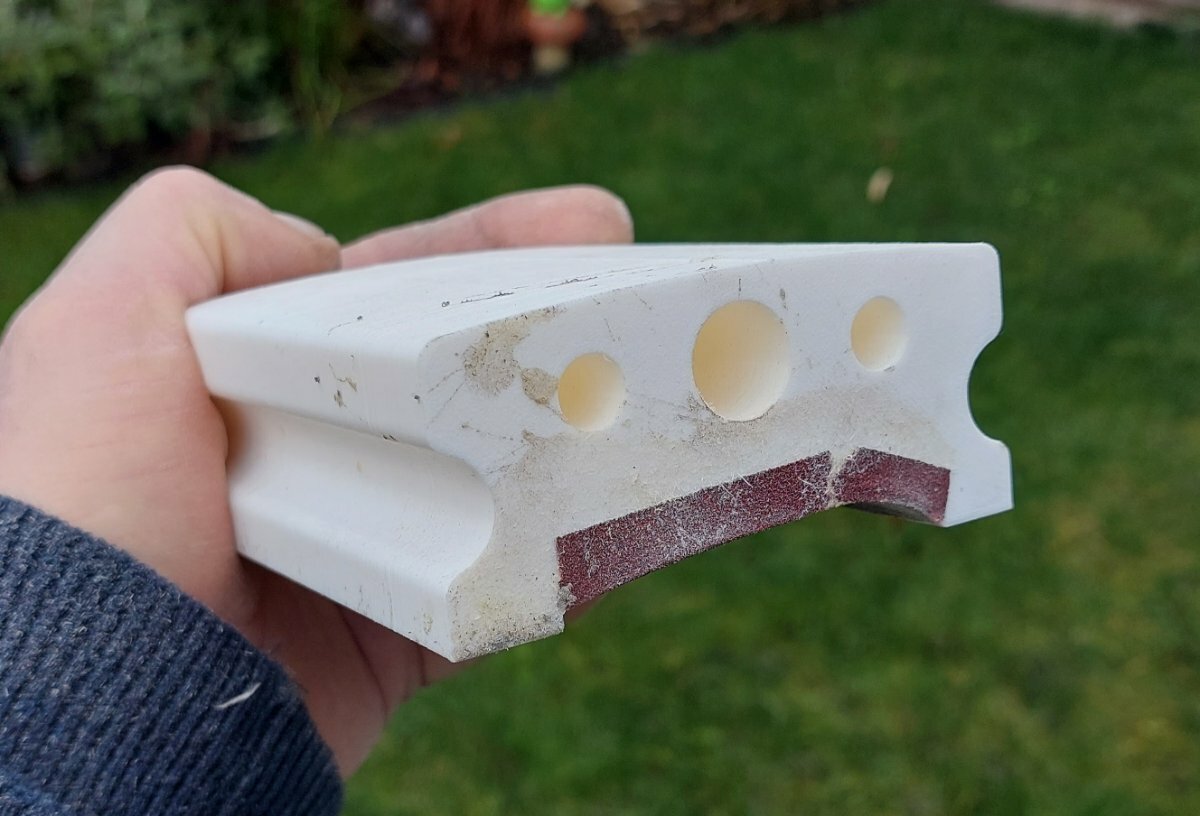
As I always do I start by removing wedges, then roughly sand the aerfoil.
These are then finished by using 3D printed profiling blocks differing in size with sandpaper attached.
The profile is modified slightly to that of the Gyroo, I'm hoping they will require no negative shim. The blade sizes are identical but these use a larger spruce LE, there's valid reasoning for this.
I've gone with the cnc routed fibreglass rienforcers from coolwind for this set, makes life easier.
Each blade has been weighed, one was slightly lighter so Ive added pva to match the rest (no2 blade), they all weigh 45g now. Mount holes have been drilled so it's just a quick balance up then get on with their covering.
Then it's on to final assembly, motor positioning and thurst alignment setting up.
If all goes well there looks like there's high pressure heading this way so I may push for a weekend maiden.
-
5 hours ago, GyroJ said:
I have the RCME plans and magazine, and I really like the way this model flies. I have flown an own design autogyro years ago. It flew well, but lacked in self stability. Prop sound wise I would prefer a tractor set up, do you have any tracktor designs as well? Many thanks ahead!
Yes, I and others have a few tractor designs.
All depends on what you are after really, something simple and moderately sized or a little larger and more complex?
-
5 hours ago, Max Z said:
Nice build Rich! As always, I admire the aesthetics of your colour scheme, very elegant.
Cheers,
Max.
Cheers Max
2 hours ago, Preben Soegaard said:I like your elegant colour scheme. Really nice. The battery pack colour looks a little off in my opinion 😉
Thank you for sharing your interesting build.If it were up to my daughters the battery would have matched perfectly with the colour scheme they proposed!
Luckily Dad won that battle.........this time!
-
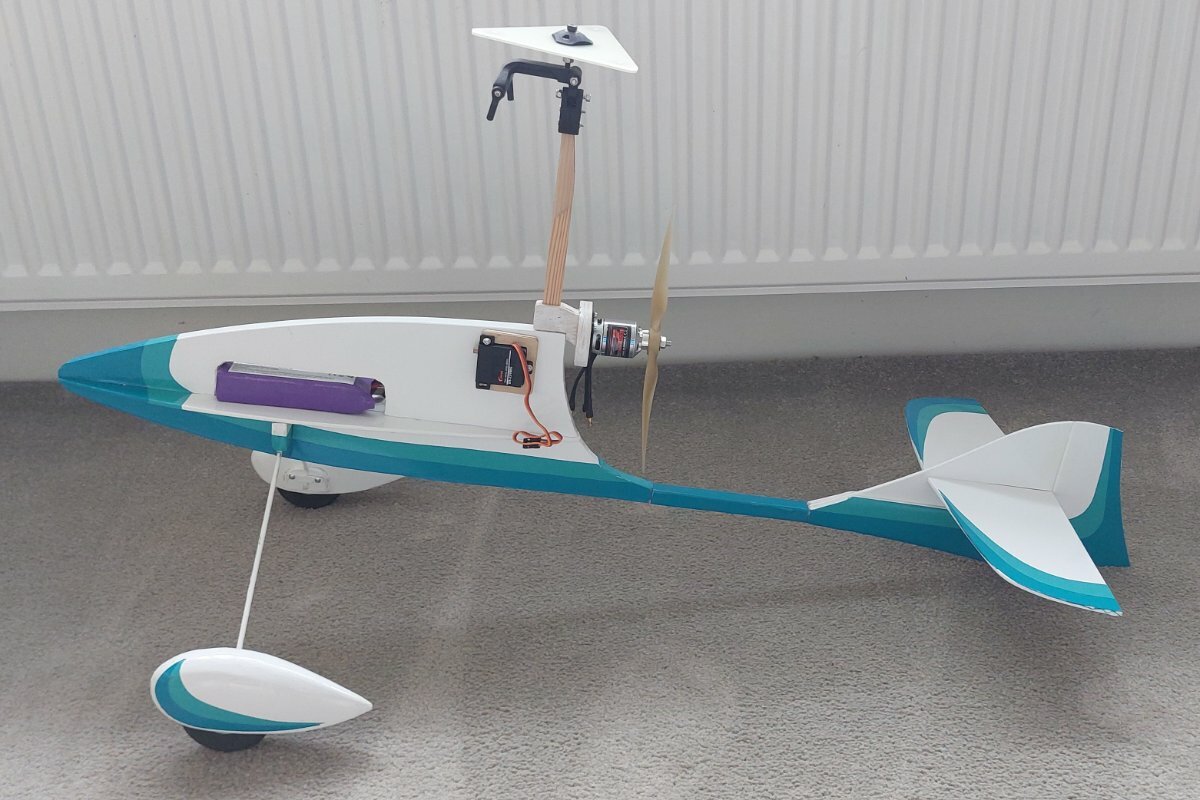
You've shamed me into covering Paul which has probably taken longer than to build it!
Ive left the mast bare for now as it may need it's length altering dependent on how the CG turns out. I've also made another motor mount which is lower, this may need to be altered further.
I will install the rudder servo and its connections next then on to the blades.
I shape these outside on a belt sander so it may be a few days before the weather plays ball.
-
2
-
 1
1
-


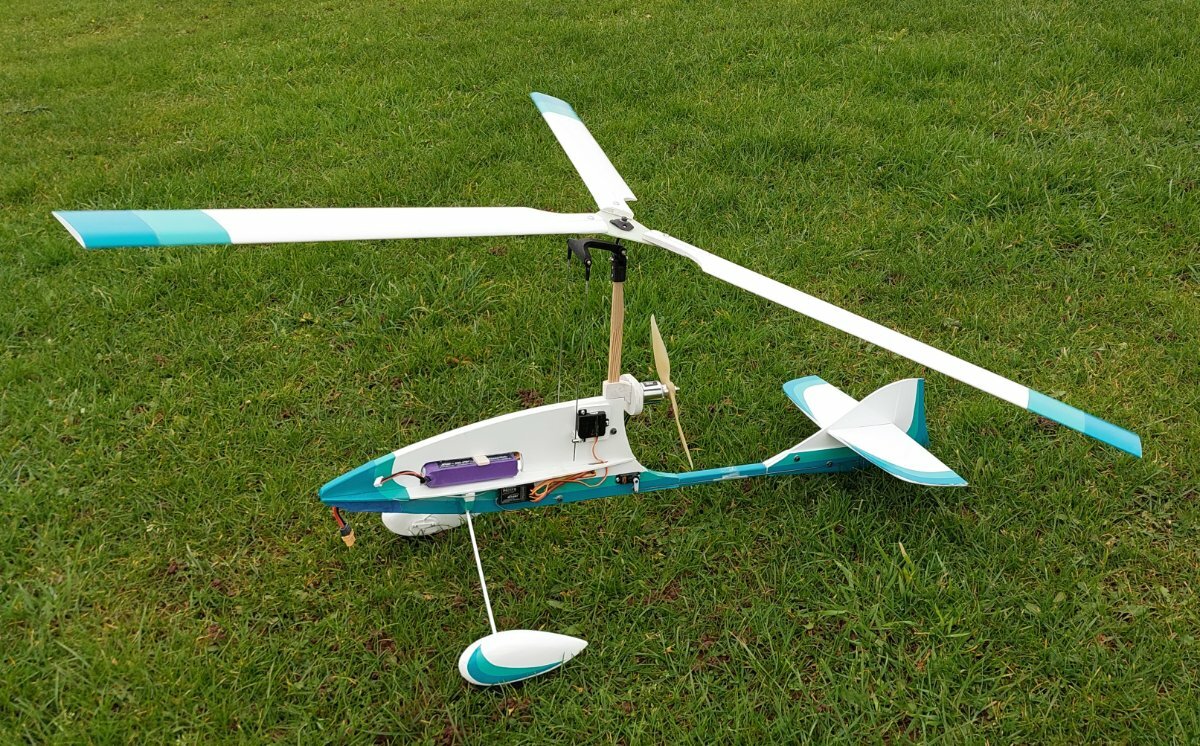
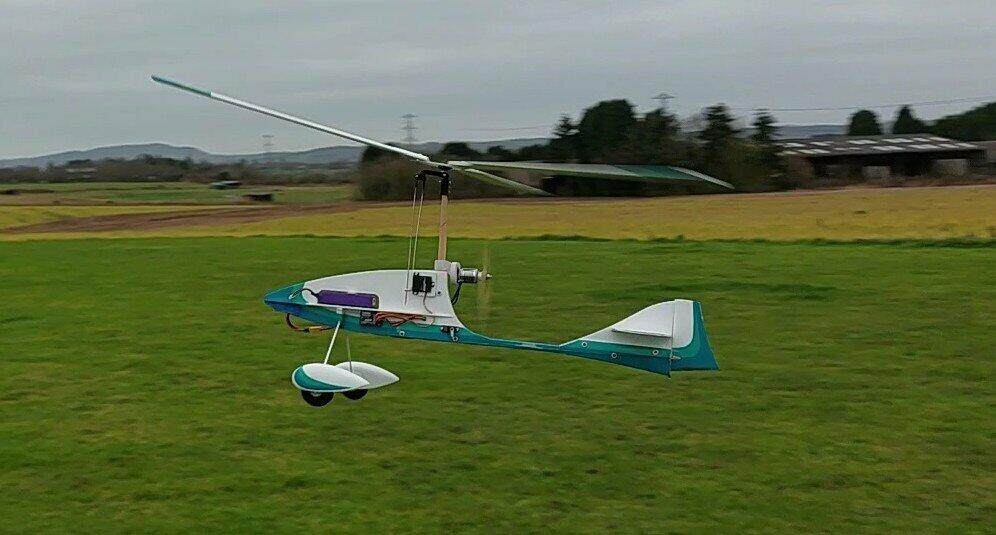


Gyroo II 'the pusher version'
in Autogyros
Posted
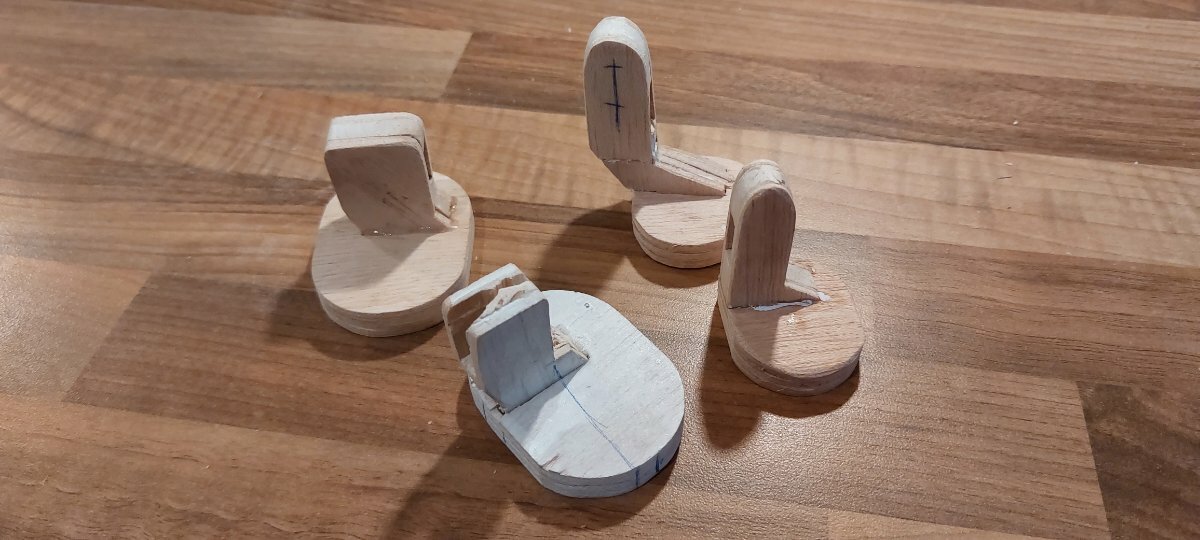
Now that's a fine looking covering job Stephen. I just used scrap offcuts of balsa to make up my spats, I find it quite therapeutic sanding them to shape.
Not much left to do!