-
Posts
422 -
Joined
-
Last visited
Content Type
Profiles
Forums
Blogs
Gallery
Calendar
Downloads
Posts posted by dave windymiller
-
-
See secrets of the mega factories on more4 now! Shows your balsa supplies disappearing!
.
Edited By dave windymiller on 23/11/2020 22:48:13
-
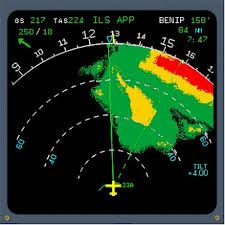
To add the distance arcs, you draw circles centred on the yellow plane at 120, 215
// draw distance arcs
tft.drawCircle(120, 215, 45, WHITE);
tft.drawCircle(120, 215, 90, WHITE);
tft.drawCircle(120, 215, 135, tft.color565(255, 255, 255));
tft.drawCircle(120, 215, 180, tft.color565(255, 255, 255));Note the two different ways to specify a colour. you can use the 16 std colours or custom by varying the rgb values. The three 255 values are red green blue values. When all three are 255 (max) this adds up to white. 0,0,0 is black with 16million options between!
To truncate the inner two circles ive added triangles (shown blue for clarity)
When two are drawn as a mirror of each other:-
//trim circles with black triangle
tft.fillTriangle(0, 170, 0, 240, 150, 240, BLACK );
tft.fillTriangle(240, 170, 240, 240, 90, 240, BLACK );You get
Next to make the arcs dashed
Edited By dave windymiller on 21/11/2020 19:47:18
-
You're making me blush! Thanks
-
I shall first draw the plane in yellow at the bottom of the screen with the below code
#define TFT_DC 7
#define TFT_RST 8
#define SCR_WD 240
#define SCR_HT 240
#include <SPI.h>
#include <Arduino_ST7789_Fast.h>
Arduino_ST7789 tft = Arduino_ST7789(TFT_DC, TFT_RST);
unsigned long res[16]; // initialisationrequired for the display
void setup(void) {
tft.init(SCR_WD, SCR_HT);
tft.fillScreen(BLACK); // fills screen black
tft.fillRoundRect(110, 210, 22, 2, 0, YELLOW); // draw yellow plane
tft.fillRoundRect(120, 205, 2, 22, 0, YELLOW);
tft.fillRoundRect(115, 222, 12, 2, 0, YELLOW); }
void loop() {
} // loop around endlessly having drawn screen
Normally the main code is within the “loop” but I am doing it to run once in the “setup” section. Loop simply goes around in circles once the screens drawn!
With a numbering system that has 0,0 as top left to 240,240 as bottom right, the wings are drawn using a rectangle tft.fillRoundRect(110, 210, 22, 2, 0, YELLOW); from 110 across, 210 down, 22 long (l to r) and 2 wide (downwards). 0 is the radius of the corners of the rectangle but 0 just gives sharp corners!
Playing with the numbers will show the effect
The fus and tail are similarly done. It takes a while to tweak the values to get the lines where you want them!! The display printed out on a 240x240 paper grid helps here!
Next instalment when I get round to it ie when its too cold in the garage!
-
Software drivers are required and im using “Arduino_ST7789_Fast.h” for this display.
Normally, to display an image, the easiest way is to save the image as a .BMP and write this to the display from the code. Unfortunately this needs more memory than arduinos have and is slow. Even the large ATmega chips don’t have enough for a 240x240 colour display.
After many attempts including using sd cards as the memory I decided on doing it the hard but far superior way. Each display is drawn by software, built up of a series of blocks, lines, curves, text etc. A circle can be half covered up to make a semi circle etc. A circle can go off the side of the screen to make a semi circle! The advantage here is the screen can be painted black (one line of code) then bits added one or a few lines for each! You don’t need to waste a ton of memory that says for each pixel, black, black, black, black .......etc.
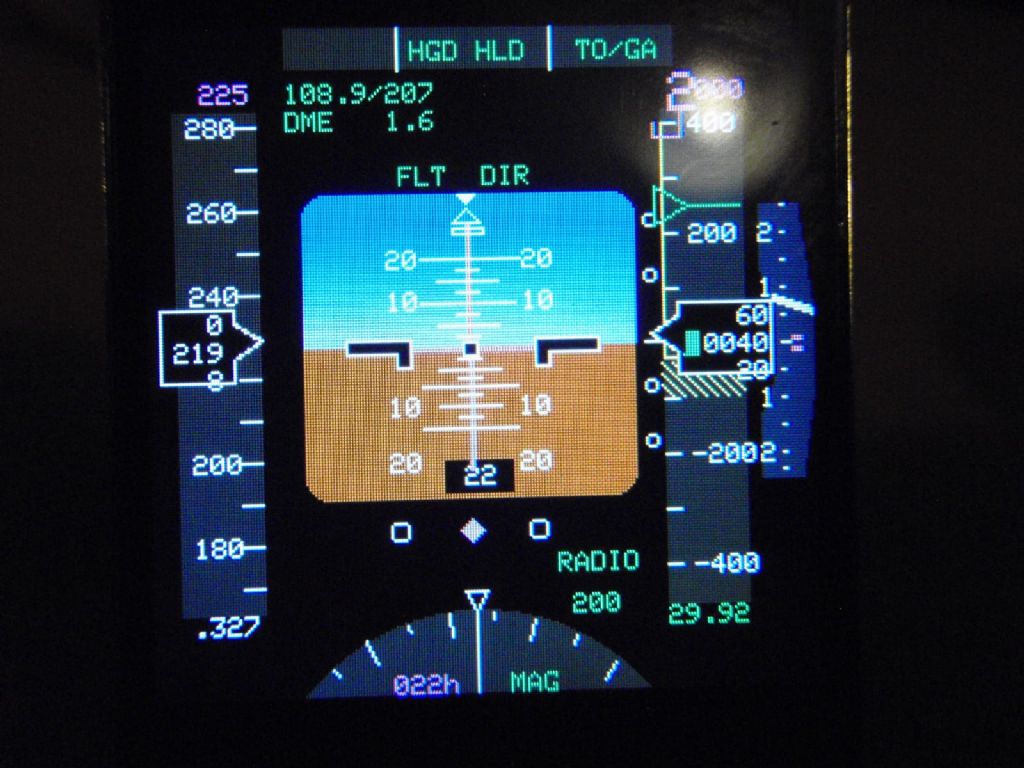
The other main advantage is speed. The above attitude/horizon display fires up in a fraction of a second. A bitmap being drawn takes many seconds. Another disadvantage of a bitmap is small details can be blurred between pixels as it most likely will not map accurately to the 240 x240 grid.
Drawing the display with code maps the elements directly to pixels giving a sharp image, particularly with small text. Limits however are that text sizes are set but as seen above, certainly not a major problem. Some artistic licence is needed re text size however!
Most of the above should make more sense as I build up the weather radar and explain what each line of code is doing! I wont claim that the software is super optimised but its simple to follow!
I will emulate the above random picture off the web (not being a pilot I don’t know what display this is off but its a good exercise!!)
-
Having dabbled with arduinos and displays, I decided to have a go at making a cockpit display for when I get my mig144 up and flying.
Heres my first (successful) attempt on a 1” X 1” screen (not a mig display but just an exercise). Bear in mind that the colours look much better than a photo shows!

It half crossed my mind to sell these displays pre programmed but decided lifes too short. If I share the info and other make them perhaps they would share their programmes too thus saving me time in the future????
Firstly you need to get a suitable display to connect to an arduino. One of the best you can get (correct me if im wrong) is a 1” by 1” 240 X 240 pixel resolution colour TFT such as:-
“1.3" ST7789 240x240 SPI Colour IPS TFT LCD Screen Display STM32 Arduino UK STOCK”
£5 off ebay. Very bright and clear display and good from all angles (some displays grey out at slight viewing angles)!
Obviously the size of the display has to be about right for the size of the plane. You can scale down the size whilst still using the same display and hide some of the border. Similarly you can go up in size too! There are loads of different size displays but many have differing connection, software requirements and performance!!
During development im using an arduino Uno but an arduino nano would be light enough to be part of the finished display for use in a plane!
Connections are simple
Display - Arduino
#01 GND -> GND
#02 VCC -> VCC (5V)
#03 SCL -> D13/SCK
#04 SDA -> D11/MOSI
#05 RES -> D8
#06 DC -> D7
#07 BLK -> Not connected
-
Hi Paul. Sadly no. Once the wings were joined to the fus, the blanks were binned. I had a similar issue with the rojair me109 (another thread on here). I used the foam core to make templates to cut new wings from foam. I didnt use the new cores just the blanks to reskin the original cores.
-
It wont be long before the flying field is flooded which would be handy for a re maiden eh Nick!
-
This project has been delayed due to covering the wings with lightweight glass cloth. After a few days i decide to trim the cloth using wet n dry at the edges. No way could i sand it. The cloth epoxy was still gummy all over. Arrggghhh. I could leave finger prints in it even after a week in the airing cupboard.
I tried to remove the gummyness with cellulose. Ive tried coating the cloth with various hardeners and even considered razor plaining the lot off. I stopped short of the razor plain and did what most would do, shove it on a shelf and forget it!!!
I think i know what happened, i got distracted whilst mixing the epoxy, the scales turned themselves off and i messed up the ratio by estimating! Should have chucked it and started again.
I looked at it the other day and it looks like its eventually set (happy days).
Time to continue with it! 2K Primer next!
Edited By dave windymiller on 28/10/2020 21:21:57
-
Looking good Nick!
Is that the one i had a go on several years back?
Last time i used nylon was for a warlord combat wing in the late 70s. Handy as you have a ready made bag with the bits already in when it gets stuffed into the deck.
It looks like rip stop nylon your using? never thought of that being used for a covering.
That long abandoned kids kite that hanging up in the garage is now being seen in a different light!!
Cheers
Dave windy miller
-
I know the problem has been "cured" but one thing ive learnt over the years if an engine is misbehaving is to reset the idle screw or air bleed to the recommended setting in the manual eg X no of turns from fully seated. If you play with the idle screws a lot trying to sort an engine out, a screw way off its setting can give very odd behavior.
-
I have recently fitted an igyro 3 extra to my hotspot. Not yet tried it but the advice i was given by renowned world jetmasters pilot to the question "do i buy a gyro or learn to fly better" was yes and yes. I know the hotspot isnt an airframe that cries out for a gyro but i want to learn about its behaviour for scale models im building
-
Ive used the same as you Allan. Had it many years. Very versatile & quick to heat. When it died i got its modern replacement TCS 50W 230V Digital Soldering Iron - T48JJ70.

This has a display and up/down buttons for temp control.
Just as good with the added temp display but i find the buttons are too easily pressed when in use (not a show stopper but annoying they didnt get the egonomics right!).
You can still get the older version
Edited By dave windymiller on 14/09/2020 22:16:21
-
-
Re the bird muck thing, my understanding is when you wash away the muck and find the paint surface has been damaged by it, wd40 is used to soften the paint allowing it to polish easier and quicker (using t-cut or similar).
I know wasps in jars dont like it from the "experiments" we did as kids! They'd rather sting themselves to death!
-
I spent a very happy few years at Ironbridge during its biomass conversion before closure!
-
When you are involved with a closing down power station "available" = stuff that would find more use in my garage than mixed in with demolition rubble!!!

-
Dave Windy Miller.
A skilled modeller and a thoroughly absorbing thread.
Edited By Doc Marten on 02/08/2020 18:51:41
Very kind words thank you. Heres the link to the spinner side thread!!
Good luck!
-
I have to agree with Kevin re "Beginning C for Arduino" was a bit hard going. Ive found the best education has been having a specific task to achieve and searching the web for examples or similar functionality and tweaking them until it does what you want. My first arduino project was an altimeter about 18 months ago (i posted it in this forum) and now at work im using arduinos for a variety of tasks, one of which has 40 arduinos talking to each other simulating a power station milling systems instrumentation.
Modelling wise I am also developing a cockpit display for a jet project 25mmx25mm, again adapted from a totally different example found on the net (pilots please excuse any errors in its readings as there is artistic license in play!) I can see it wouldnt be that difficult to have a display that actually worked using various sensors (but lifes too short)!
At work i am now circuit boards using the ATmega328 chip directly but using arduino C to program them. This sub board (hand soldered prototype in picture) replaces 2 ics that are no longer available in one of our products. The key thing again was having an idea and end result to aim for and searching the web. I still find myself grabbing hold of the blink sketch from time to time (Blink is example 1 in the examples). Stick with it as its a fascinating subject, im glad i did as my job has totally changed as a result. I have never written a sketch from scratch by the way.
-
Thanks for the replies. That smashed Vulcan must have been painful to watch. I have considered the bungee/ramps approach but having a spinney thing front and back sounds like a problem (particularly the front engine).
The mk1 version:-
appeared to work well except for the rear prop eating the balsa blocks plane support on the dolly. Without this issue and the immense power to weight i think the mk2 should work. Went to try it yesterday and found i had the wrong transmitter for the plane Doh!!! The rapier is still on 35mhz 1024PCM being a "now and again" plane rather than a regular hack.
-
-
-
MK2 dolly with seperate rx for steering for Rapier twin.
MK1 used balsa blocks that located into the handgrip in the center assuming it would lift away before the back prop reached it. Wrong. It flew but the rear prop was broken (thankfully the engine stopped too). The balsa block was destroyed. This one has a camera to get a close up of the carnage as viewed from underneath!!
What could possibly go wrong?
-
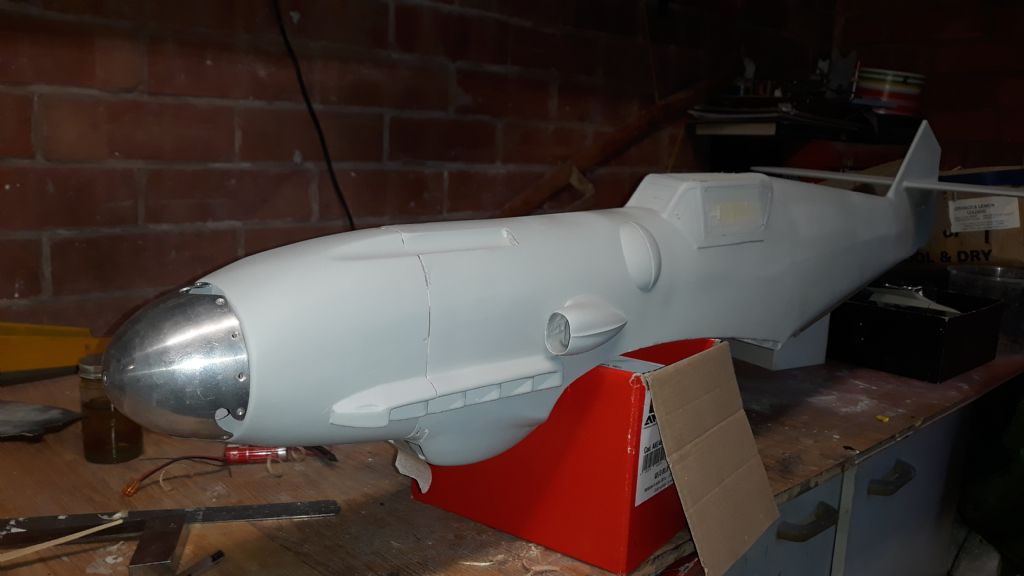
Ive now filled the wing joints, cut open the cowl for the engine and assembled the cockpit
The cockpit is balsa then two clear vac form layers. The inner vac formed is painted except for either side of the glass bullet proof glass. This gives a very natty looking glass screen. The outer will be painted except for the main cockpit glass and two little windows that a fuel tank can be seen through.
A longer engine would not work in this model so the fp25 looks to be the right choice!
There a Komet kit on Ebay at the moment but you will need to sit down to look at the (optimistic) price!!!!!
Edited By dave windymiller on 29/06/2020 15:46:06


![20201121_185237[1].jpg 20201121_185237[1].jpg](/sites/3/images/member_albums/42127/881665.jpg)
![20201121_185747[1].jpg 20201121_185747[1].jpg](/sites/3/images/member_albums/42127/881663.jpg)
![20201121_193348[1].jpg 20201121_193348[1].jpg](/sites/3/images/member_albums/42127/881671.jpg)
![20201119_214317[1].jpg 20201119_214317[1].jpg](/sites/3/images/member_albums/42127/881505.jpg)
![20201119_214428[1].jpg 20201119_214428[1].jpg](/sites/3/images/member_albums/42127/881504.jpg)


LCD cockpit displays
in Gadgets and Electronics
Posted
Wow indeed. He must have a big team and massive budget.