


jeff2wings
-
Posts
3,155 -
Joined
-
Last visited
-
Days Won
5
Content Type
Profiles
Forums
Blogs
Gallery
Calendar
Downloads
Posts posted by jeff2wings
-
-
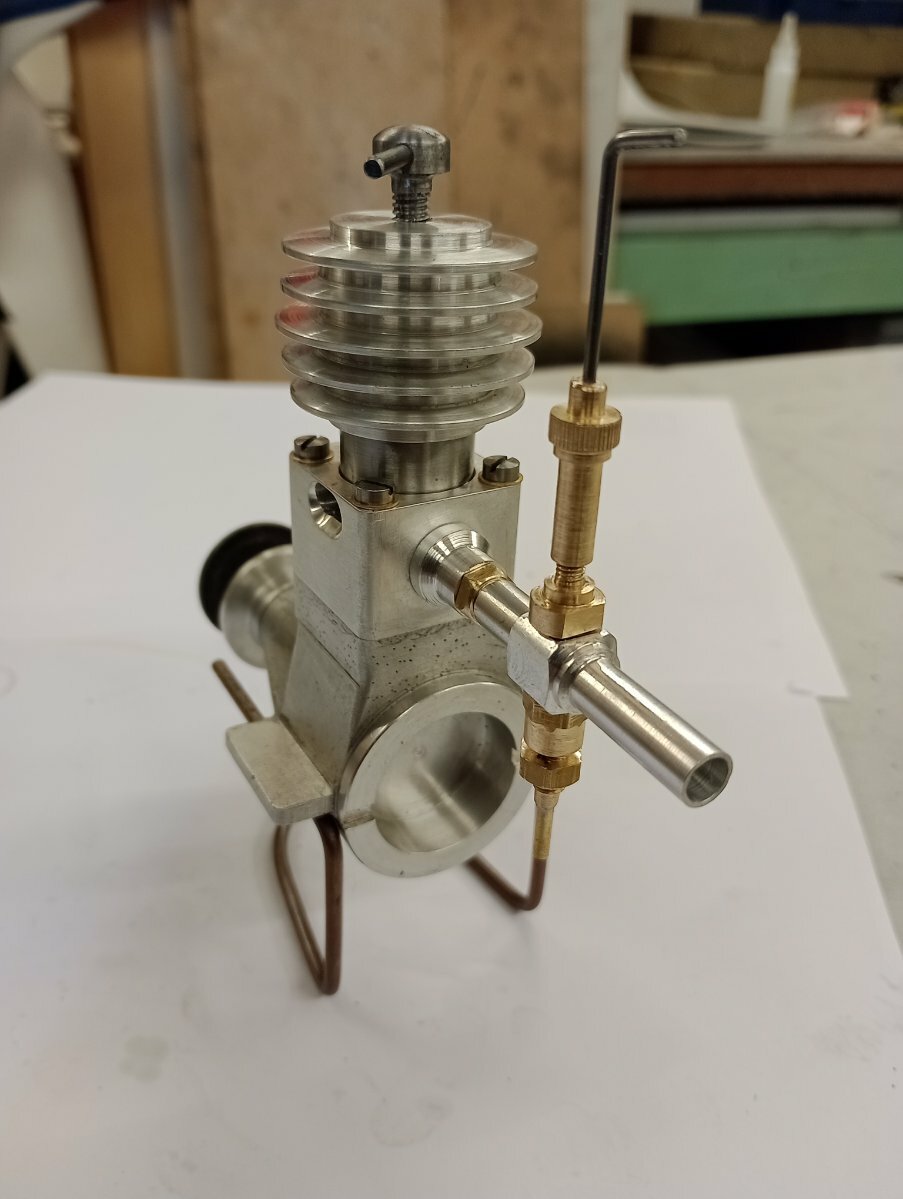
So with those out the way time to revisit and finish off these two, first one will be done as a full glow version

Started in 2022😏
-
 1
1
-
-
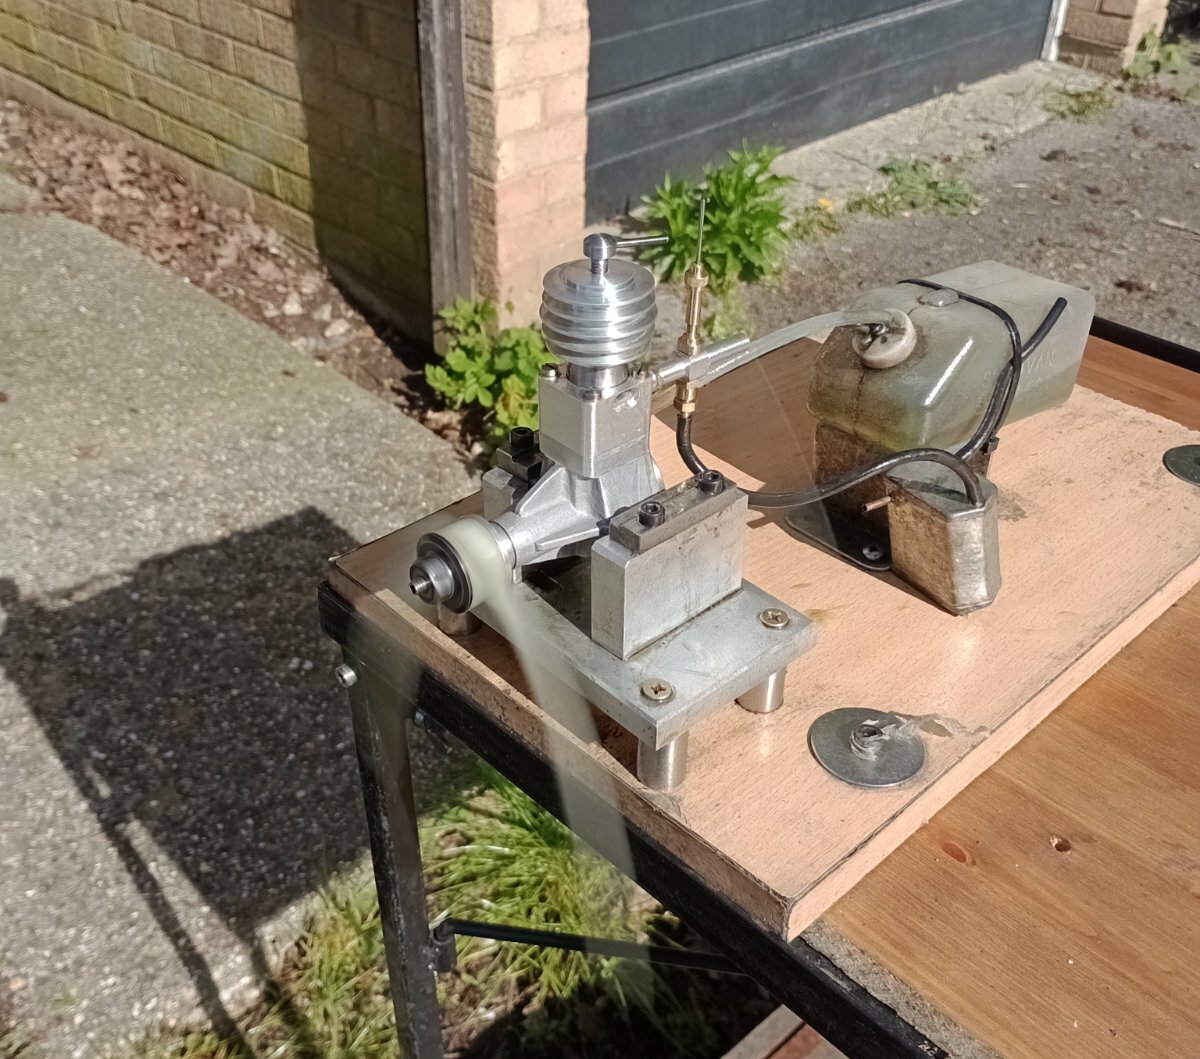
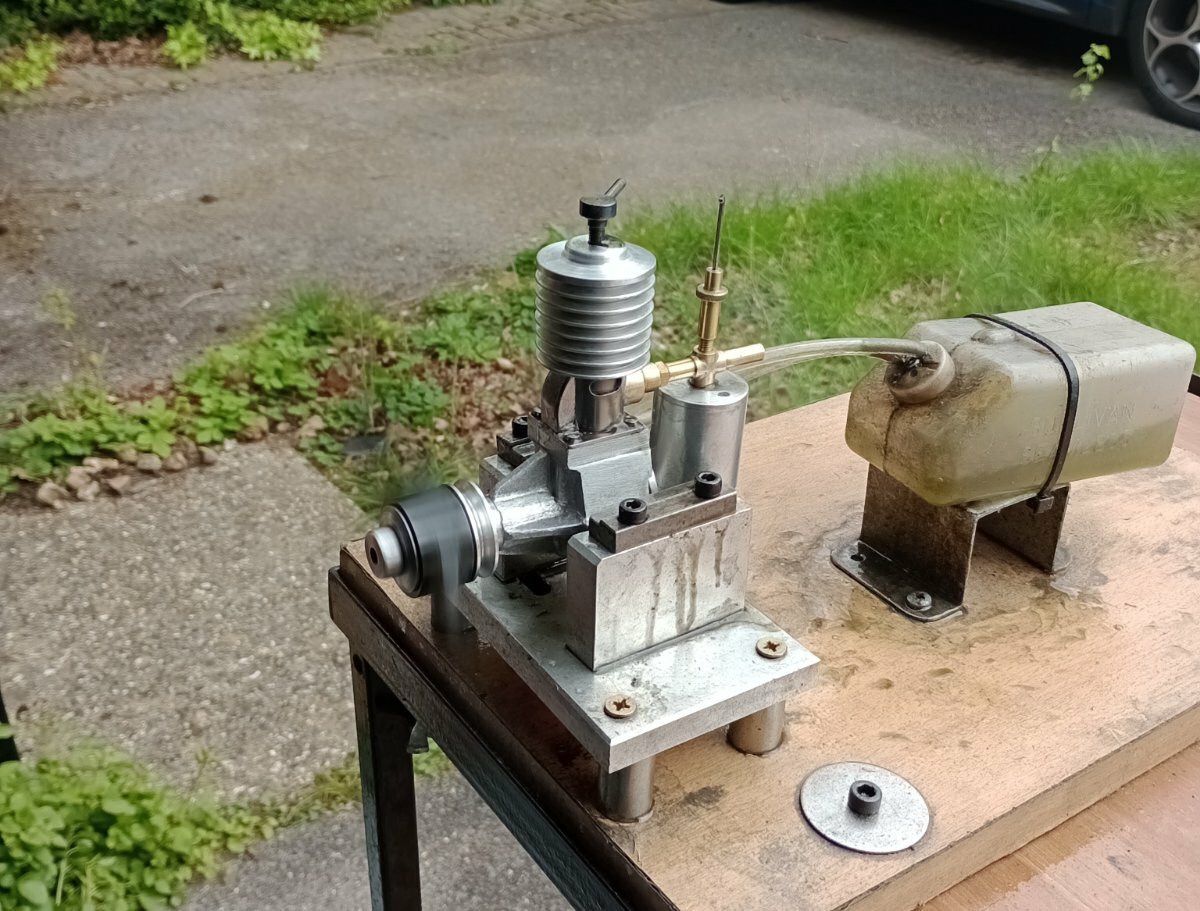
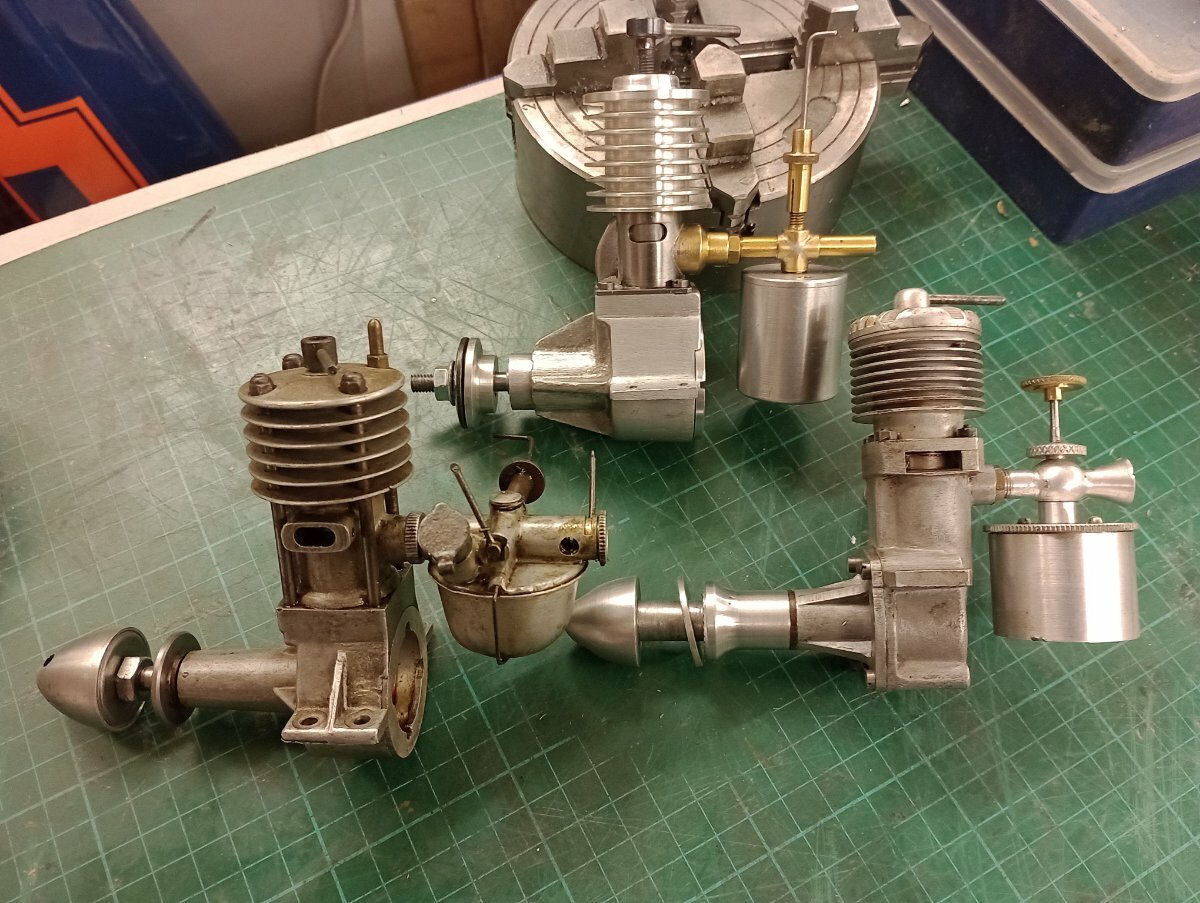
Well that was interesting if a little unexpected, finally stopped raining long enough to test run these engines back to back and get some rpm readings, the dc wildcat on a14x6 MAS and D2000 made 4,150,the first Sparey on the same made..............4,750 ! This was after some fettling that consisted of making a new cp,conrod, resized piston by 'cherry bombing and grinding a much finer taper on the needle valve, the other Sparey made only 4,200 rpm although the fits are a bit tighter so may need a bit more running in,so l think I will call these finished and a success and handedly enough, these arrived the other day....
-
Looks like a Majesco 2.2 from 1946
-
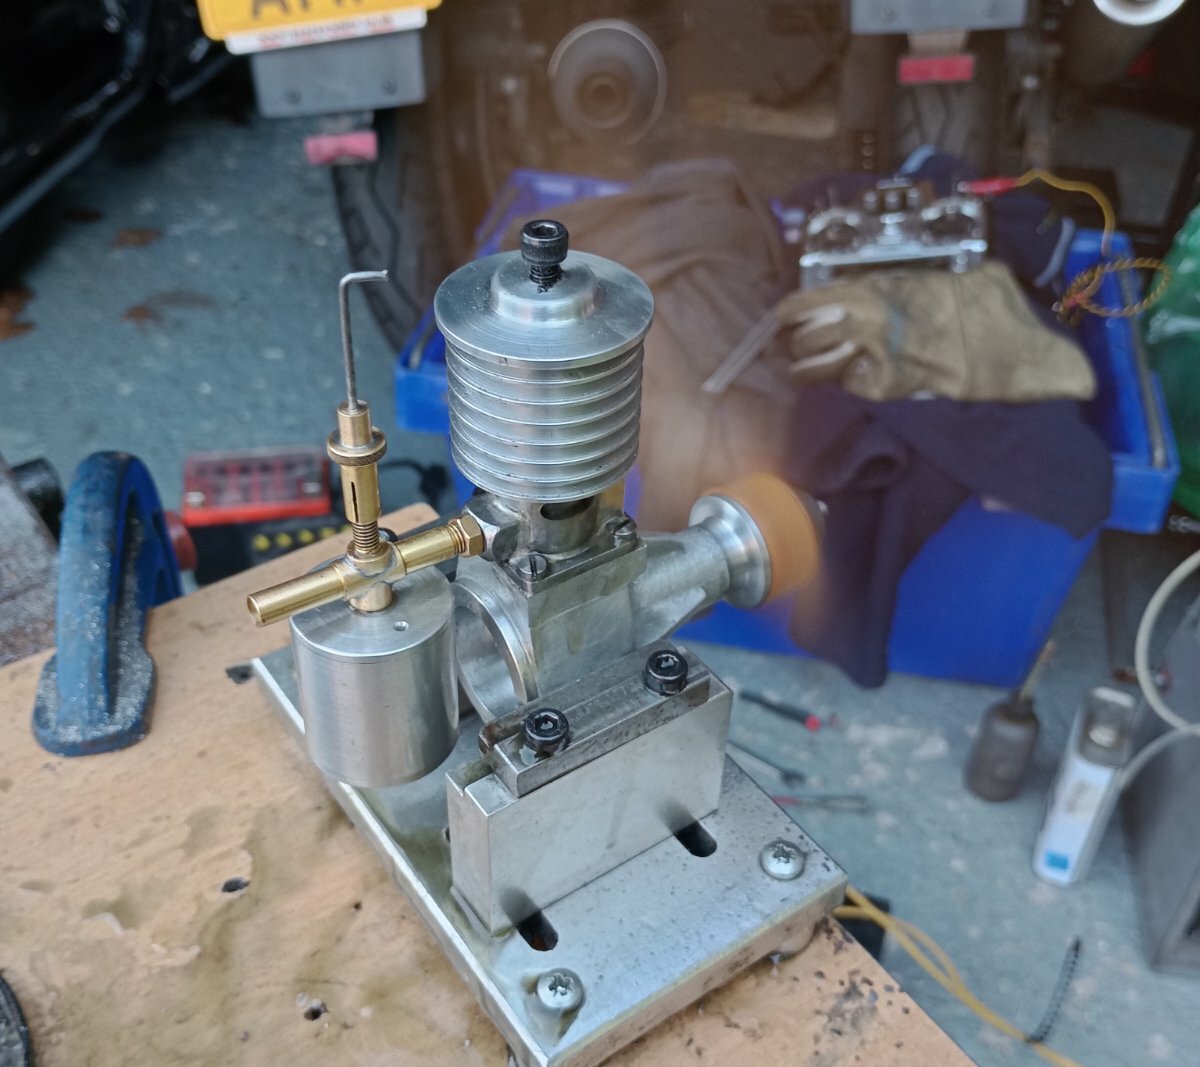
So got her fired up this morning with 6 flips of the MK 13x6 prop D2000 fuel with a bit extra either, actually much better than the other one that needs the electric starter too start probably due to leaking past the cp so will have to address that and hopefully get it running like this one.
now I need to decide on what model build for it ??
-
1
-
 1
1
-
-
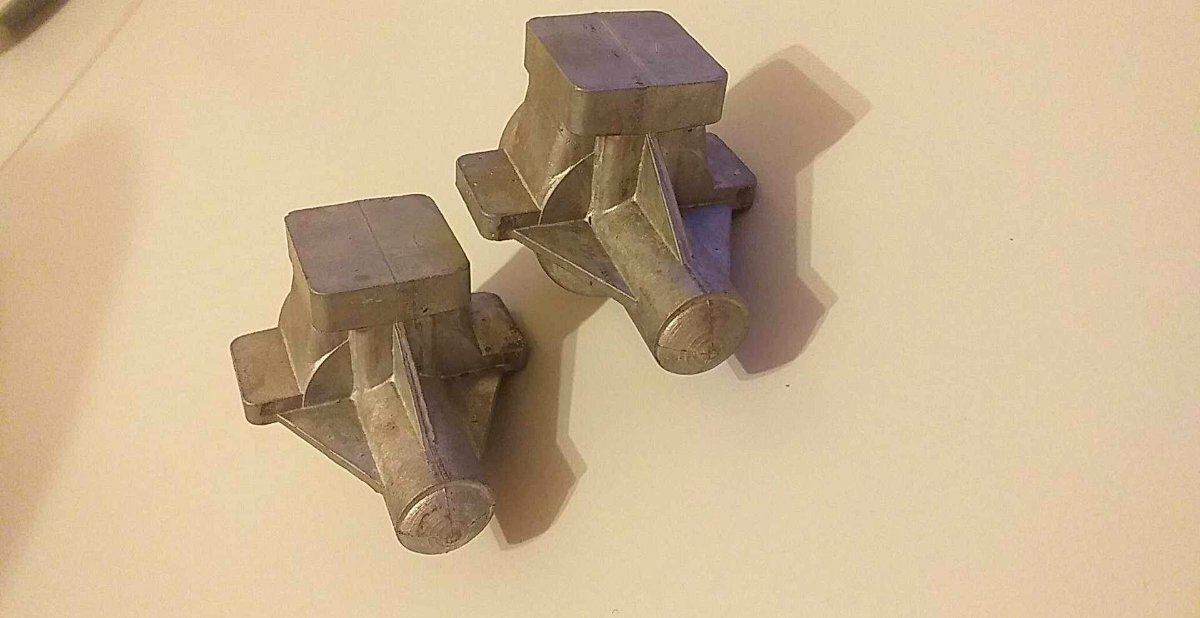
Just waiting for the new set of castings to arrive for the next two
-
3
-
-
Yes,I know, I have followed a number of your builds such as the boll-aero glow &diesel engines and the Jones 10cc (that I have a set of castings) along with Ramons's
And Jason's builds that are both inspiring and intimidating at the same time! I suppose I should really take this over to ME but as a life long aeromodeller I naturally posted here,this is a relatively new side of the hobby for me that started out just fixing up/restoring old engines and escalated from there LOL !
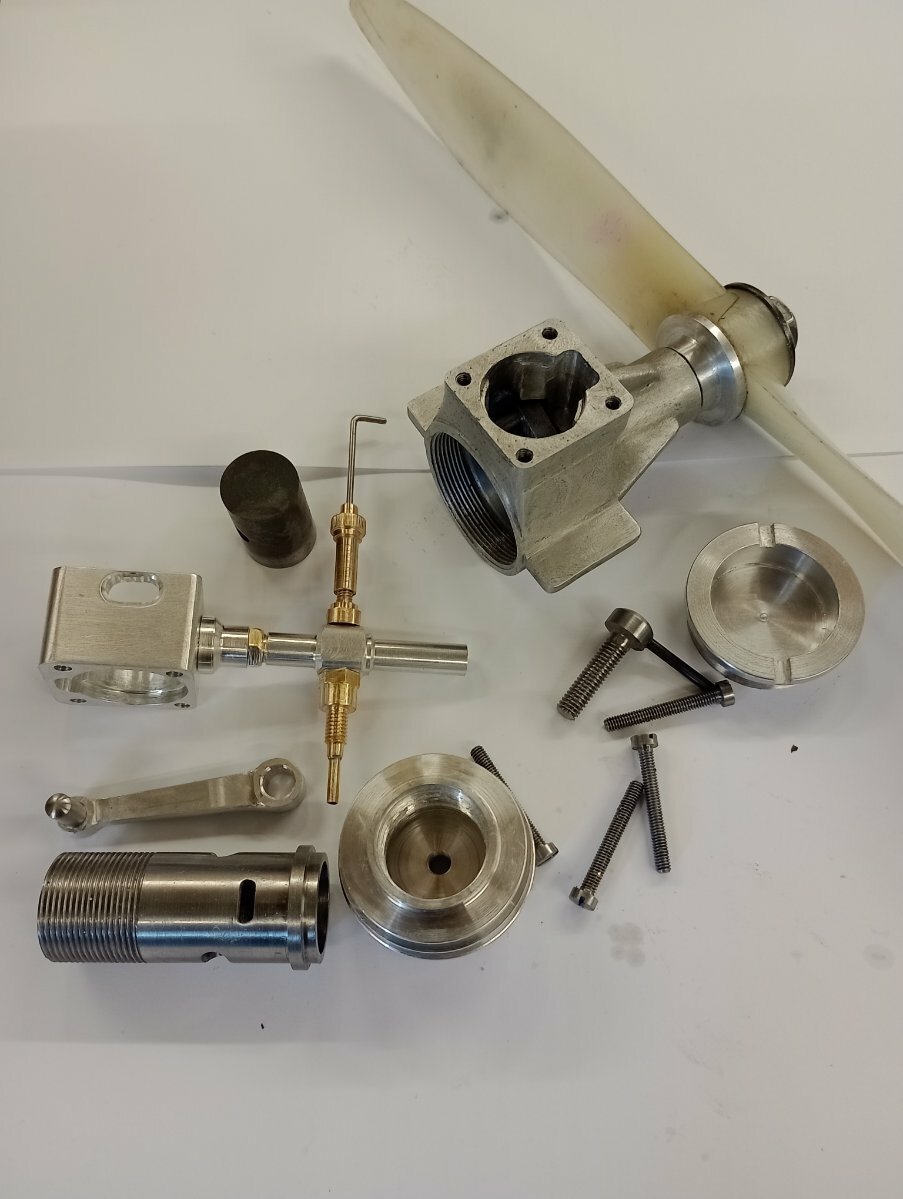
Anyway the castings for the Sparey and Atoms were a job lot from eBay, part of an estate sale that I got for a very good price, but as you have noted they leave a bit to be desired both in dimensions and with porosity within the castings, the new castings I have arriving will be a lot better .
-
Thanks, it's always a thrill with the first sustained run from an engine you have made,lessons learnt on this build will hopefully make the next three a little less problematic 😀!
-
Hope your set of castings are better than the ones I have.Be sure too read and take note the MEN build article on the Atom Minor.
-
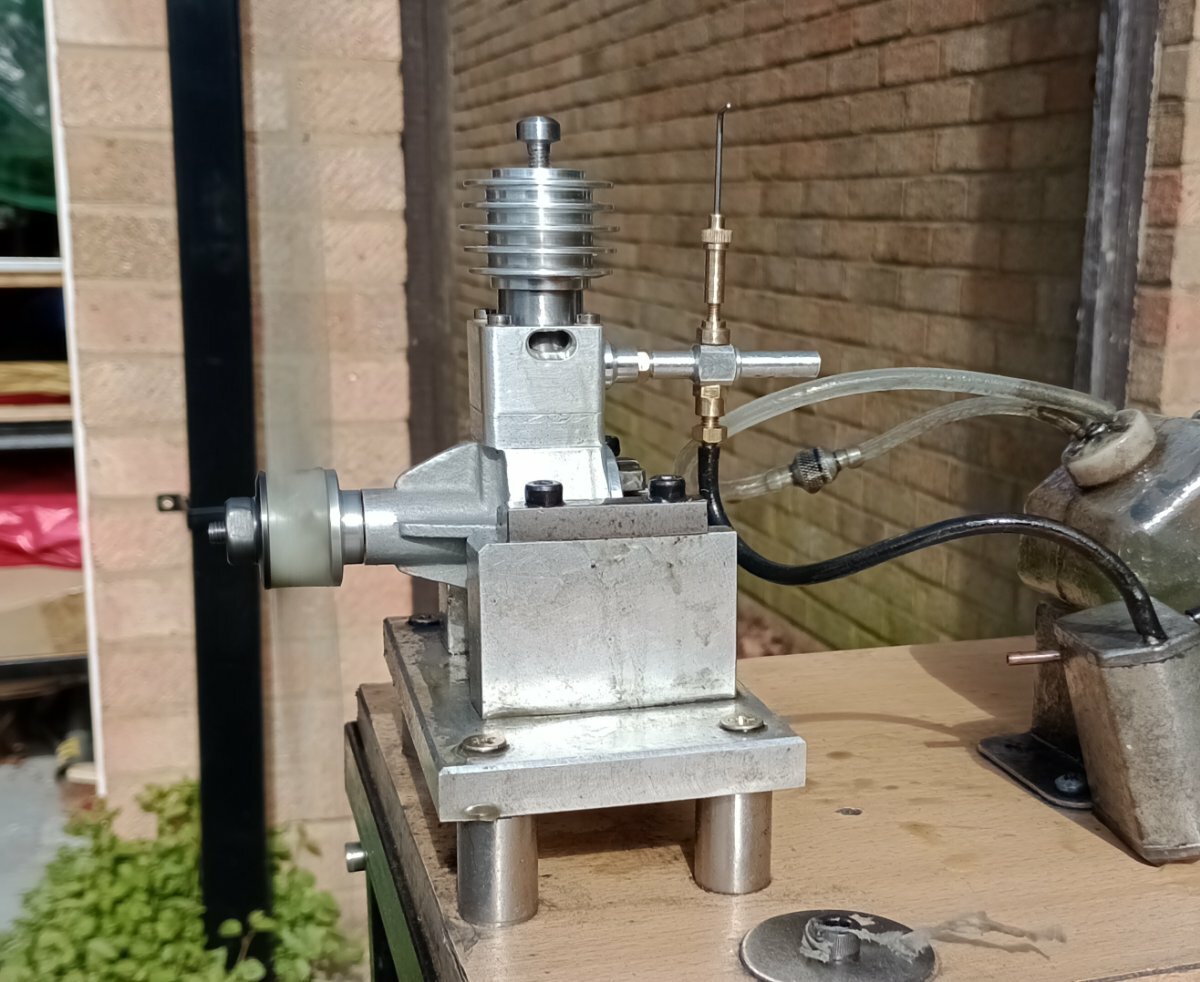
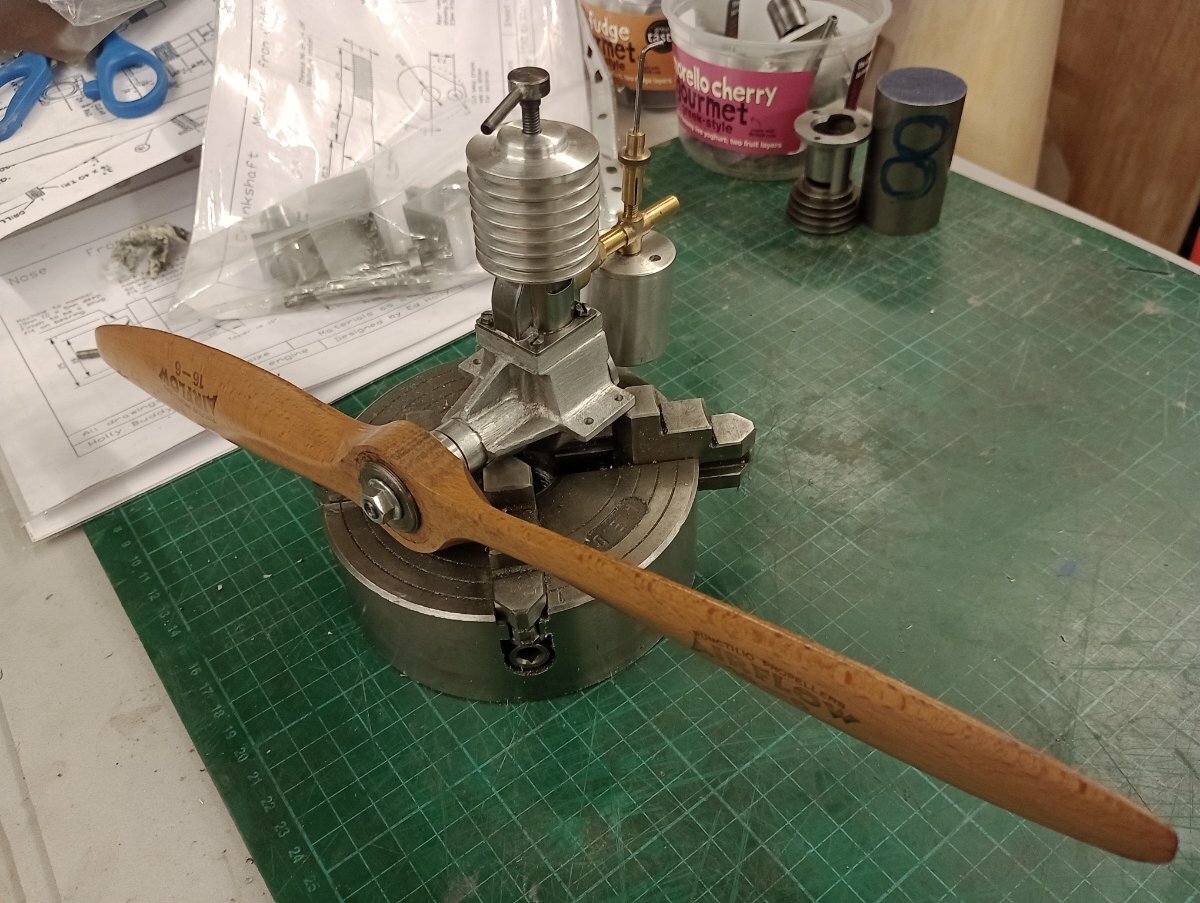
Run four tanks through the the engine this morning after changing the prop to a14x6 MAS and the fuel for some D2000 (had been using D1000) the 14" proving more suitable than the 16' wood that I used for one run.
-
1
-
-
Ron's notes actually state the backfire was due to excess fuel from the course taper on the needle valve which gave a 1/2 turn from fuel shut off to running and shortening of the cp due not being able too back off sufficiently for slow running, both issues having been dealt with when I first built this engine.
-
I brought them from Hodakov Tolik who is in Odesa Ukraine you can find him on Facebook $40+postage.
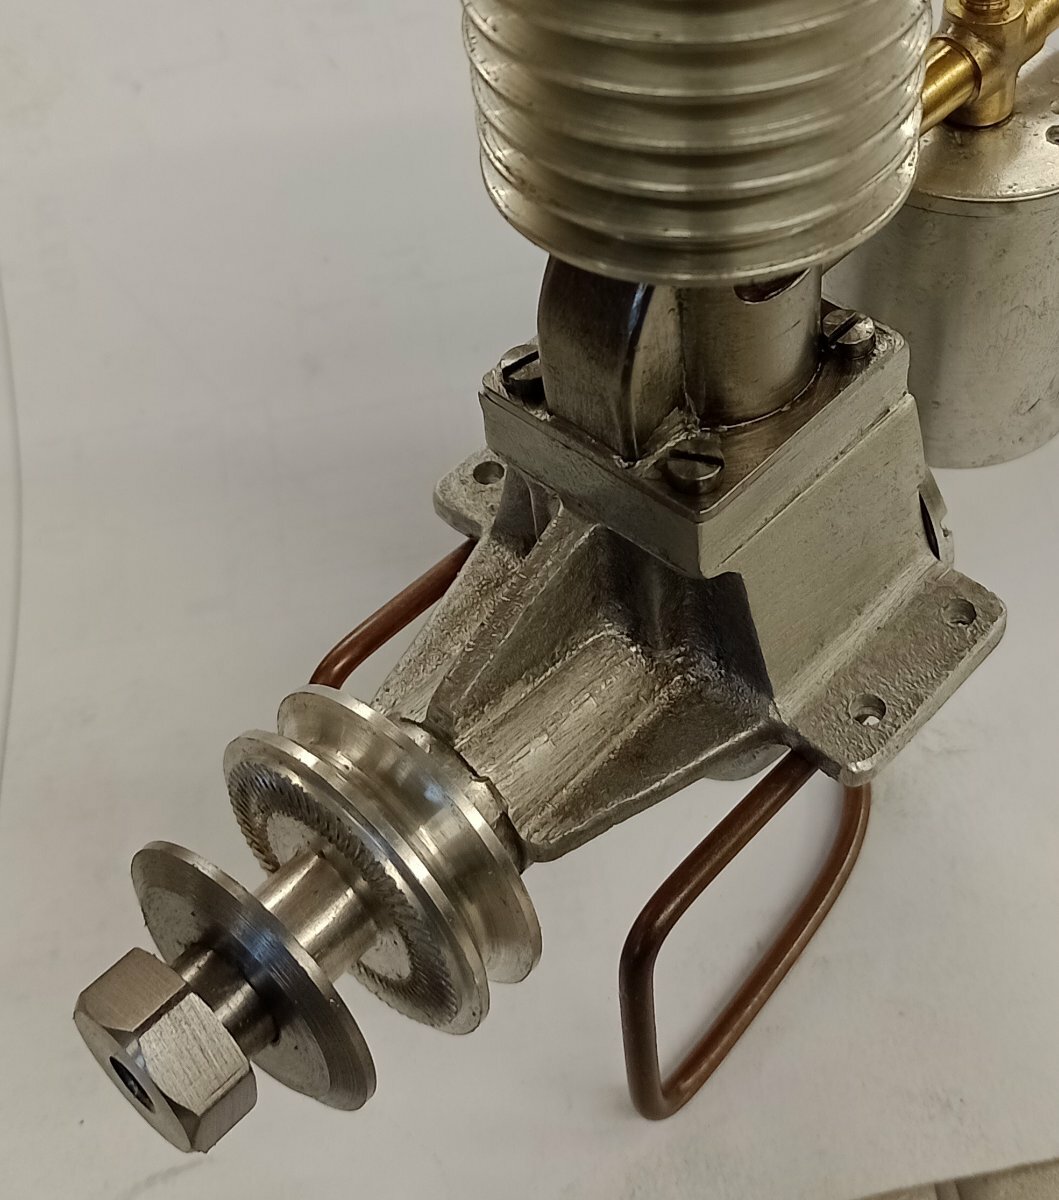
So I gave the engine a thorough clean in the u-son strapped a 16x6 wood on it and had a go at getting it to run, got a few short burst from the prime but it kicked back a few times and loosened the prop, so on the fourth time gave it a bit extra on the spanner, and the end of the crank snapped off!! Point of failure being where the centre drill hole finished. 'Oh bother ' I said (para phrasing here) so stripped it down again ,cut a bit more thread,took 20 thou off the shoulder to reduce end float and made a new prop driver in keeping with the original. I think the next time I will use a MA or APC probably 14 or 15" .
-
Thanks, well l'm getting the hang of it now, so................😁
-
.......and I've just brought two more! Should be a lot more easier with thse than the rather poor Hemingway ones 😢
-
1
-
-
Thanks ED,I have tried those rods ,found them OK for manifolds and silencer but again a bit hit & miss on castings.
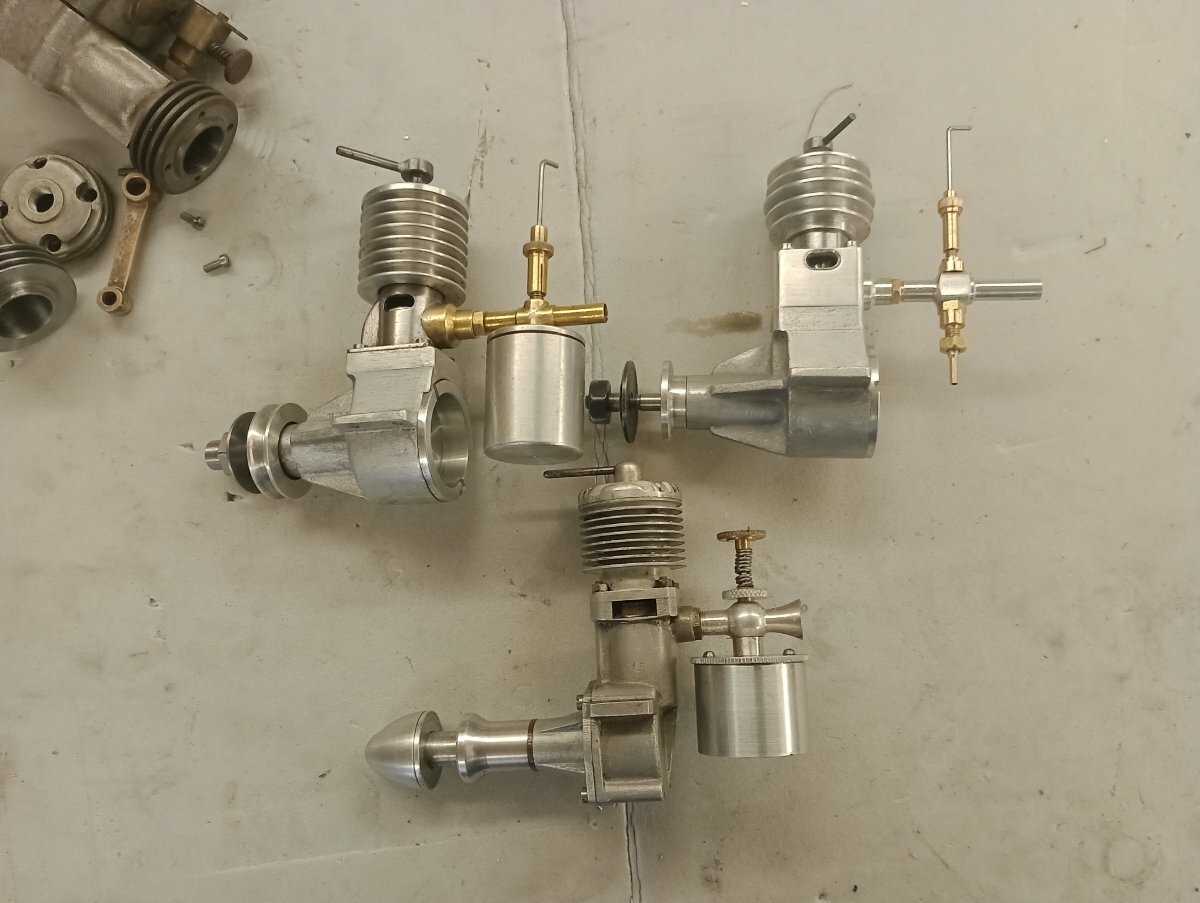
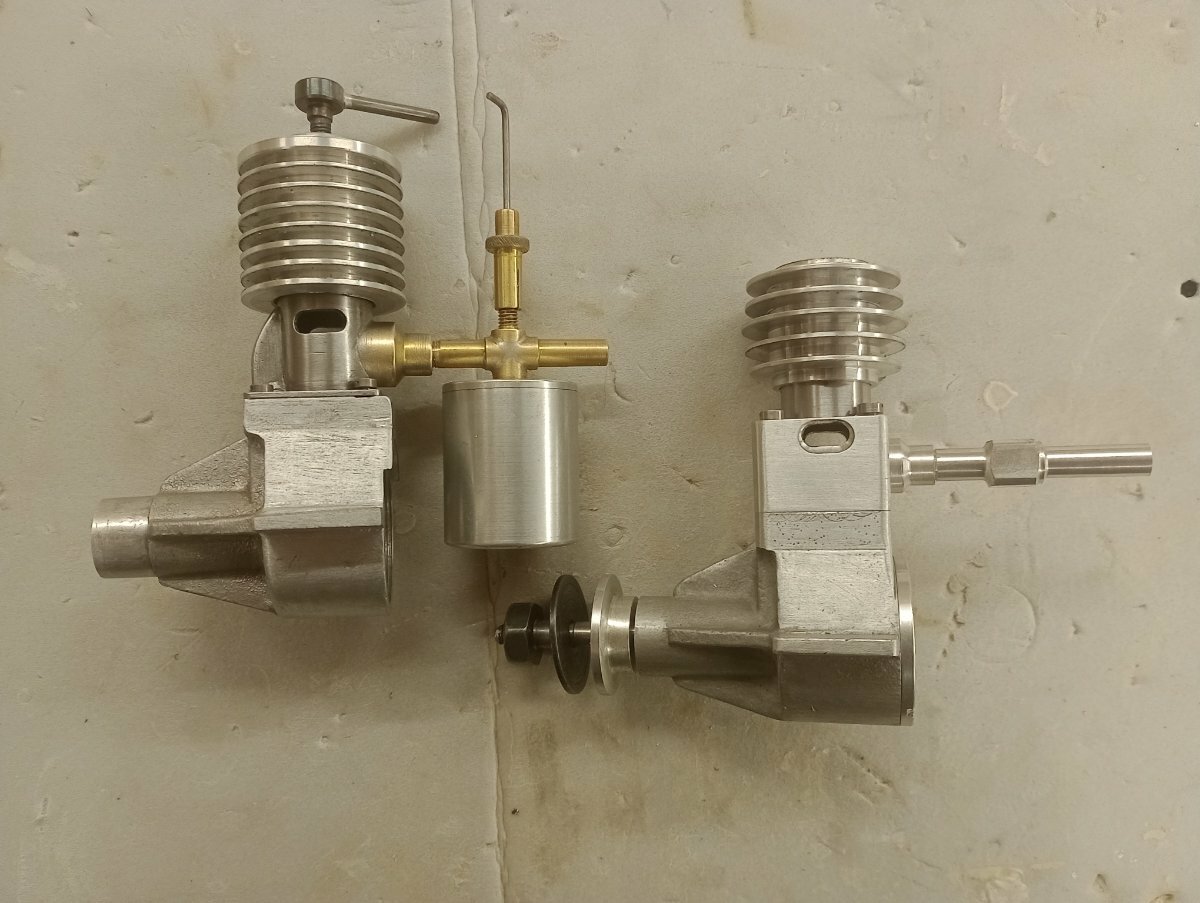
Finished off making the second Sparey, actually got to reuse the piston/cp so quite pleased with that.
-
It's quite capable of swinging a 16 " prop but not that one as it's for a modern petrol engine ,probably one about 20-25cc
second run on a 16x6 airflow wood 3,900 rpm with incorrect port timing, l will see what rpm my Mk3 wildcat and ETA 5 do on this prop
-
Repairing a crankcase is always a bit difficult particularly if it's diecast due to having things like zinc,tin,nickel etc low temperature brazing being equally as difficult as tig,the castings tend to be thin and it's easy to melt the hole lot! With tig welding you get blow holes from the zinc gassing off giving a poor weld/finish.That being said these are sand castings with LM4 and will take tig welding quite well and that's how I got out of jail this time !😄
made sure it's a nice loose fit this time
I ground the needle valve by hand on a sanding belt but the suggestion to use a sowing needle is a good alternative
-
Got my bearings from model fixings,be aware the early speed 61 had a 15mm crankshaft and later versions 17mm
-
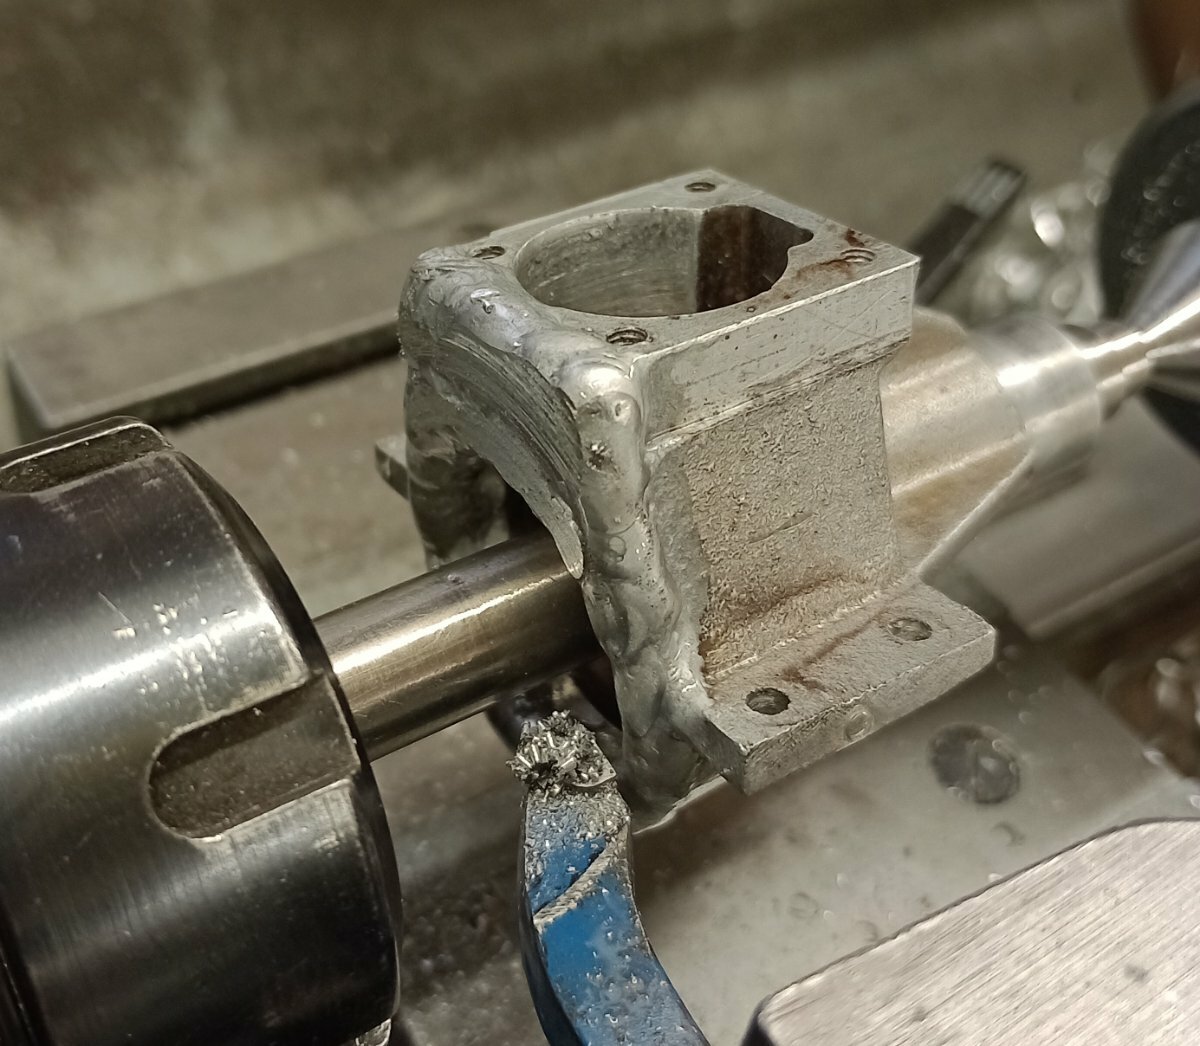
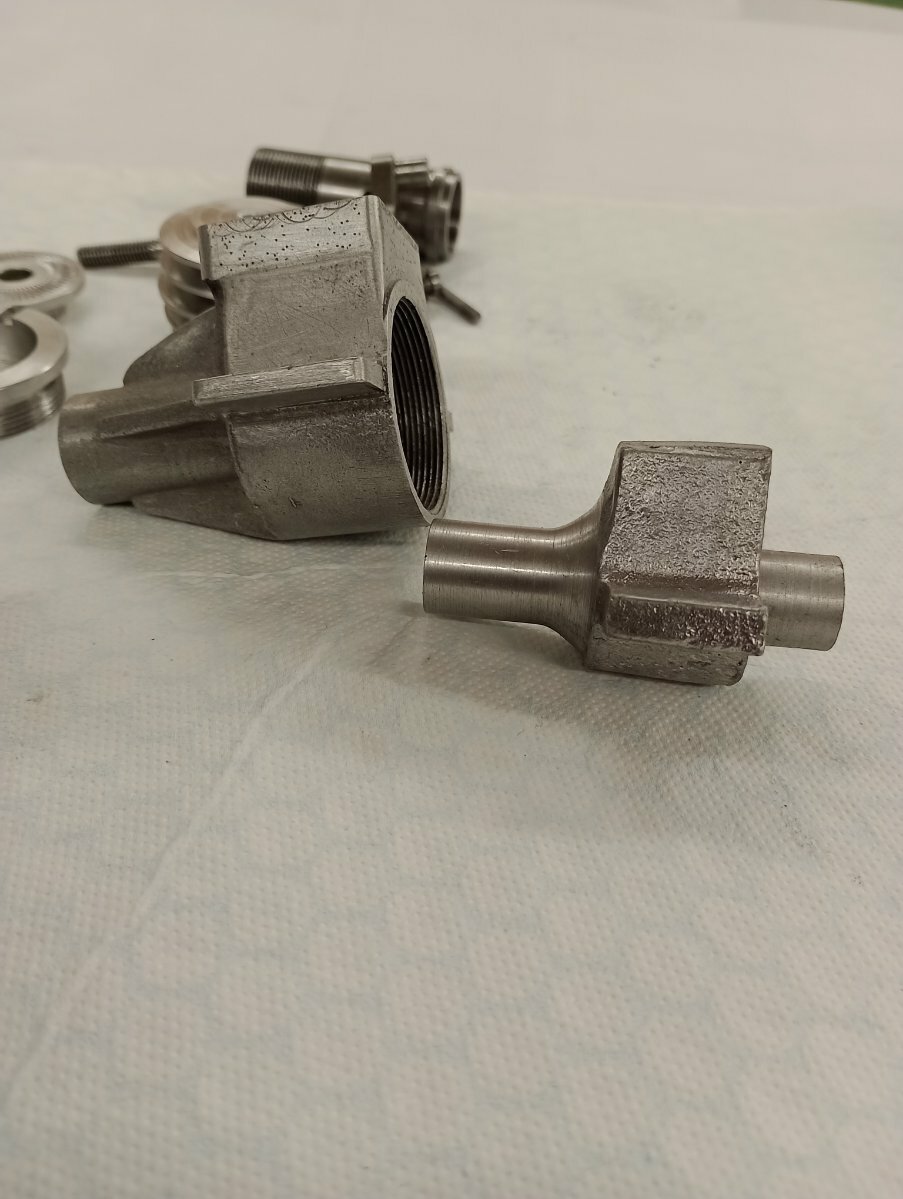
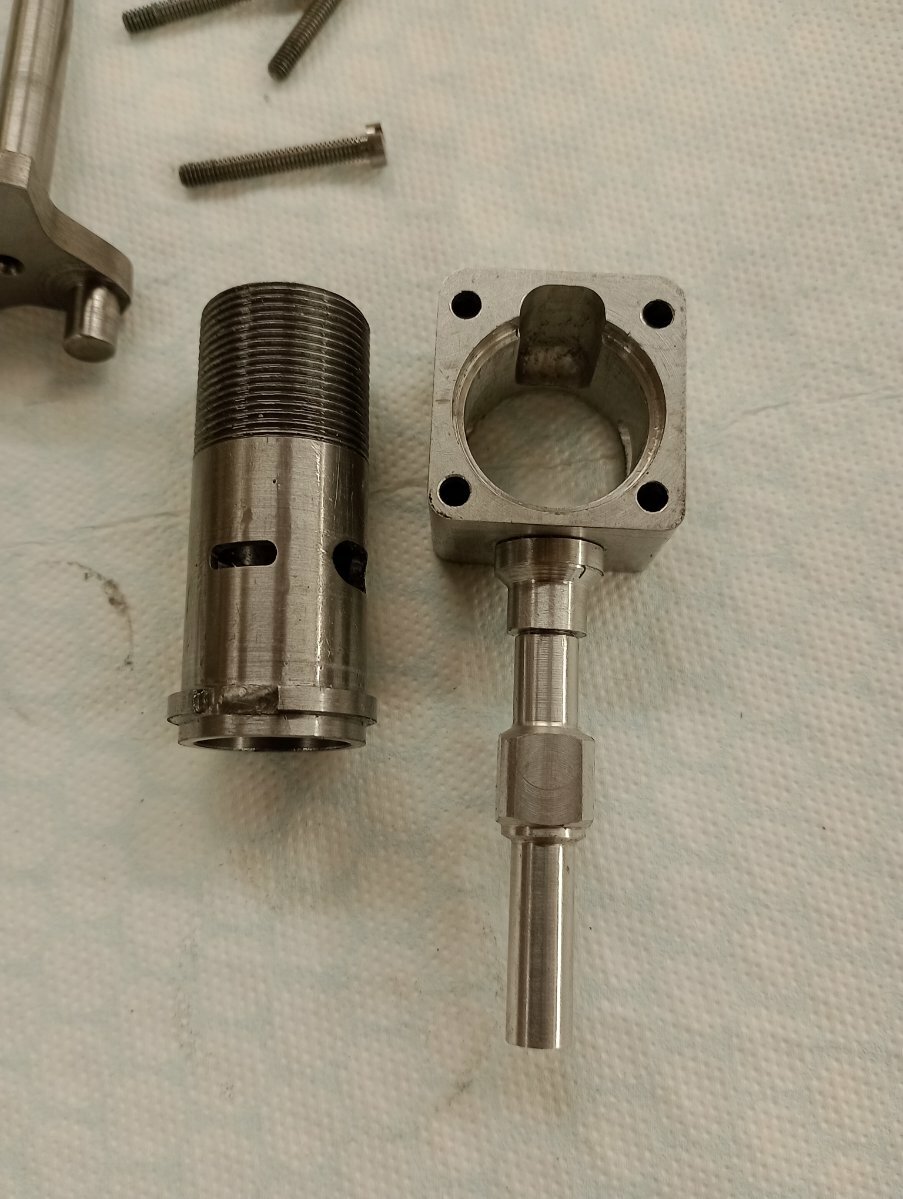
A cNot had a great deal of spare time but have made a bit of progress on the second Speary although I needed to do some reworking in order to correct a mistake I made and one made previously by the guy that I bought the casting sets from.
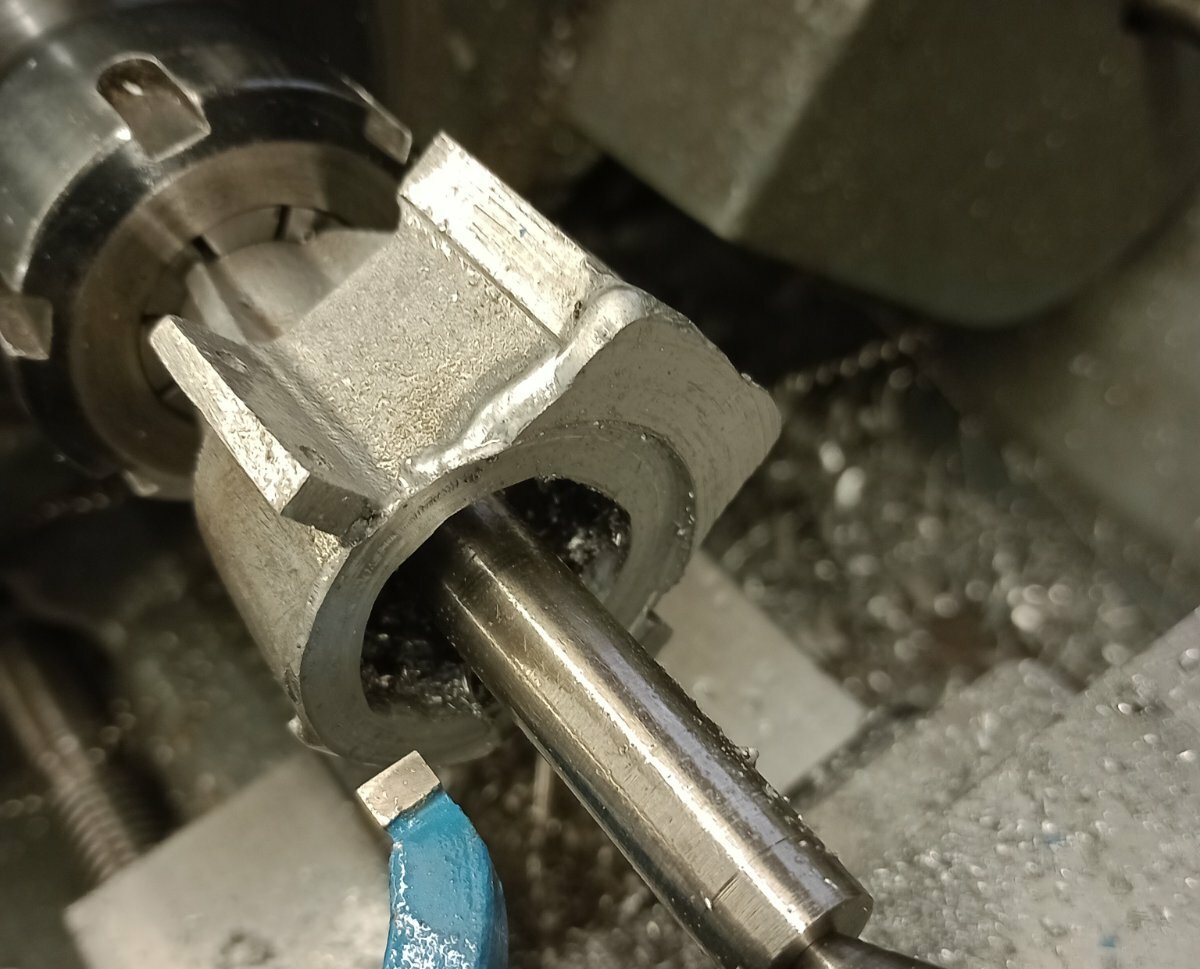
so wot happened was,I screwed the rear cover in and it got stuck, like proper stuck so I had to machine the hole thing out and then repair the damaged threads and the previous mistake by welding
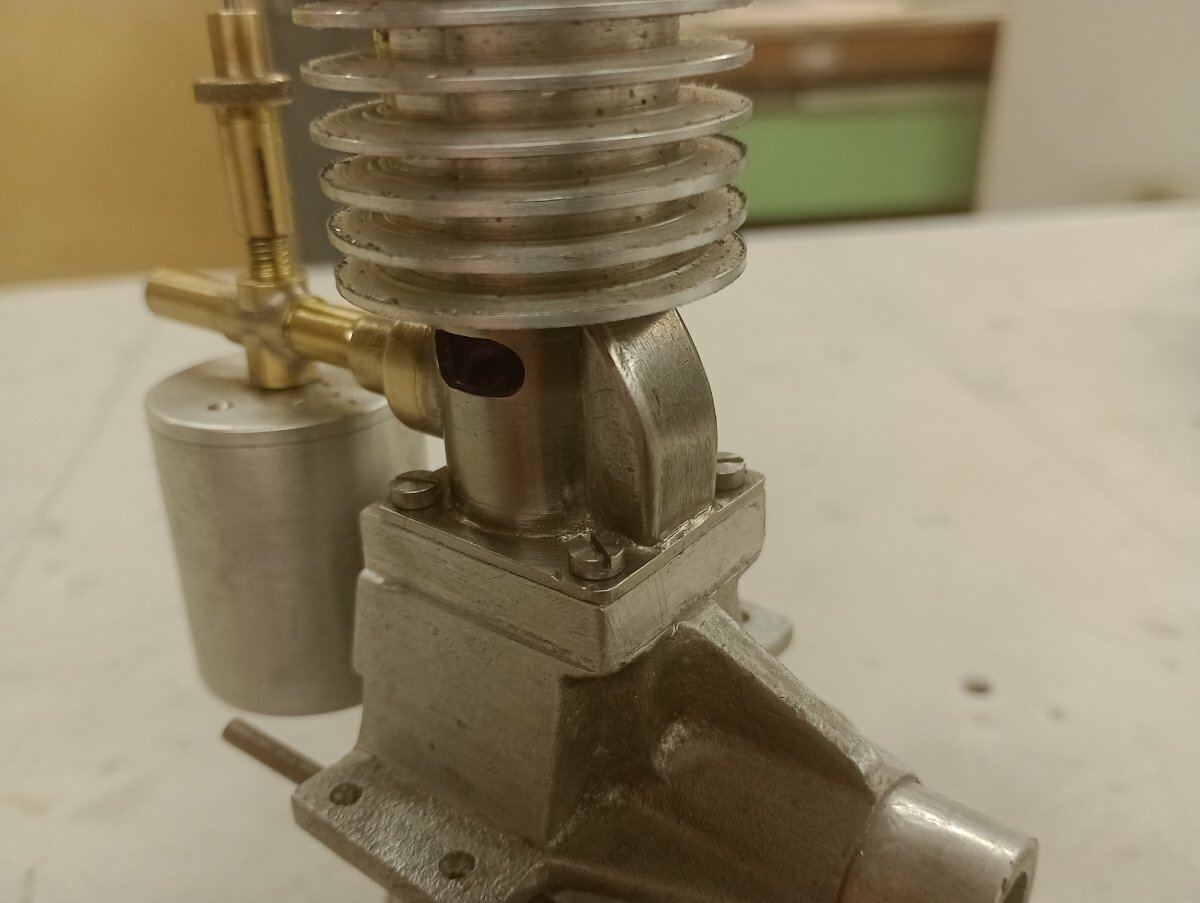
Once squared up I cut the recess and then brought it out to size and re-cut the thread ,then too take an actual step forward, soldered the intake and transfer on
also found time to fixthe broken and missing timer arm on the Ok super 60

-
1
-
-
No,that would be this anonymous lump from Woking precision models (?)
The following pictures should help explain, basically it's based on the Swiss Dyno construction
-
1
-
-
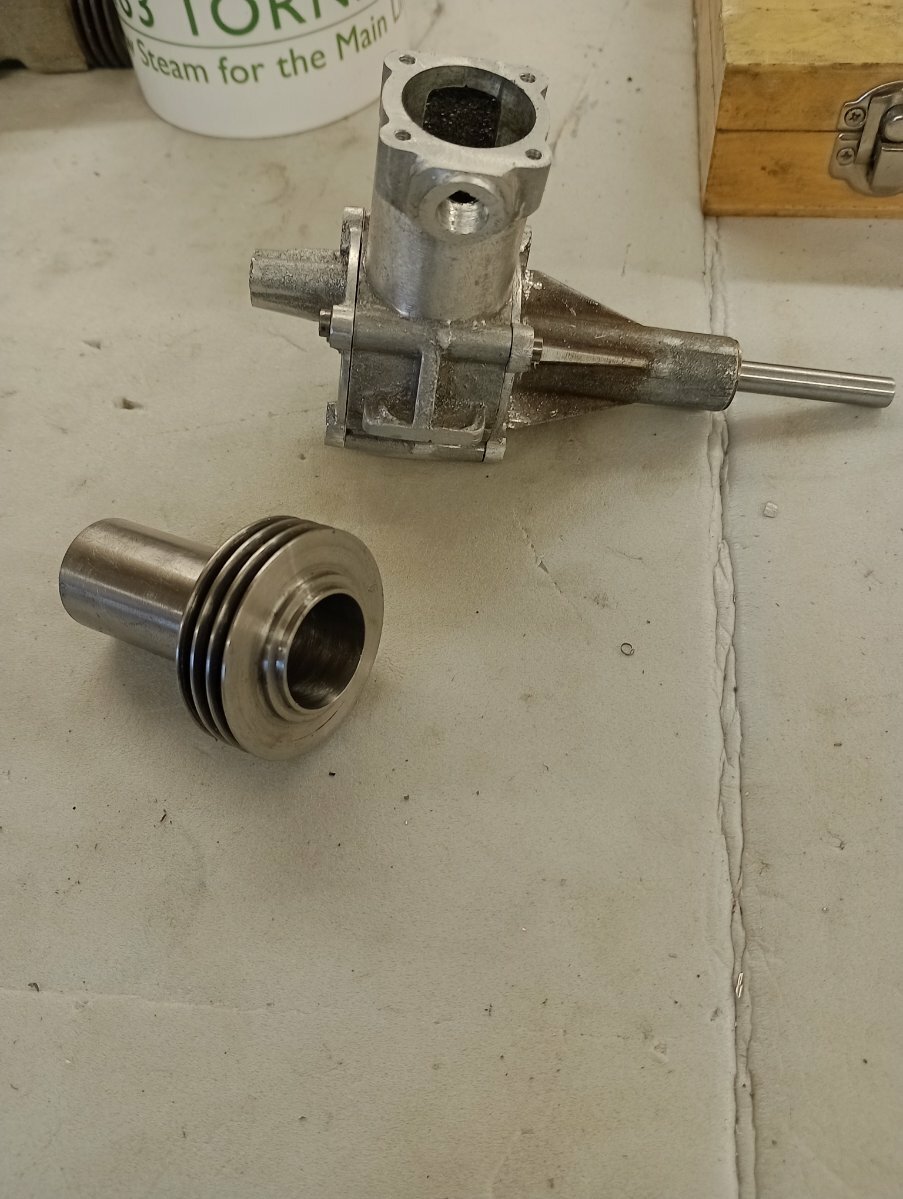
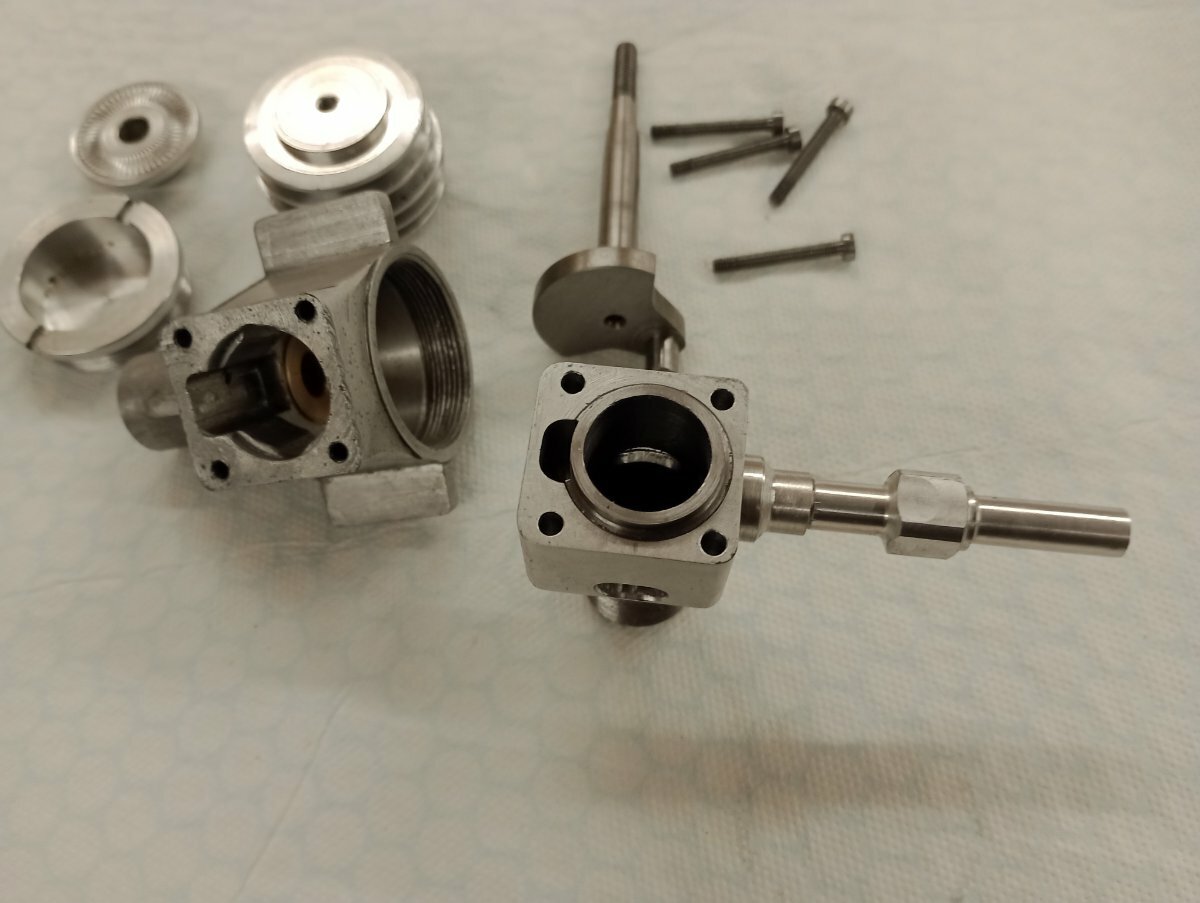
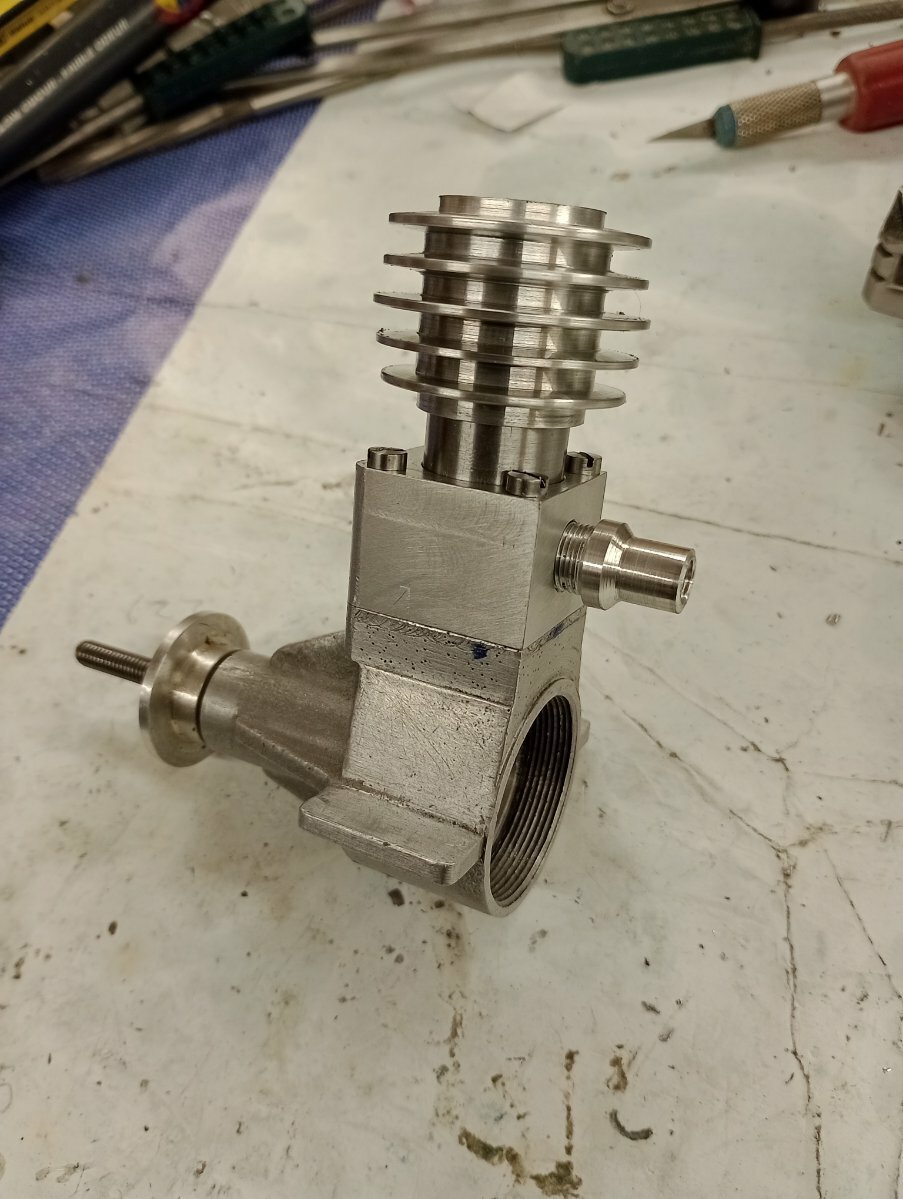
Intake tube done and exhaust ports opened out, once I've made the N/V it's onto the piston/liner that's the hardest and most important part of the build
-
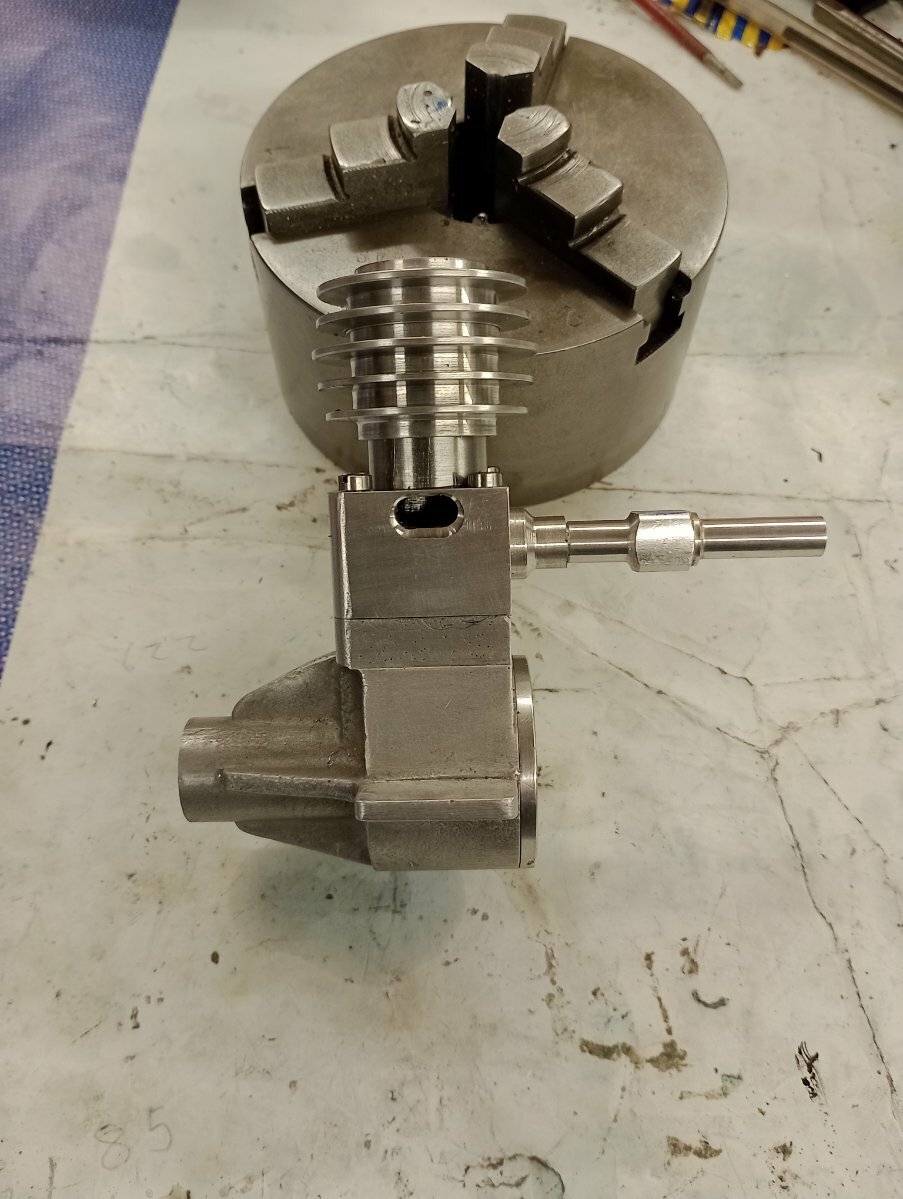
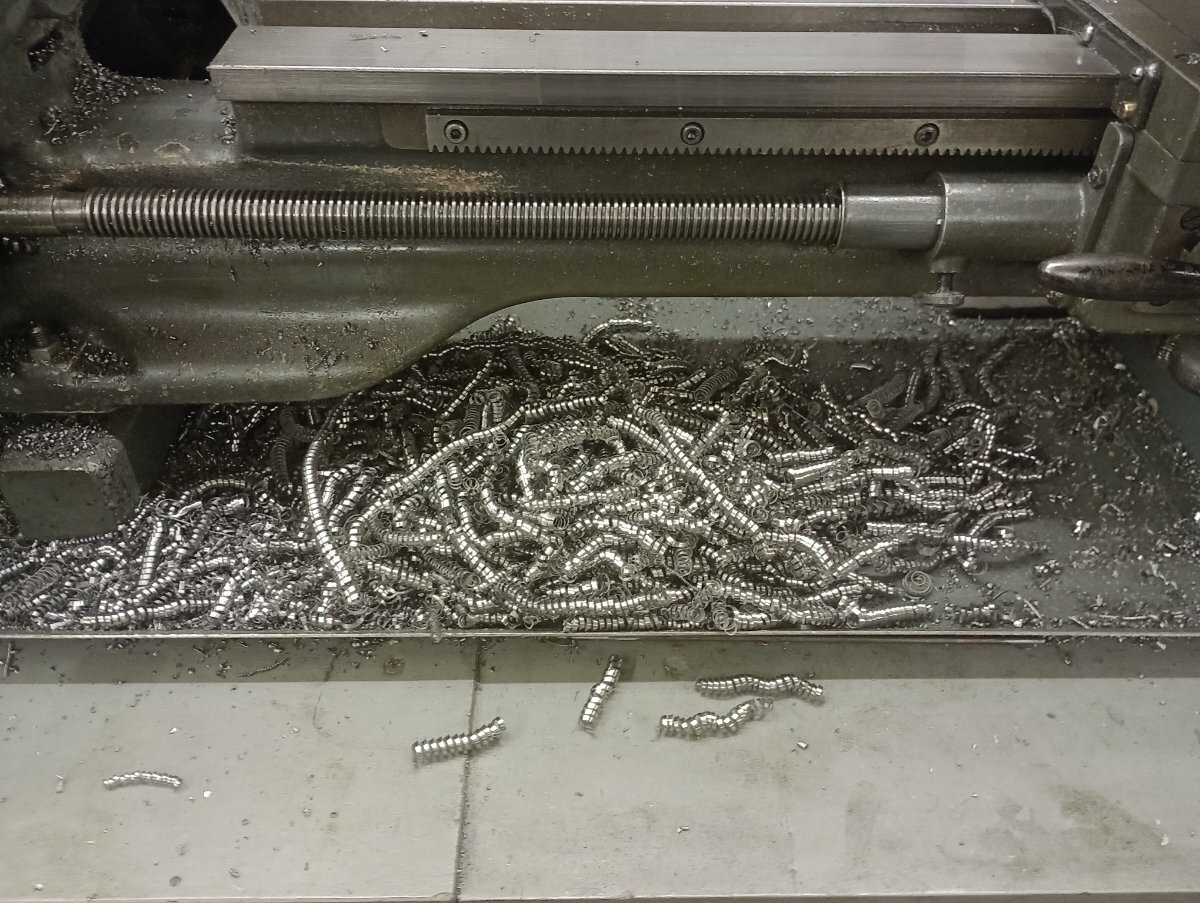
Having finished making the six crankshaft blanks made a bit more progress with the Speary 2,0
-
2
-
-
Yes you did doge a bullet there, lucky not too have it disengage from the chuck and damage it and more to the point, you!! Mounting the workpiece securely is paramount for safety and accuracy,also if you had machined the shaft (oversize) first it would have reduced the excessive jaw over hang.Also increasing the rpm is exactly the opposite of what you need to do to improve the quality of finish, a mistake most beginners make when starting out,myself included! I would recommend talking a step back and sort out the basics of work holding, tool grinding and getting the lathe running at the right speed range,you're up against it using a 100 year old lathe as it is(and good on you for doing so)
three crankshafts produce a lot of swarf
-
1
-
-
If you go on e-bay and look for myford accessories they sell a clip together belt,abit like the old motorcycle final drive belts before using chains,this should give you the chance of adjusting the belt length to suit
-
Speed,feed and depth of cut,l'm running 200 rpm 20 thou cuts and hand fed face cut,I prefer hss as it seems more tolerant of interrupted cuts and of course you can regrind/shape them too suit,btw when you put a cut on how do you measure it as there are no graduations on your cross slide ? are you using a dial indicator?


Another engine ID please
in IC Engines
Posted
Oliver Battleaxe 2cc 1946 v/rare