


Lucas Hofman
-
Posts
1,183 -
Joined
-
Last visited
Content Type
Profiles
Forums
Blogs
Gallery
Calendar
Downloads
Posts posted by Lucas Hofman
-
-
A simple stripe makes a lot of difference!

Now we are at the ARF stage!
Cheers, Lucas
-
 4
4
-
-
Cowling and the black fields under the wing are done. Striping tomorrow. In the picture I am trying out whether 8mm og 10mm wide stripes looks more like the prototype. I am leaning towards the narrower stripe, but with a 10mm gap between the red and the stripe.
Regards, Lucas
-
1
-
-
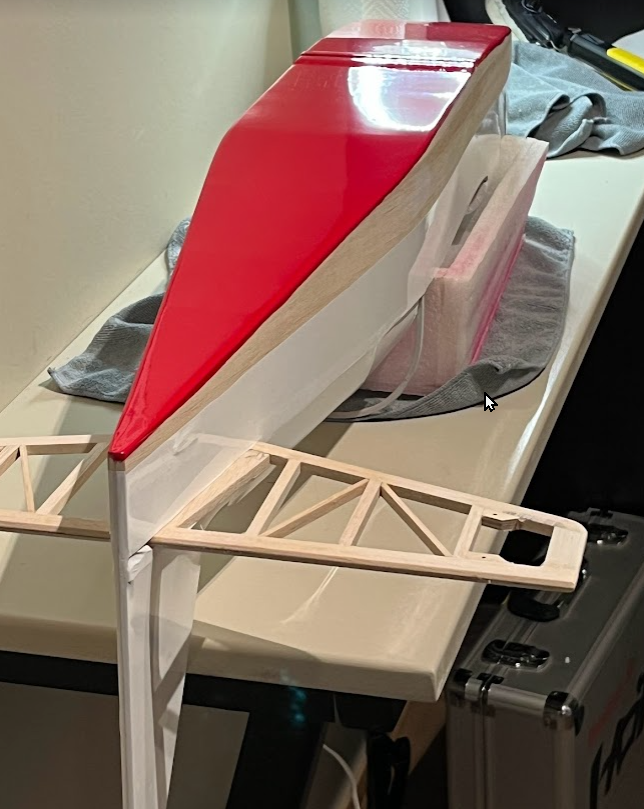
Nearly finished with the fuselage:
Some striping and the cowl are left. Finished with covering this weekend. It is funny that I always look forward to the covering stage, and then I am glad it is over...
Cheers, Lucas
-
2
-
-
I bought one too. I think it was this one: https://www.slecuk.com/crafty-cutter. However, the cutting edges get blunt quickly when cutting film and the blade could not be shifted.
Thanks for the tip about gluing 2 blades to a piece of wood. That may come in handy.
-
A little further every day:
A razor blade with a 3mm wood piece glued to one side helps to cut a constant distance over an edge. It helps with getting nice seams.
Cheers, Lucas
-
1
-
-
12 hours ago, Fun Flyer said:
It's almost a shame to cover it. The build quality is beautiful.
Thank Fun Flyer. However, the build speed is quite slow I fear...
But since building is for fun that does not matter.
Regards, Lucas
-
I took the topside first. Not too pleased with how the tail turned out:
Mostly because of the stringers that I should have continued further back. Also there is very much crimping involved, which tend to lead to somewhat ragged edges.
But the whole topside is done. The rest is easier.
-
When one forgets to press the "Submit Reply" button one does not get feedback, but the site does not lose the content entered. So "the red stuff" came on the next day:
Since it will be raining tomorrow (on snow, so the surface gets very slippery) I expect to start on the fuselage. Is it wise to start with the difficult part, i.e. the fin?
Lucas
-
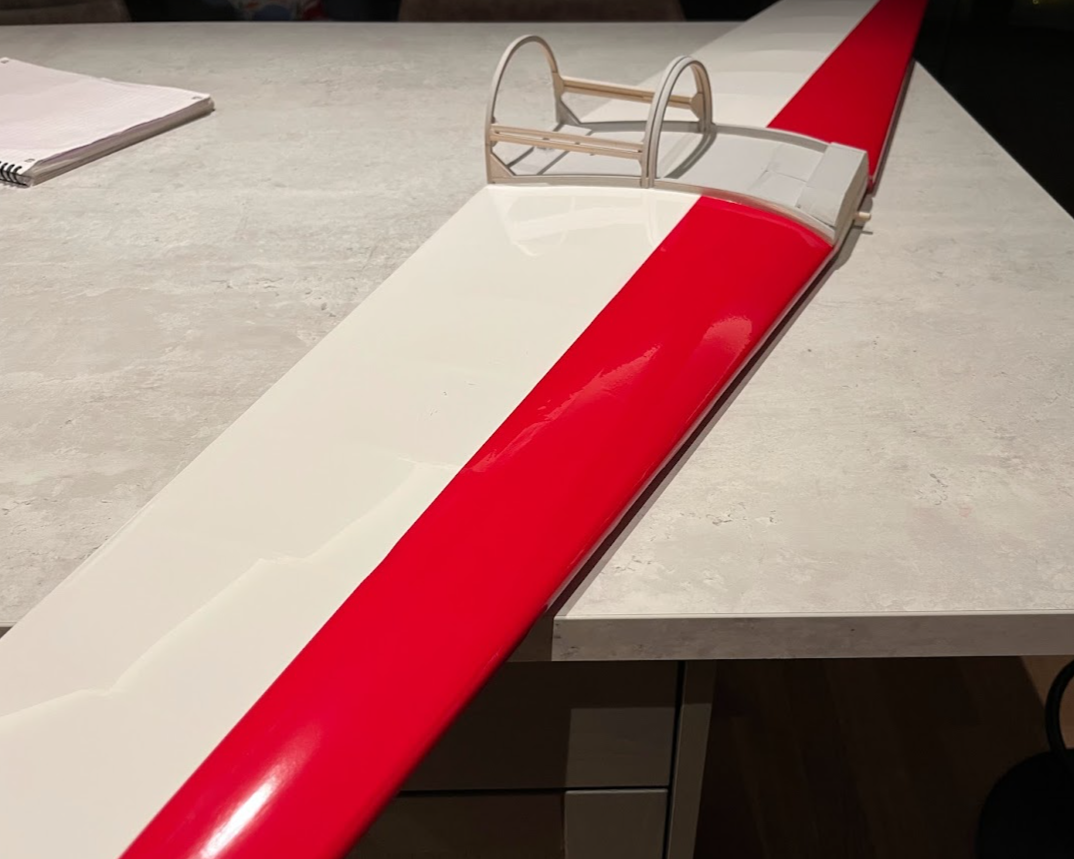
To cover the ailerons cost as much time as the wing itself...
The red stuff is next.
-
To cover the ailerons cost as much time as the wing itself...
The red stuff is next.
-
1
-
-
The feeling comes back quickly and the first results are not too bad:
-
3
-
-
Final sanding round and closing of the wing seat gap with epoxy/microballoons, force into the gap with a syringe:
Happily I got the wing off again....
Now there is not postponing anymore. Tonight covering will start. It is more then 2 years ago since I last covered a model, I hope I still can do this properly. Happily it is an easy scheme to cover.
Cheers, Lucas
-
1
-
-
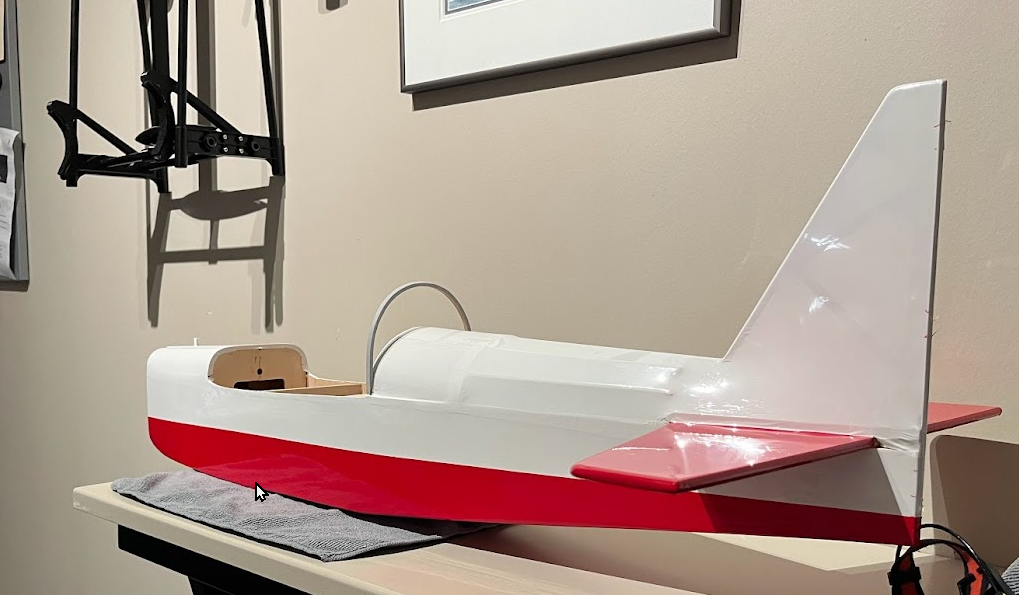
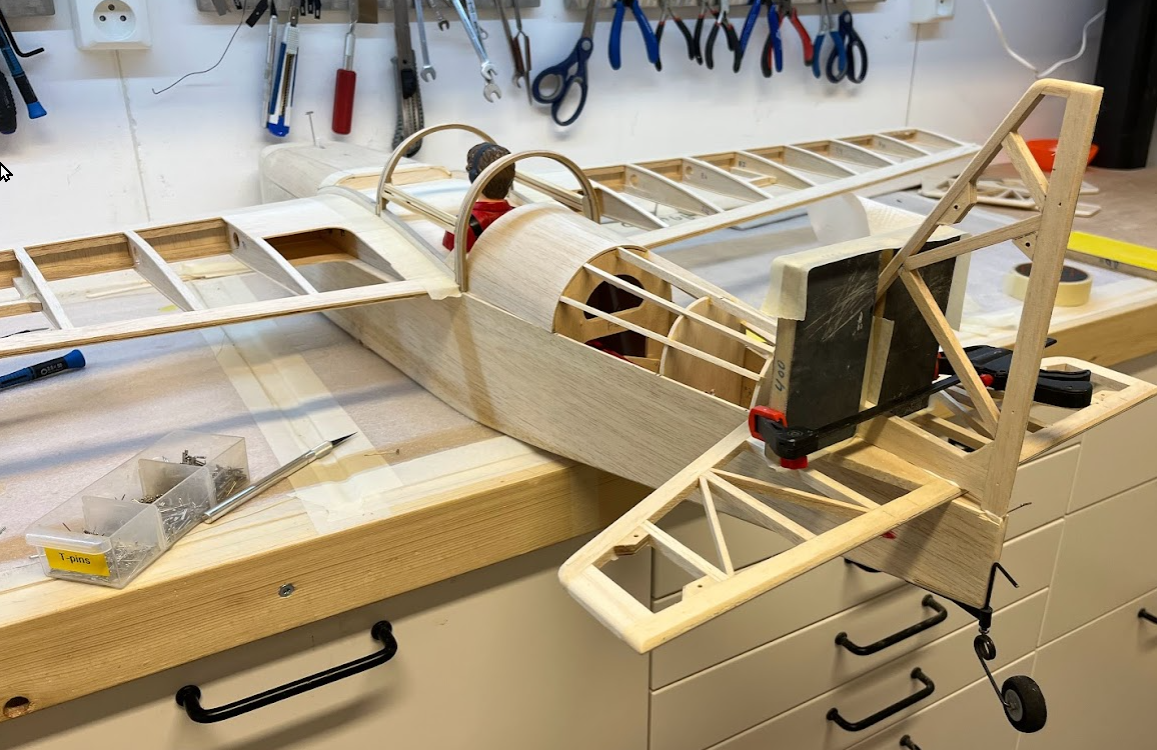
This is a good phase in building: I could not withstand the urge to spend an hour mounting everything together and see the complete airframe "in the flesh":
All the best for the new year!
Lucas
-
2
-
-
All the fin reinforcements are in place.
Not too long now before covering starts!
-
2
-
-
I always try to do some "new things" with every build. In this case I would like to use Robart pin hinges, so that the hinge line can be 3 mm behind the aileron leading edge. Like on the full size. However, trying to drill the holes (in a test piece of the same thickness as the aileron) I did not manage to prevent the holes from coming through the surface.
So the fallback solution is the well known fuzzy hinges. Tonight I made all the slots:
-
1
-
-
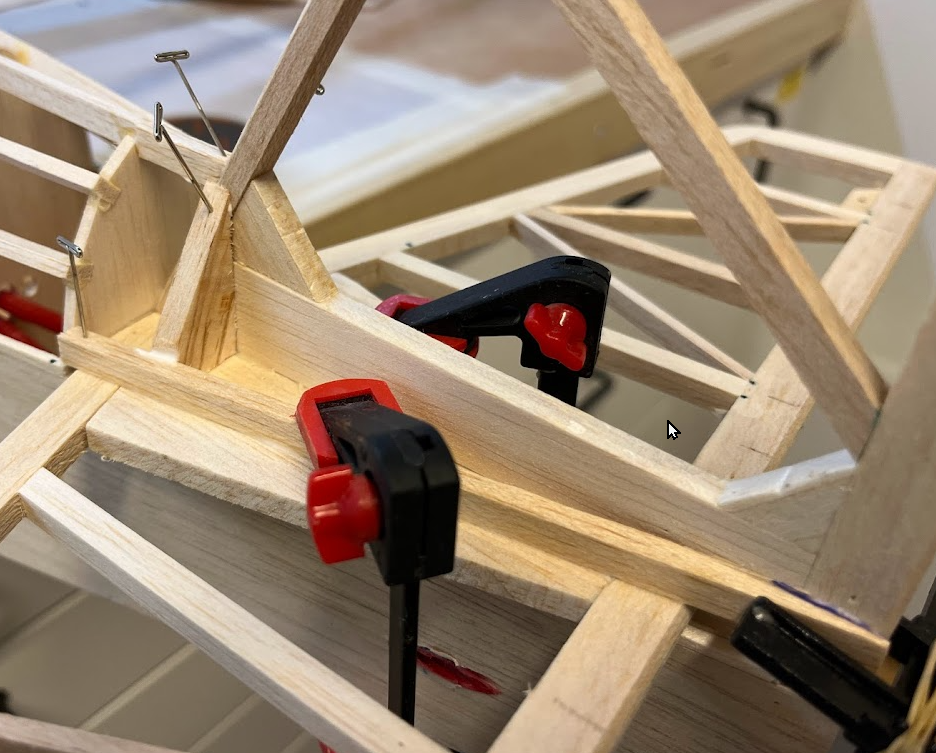
On 29/12/2022 at 09:17, Peter Miller said:
A bit neater than my usual system for clamping them.Must do that in future.
Main reason was that I only had flat nylon strips around, but it is little work and absorps the landing loads very well.
Glued the tail feathers in place last night. It is beginning to look like a plane:
-
1
-
-
1 hour ago, Peter Miller said:
A bit neater than my usual system for clamping them.Must do that in future.
Main reason was that I only had flat nylon strips around, but it is little work and absorps the landing loads very well.
-
Bend the landing gear tonight. it is always difficult to get both legs symmetrical!
I glued some light ply strips on the bottom to lock the 4mm legs completely in place:
Hope to glue to tail feathers i place tomorrow.
Cheers, Lucas
-
On 19/12/2022 at 09:14, Peter Miller said:
According to MY plan and the RCM&E plan the front of the tailplane is butted up hard against F-8 which leaves the gap in front of the fin post.
I mention both plans because variations between the two are not unknown.
I hope that sorts the problem out.
It does. I saw it when I did have another good look at the plans.
Merry Christmas and many happy landings next year!
Lucas
-
On 02/04/2022 at 11:16, Peter Miller said:
Lucas.
Here is a photo of one of my ba=race attachment points
@Peter, are both sides like this, or do you have a possibility to adjust the length at one end?
Lucas
-
I think I saw the answer on one of the photograph in the build article. The stabilizer should go even more forward as on the picture above. @Peter Miller Can you confirm. Should it move all the way to the bulkhead. I cannot figure it out from the drawing.
Looking one more time at the drawing I see on sheet 1 the forward fine and stab aligned at the front.
Regards, Lucas
-
Question about where the horizontal stabilizing should be. Should it be as in the following picture?
Which means the elevator joiner should be mounted before glueing on the fin. Or should the stabilizer further back, so that the aft spar aligns with the aft spar of the fin?
Regards, Lucas
-
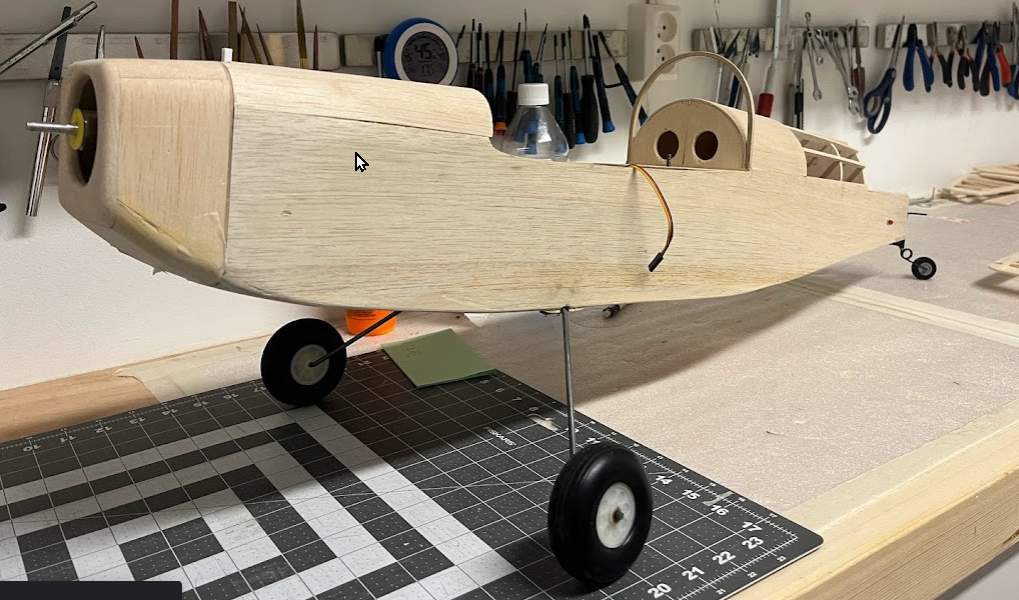
Next was the landing gear. I have a nice bending jig that bends 4mm piano rod easily. However, when fitting I found out that it was 1,5 cm too narrow. That was not my fault: the horizontal part of the landing gear is draw a bit narrower than the fuselage frame next to it. Now 1m rod is cut up in 3 pieces that all are too short....
Well, on the other hand I could have checked the drawing against the model. Then I would have found out. Now a trip to the model shop is needed before we can continue.
Happy Christmas and many happy landings next year if I do not "see" you before.
Regards, Lucas
-
2
-
 1
1
-
-
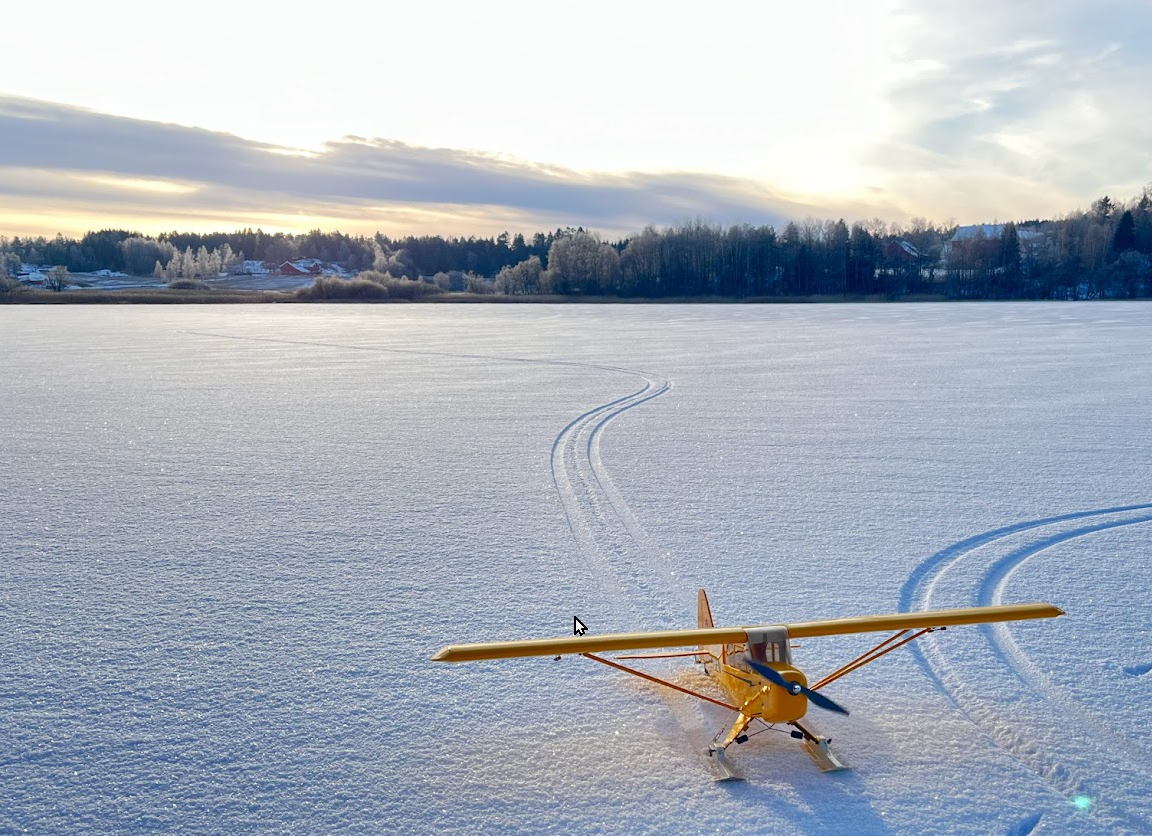
A long time with no progress. Partly due to RC sailing and 5 club boats that needed some service. And I have been flying on ice for the first time this winter:
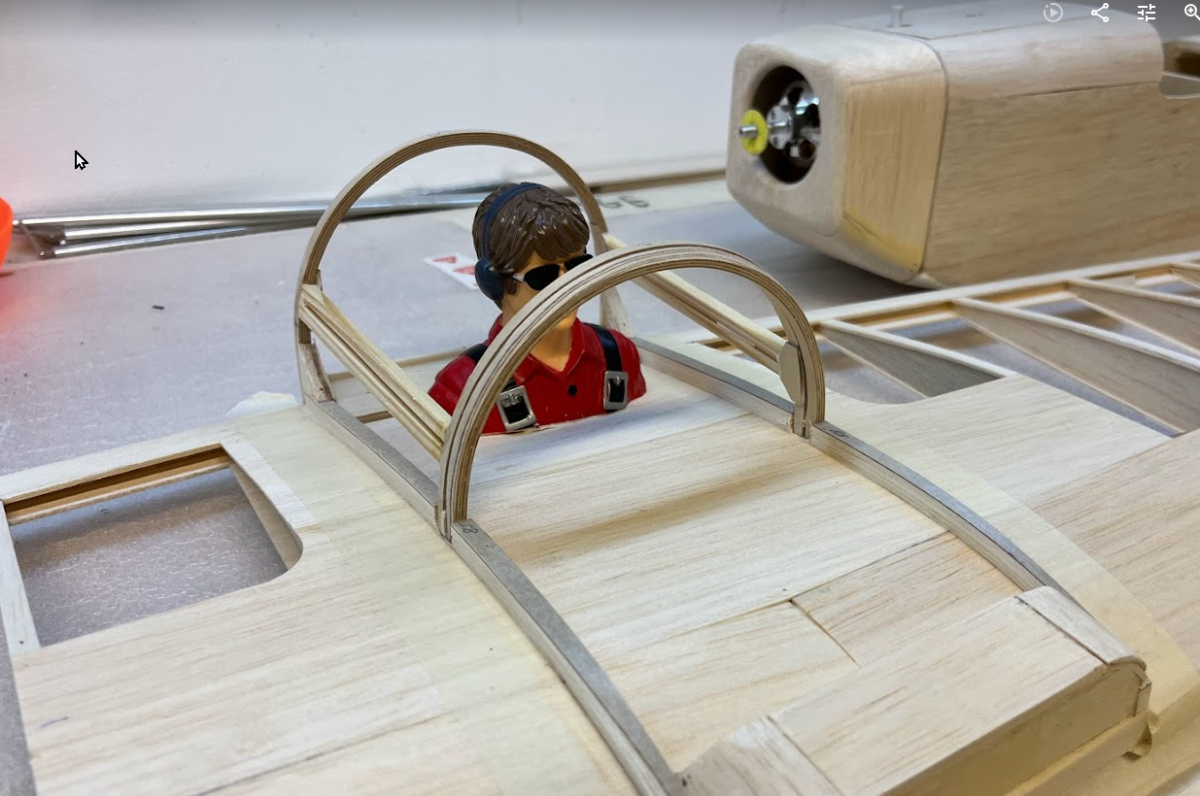
But today a little was done:
The canopy frame came out well and are quite solid. Maybe it will be an opening canopy some time in the future. The pilot was too high so part of his chest was removed. He is skrewed in place from below so he can be swapped out for a little camera some time in the future.
-
1
-


Lucas's Rans S-9 Chaos
in RCM&E Plan Builders
Posted
Started with the canopy tonight, but I wonder how to fix this while gluing. If using small screws, how many would one need? Is it best to drill and fix dry, then take out all screws, apply canopy glue and screw to hold or is it better to glue first (but how to hold the plastic sheet in place then), and drill holes and screw later?
All advice appreciated!
Lucas