

.JPG.5de97394e10ff89d3bebb1d8fe2f7c38.JPG)
David Hayward.
-
Posts
366 -
Joined
-
Last visited
1 Follower
David Hayward.'s Achievements
168
Reputation
-
.thumb.JPG.03bb2f460e959cb7df68c482bfeb0b7d.JPG)
Seagull Master Kit Edition A6M2 Zero Build
David Hayward. replied to David Hayward.'s topic in Warbird kits
Some further progress... As there will be a separate battery for the retracts I am using two C&K DPDT panel mount slide switches, sourced from RS, and wired to utilise both poles of each switch. Z30, Z31. Construction wise its pretty much there, so I put it all together and immediately found the drop tank sits just 5mm above the ground, so I’ll be modifying that to give more clearance and also attaching with magnets rather than the screw fixing I currently have. Apart from that all else seems ok, weight is currently 8.5 lb. Z32,33,34. A few things to fettle but after that, onto finishing, I will be glassing the fuselage and covering the wings with Oratex. -
Seagull Master Kit Edition A6M2 Zero Build
David Hayward. replied to David Hayward.'s topic in Warbird kits
With construction of both wings complete I set about fitting the mechanical retracts which were supplied with the kit. A plastic moulding forms the well for the wheel and leg which fits nicely into the cut-out in the wing sheeting with the actuating rod passing under the moulding on its way to the fuselage. I will be powering the retract servo, a Futaba S3170G with it’s own battery pack as a precautionary measure. Retracts in, I then fitted the aileron and flap servo’s, but will complete the linkages later. -
Seagull Master Kit Edition A6M2 Zero Build
David Hayward. replied to David Hayward.'s topic in Warbird kits
Well about three weeks has passed and there doesn’t seem to be a lot to show, but to keep this blog up to date, tailplane and fin are now sheeted, I have assembled the ailerons, flaps and servo cradles plus part way through construction of second wing. -
Seagull Master Kit Edition A6M2 Zero Build
David Hayward. replied to David Hayward.'s topic in Warbird kits
I thought now wood be as good a time as any to fit the canopy and put fixings in for the screws, which will be the only means of securing it as I prefer not to glue canopies if I can possibly avoid it. Underside of the fuselage directly under the wings is detachable for access to servo’s etc and constructed as a separate item and also has the drop tank attached to it. Rather than permanently glue this in position I have fixed in position with screws so I can detach it easily. The aerial supplied, which fits just behind the canopy, is made from a very hard plastic or resin material, so it concerns me if the model should perhaps nose over, it would rip out the fixing and some of the fuselage, so I made a replacement from balsa. Time to make a start on the wings, rather than pinning ribs etc to a building board, parts slot together with R1 and the leading edge each clamped to a frame made from the rectangular tube that was used in construction of the fuselage, but now cut into two parts and joined by supplied plywood angle; I imagine this is the same construction technique used for their ARTF models. While the glue is drying on the wing I pieced together and glued the tailplane and fin. -
Seagull Master Kit Edition A6M2 Zero Build
David Hayward. replied to David Hayward.'s topic in Warbird kits
Installing the engine, in this case an OS 91 FS and then fitting the cowling were next on the agenda. First the engine, instructions state the engine should be positioned so the drive washer is 150mm forward of the firewall, however, measuring from the plans the drive washer is 145mm forward of the firewall. Neither are achievable with the engine mount supplied with the kit, the arms just aren't long enough. With the cowling located as per plan and constraints of the fuselage as it currently exists, the front of the cowling is 130mm forward of the firewall, so I am mounting the engine with the drive washer 135mm forward of the firewall. I am hoping this slightly aft position of the engine won’t mean I will have to add weight to get the CG right. Now the engine position is set, fixing the cowling was next. There is a dedicated sub structure to support and provide fixing for the cowl, however, there is no reference to it in the instructions until almost the last page although it does appear in some images. With the sub structure assembled and glued, the instructions don’t detail where it should be positioned. The plans show it backed onto F2A and wherever it appears in an image it’s shown flush with the front of F1. Dropping the structure into the cowling, it naturally sits 45mm into the cowl, just in front of the slightly flared back end. So I went with this as the best position for supporting and fixing the cowl. The structure did require packing in order to fit snugly onto the fuselage front box and I fixed it with screws initially in case its position needed adjusting. With some careful measurement I made a cut out for the engine and drilled fixings for the cowl, fortunately all worked out fine. -
Seagull Master Kit Edition A6M2 Zero Build
David Hayward. replied to David Hayward.'s topic in Warbird kits
Yes I doubled the width of the former around the circumference with balsa at the time of fitting the sheet; doesn't show in any of the images. -
Seagull Master Kit Edition A6M2 Zero Build
David Hayward. replied to David Hayward.'s topic in Warbird kits
Further progress with sheeting the fuselage which is now completed although still in its 'rough' state, will look better once filled and rubbed down. Moving onto engine installation and fitting the cowling next. -
Smooth Operator designed by Pete Tindall
David Hayward. replied to David Hayward.'s topic in Build Blogs and Kit Reviews
Yes it's a nice size model and as you say quite a lot to cover. Very distinctive colour scheme Richard, that should show up well. Flies very nicely and pretty docile too, I'm sure you'll love it. -
Seagull Master Kit Edition A6M2 Zero Build
David Hayward. replied to David Hayward.'s topic in Warbird kits
Thanks Paul, hopefully I'll make a better job of it. -
Seagull Master Kit Edition A6M2 Zero Build
David Hayward. replied to David Hayward.'s topic in Warbird kits
More work on the fuselage, stringers, fin support, control rod tubes etc completing the skeletal structure. Next came gluing 2mm sheet balsa skins which are all pre-cut. A couple of pieces had joints along their length which weren't glued very well, so just needed gluing again before trying to bend around the fuselage. Skins so far all going on fine, using plenty of water to help ease them round the various contours. -
Smooth Operator designed by Pete Tindall
David Hayward. replied to David Hayward.'s topic in Build Blogs and Kit Reviews
Well I think it would be fair to say the Smooth Operator has met expectations with the maiden flight now completed on Saturday, flown by clubmate Derek with just a few gentle maouvres and a crackin' landing; wind was fairly brisk and a little gusty... -
Seagull Master Kit Edition A6M2 Zero Build
David Hayward. replied to David Hayward.'s topic in Warbird kits
Yes it is and yes that's about the size 4 stroke I plan to use. -
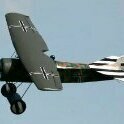
With the last project out of the way and the workshop cleaned ready for the next, I’m now starting a Seagull Master Edition A6M2 Zero, as I am in need of a warbird. The only other Seagull kit I have built was a Boomerang Trainer about ten years ago and from what I remember they are quite nice kits. An image of the box shows the basic spec of the model. In the box we have a set of comprehensive instructions and a full size plan (almost as big as my workshop) which is used for information/reference rather building directly from. Wood is mostly lite and birch ply with some balsa. Again a pretty comprehensive hardware pack is supplied. Clear canopy of course, glass fibre engine cowl, dodgy looking pilot, pushrods, fuel tank, nuts & bolts etc; here’s a short video of everything supplied. Zero Parts-2.mp4 Going with the instructions the fuselage is built first. One minor change I made in the order of build was to glue formers F2 to F5 in place before F1. The reason for this being F1 is angled to give 3 degrees side-thrust, thus the fuselage sides are not the same length and F1 sits at a slight angle between the two sides and fitting formers F2 to F5 first ensures distortion doesn’t creep in when F1 is then glued and clamped. So here is F2 being glued to the rh fuselage side and held square to get things off to a good start. Once this was dry, formers F3 to F6 added and then at this point a rectangular steel spine is passed through rectangular slots in formers F1 & F6 and then all formers up to F12, which ensures a nice straight fuselage. That’s progress to date, more to follow...
-
Hangar 1 Calypso Build
David Hayward. replied to David Hayward.'s topic in Classic Aerobat Build Blogs
A simple design to make my job easy, I used Solarfilm Supershrink Polyester covering for the yellow and Solartrim red for the trim, plus Guild red to paint the engine cow, plus a couple of coats of gloss fuel proofer. Final weight is 6lb 3oz which I think is pretty good for 64" span model, the OS55 up front should pull that around with reasonable haste. -
Hangar 1 Calypso Build
David Hayward. replied to David Hayward.'s topic in Classic Aerobat Build Blogs
Tailpane and fin fixed in position. Control rod to elevators installed and tested. Then it was time to install and test the closed loop system for the rudder. After which underside of fuselage was sheeted pretty much completing construction. rudder c.loop-b.mp4 Getting the model balanced, just needed to move the rx battery back level with the wing trailing edge to get the CG between the forward and rearward positions shown on the plan. It will move back a little when covered but will still be closer to the forward position. Couple of images of the completed model, just need to get on with the covering.

