


Denis Watkins
-
Posts
5,804 -
Joined
-
Last visited
Content Type
Profiles
Forums
Blogs
Gallery
Calendar
Downloads
Posts posted by Denis Watkins
-
-
There are two camps here David, as you suspect, to clean off, or not, the burnt cellulose.
In truth, it is not very deep, and a good quality adhesive will penetrate down to good timber and the joint will be sound.
A good glue joint is 1st made by " wetting ". The glue is spread evenly and wets both surfaces to penetrate and dry.
Heavily burnt surfaces are best wiped over with abrasive paper.
-
There is a manual on CenturyUK Frank.

-
Reverse the throttle setting
On the transmitter Greg
And bind again
-
8 minutes ago, cymaz said:
Oh, also thinking of adding Dubro 10oz tanks but surgery may be needed....keep you posted
I don't have my Dual Ace now, but I flew with 6oz tanks, believing the fuel load lighter, and easily flew 12 minutes, though I deadsticked 1 motor one time at 14 minutes, so stuck to 10 minute flights thereafter.
Is it that you want a secure longer safer flight margin? As your looking in the region of 25 minutes with a .40 on a 10oz tank.
-
Wow Jim. Superb.
-
 1
1
-
-
All good suggestions here above. In my last life I was a school teacher and we evolved to the powered pole from free flight.
Like the flat based gliders from the BMFA today, we 1st designed, trimmed and flew low cost gliders from hand launch.
They were then stabilised by 2 strings from 2 points from the powered pole, with small outer wing tip weight as suggested.
Most of the models actually flew well as opposed to some being dragged around the pole.
-
As you say KC, Flaps are not clearly seen.
The Australian Accident Investigator sees the " nose high " approach bringing on the stall.
A normal approach is level to nose down.
-
Ares do quite a range ED, from 1S to 3S, but though expensive, have had a few from ebay, and they are still flying after 2nd season.
Just search Ares 1S battery or the like for your model.
-
Phil, did we start off with Turningy? Which is here
https://manuals.plus/turnigy/plush-32-series-esc-programming-card-manual#axzz7rJCSyLf4
I don't know YEP
But YouTube has full YEP set up
-
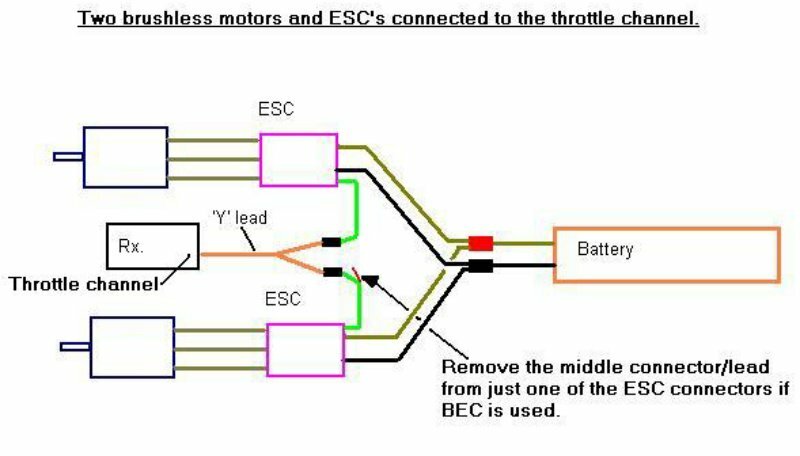
This diagram appeared sometime back and was used to double up on 4 motor.
-
You can reduce your servo end points on your Transmitter John.
Typically a percentage to get say 50% - 80% travel.
-
According to the bumph, you have the right cable, shown here:
About this item
- Flysky FS-SM100 Simulator Cable
- Although the SM100 cable was intended for FMS and older Windows PCs, so far we have tested the SM100 flight sim cable on Windows 10 with FPVFreeRider, PicaSim & Clearview flight simulators and it works great.
Now Greg, sleep on it and try again.
A flight Sim is invaluable in getting you flying without damage to a model.
-
37 minutes ago, Greg said:
Just another question whilst I am here. I have been looking at the Realflight 9.5 Trainer Addition simulator. But I can't find if it will work with my FS-T4B transmitter. Does anybody know?
If you have the correct FS-T4B lead Greg, that is your only hurdle.
Any flight Sim just uses any sticks from any transmitter.
-
11 minutes ago, Greg said:
No that is not going to work as I can't find a Run file.
Is there a .exe file to click on
-
On 17/01/2023 at 14:57, Denis Watkins said:
Configure your sticks Greg, it does not matter that you have a Flysky; The correct lead just connects your controls and switches to the computer, and nothing else, no transmissions or signals, nothing from the RF board.
Connect your Transmitter, Switched OFF to the computer by USB lead, and it will come live.
Ok, your Tx needs to be calibrated to the sim, and is very simple. The sim has to deal with people who use left of right, up or down in all manner of ways, so all that it needs now is for you to go to Settings, and push each stick carefully, as instructed by On screen prompts,to all four corners for both sticks then set your switches for flaps and retracts.
I am your age by the way, as are many on this site.
And we all keep this hobby going.
-
With the address book hack Gonzo, it is just a list of emails that the hack can contact.
From there, it depends what you do with their email, you download parts or you contact them.
If you do none of those things, then nothing will happen.
They cannot possibly get your bank from an email address alone.
-
1
-
-
Turningy Instructions are online too
-
Setting (Brake ON/Brake OFF) by the controller
Set the throttle stick at middle-> Power on ESC->A sequence beeps and then follow with single and repeat DD- , means now it’s in controller brake setting procedure -> move the throttle stick to Max throttle position (means Brake is ON), or move the throttle stick to Min throttle position (means Brake is OFF)->a sequence beeps means setting ok and followed 2 beeps “means ESC is ready to go.
-
Normal start procedure:
Power on the controller and set the throttle stick to the Min throttle position (if higher than1800us, it will get into throttle calibration).
Connect ESC as connection diagram, power on ESC, ESC will automatically detect the battery cells and using beeps to indicate the cells number. For example, using a 4s battery, beeps will be: ““. Then 2 beeps “means ESC is ready.
- Read more: https://manuals.plus/turnigy/plush-32-series-esc-programming-card-manual#ixzz7qfhZaiKH
-
Setting (Brake ON/Brake OFF) by the controller
-
Let the Phoenix configure your sticks Greg, it does not matter that you have a Flysky; The correct lead just connects your controls and switches to the computer, and nothing else, no transmissions or signals, nothing from the RF board.
Connect your Transmitter, Switched OFF to the computer by USB lead, and it will come live.
Ok, your Tx needs to be calibrated to the Phoenix, and is very simple. The Phoenix has to deal with people who use left of right, up or down in all manner of ways, so all that it needs now is for you to go to Settings, and push each stick carefully, as instructed by On screen prompts,to all four corners for both sticks then set your switches for flaps and retracts.
I am your age by the way, as are many on this site.
And we all keep this hobby going.
-
1
-
-
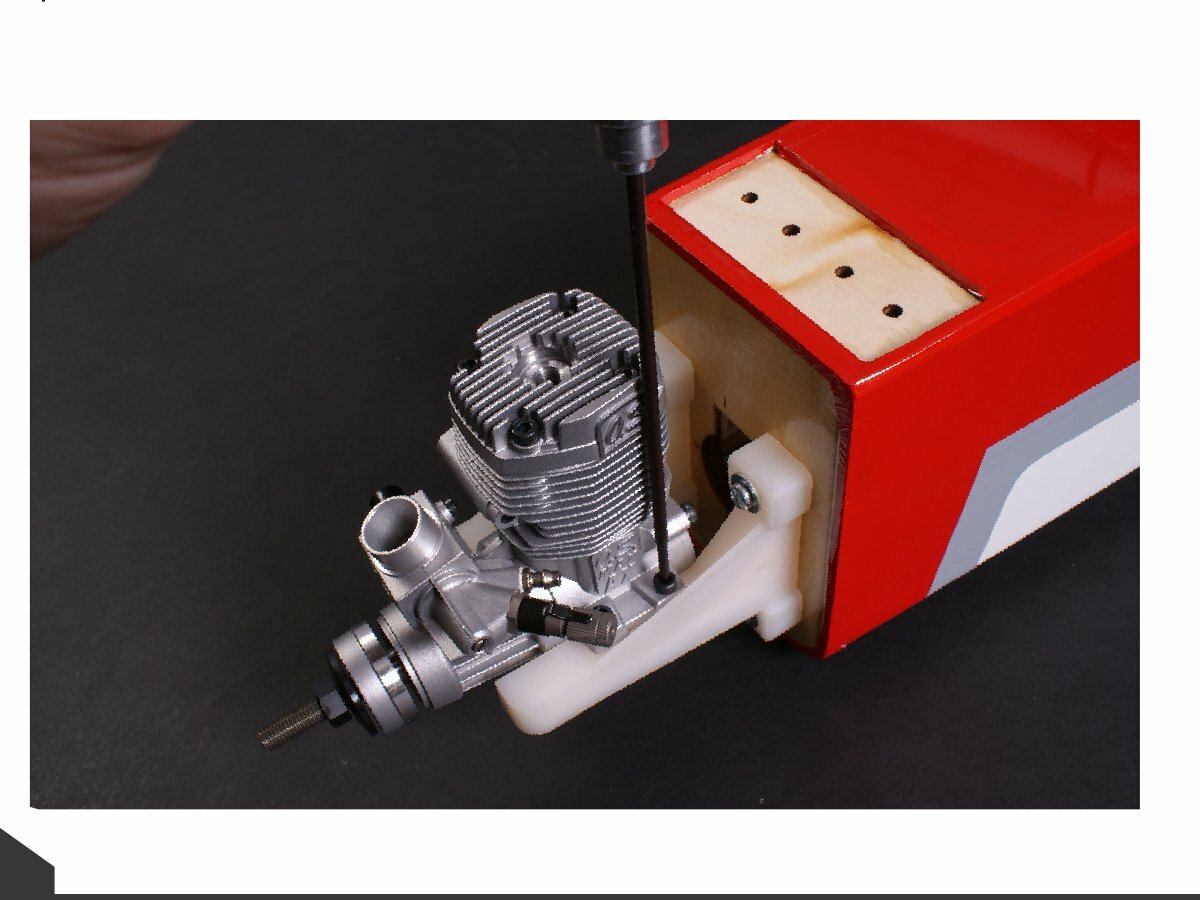
Micro screws
-
That's it Phil, you have the throttle set after the finishing 2 beeps.
To go onto the Brake, start again
But this time to have the throttle stick in the middle.
So all off, tranny and ESC
Switch on Tx with throttle stick in the middle
Power up the ESC and decide on brake etc
-
You two, are both so right. The models are difficult to fly as they have to be flown so fast, yet the more expensive lightweights can be flown more scale like.
My own successful models are home built, EPP foam, 100grm AUW, 16" - 20" span, 6A ESC, with 2S 300mah lipo, with 10grm or less, brushless motor.
-
Glad you sorted it Steve, hope it works out.
Just be aware that my list of No Stock, did not appear until I came to pay.
I had 9 items in the basket, totalled up and ready, but 7 Out of Stock.
Only appears when you come to pay.
-
Double check those head bolts JD8, as if they are M3,
It can easily and cheaply be tapped out to M3.5
-
To me too Stu, the A10 is a beautiful aeroplane, and am lucky that like so many, in my teens, I could not afford radio or large scale builds as then it was my belief and desire to build and fly a Short Sunderland ! ! !
Stay keen.

How about . . . The Nationals?
in Shows, Club Events and Competitions
Posted
Grantham, this morning
RAF Barkston Heath, active pilot training