


Chris Walby
-
Posts
2,828 -
Joined
-
Last visited
-
Days Won
3
Content Type
Profiles
Forums
Blogs
Gallery
Calendar
Downloads
Posts posted by Chris Walby
-
-
I discussed this with George at 4-Max and suitable solutions for me is to use a high current UBEC or power distribution boxes. Both or these are supplied from 3S2200 lipos which has a couple of advantages. Firstly I use 3S2200 batteries as flight packs which means they get a good performance discharge (way beyond the sort of load a RX/servos would exert in normal use) so I know they will perform when I need them to. Secondly with a high current UBEC I won't get a brown out on the RX if a servo fails or jams as the UBEC can supply more than enough current.
Works for me, but I am sure there are a few die hard that would argue differently.
-
 1
1
-
-
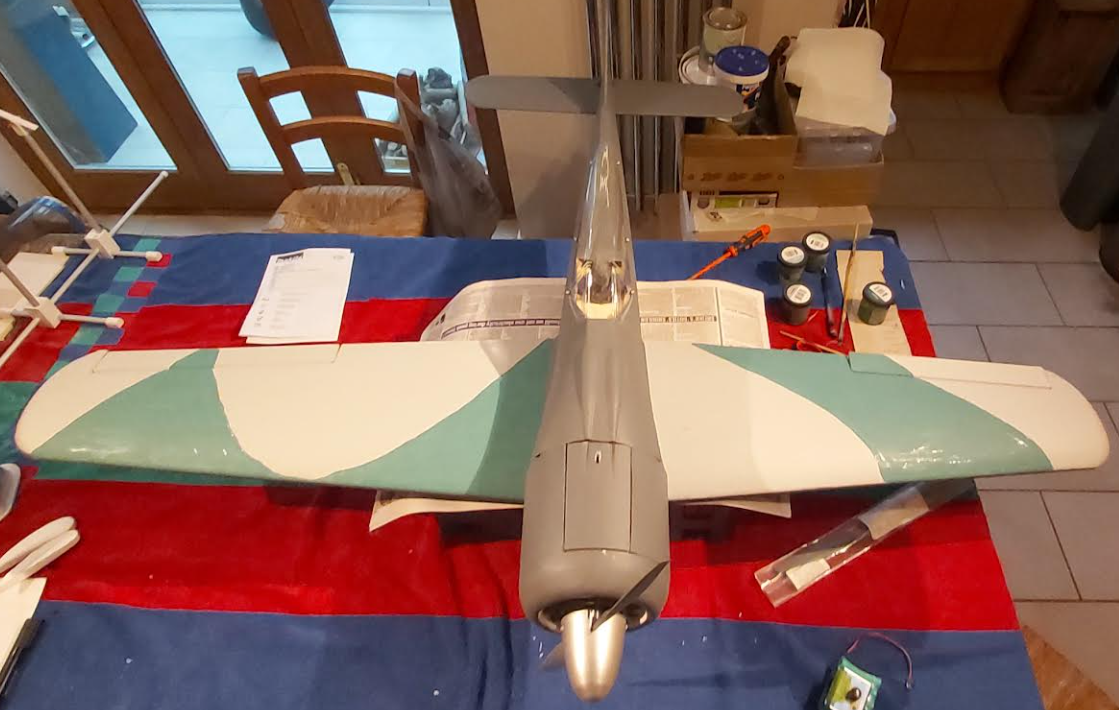
Well I am doing Red 23's other aircraft...the one that there are no photos of!
And the fuselage is grey...don't know why the photo make it looks brown!

I'll start watching Ron's videos and others weathering techniques so I am ready when I get to that point.
Rubbish weather today so I'll make a bit more progress later on.
John's FW190 and dolly are finished and James is somewhere in the covering and painting stage.
-
Looking absolutely fabulous there Richard and you are way faster than me on the building board 🙂 I was going to hum and harr, but the realisation that I don't have anything with a clipped wing nailed it for me (easily convinced after flying the FW 190),
Put me down for one and I'll see if James and John want to join in.
Might have the FW190 finished in time to start Tempest at this rate!
-
5 hours ago, Ron Gray said:
For those who are still building or haven’t started yet I would strongly recommend strengthening the motor mount plate. I thought mine was split but it turned out that it just flexes a hell of a lot! I’ve now applied, with difficulty, some carbon tow to the back of it and into the fuse sides and the improvement is amazing.
If I was building it again I would double the thickness of that plate.
I had the same issues with a Ripmax Spitfire so I used a thicker piece of ply for mine, hopefully I won't end up bending the motor adaptor with my big prop!
-
Its just so simple...not!
-
1
-
 1
1
-
-
8 minutes ago, Lipo Man said:
That’s looking very sharp already. I’ll be interested to see the final scheme - lots of variety on the ones built, I think.
....its meant to be heading towards this, So I have a fair way to go.....unless apparently he had two aircraft and mine is the one that never appeared in any photos 🤣
-
3
-
-
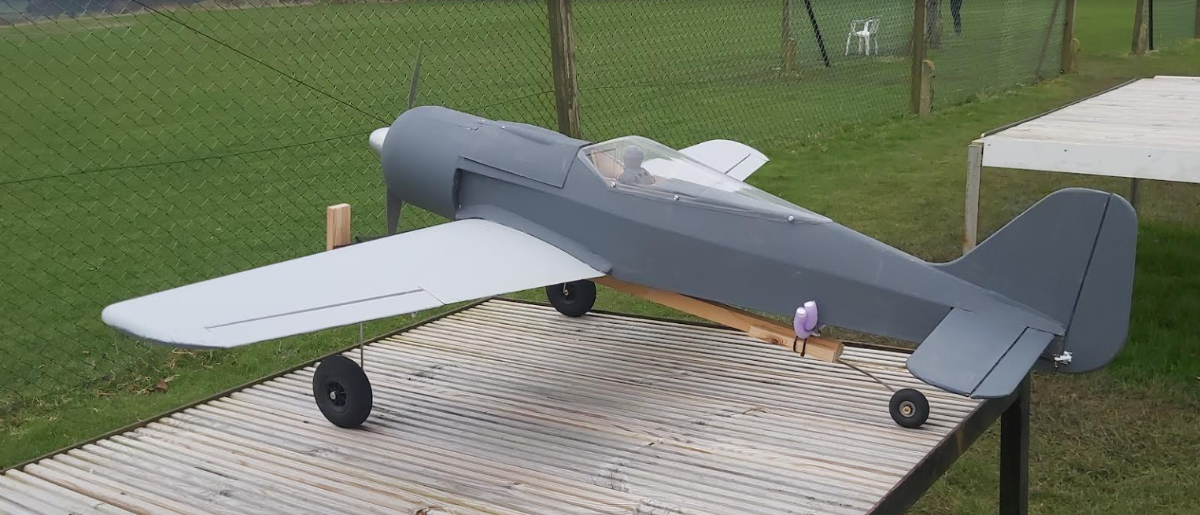
Eric, I have since bent the tail wheel up as for the maiden it sat up with a high angle of attack. Good news it leapt off the dolly, just with the 13x10 prop I think it might be better letting it build the speed up more gently. Although saying that the take off roll was a lot longer on the second flight.
I'll compare the photo with my dolly stance, but I would expect the full size let the tail lift before easing the mains off.
-
Always wondered who the puppet was and who the puppet master is....The Green man himself...or could it be Baron von Sweep? Not seen them for a few weeks guess they are wind tunnel testing the Tempest real dedication when you have that much fur!
-
3
-
-
Could be quite hard to fly scale as it just begs to be given a bit of stick + with no normal warbird bite I think I will set a rates switch for just that!
Oh and the rudder in flight is nice, a bit of yaw but not much roll so need to experiment with that + the stall...what stall! Will even try spin at some point as I think that will have a nice recovery if its anything like the rest of the flight envelope to date.
-
With a couple more FW190 maiden today any ideas as to how many are ready to be scrambled for flight duties?
And of course not forgetting the Best of British at Buckminster 27/28/29 September this year. I attended the Lindsay Todd "Renaissance" meeting a few years back (mass build) and it was great to see them turn up and chat with the designer. Lets hope we can squeeze a WR slot in.
If I get the Tempest finished I could be tempted to find another stick wiggler to be employed
-
1
-
-
Very similar maiden to mine, I had a very grey sky and a rather grey model! With you on the spinner balance and mine was C of G at 78mm so all good. Second flight I tried inverted and it did not need much elevator so I think we are quite close there + this helps the leap off the dolly so win win.
Agree with you, BIG THANKS TO RICHARD AND TEAM for all there hard work. Great flying model that is low cost and easy to build...with lots of bling if you want
Just leaves me with all the painting and weathering to do.
-
1
-
-
Maiden and one other flight. Did not need the slight up trim on the elevator so removed that and my aileron rates were too high on the maiden. C of G is 78mm and that was fine (has 60g on the battery hatch so will see if I can lose that at some point). I don't think the 13x10 works very well so at some point will try a 13x8 or even a 13x6/7. Second flight was 5 min of mixed THR and some WOT and landed with 50% on a 4S4000 so well happy with that!
Better get on with finishing the painting and weathering.
PS dolly legs are too long, but other than that it works a treat so thanks to Eric
PPS thanks to everyone else for help, encouragement and filling the thread with a lot of old waffle!
Possible John's maiden Sunday and need to chase James up now!
-
4
-
-
Mine is only a 600KV and anything under 13 inch dia and its doing less than 500W
13x10 yields 540 W and 120w/lb I don't want unlimited vertical or non scale, might even get away with the 13X8 if the dolly works well.
Will soon find out once it heads across the grass on its maiden
-
Update time!
Missed out on the FW flying as its still not finished so had to make do 😉 for 6 flights + 1 maiden and 3 training flights so a busy morning at the field!
Might just glue the rudder hinges and get on with it as the rest is there from a flying perspective!
John's is ready, but the excuse today when he brought up his dolly is that its too wet and muddy and would wait until Easter!
James is in final painting stages... I think although he did say he was going to dope it as he likes the smell!
Mine has been papered and some paint, but I might just connect things up and go fly now the dolly is finished! This flying by the others is just too much pressure and I'll finish the painting and weathering later!
Prop testing with the model has given me
13x8 470W
13x10 540W so I am going to go with the pitchy beast for starters, failing that either the 13x8 or a 14 inch prop if I have to. What's the view of the green chap with the wild hair? or anyone else?
-
Failing all of the above suggestions, phone John at Logic RC, very helpful chap and I would expect he will know what the issue is and how to resolve it.
PS people complain about the price of Specky stuff, but at least in my experience support is there and it works.
PPS please let us know the fix!
-
Most likely you will need to set the trim or throttle end point down a bit and then the ESC will arm.
Its a safety feature to stop the ESC arming and starting on the fly with the motor rotating! Its just Speky seem to output a slightly higher throttle setting compared with other manufacturers.
Just make sure the prop is off in case it springs to life unexpectedly.
PS you can check the TX in monitor mode that the throttle output is working with the RX unpowered first
-
1
-
-
3 hours ago, Geoff Copping said:
Don't be late or you could be put on a charge.
There are always positives and negatives with this type of job, but if you have the right chemistry you could be fully charged and become one of the best at your post. Although once fully charged there is a risk of your electrolyte levels dropping if you start gassing on the job, but that might be a limit of your capacity so just be careful you don't dilute yourself with water.
-
2
-
-
My DR1 will be flown at or very well below scale altitude! But hopefully above ground level.
PS still think I could get away with a barrel roll (especially if its a climb in/drop out)!
-
Hi Eric,
Thanks for the motor info and dolly rational, I think I'll add a couple of foam wedges to prevent the fuselage moving as I have put the LE restraints further out.
Looking at the video, do you purposely hold it down on the dolly until its picked up a bit of ground speed and then ease it off or just let it naturally lift off the dolly?
-
On 05/01/2024 at 19:52, Eric Robson said:
Hi Don,
The frame is two 570mm x 32 x12 lengths of pine , 2 100mm wheels and 1 50mm wheel. Just an old pair of undercarriage legs I has in the spares box, the pink is hair curlers with a soft wire centre to prevent the wing getting damaged by the undercarriage wire protruding.
Hi Eric,
I see you have moved on to flying your Corsair ! and what looked like a modified dolly and just had a couple of questions as I procrastinate with my build by finishing off my dolly. John, one of the other two builders on my thread really wants to launch via the dolly so I am just making sure I understand your design.
- Not sure what the hair rollers are doing on the crossmember as my FW sits on the center of the wing against the wood crossmember, so I have moved them inwards and put some hard foam blocks further out to support the wing tips
- The two uprights that sit against the LE, is there a reason as to why they are not further apart?
- Would the FW benefit form the Corsair dolly mod?
Thanks for your time
PS what size prop and motor are you running?
-
Lesson learnt the hard way is never forgotten!
45 Years ago I used to work on forklift trucks, even the big narrow aisle 72V ones and we were issued very nice Fluke digital multi meters that with a lead swap could measure current (unfused). After a few weeks I made the mistake of measuring the battery voltage while fault finding after measuring the current through a relay. No display nothing, took the cover off and the vaporising circuit board track totally destroyed any components as it straighten up from terminal to terminal!
Popped it in its box and sent it back to Fluke (Watford IIRC) asking what the repair cost would be as it was my mistake, blow me it cam back the next day FOC! it even had new leads and the film on the display! I mentioned this to our controls engineer and he just said as customer service it was not even worth them looking inside, just replace with new.
I still have the multi meter and it still works although I do have to change the battery once every 5 to 10 years!
-
1
-
-
Try looking here another annoying scam! its been going all day
-
4 hours ago, jrman said:
Mine was also by "Jet Frog".
same here 75p
Someone some where has screwed up big time, surprised its not in the national news?
-
2 hours ago, Brian Cooper said:
Should it not be
-
3
-


Warbirds Replicas Hawker Tempest V -Mass Build 2024(part two) .
in Warbird kits
Posted
IMHO I think you are missing the point Stu as there has been lengthy discussions about why Richard has selected electric (cost, direction of the hobby etc) and why the FW is kept light (no UC, flaps etc) as it produces a well flying model. By all means add IC and anything else, but you risk increasing the wing loading. Not a problem as plenty of warbird models have high wing loading and poked tiger attributes to follow! We have come full circle where models for IC where designed to withstand the vibration of IC and now IMHO we have designs for electric and would require beefing up for IC. My justification is that traditional kits when fitted with IC balance up and so does Richards with electric..which means he has designed the tail to be proportionally lighter so we benefit from an overall lower wing loading (oorr he is clever!).
On Leccy's point could any of the scrap be cut or fashioned to provide a jig for sanding?
Richard, could you please slow up a bit...you are going to embarrass us amateurs 🙂