

Martin Gay
-
Posts
803 -
Joined
-
Last visited
Content Type
Profiles
Forums
Blogs
Gallery
Calendar
Downloads
Posts posted by Martin Gay
-
-
The PSS boys like it rough!
The wind dropped and Phil Cooke made a downwind landing to save the model
-
 4
4
-
-
Hi Phil,
This thread prompted me to look at my collection of 35MHz receivers. I don't have a dual conversion crystal, but I do have a JR 7-channel synth rx if that is of any use to you.
Martin.
-
1
-
-
-
You don't realise how big this PSS model is until you see the 36" balsa sheets on the back of the table!
-
-
Andrew, being too flat in your locale is no excuse! 😄
The PSSA have a member that drives from Belgium to North Wales. This year we had another member from the USA join us for one event.
It is definately worth a visit when the wind is blowing. It is also addictive.
-
2
-
-
Toto,
I beefed up door security with two U-bolts through the door frames ans a steel bar across the outside of the doors. This was put through the U-bolts and padlocked at either end. It also stopped the handle from being turned.
All in all a good visual deterrent to a casual thief.
Martin.
-
1
-
-
-
Phil,
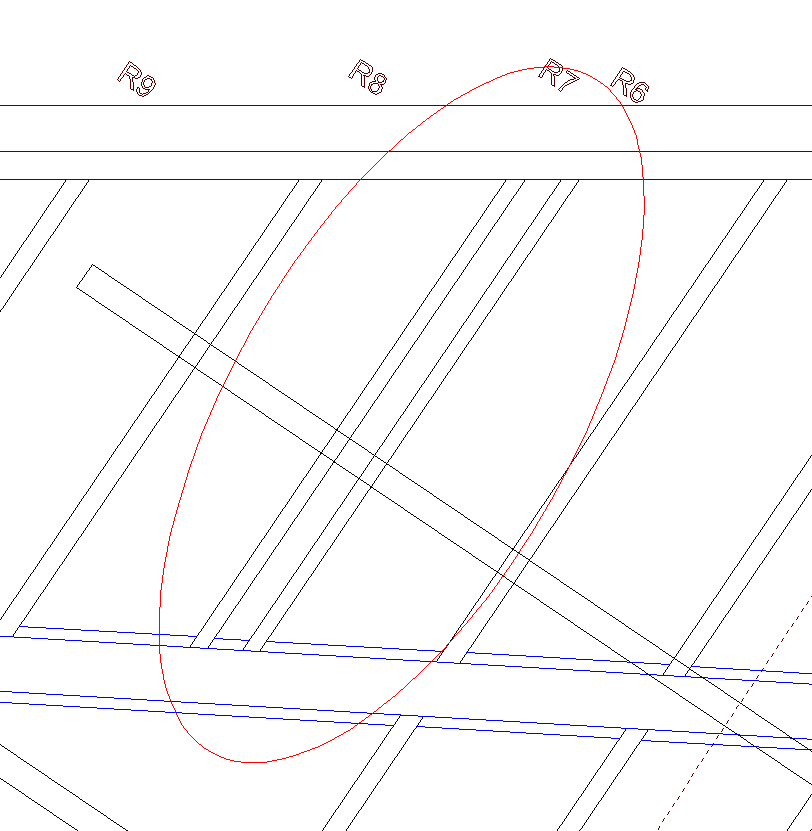
The holes in the lower skin will be between the two ply half ribs highlighted in red below!
Martin.
-
I recommend fitting the drop tank(s) mechanism. You don't have to use it, but it is there should you decide to fit them.
On the photos that I have seen the drop tanks are on the inner part of the wings and the outers carry the missiles. However, I have only seen one photo of this configuration, so you may not need the outer mechanism if your chosen scheme only had drop tanks.
-
Very tidy work!
-
1
-
-
11 hours ago, toto said:
If I make do with 600mm, I'll get two surfaces of 610mm from each 1220 x 2440 sheet
Toto,
This could allow you to double up on the thickness of the worktops!
-
-
If you are adding drop tanks, now is the time to consider the linkages.
The twin riblets are where the drop tanks would be fitted.
-
R1 adjusted on the wing plan and the cut files, at least it was too long and not too short!
Many thanks.
-
1
-
-
It's going together nicely Phil.
Have you seen the canopy buck yet?
-
1
-
-
Get well soon, Phil.
-
1
-
-
Looking at the work you are doing, Chris, it won't be long before your Dak is in the air again.
I am hoping for another "maiden flight" at the next PSSA meeting in 24 days.
-
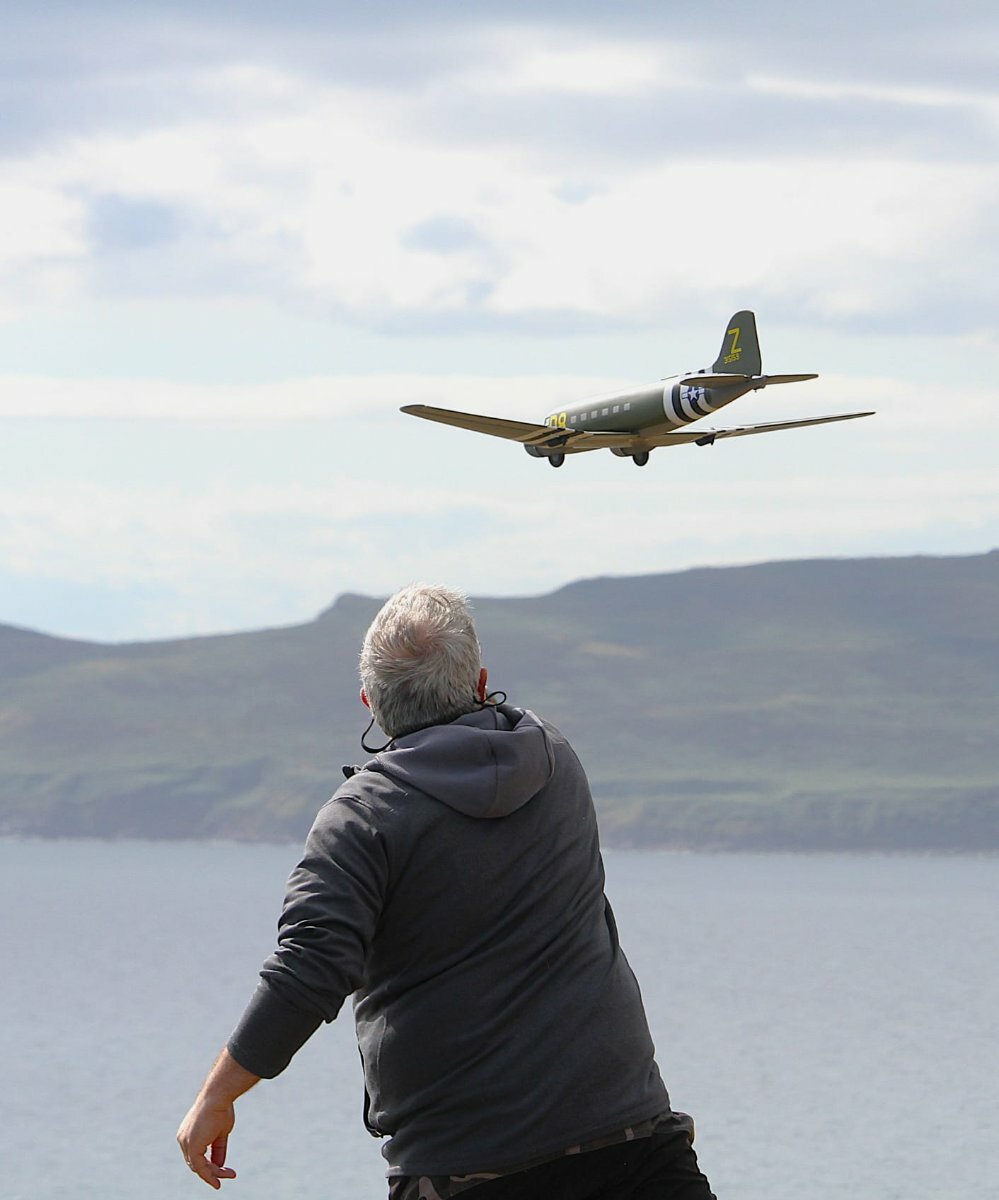
I do like the DC3. This is my own design 1/32nd sized version on it's short maiden flight. Unfortunately, it suffered from an almost terminal tip stall shortly after this photo was taken.
A new wing is being constructed with more washout. Hopefully that will reduce, if not cure, the tip stall problem.

-
2
-
-
I find it easiest to view the item in person before buying anything.
Yes, it is limited by how far I am willing to travel, but I find that scammers disappear quickly when I ask for an address!
-
To be honest, you followed the plan!
I will update the fin drawing to reflect the thicker fin on this size of Sabre.
Apologies.
-
That will work, I did it that way on the little Lancaster and DC3 which used a single central keel.
You will need to keep checking that the fuselage stays straight, though.
-
1
-
-
Very neat planking Phil. No gaps visible on the inside either. I am impressed.
-
1
-
-
It's look good, Phil.
I wish my workbench was as clean and tidy as your one!
-
1
-
How rough a flying field can you fly from
in All Things Model Flying
Posted
Adrian, I think it is the Andy Conway Tonka.