

Roy Thompson
-
Posts
583 -
Joined
-
Last visited
-
Days Won
2
Content Type
Profiles
Forums
Blogs
Gallery
Calendar
Downloads
Posts posted by Roy Thompson
-
-
Looks like it’s got good bones for a restoration project Neil.
A touch of delaminating veneer, but we got a repair scheme to fix that, and we’ve seen a lot worse. 🤣
-
 1
1
-
-
4 hours ago, Robin Colbourne said:
Very nice find Roy! Was that the kit that 'A Plane Olde Bargain' was advertising recently?
Is this completed one on Ebay a Simple Skyman or Escort? It appears to have a strange hump behind the wing, or is the wing too far forward?
I spent ages searching "Galaxy Models Escort" on Google. Very interesting, but I didn't see any model aeroplanes... 🤪
Bowmans Simple Skyman or Galaxy Models Escort on Ebay
Your right Robin the first one was with Plane Olde Bargain, that had a built up wing still 3ch then this other kit pop up.
This built one looks quite tidy even if the wing is along way forwards.
-
Scratch building is an endangered pastime all over, but sounds like you’ve a few more challenges.
I was wondering if you’ve come across this forum by Nick aka Mr Smoothie on RC Groups. His was built to the same plans as my own and he decided not to go the contra route, as he quite rightly points out; the motor assembly then becomes a project in its own right.
Nicks finished model looks fantastic and between all us MB fans there is an amazing amount of information here, enjoy 😀
https://www.rcgroups.com/forums/showthread.php?4163253-Martin-Baker-MB5-1-7-6-scale-Dan-Parsons
-
Someone pick up a bargain yesterday on eBay. NIB SKYMAN 55” 3ch with a roll of film to go with it. The roll of film probably worth 1/4 of the price alone 😀
Thats the second Skyman in as many months to pop up. I was tempted but resisted the temptation to add this to my stock of kits, and if they had been the 4ch versions, I may have had a bid.
I wonder if we’ll see either of them crop up on here, I hope so.

-
As it's been some time since I last updated here, I thought I better pull me finger out.
First up, the Raider is still waiting to be covered, over projects have taken over for now, but we will soon be back at it.
As for the Magister, that is all done and had a few flights last year and is currently in storage until the nice weather returns. I realise that I've not posted any finished pictures here, so I'll put that right, with some before and after shots.
-
 1
1
-
-
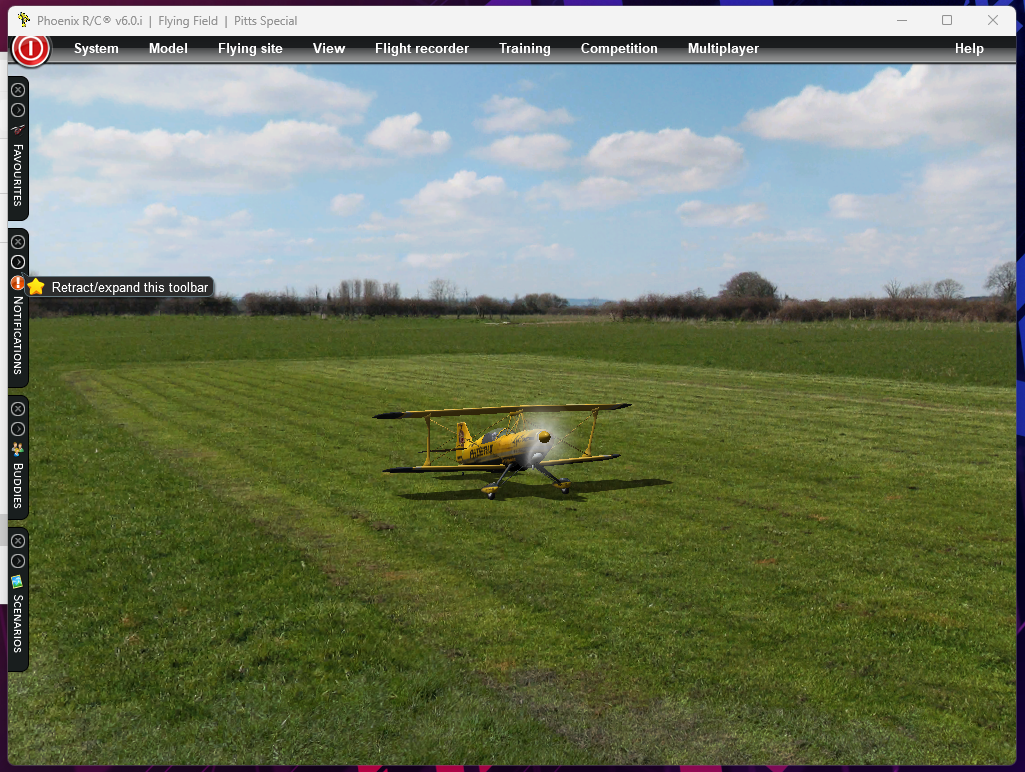
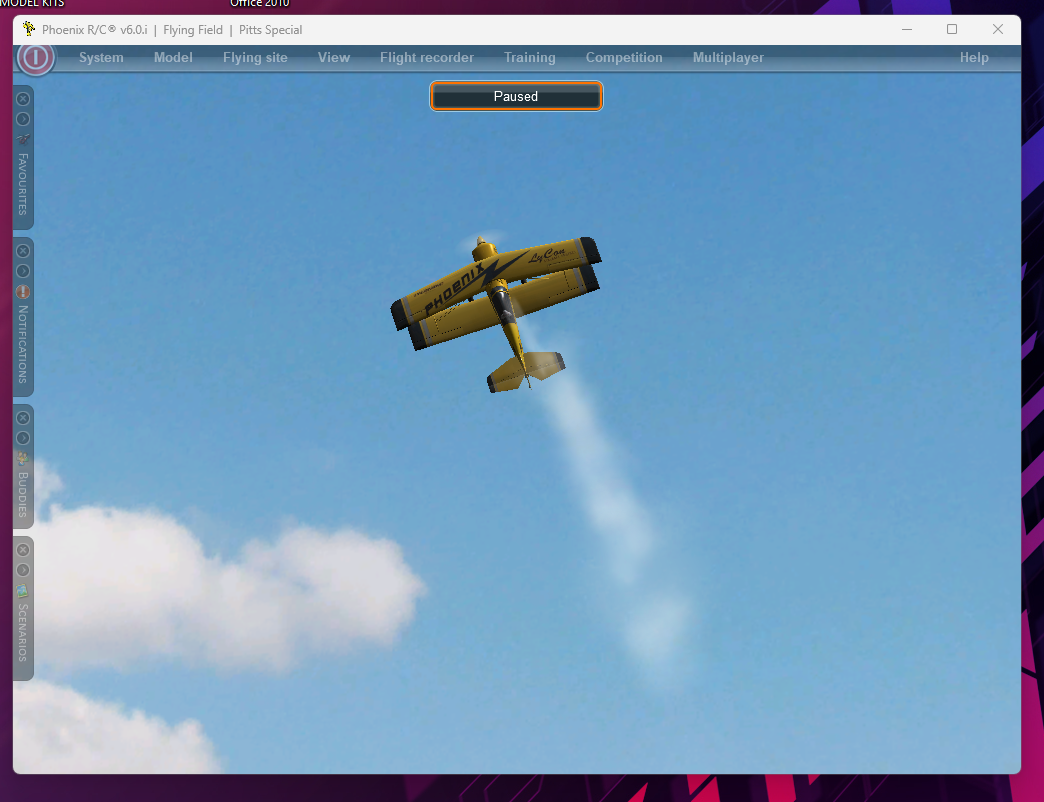
I'm pleased that I have my sim up and running on the new PC, one less thing I need the old one for.
So to round up, and install successfully on a new Windows 11 PC;
Download a copy of the installation V5.5 DVD from RCThoughts.com. Then install the directX that is on the installation DVD
Map: Phoenix DVD V5.5\files\#INSTALL\utilities\DirectX\DXSETUP.exe and run it as administrator.
Following that, install the sim as normal and add the updates as required.
-
1
-
-
Went back to my original Phoenix Rc PC-DVD and installed a copy from there with Direct X selected, but the Direct X part failed. So downloaded a new copy of the V5.5 DVD from RC Thoughts.com and did as you suggested. The good news is I have a working copy now, but it's V2.5
I was hoping that the other copy of V6.0i would now run, but no, that's just too easy. So I assume my next step is, uninstall the sim and start again.
I'm making the assumption that as V2.5 runs that Direct X has installed satisfactorily and by uninstalling and re-installing the sim it won't affect Direct -
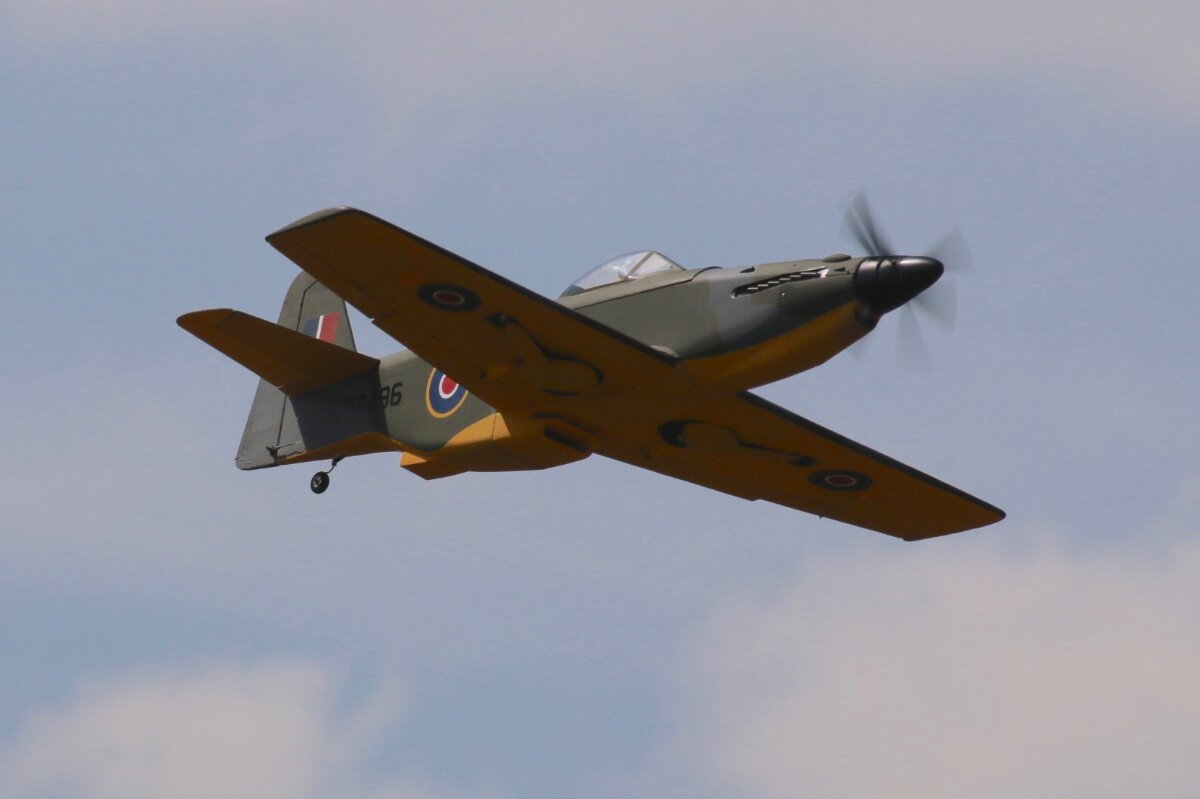
Good luck with her Chris, she should look excellent when finished. Of course you will need to get used to people asking if it’s a Mustang !
Re the issue of pushers props, I use the Ramoser varioProps from Germany for all my contra motors. They do a good range of tractor & pusher props that are ground set for pitch. This makes them very flexible to suit your motor.
Now the important question; how many watt’s, cells, span and whats the AUW going to be?
Good luck, and keep posting the pictures 👍
-
3
-
-
Interesting idea, I have a go tomorrow.
-
1 hour ago, Denis Watkins said:
My Phoenix does work on Windows 11, but I have to follow this sequence for it to launch.
Assume the Phoenix is installed and the computer is now OFF.
Get the transmitter, which is also Off, and plug in its Phono lead plug.
The transmitter will then come on.
Now put the other USB end into the computer.
Now switch on the computer and allow loading to finish.
Now try to launch Phoenix.
Just given that a try, thanks Denis, but no joy.
It's going to be something stupid and so simple, I just know it!
-
Recently upgraded to a new ASUS i7 pc with Windows 11, and GeForce RTX3070 graphics card. I'm now trying to install Phoenix RC on it, but it will not launch.
I've installed the latest Direct X, updated the graphics card drivers, tried with and without compatibility settings, and installed and uninstalled the Sim more times than I care to mention. Have trolled through all the forums but cannot find an answer.
What am I missing?
P.S. My old machine is Windows 10 and Phoenix is all good. I don't recall having any big issues when I installed it on this machine, but it was a long time ago. Don't really want to hold on to the old PC just for this one Sim, but if needs must😆.
-
Hi Jonathan, welcome back to the hobby.
The simple answer to your questions is yes, just as you do with any other engine turning a propeller.
-
Hi Richard,
I don’t know if this will help you but I had a similar situation with an old set of foam wings last year. I detailed how I fixed them here.
-
RE the pop-up, has anyone found a way to stop the pop-up!
Every time I go to a new thread there it is!
I’ve tried it all and saving my options etc…. Don’t have this with RC Groups
-
Hi Chaps, can I add my little project.
It's intended as a follow-on club project after the spitty contest last year.
The idea is to use the same kit we used for the spitty i.e. the value electronics kit. Of course there will be difference, for starter there are 4 SG90 servos, the motor I'm recommending is the 2212-1000kv instead of the 1400kv motor. Of course, being a glider, it needs a folding prop and a speed controller with break function, which unfortunately will add a little to the cost of parts.
Once we have a good few of these built, the intention is to do a comp with timed motor run (20 second ish) and then glide. Longest glide wins, with extra point for spot landing.
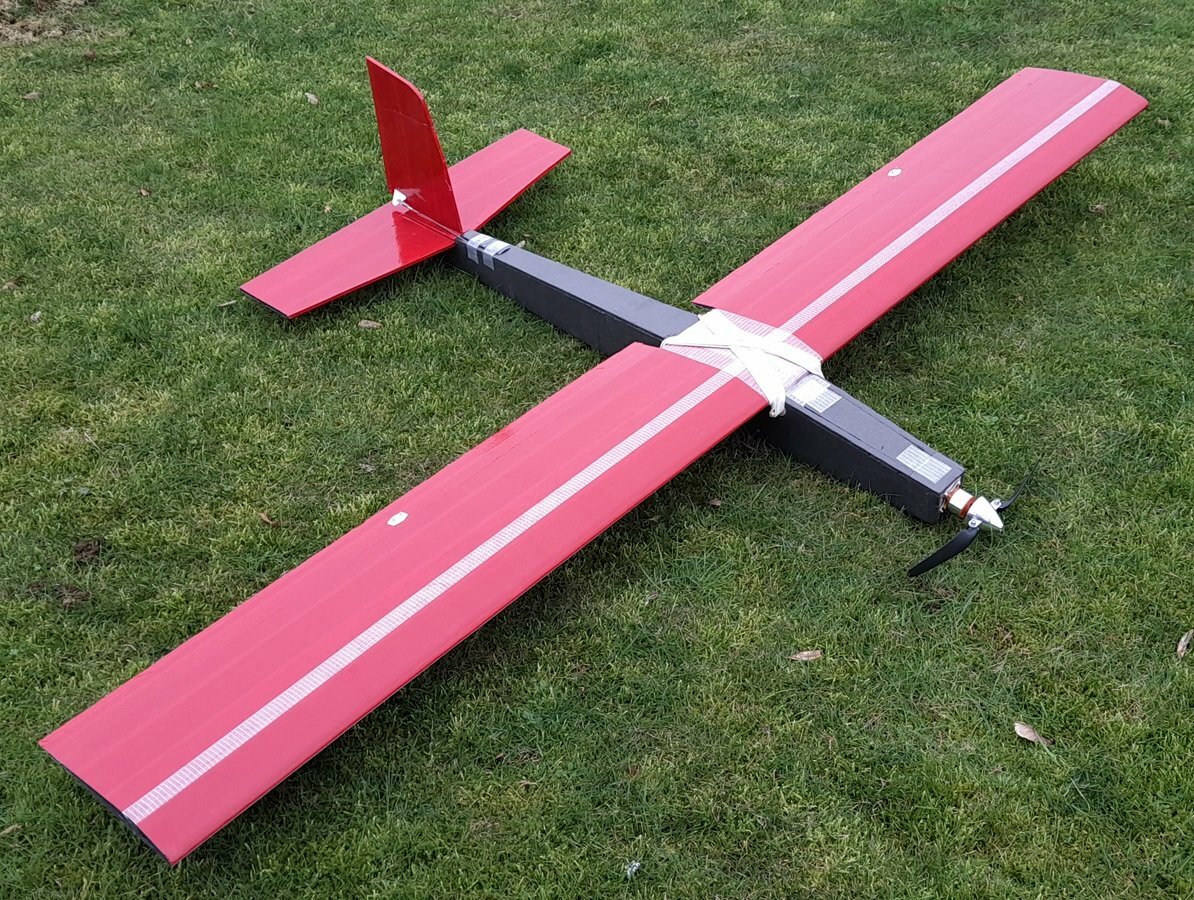
This is the prototype, It's flow a couple of times so far, and it's flies really well, and now we have an ESC with a break the glide is better than I ever expected. Can't wait to see how see preforms when there is some thermal activity.
-
2
-
-
In case anyone's wondering, I've been side tracked again! So not much to report on the raider.
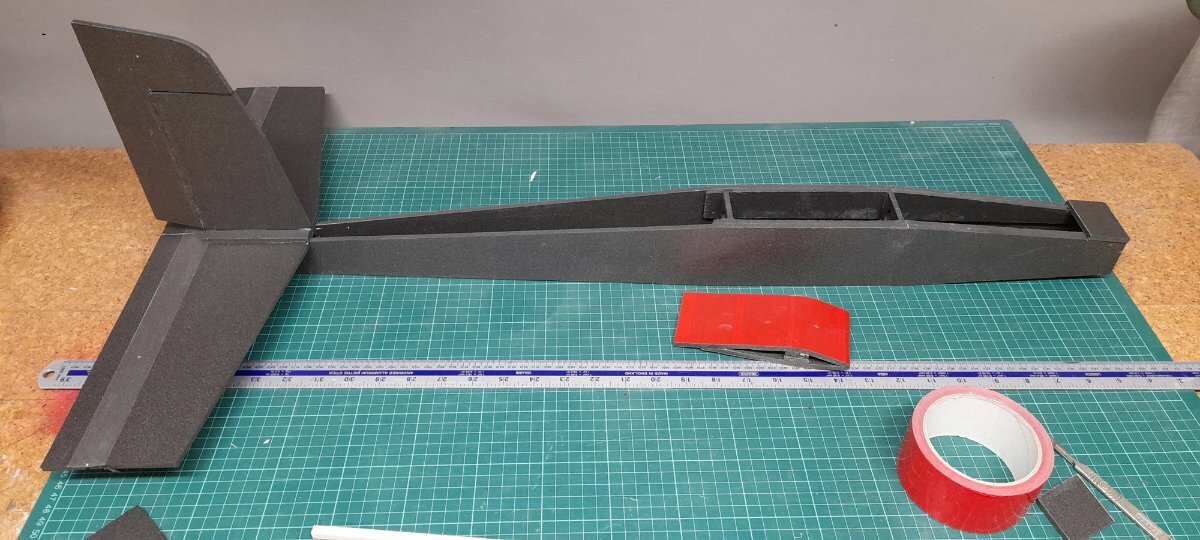
However, my own design foamy glider the BMAC Simple Glider for this year's, club build and comp is coming along nicely.
When I say own design, I mean size, shape and material. It's amazing what you can knock up out of underlay and sticking tape😁 The prototype has flown a couple of times so far and quite impressed if I say so myself.
-
1
-
-
Merry Christmas and best wishes for a happy new year, to everyone.
The model is all sanded and ready for covering, so hopefully over the Christmas period I will make a start on the covering. I'm liking the look of the Typhoon Black Jack, hopefully if it comes off it will look better than another USAF type scheme.
-
Jobs completed over ailerons hinged, the servo installed and links made. That was nice and easy.
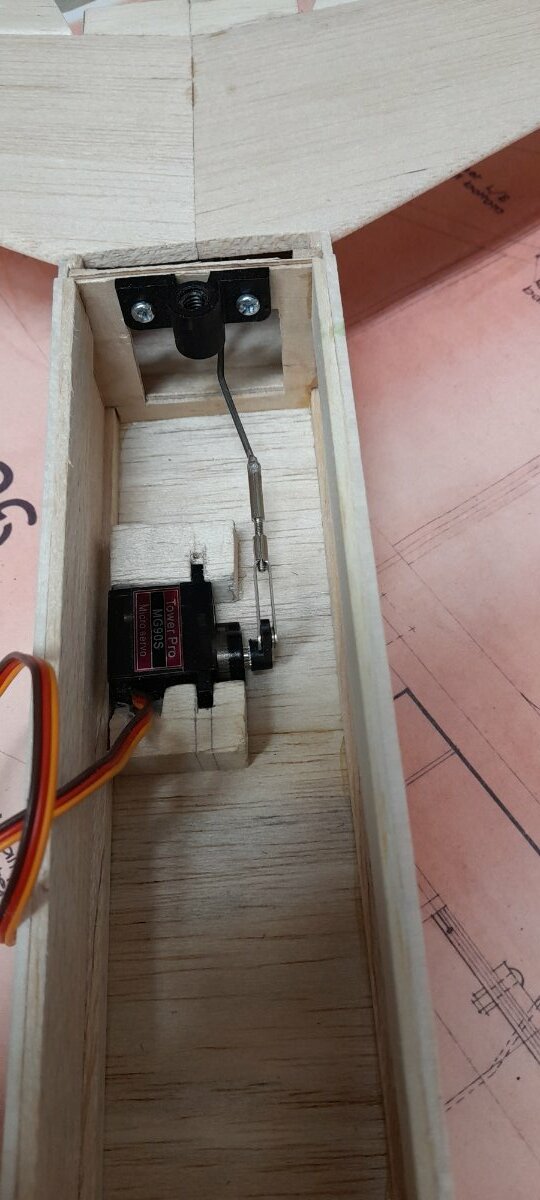
Next up elevators. Having had a proper look and taking in your comments Alan, I’ve gone with the plans and made a bent link. Reason being with a standard 9g servo, if I try and reorient it clashes with the aileron servo links. To install the servo I’ve 3d printed a mount to hold the servo which I can release if I need access to the servo later. The picture shows my first thoughts of making the mount out of wood, before deciding it would be much better printed.
Once all of the parts were put together then I could fit the horizontal stab with the elevators all connected. Once the stab is fitted there is no way to get at the links. With the stab in place the elevators were held horizontal and the servo mount with servo was glued into place. The tail fins I’m going to leave off until I have them covered in, probably film, but there is a temptation to use red tissue. Oh yer the base colour for the fins is red! I have a colour scheme in mind, but we’re come back to that.
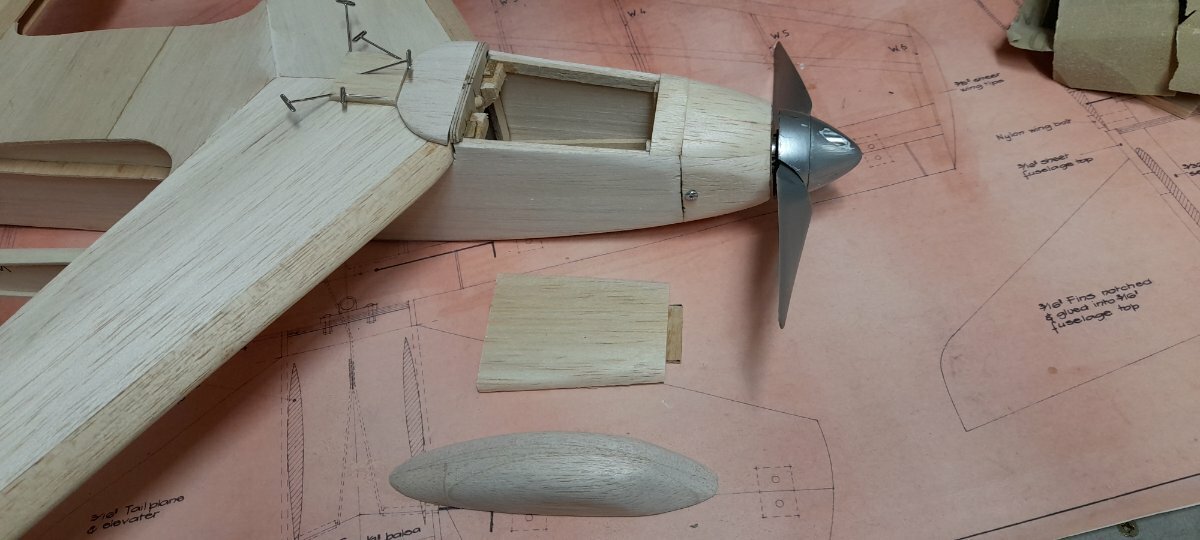
Last job completed is the battery hatch and motor cowl. The cowl is made from a box of ¼ balsa sheet and a thin ply nose ring, then all sanded to shape. The forward top deck has been cut into two parts to make the hatch. This is held in place with magnets.
I’m in two minds about a canopy for this one I’m tempted to just use the balsa block I’d shaped with an idea of vac moulding one.
The list of things left to do is getting shorter, so hopefully not too much longer until it’s ready for covering.
-
It’s been a couple of weeks, so probably time to catch up. Progress has been coming along I managed to do an hour or so most days. I'll post more details later.
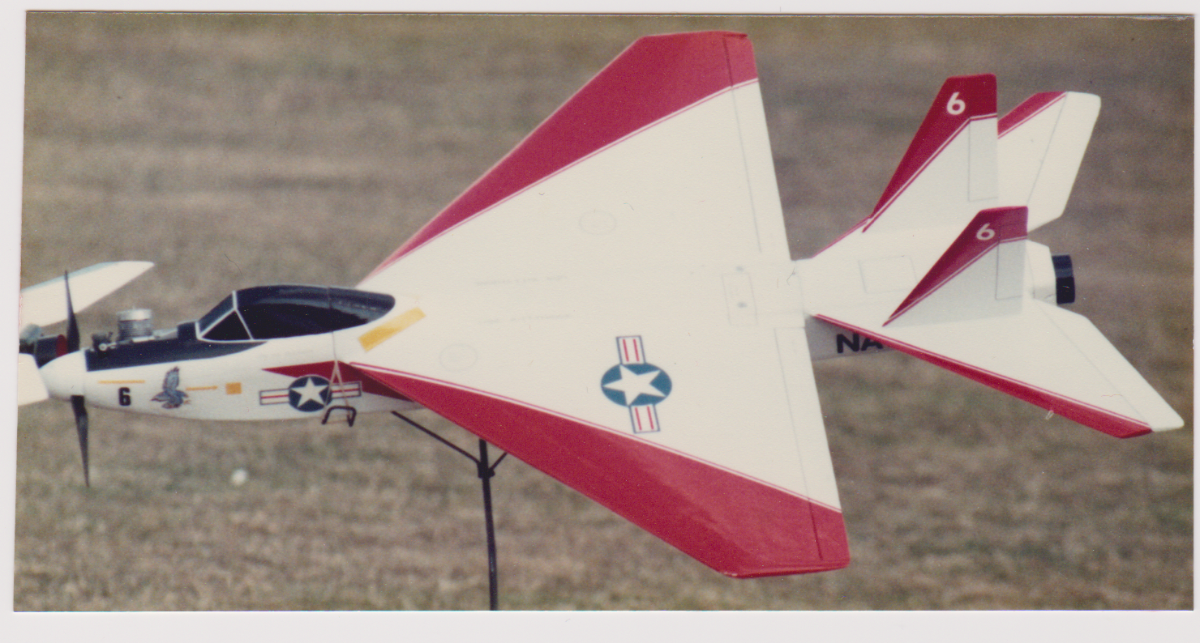
A club mate Ray recolonised this model instantly last week when I posted a pic on our club page. He had one, in around 1982, covered in yellow tex with blue line painted on. Powered by a Cox TD09, it went like stink. Ray has found a couple pictures of it taken at the time suspended from a washing line. High tech for the 80’s!
He also found a second photo taken at Eastnor Castle trade show 1984. It’s on a small stand and we are guessing it may have been Bowman’s own demonstrator.
-
2
-
-
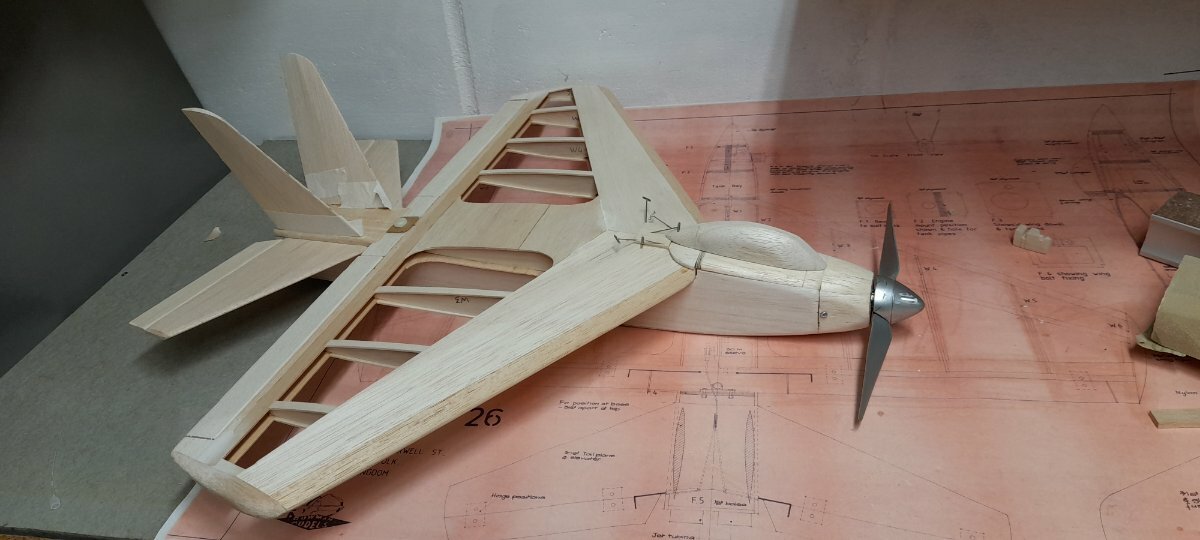
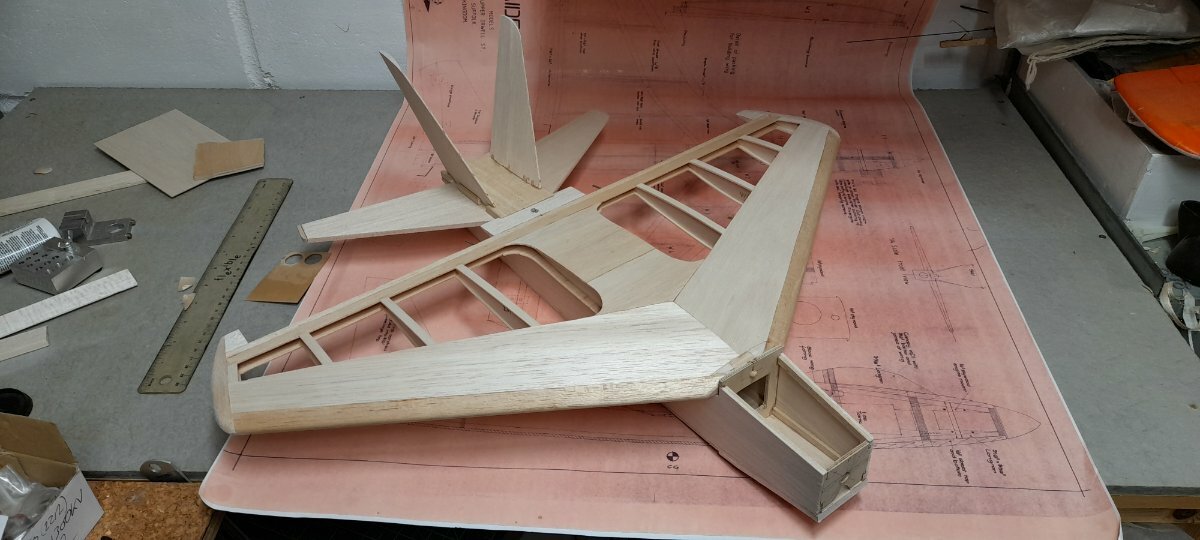
Current Bowman build, the Raider 26
build log here.
-
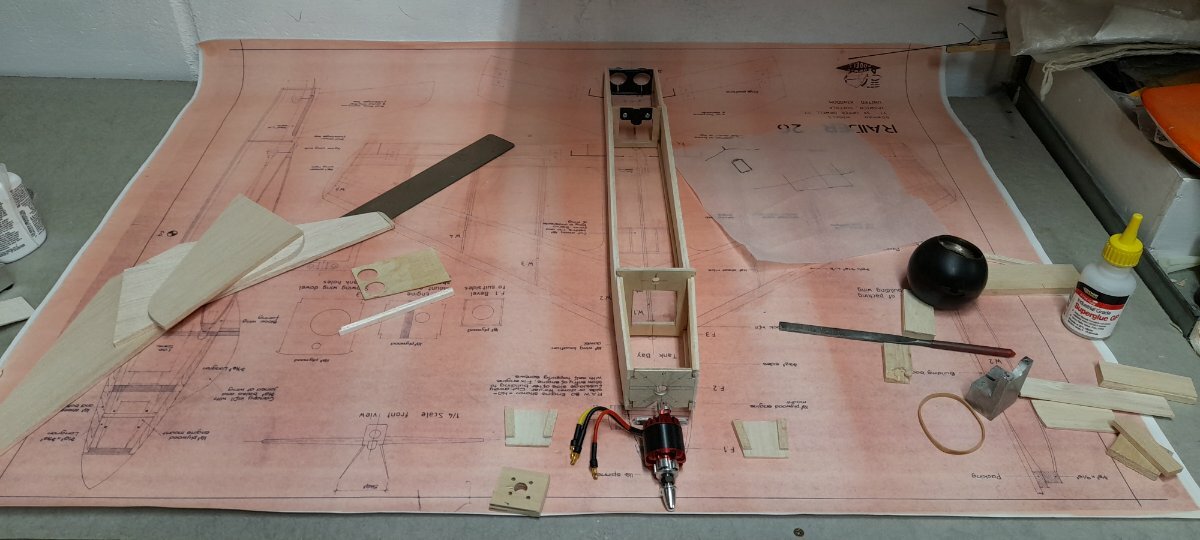
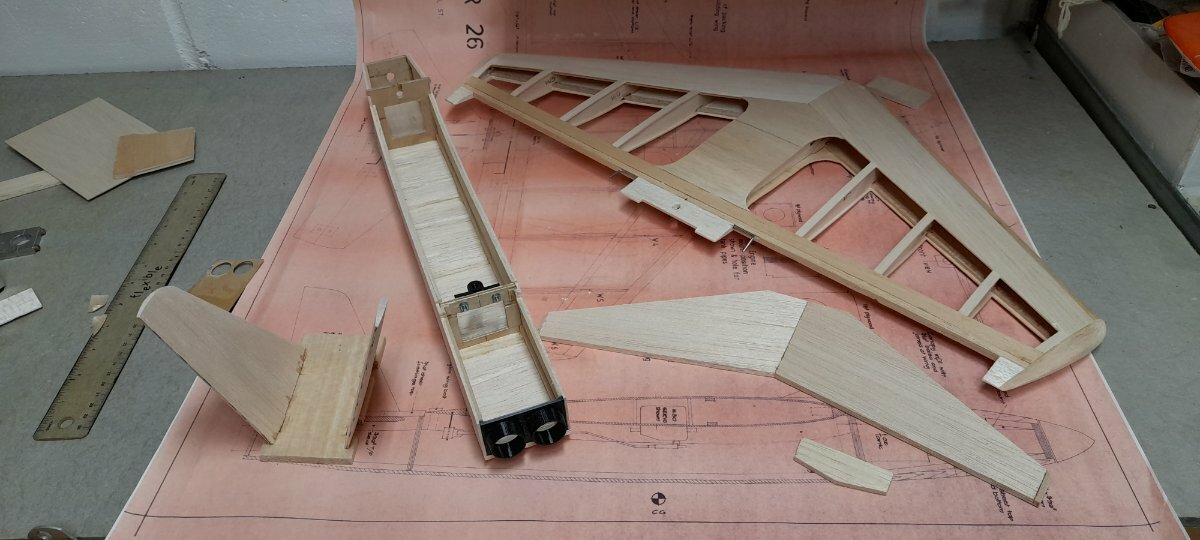
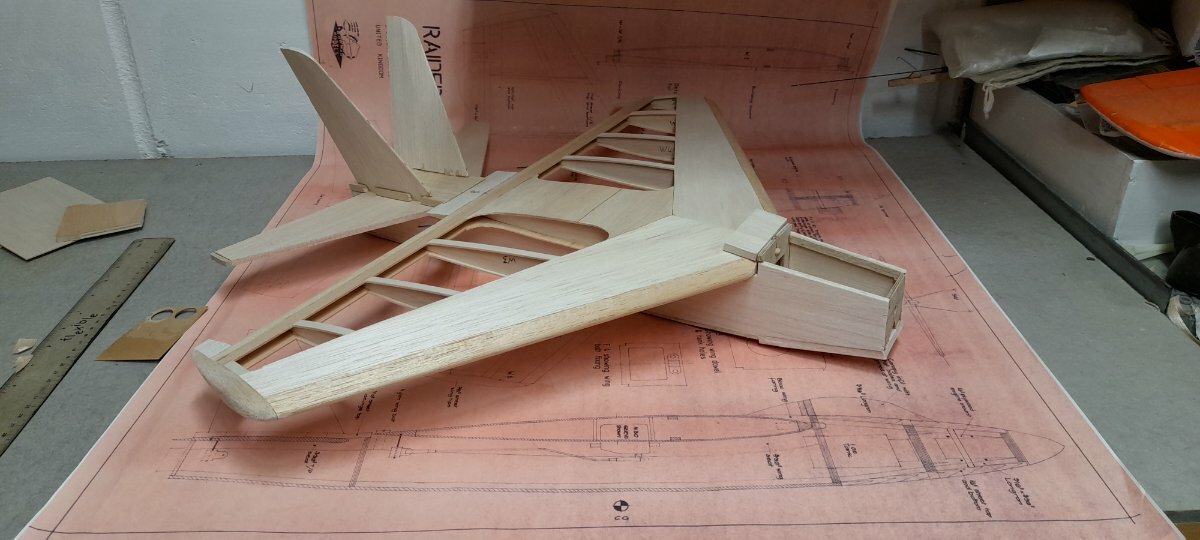
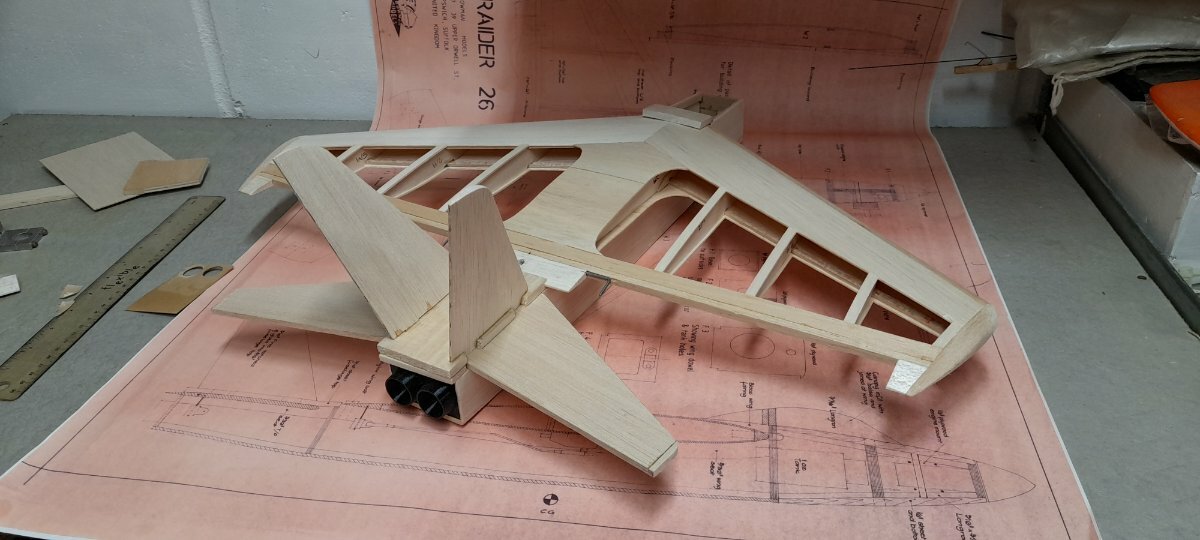
This weekend we've made good progress, well that's what happens when it's a cold and wet weekend.
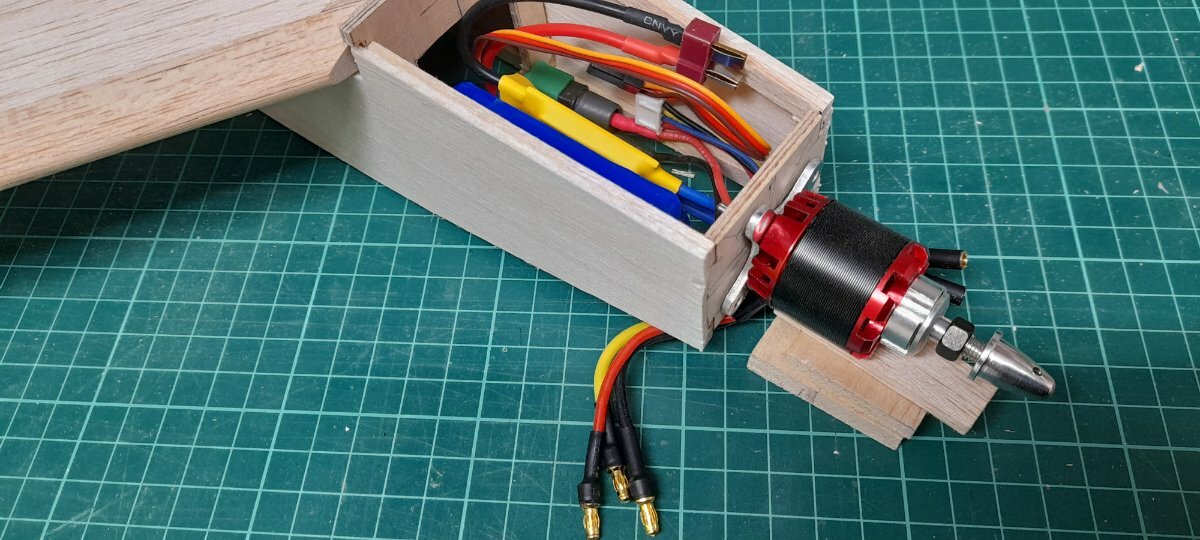
Manly I've been concentrating on putting the fuselage together and working out how the motor is going to fit. After playing around with the layout I've gone for making a new bulkhead 32mm back and cutting the sides flush. later I'll make a cowl out of scrap balsa to cover the motor. This I think will give the best access to the motor if it needed.
The other job tackled has been the horizontal fins. These been sanded to shape before fitting to the top deck. to get the angle I've made a gauge to hold the tops 5 1/4 inches apart with the C/L marked on it, then used a set squire on the top deck to line them up.
Couldn't build a model these days without 3D printing something so I've replaced the last former and the two bits of plastic tube with a 3D printed one, which will double as an air outlet.
-
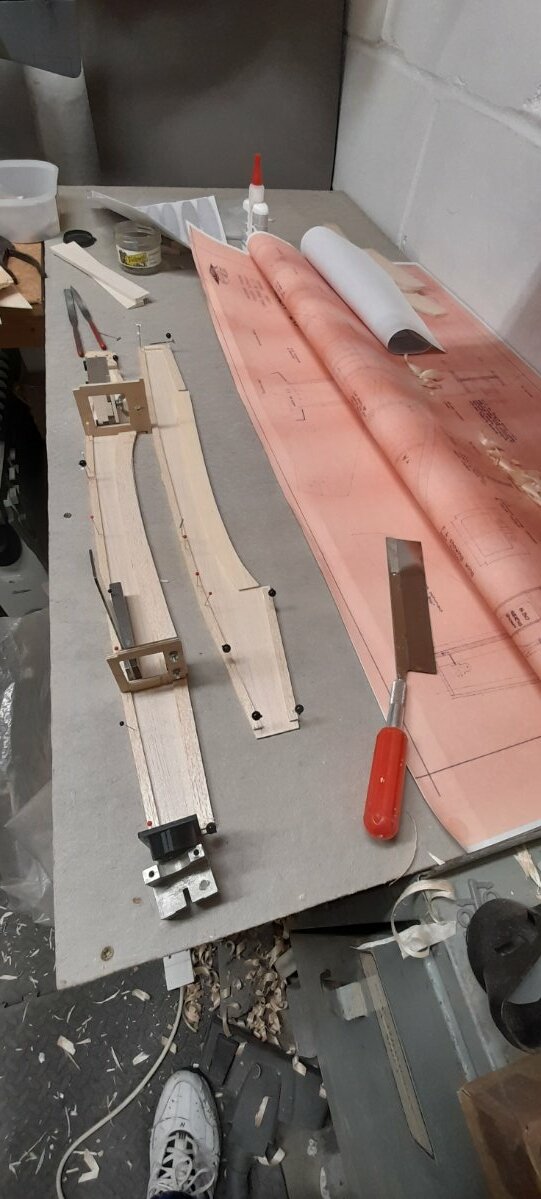
On 02/12/2023 at 20:19, Alan Gorham_ said:
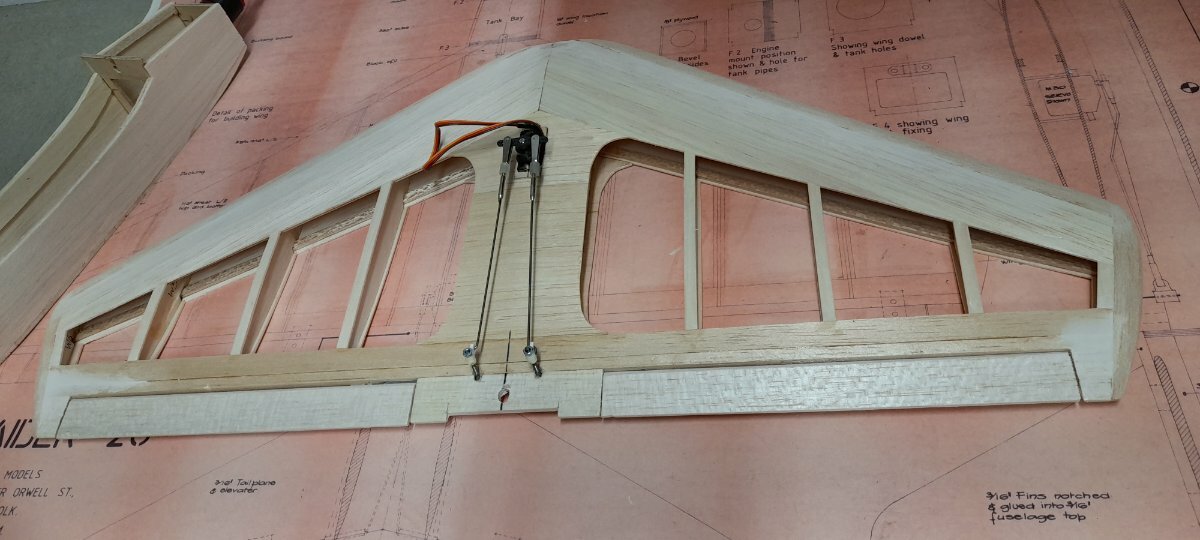
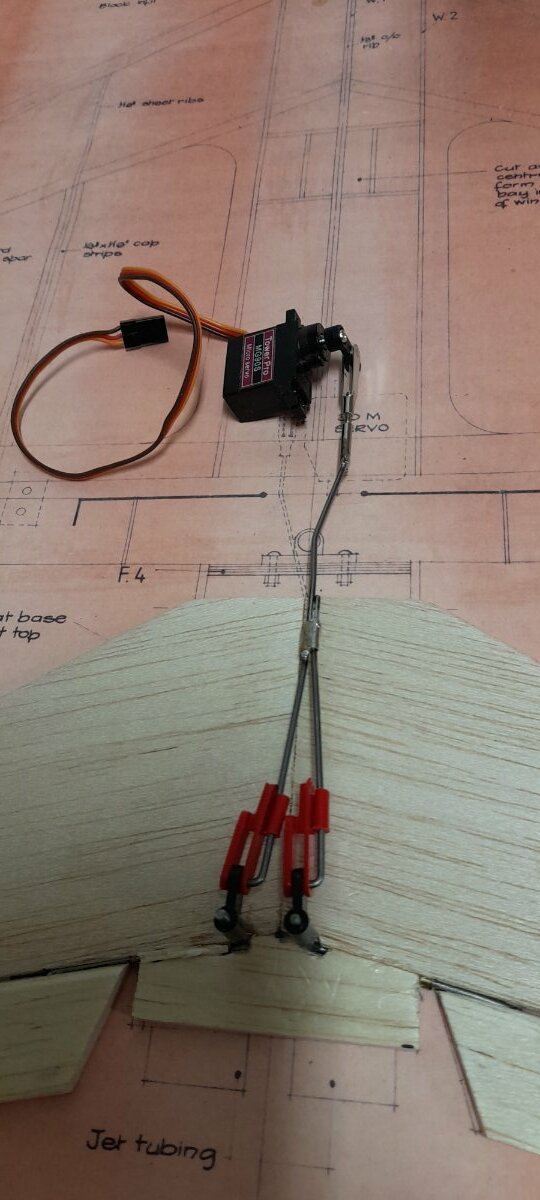
Nice progress Roy. What are your thoughts on the shape and routing of the elevator pushrod as shown on the plan? It's not very direct or rigid looking to my eyes!
Haven't started them yet, been putting off bending the links up. Very tempted to try and make a "Y" push rod up, going direct to the elevator control horns. What are you thinking?
-
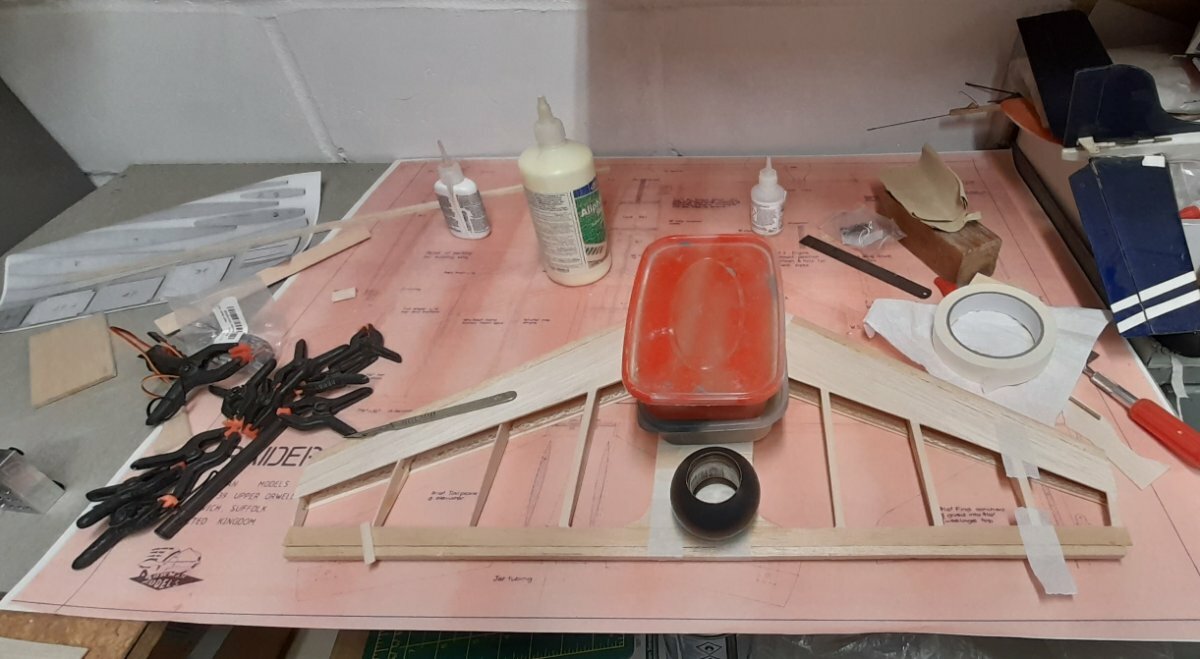
Got a little more done yesterday, and the wing is almost complete, just the ailerons to hinge.
Having turned the over the first job was to make the cutout in W1 for the aileron servo, and make a box around it. Making the servo cut out would have been easier in rib w1 before fitting it, next time!.
After that it just a case of adding the rest of the sheeting and adding the cap strips. I've also added a couple of little 1/16 ply plates to take the servo screws. then it time to make up the control links and cut and fit the trailing edges. The last job of the day was to fit and shape the tip blocks.
Next on the list is to make up the fuselage side.
-
1
-
-
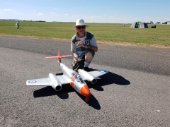
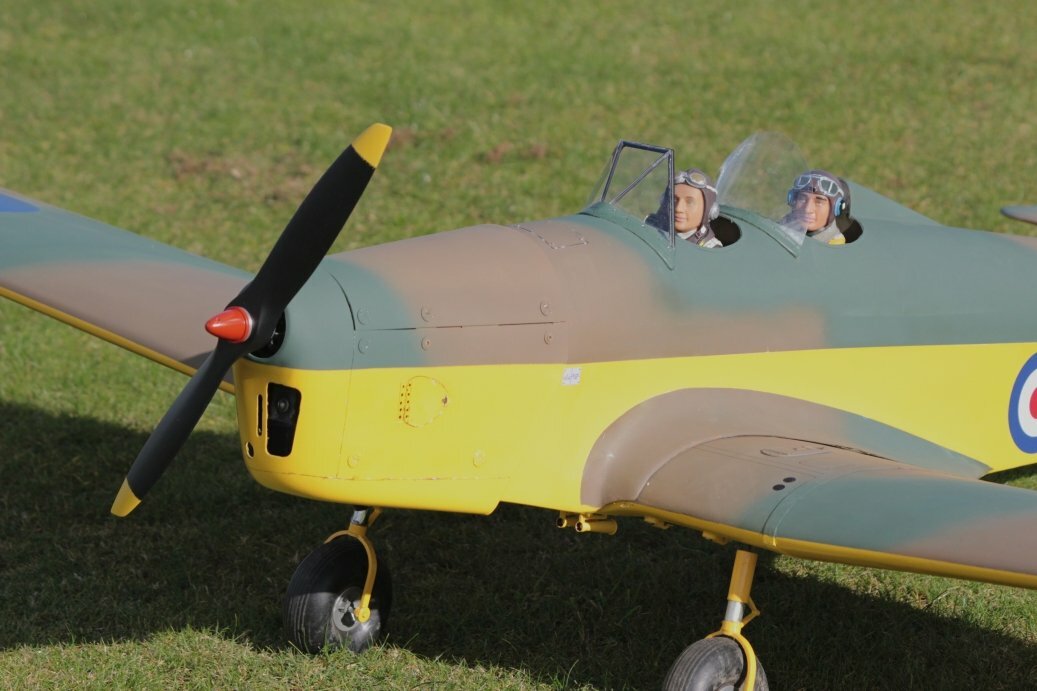
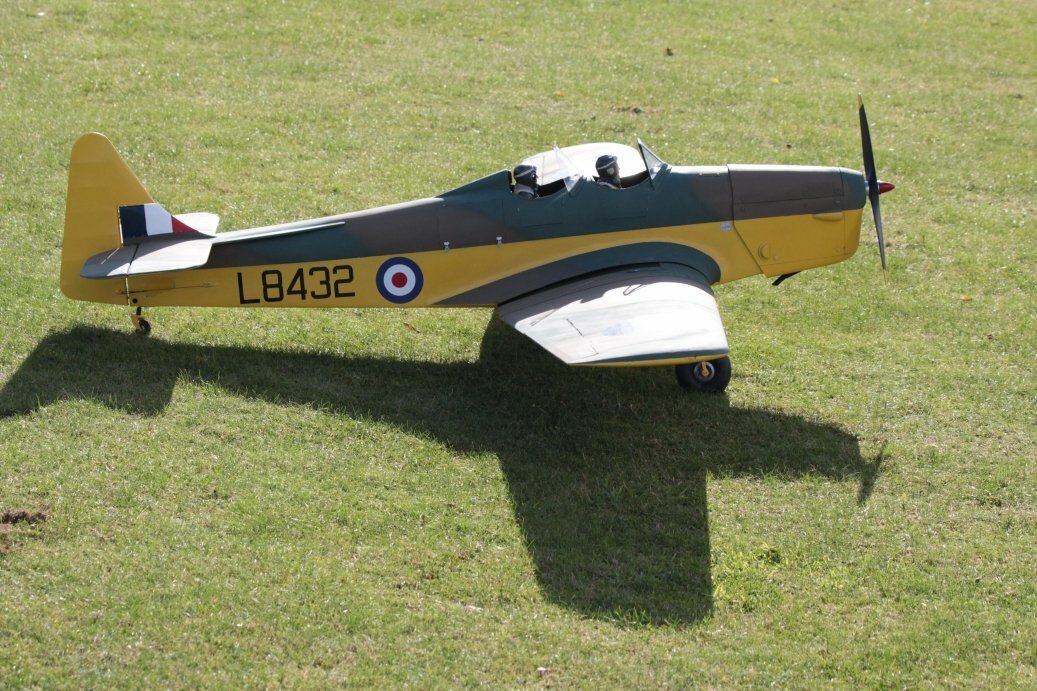
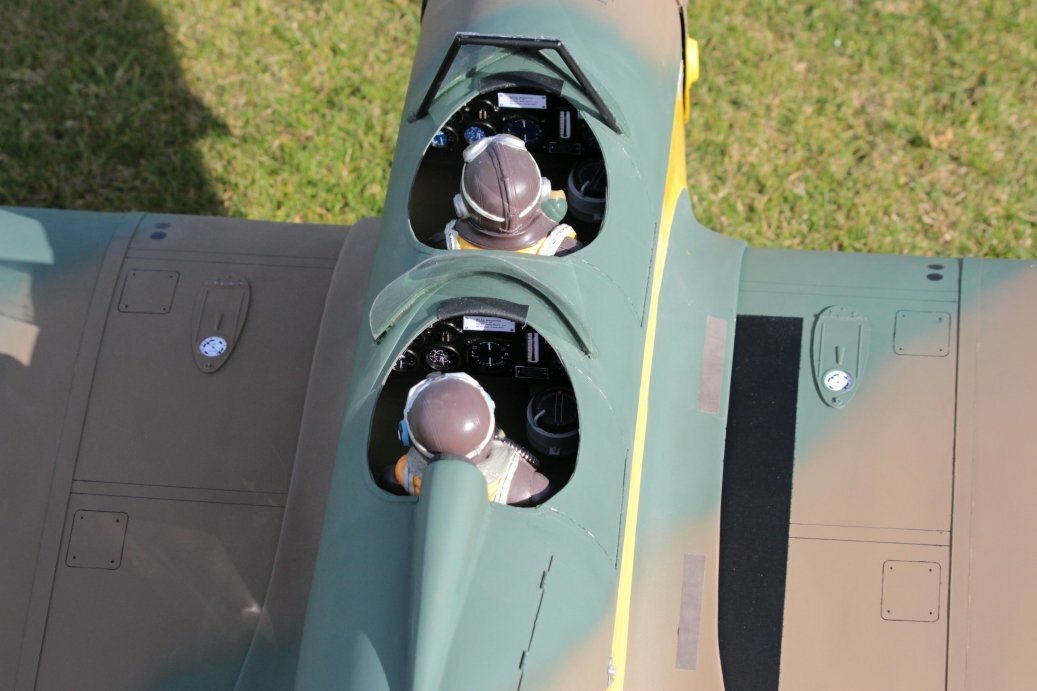
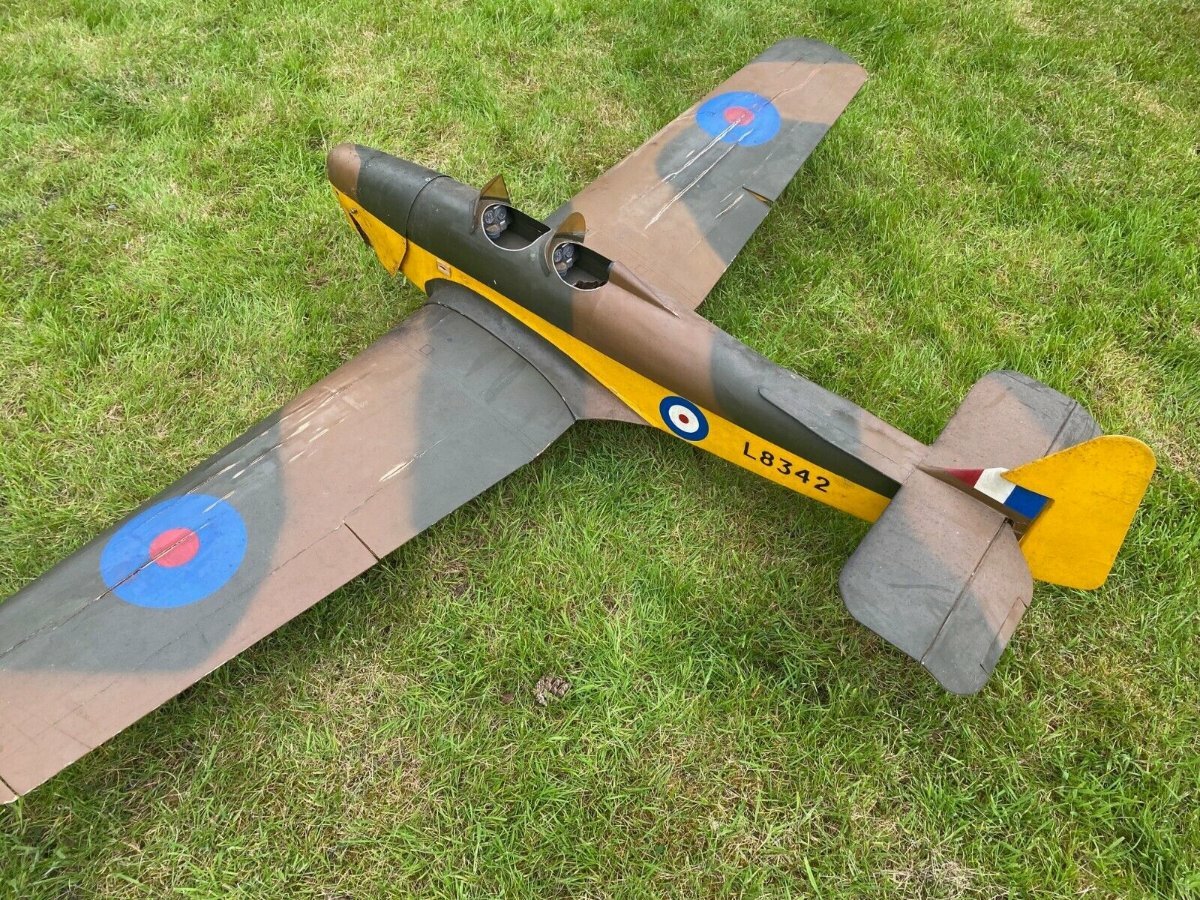
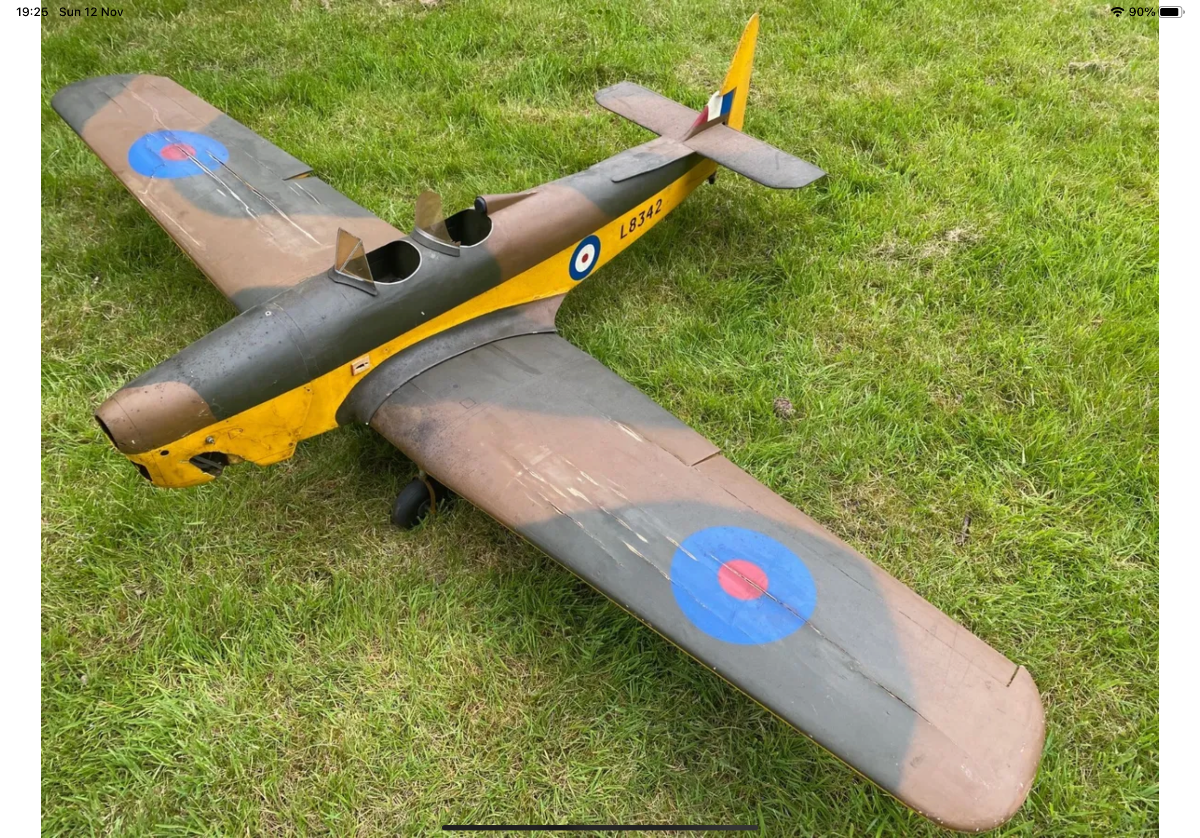
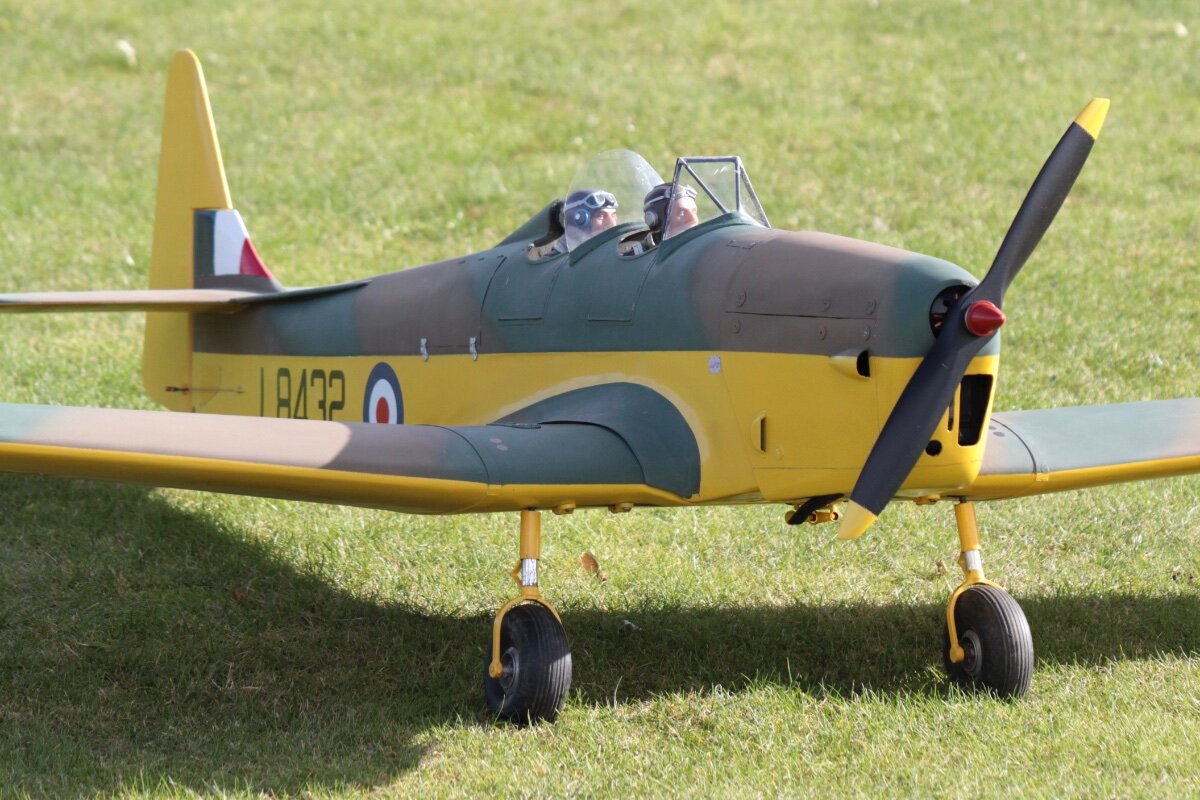
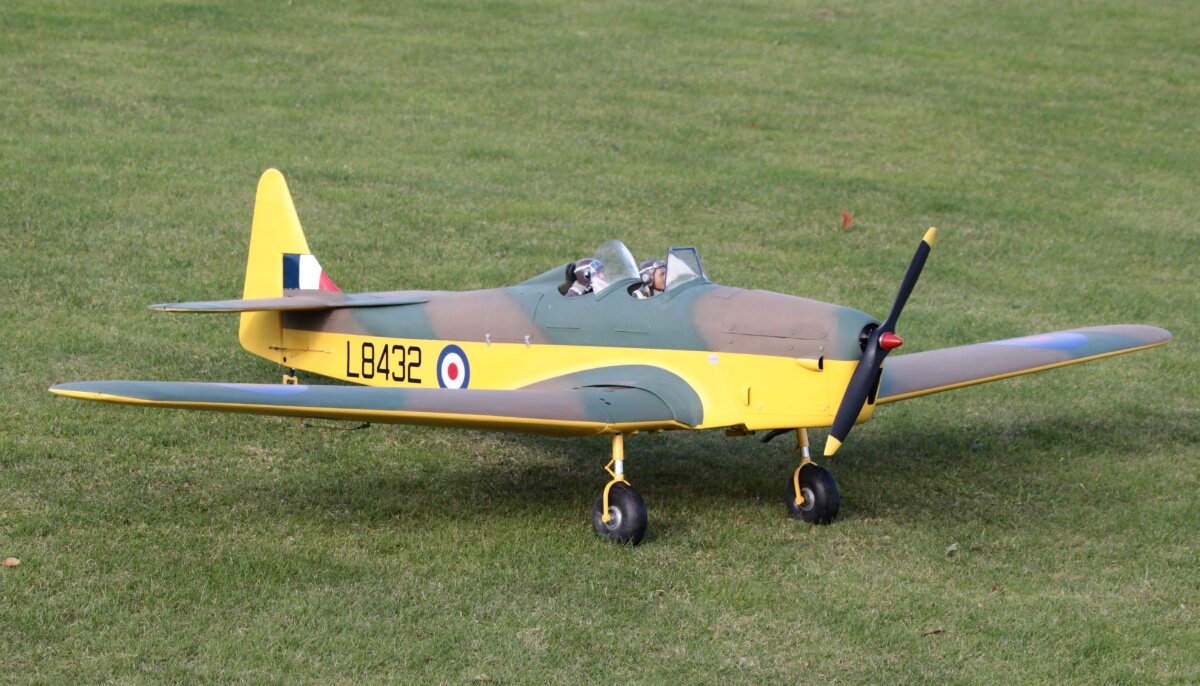
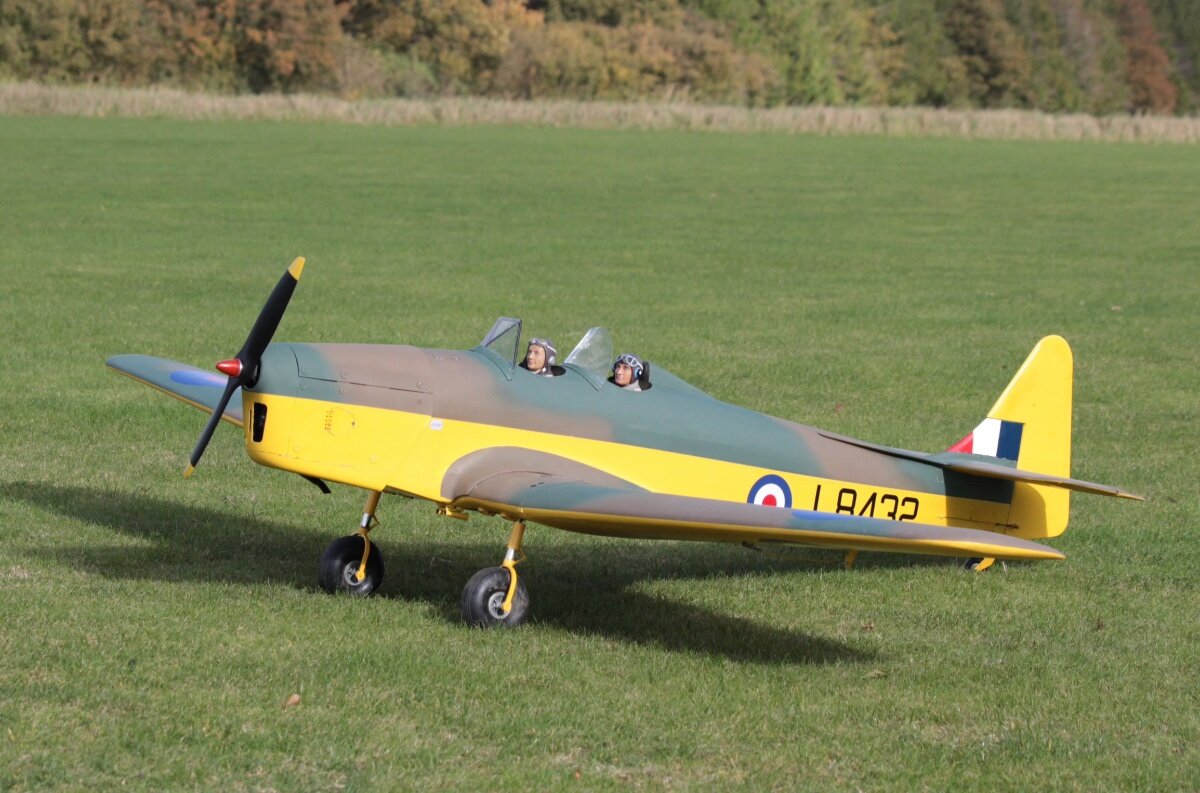
My last project from how she looked when I picked her up to now all completed and looking resplendent with her new cowling, fitted and painted. This was a complete back to bare airframe restoration and E conversion.
She is a Bowman’s Model, Miles Magister 1 designed in 1979 with an 85 inch span and an AUW of 13 1/2lbs (recommended 10lbs), running a 6S system turning a 16x8 wooden prop. She fly’s really nice even with the extra weight.
-
19
-
.jpg.f84d877602e4834be1f290ada300091d.jpg)


c1.jpg.810cb880477958b79674c744a28c9083.jpg)
C1.png.8d572d2de89552b45fa82f717ae2819a.png)
C2.png.e8c6c4c0e9609408720eb7471d8add02.png)


BOWMAN KITS - Dave Banham's Miles Magister 1 E-Convertion & Restoration
in Traditional kits
Posted
How spooky is this ? Just turned the calendar over.
Martin did I see you’ve just the motor to throw in Neils, for sale aswell.
Neil if someone wants this what part of the country are you in, and do you have this up for sale anywhere else.