

Roy Thompson
-
Posts
639 -
Joined
-
Last visited
-
Days Won
2
Content Type
Profiles
Forums
Blogs
Gallery
Calendar
Downloads
Posts posted by Roy Thompson
-
-
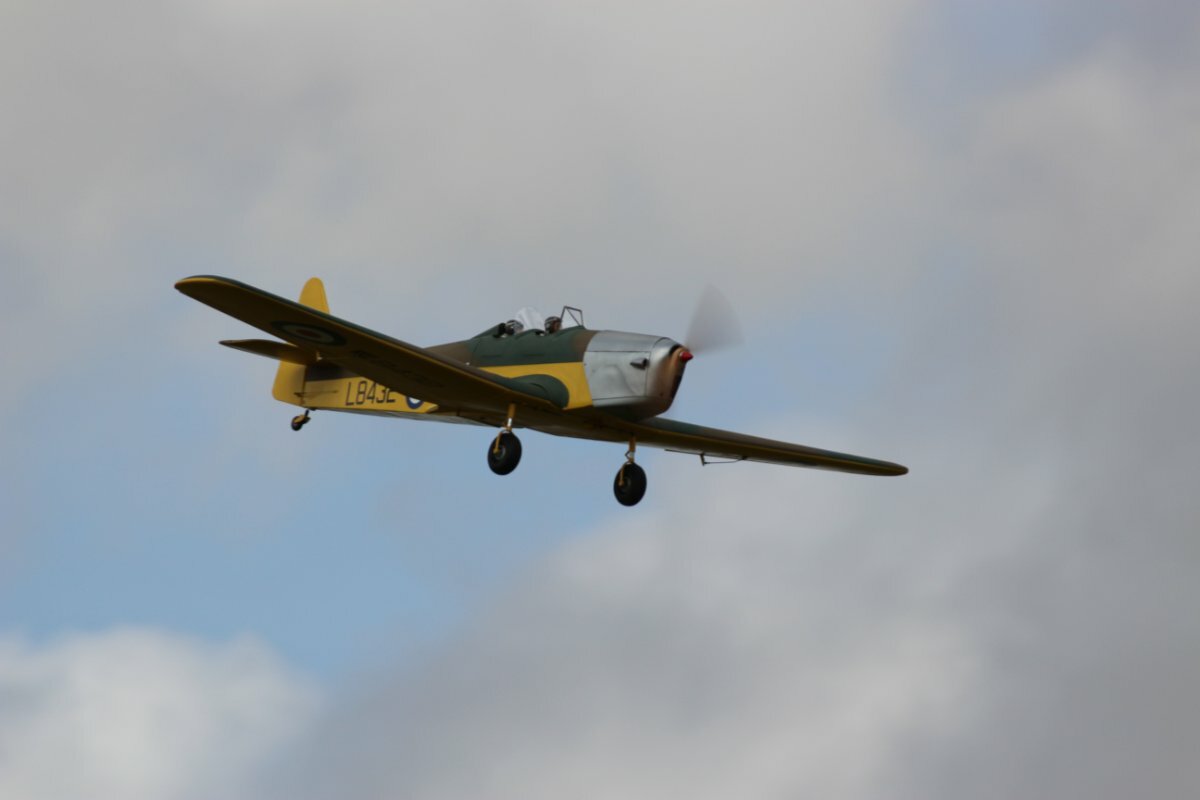
This is more like it, check out the slow mow for just how much the undercarriage legs flex!! The 13 1/4lbs AOW probable not helping.
-
 5
5
-
-
2 hours ago, martin collins 1 said:
Says members only Roy............
Thanks, I thought that may happen. I see if I can a link from Dom.
-
-
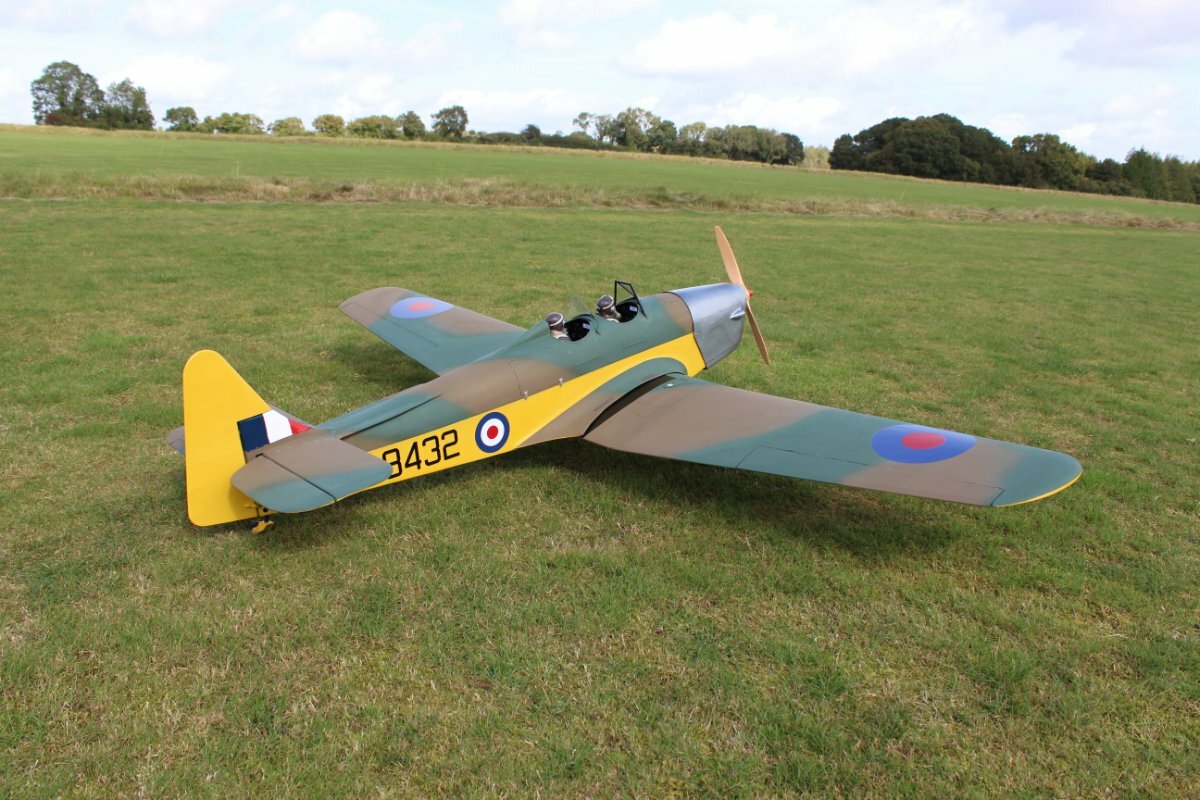
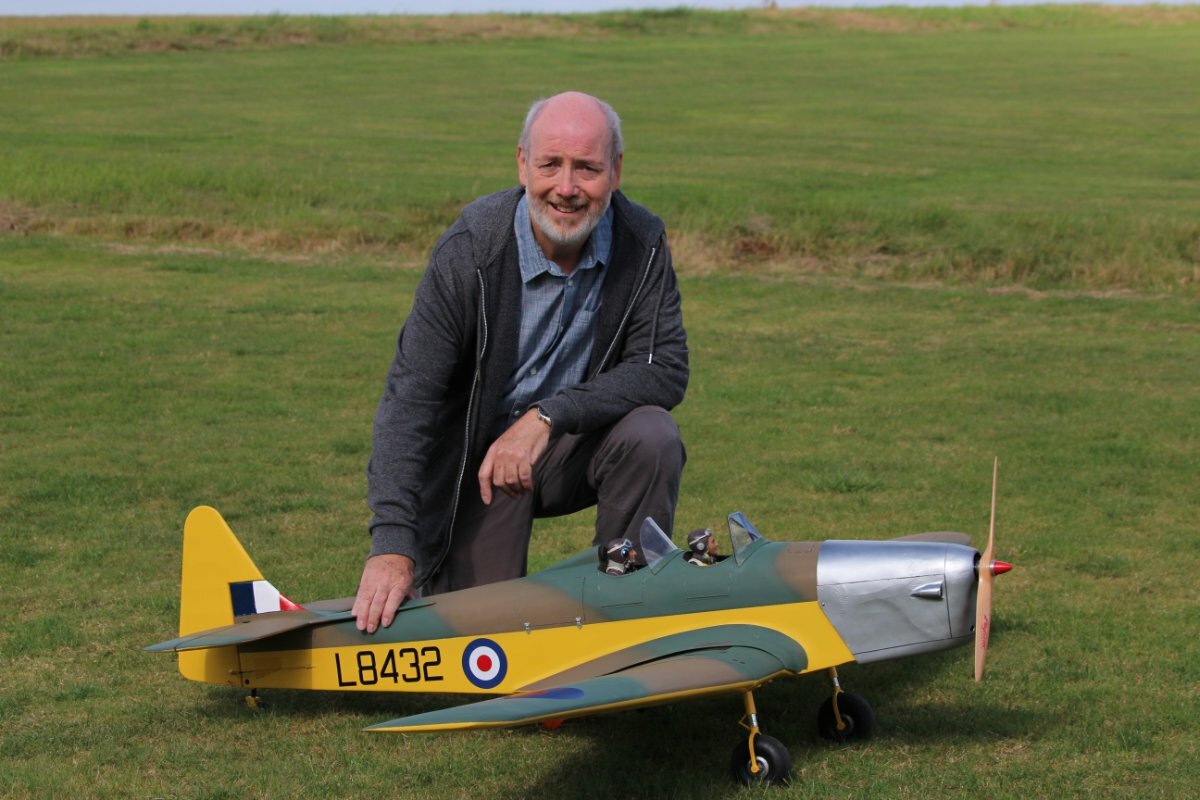
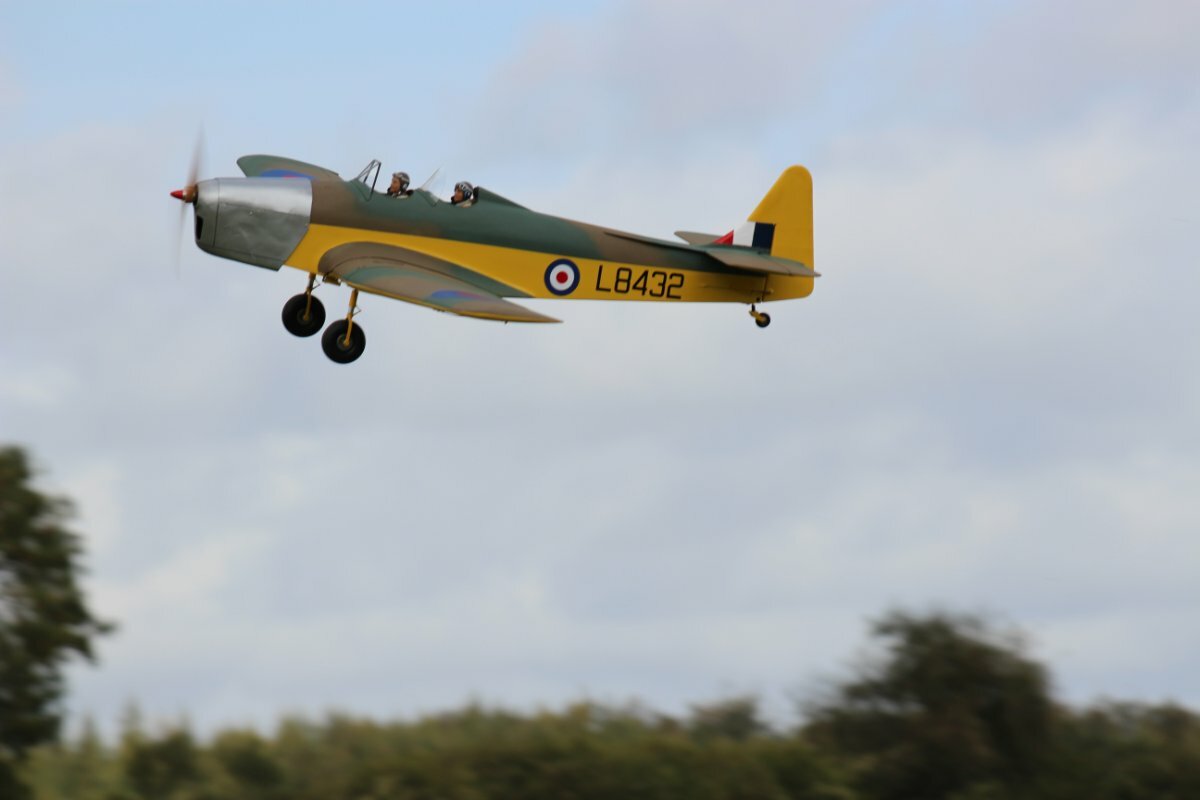
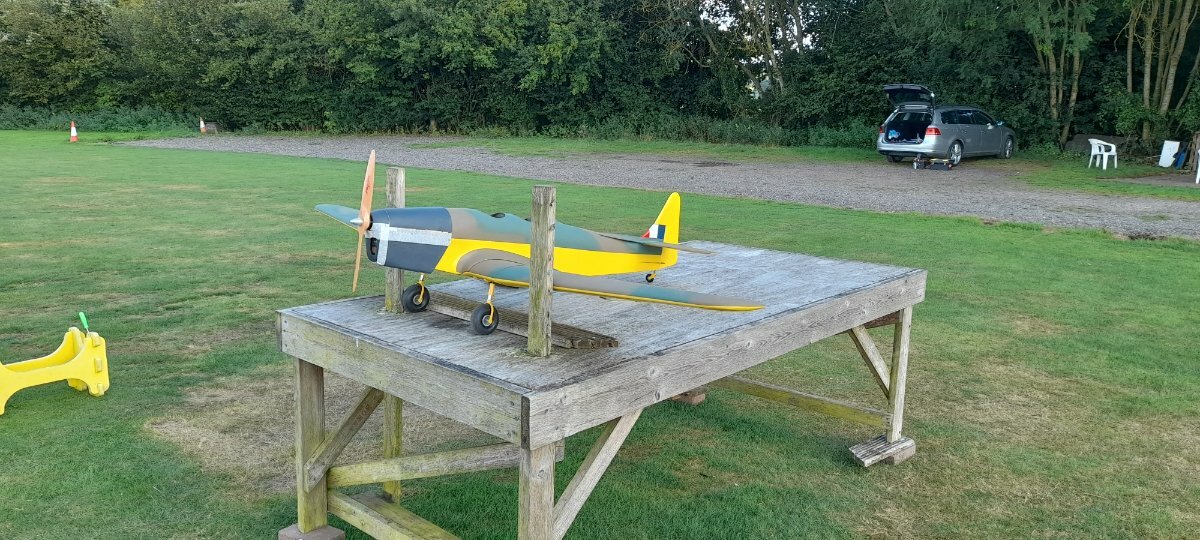
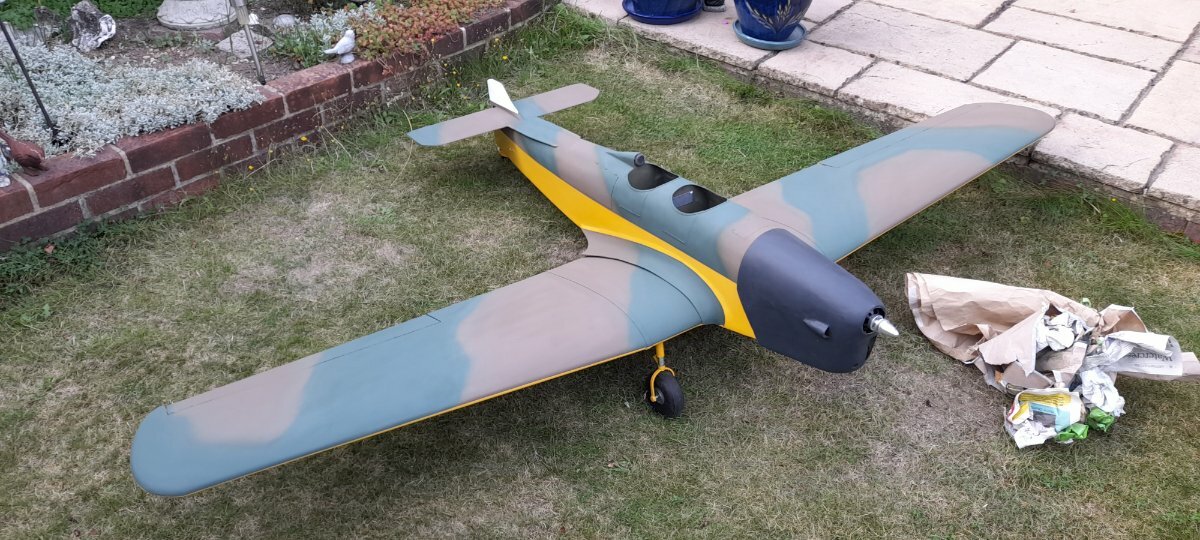
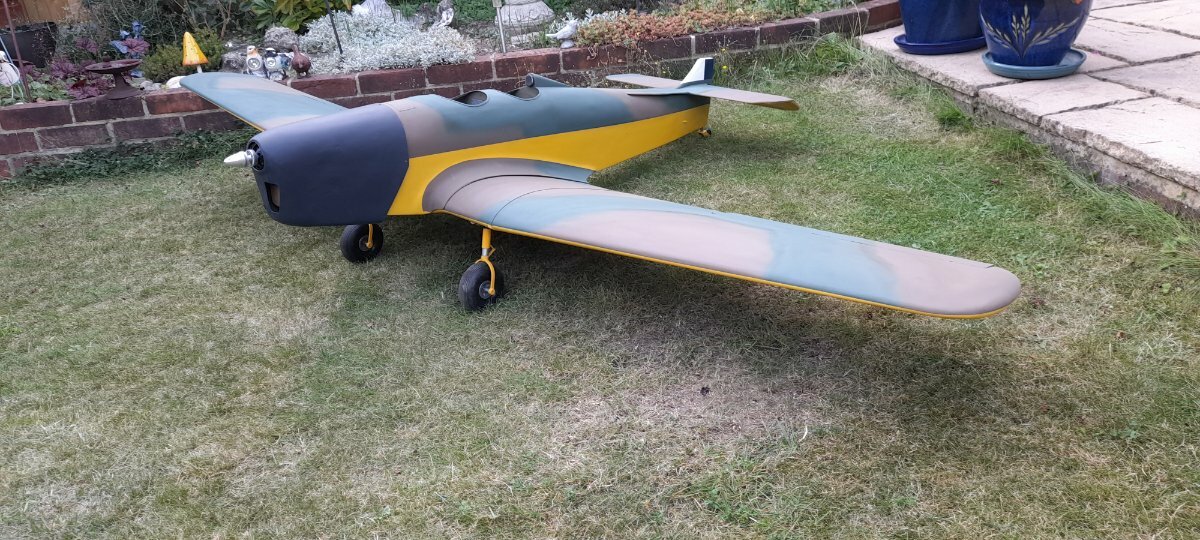
Well, we had a fun afternoon up at the field today.
After a weekend of final bit's & bob's, she was ready for an outing and some pictures in the sunshine. The only outstanding thing is the new cowling, which I'll be picking up this Saturday from the BMFA Model Builders Show.
I was intending to get some pictures & video, and by luck Dom & Trever from Essential RC turned up, so that was the video, taken care of and my camera was taken by my friend.
We won't talk about the first couple of landings, I blame the camera's.
-
13
-
-
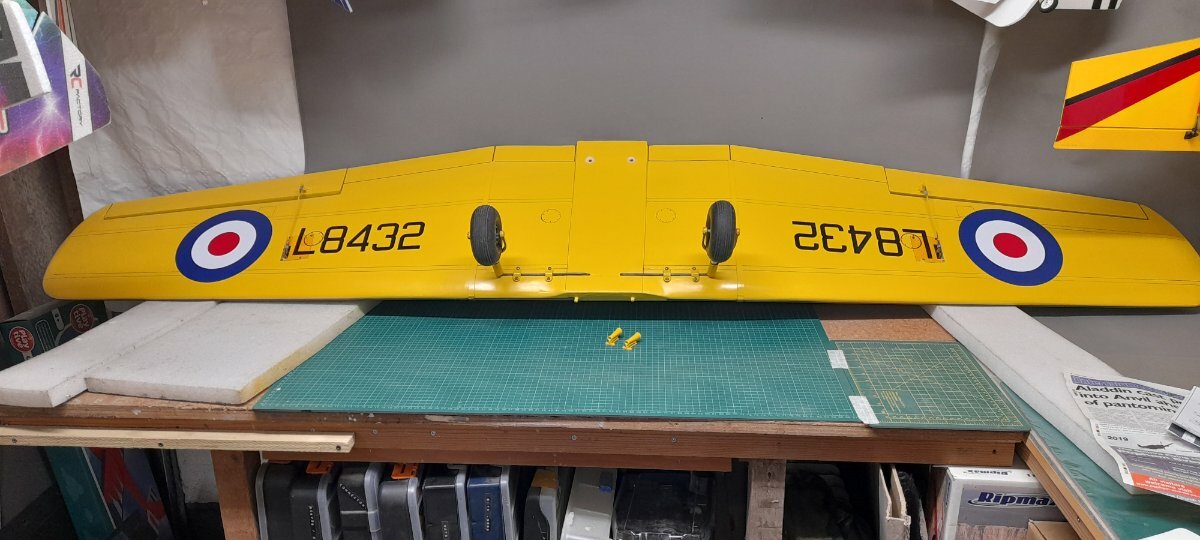
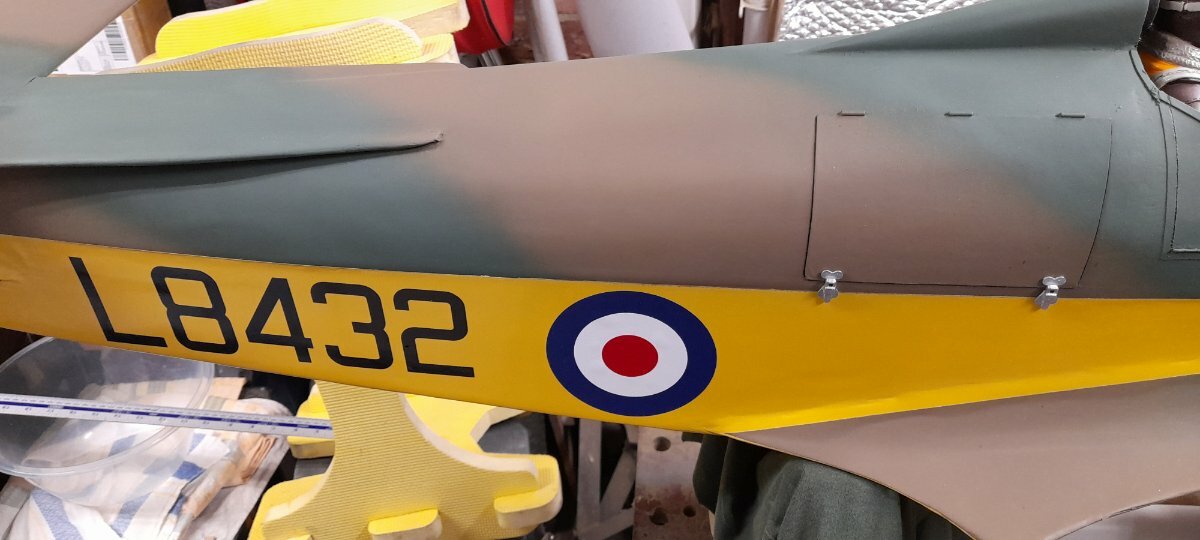
You know when you're approaching the end of a toy aeroplane build, when you get to the part where you put the stickers on
 That was yesterday's job adding the last wing decals. To add a little more detail and reflecting back to how this model was originally, we also set about it with indelible ink pens, straight edges & rulers.
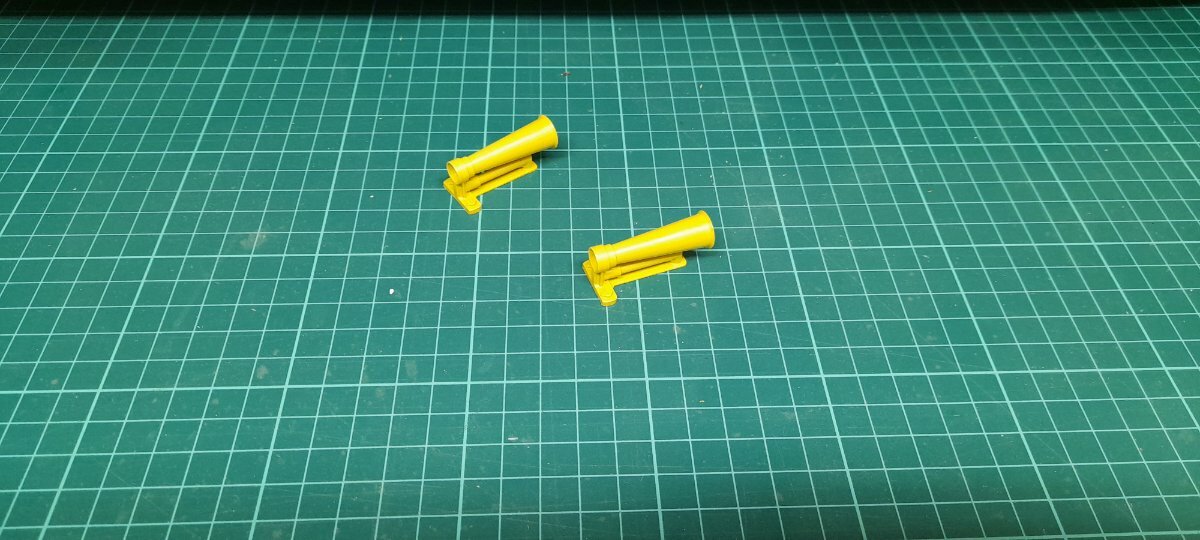
We not quite there yet, still some other little detail I'd like to add before we are done. The Venturi tubes I printed some time ago have been fitted after a lot of thought about which location to put them in. With the words from the Shuttleworth Engineer (you won't be wrong where ever you place them) as comfort, I've gone for the underside of the wing, between the legs. I'm hoping there is less chance of them getting damaged.
One last embellishment I've been playing with is a printed fuel panel, which will be the finishing touch for the wings.-
3
-
-
Hi Martin, Give John Bristow (Mr Deluxe Materials) a call. I'm sure he'll be happy to answer your question.
01256 883944 or 07515 704774. Tell him Roy sent you.
If it turns out it is, I expect it will appear in an info add.
-
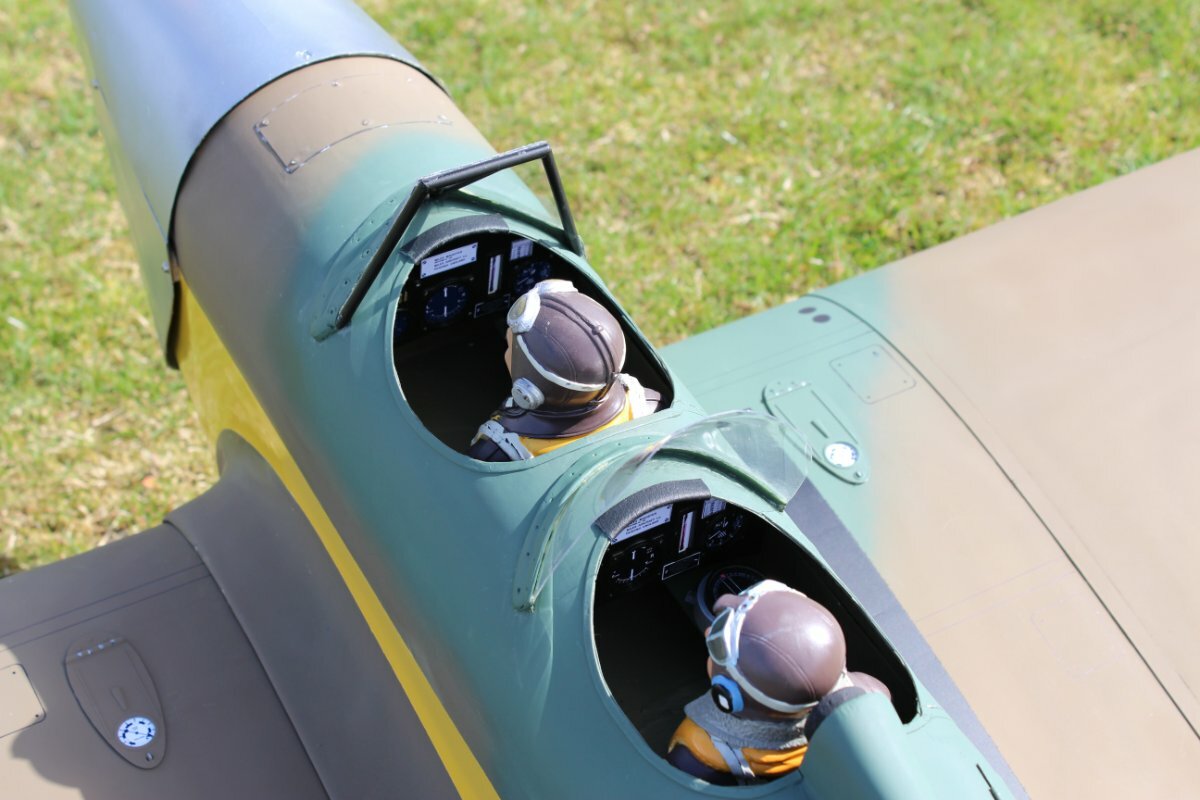
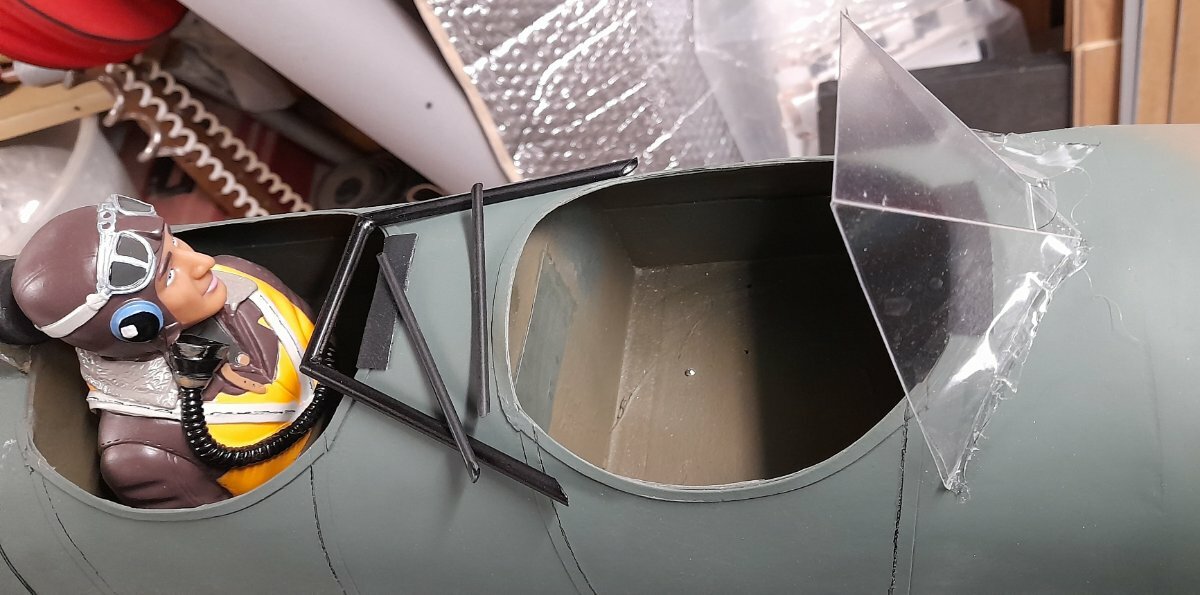
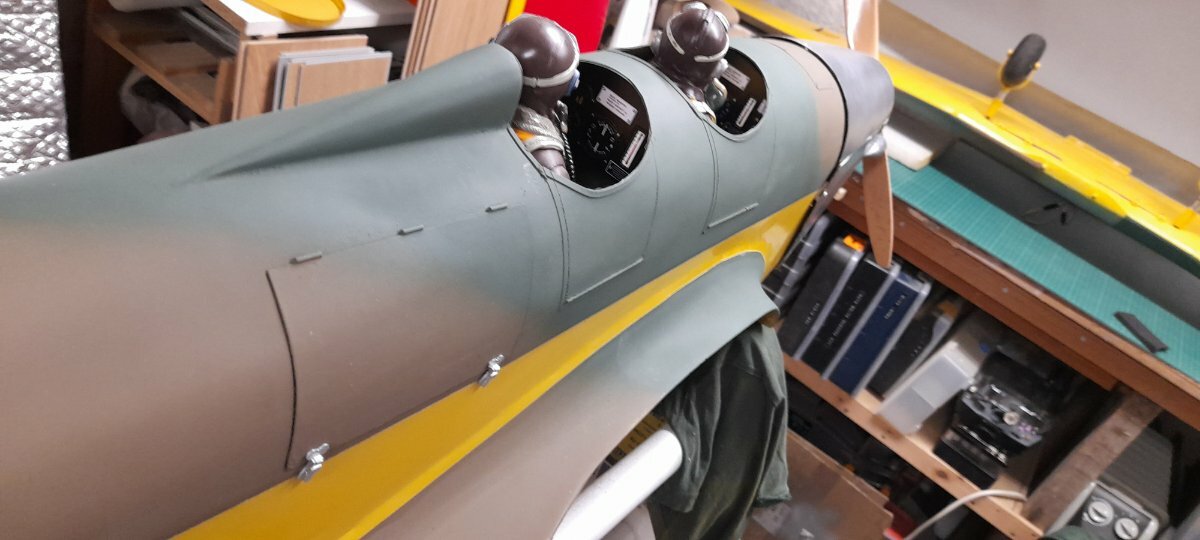
Following on from yesterday, the new front windscreen is on.
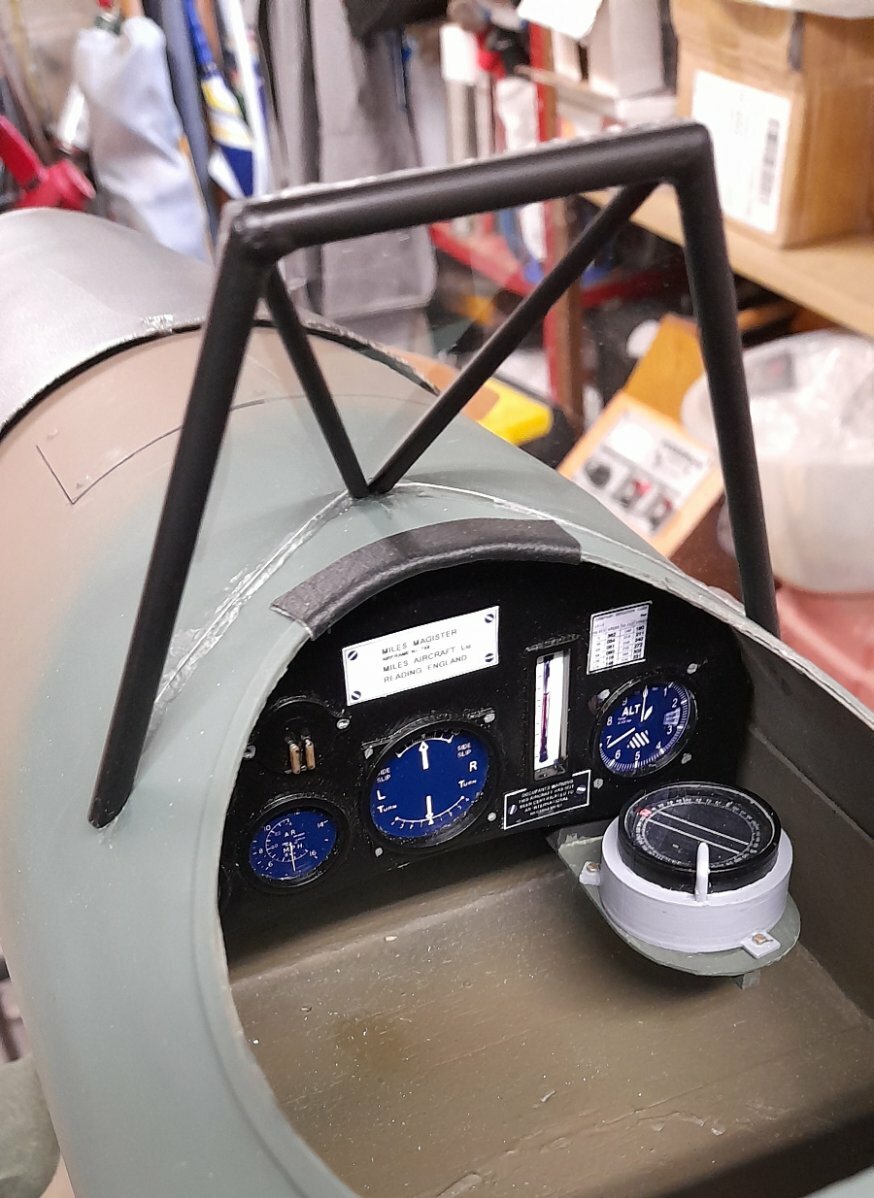
The rollover hoop, was made up from polystyrene tubes and given a coat of satin black paint before be stock in place with Foam 2 Foam. I did consider drilling holes in the decking to allow the tube to go through to the cockpit floor, but then decided this was good enough for sports scale.
The new back screen has also been added, and all that is left is adding the fairing strips along the bottom edge of the screens. For this, I'm planing on using Eze Epoxy Putty, I've not used it before so should be interesting.-
5
-
-
After the success of the first flight, the focus is now on adding the finishing details.
Over the last few days, we have cut back the yellow paint on the fuselage to remove the marks from the frog tape, however this left the paint on parts of the left-hand side too thin. So the left-hand side ended up getting another and final blow over with the yellow paint.
With the painting finally out of the way, next up for the fuselage, adding the decals. These were all sourced beforehand from Pyramid Models, my go-to company for decals. I'll add the wing decals once I've finished with the fuselage.
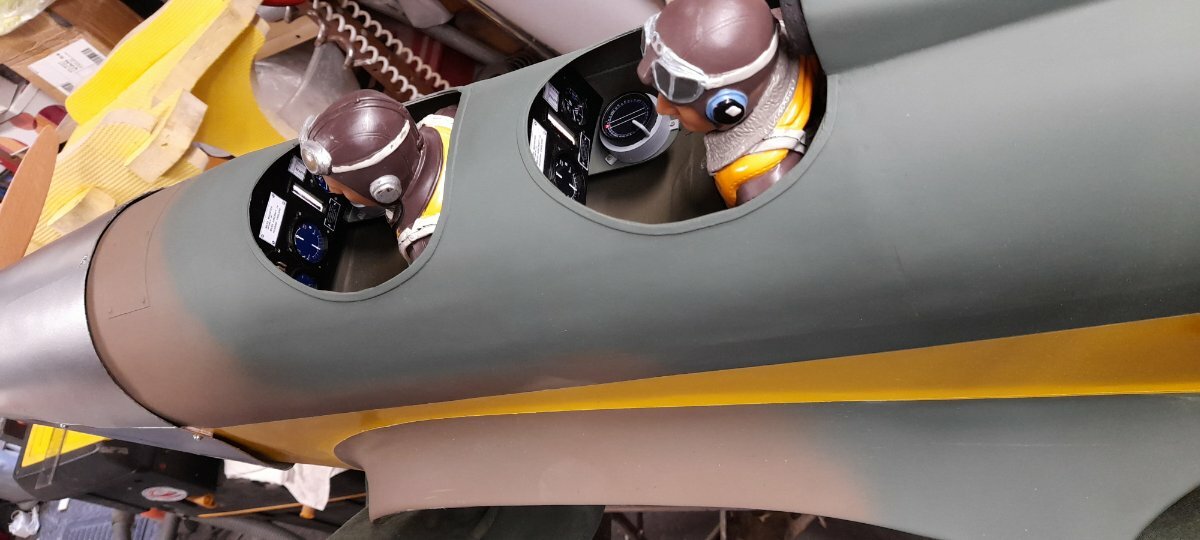
Now the bit I've been wanting to get on with fitting out the cockpits with my 3D printed panels. Before the panels could go in, I needed two shelves for the type 8 compass, here we've gone back to old school with ply and balsa. A 1-inch thick 3D printed back piece was fixed to the panels, then a smear of epoxy run around the outline before positioning the panel assemblies in place, supported with a block of foam sponge until the epoxy set.
The two pilot were next. They were glued to their printed boosters and balsa blocks added inside the boosters to take fixing screws. The two pilots are then held in place with two screws from under the cockpit floor.
The last little detail for now is the two laches fitted to hold the stowage shut.
With all that done, next up will be fitting the two new windscreens and the rollover bar.-
8
-
-
Things are moving on this week.
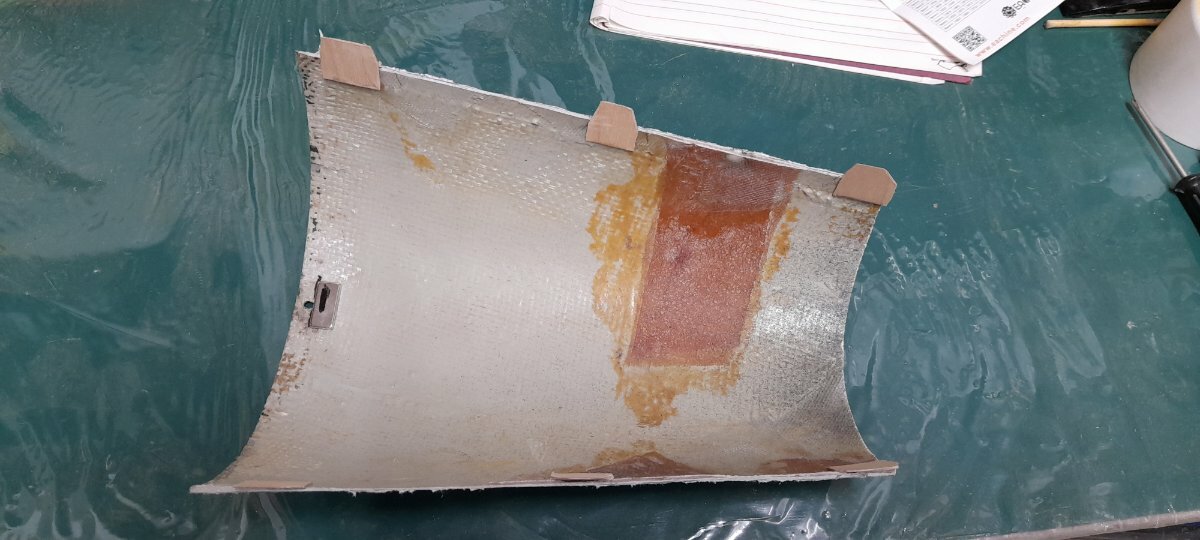
Monday I decided to tackle making the battery bay cover. The cowling from this model you may remember was very beaten up, and that I had spent some time making repairs, I also have an untouched, cowl from the other kit. Hopefully the reason for patching up the cowl will now become clear.
As you may know, Martin has also picked up a second hand Bowman Magister to home his old Kalt 22cc petrol engine. Martin's example, I must admit, was in far better condition than mine but lacking a cowling. Martin reached out to me about finding/making a replacement cowl, and as I had already thought it would be a good idea to make a mould from my untouched example before I began cutting it apart, I offered it to martin to use as a plug. By good luck, Martin has contacts with a company who specialise in composites, and their quote to make up a handful of copies turned out to be very reasonable.
My plan therefore is to use one of these new cowl to replace my old original cowl eventually, but first I'm going to use the old one to work out how to make the battery bay hatch. Once I'm happy with it, I will then start cutting the new one using the knowledge gained. With luck, I will be collecting the new ones from Martin at the BMFA Model Building Show at the end of the mouth.
Getting back to Monday, I spent the day measuring and marking out the cowl panel lines for the top panel, before attacking it with the dremel and cutting disc. The idea is plywood tabs along the sides will locate the top part, and magnets fore and aft will hold it in place. I have thought about having other fixing or latches, but this seems the simplest and less visible way of fixing, and so far so good.
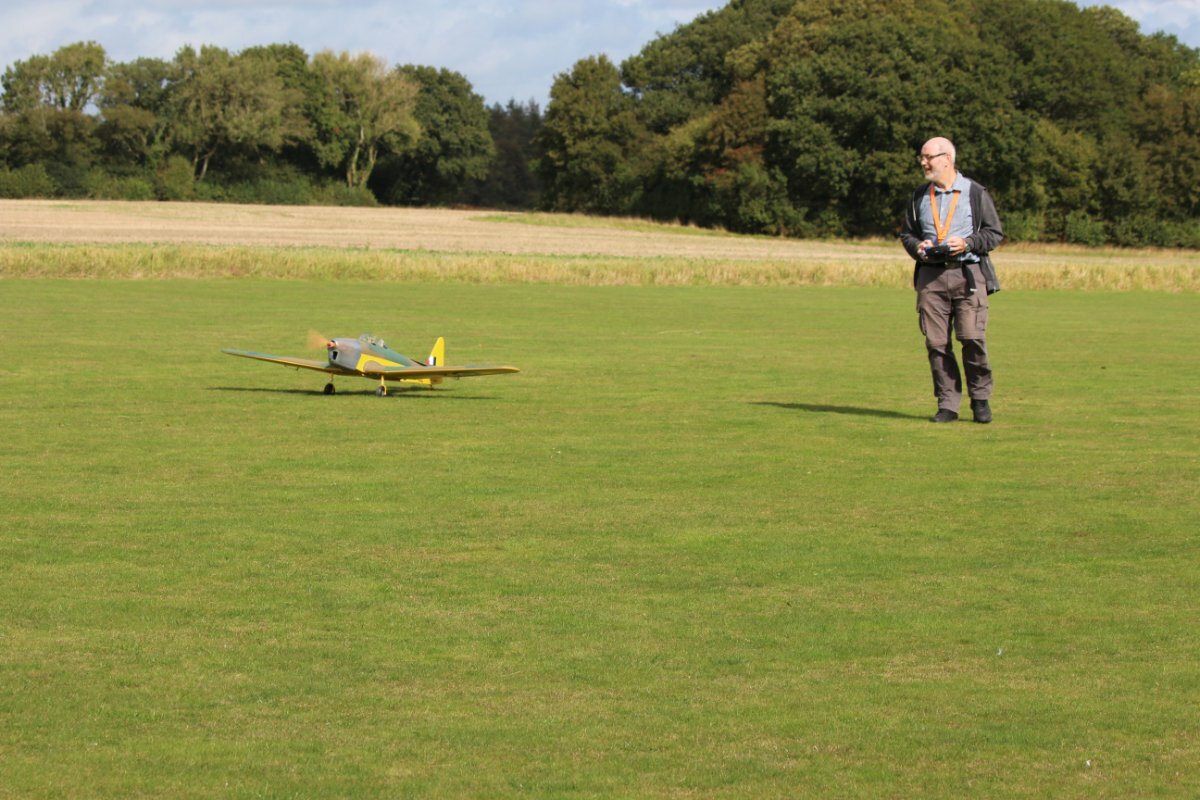
Wednesday we had a pleasant couple of hours in the garden assembling and checking the model for CG, radio and control movements, my garage workshop being too small to fit the model assembled.
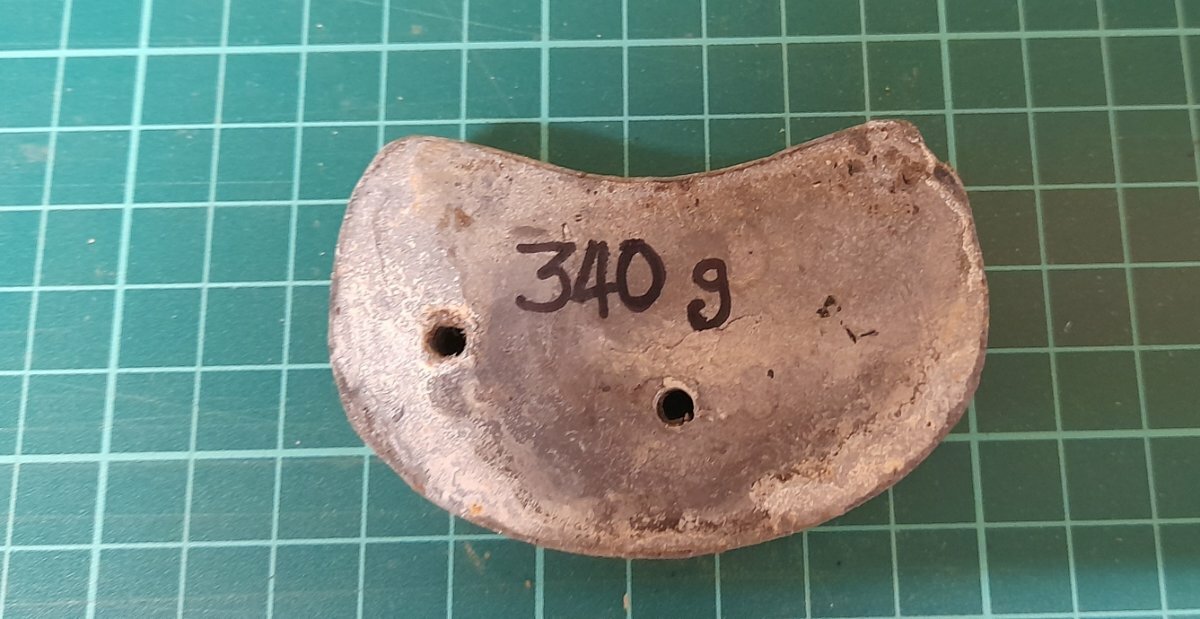
The good news from this was the model wasn't nearly as tail heavy as I was expecting, allowing the removal of a lot of the lead (340g worth) I had fitted, the total weight being dead on 13lbs. With all the setting up out of the way, now we were ready to take her up the field at last.
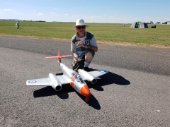
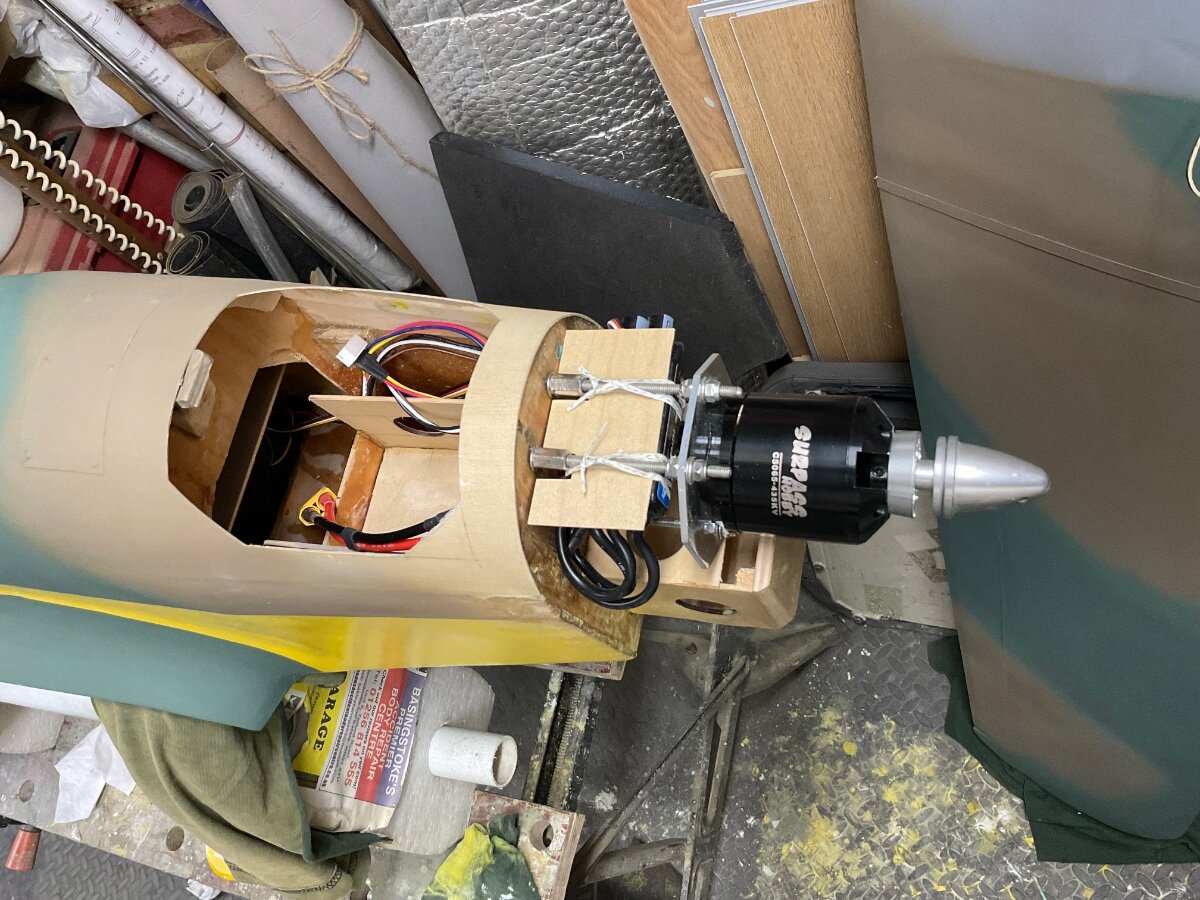
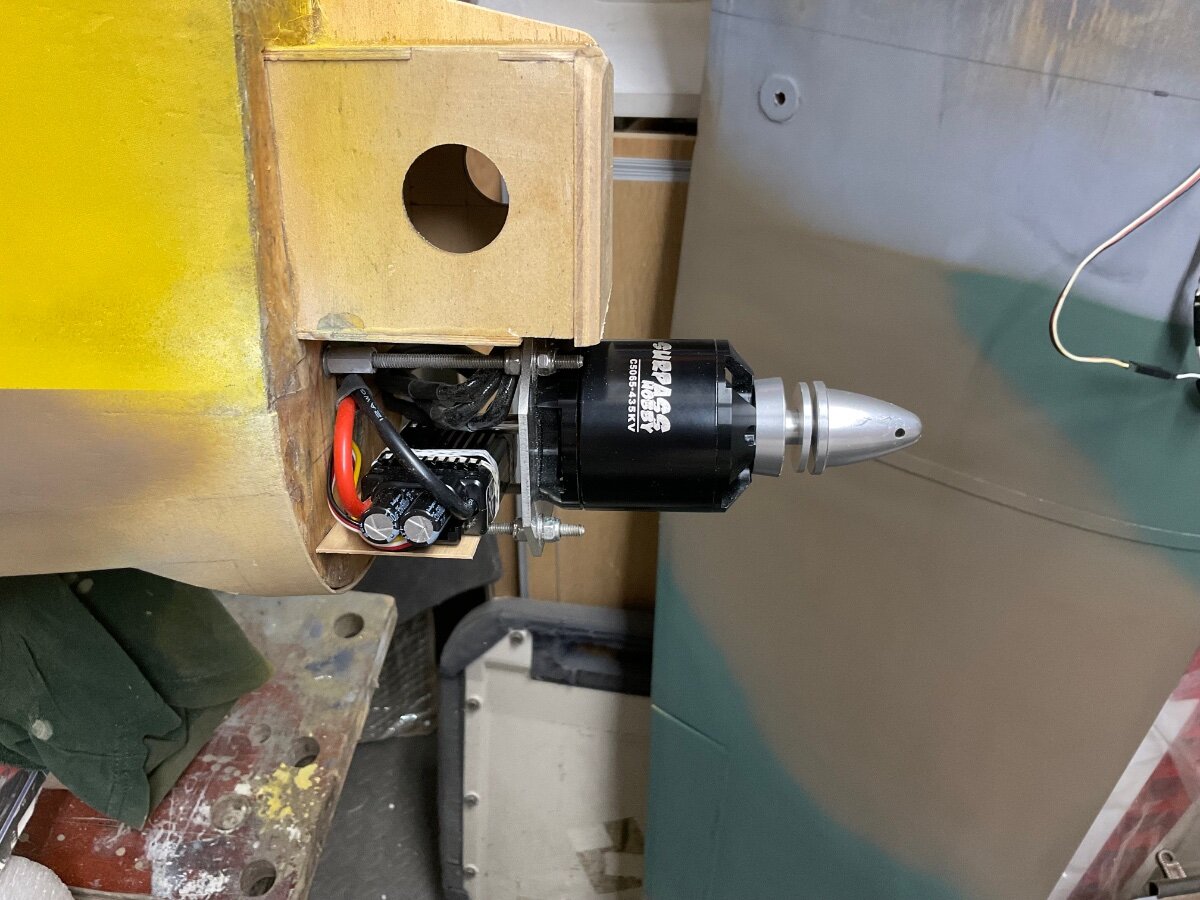
This afternoon, with my new 6s 5200mAh pack charged for the first time, loaded her up in the car and headed out for the flying field. All went fine, the range check was good, the motor run-up showed a total power of 1578 Watts spinning a 18x8 wooden prop. In a 13lb model I think this is more than enough.
There came a point where there was nothing else to do but take her out on the strip and give her a go. I've been told that these models fly like a big old trainer, and I can now agree with that. The first flight was kept short, just over 2 minutes, and I only flew circuits (sorry no video). She was air bourn, very quickly with little over haft throttle, in fact I never used fall throttle during the flight. As for trim, only a couple of clicks were needed, she does fly very well and my best guesstimate control throws are about right.
The only issue I had was a radio signal low warning from my transmitter. I don't know what is coursing, as I can't find anything obvious. There is no sign of any signal loss in flight the telemetry doesn't drop out, and on the ground I can get up to 50 steps before losing signal on the range test. For some reason, my Jumper TX doesn't like this Orange receiver, although it works OK with my old spektrume radio's. I will swap it out tomorrow.
Now we know it fly wells, I can concentrate on finishing up all the details, but that's for another day.-
2
-
-
Well we didn’t make it to the E Fly-In event with the Magister, besides it not being ready I don’t think I could have fitted it in the car with all the other models I wanted to take.
The Great British weather did its best to put the mockers on the day, after the hottest day of the year on Saturday But nonetheless we had fun.
-
1
-
-
The Digimac III was my first radio, my big brother brought it for me. That poor radio took a lot of abuse over the years, good job we lived near their factory. I made regular visits there for repairs and to have it upgraded to four channels.
Looks like a fun little project.
-
 1
1
-
-
5 minutes ago, Alan Hilton said:
Cracking job it looked like a black bag job at the start .My dad used to fix them during the war .He was rather rude about the main spar which he had to re glue often .
That’s the problem with giving perfectly serviceable aircraft to pilots, and worse still student pilots.
-
Thanks.
I’m going to use a 6S 5000mAh pack, and if my calculations are correct it should give me a bit more horsepower than a 120 4S. Must admit I’m looking forward to powering it up to see what the performance is like.
-
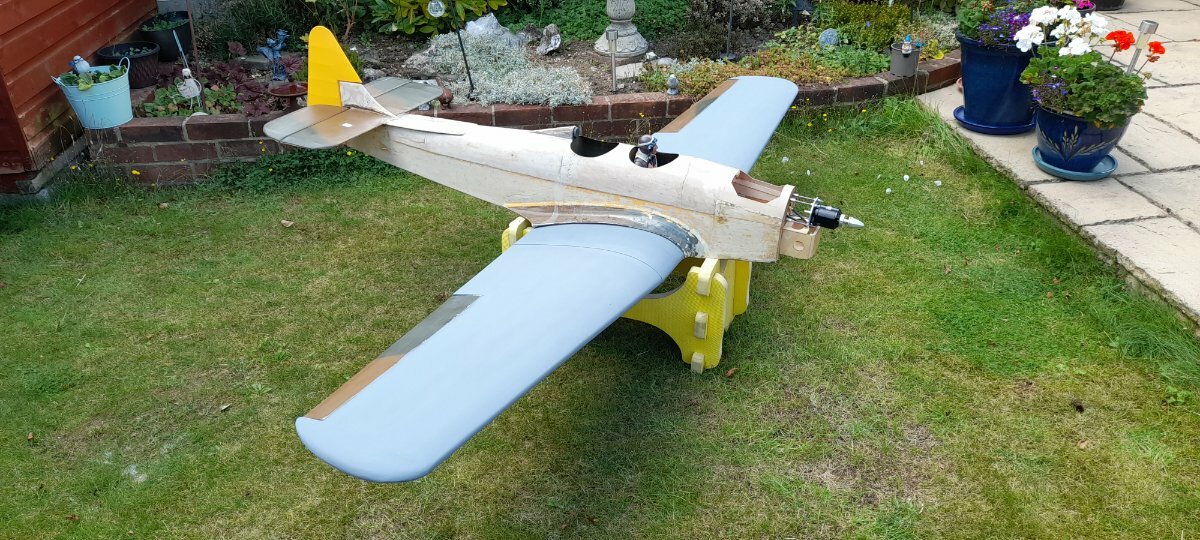
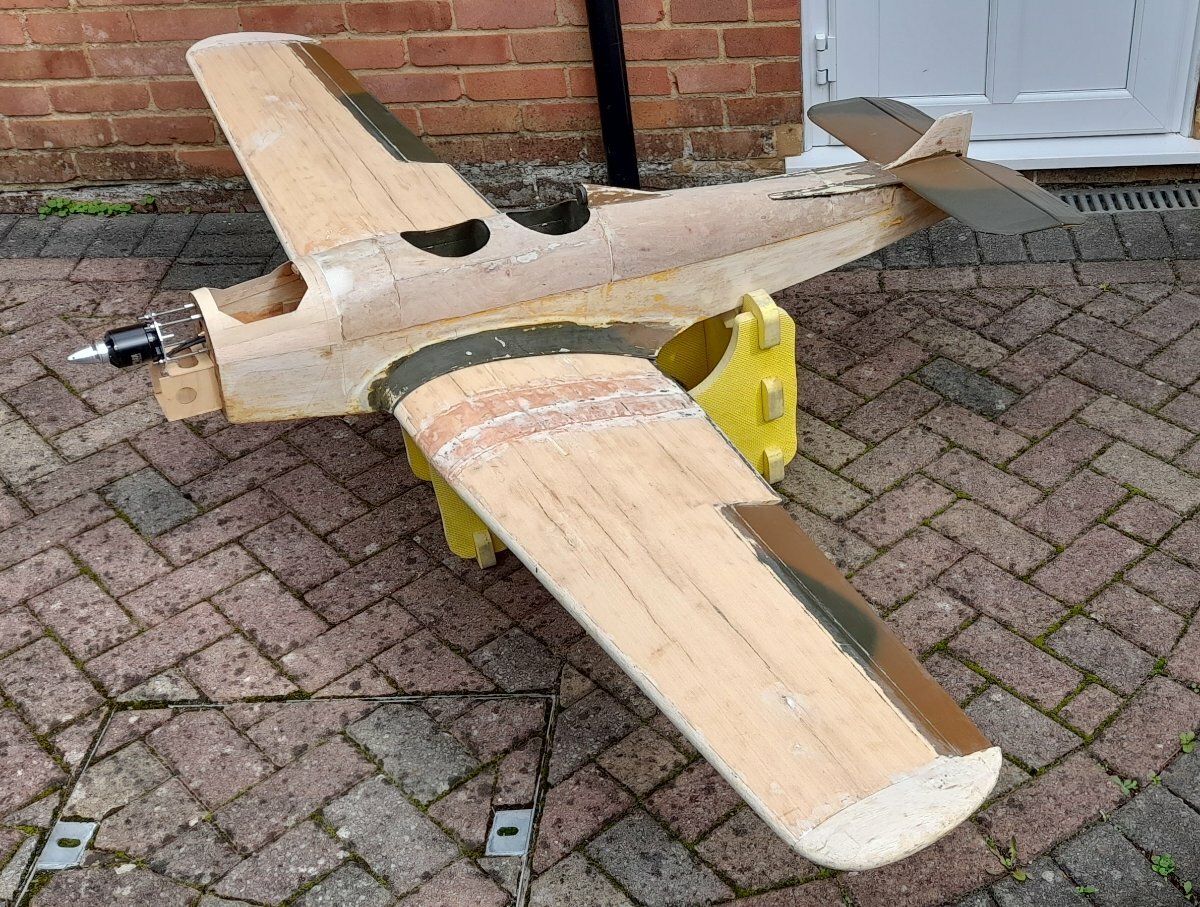
Pictures of yesterday’s progress. We are almost at the point where I can stick a battery in it and bring it to life for the first time in who know how many years, or decades for that matter.
-
4
-
-
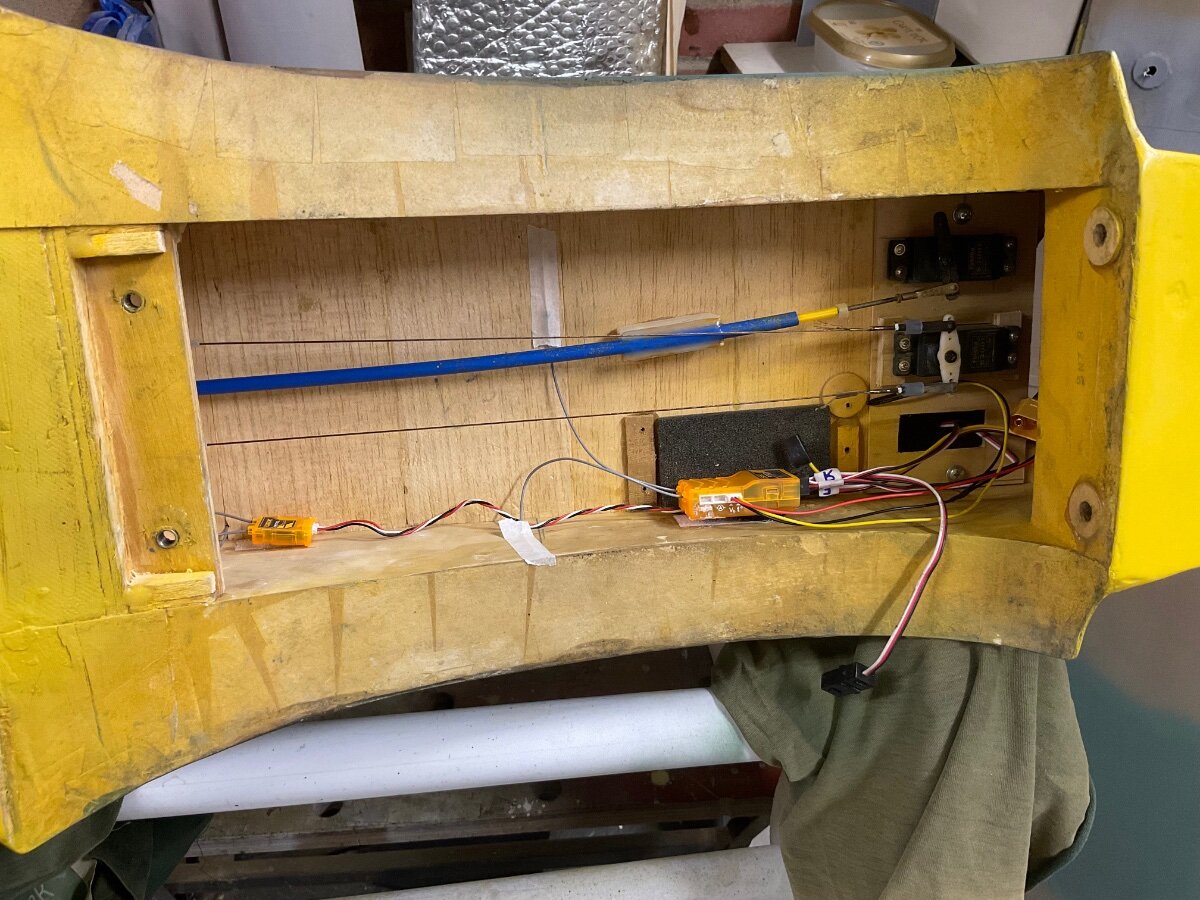
Yesterday I refitted the rudder using pin hinges, installed and adjusted the closed loop system. Undercarriage saddle clamps cleaned and painted, before reinstalling the gear. Motor ESC and radio installed, and tail fin insignia painted. Painted 3D printed latches for the stowage. Cut out two new windscreens.
It’s starting to fill like it’s moving on a lot quicker, still lots to do but not anywhere as much as there was.
The only down side is where I used frog tape for masking it has marked the yellow paint finish, so I will need to give it a going over with cutting paste before too long. This could be the first and last time I try frog tape.-
1
-
-
Humbol aerosols for the top, Halford's car paint for the yellow. I do have an airbrush setup I could have used but, but aerosols was quick and easy.
-
1
-
-
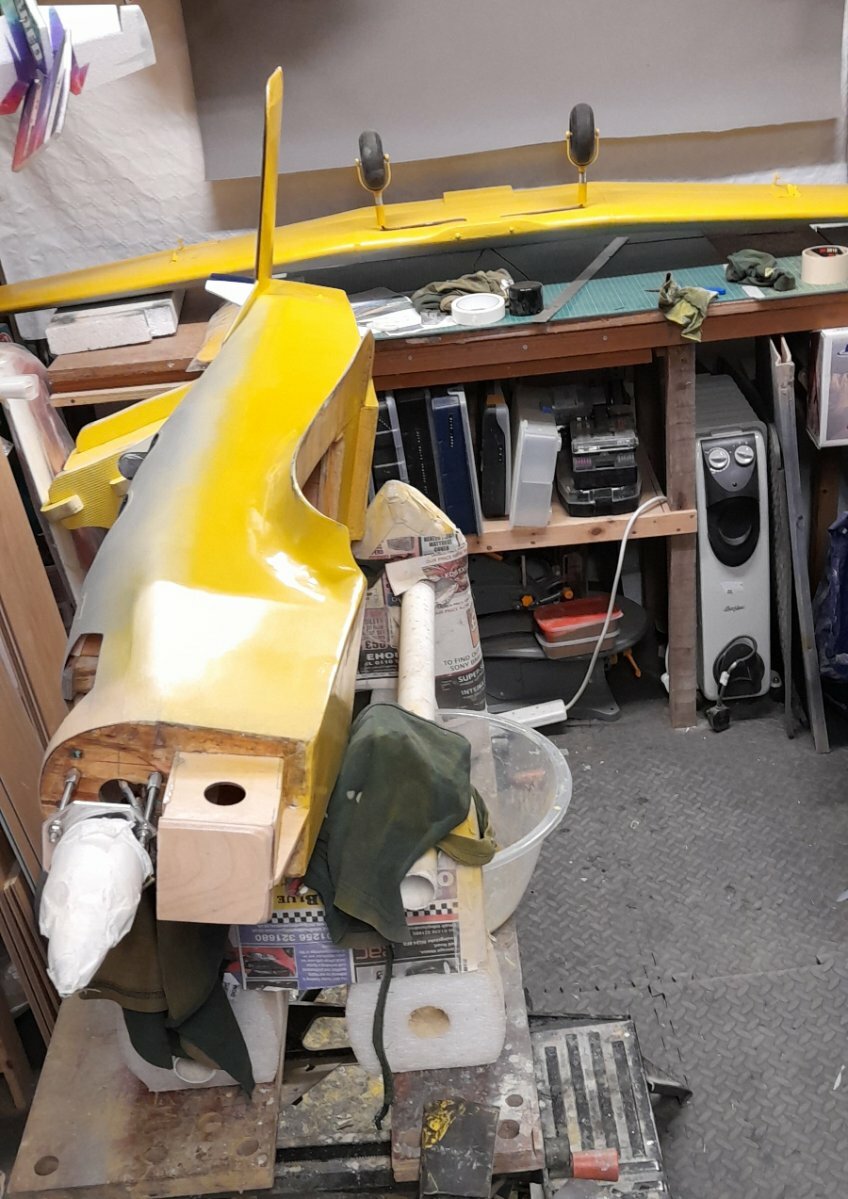
We have some visible progress this week. I've made an effort this week to spend at least a couple of hours each day, just to get it to the point where I can start fitting out the rest of the gear on the inside.
After having some issues with the primer just down one side where I was using a white primer over a coat of high build primer sanded back, the white crinkled. I don't know why it should do it just on the one side, as the other side went on OK. Anyhow, that resulted in more rubbing down on the that side and an over light coat of the high build before the yellow top coat, without the white. Strange.
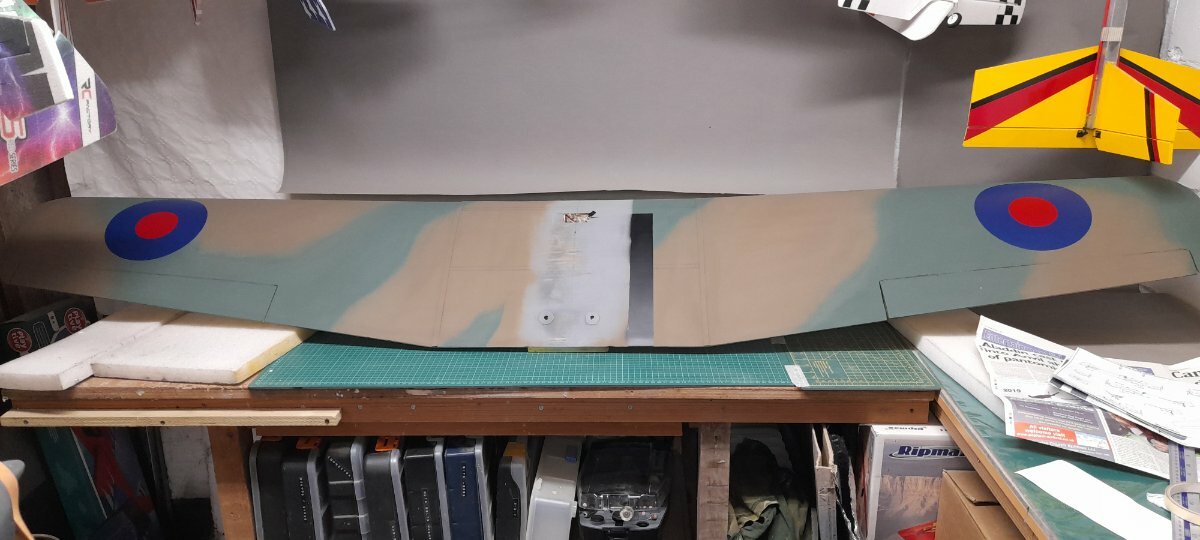
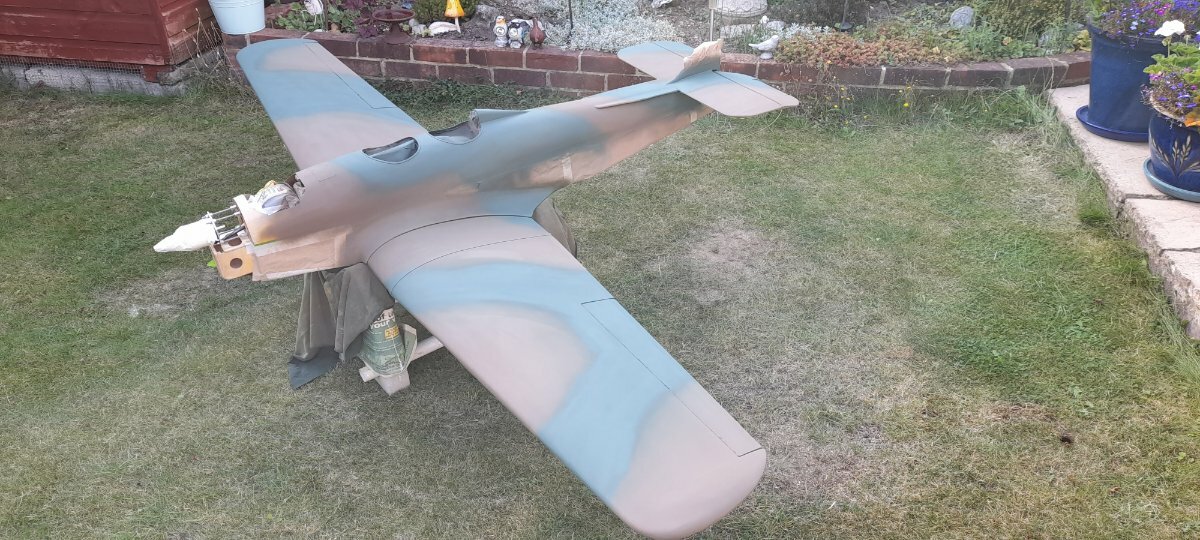
Next up, an evening spent masking all the yellow and the top of the fin where the insignia will go. The following day I managed to spray most of the dark earth areas ready for the dark green, I've had to wait until the wind drops to allow me to do this outside in the garden, I don't like spray-painting in my workshop even with extractor fans and a face masks, plus the dust from the overspray get everywhere.
The other issue with painting inside is I can't assemble this model in the workshop, I just don't have the room. Which has meant that the dark green had to wait until Sunday afternoon, when we got home from the Popham model air show.
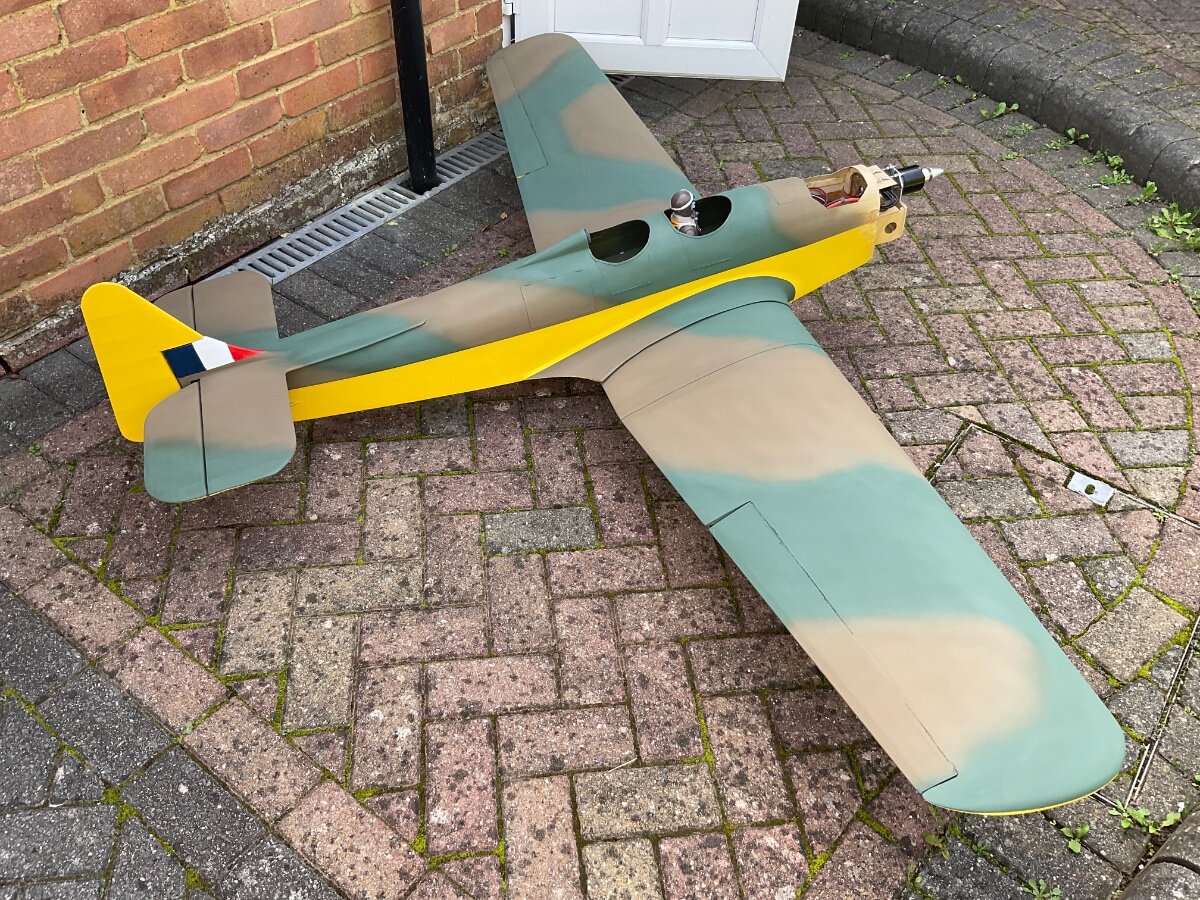
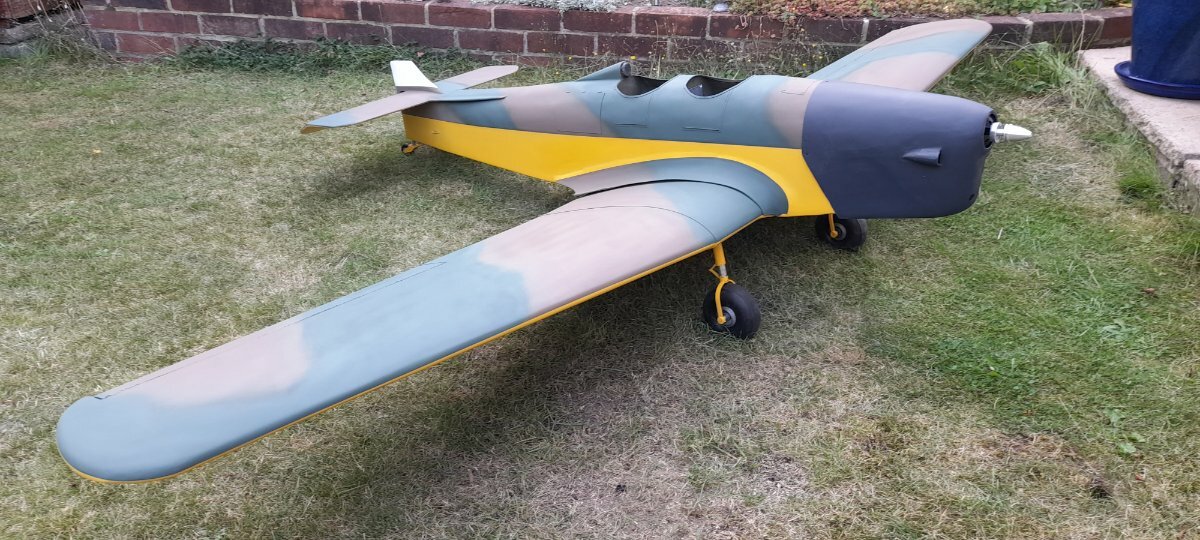
As soon as I was happy with the camo, I couldn't wait to get the masking off and see what see looked like. It's like the butterfly emerging from its chrysalis.
Well, it's not perfect, but for my needs it's will do.-
7
-
-
Not a lot to report this week in the few hrs I've had, just priming, rubbing down followed by more primer and a little paint here and there. Hopefully by the end of the week we should have something worth showing.
-
Been very busy with the cornflakes box today. Storage box boor, cockpit doors and front instruments panel access panel all made from card, very pleased with the overall effect.
-
4
-
-
1 hour ago, Geoff S said:
You've obviously made an effort with the forward extending battery box. Will the cowl shape allow a bit more?
No not really it all gets very snug from that point in. There will be the large lump of lead to go back on the front of the battery box as well. If I’ve done my calculations correctly I’m hoping not to be too far off, time will tell.
We all need a bit of tolerance in our lives. I let her have control of the TV remote, she lets me play with my toy planes!
-
Progress is happening and despite the fact I've been working on it for a few hours every day, it seems dreadfully slow progress. This hasn't been help be the strong winds every time I want to spray a coat of primer or paint.
This week, however, I called a stop to rubbing down on the wing and finished it in a coat of grey primer all over. Only to remember that the yellow underside will need white primer. First job this week, trip to the car spares shop for white primer. On the subject of the yellow, I've been in two mind about matt or gloss. The pre /post ww2 all yellow A/C are gloss yellow, and the camo was only added for the war years with little regard for any standard layout. So I think I'm going with gloss on the underside.
One small embellishment to the wing, I've added wing joiner capping strips, made from card. One way to recycle the cornflakes box. I will use card to simulate the cockpit & storage box doors, as when you look at them, none are flush with the skin. The same idea will be used for the refuelling panels on the wings as well at some point.
The rudder has been refurbished. The covering, which wasn't done as nice as it could have been, was removed and replaced with new Solertex from an old roll I've had for years, originally brought to cover parts of the MB5. The fabric hinge is now replaced with 3 pin hinges, and it's been given a coat of matt yellow for now.
Hopefully by the end of this week we will start to add some colour to the rest of her.
-
5
-
-
Continuing with the conversion, I’ve been giving the balance some thought. Assuming that this model had a 120 4 stroke originally at 1Kg plus another 620g of lead, I need to be around 1.6 to 1.7Kg hanging off the firewall. So let’s assume the battery will be around 6 to 700g the motor is 375g, and with the lead added as well, I’m hoping that this put me at around the 1.6Kg mark and not too far away from a reasonable starting point for the CG. Time will tell.
Over the last couple of weeks I’ve been busy with the sanders and loads of sheets of sand paper, resulting in covering everything in the workshop with a thick layer of dust! This despite the vacuum cleaner being on the go the hole time. Glad that's dune and dusted 🤣
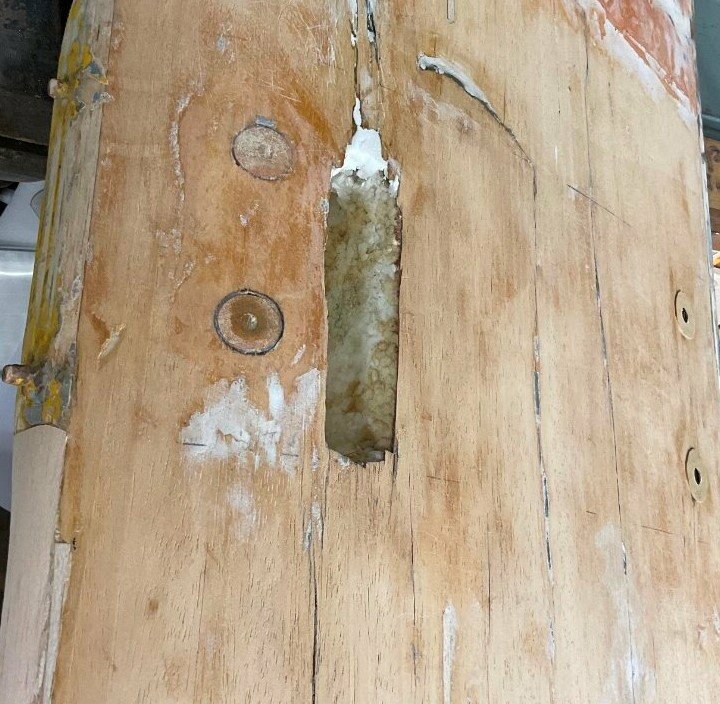
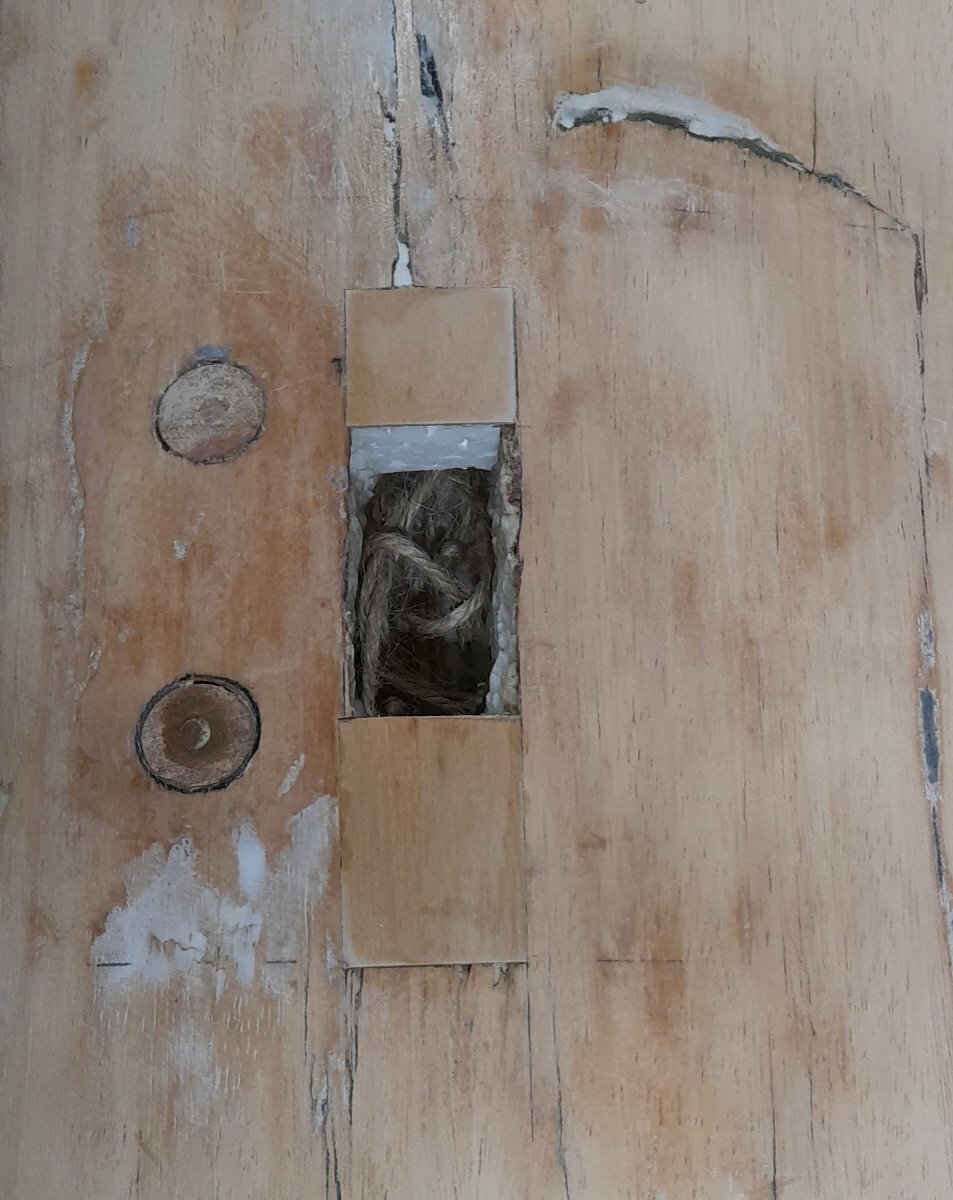
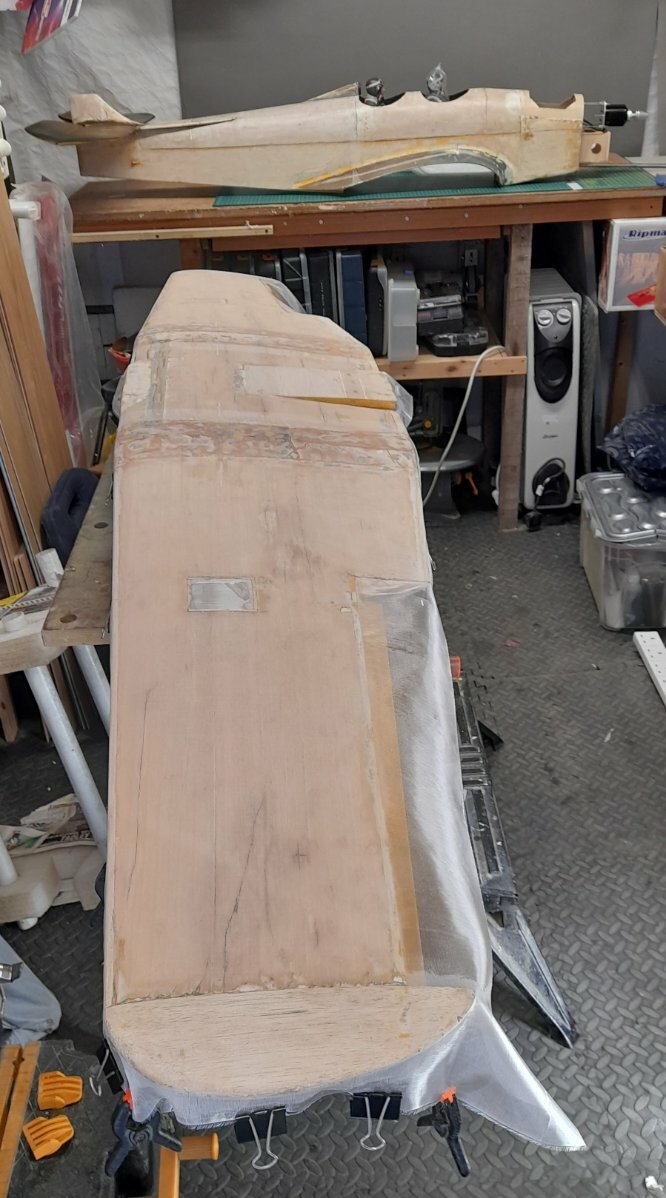
I was wondering how many nasties I would find, but touch wood, no more than I already knew about. The main one was the dent in the left hand leading edge. With all the paint out of the way, I could see just how much the damage was. All that was needed in the end was to splice a new 3” long piece of wood in to the leading edge.The fuselage and wing have now been covered in light weight glass cloth and EZE-Kote. Before covering the wing, I've taken the time to fit servo drawstrings and tidy up the servo lead opening with new foam and thin ply. At least when the wing is off, it's going to look a lot nicer than it did. Now we are back into the process of painting on coats of EZE-Kote , primmer filler and then sanding back before repeating. This is the point where I have to stop myself thinking why don’t I just buy BNF’s
-
1
-
-
Two for the price of one. Currently, we two Bowman Magister being returned to the sky's.
The restoration and conversion of my Magister has its own thread here:
Plus, we have a second stock Magister being resurrected and flown:
-
2 minutes ago, kevin b said:
It's not the material, or worrying about getting it right Paul.
It's just that I spent a large part of my adult life rubbing down filler and paint on motor cars !
You should know all the shortcut then! 😅
I fill your pain, sanding and more sanding is where I'm at currently. Just stay focused on, it will look wonderful when it done.


BOWMAN KITS - Dave Banham's Miles Magister 1 E-Convertion & Restoration
in Traditional kits
Posted
Thanks, Brian.
I have a photo of the moment of the first landing Monday, the wheels are right back, almost touching the wing. The good thing about torque rod setup being they came straight back without breaking anything. Looking at the video when I did a touch and go, you can see the wheels going backwards and the nose going down. That was the point when that landing turned into a go around. Still, that explains all the scrapes on the underside of the cowl.
I'm surprised yours is heaver, but at the same time, it makes me feel better. Looking at the vid I do need to work out how to slow it down on the approach without it dropping out of the sky. I have the c/g at 100mm, may move that back a bit and increase the elevator movement with greater expo. Would be nice to have the original instructions to see what they recommended. I did phone the people who own the Bowman rights this week, but they are still! along way away from shorting out all the drawings they have.