Kelly Posted January 1, 2013 Share Posted January 1, 2013 This is a review/ build of the Hobbyking Giant P-51D Mustang EPO. I have done a sort of unboxing on Youtube and I will do another few videos as I progress with the build, So I shall start with the manual Nice and glossy with Colour pictures, nice. Bit of safe operating info like 'don't stick your finger in the prop when the motor is running'. Apart from that nothing of use to help with the actual build, It does give the location of the CoG but no info on the control throws??? Now the canopy, as seen in the video on Youtube came in a damaged condition. If you enlarge the rather poor picture the damage is on the right hand side as viewed from the front, and half way along the top is a bubble type blister caused during the manufacture, Blister a bit clearer (i hope). You can see the cresing on the RH side also a join seam all the way along the centre line of the canopy. Creasing in more detail,plus the paint flaking off on the frame. Not very clear on the picture but a small slit half way along the windshield frame has been caused by the metal U/C legs packed inside the canopy as shown on the video. So not a good start then. I have tried to find a commercial replacement for the canopy,none are the same size( too short) based on the wingspan of the model. I could make my own,but is it worth it? ,it's only a sport scale model . If you want to see the unboxing video it is in the topic section , foam models on this forum. To be contnued.......... Quote Link to comment Share on other sites More sharing options...
Kelly Posted January 12, 2013 Author Share Posted January 12, 2013 Cut away part of the lower fuselarge tail section to gain access to the servos. Tail wheel when retracted fouls the rudder servo arm. One of the elevator servo arms is rubbing against the fuselarge side. The lead from one of the main U/C legs is a very bad fit . A few pics the link to youtube will follow soon (loading) with more detail. Ignore the bit about the tailwheel steering direction it is correct in the original position (I think) Quote Link to comment Share on other sites More sharing options...
Kelly Posted January 13, 2013 Author Share Posted January 13, 2013 Youtube link Quote Link to comment Share on other sites More sharing options...
Kelly Posted January 13, 2013 Author Share Posted January 13, 2013 Checked out the motor and its mountings. I had to add more thread to the prop adapter to enable a 2xblade prop to be fitted. Esc with no name Two seperate plywood plates make up one mounting plate front and rear of firewall .four seperate plates in total ?? four aluminium tubes connect the two sets of mounting plates All but two of the eight screws were found to be loose as well as two of the scews holding the motor to the mounting plate. Re-attached the magnets holding the battery hatch in place magnets originally glued to the foam with paint on the surface traces visable ? paint removed and magnets glued into place with CA. The gap between the spinner and the nose is rather large Will have to close the gap with some balsa and filler. Quote Link to comment Share on other sites More sharing options...
Kelly Posted January 28, 2013 Author Share Posted January 28, 2013 Used CA hinges and standard control horns/linkages on all the control surfaces Tailwheel fitted crush damage to flap inboard tip cured by soaking in hot water I have decided to use the supplied servos they appear to function OK. Video link soon. Quote Link to comment Share on other sites More sharing options...
Kelly Posted January 29, 2013 Author Share Posted January 29, 2013 link Quote Link to comment Share on other sites More sharing options...
Kelly Posted January 29, 2013 Author Share Posted January 29, 2013 link Quote Link to comment Share on other sites More sharing options...
Kelly Posted February 2, 2013 Author Share Posted February 2, 2013 Nose spacer in place, ready to sand/filler to shape Pitted wing spackled (light weight filler) Quote Link to comment Share on other sites More sharing options...
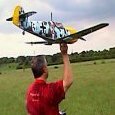
Kelly Posted February 3, 2013 Author Share Posted February 3, 2013 Added ply plates to wing stubs and underside wing roots Got the idea to make the wings removable here **LINK** The undercarriage units need to br replaced,poor quality fittings and grubscews failed when trying to attach the u/c legs. If Hobbyking is following this thread a replacement cockpit canopy and the latest retract units would be nice Youtube link explains in a bit more detail It will fly eventually Quote Link to comment Share on other sites More sharing options...
Kelly Posted February 12, 2013 Author Share Posted February 12, 2013 Well the E-Flite retracts are due anytime now,a few thought coming to the end of this build. Cost so far The model £68 plus £30 postage Esc 60 Amp £40 Control horns and CA hinges £10 Retracts £58 Misc £15 Total £220 approx Still good value compared to a H9 Mustang etc Not included the cost of lipos but they serve multiple models anyway . It has been on sale for several years now and the foamy models i'm sure are well improved since then. I may appear to moan a lot about this one but on the whole,if you are prepared to put a bit extra money and work you can have a decent model (i hope) in the end Quote Link to comment Share on other sites More sharing options...
Kelly Posted March 6, 2013 Author Share Posted March 6, 2013 This is not good ( poor picture sorry) This is one of the extension leads for the retracts. I will have to check all the wiring, may end up replacing it all Quote Link to comment Share on other sites More sharing options...
Kelly Posted March 27, 2013 Author Share Posted March 27, 2013 Added some cockpit detail Edited By Kelly on 27/03/2013 19:33:47 Quote Link to comment Share on other sites More sharing options...

Recommended Posts
Join the conversation
You can post now and register later. If you have an account, sign in now to post with your account.
Note: Your post will require moderator approval before it will be visible.