

Robert Parker
-
Posts
2,657 -
Joined
-
Last visited
-
Days Won
4
Content Type
Profiles
Forums
Blogs
Gallery
Calendar
Downloads
Everything posted by Robert Parker
-

Building Tony's Sunderland
Robert Parker replied to Robert Parker's topic in Tony Nijhuis plan builders
Hi All, Well I'm back with the Sunderland, sort of, and this year is certainly one to put behind me. I have lost both my mother and aunty within two months of each other as well as my wanting to build or fly these past couple of months. This week I have made a bit of a start on the wing tip floats and the tailplane/elevators to try to get me back to building I deviated from the build article here and "built-in" the supports and ensured I made a left and right. The elevators use a 3mm balsa core and both halves are back to back. when dry they will have a 6mm leading edge added and flipped over to repeat the ribs. Next, after finishing the elevators I'll start the tailplane. That's all for now Regards Robert -
JB Aviation DH71 Tiger Moth
Robert Parker replied to Robert Parker's topic in Building from Traditional Kits and Plans
Hi Mick, So sorry for the long delay in replying, I'm not having a good time at the present. However, I have not flown her yet or anything else this year to be honest but it will have to wait until next year along with all the other aircraft I have waiting to be maidened. I have not weighed her or at least I don't recall weighing her but can do tomorrow. Regards Robert -
Forum members' new models: Let's see them.
Robert Parker replied to Paul Marsh's topic in All Things Model Flying
Hi Leccyflyer, Some great shots of both the Wellington and ME109 must be a great camera/lens, particularly like the one where the 109 is coming out of the clouds, could be the real thing. Love the wimpy, I built two, the first was when the plan first appeared in Model World along with a Bronco, both designed by TN, mine was powered then by the old speed 400's and Nicad cells and refused to get into the air, the second built a few years ago I tried Turnigy brushless motors 2830/11 with a single 3s 30c 4000 lipo, although slightly lighter, tipping the scales at 3lbs auw, than my first one this one did take to the air but not for long. What motors have you fitted in your wellington?? One day I build another I still have a copy of the plans. Regards Robert -
Building Tony's Sunderland
Robert Parker replied to Robert Parker's topic in Tony Nijhuis plan builders
Hi All, Not a lot achieved this week. Wing joint bandaged and wing seat trimmed and bolt hols drilled and captive bolts are next. I used a cross line laser to get the fuselage "plumb" using the datum lines I put on the formers and then levelled across with the laser wing tip to wing tip a little more trimming was required and the wing diagonals from aileron cut out to tail were spot on. This aircraft is going to have some presence in the air when she is finished. Not a bad crop of runner beans either. Next, wing captive nuts/bolts and final wing fitting and then we will move on to the tail feathers, the fin is all sheet but there is a bit of work in the tailplane. So that's all for now. Regards Robert -
Building Tony's Sunderland
Robert Parker replied to Robert Parker's topic in Tony Nijhuis plan builders
Hi All, Things are coming along a bit now. I now have a one big wing, ailerons hinged and nacelles finished. Completed nacelles with rear access panels A nice snug fit they will be held in place with some small magnets. Ailerons hinged using some of Ron Gray's laminating film. Packed up the tips and centre section to keep the nacelles in the air and glued up and weighted down after the photo was taken. That's as far as I have got for now Next, some wing bandage and fitting to the fuselage and then on to the tail feathers. That's all for now Regards Robert -
Building Tony's Sunderland
Robert Parker replied to Robert Parker's topic in Tony Nijhuis plan builders
Hi All, Work on the nacelles has progressed quite well so far, although I'm not too fussed on the one of the nacelles. All of the motor fitted along with the esc's and all programmed. To the right of the picture the formers for the nacelles are pre-cut, all of the N-4 pieces have been cut as I see it too wide by about 6mm. All of the other pieces are a perfect fit. And they match the plan part but not the actual nacelle drawing I am not keen on the idea of "building-in" the esc's so I have made access hatches so I can get to them in future if needed. Sheeting the front section was straight forward and hatches marked out. The mid sections are planked in 3/16th balsa with a solid balsa block rear to be shaped to suit. At this point I dropped George from 4Max a couple of questions on batteries and an additional power source for the servos. Glad I did and his prompt reply was timely as I needed to remove all of the middle wires from the esc's and so 4 more access panels at the rear of the nacelles just in case I need to get at the plugs, only really need them on the inners to access the "Y" leads. So a ply plate with the rear block attached will do the job. Next, the additional access panels and rear solid blocks. That's all for now Regards Robert -
Thanks for your replies, in my hast to post I misspelt the name of the company it should be onbuy.com and not as my title onebuy.com. The trust pilot reviews, now having read quite a few of them are either 5* or 1* with either items arriving as bought or not arriving at all. For such an expensive item I may reconsider going back to a main retailer. But I'll wait for a while to see if there are any other replies Regards Robert
-
Hi All, I have been considering buying a new camera and came across this website, the prices seem to good to be true. With a saving of 500 pounds compared to traditional camera outlets on the face of it it is a bit of a no brainer. Anyone out there had any experience of this UK based outlet Regards Robert
-
Building Tony's Sunderland
Robert Parker replied to Robert Parker's topic in Tony Nijhuis plan builders
Hi All, The wings are now complete with the tips added, shaped and the whole panels sanded down. With the sheeting I opted not to make the entire sheet first but to fit them individually and making the servo boxes as I went and freeing the ailerons to sheet son their own. Both panels done along with leading edges added. Wing tips added, shaped and sanded ailerons dry fitted. Yes, the power cables have pulled out on the rear panel, thanks to the large holes in the ribs they were easy to reinstate at this point in time. I have offered up one of the motors to see how to fix and cable run. The mount will have to be turned so the fixings will not conflict with the locating lugs on the nacelle sides but these will have to be notched to allow the captive nuts/bolt to fit. Not sure if I would be happy with only two fixings per motor. Next, it will be the construction of the nacelles That's all for now Regards Robert -
Building Tony's Sunderland
Robert Parker replied to Robert Parker's topic in Tony Nijhuis plan builders
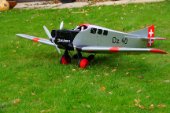
Hi Mike, Our club did consider flying there a couple of years ago, but like Ray we thought the proximity of the A465 was a little too close for comfort. I would not mind giving some of my water birds a chance to have a go flying off water, my Dornier is still waiting to be maidened along with a lot of other models I have built recently. I just have no time to fly at present due to family illness for at least the rest of this year and possibly into next. Thanks for the comments I need some encouragement/support at this moment Regards Robert -
Building Tony's Sunderland
Robert Parker replied to Robert Parker's topic in Tony Nijhuis plan builders
Hi All, Wings are progressing, all of the electrics have now been fitted as well as the aileron servos. I have made a start on the nacelles, I jumped the gun a bit here not reading the instructions, or thought I had read them but it is not the end of the world just a little awkward shaping the leading edges after the lower sheeting has been fitted and I will need to pack up the centre section when it comes to joining the wings. Next will be the lower sheeting and leading edges and then on to the laminated wingtips. That's all for now Regards Robert -
Building Tony's Sunderland
Robert Parker replied to Robert Parker's topic in Tony Nijhuis plan builders
Hi Ray, No I don't mind at all. She looks great and at 90", she must have a great presence in the air. We are not a million miles apart by the looks of it I'm 15 miles out of Swansea and fly at GcG when I can, though that possibly will not happen this year. Regards Robert -
Building Tony's Sunderland
Robert Parker replied to Robert Parker's topic in Tony Nijhuis plan builders
Hi All, I have now sheeted the tops of both wing halves and given them a good sanding down whilst wearing my new dust mask well worth the money. Next, will be to install the wiring for the motors, speed controllers, and servos then building the nacelles. That's all for now Regards Robert -
Hi All, This works a treat having used over the weekend not a cough was had. I would recommend this to anyone, it even fits and seals over my mustache, my glasses are a little high on the nose piece but still usable. Regards Robert
-
Thank you all for your replies, I have decided to go for the force 8 and will give it a go when it arrives. Regards Robert
-
Hi All, It says it all in the title really,. Having been a keen modeller/builder for 30 years, I have noticed for a while that I start coughing when sanding sawing balsa or ply, for the past few years I have been wearing disposable PPP3 grade dust masks when carrying out these tasks. Can anyone recommend a suitable non-disposable mask with filters and where they can be sourced, there seems to be so . I have been taking a rest from building as my chest is a little worse. Regards Robert
-
Hi David, Like you I have used NiMhs and also used LiFe batteries and for a while I switched to LiFe batteries as they were lighter etc, however, I had a few which failed without warning and only a few charges into their use and so I went back to NiMhs batteries. I later I tried the LiFe batteries and these have been good so far, so I now use both, not in the same model, but if I need a little more nose ballast I try a NiMhs battery, if your need to add extra weight may as well make it useful weight. My models are mostly IC powered with spektrum radio. For Ubec's I get mine from 4Max in my electric models. Regards Robert
-
Building Tony's Sunderland
Robert Parker replied to Robert Parker's topic in Tony Nijhuis plan builders
Hi All, I now two wing halves built to the same level. Lower spar fitted and when dry I'll fit the trailing section of the inner rib and cut back the excess spar material. Next, is the top sheeting which should be straight forward. That's all for now Regards Robert -
Hi Manish, Yes, the entire cylinder does rotate, but it seems that in the early engines it moved up and down slightly when the engine warmed up as there was some play in the circlip holding the cylinder in place according to the chap at RCV, when this first happened with my engine I shut it down and checked it over as well as a lot of club mates did too and I started it up again and when it got warm the same thing happened again and again. I did not attempt to strip down the engine. Just contacted them for advice. Regards Robert
-
Hi Andy, I have just come across this thread. From description on the opening thread you say it sounded like a sewing machine. Is this sound from cold or after the engine has warmed up. The reason I ask is I once had an RCV CD58 with the same problem a few years ago. I contacted RCV engines and spoke to someone, sorry I cannot remember his name, but he asked me what the serial number was and I recall it was in the low thousands and he asked what fuel I was using and I replied pro-synth 2000 which is the recommended fuel. He went into a lot of detail but basically with the earlier engine the cylinder liner was moving slightly hence the sewing machine sound. He said it could be repaired or offered me 25% discount on a replacement engine on receipt of my old one, I took up the offer and it has run faultlessly since although hardly used recently. Hope this is of some help Regards Robert
-
Building Tony's Sunderland
Robert Parker replied to Robert Parker's topic in Tony Nijhuis plan builders
Thank you D.D. -
Building Tony's Sunderland
Robert Parker replied to Robert Parker's topic in Tony Nijhuis plan builders
Hi All, All of my deliveries have arrived and work has resumed on the wings. Wing tip supports made ready for installation Wing panel almost completed Once again the notches in the tip rib requires the top spar to be notched over by around 3mm but at least they all matching We have reached the end of progress for today, next, I'll add the shear webbing before lifting from the board and starting the other wing panel That's all for now Regards Robert -
Building Tony's Sunderland
Robert Parker replied to Robert Parker's topic in Tony Nijhuis plan builders
Hi Ronos, Your Sunderland looks great have you had chance to fly her yet. What did you use for covering? Regards Robert -
Building Tony's Sunderland
Robert Parker replied to Robert Parker's topic in Tony Nijhuis plan builders
Thanks Andy welcome aboard. Hi All, I have started on the wings and have come to a bit of a delay. All was going well, ribs cut out and sanded down and started gluing the ribs in place when I noticed on the plans that the support plates for the wing floats were to be made from 9 x 6 obechi with ply plates on top. The obechi was not in the box of wood supplied, but having had said box for some years I may have "borrowed" it for another project, possibly my Dornier Do24 that I built a couple of years ago. Plus I realised that I had not bought any extension leads or power cable to put in the wings or even any servos. So all of the above have been ordered and have already started to arrive (next day by 4 max) Plans and instructions at the ready....... One set of ribs cut out This is the rib that needs the float supports and I think it would be easier to do before gluing in place I had to notch the spare for W18 to fit flush with the tops of the other ribs, the notches are 6 x 3 on a 6 x 6 spar, the other option was to plane the spar down when able to remove from the board, but the top was high so I went for notching the spar. This progress so far and awaiting deliveries which hopefully wont take too long, so that's all for now Regards Robert -
Building Tony's Sunderland
Robert Parker replied to Robert Parker's topic in Tony Nijhuis plan builders
Hi All, Progress has not been at my usual pace recently, I have now finished the fuselage and ready to start the wings but before I do I have to carry out some urgent house repairs I discovered yesterday which will take up my time next week. I photo copied part of the plan to cut out the wing section to make life a little easier And I did the same for the stabiliser. I made 2 copies, one for each side and traced through for the opposite side Well, after a deep breath the section was cut out, spot on then added the wing mounting plates. The nose block is sanded to shape and the tail block done too. That's as far as I have got Next, it's on to the wings Regards Robert
