


Dave Garrett 1
-
Posts
151 -
Joined
-
Last visited
Content Type
Profiles
Forums
Blogs
Gallery
Calendar
Downloads
Posts posted by Dave Garrett 1
-
-
On 02/11/2023 at 18:38, Cuban8 said:
One thing I have found to be certain is that cyanos last for ages in a fridge compared to normal room temperatures, where a warm summer can ruin a bottle in no time.
I have several bottles of very thin grade in a sealed plastic zip bag in our kitchen fridge and they're easily three years old and still in A1 condition. Used some for a domestic job the other day, actually.
The same is true for epoxy resins. Hence, the glue & beer fridge in the garage.😂
-
8 hours ago, Nigel R said:
Obtaining good results with these things is simple
Place in bin
Use proper marking gauge
Cut slot with strongest knife blade you have
The thing is pretty damned good at putting dings in the top & bottom of the TE strip, you have just spent ages shaping😂.
Agree with marking out & using knife free-hand to cut slot. I also find poking the end of a 6" steel rule (or hack saw blade) into the slot, is a good way to increase the width slightly for thicker hinges.
Regards
Dave.
-
 1
1
-
 2
2
-
-
Hi Dazza.
Many moons ago, I built a 4 channel Super 60 from the Ben Buckle kit. If I remember correctly the only deviation from the plan was to glue on the horizontal stabiliser with epoxy. It was powered with a well used OS 40LA 2-stroke, not the most powerful engine by any means. Like KC mentioned above it did fly very well & was not difficult to fly at all, providing you do not use excessive throttle. The only time I used anything much above half throttle was on take off, if the grass on the patch was a bit long.
Incidentally with the 40LA the C of G was spot on. With a 40 4-stroke, you may need a bit of lead in the tail. If you decided to glue on the horizontal stabiliser, it may be prudent to carry out as test balance prior, so you can hide the weight in the back of the fuselage.
Best of luck & have fun
Dave
-
1
-
-
Ha HA
45 yrs in the aerospace industry tend to make one think conservatively.😀
Dave
-
Hi Mike
Considering the amount of time & cost involved in building the Petrel, my advice would be, go with what Chris has put on the plan. Don't risk unknowns (3D printing) for such a critical part.
Best Regards
Dave
-
Hi Matty.
Just an observation. The cative nuts on the back of the fire wall look like they should be knocked in further. The prongs on the back should be fully embedded into the wood. They would be difficult to refit if they fall out when the fuselage is complete. I also add a drop or two of thin cyno to secure.
Best Regards
Dave
-
Hi Allan
The only time I have experienced rubbery epoxy sets is when using the twin syringe packs. When mixing small amounts typically used by aeromodellers, the twin pack syringes don't seem to reliably eject the correct proporsion of resin & hardener. I swapped to the larger 2 bottle packs (Z epoxy or HK) & use Mk1 eyeball to judge 2 equal size puddles of resin & hardener before mixing.
Regards
Dave
-
1
-
-
Thanks lads, I am about to encounter exactly the same issue with my DB Sports & Scale Tiger moth?
-
I've had exactly the same problem with the Hobbyking transparent film. I found the masking tape method does work eventually, but you have to attack the same corner multiple times.
Dave
-
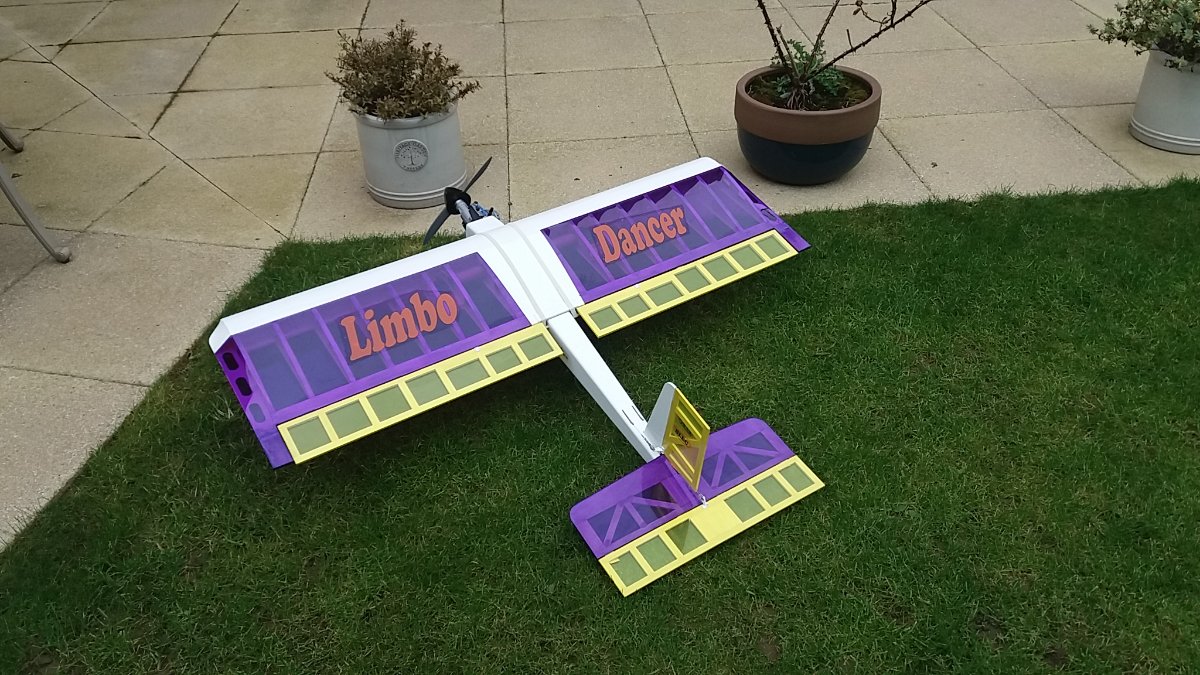
About time I posted on the new forum. Just finished a SLEC Limbo Dancer in time for the glorious 29th. Nice straight forward kit (apart from messing up the push/pull rudder & elevator several times). Started in January, so a real quick build for me. Powered by a ASP 40.

-
4
-
-
Posted by john stones 1 Moderator on 31/01/2021 21:50:54:
I'm alive n kicking then.

What time does the turn come on tonight ? And who do we like from the Younger musicians/bands ?
My faith in modern music was restored by Finish symphonic metal band Nightwish. Not that well known in the UK.They are led by the impressive Dutch Amazonian lady Floor Jansen. Brilliant live. Went to see them at Wembley a couple of years ago, expecting to be the oldest rocker In town. Fortunately, I did not look a bit out of place. Here one of my favourites
-
Looks like a Flair Astro Hog to me. I built one about 12 years ago.
Regards
Dave
-
Thanks
Will try on scrap bit of foam first
Dave
-
Hi Everybody
Anybody got any ideas how to apply the decals? The adhesive on the vinyl does not appear to be strong enough to hold them in place. Do you have prep the foam with some sort of primer?
Thanks in advance
Dave
-
Hi Onetenor
I work in the aerospace industry, and nickel plate or more commonly hard chrome plate is used extensively to recover worn journals or bores. To be of any engineering use, the plating thickness is normally around 0.10mm thick (0.004" in old money). The recovery process is: Machine journal undersize by 0.20mm, plate 0.15mm thick, machine back to correct size. Unless it is an expensive component, it is not really economic.
As Engine Doctor says. plating adhesion is always a problem.
Regards
Dave
-
Current favourites include
Ghost Love Score, Nightwish - Symphonic metal at its best
The Sound of Silence, Disturbed - Brilliant cover of the Simon & Garfunkel classic
Ommadawn, Mike Oldfield - Have been listening to Mike's music for 40 years
-
Hi Tony
Unfortunately my kit is still on the maturing shelf waiting inspiration! Hopefully I can start next summer when I become a full time aeromodeller. I will probably go electric for this one, although I am looking for an excuse to buy a Satio 45.
You are correct, many kit instructions assume the builder has some experience & can work out things for themselves. The build logs on this forum are a great source of ideas for solving most problems.
Regards
Dave
-
Hi Tony
I have the plan in front of me now (from early laser cut kit). As far as I can tell, part 150 is a length of 6mm square balsa cut from stock. It is used to position the servo bearers at the correct distance underneath the top fuselage doubler (part 117).
I hope this helps
Dave
-
Hi Chris.
I build a 4 channel version about 10 years ago (also the low wing version).
If I remember correctly, the 2 wing tip pieces are joined together before fitting & are not separated by the lower main spar. The lower main spar ends at the inside edge of the joined wing tip pieces. The top wing spar ends at the last rib. A separate angled piece of spar stock runs from the top main spar to mate with the top face of the wing tips (ending at outside edge). Also the wing tip does not lay flat on the building board. The front edge of the joined wing tip has to be raised to meet the leading edge. The front edge of the wing tip is also chamfered at approximately 45 degrees to mate correctly with the leading edge.After removing from the board, the lower spars will be slightly proud of the wing tips lower surface. The lower spars can be tapered from the last wing rib for a nice blend.
I hope this helps
Dave
-
Hi Everyone
I have done a bit more on the Pup.
All the outer & centre wing sections have now been build.

The aileron servo mounts have been constructed & mounter in the lower wings. The anchor points for the wing struts have been epoxied into position (split pins glued into spruce blocks).

The next stage was to separate the ailerons from the outer wing panels. The leading edge of the ailerons are shaped to a shallow 'V'. Scrap balsa is used to fill the gap between the rear wing spars in the aileron bays. The ailerons were each hinged with Kavan mini hinges. finally the aileron horn are glued into position. Scrap balsa sheet was added adjacent to the horns to support the covering.

The wing sections are now ready for joining.

I have now have a replacement motor & speed controller, so I am in a position to construct the motor box for the fuselage firewall. With that done, I should be able to crack on with the fuselage.
That all for now
Cheers
Dave
-
Hi Everyone
I can't believe it has been over a month since my last post.

Over the last month, I have been steadily working on the starboard wing. I have also been working on other projects. The weather has improved & I have been able to get some flying in. I have also lost a week due to man flu (much worse than female flu). All these things has resulted in slower than expected progress on the Monocoupe
 .
.However, we finally have a completed starboard wing.

The next stage is to separate the ailerons & flaps from the wing.
Hopefully there won't be such a large time gap to the next update
Cheers
Dave
-
Hi Trevor,
I opted for the olive drab solartex, I will probably give the airframe a coat of satin fuel proofer to fill the weave & make it easier to keep clean. I will probably start cover a the tail feather this week to break up the never ending balsa butchery on the Pup & Monocoupe.
Everyone
I could make no more progress on the fuselage as I need to drill the firewall to suit the motor. Until I get a replacement, I am stuffed.
I carried on and completed the tail feathers. The elevators have been joiner with a bent wire joiner & hinged to the stabilizer with Kavan mini hinges. The Stabiliser & elevators have been shaped, final sanded & are now ready for covering.

Similarly for the fin & Rudder

The upper wing panel have been framed up

The starboard lower wing panel was next. I added a light ply brace across the bay where I will mount the servo. I even remembered to add slot in the ribs for the servo wires
.
Finally the Lower port wing & centre section.

I have just double checked, I have made port & starboard wing panels for the upper & lower wing, with remembering the servo wire holes, somebody must be smiling on me

Cheers
Dave
-
Hi everyone
Finally the port wing is finished
. Apparently , you now have to make another oneAfter the 2nd & 3rd wing tip laminations are added, the lower rib cap strips are added.

The LE sheeting is then scalloped behind the wing spars. That was a bit of fun. To make the job simpler, I decided to make a couple of templates. The outer ribs are spaced further apart than the inner ribs. I raided Mrs G crockery cupboard to find suitable plates, saucers or bowls with approximately the right radii. I placed the selected crocks over pieces of scrap light ply & drew round the edge. They were then cut & sanded to shape. (If Mrs G reads this I'm in deep trouble!) The template shapes were than transferred to the wing sheeting & then cut out using a Dremel sanding drum.

The wing tip laminations are then trimmed flush with the parallel section of the TE & LE. Full length balsa LE & TE strips can then be glued into position. After the glue had cured, the LE, TE and wing tips are planed & rough sanded to their final shape. The last job is to install paper tubes to carry the servo wires. The kit even included sheet paper for the task.

I will wait until the starboard wing is completed up to this stage before I separate the flaps & ailerons.
I have a half day tomorrow to take Mrs G Senior (mum) to hospital. Hopefully I should have some time left to allow me to frame up the starboard wing.
It will take me a couple of weeks to build the other wing, so probably no updates for a while.
Cheers
Dave

-
Hi Richard
Try plugging ailerons into channel 1 & 6 (page 42 of manual is useful), From the linkage menu, select model type, then change wing to 'flying wing'
Hope this helps
I am also trying to get to grips with this beast
Regards
Dave

another annoying scam!
in All Things Model Flying
Posted
Exactly the same thing has happened on my credit card today, £0.44 in my case