

John Rickett 102
-
Posts
240 -
Joined
-
Last visited
-
Days Won
10
Content Type
Profiles
Forums
Blogs
Gallery
Calendar
Downloads
Everything posted by John Rickett 102
-
Thankyou Graeme for the support, it does make a difference to the enthusiasm to carry on. Patience - yes, skill - not a lot, persistence - flagging sometimes!
-
Ok Brian, yes the Sea Fury (Chiltern Models) with a Laser 180v I believe, what happened to that?
-
Thanks for that Brian, Have our paths crossed in the past?
-
Thanks for the comments, its good to know someone is reading this stuff! The model could be described as mutton dressed as lamb. Its 25 years old and though much repair and rework has been done, its still an old aeroplane, that's obvious as soon as you look beneath the surface. The goal is to get it into the air again and looking quite different from the drab impressed-into-service scheme it wore before. The finish will be a fictitious one inspired by (that's a modern euphemism for unimaginative copying) the final scheme of the Hampshire Aeroclub aircraft G-ACZP, pictured earlier. However I thought I'd modify it to resemble the first operator of G-ACZP which was Jersey Airways. One of the problems I've given myself is getting the registration to look similar to the 1930's standard British lettering. None of the Microsoft fonts come close so it will be a case of designing the letters from scratch. The plan is to use G-ACXC which was the nearest registration to G-ACZP never put on an aircraft. It was originally issued in a batch for Cierva C30 autogyros, which weren't completed. G-ACXC is really only three letters - the G being a simple horizontal bar to a C so producing them should not be too much trouble. As the fuselage colours of red and white have their interface near the centreline with the letters superimposed, I thought that juxtaposed colours (red on white and white on red) fashionable at the time, would be an added interest.....all this is to play with in the next few weeks.
-
The elevator and rudder servos, plus switches, sit on a tray high up and immediately behind the cockpit, this allows a straight run for the closed loop cables to the control surfaces. Below the servo tray is another which holds the receiver and Powerbox Lightbox. Before committing to covering the bottom of the fuselage, I thought it a good idea to make sure I could access everything in the future through the top hatch. With 12 servos, 3 batteries and 2 lights it became apparent (after I had made the trays and supports) that getting all the wires connected was going to be a problem; I had not allowed enough space between the trays to get the excess wires out of the way using one hand. Nothing for it than to create another hatch in the bottom of the fuselage below the trays. Its done now. I can in future work, albeit awkwardly, but with both hands and hopefully once painted yet another hatch on the bottom won't be too apparent. A trial fit to make sure no warps had crept in at the covering stage. All is now covered (Koverall) and 4 coats of non-shrinking dope have been applied. There was a slight twist in the fuselage putting the tailplane low on the left hand side. Hanging a weight (a lipo battery) from the right hand Zulu shield while doping held the right position until the dope had dried and locked up the covering. The next step is priming, using epoxy primer, which should offer the greatest resistance to the ravages of glow fuel and then painting can start in earnest.
-
Just to reiterate what's been said about the old DB kits, I've built several and to my mind are value for money and have few drawbacks. Obviously the parts have been cut with bandsaws, but that doesn't mean care wasn't taken, whatever errors there may be in the general fit of parts shouldn't cause anyone, except a raw beginner perhaps, to have anxious moments. The kits are remarkably complete and the design well thought out, which you'd expect of DB. It may be advisable to substitute some of the nuts and bolts for metric, stainless ones, the imperial hardware supplied were (zinc?) plated and succumbed to damp fairly quickly. Innovative thinking like the use of split pins as anchors for the struts works well, they're light, strong, unobtrusive and will pass the test of time. I'd advise making the rigging functional rather than just decorative if you want the model to be aerobatic. Loops and stall turns are easy, rolls will need a lot of speed. With its cavernous fuselage and long nose, there shouldn't be a problem in fitting the radio gear and getting the balance point correct. The disadvantage of the one piece wing design is that it takes so long to rig, I'm fortunate in having a van so it will go in ready assembled but does preclude taking anything else to the field on a chosen day, and of course the model will take up valuable storage space unless derigged. Don't let that put you off though, you'll be rewarded with an easy to fly model, not ridiculously non-scale and less likely to tip over on landings than some of its contemporaries, keep it into wind though......what's not to like about a DB SE5?
-
The top and sides of the fuselage have been covered but I was holding off covering the bottom as I needed to complete the wiring for the landing and ground signalling lights and also solve how the closed loop cables were going to be installed once covering and painting were complete The rudder and elevator servos are installed immediately behind the cockpit, there is a small hatch to access them and also switch for the receiver. From the servos to the exit guides at the rear end is 57 inches, too long to feed cables straight through without them getting caught on the intermediate formers. I soldered two piano wires together, which is long enough to reach and intended to pull the cables through, but that drooped under its own weight and would not go far enough. The decision was made to install a small access hatch under the fuselage, just large enough to get my hand in, where I could guide the piano wire in a straight line. The hatch cover is a piece of 1/8" liteply with one side given a single layer of fibreglass cloth which will form a base for painting. Hopefully it will be unobtrusive once all is painted. The hatch simply spans two longerons and lined with some 1/8" liteply strips to form a seat for the cover and also gluing area for the gussets. 3/8" ply here may be overkill but they shouldn't break away under the strain of the small screws.
-
Thanks for the suggestion but I’d rather not use a gazebo for a couple of reasons. Firstly, I tend not to build logically and don’t wait to start painting until everything is ready. I quite like bringing some parts to completion long before other parts as it boosts morale and sustains me through the less exciting bits – I’d be erecting and dismantling a gazebo quite often. Having said that a gazebo may have helped yesterday as a very light shower developed just as I was finishing painting one of the inner cowls. The sun was shining but I suddenly saw a few drops on the newly painted surface. Now dry, they’ve left some watermarks, it’s not bad enough to start over again but annoying none the less. Secondly, and more importantly, I need a strong light (the sun) behind me to reflect from the work in hand so that I can watch the paint build up with each pass. Whenever I’ve tried painting under overcast skies I’ve been disappointed with the uneven result. Especially when trying to obtain a gloss finish, getting the coat wet (without overdoing it and producing runs) I find quite difficult but am helped considerably by seeing the reflection as the paint flows. For this model I wanted to get a good gloss finish on those parts that would have been aluminium and a satin sheen on the fabric covered areas. I realise that high gloss on a 1930s aeroplane, even one which has had multiple liveries possibly into the 50s, wasn’t very likely but I wanted to try my best at getting a consistent shine on those bits which could shine. Plan A was to leave on the masking until the black had been applied. Having sprayed the red, I started to get worried after 30 hours or so that the 2K paint would be hardening and with little prospect of suitable weather for further painting, by the time the masking did come off the paint would chip and form a ragged edge. I decided that it would be better to remove the tapes and mask up again; more work but I felt easier about doing it. The same has been done with the inner cowls as its unlikely there will be any more painting done in the next couple of days. Seeing the result, it would probably have looked better with 2mm cheat lines instead of 3mm but I find its difficult to apply such narrow masks without distorting them – it’ll stay as it is!
-
Yes, frustrating Jon. With spraying outside in the summer insects and dust are to be expected, but I didn't expect a fly on a cold winter's day; hopefully T Cut will improve it a bit.
-
The outer cowls were masked using the cut masks and 3mm tape over the pre-applied coat of silver to create the cheat line, and then further masked where the black is going to go. I think that applying the silver first was a mistake as it showed through the red when that went on. I had to apply 5 coats of red to obscure the silver. That would normally be ok if the part was a single colour or if any masking is to be removed while the paint is wet, but as I didn't want to remove the cheat line masks until after the black has been sprayed, the build up of paint will probably show a distinct edge once the tape is removed. We won't know until later. If nothing else, I learned that provided the weather is dry, spraying can go ahead when the temperature is 4C. I also learned that flies will come out even at that temperature!
-
Good luck with the DB SE5, there's nothing really wrong with the original kits. I've just finished restoring one I built over 25 years ago. I'd used (painted) Solartex as the covering; time and glow fuel took its toll on the finish so all the covering was stripped off and recovered with Sig Koverall and painted with Klass Kote. Its flying again now with its original Laser 200v which, to my mind is the perfect fit for the model.
- 59 replies
-
- 10
-

-
With the covering nearly complete, thoughts turn to the colour finish, which is going to be loosely based on G-ACZP built in 1935, named Belecroute Bay and first operated by Jersey Airways. It was the longest surviving aircraft although this only lasted until October 1958 when it suffered a leg collapse after ground looping at Barajas airfield near Madrid and was subsequently destroyed when the ground handlers attempted to lift the wing with a forklift truck and broke the main spar. It never flew again. The final livery of G-ACZP was that of Hampshire Aeroplane Club, owned by the charismatic Viv Bellamy. The aircraft was a DH86A whereas the model is a B, incorporating the larger tailplane and Zulu shields of the developed aircraft. It seemed to me that as the earlier full size aircraft has displayed unstable flying characteristics, I’d be safer building the B version. The picture below shows the details of the colour scheme better than the ones above. The picture has an orange hue but it was red and white. I've read that the 'eyebrows' on the cowls and the fuselage stripe were navy blue and gold however, not following the original scheme exactly, I intend to paint these black and silver. Also the eyebrows are centred somewhat below the spinner centre lines though I'd prefer them to be on the same axis. I wanted a civilian finish with a British registration and one which hopefully would be visible in the air to my failing eyesight, predominately white with some red seemed a suitable choice. At least it’s a departure from silver wings which most of the aircraft had and can seem almost camouflaged against British skies. The model is unlikely to be entered into a competition so having a finish which does not replicate a full size example in my view isn’t a detriment. What is important is getting the eyebrows and the fuselage stripe all in line. With so many curves it proved difficult to measure but if I got it wrong, it would be obvious once assembled in all its glory at the field. A eureka moment occurred when I remembered that in the loft was a laser level. All that was required was a new set of batteries and a tripod. By using the bottom of the windows as a reference to level the model, it would then be quite simple to adjust the laser level to line up on the cowls. Having found the centre of the prop-driver hole and lined up on that, all that was required was to mark the rear of the cowl to get a parallel line with the fuselage. The picture below of the left outer cowl shows that my initial determination by measurement was out by about 1/8", perhaps that's acceptable for one cowl but if the others had a similar error in the opposite direction it would become obvious, this way there's no mistake. To get consistent eyebrow shapes would also be a challenge. Using masking tape freehand on a single cowl has worked in the past but with four cowls, it becomes a bigger problem. About 18 months ago I treated myself to a vinyl cutter, mainly to cut registration masks but it will make whatever shape is required. The shapes below are 3mm wide which should produce decent cheat lines without being too pronounced. So far I've been cutting paper rather than waste expensive mask material. These seem to be getting fairly close to the curves required. The straight lines can 3mm masking tape and will stay put for a few days while painting. I think if I'd tried to curve the tape around the front of the cowls they would have a tendency to creep. All that's needed now is some fine weather similar to last week to continue painting.
-
Thanks for the compliment Brian. I now find working with fibreglass to be so practical and not at all difficult, so prefer it in most instances to litho. I had always assumed that the lamp in an aircraft was white. All the DH86 pictures I have are black and white but appear to show the lamp as having a clear lens. White is surely the most penetrating colour and hence easiest to see from the ground, so I don't know what the lamp is under the Rapide, perhaps you could ask one of the staff at Old Warden. Regardless of the answer mine is going to be white, its only a semi scale model and if I can get a decent flashing light under the nose, I'll be happy. Yes, I'm sure the only time the lamp was used was to signal morse code messages.
-
The top and each side of the fuselage has now been covered, not the bottom yet as I still need access for installing the control cable and servo cable runs. The covering is again Sig Koverall. Prior to covering, a bit of work was done in making the the landing light and a ground signalling light removable. This picture shows the original lamps glued into position. The lamps were 12v 50w and 35w halogen ones driven by a circuit I had designed using my limited electronics skills. The signalling lamp flashed ½ second on ½ second off, which was all I could achieve with a simple 555 timer. I was going to retain the system as is, however on testing the circuit the ground signalling light would flash but the landing light wouldn’t work. There is a fault on the board somewhere which makes one of the relays chatter and I can’t find out why. It looked a bit Heath Robinson so a neater and more modern approach would be 12v 4.2w leds and a Powerbox lightbox powered by a small 3s lipo. This amazing little unit has 4 programmable outputs so will do all I want to achieve (its on order but not arrived yet). Also, the lamps were glued in which made changing them impossible without causing damage. Fortunately neither lamp failed, however I decided that making the lamps capable of replacement would be a better arrangement so the old units have been cut out and the new ones held in with screws. The landing light is now held in place by a simple fibreglass ring which retains the glass lens (a cabochon) and in turn, the lamp. The ground signalling lamp is held by trapping the flange of the lamp between two liteply formers screwed to bearers in the fuselage. The fibreglass ring was moulded in place using trusty parcel tape as the release medium. A few layers of 50 gm cloth followed the curves and once dry, a hole cut out which was slightly smaller than the cabochon to hold it in place and the excess trimmed off the rear to form another circle. Small wood screws screwed into the original ply ring hold everything together. At first I drilled the holes too close to the edge of the ply ring, so had to apply the trusty Cataloy and have another go. This time the holes are in the right place. I'm sure the final painting will cover up the mistakes!
-

DB Sport and Scale Auster J1 Autocrat
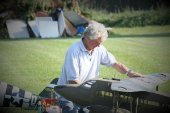
John Rickett 102 replied to Danny Fenton's topic in Scale Matters
Danny, Keep in mind that the solder will follow the heat - as you warm the area play the heat towards the stub to try and make a stub reach temperature before the header. Things are working in your favour as the stubs have a lower mass than the header, so will heat up sooner, however if you work the heat to ensure that happens, you'll find that when the melting point is reached the solder will run into the joint rather than down the side of the header. Judging how hot things are getting is a bit of a black art but have a go on your test piece. Keep saying to yourself, the solder will follow the heat! -
The cockpit framing is made from 1/8" ply and I thought, looked a bit rough with its popped, scratched and yellowing, re-glued windscreen panels. I suppose it was in keeping with an impressed war weary transport aircraft, but the new finish will be civilian, in which case a bit of smartness is called for. The old panels were removed and new ones glued in using RC Modellers canopy glue. The framing was then given a make-over with lithoplate to create sharper corners and neater edges to the windscreen panels. Here the panels have been masked in readiness for covering and painting. The windscreen area will be white eventually, as will be all the upper half of the fuselage so I'm hoping it won't look as stark as it does just now against the rest of the structure.
-
Thanks for that Jon. Yes, the plan is to have it ready for the spring. All the repair work has been done and its now cosmetic stuff really. I've decided to do some work on the cockpit framing which will take a while, after that its final preparations for covering the fuselage. I think I have everything needed, except for rigging materials, I've binned all the old stuff and will renew. I'll post pictures once there is something meaningful to see.
-
The wings have a high aspect ratio and sharply tapering tips. To prevent tip stalling, aerodynamic washout was incorporated by a gradual change of wing section plus physical washout with the trailing edge built with the tips at a lower incidence than the root. To maintain that washout during recovering, a simple jig was made to hold the root in one position while twisting the wing a bit and at the same time shrinking the covering with an iron. 3 hands would have been better but this method sufficed. Non-tautening dope will be applied so hopefully no further stresses should be induced.
-
Thanks for that, I'm good at spotting mistakes hours later, so will go with reporting it to a moderator. Thanks
-
4 wing panels now covered and ready for doping. This job will also have to wait until there is less damp weather, while its ok to dope outside, its better if the air is dry to prevent trapped moisture (bloom).
-
Please help, how do I delete a picture (unintentionally inserted) from one of my own threads
-
All the cowls have now been filled, primed again and rubbed down. The next step will be a coat of 2K primer sprayed on but, as I have no indoor spray capabilities, that requires dryer and warmer weather so the job is on hold. On then to covering the wings. I'm using Sig Koverall, this is a polyester heat shrinkable fabric similar to Ceconite and Diatex. None of these have any adhesive or colour pigment applied as purchased and to my mind are preferable to those that do. Koverall, at 1.5 oz/yd2 is lighter than Ceconite Lightweight (1.87 oz/yd2) and Diatex 1000 (1.73 oz/yd2) but requires more dope to fill the weave so perhaps there is little eventual weight savings. Being a slightly looser weave allows it to follow curves more easily, though when the time comes to apply the first coat of dope, care must to taken not to push the dope through the fabric and form drips or puddles on the inside. All is not lost should this happen as a few coats of thinner applied over the area plus the application of a vacuum cleaner head will suck the blobs back through the fabric. It could be argued that blobs on the inside cannot be seen, but they can once a gloss finish has been applied, the blobs form raised bumps on the outside which, if an attempt to rub them down is made, can easily end up cutting the fabric – best to remove the bumps with thinners before painting. Patches of Koverall (left) and lightweight Ceconite for a comparison. The slightly more open weave and thinner fabric of Koverall can be seen in this picture The covering is applied using fabric cement, thinned with the proper cement reducer. Fabric cement is purpose made for the job and is much easier to use that dope as the adhesive. A small quantity of the cement is first thinned approximately 30% with the reducer to produce a fairly thick liquid which is then applied, twice, with a brush all around the edge of the surface to be covered and anywhere where there is a concave surface. These wings are slightly undercambered so cement must be applied to all the rib caps. I find it easier to cover the top and bottom separately, (this is a top). Here a piece of covering, cut oversize, is placed in position. Another bottle of cement is thinned 50/50, this makes the cement penetrate the fabric and adhere itself to the cement previously applied to the wood. At this point the covering is well and truly stuck down. Small areas can be repositioned if necessary by softening the cement with a fresh application. The benefits of this material over prefinished cloths become obvious when its realised that the cement and subsequent dope penetrate the fabric rather than just sitting on the surface, waiting to let go or fall off in flakes! Where the fabric needs to be cut to clear projections, in this case for the rigging supports, its easier to apply patches first and then cut oversized holes in the main fabric. This allows the fabric to be positioned clear of the projections and taughtened by hand as the cement is applied without having to be too precise in where the cuts would have to be made if all done in one piece. Trying to stretch the fabric over this type of projection would have left unsightly gaps so much better to cover this small section first. Here a small patch has been stuck on, the main cover then has a hole cut out, placed over the wing in roughly the right position The covering is then cemented and shrunk. Once doped and some filler primer applied, the cut edge will be invisible.
-
All four cowl parts have now been cleaned up as much as possible. It took 3 coats of paint remover before most of the paint would lift and then in some parts the paint has a tenacious attachment. Seeing as the paint won't lift after repeated attack with paint remover I doubt that fuel will get through epoxy paint to attack it later on so I'll leave as is. The picture here shows the cleaned cowls with some fibreglass cloth repairs hardening nicely. The next job will be to give a light spray with primer which should show up the remaining troughs and pits, these will be filled with Isopon.
-
With the repairs and modifications to the outer wing panels complete attention has turned to cleaning up the rest of the airframe. Although I’m not a fastidious cleaner of models at the end of a flying session, I do wipe down as much of the exposed parts as I can, this though is what happens if fuel residue isn’t completely removed. Slowly it works into the paint, softening and lifting it, but then I suppose that’s why paint remover used to contain nitro methane! In fairness the model has languished in the shed for about 6 years and I didn’t spot the extent of the creeping effects of decay or perhaps I would have attempted to arrest it. This softening has occurred even with the application of TufKote as a fuel proofer. The Tukote may have reduced the affects that would have occurred with fuel directly onto enamel, but does show that model ‘fuel proofers’ are not a long-term solution. No Nonsense paint remover once again did a reasonable job of softening the remaining paint which was then scraped and rubbed down with wet n dry paper. The residual paint here is actually underneath a thin layer of fibre glass cloth from an earlier repair I had forgotten about. On seeing the repair I remembered I had once taxied into a concrete ramp. Having got back to the bare state I realise what a poor job I had made of the fibreglass work all those years ago. Although generally sound and adequate for the purpose, the surface is far from flat. This didn't really show up when the model was painted in a matt camouflage finish however its going to be a gloss civilian livery this time so a good base if essential. Isopon resin and perhaps another layer of gloss should improve things.
-
Originally the outer wings had a single lug, installed toward the trailing edge, to hold the wings in position while the rigging was attached. I thought that once the rigging was tightened this would hold the wings together sufficiently such that there would be no need for anything more elaborate, I found however that on landing, a gap would have opened up at the front, probably caused by the drag of the wings. It didn’t seem to affect the flying but didn’t look very nice. With the covering stripped off, now would be an opportune time to fit another lug on each wing, toward the leading edge, which would securely hold each outer panel in place. Its all quite simple, a 7mm wide strip of 4mm birch ply set to span two ribs on the inner panels and project 15mm onto the outers where another piece of ply acts as an anchor. A servo screw then holds the bits together. There’s very little stress at this point so I’m confident this will be an effective fix. I must like doing things twice though as I'd already cut into this part of the wings to fix the broken wing joiners, why didn't I do this job at the same time!