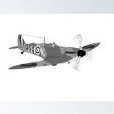
LHR Dave Posted March 28, 2016 Share Posted March 28, 2016 I don't usually do build blogs but promised the designer of this glider Ton Van Munsteren that i would post a few pics. Horizontal stab,Vertical stab, Rudder and elevator Outer wing panel Carbon wing joiner Wing panels Fuselage construction I will post some more pics as the build progresses . Quote Link to comment Share on other sites More sharing options...
LHR Dave Posted March 28, 2016 Author Share Posted March 28, 2016 I should of added that all parts for this build have been manufactured myself and not from a laser cut kit. Quote Link to comment Share on other sites More sharing options...
Ton van Munsteren Posted March 29, 2016 Share Posted March 29, 2016 Hi Dave, Thanks for posting the pics, the RedEagle is looking great. Like the carbon wing joiner. Cheers Ton Quote Link to comment Share on other sites More sharing options...
Alan Thorpe Posted March 29, 2016 Share Posted March 29, 2016 Ah great stuff with the build and especially cutting all your own parts, impressive work! I built the same model from laser cut kit last year, I really enjoyed it, it flies fantastic. Just wondering how you go about cutting the parts from the plan, do you trace out the part and transfer it over a sheet of balsa to cut out, or how does it go? What about the ribs, how do you accurately get the same profile on each one? I'd like to have a go but I know I'd make a complete disaster of it!! Following your build anyway, great work! Fancy carbon and all! Just managed a sneaky flight yesterday evening when the wind died for 20 mins, it is a great flyer! Enjoy the build! Alan Quote Link to comment Share on other sites More sharing options...
LHR Dave Posted March 30, 2016 Author Share Posted March 30, 2016 Alan The kit is cut by photocopying the plan using a toner type copier (like the big ones they have in offices and the small printer shops you see in the high street). Once copied the part is roughly cut out Then it is turned print side down on to the balsa or ply etc. then using a cloth, apply a small amount of paint thinners(other substances could be used its just a matter of experimenting).rubbing down over all the part detail. then remove the soaked through paper to reveal the part nicely printed on the wood Notice that it is printed mirror image on the wood ,this is not a problem and part numbers etc can be re written on part in pen.You could always select print in mirror image on the printer then it would transfer correctly onto the wood. The part is the carefully cut out from the wood one you have done all the components you have yourself a kit of parts for less than half the price of a laser cut kit. I use the mirror image function on the printer for printing the opposite wing panels on models then build over the top of the photocopy its a good way of making sure you have a left and right half of a wing. Wing ribs are produced in the same way as above if there are only two ribs of each type if there are lots of the same size rib i use the sandwich method. Onto a couple of pieces of alluminium sheet i transfer the image in the same way as i do onto wood. i then cut the two ribs out from the metal sheet and drill two holes through them to except a couple of securing bolts. up to about 4-5 pieces of your wood choice can the be drilled and sandwiched in between the metal ribs. tighten the bolts and simply file to shape, thus producing identical ribs. Hope this explains things. The latest pic of the Red Eagle below Dave Quote Link to comment Share on other sites More sharing options...
LHR Dave Posted March 30, 2016 Author Share Posted March 30, 2016 Just a quick note ,if you try to photo copy using an ink jet type printer it will not work. it has to be a toner type printer for the ink to transfer successfully . Dave Quote Link to comment Share on other sites More sharing options...
Ton van Munsteren Posted March 30, 2016 Share Posted March 30, 2016 Great build Dave and great to see how it works with thinner, never tested that , have a new bottle of thinner so will have a go lateron. Well to be honest I could not wait and had to do a test rightaway and must say it works perfectly. Don't make the tissue to wet as can be seen on the left, the right image of the motor is just perfect. looks like I have some more plans waiting for a build very soon. Thanks for the tip Cheers Ton Quote Link to comment Share on other sites More sharing options...
Alan Thorpe Posted March 31, 2016 Share Posted March 31, 2016 Hey Dave, Thanks for the handy tip, that's great stuff really, never knew how to do that, I'll definitely give it a try on a plan soon! Just wondering if you could use thin ply instead of the aluminium for making the ribs? Thanks a lot for the help and pictures, inspirational stuff!! Cheers, Alan Quote Link to comment Share on other sites More sharing options...
Andy G. Posted March 31, 2016 Share Posted March 31, 2016 Alan.. Thin ply works just fine for the templates! If (when) I build another Red Eagle the only mod I would make would be local reinforcement of the fuselage around the wing mount area as I have stress fractured mine at either end of that bay on a few occasions now. Otherwise, a top notch plane!! Quote Link to comment Share on other sites More sharing options...
LHR Dave Posted March 31, 2016 Author Share Posted March 31, 2016 Andy... Any chance of a photo of the stress fractures so that i can apply the reinforcement on my build now. And yes thin ply works just as well as would most materials that are actually harder than the rib being cut Dave Quote Link to comment Share on other sites More sharing options...
Andy G. Posted April 1, 2016 Share Posted April 1, 2016 Dave, stress fractures have all been repaired and recovered, but basically as I see it the '" weakness" is at the formers position. I fly mine mainly off the slope, where the grass tufts are quite tough and usually the fractures occur if I graze a wing tip against these on landing causing the plane to pivot around and put it's nose in. Another contributor on the Red Eagle topic broke theirs in the same place. Perhaps a localised doubler in the under wing bay or some triangular stock to reinforce the former to side area would do the trick? Or maybe I should learn to land better! LOL.. I built mine from the RBC short kit which was excellent and to date my Eagle has had over 15 hours of flying time and despite looking a little scruffy and war weary now still flies beautifully. Quote Link to comment Share on other sites More sharing options...
Alan Thorpe Posted April 30, 2016 Share Posted April 30, 2016 Hi there, Just contemplating going slope soaring at some stage this summer,it will be my first time, up until now i've been flat field soaring with the RedEagle and another glider, Thush motor glider. I'd like some advice please, on taking these gliders to the slope for the 1st time. I've flown both gliders in some wind, just a little over 10 knots lately and all was good, at our flying site with good space. Hoping it should be good craic with a few other gliders in the air at the same time!! Sure let us know what you think! Cheers, Alan Quote Link to comment Share on other sites More sharing options...
LHR Dave Posted May 29, 2016 Author Share Posted May 29, 2016 Progress has been made after a few weeks of idle activity. wings ready for covering and fuselage to continue, the end is nearly insight. Quote Link to comment Share on other sites More sharing options...
David Begg 1 Posted May 31, 2016 Share Posted May 31, 2016 Has anyone had success with LHR Dave's copying of plan parts idea. I have tried paint thinners, nail polish remover, a product called ,Desolve It, ( removes super glue and epoxy, works well doing that job), without any success at all. Is there a degree of luck with the brand of photocopier used and hence the toner used to copy the plan? My Red Eagle plans were copied on a Canon plan copier. Quote Link to comment Share on other sites More sharing options...
LHR Dave Posted May 31, 2016 Author Share Posted May 31, 2016 Hi David I have always used the large photocopiers that you get in offices, print shops etc, this gives you the option of making A3 size copies. The one used for the Red eagle plan was a Canon. I have always used paint thinners but recently experimented with Toluene which also works well. It may well be the toner you have used but equally maybe the thinners etc. I have to say that ever since I learned of this method of reproducing parts from plans it has worked for me every time. let me know how you get on. dave Quote Link to comment Share on other sites More sharing options...
David Begg 1 Posted May 31, 2016 Share Posted May 31, 2016 Thanks for the reply LHR Dave. I quess one type of Canon toner is pretty much like another, so that is unlikely to be the problem. I will pick up a different type of thinners this morning and see if that does the trick. I will try to find a thinners that contains Toluene. I will certainly keep you informed of progress. Cheers David Quote Link to comment Share on other sites More sharing options...
Alan Thorpe Posted May 31, 2016 Share Posted May 31, 2016 Hi David, Just wondering if the copier you used has normal powdery toner as in a laser jet printer or could it be the coloured wax instead of toner, as it may not separate off the page as easily? Only a pure guess too, as I haven't tried this method yet, butmaybe try increasing the contrast so that more toner is used,making it thicker and easier to transfer? Just 2 guesses, hope you get it to work for you! Cheers, Alan Quote Link to comment Share on other sites More sharing options...
David Begg 1 Posted May 31, 2016 Share Posted May 31, 2016 Hi Alan, I had the plan copied at the local copy shop, the girl used the Canon plan copier, it appeared to make a large but ordinary photo copy of the plan. I would doubt if Canon would use different technologies on different copiers, rather a variation on the same. As I said to LHR Dave I will try some different thinners ( with Toluene? if possible) If that does not work, I will then try recopying the section of the plan I require on another copier. If still no luck??????????? I am going out shortly and will pick up the different thinners then. I will let you know of developments. ( I live in New Zealand and our time is 12 hours ahead of you, the shops are just opening here.) Cheers David Quote Link to comment Share on other sites More sharing options...
PatMc Posted May 31, 2016 Share Posted May 31, 2016 For anything under A4 size I copy on a scanner then print on this type of single A4 label using a bog standard inkjet. Next I roughly cut each image out, stick to the wood then cut the exact size part out & peel off the label paper. If there are several parts that will fit in a single sheet of A4 I copy them (individualy if necessary) open the image[s] up in a graphics program & arrange as many as possible of them to fit within A4 size before printing. Edited By PatMc on 31/05/2016 22:32:52 Quote Link to comment Share on other sites More sharing options...
onetenor Posted May 31, 2016 Share Posted May 31, 2016 Car thinners usually contains Toluene and xylene. However I always iron on the back of the print. This transfers about 1/3 of the thickness of the toner to the wood so you can often pull another one or sometimes two more prints off getting fainter each time.The heavier the print the more you can pull. off. The printer uses heat to fuse the toner to the paper to start with so this just reverses the process Good luck John Quote Link to comment Share on other sites More sharing options...
David Begg 1 Posted June 1, 2016 Share Posted June 1, 2016 Hi Onetenor, Purchased thinner that contains xylene, nothing. I tired the heat trick earlier, nothing. I will get the ribs that I want to transfer the copy of copied with a normal office photocopier and see what happens. Hi Pat Mc, yours is the method I usually use, it seemed of the thinner and photocopied process worked it would be a better and easier way to transfer the patterns. Cheers David Quote Link to comment Share on other sites More sharing options...
David Begg 1 Posted June 1, 2016 Share Posted June 1, 2016 Just went down to the local school and got the office lady to copy my copies of the Red Eagle wing ribs using the schools very normal A3 size Konica Minolta photocopier. The process works, easy as. Lesson, not all toners are the same and plans copied on a Canon plan copier won't work using this process. Thank you all for the assistance, much appreciated. Cheers (from New Zealand) David Quote Link to comment Share on other sites More sharing options...
David Begg 1 Posted June 5, 2016 Share Posted June 5, 2016 Well more dramas with my Red Eagle construction, dramas which people need to be conscience of and tuck away in their memory banks. I made the wing ribs, perfect, very pleased with them, after the problems of the thinners photocopy method were solved. Came to place the wing together prior to glueing, and nothing fits!! The wing ribs were all approx 8 mm short. I checked the wing ribs again for size, they are perfect. Went back to the original free RCME plan, checked the ribs again, perfect. I then checked the wing on the photocopied plan with the wing on the original plan, the copy had been stretched in width, by you guessed it, 8mm. I am very lucky, the ribs were copied in a direction where they were not affected, or the ‘stretch’ was so small as to of no visible significance. I was also fortunate that I best fitted the components before starting the final assembly with glue. I am now wondering if the light weight free plan is going to be up to the rigours of assembly and construction being undertaken on it? I will cover it with plastic film, it should be OK, better being the correct size and having to tape it up in places than constructing a faulty glider. Moral. Check everything, then check again, and don’t assume a photocopy is perfect 100% copy, it may not be! Cheers David Quote Link to comment Share on other sites More sharing options...
Andy G. Posted June 5, 2016 Share Posted June 5, 2016 Built mine o.k.off the thin free plan, as long as you cover it you shouldn't have any problem. Quote Link to comment Share on other sites More sharing options...
LHR Dave Posted June 5, 2016 Author Share Posted June 5, 2016 I am the same as Andy G, I used the free plan from the magazine covered the plan in plastic to protect and it has been completely fine. David I am sure your Red Eagle will be superb when complete keep up the good work. My build has slowed down now the nicer weather is here in the UK but will post what progress i do make. Dave Quote Link to comment Share on other sites More sharing options...

Recommended Posts
Join the conversation
You can post now and register later. If you have an account, sign in now to post with your account.
Note: Your post will require moderator approval before it will be visible.