

Robert Parker
-
Posts
2,657 -
Joined
-
Last visited
-
Days Won
4
Content Type
Profiles
Forums
Blogs
Gallery
Calendar
Downloads
Everything posted by Robert Parker
-

Building Tony's Sunderland
Robert Parker replied to Robert Parker's topic in Tony Nijhuis plan builders
Hi All, Just a quick update on progress, the sheeting is now complete and sanded just the front nose block, rear turret floor to carve, the cockpit floor, and the wing mounting plates left to do and that is the basic fuselage construction completed and that it is a big big fuselage....... .........that's a 12" ruler standing next to it. That's all for now Regards Robert -
Building Tony's Sunderland
Robert Parker replied to Robert Parker's topic in Tony Nijhuis plan builders
Hi Mike, Thanks for the water handling traits, my Sunderland will be flown off a dolly unless our patch gets flooded. I'm the club secretary for AVRCC (Amman Valley Radio Control Club), we fly (when we can) at Gwain Cae Gurwen. Is this anywhere near you? Regards Robert -
Building Tony's Sunderland
Robert Parker replied to Robert Parker's topic in Tony Nijhuis plan builders
Hi All, It took a while to get the ammonia but ended up with Amazon. Whilst I was waiting I joined some sheets together and glued them to the sides, it seems a lot to bend and not only simple bends but both convex and concave. Easter came and went without any modelling activities and then the snow came for a couple of days so today I made a start on bending one side. I applied a couple of coats of ammonia, working outside for this bit and PPE having read the warnings on the bottle, and set aside for 20 mins for it to soak in. Sides glued on ready Temporary bench set up outside, this stuff really takes your breath away when the wind stops, two coats applied Well, I started at the rear which was too tight a curve and the sheet split a bit, a spot of cyano and started in the middle slowly bending it over the formers and working equally forwards and backwards until I got to the cockpit area and cut the sheet just in front of the cockpit opening and again the sheet split but not too badly again a spot of cyano and whilst that set I concentrated on the rear which was rolled around the formers. The split is where the purple pin is. A couple of splits here but not too bad. This is the first time I've used ammonia to bend balsa seems ok but should I have left it longer to soak or am I missing something. Slightly of topic I took the wife and daughter to a garden centre that we had not been to for some years, and as turned into the trading estate I saw this and my wife said drop us off and we'll catch you up. mmmmmmmmm how many servos, Stuck in a factory car park In need of a post flight clean up........... A nice treat and totally unexpected after sooooooo long of being deprived of anything aviation other than my work bench That's all for now Tomorrow I'll glue in place this side and start on bending the other side. Regards Robert -
Building Tony's Sunderland
Robert Parker replied to Robert Parker's topic in Tony Nijhuis plan builders
Thanks Craig, love your Concorde, can you buy ammonia from a chemists shop? My workshop was the spare bedroom so I can imagine what my other half might have to say with the smell, how long does the smell last. Regards Robert -
Building Tony's Sunderland
Robert Parker replied to Robert Parker's topic in Tony Nijhuis plan builders
Hi All, The hull is now complete and she's the right way up in the jig and the stringers are now gluing in place 9mm sheet added to the tail section with a sold block fillet in place That's the rough shape All sanded and blended in. Time to flip her over and make a start on the top side There was one thing I had not noticed about the Sunderland and that was how the fuselage tail area curved downwards in to the fuselage. The front end too is very curvy too, I had to soak the longerons quite a bit to get them to twist and bend around the formers The clamp is to stop the back end of the front formers from spring out Next, top sheeting which I think is going to be a bit of fun. I may reduce the width of the sheeting to 50mm That's all for now Regards Robert -
Building Tony's Sunderland
Robert Parker replied to Robert Parker's topic in Tony Nijhuis plan builders
Hi All, Started sheeting the hull and progressing well. I only had to wet the two front sheets, using the heaviest sheet from the balsa supplied 34gramms for the front and the mid-section sheeted with 28 gram sheet, I know not much of a difference but it does all add up over the whole model. Next, the rear section is sheeted using 9mm sheet with a wedge fillet at the back of the step down and then cut, plane, and sand to shape. That's all for now Regards Robert -
Building Tony's Sunderland
Robert Parker replied to Robert Parker's topic in Tony Nijhuis plan builders
Thanks for all your positive comments, hopefully I will be back at the build during the week now that the gardening duties have been completed. Regards Robert -
Building Tony's Sunderland
Robert Parker replied to Robert Parker's topic in Tony Nijhuis plan builders
Hi All, Made some progress with the fuselage this week, this weekend seems to have been booked by Mrs P for gardening duties. Still it's nice to get the green off the slabs and get rid of all the weeds and trim back the undergrowth. All straight and true This is a big fus I took the opportunity to make the battery tray now as once the bottom is sheeted and the top sheeting on there would be little chance to fit the tray Inverted, and time to pull in the sides around the rear formers, plenty of water and let it soak for half an hour worked well and then pin and clamp up and add the keels. Next, the hull will be sheeted in two stages from the centre to the nose and then centre to rear, with the last section being 9mm sheeting That's all for now Regards Robert -
Laminating film - buying it and using it.
Robert Parker replied to Ron Gray's topic in Modelling Money Savers...
Hi Ron, Payment sent -
Building Tony's Sunderland
Robert Parker replied to Robert Parker's topic in Tony Nijhuis plan builders
Hi All, It's been a busy week with work bit I have had a tidied up the bench and got my Cambrian 55" Mustang off the building board and she is waiting to be fuel proofed and engine re-install and setting up all of which can be done off the bench. The motors and speed controllers with props arrived during the week I have made a start on the Sundereland and cut out all of the parts for the fuselage and giving them a light sanding, joined the sheets for the side and blended in the aft sheeting to the fore sheeting, with the aft being 3mm balsa and the fore sheeting being 4.5mm, this is to aid bending the sheeting to shape, that's the fun of flying boats they do have very rounded hulls at the rear end. Buying the CNC pack saved a lot of work cutting these out The box of Toupet at the back right of the picture is a powder filler that I have found to be excellent so far it sands at the same rate as balsa and the 2kg box should last years or until it goes off, i have used another product called "easifill" for dry wall construction but it comes in 10kg bags!!! Former positions marked out The sides have been cut to shape and the first formers glued in position Second side glued on and all squared up, I might struggle to get the two servos in place and the flight pack (not), it is a big fuselage, the deepest I've built so far. This is progress up to date, Next the fuselage will be transferred into my SLEC jig so the other formers can be added, water bottle at the ready. That's all for now Regards Robert -
Laminating film - buying it and using it.
Robert Parker replied to Ron Gray's topic in Modelling Money Savers...
Thanks for getting back Ron, The weight is very good being similar to Solarfilm, could is this be a new replacement for Solartex I'll go for 10m to try it out Regards Robert -
Laminating film - buying it and using it.
Robert Parker replied to Ron Gray's topic in Modelling Money Savers...
Hi Ron, I'm very interested in this product. I have a couple of questions for you, 1. In your opening post you said that you painted after lightly sanding (as it was a gloss finish) what paint did you use, I use a lot of spectrum type paint or car paints are these compatible to the film? 2. How easy does the film take to curves such as wing tips and nose cones. 3. It may be a simple question but how does the weight (38 microns) compare to other iron-on films g/m2. Regards Robert -
Hi All, My first RC model was in 1990, a Galaxy Models Fiesta a channel trainer with an OS FP 25 up front, (this was the worst motor I ever owned) The plane few great however, getting the motor running was quite a task, I think every club member had a go, but I had no choice but to keep on with it funds were low being a student at uni. I had and still have my first radio it was a Futaba "Attack 4". The model suffered several arrivals during it life until the day arrived of the last flight, my club then Barry Areo Modellers were flying from a farmers field complete with cows who kept well clear of us, on that day I had a couple of flights all be it short due to the motor playing up. My tutor made another adjustment to the engine and it sounded great so due to the long grass it was down to me to hand launch which I was used to and did once more, however, on throwing the model my finger accidentally knocked the "on-off" switch to the off position, from that moment the model was doomed, it flew a long slow arc banking slightly at full bore until it hit the metal fence, the type which has 4" square holes in it, the motor and fuselage went through very easily but left everything else behind. I did rebuild it but it did not last long, back then we did not have buddy boxes and the transmitter was passed from tutor to pupil. Seems such a long time ago. Regards Robert
-
Hi All, I have had a liking for the Sunderland ever since I was a boy when I built a lot of Airfix kits and the Sunderland was one of them. Well 5 decades later I am about to embark on building another but a bit bigger, Tony's 72" (1.8m) wingspan. Having looked back through the forum there are a couple of threads on the TN Sunderland that started but never went to completion. I aim to carry this through to the finish with lots of photos as we go. Last September, I was sent to work in Pembroke Dock for three months. This was cruel/temptation as I saw pictures of Sunderland's on the wall of the building I was working in, driving past the maritime museum which had a wing float in the grounds and of course the aircraft hangers in the dock every day. So this has given me the push to start building. There are nine Sunderland's in this picture can you spot them Back in 2016, I purchased the CNC plan & wood pack pack along with the cowls, turrets and canopy with the intention of building it one day, and it has sat on the bench ever since with the odd sheet of balsa "borrowed" and later replaced. The box of balsa and ply, the magazine article and I just had to have another Airfix kit too There is a lot of balsawood there and a lot of lovely CNC machined parts. CNC wing ribs and nacelle parts Cowls, turrets and canopy You can't have too many pictures of a flying boat. Yesterday, I ordered the motors & speed controllers from 4 Max so they should arrive later this week. Today, I have made a start on marking up all of the CNC parts and finishing a Mustang off to make way to start building later in the week. That's all for now. Regards Robert
-
The 'share your photos' thread (not model flying)
Robert Parker replied to David Ashby - Moderator's topic in Photography
Hi All, Over the years I had three 400fours and a total of 15 bike over 17 years. Like DD my first real bike after my moped was a Honda 250N Super Dream (CKG 824 V) in blue, and they were everywhere along with the RD 250's. Steve, you are right you could tell what bike was coming down the road by it's exhaust note. The two strokes with their "ring ting ting ting" sound and blue smoke from the exhausts and the deeper four stroke note, put some spun bellmouths on the carbs and the sound was even beter, well it was on my Z650 with Motad exhaust. Top left the same 400Four but in street racer mode with K&N air filters and multi fit belly pan, top right, CB900F, with a claimed top speed of 140mph but a bit slow in the mid range (for me), bottom left VF750 this was the predecessor of the VFR, I was plagued with electrical faults with this one, but I ride from Cardiff to Holyhead to Birmingham and back to Cardiff in 12 hours and 550 miles, I was bored I wanted to know where the A470 ended. and finally bottom right, the "plastic pig" as they were know a CX500 with king and queen seat, the original was like a plank, pull back bars and 3/4 fairing with a car radio cassette player and two 50 watt speakers covered with plastic, you could hear it upto 100 mph. Those were the years, how I survived them I'm not sure someone must have been looking down on me. I would like another but my wife will not allow it, she says she spends too much time putting riders back together and does not want me to be another and to be honest I think with the sheer volume of traffic (pre-covid) and I think she has a point. I'll stick with model aircraft. Regards Robert -
The 'share your photos' thread (not model flying)
Robert Parker replied to David Ashby - Moderator's topic in Photography
Hi All, I needed to take a break from building RC planes as I'm running out of hanger space and have just spent the last few weeks building this. You could just put the key in and ride away, oh the memories Under the points cover there are even the points and condensers and an oil filter inside the filter cover Even the rear shocks have real springs I had hoped it would have been a little bigger this is 1/12th scale and the scale detail is tremendous albeit on the small side with my big fat fingers I had to build most of with tweezers and the number of small pieces that I dropped on the floor and then spent ages looking for I lost count. Some pieces were 1mm across. My old bike back in 1993 not long after this photo was taken some low life stole it and burnt it, I was totally gutted. This kit is by Aoshima available from Kent Models. I enjoyed building this model, a change from balsa, although some parts were a little fiddly to fit/assemble, the whole build took me back to my youth all those years ago. Regards Robert -
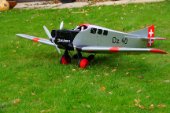
Messerschmitt M-19 (Civilian)
Robert Parker replied to Dwain Dibley.'s topic in Build Blogs and Kit Reviews
Coming along nicely DD. Regards Robert -
Hi CK, I'm with Chris on this, I have used it on balsa and it warped and twisted what even made this worse was I used Poly C, which is also water-based, and every coat I applied just seemed to make it worse. Fine on ply though, am like you, I opted for the socially acceptable approach as my workshop is in the house. Regards Robert
-
Messerschmitt M-19 (Civilian)
Robert Parker replied to Dwain Dibley.'s topic in Build Blogs and Kit Reviews
A nice looking model DD, I had to look it up. I found CNC cut kits are a lot cleaner to handle with no charcoal edges. Looking forward to watching this build Regards Robert -
Forum members' new models: Let's see them.
Robert Parker replied to Paul Marsh's topic in All Things Model Flying
Hi All, Just finished my latest model a 1927 DH 71 Tiger Moth racer, built from an old JB Aviation kit. The wingspan is 66", powered by an OS 52FS and covered in Oratex Regards Robert -
JB Aviation DH71 Tiger Moth
Robert Parker replied to Robert Parker's topic in Building from Traditional Kits and Plans
Hi All, Thought I'd make use of the early morning sunshine and took a few photos The office A look back to 1927 I had intended to fit a new OS 52 up front but during the course of the build my used OS 52 became available if you know what i mean rigging attachment loops over metal "L"s Lower rigging threaded through the eye of the split pin the rigging wires (elastic) threaded through off cuts of snake inners through the cowl Just have to wait for the maiden Regards Robert -

-
-
-


