

Nev
-
Posts
847 -
Joined
-
Last visited
Content Type
Profiles
Forums
Blogs
Gallery
Calendar
Downloads
Everything posted by Nev
-
Brian Taylor Spitfire 69" - build only
Nev replied to Nigel Day's topic in Building from Traditional Kits and Plans
Looking good that Nigel. Little bit at a time that’s the secrete and stop while you’re in front. Nev. -
You wait till you see the next bit. It’s probably fair to say I have been putting this bit off. But I committed quite early on to have a go at the side opening hatch that Danny showed. I glued the stiffening bands in well over a year ago but just didn’t want to face cutting up the cowl. I was convinced it would weaken it too much. I only cut down the hinge line first, I figured I might stand a better chance of getting it all back together again straight if I didn’t cut the hatch out completely. But now I have access. Bit more work to do yet, magnets to keep it closed I think, but it’s a lot more ridged than I thought it was going to be. Be flying in the summer at this rate ! Nev.
-
Hi. I haven’t updated for a while but I now have the wings finished. These are fiddley little things. Don’t really like these hinges but it’s too late now. All in and working. No rib tapes on the bottom but I’m glad I had a go on the top. Nev.
-

-
-
-
-
-
-
Glue in the microwave, brilliant. Just tried it, worked a treat.
-
Brian Taylor Spitfire 69" - build only
Nev replied to Nigel Day's topic in Building from Traditional Kits and Plans
Is that a big lump of plastic up the front Nigel, isn't that cheating! Have you got any thin ply you could wrap around the wing leading edge and extend tha fairing a bit, then trim it back to shape when your happy with the fillet bit. Builds looking good though. Nev. -
Johns Skywriter....will it be spelt correctly ?
Nev replied to john stones 1 - Moderator's topic in The 2017 Mass Build
Ahh some gluing at last. Are you planning ailerons on top and bottom wings, if so then maybe 4 bays would be enough but having never built a biplane I'm only guessing. Nev. -
I don't consider it bodging, I think of it more as improving. It's the same with repaire, I bet all your repairs are better than the original, be it toy, garden furniture or model. Nev.
-
Excellent. If you can do that as a complete beginner (no offence ment) to 3D printing that's great. Was the fan nozzle a pre prepared file ? I'm going to download some cad software and have a play (this is just the build up to clicking the buy button you understand). Well done that man. Nev.
-
Good progress there SW, if I remember, next comes a lot of juggling. In what ever order you like, you need to get both halves to this stage before you go for the big close up Do as much as you can before you join the halves, it gets a bit restricted afterwards. The dowels were a great idea. Nev.
-
I know you are assembling this yourself but it certainly looks like you get your money's worth. If it performs anything like, it looks its got to be good value. Can't wait for the test. Nev.
-
Definitely interested Tony. For that kind of money I'm thinking of trying one myself, how is the quality looking so far.
-
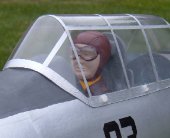
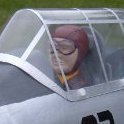
I think your on the right lines but yes the vey end looks a bit stubby, no criticism intended, a bit more tapered and maybe a tad longer would look more like the photos. I haven't been doing much, just messing with the cockpit fitting so absolutely nothing to show. The model Chippy doesn't need the band but is quite prominent on the full size, so as far as detailing goes it's the be bare minimum. Danny, as I'm sure you know goes a lot further and is trying to encourage us to have a go at including some of the scale details. Keep sanding and shaping and you'll get there. Nev.
-
I never like doing these fillets, too many arty curves and not enough measuring and cutting. Yours are looking good though and got to be good for weight saving. Nev.
-
I,m not doing 4 engine necells but would love to bo a Dakota sometime, could be a long wait though. Nev.
-
I didn’t prepare the wood with anything Martyn. I’m sure you know with your own Chippy the planked fuselage and sheeted tail surfaces are very rigid anyway, not sure I would have tried it on a built up wing. When I say I soaked the paper, I floated it onto the surface of the water for about 10 seconds or so, then lifted it out and left it wet side up while I applied the pva. In the end I hardly diluted the pva at all, it worked better if it still had a bit of grab. By this time the paper will have soaked up most of the water left on the surface. After you put the paper on, smooth out any wrinkles with a credit card, this squeegees out any excess pva/water. I would say that this “wets” the wood less than covering in glass cloth and Poly C as most of the moisture is retained by the paper. Maybe I got lucky. It was all trial and error, the first parts I tried were some servo covers made from 1/16 obeche sheet, these did warp as I would have expected but have straightened out since left under weights. They actually bowed inwards, pulled in by the shrinking paper, not bowing out by the swelling of the wood on the wet surface. But I think I’m overthinking this now. Nev.
-
You’re not kidding Nigel, he doesn’t let up on anything, you think after all this time he would have forgotten what we said on page 1 I think he has a thing about Spitfire as well so you’re in for it. Nev.
-
You certainly crack on when you put your mind to it Martyn. Nice wings. Nev.
-
Yes I will do that bit at least and treads on the wings. Nev.
-
No rivets you said we didn't have to do the rivets ! Brown papers not for everything Colin but it's another tool in the box. It could be a quick way to get a smooth finish on foam though. Nev.


