

Danny Fenton
-
Posts
15,165 -
Joined
-
Last visited
-
Days Won
22
Content Type
Profiles
Forums
Blogs
Gallery
Calendar
Downloads
Everything posted by Danny Fenton
-
Okay a quick search and this tool is in ilustrator... Unfortunately my version is too old, but I can draw it on my other half's PC if you want to play with cutting. How long a line do you want and in what format? Cheers Danny
-
Agreed, not to mention how to hold the film still during the process, lots of problems, just shows how good an engineer Mick is. I have searched for how manufacturers cut tape continuously to no avail. Cheers Danny
-

Any tips on glassing a model?
Danny Fenton replied to Allan Bennett's topic in Building from Traditional Kits and Plans
With glassing there are several ways that work. But not everybody finds they get on with somebody else technique. I had a modeller ask me for help because he couldnt get his cloth to lay flat. I explained that he should try a different brand of cloth. I told him what I use, but he was adament he knew better. Anyway he couldnt get a good result and bad mouthed using glass from then on. This video shows how your cloth should behave, if it doesnt then change materials. Cheers Danny -
Sorry if I had seen it I would have tried to help. Next time i fire up illustrator i will try something that should work. Cheers Danny
-
I cannot believe that would be difficult, create a few in say ilustrator, then duplicate, then duplicate again?
-
Thnk's Ron, that does look like the stuff. I will get some and see.
-
Yep noted ?
-
Had a good rummage on the web John and struggling to find your first aid tape, have you a link? Cheers Danny
-
That's very interesting thanks for that. The last batch I got from Gary was not Solartex, really don't know what it was. I will bear them in mind for future builds. The edges were the best I have seen. Cheers Danny
-
Thanks John that's great information. My full size pinking scissors are as you say 5mm pitch. I got some lovely stuff from Gary Sibbert in the States, the company was Pink-it the difference being it was on a continuous roll. But unfortunately Gary called it a day. Cheers Danny
-
This may interest you, and perhaps those in the know will comment as to whether all tape is a standard size? These are the dimensions of rib tape applied to Jacqui Sephton's Auster during a re-cover. Cheers Danny
-
Thanks guys. I measured the tpi of Mick Reeves 1/4 scale tapes and they came out at closer to 1/5.... So thats what I used.
-
Added some rivet/screw detail to the cowl. moved on to the sticky out bits. Rib tapes done, just periphery tapes left, then the other wing. I will add the tapes on the underside but not the stitching ? Cheers Danny
-
I am not sure if anybody else gets this but there comes a point where a model suddenly comes alive, and that was this morning for me. Can't wait to get some paint on the beastie. Cheers Danny
-
Woke up this morning to find an Auster on the bench....
-
Fantastic news Nick, really wonderful achievement!! Cheers Danny
-
I know often it seems as though stuff goes to plan and it seems unfair, but just to prove it doesn't I applied chart tape to the cowl and when I fitted it to the model the lines were not the same on each side. This pic shows the cowl just after the tape was removed. And this just after I sanded the lines off again and re-applied more Chart-Pak tape. Using 1/32nd for this as the cowl lines are much more pronounced. The camera angle makes the lines look less than parallel, they are parallel...... Ah well I couldn't have just left it that way. Not sure how the error crept in. Cheers Danny
-
Thanks Geoff, the Auster has always been a favourite of mine, my Dad learned to fly in one, and there were always one or two at Sherburn, where my Dad ran the maintenance outfit on the airfield, so they were always around. I didn't realise the Aiglet was aerobatic, that's something I wasn't aware of! Cheers Danny
-
Hi Matt, and I am really pleased that you have enjoyed the thread. My goal when writing the scale column for the magazine, posts on here, and the videos, is to inspire and show how stuff can be done and its not too hard with patience and care. This post has made my day thanks If I can offer some advice on the choice of subject, keep it fairly simple and easy to fly, there is nothing worse than building something gorgeous and then you are too afraid to fly it. My first real scale model was a Hurricane and its lovely, but still hasn't flown. The Chipmunk is an excellent choice, great flyer, fixed undercarriage. Other good choices are many of the high wing cabin models just watch the amount of glazing. I did a Super Cub for indoor scale and it was a great choice. I too peered into Pete's DH9 (or was it Micks??) and seeing the half eaten sandwich and mug of coffee made me feel quite inadequate. Cheers Danny
-
Curtis Condor biplane twin
Danny Fenton replied to David Ovenden's topic in Building from Traditional Kits and Plans
Well done David, your persistance has paid of ? Cheers Danny -
Anchored the exhaust firmly but not rigidly to the airframe. The exhaust I made, including flexi was lighter that the Saito supplied one! I also milled the wheel centres so that the wheels could sit further over the piano wire axle, a bit of a soldering mess, and now the wheel hides some of it ?
-
You could be right, but a flat three section windscreen does seem to have been fitted to some later ones... This is Andy and Jacqui Sephton's Auster and it has additional uprights and a three section screen. Cheers Danny
-
Thanks ? but the judges would drive a bus through the errors. Many think you can take a kit and compete, but to do really well the outline first has to be accurate, detailing doesnt get you much. Well apart from the "oooohhh" factor, which is nice. Do you or any others want a copy of my windscreen template? Sorry but the flat sided one just looks wrong imo. Cheers Danny
-
Just came to the same conclusion David, as Alan says its just for fun and wont be competing so doesn't really matter, and if you guys weren't sure I am sure others wont have a clue ? It changes daily, but keep coming back to G-AGTO..... my one concern is it looks more grey than silver. KlassKote silver is more like the Chippie in the background. There again its only fun scale.......... Cheers and thanks for the help, much appreciated.
-
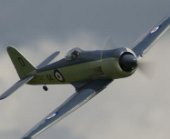
It is interesting that you say that David, it is quite difficult to tell from profile shots which most on the web are. I thought I saw one with the exhausts on starboard. I wonder if they had a variety of power plants? I found one good shot (above) on the web from the underside of a J1, and the exhaust was on port so assumed I had got mine wrong. Thanks for the info, I will dig a bit deeper Cheers Danny

