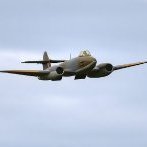
Andy Meade Posted August 13, 2014 Share Posted August 13, 2014 Hi there guys and gals! Well, after the Lleyn meet I realised that the Jim Fox Viggen that I had sat on my "long term build" bench was just not going anywhere. I bought her off of eBay last year with the intention of going for 6 or 7kW EDF install, which with scale undercarriage (inline bogeys on the mains) would give me flight times of maybe 5 minutes tops on 10 or 12S lipos. I've loved Viggens for a long time (almost as long as my love for MiG 29's!) and I want to see one of my own in the air, so the decision was made. Why bother with 5 minute (or perhaps 10 minute with a turbine) flight times, when I can stay up for a hour or two at a time on the slope? Yes, PSS conversion beckons.... I say conversion, but this machine was never finished by its previous owners. The wing was finished in solartex over a glassed foam wing - the finish under the 'tex was horrible. The ducting and fin is all installed, but no radio bay or servo mounts. I do have a complete "before" pic somewhere, I will dig it out, but for now - to the build! Here is the nosewheel cavity. I don't need no stinking undercarriage, so it's going. Stick a block of bluey-pinky foam in there with thickened epoxy blasted through a syringe on the inside : Carve, carve, sand and fill : A touch of light glass : Then Poly C the beggar on there : The canards had the breaking strain of a Kit Kat, so out the came, and a hardwood spar was introduced through some lovely looking ducting : inside : Slots relieved in canard, and CF anti rotation pins added to the front too to stiffen things up a bit : Huh, CF rods aren't in that picture. One of the canards needs a little LE adding back in, but will detail that in the next installment. Quote Link to comment Share on other sites More sharing options...
Andy Meade Posted August 13, 2014 Author Share Posted August 13, 2014 Controls will be elevons, canards on the throttle stick or 3 position switch, rudder, and hopefully some scale embellishments. Power will be two large 6v packs, or maybe two 3S lipos as far forward as I can get them. Colour scheme will be the lovely, classic splinter : Edited By Andy Meade on 13/08/2014 14:09:34 Quote Link to comment Share on other sites More sharing options...
Jamie sawyer Posted August 13, 2014 Share Posted August 13, 2014 I'll watch this one I think!!! Funny because a jet is what I have been wanting and needing for the slope. It was in my mind this morning. What sort of wind speed will the Viggen be happy in ?? 15 to 20 mph ?? Keep the pictures coming Quote Link to comment Share on other sites More sharing options...
Andy Meade Posted August 13, 2014 Author Share Posted August 13, 2014 Hi Jamie, Not sure! It's a big wing, but it's extremely thin, with a razor like LE. I shall take the LE off anyway as it's a bit dented, then replace it with hardwood - with the wing so low she'll be skidding in on it with one of trademark heavy landings. On a coastal site, I'd like to say 15 for mooching about, 20 to be great, 25mph winds to be ballistic. Thanks for the reply - I'll keep the pics coming in fits and starts, as I tend to build a lot and take pics quickly, then upload them a few days later with the description. edit to add : I thought about the wing a lot over the last few days, and I'd like to cut another with a slightly more "slopey" section, but would have to re-do the huuuuuge fuselage fillets if I were to go that way. I don't want to do that because all of my fillets look awful. Tonight I shall mostly be cutting the fin to make a rudder, and maybe some blending work around the poorly fitting cockpit base. Edited By Andy Meade on 13/08/2014 14:19:08 Quote Link to comment Share on other sites More sharing options...
Mark Kettle 1 Posted August 13, 2014 Share Posted August 13, 2014 Nice Andy, because this is nearly done you will still have enough time to do the PAK T50, I'm I right? Quote Link to comment Share on other sites More sharing options...
Andy Meade Posted August 13, 2014 Author Share Posted August 13, 2014 It actually is not that far from completion - most of the work will be in the wings and finishing. I hope to have her ready for the October Orme meet. The PAK however...might be April 2015. I am using up a lot of brownie points as it is trying to get my 4th PSS build of the year complete! Don't tell her I'm also going to re-finish my Howard Metcalfe Models F4 for October either... Quote Link to comment Share on other sites More sharing options...
Jamie sawyer Posted August 13, 2014 Share Posted August 13, 2014 Is there any where good to look for a jet kit for PSS. Do you guy's prefer glassing the wings for that extra weight and strength for sloping. Are you going for a grey colour scheme. It might be a bit troublesome against a moody sky ....sorry about all the questions lol. I'm just finding my feet with the whole slope thing. Did it years ago and have just recently started trying it again . Quote Link to comment Share on other sites More sharing options...
Andy Meade Posted August 13, 2014 Author Share Posted August 13, 2014 Always good to ask questions Jamie PSS kits are far and few between these days, good ones I know of are from here : http://www.islandmodels.ie/index.php/pss I've seen them both fly and they perform well. Glassing wings isn't really a necessity, it depends a lot on where you fly from most, how great your landings (arrivals!) are, and what sort of finish you're after on the completed model. Grey underside shouldn't be a problem - I can always turn the nav lights on if I get disoriented Quote Link to comment Share on other sites More sharing options...
Andy Meade Posted August 15, 2014 Author Share Posted August 15, 2014 OK so a bit more progress. I cut the rudder from the fin, as per looking at a 3-view of the full size. Front faces sheeted in 3/16" hard balsa, top and bottom faced in 1/16th" ply : I dropped a shortened aileron bellcrank through the fuselage, pinned it to the fin with its bearings, then supported it inside with a large balsa block with a vee cut into it (not pictured yet). Rudder control will be a long snake going into the nose: Here is a quick overall view to show her size - I have named her Ingrid the Big Swede (cutting mat is A4), and the canards are now glued to their new main spar, carbon dowels, and fuselage : Here is a shot showing the inside of Ingrid's nosey where the undercarriage door has been blocked off : Ingrid's bum is missing a protrusion that is on the full size. This probably holds something for rear looking IR? Certainly a nav light, anyway, so I am re-creating it with a 1/16" ply inner, and pink foam outer : Now epoxied on, next to some inspirational piccies that I stuck around the workshop about 6 months ago - you can clearly see the blended protrusion in the photo : That's it for now, hopefully lots of work over the weekend! Quote Link to comment Share on other sites More sharing options...
Matt Jones Posted August 15, 2014 Share Posted August 15, 2014 Are those the retract wheel wells? Is the wing on upside down? Quote Link to comment Share on other sites More sharing options...
Andy Meade Posted August 15, 2014 Author Share Posted August 15, 2014 Nope, the retract units go straight through the wing. "Back in the day" there were no really slimline units, so the instructions say cut clean through, then put a blister on top of the wing to cover the retract. Horrible. I removed said blister, and all this area on top and underneath where the cutouts are will have expanding foam blasted into them before being glassed. Quote Link to comment Share on other sites More sharing options...
Mark Kettle 1 Posted August 15, 2014 Share Posted August 15, 2014 Andy what's it's span and length? Quote Link to comment Share on other sites More sharing options...
Andy Meade Posted August 15, 2014 Author Share Posted August 15, 2014 Hi Mark, What a question to ask a lady! Ingrid is 5 foot exactly in length (new protrusion included), 43" wingspan, and 19" high. A lot of bulk in that shapely fuselage Quote Link to comment Share on other sites More sharing options...
Mark Kettle 1 Posted August 18, 2014 Share Posted August 18, 2014 Some lady! Quote Link to comment Share on other sites More sharing options...
Andy Meade Posted August 19, 2014 Author Share Posted August 19, 2014 Not done too much that's exciting, so here is the only photo of note - protrusion is shaped, filled, and glassed : I've worked on the wings a fair bit, got down to brass tacks (pretty much). It has been entirely glassed, but someone was so horrified by their handiwork (I know the feeling!) they Solartex'ed over the top of it. I have power sanded it as flat as I can get it, and will blow a thin layer of primer over things to see how good / bad it is. New LE's are ready to go on, then the decision will be made whether to solarfilm over the glass or fill/sand them into shape as is. Servo tray has been cut and ready for nose install. Should get this done tonight, then the cockpit sides will be ready for P38 body filler to blend into the canopy sides better. Will fill around the canards at the same time, then the fus will be ready for final sanding and primer guide coats. Quote Link to comment Share on other sites More sharing options...
Andrew Price 2 Posted August 19, 2014 Share Posted August 19, 2014 Very Nice. Quote Link to comment Share on other sites More sharing options...
Andy Meade Posted August 29, 2014 Author Share Posted August 29, 2014 Things are moving well at the moment, the wing was "red-spotted" and rubbed back, just to see how smooth I could get the surface as I want to spray directly onto this one, without filming it first. It seemed to go OK, so I used the expanding foam on the wheel wells, lightly filled them, then red-spot filled again, then hit it back again. Phew. The cockpit area has also been built back up where the glass fibre had been chopped back too hard by a previous owner - now all filled and smooth. Canards received a bit of the red stuff too (can't get enough of it!) where things get bumpy around their new spar. Pine LE's have been added now, so once they have been carved to shape (not knife edged like the previous ones), the wheel areas will be lightly glassed, wires will be let in across the TE for the nav lights, then it should be time for final fillering and sanding. Phew. Yes the little Phantom is getting worked on at the same time in the background - she's just about ready for solarfilming the wings and fin, then go mad with the prymol, then priming. Just about on schedule still for the October meet. Oh, and the Me262 has had it's nose renovated - have removed the "2" and the swastika, and will be re-applying them in a more appropriate size. Also the 4 x 30mm cannon have been added to the nose for a bit more detail, and the cockpit has now got a frame on it. Non-stop PSS at the moment!! Quote Link to comment Share on other sites More sharing options...
Mark Kettle 1 Posted August 30, 2014 Share Posted August 30, 2014 Andy I swear I can see a convey belt at the back of your workshop...........look there ! > ------>--------->------ Quote Link to comment Share on other sites More sharing options...
Andy Meade Posted August 30, 2014 Author Share Posted August 30, 2014 It feels like it sometimes Mark! this year I have so far completed 7 new builds, all from plans bar the JP which was assisted by a CNC kit. This should be 2 more, and will take my tally of PSS planes from zero airworthy in January to 5 by the end of the year, with another 4 planned for the first meet of the season next year! It is getting a bit silly, but I love it and at some point must do some house DIY, but I've managed to dodge that so far! Anyone fancy an impromptu meet in December? Quote Link to comment Share on other sites More sharing options...
Phil Cooke Posted August 30, 2014 Share Posted August 30, 2014 errr, yeah! Speak to Timbo - there IS an annual end of year/Christmas meet on the Orme! Quote Link to comment Share on other sites More sharing options...
Andy Meade Posted August 30, 2014 Author Share Posted August 30, 2014 awesome! Quote Link to comment Share on other sites More sharing options...
Mark Kettle 1 Posted September 2, 2014 Share Posted September 2, 2014 Any progress Andy? Quote Link to comment Share on other sites More sharing options...
Andy Meade Posted September 4, 2014 Author Share Posted September 4, 2014 Nothing major to report as yet Mark - 2x servo trays are now in - one for elevons and rudder, another for canards. Lot's of glassing and filling and sanding going on at the moment, and the pine LE's are on the wing. Will get some photos done when there's something interesting to look at Quote Link to comment Share on other sites More sharing options...
Mark Kettle 1 Posted September 4, 2014 Share Posted September 4, 2014 Great, seen on a video of one recently a Viggen approaching Waddington, also about two years ago I sold one at a swapmeet a fully decorated Viggen -profile fuse etc, could have sold it 6 times over because when it was put behind the stand for save keeping. Quote Link to comment Share on other sites More sharing options...
Andy Meade Posted September 29, 2014 Author Share Posted September 29, 2014 Well, I was away on holiday for a week in the camper, so missed my sanding block and film iron so much, I decided to use them both all day yesterday, ha. A quick shot of the Viggen and Phantom, after a quick wet and dry this morning. I stuck to the silver solarfilm / prymol / car primer formula that worked reasonably well on the Me262 on all the ailerons / rudders / elevators / canards / fins, and all over the F4 wing. The Viggen's wing has had a LOT of filling and sanding in progressive stages (a poor glass finish by previous owners unfortunately) but I decided to call it done as is. The Viggen fus is glass, so got a quick rub down then a breath of prymol on it before primer coat. Time to fit the waggly bits on both airframes, then we are ready for some top coat action. Quote Link to comment Share on other sites More sharing options...

Recommended Posts
Join the conversation
You can post now and register later. If you have an account, sign in now to post with your account.
Note: Your post will require moderator approval before it will be visible.