Nigel R
-
Posts
6,994 -
Joined
-
Last visited
-
Days Won
3
Content Type
Profiles
Forums
Blogs
Gallery
Calendar
Downloads
Everything posted by Nigel R
-
Split and list it yourself, this will take a lot of time, and you would benefit from knowing the game to get best results, or what to do and what to not bother with. Sell the lot to a plane olde bargain, you will get a reasonable return for little effort. Middle ground, post a photo or two here, the high value stuff will be identified toot sweet.
-

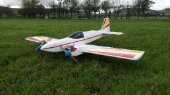
My Next Assembly ( The Trilogy ) Phoenix 60 EP
Nigel R replied to toto's topic in Build Blogs and Kit Reviews
I'd contend that just about any control pushrod type works best in a straight line (although, snakes benefit from a gentle curve to allow for expansion/contraction). -
My Next Assembly ( The Trilogy ) Phoenix 60 EP
Nigel R replied to toto's topic in Build Blogs and Kit Reviews
I did indeed have that job. That said - nothing to do you making the right slot for your install, and then sticking a patch of covering over the old one. For future reference (maybe) slec sell a neat moulded snake exit doodad which makes things look lovely when it's all together. I've used one on the elevator snake here: all manner of untidy holes and gobs of epoxy can be hidden by one of those. I use them on most of my airframes. -
81a is a lovely bit of kit. Very economical and reliable runner - (touch wood) I've never had mine cut on me in flight. Just a thought, the Gangster U/C might be quite short for a big four stroke prop, might need a three blade?
-
Would be 80 or 90 four stroke for me.
-
My Next Assembly ( The Trilogy ) Phoenix 60 EP
Nigel R replied to toto's topic in Build Blogs and Kit Reviews
A perfect snake install, by kc of this forum: And one of mine: note distance from horn to the point where the snake enters the fuselage, i try to make mine cross the side at 2.5" from the horn. -
White bead foam has been used for ages as a core material for wings and things. Packaging for white goods will probably be quite "heavy" foam though.
-
Ask your airframe after it's flown 😈
-
If the hatches have 'shape' then I do just about what Futara57 suggests. Build then cut. Reinforce as necessary. In Futara's example, there are no end formers or panels - the hatch will be unlikely to change shape, it is made from solid unstressed wood. A planked fuselage and planked hatch will be more susceptible to warping after the hatch is cut loose. However. With some careful advance planning, the hatch goes somewhere flat. Flat things are easy to make hatches in. 🙂 What model are you 'hatching'?
-
Probably they count toward wing area. They are, after all, area. Probably. On this plan they are set at zero, relative to wing AoA, and thus in line with neither upper nor lower surface: https://outerzone.co.uk/plan_details.asp?ID=4853
-
crikey, you're working fast!
-
My Next Assembly ( The Trilogy ) Phoenix 60 EP
Nigel R replied to toto's topic in Build Blogs and Kit Reviews
toto apologies if my post came across a bit abrupt - just saw an issue that needed correcting ASAP before you go any further -
I still use the 'old school' method of foam wrap. It does not take long, and seems to cover all bases.
-
My Next Assembly ( The Trilogy ) Phoenix 60 EP
Nigel R replied to toto's topic in Build Blogs and Kit Reviews
Sorry, I'm calling this now, that install is a disaster waiting to happen. Far too much unsupported plastic tube, it will flex, you will have no control, this will not end well. Stop. Return to the solid pushrods this thing came with. Learn to walk before running. Refer to the manual: https://www.manualslib.com/manual/965559/Phoenix-Model-Tiger-60.html?page=5#manual This shows the location the elevator horns should be, right up close to the inboard edge of the elevator, pic #49. Pic #50, shows what the pushrods should look like when installed. Note, straight. Follow these instructions exactly for best results. As a lone beginner, with no experienced guidance on hand, you need to do this as per instructions; with experience you gain knowledge of why these things are done in that way. -
Second flight of The Seagull Boomerang Trainer
Nigel R replied to aidan mcatamney's topic in Beginners
They're not, but your perception is what it is. If your club does not possess the skillset to set up a glow motor, and (at some point) teach you how to do the same, then that is your problem, a lack of expertise. As has been pointed out before. Electric can also fail, in numerous different ways to IC - as I think has also already been stated a lot of times on some of your many threads. Well... as above, not really. Note, you are still very much a beginner. Come back after a few years of using both power trains and reassess, after a handful of BEC failures, motor / esc / lipo overheating issues, motor winding failures or magnet failures, poor cell performance, solder joint failures, connector issues, maybe even a lipo fire. There are many traps for the unwary in both routes. Etc. -
As PatMc says. Undo grub screws, (carefully) push shaft through, tighten grub screws, job done.
-
Moisture speed up the curing. Your fingers are slightly moist because we're animals... Unlike that nice dry balsa you actually want stuck... Similarly, breathing on cyano seems to cure it rapidly (thus, I've never bought activator)
-
Less than solarfilm would cost.
-
I'll put a fiver on it being constant chord and therefore the same wing loading...
-
Seagull Boomerang is, what, 6lb, time its fitted out? I'd be surprised if a Hi Boy was much different. Here's an unstarted kit on ebay One of the big plus points for this kit - in its day - the interlocking fuselage parts meant you had a good chance (as a beginner) of ending up with a warp free model. Foam wings also meant things were (in general) straight. All fairly quick to put together, too.
-
Unicorn on outerzone Looks like a really nice basic sport aerobat with minimal build time / effort. I'm sure I have a spare 60 or two somewhere around here...
-
2mm threaded push rod Doobery things
Nigel R replied to toto's topic in Model Engineering and Accessories
Numbers... Expansion for nylon is around 0.1mm, per degree, on a meter of nylon. For 40 deg change in temp (a fairly extreme case!) - that gives 4mm on 1000mm, (or 0.4%) - note for a whole metre though. I'd make an assumption (dangerous) that the protrusion from either end of a control run is 25mm, giving 50mm total (as this is about what I believe the instructions call for, "no more than 1" sticking out") With a correctly fixed snake, we only need to worry about the bit sticking out - that would give, for that 40 degree rise, a much smaller change in the control run - 0.2mm change. Another assumption - most of my installs use a standard servo with a standard arm and would probably show a total movement of around 1/2" (say 12mm) either way. In my typical install, the expansion/contraction over our 40 degree change is approx 1.5% of the servo movement in each direction. I can't say I fly in 40 degree weather very often but I appreciate countries other than the UK exist! Most of my flying occurs between (say) 10 degC and (maybe) high 20s deg C, so the change I see is much less, about half. YMMV. For me, snakes are easy and work "sufficiently well". -
2mm threaded push rod Doobery things
Nigel R replied to toto's topic in Model Engineering and Accessories
https://www.nexusmodels.co.uk/sullivan-2mm-gold-n-rod-nylon-type-semiflex-48-inches-1219mm-f-sln576.html £23! Safe to say I'm finding that quite a lump to swallow for four clevis, four bits of studding, and two nylon inners and outers. That said, they have changed the colour, maybe that's what you're paying for. Either way 2-56 hardware is not hard to come by. Matches my experience, perhaps a click on or two on a hot summer day. -
Snap (well, I made about four flights, I think). It wasn't a bad airframe, I was a bad pilot!
-
2mm threaded push rod Doobery things
Nigel R replied to toto's topic in Model Engineering and Accessories
The topic has come up on the forum a few times, I believe. The outer and inner are made from the same stuff and expand/contract at the same rate. If you fix the very ends of the outer, and only the very ends, and leave the middle "free to expand", then any change is matched by any change of the inner rod. Done this way, the only expansion that affects trim is the very small piece of inner that protrudes from the outer, that very last inch at each end. The expansion on 2" of nylon rod is small. in order of a few thou per 10 deg C, if my sums are right. I appreciate this is not possible as a retrofit for an existing install.