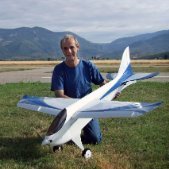
Steve Colman Posted May 8, 2022 Share Posted May 8, 2022 I've recently acquired the above kit and wonder if anyone would be interested in a build log? This will be the first "kit" that I have built for over 30 years so will be quite interesting for me to see how kits have changed during those 30 plus years, and whether I'm still capable of doing so after years of ARTF's and foamies. Please note that I am a notoriously slow builder so if there is any interest I hope that you have a high patience factor. Before I begin the build properly, here is a brief introduction the the model. The kit is a 2nd generation model originally made by Kavan but which is now manufatured by Pelikan in the Czech Republic. It fulfills all the vurrent FIA competition regulations although my use of the model will be for sport flying. The model is also known as the "Circle Dancer" as can be found on the Hyperflite web site in the UK. To start the ball rolling I include a few introductory pics to provide an overall flavour of the model. The manual is an A5 size booklet in English, Czech and German. Typically of modern printed instructinal materials the text is very small and difficult to read. the manual is available as a PDF although the one I've found and downloaded is for the previous iteration of the model and there are some differences in the construction. As can be seen, the photos in the manual are very small and in BW only. Now, if what you have read and seen is enough to whet your appetite for a full build log please let me know and I'll try my best to oblige. Steve. 1 Quote Link to comment Share on other sites More sharing options...
Outrunner Posted May 8, 2022 Share Posted May 8, 2022 Go ahead Steve, very interested in seeing your build log? Phil Quote Link to comment Share on other sites More sharing options...
Bob Bertram Posted May 8, 2022 Share Posted May 8, 2022 Yep, count me in too. I bet you are not as slow as me Steve. Quote Link to comment Share on other sites More sharing options...
Mike Chantler Posted May 8, 2022 Share Posted May 8, 2022 Ditto. Quote Link to comment Share on other sites More sharing options...
Andy Gates Posted May 8, 2022 Share Posted May 8, 2022 There is no such thing as a bad build log. There is always something to learn or new techniques or different ways of doing things. So please go ahead, watching and waiting...... Quote Link to comment Share on other sites More sharing options...
Steve Colman Posted May 8, 2022 Author Share Posted May 8, 2022 Thanks for your interest gents. In my introduction I forget to mention that the kit comes with a full size plan. The model can be built as either a pure glider with a tow hook for bungee launching or as an electric powered model. Of course, for those that want the option of both, the tow hook could be added to the fuselage, motor or no motor. I have opted for the powered option. These first two photos show the small differences to the fueslage build of the pure glider version vs the powered version. The pure glider parts are shown above the powered version and show the two main longitudinal formers that run down the centre of the fuselage along with the associated pieces that form the nose. Note the differences, particularly the different location of the square opening for the 2 servos and the extra space and slenderness afforded to accommodate a motor and ESC for the powered option. Quote Link to comment Share on other sites More sharing options...
Shaun Walsh Posted May 8, 2022 Share Posted May 8, 2022 Count me in too, be interested to see how your construction compares to mine. ? Quote Link to comment Share on other sites More sharing options...
Steve Colman Posted May 9, 2022 Author Share Posted May 9, 2022 A few more pics to keep the ball rolling. As most people here are seasoned modellers I don't intend to explain every minor detail like the necessity to fettle and shape some parts for a good fit, or sanding unless they are absolutely vital to the build. This is more of an overview of the kit, the parts and how they go together along with my observations, any issues I encounter along the way. I'm trying hard to document each step but I may inadvertently miss a few bits here and there. Instead of writing reams of text I have annotated the pics with the salient points which I hope will make things easier to understand for everyone. However, please feel free to ask questions if you have and doubt about what's presented. Quote Link to comment Share on other sites More sharing options...
Steve Colman Posted May 9, 2022 Author Share Posted May 9, 2022 (edited) With the super easy parts out of the way lets make a start on the fuselage pod. Again all should be self explanatory but please respond if you have any queeries. Edited May 9, 2022 by Steve Colman 1 Quote Link to comment Share on other sites More sharing options...
Steve Colman Posted May 10, 2022 Author Share Posted May 10, 2022 The simple matter of access. Very basic stuff here but it's all part of the story. Quote Link to comment Share on other sites More sharing options...
Steve Colman Posted May 10, 2022 Author Share Posted May 10, 2022 (edited) Important Points of Attachment. Or, bits that attach other bits to the fuselage pod. Edited May 10, 2022 by Steve Colman 2 Quote Link to comment Share on other sites More sharing options...
Mike Chantler Posted May 10, 2022 Share Posted May 10, 2022 Nice looking kit and photos ? Quote Link to comment Share on other sites More sharing options...
Mike Chantler Posted May 10, 2022 Share Posted May 10, 2022 (edited) Inspiring me to start a Hoellein Slope Infusion that I have had for a while. Edited May 10, 2022 by Mike Chantler Quote Link to comment Share on other sites More sharing options...
Shaun Walsh Posted May 10, 2022 Share Posted May 10, 2022 I found it easier to glue in the doublers and triangular sections with superphatic then dry fit the formers and wing nut plate (having glued the nuts in) and run thin cyano around all the joints. Quote Link to comment Share on other sites More sharing options...
Steve Colman Posted May 10, 2022 Author Share Posted May 10, 2022 (edited) 2 hours ago, Mike Chantler said: Nice looking kit and photos ? Thanks Mike. I'm enjoying it. I feel happy that you feel inspired ? Edited May 10, 2022 by Steve Colman Quote Link to comment Share on other sites More sharing options...
Steve Colman Posted May 10, 2022 Author Share Posted May 10, 2022 40 minutes ago, Shaun Walsh said: I found it easier to glue in the doublers and triangular sections with superphatic then dry fit the formers and wing nut plate (having glued the nuts in) and run thin cyano around all the joints. Shaun, I did glue the doublers and triangular sections as you describe. I then decided to glue the wing nit plate and former together for some extra rigidity at that particular poit although it's probably not necessary. I've still yet to glue the formers to the fuselage sides which is a while away yet. I'm thinking of making a little change to the servo location which I'll highlight at a later stage. More photos to come before I get that far and I'll welcome your input at the time. Quote Link to comment Share on other sites More sharing options...
Steve Colman Posted May 10, 2022 Author Share Posted May 10, 2022 (edited) A few more details at the rear of the fuselage pod. Edited May 10, 2022 by Steve Colman Quote Link to comment Share on other sites More sharing options...
Steve Colman Posted May 11, 2022 Author Share Posted May 11, 2022 Although I'm building the Resco as a powerd model I decided that it would be a good idea to glue in the ply plate for the tow hook for two reasons: 1. It helps to locate and secure the fuselage parts during construction / gluing. 2. It will enable the tow hook to be retro fitted some time in the future if desired. Thanks to all for taking the time to view and comment. It is very much appreciated. 1 Quote Link to comment Share on other sites More sharing options...
Steve Colman Posted May 12, 2022 Author Share Posted May 12, 2022 Before I start to glue everything together and close everything up, here's one last look at the internal structure of the fuselage pod. Quote Link to comment Share on other sites More sharing options...
Steve Colman Posted May 12, 2022 Author Share Posted May 12, 2022 (edited) A little more work and it's now starting to look like a fuselage pod. Edited May 12, 2022 by Steve Colman 1 Quote Link to comment Share on other sites More sharing options...
Steve Colman Posted May 12, 2022 Author Share Posted May 12, 2022 (edited) A VERY IMPORTANT POINT ! I'm re-posting two early pics concerning the tailplane construction. I have circled the 2 holes in the centre rib. You will notice that they are different sizes and I have shown the rib positioned one way in pic 03 and the other way in pic 04. The correct way is with the larger hole towards the LE as shown in pic 04. There is no mention of this in the manual until the end when it details the construction of the tailplane support plate. In my opinion there should be only one way in which the rib can be inserted thus avoiding a simple mistake. Edited May 12, 2022 by Steve Colman Quote Link to comment Share on other sites More sharing options...
Steve Colman Posted May 13, 2022 Author Share Posted May 13, 2022 Apologies and an update with reference to the above post. While the instructions say nothing about the orientation of the centre rib it is pointed out on the plan. Quote Link to comment Share on other sites More sharing options...
Shaun Walsh Posted May 13, 2022 Share Posted May 13, 2022 (edited) That nearly caught me out. I made a thin light ply plate to go over the rib to reinforce it when assembled to the boom as I thought that the screws might damage the balsa rib. Edited May 13, 2022 by Shaun Walsh Quote Link to comment Share on other sites More sharing options...
Steve Colman Posted May 15, 2022 Author Share Posted May 15, 2022 On 13/05/2022 at 09:34, Shaun Walsh said: That nearly caught me out. I made a thin light ply plate to go over the rib to reinforce it when assembled to the boom as I thought that the screws might damage the balsa rib. Yes, it pays to study the plan very carefully as I've again realised with the next part of the build, as I will outline in my next couple of posts. I'm sure you'll have some good input to give. Quote Link to comment Share on other sites More sharing options...
Steve Colman Posted May 15, 2022 Author Share Posted May 15, 2022 The build moves on another simple step - apparently. A few photos detailing how the tailplane pylon is put together. Quote Link to comment Share on other sites More sharing options...

Recommended Posts
Join the conversation
You can post now and register later. If you have an account, sign in now to post with your account.
Note: Your post will require moderator approval before it will be visible.