Kelly Posted July 29, 2009 Share Posted July 29, 2009 It will look like this Kit is up to the usual high standard, nice touch is the optional mechanical retracts included with the kit, not bad for £99 . Suprised to find the ailerons are not pre-fitted and pinned as per the Boomerang and the Seagull 40 ,maybe to keep the cost down. Soon had them cyanode in place,will pin them as well later. The wing is made up of the centre section and two outer wing panels epoxied in place with the usual plywood braces (not done yet in pic). Going for the retractable U/C option,they are shorter and just as robust as the late P-40,and they go straight up and down,none of that twisty nonsense as with the P- 40. More to follow soon Quote Link to comment Share on other sites More sharing options...
Stephen Grigg Posted July 29, 2009 Share Posted July 29, 2009 Very interesting model.Will be watching this thread avidly Kelvin Quote Link to comment Share on other sites More sharing options...
Kelly Posted August 8, 2009 Author Share Posted August 8, 2009 Bit more done on the U/C Drilled the screw holes for the U/C Fitted the retract servo U/C legs cut to length, wheels fitted on stub axles Push rods in place,bit of fuel proofer spread around the exposed wood in the wheel wells Quote Link to comment Share on other sites More sharing options...
Merlin spit Posted August 9, 2009 Share Posted August 9, 2009 what a good looking model, bargain i reckon kelvin ,hoping you have good luck with this one Quote Link to comment Share on other sites More sharing options...
Stephen Grigg Posted August 10, 2009 Share Posted August 10, 2009 Hi Kelvin is the build as easy as previous Seagull kits,the retracts are new territory for me,how straight forward have they been? Quote Link to comment Share on other sites More sharing options...
Kelly Posted August 10, 2009 Author Share Posted August 10, 2009 Hi Stephen, If you found the Boomer and the seagull okay then the Texan is very much the same, just more of it. I have not connected the U/C to test them yet,but they are not too difficult to set up. Things you will find different are Using a seperate battery, switch and Y lead to operate the retracts Fitting the canopy Cutting out the cowl to fit round the engine/exhaust. Two servos used to operate a split elevator Steerable tailwheel. So a little bit more to do then . I will cover these points in the build , although it may take me a while kelvin Quote Link to comment Share on other sites More sharing options...
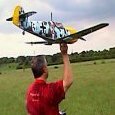
Kelly Posted August 10, 2009 Author Share Posted August 10, 2009 Hi Austen, I do not fly over the trees when landing,I prefer to land crosswind My flying site surrounded by those rather tall trees Kelvin Quote Link to comment Share on other sites More sharing options...
Stephen Grigg Posted August 10, 2009 Share Posted August 10, 2009 Thanks for the info Kelvin,Ive a lot on at the moment,but I want something scale for this time next year. Quote Link to comment Share on other sites More sharing options...
Merlin spit Posted August 11, 2009 Share Posted August 11, 2009 i landed my spitfire in the hedge a few weeks back, trying to go back round on one landing atempt ,i didnt gain anough height and flew full thottle in the hedge about 10 ft up (wish they would cut the hedges)i got it back a it scratched and bruised ,more me, than the spitfire luckly .the texan should stand out well, i like that colour scheme alot ,wish i had a smooth piece of grass to land on and id get one too Quote Link to comment Share on other sites More sharing options...
Kelly Posted August 19, 2009 Author Share Posted August 19, 2009 Done a bit more, Tested and adjusted the U/C, thread locked all the grub screws and push rod ends,fitted the plastic wheel well covers. Now for the messy bit sticking the outer wing panels in place with epoxy,yuk. Using a combination of the plastic bags the wings were packed in, making tape and vasaline I am trying not to get it all over the wings like I usually do . So far so good . Quote Link to comment Share on other sites More sharing options...
Stephen Grigg Posted August 19, 2009 Share Posted August 19, 2009 If you leave the plastic bags on Kelvin itll protect the wings and youll know there as new underneathGood job,good thread,from avid Texan Seagull fan Quote Link to comment Share on other sites More sharing options...
Kelly Posted August 20, 2009 Author Share Posted August 20, 2009 Well it worked, no epoxy on the wings Quote Link to comment Share on other sites More sharing options...
Kelly Posted August 25, 2009 Author Share Posted August 25, 2009 Aileron servo's fitted Aileron linkages in place Quote Link to comment Share on other sites More sharing options...
Stephen Grigg Posted August 29, 2009 Share Posted August 29, 2009 I ordered the same kit as you Kelvin,what engine do you plan to fit in yours.Iv just acquired an old OS 90 4 stroke which may sound just right for this model Ive also a new SC52 4 stroke.Ihave its twin in a Flair Cub Ive just finished and flown and thats lovelyEdited By Stephen Grigg on 29/08/2009 23:22:54 Quote Link to comment Share on other sites More sharing options...
Kelly Posted August 30, 2009 Author Share Posted August 30, 2009 Hi Stephen Well I have two SC46's doing nothing, lower end of the power range but it is a scale model,I will be fitting one of them. Bit more done. Engine mount drilled and fitted Fuel tank in place sealed in with a bit of silicon sealer. Cowl mounting blocks fitted ,drilled and fuel proofed. Carboard templates for various bits of the cowl to be cut out. Cowl with the bits cut out. Lucky me saw this at Rufforth Quote Link to comment Share on other sites More sharing options...
Stephen Grigg Posted August 30, 2009 Share Posted August 30, 2009 Im watching your every move and taking notes Kelvin Quote Link to comment Share on other sites More sharing options...
Kelly Posted August 31, 2009 Author Share Posted August 31, 2009 Tail feathers in place, fitting same as seagull 40 Quote Link to comment Share on other sites More sharing options...
Kelly Posted August 31, 2009 Author Share Posted August 31, 2009 Beginning to look like a Texan Quote Link to comment Share on other sites More sharing options...
Stephen Grigg Posted August 31, 2009 Share Posted August 31, 2009 Coming along very nicely Kelvin,doesnt look like there is much more to finish it Quote Link to comment Share on other sites More sharing options...
Kelly Posted September 1, 2009 Author Share Posted September 1, 2009 Switches with extensions and servos installed. Quote Link to comment Share on other sites More sharing options...
Kelly Posted September 2, 2009 Author Share Posted September 2, 2009 Servos connected, used a Y lead for the two elevator servos, Engine and cowl fitted Him and Her in the cockpit. Almost completed Quote Link to comment Share on other sites More sharing options...
Stephen Grigg Posted September 2, 2009 Share Posted September 2, 2009 Lovely workshop with the star in the middle Quote Link to comment Share on other sites More sharing options...
Kelly Posted September 3, 2009 Author Share Posted September 3, 2009 It is our front room , I have a very understanding Wife. The mess has to be cleared up by the morning and the building board returned to its main function as a coffee table . Quote Link to comment Share on other sites More sharing options...
Sheldon Holy Posted September 3, 2009 Share Posted September 3, 2009 Hi, looks like a nice build. Jus a thought... wouldn't it be better to use the Saito from the P-40? You need to put a 13/6 on the SC .46, i have ,it purrs, produces loads of power, will help get past that big cowling, and still gives really smooth throttle response. Sheldon Quote Link to comment Share on other sites More sharing options...
Kelly Posted September 4, 2009 Author Share Posted September 4, 2009 Hi Sheldon, The Saito is already spoken for with my next model .. I think it will have enough power to fly well,the full size Texan is flown pretty slow as the video above demonstrates . Hope to test fly it next week,few bits and bobs plus the decals to do so not quite ready yet. Cheers Kelvin Quote Link to comment Share on other sites More sharing options...

Recommended Posts
Join the conversation
You can post now and register later. If you have an account, sign in now to post with your account.
Note: Your post will require moderator approval before it will be visible.